\
Fig. General content based audio search scheme.
\
Fig. General content based audio search scheme.
\
Fig. General content based audio search scheme.
\
Fig. General content based audio search scheme.
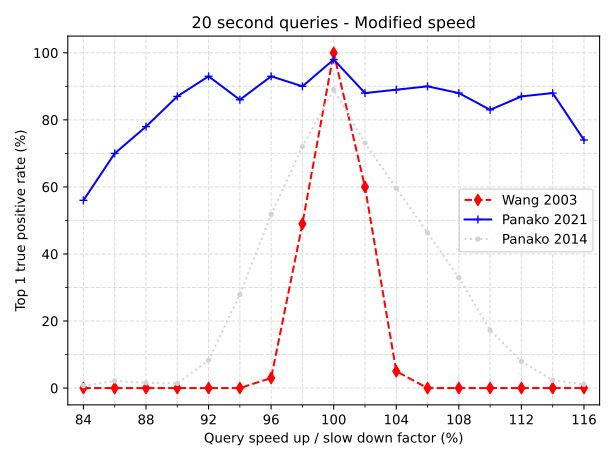 \
Fig. The top one true positive rate for 20s query fragments. The audio playback is speed modified from 84 to 116% with respect to the indexed reference audio. The original query length is 20s, if it is slowed down by 10% it takes, evidently, 22s. Note the improvement of the 2021 version of Panako (blue) vs the 2014 version (light-gray). As a baseline the standard algorithm (wang 2003) is included as well. For the 2021 Panako algorithm, audio recognition performance suffers (below 80) when playback speed is changed more than 10.
\
Fig. The top one true positive rate for 20s query fragments. The audio playback is speed modified from 84 to 116% with respect to the indexed reference audio. The original query length is 20s, if it is slowed down by 10% it takes, evidently, 22s. Note the improvement of the 2021 version of Panako (blue) vs the 2014 version (light-gray). As a baseline the standard algorithm (wang 2003) is included as well. For the 2021 Panako algorithm, audio recognition performance suffers (below 80) when playback speed is changed more than 10.
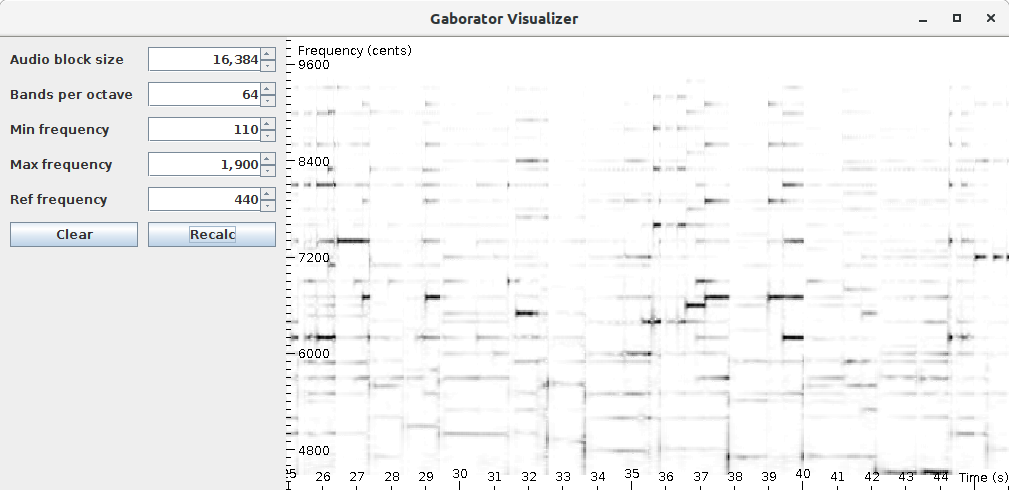
- The number of dependencies has been drastically cut by removing support for multiple key-value stores. - The key-value store has been changed to a faster and simpler system (from [MapDB](https://mapdb.org) to [LMDB](http://www.lmdb.tech/doc)). - The SyncSink functionality has been moved to another project (with Panako as dependency). - The main algorithms have been replaced with simpler and better working versions: - Olaf is a new implementation of the classic Shazam algorithm. - The algoritm described in the Panako paper was also replaced. The core ideas are still the same. The main change is the use of a [Gabor transform](https://en.wikipedia.org/wiki/Gabor_transform) to go from time domain to the spectral domain (previously a constant-q transform was used). The gabor transform is implemented by [JGaborator](https://github.com/JorenSix/JGaborator) which in turn relies on [The Gaborator](https://gaborator.com/) C library via JNI. - Folder structure has been simplified. - The UI which was mainly used for debugging has been removed. - A new set of helper scripts are added in the `scripts` directory. They help with evaluation, parsing results, checking results, building panako, creating documentation,... - Changed the default panako location to \~/.panako, so users can install and use panako more easily (without need for sudo rights)
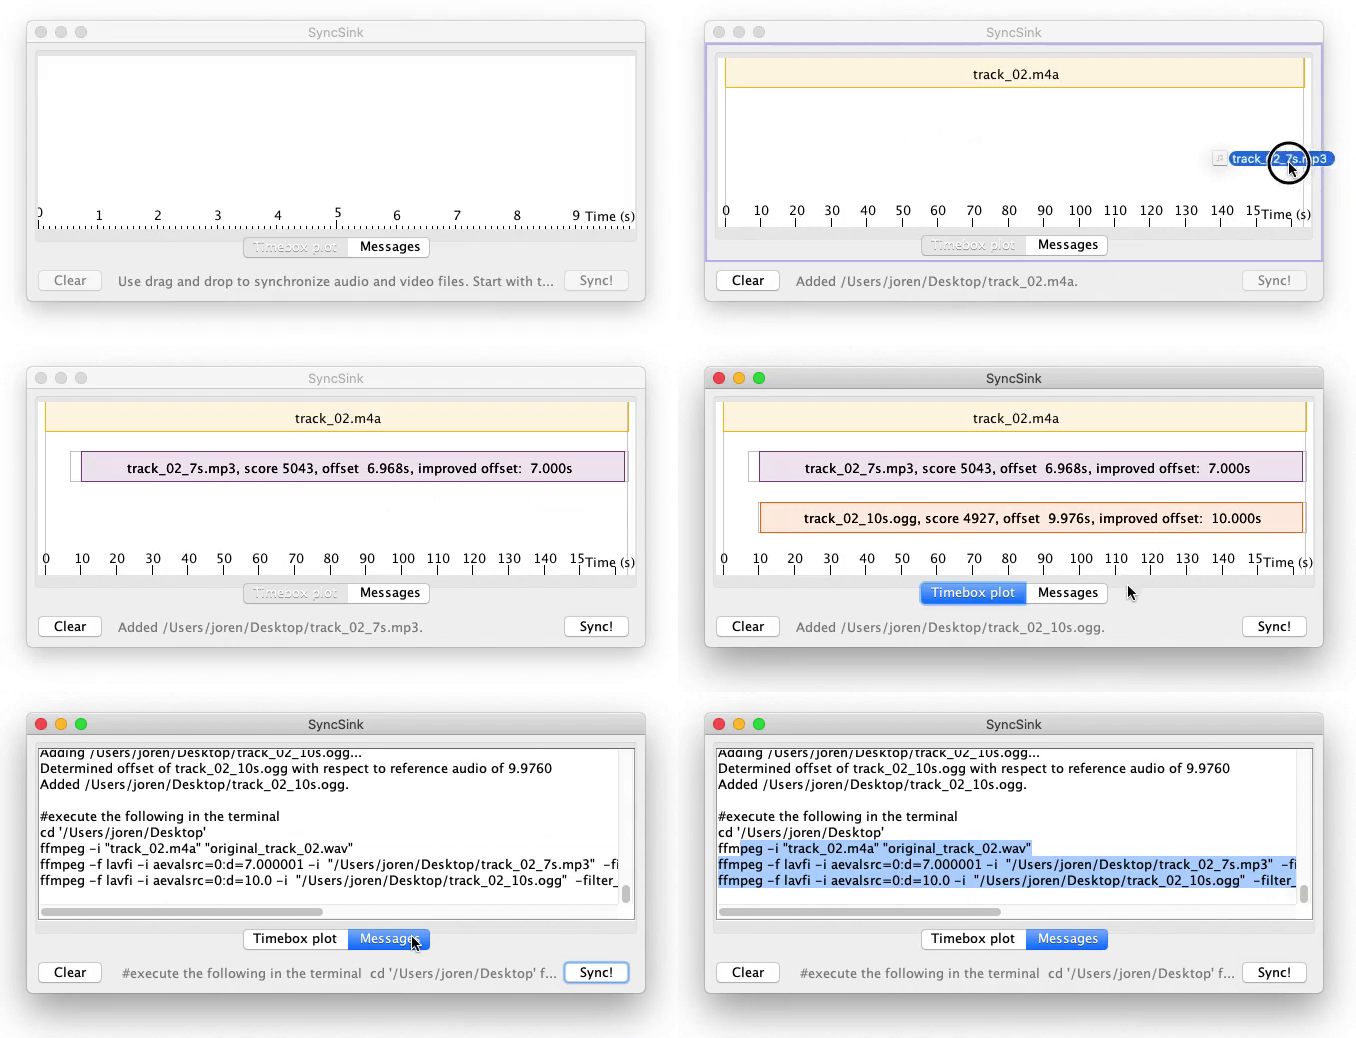
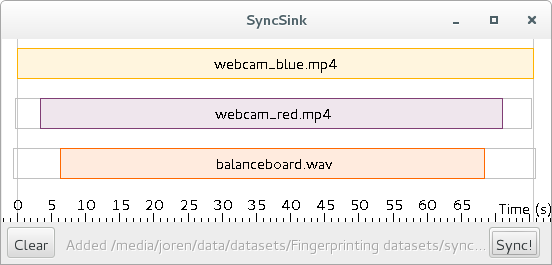
SyncSink is a tool to synchronize media files with shared audio. SyncSink matches and aligns shared audio and determines offsets in seconds. With these precise offsets it becomes trivial to sync files. SyncSink is, for example, used to synchronize video files: when you have many video captures of the same event, the audio attached to these video captures is used to align and sync multiple (independently operated) cameras. Evidently, SyncSink can also synchronize audio captured from many (independent) microphones if some environmental sound is shared (leaked in) the each recording.- [SyncSink-synchronizing\_audio.gif](https://0110.be/files/attachments/483/SyncSink-synchronizing_audio.gif) - [syncsink-1.0.jar](https://0110.be/files/attachments/483/syncsink-1.0.jar) --- ## [Calling JNI code from multiple Java threads: sharing state](https://0110.be/posts/Calling_JNI_code_from_multiple_Java_threads%3A__sharing_state.md) - Published: 2021-06-01T00:00:00Z - Updated: 2025-11-29T14:32:05Z - Author: Joren - ID: 481 - Canonical: https://0110.be/posts/Calling_JNI_code_from_multiple_Java_threads%3A__sharing_state - Tags: [Code](https://0110.be/tags/Code.md), [UGent](https://0110.be/tags/UGent.md)
Fig: SyncSink in action: syncing some audio files
 A good year ago I was asked to develop audio recognition technology for an e-costume. The idea was that *lights in the costume would follow a sequence synchronised to a certain song*. Only a single song should trigger the lights, all other music should be ignored. Recognition of music and synchronisation is typically done using audio fingerprinting techniques. The challenge was that the recognition needed to run on a cheap, battery-powered microcontroller with limited CPU and memory. I delivered a prototype but eventually a cheap, battle-tested, off-the-shelf, IP-cleared, alternative was found.
The prototype gathered dust for a while but the idea stuck in my head. With my daughters fourth birthday approaching during the lockdown, I decided to turn the prototype into an over-engineered birthday gift and let an 'Elsa-dress' react to 'Let It Go' from the Frozen soundtrack. With the prototype as a starting point, I ordered an RGB-LED-strip, a beefy Li-Ion Battery, an I2S digital microphone and, of course, an Elsa-dress.
I had an ESP32 microcontroller laying around and used it as the core of the system: it supports [I²S](https://en.wikipedia.org/wiki/I%C2%B2S), has a floating point unit (FPU), is easy to use together with LED strips and has enough memory. The [FPU](https://en.wikipedia.org/wiki/Floating-point_unit) makes it straightforward to use the same code on traditional computers as on embedded devices: fixed-point math can be avoided.
After soldering the components together and with the help from my better half to sew in the LED strip, it all came together. In the video below, the result of our work can be seen. The video first shows a song that should not and is not recognised. Then, "Let It Go" is played and correctly recognised. After the song is stopped, the lights go on for a while and finally stop: this is by design to allow gaps in recognition. Lastly, the song is continued and again correctly recognised.
A good year ago I was asked to develop audio recognition technology for an e-costume. The idea was that *lights in the costume would follow a sequence synchronised to a certain song*. Only a single song should trigger the lights, all other music should be ignored. Recognition of music and synchronisation is typically done using audio fingerprinting techniques. The challenge was that the recognition needed to run on a cheap, battery-powered microcontroller with limited CPU and memory. I delivered a prototype but eventually a cheap, battle-tested, off-the-shelf, IP-cleared, alternative was found.
The prototype gathered dust for a while but the idea stuck in my head. With my daughters fourth birthday approaching during the lockdown, I decided to turn the prototype into an over-engineered birthday gift and let an 'Elsa-dress' react to 'Let It Go' from the Frozen soundtrack. With the prototype as a starting point, I ordered an RGB-LED-strip, a beefy Li-Ion Battery, an I2S digital microphone and, of course, an Elsa-dress.
I had an ESP32 microcontroller laying around and used it as the core of the system: it supports [I²S](https://en.wikipedia.org/wiki/I%C2%B2S), has a floating point unit (FPU), is easy to use together with LED strips and has enough memory. The [FPU](https://en.wikipedia.org/wiki/Floating-point_unit) makes it straightforward to use the same code on traditional computers as on embedded devices: fixed-point math can be avoided.
After soldering the components together and with the help from my better half to sew in the LED strip, it all came together. In the video below, the result of our work can be seen. The video first shows a song that should not and is not recognised. Then, "Let It Go" is played and correctly recognised. After the song is stopped, the lights go on for a while and finally stop: this is by design to allow gaps in recognition. Lastly, the song is continued and again correctly recognised.
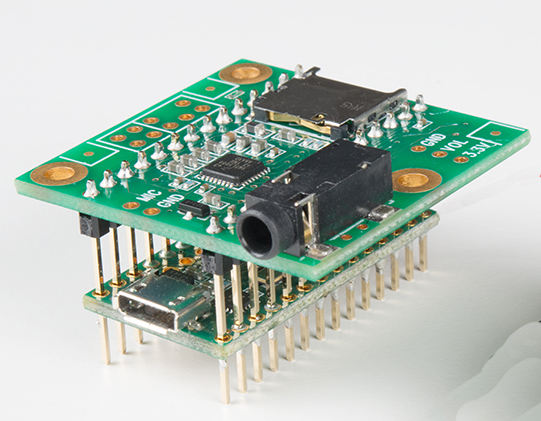 For synchronisation between several devices [SMPTE timecode](https://en.wikipedia.org/wiki/SMPTE_timecode) data is often encoded into audio using [LTC](https://en.wikipedia.org/wiki/Linear_timecode) or linear time code.
This blog post presents an LTC decoder for a [Teensy 3.2 microcontroller](https://www.pjrc.com/teensy/teensy31.html) with [audio shield](https://www.pjrc.com/store/teensy3_audio.html).
The audio shield takes care of the line level audio input. This audio input is then decoded. The decoding is done by [libltc](https://github.com/x42/libltc). The library runs as is on a Teensy without modification. The three elements are combined in a relatively simple [teensy patch](https://github.com/ArtScienceLab/ARDUINO_LTC_DECODER/blob/master/LTCDecoder/src/main.cpp)
To use the decoder connect the line level input left channel to an SMPTE source via e.g. an RCA plug.
For code, comments, pull requests please consult the Github repository for the [Teensy SMPTE LTC decoder](https://github.com/ArtScienceLab/ARDUINO_LTC_DECODER)
For synchronisation between several devices [SMPTE timecode](https://en.wikipedia.org/wiki/SMPTE_timecode) data is often encoded into audio using [LTC](https://en.wikipedia.org/wiki/Linear_timecode) or linear time code.
This blog post presents an LTC decoder for a [Teensy 3.2 microcontroller](https://www.pjrc.com/teensy/teensy31.html) with [audio shield](https://www.pjrc.com/store/teensy3_audio.html).
The audio shield takes care of the line level audio input. This audio input is then decoded. The decoding is done by [libltc](https://github.com/x42/libltc). The library runs as is on a Teensy without modification. The three elements are combined in a relatively simple [teensy patch](https://github.com/ArtScienceLab/ARDUINO_LTC_DECODER/blob/master/LTCDecoder/src/main.cpp)
To use the decoder connect the line level input left channel to an SMPTE source via e.g. an RCA plug.
For code, comments, pull requests please consult the Github repository for the [Teensy SMPTE LTC decoder](https://github.com/ArtScienceLab/ARDUINO_LTC_DECODER)
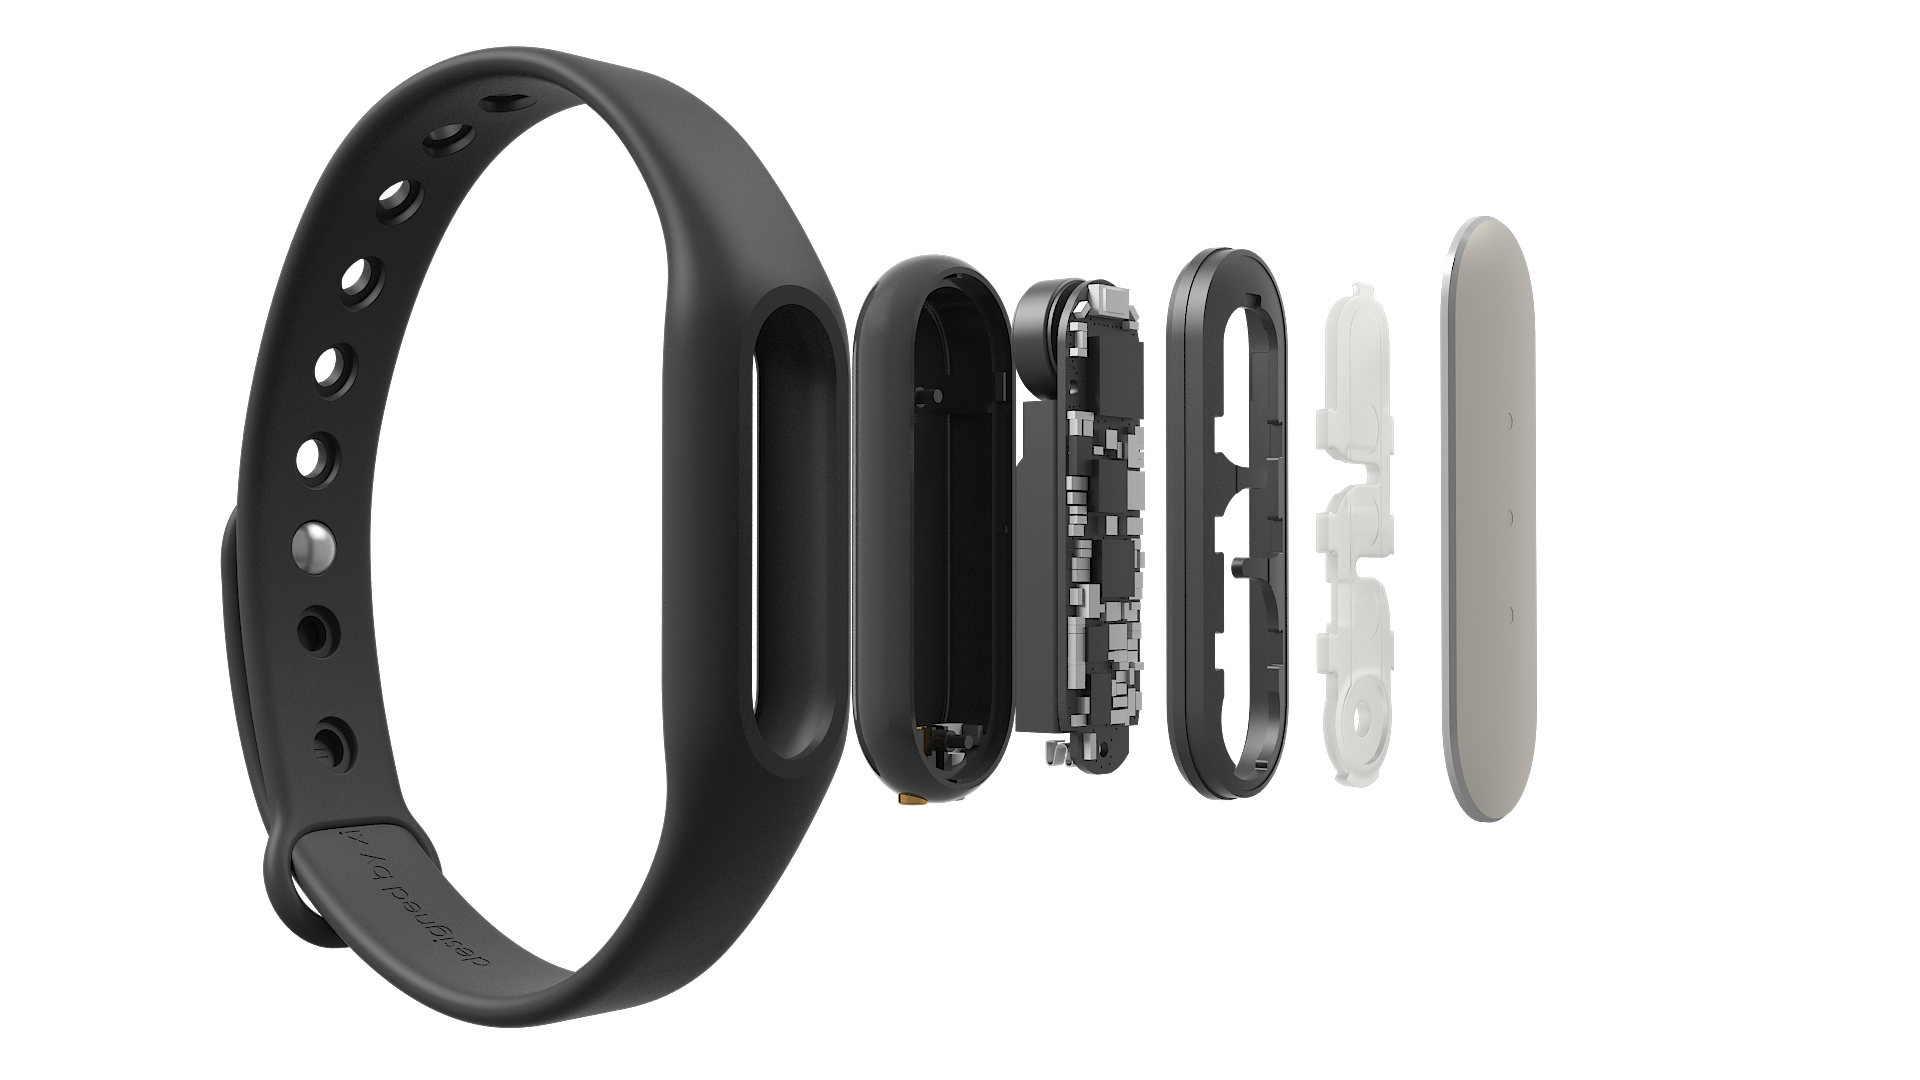
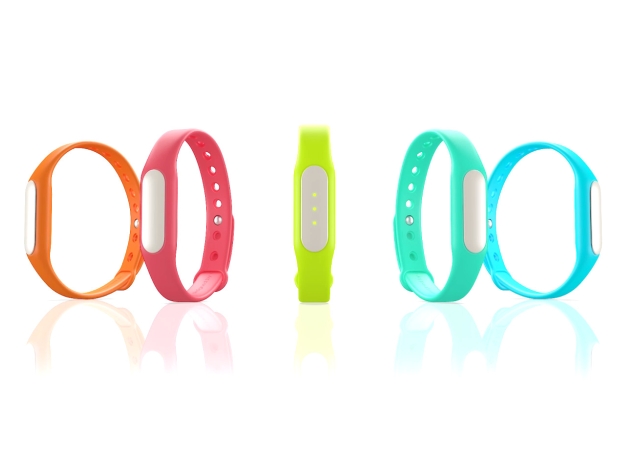
 The [Mi Band](http://www.mi.com/in/miband) is a bracelet with some sensors, three RGB leds and a vibration motor. It is marketed as an activity tracker and notifier. It is a neat little device that communicates via Bluetooth LE and has a battery life of around 30 days. It would be nice if it could be used for whatever purpose you want but alas, its API is not very open. This blog post gives pointers to useful resources and tips to make it work with your own code.
There have been some efforts to reverse engineer the Bluetooth protocol. This [blog post](http://allmydroids.blogspot.be/2014/12/xiaomi-mi-band-ble-protocol-reverse.html) contains some info. There are even complete implementations available of the protocol, there is a [Mi Band protocol implementation in python](http://oscaracena.bitbucket.org/mibanda/api/_modules/mibanda.html#BandDevice.setUserInfo) and a [Mi Band protocol implementation in Java](https://github.com/pangliang/miband-sdk-android). It is however not always clear which firmware version is targeted.
I would advise against installing the official Mi Band app, if you want to use it with custom code. The app upgrades the firmware to the latest version and it seems that Xiaomi is obfuscating the protocol more and more with each version. I was able to send vibrate and led commands to a Mi Band with firmware version 10.0.9.3. With the previously mentioned sources and the flow described to the right the device reacts to commands. I used an Android device. The flow:
1. Pair with the Mi Band in the Android Bluetooth setting.
2. In your code, connect to the paired device. Save the device address, you will need it later.
3. Send a pair command to the device. This is part of the Mi Band protocol and has nothing to do with the previous Bluetooth pairing. If all goes well it reacts with a 2. See [here](http://allmydroids.blogspot.be/2014/12/xiaomi-mi-band-ble-protocol-reverse.html)
4. Send user info. This step is crucial and not trivial. The user info needs to be encoded in a certain way and is [CRC'd](https://en.wikipedia.org/wiki/Cyclic_redundancy_check) with the device address. The following is an example implementation of the [Mi Band user info encoding](https://github.com/pangliang/miband-sdk-android/blob/master/src/com/zhaoxiaodan/miband/model/UserInfo.java#L58)
5. Now you can send vibrate or other commands.
Some notes: the self-test command works without the set user step. For Android the [Mi Band protocol implementation in Java](https://github.com/pangliang/miband-sdk-android) works well. To check the firmware version of the device, call the `get device info` characteristic. The last bytes, interpreted as an integer, define the version info. For my device it is 10.9.3.2:
````
Write to characteristic 0000ff05-0000-1000-8000-00805f9b34fb
onCharacteristicWrite status: 0 characteristic 0000ff05-0000-1000-8000-00805f9b34fb
Read firmware version
11 value: 2
12 value: 3
13 value: 9
14 value: 0
15 value: 1
`````
Another note: the set user info needs to be called with a 1 as type the first time the band is used. This is done with `new UserInfo(20111111, 1, 32, 180, 55, "NM", 1)` with the Android sdk by GitHub user pangliang. This sets and overwrites the user info. The next times you do not want to overwrite the info and the type needs to be zero.
- [vibrate\_flowchart\_\_1\_.svg](https://0110.be/files/attachments/439/vibrate_flowchart__1_.svg)
---
## [Synchronizing Multimodal Recordings Using Audio-To-Audio Alignment - In Journal on Multimodal User Interfaces](https://0110.be/posts/Synchronizing_Multimodal_Recordings_Using_Audio-To-Audio_Alignment_-_In_Journal_on_Multimodal_User_Interfaces.md)
- Published: 2015-08-06T00:00:00Z
- Updated: 2025-11-29T19:45:17Z
- Author: Joren
- ID: 434
- Canonical: https://0110.be/posts/Synchronizing_Multimodal_Recordings_Using_Audio-To-Audio_Alignment_-_In_Journal_on_Multimodal_User_Interfaces
- Tags: [Code](https://0110.be/tags/Code.md), [Java](https://0110.be/tags/Java.md), [Music Information Retrieval](https://0110.be/tags/Music%20Information%20Retrieval.md), [Panako](https://0110.be/tags/Panako.md), [Research papers](https://0110.be/tags/Research%20papers.md), [UGent](https://0110.be/tags/UGent.md)
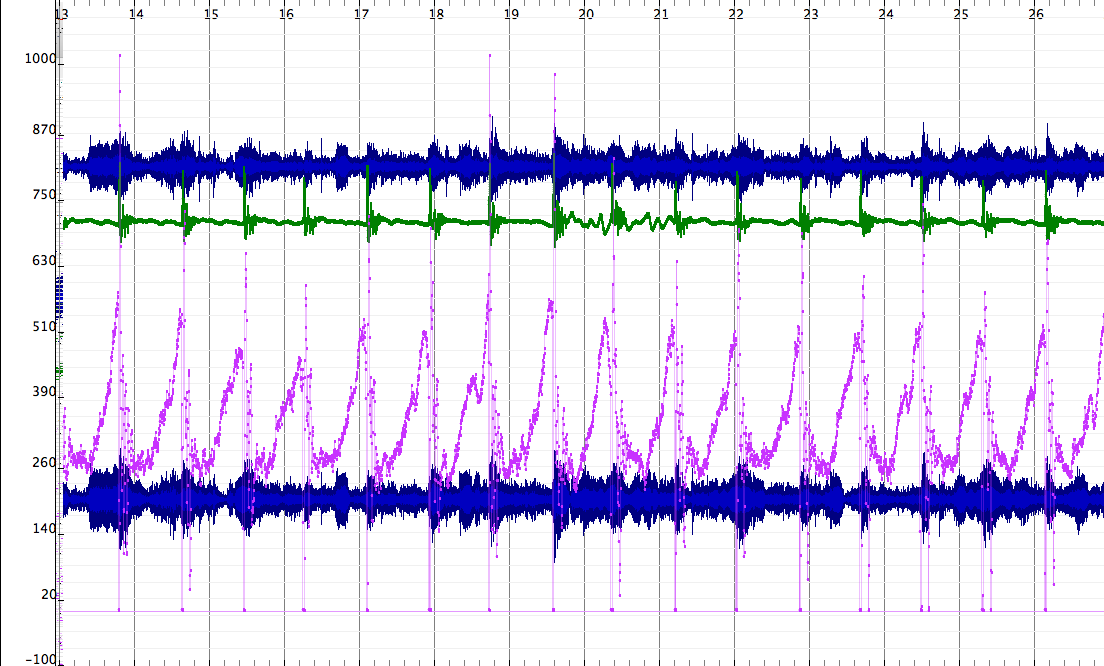
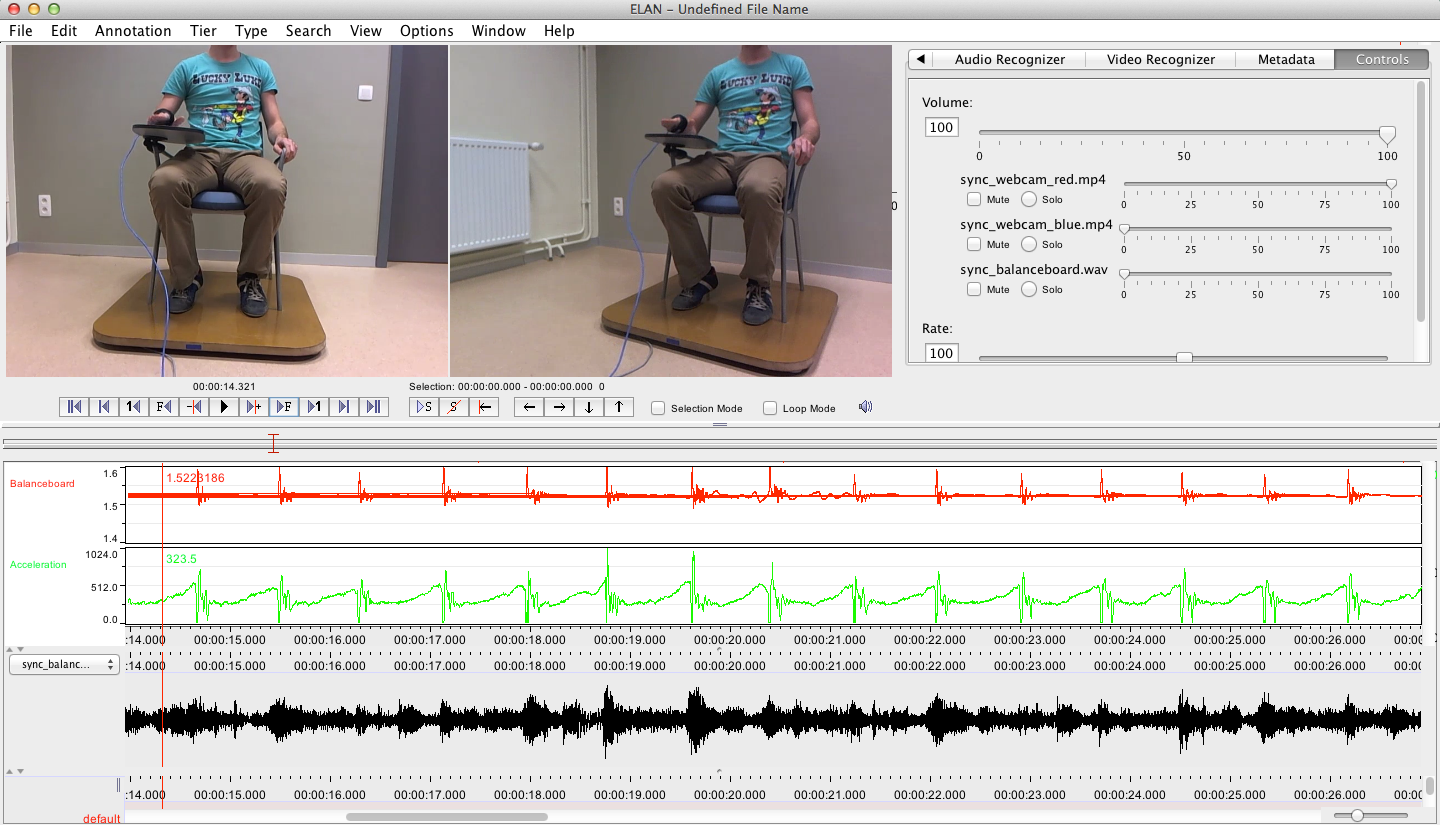
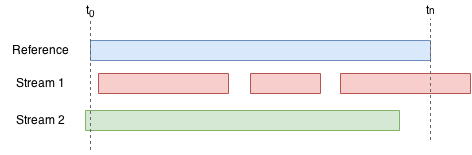
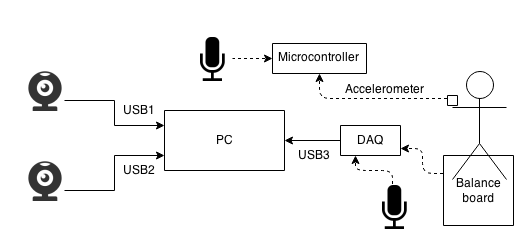
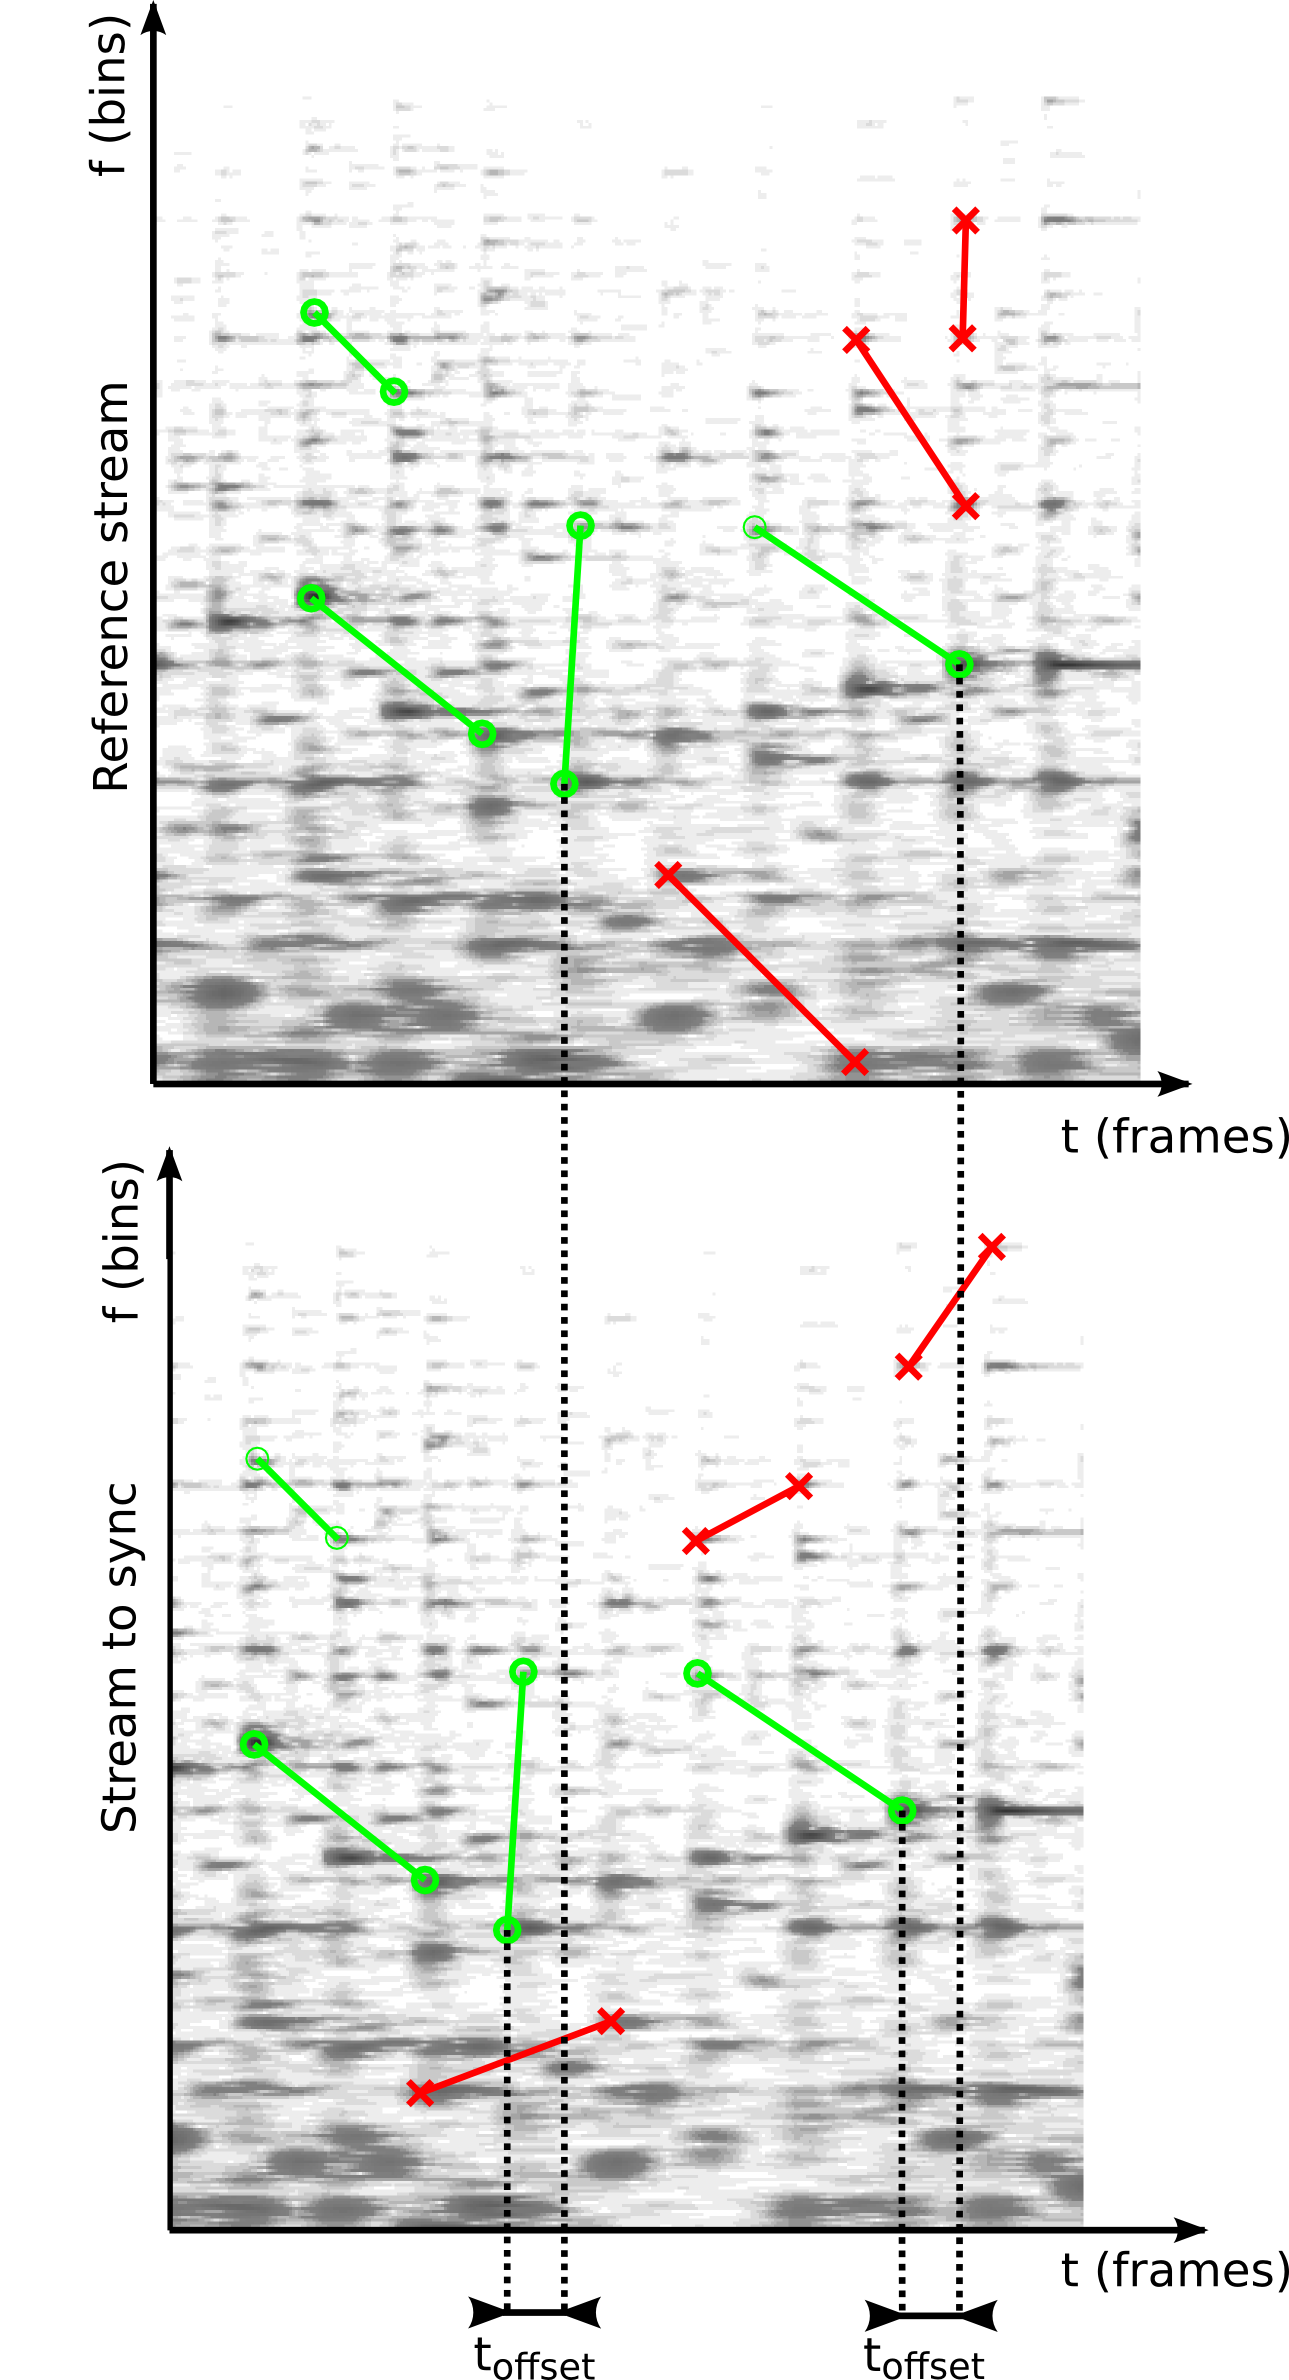
The article titled *"Synchronizing Multimodal Recordings Using Audio-To-Audio Alignment"* by Joren Six and Marc Leman has been accepted for publication in the [Journal on Multimodal User Interfaces](https://www.springer.com/computer/hci/journal/12193). The article will be published later this year. It describes and tests a method to synchronize data-streams. Below you can find the abstract, pointers to the software under discussion and an author version of the article itself.
### Synchronizing Multimodal Recordings Using Audio-To-Audio Alignment
The [Mi Band](http://www.mi.com/in/miband) is a bracelet with some sensors, three RGB leds and a vibration motor. It is marketed as an activity tracker and notifier. It is a neat little device that communicates via Bluetooth LE and has a battery life of around 30 days. It would be nice if it could be used for whatever purpose you want but alas, its API is not very open. This blog post gives pointers to useful resources and tips to make it work with your own code.
There have been some efforts to reverse engineer the Bluetooth protocol. This [blog post](http://allmydroids.blogspot.be/2014/12/xiaomi-mi-band-ble-protocol-reverse.html) contains some info. There are even complete implementations available of the protocol, there is a [Mi Band protocol implementation in python](http://oscaracena.bitbucket.org/mibanda/api/_modules/mibanda.html#BandDevice.setUserInfo) and a [Mi Band protocol implementation in Java](https://github.com/pangliang/miband-sdk-android). It is however not always clear which firmware version is targeted.
I would advise against installing the official Mi Band app, if you want to use it with custom code. The app upgrades the firmware to the latest version and it seems that Xiaomi is obfuscating the protocol more and more with each version. I was able to send vibrate and led commands to a Mi Band with firmware version 10.0.9.3. With the previously mentioned sources and the flow described to the right the device reacts to commands. I used an Android device. The flow:
1. Pair with the Mi Band in the Android Bluetooth setting.
2. In your code, connect to the paired device. Save the device address, you will need it later.
3. Send a pair command to the device. This is part of the Mi Band protocol and has nothing to do with the previous Bluetooth pairing. If all goes well it reacts with a 2. See [here](http://allmydroids.blogspot.be/2014/12/xiaomi-mi-band-ble-protocol-reverse.html)
4. Send user info. This step is crucial and not trivial. The user info needs to be encoded in a certain way and is [CRC'd](https://en.wikipedia.org/wiki/Cyclic_redundancy_check) with the device address. The following is an example implementation of the [Mi Band user info encoding](https://github.com/pangliang/miband-sdk-android/blob/master/src/com/zhaoxiaodan/miband/model/UserInfo.java#L58)
5. Now you can send vibrate or other commands.
Some notes: the self-test command works without the set user step. For Android the [Mi Band protocol implementation in Java](https://github.com/pangliang/miband-sdk-android) works well. To check the firmware version of the device, call the `get device info` characteristic. The last bytes, interpreted as an integer, define the version info. For my device it is 10.9.3.2:
````
Write to characteristic 0000ff05-0000-1000-8000-00805f9b34fb
onCharacteristicWrite status: 0 characteristic 0000ff05-0000-1000-8000-00805f9b34fb
Read firmware version
11 value: 2
12 value: 3
13 value: 9
14 value: 0
15 value: 1
`````
Another note: the set user info needs to be called with a 1 as type the first time the band is used. This is done with `new UserInfo(20111111, 1, 32, 180, 55, "NM", 1)` with the Android sdk by GitHub user pangliang. This sets and overwrites the user info. The next times you do not want to overwrite the info and the type needs to be zero.


- [vibrate\_flowchart\_\_1\_.svg](https://0110.be/files/attachments/439/vibrate_flowchart__1_.svg)
---
## [Synchronizing Multimodal Recordings Using Audio-To-Audio Alignment - In Journal on Multimodal User Interfaces](https://0110.be/posts/Synchronizing_Multimodal_Recordings_Using_Audio-To-Audio_Alignment_-_In_Journal_on_Multimodal_User_Interfaces.md)
- Published: 2015-08-06T00:00:00Z
- Updated: 2025-11-29T19:45:17Z
- Author: Joren
- ID: 434
- Canonical: https://0110.be/posts/Synchronizing_Multimodal_Recordings_Using_Audio-To-Audio_Alignment_-_In_Journal_on_Multimodal_User_Interfaces
- Tags: [Code](https://0110.be/tags/Code.md), [Java](https://0110.be/tags/Java.md), [Music Information Retrieval](https://0110.be/tags/Music%20Information%20Retrieval.md), [Panako](https://0110.be/tags/Panako.md), [Research papers](https://0110.be/tags/Research%20papers.md), [UGent](https://0110.be/tags/UGent.md)
The article titled *"Synchronizing Multimodal Recordings Using Audio-To-Audio Alignment"* by Joren Six and Marc Leman has been accepted for publication in the [Journal on Multimodal User Interfaces](https://www.springer.com/computer/hci/journal/12193). The article will be published later this year. It describes and tests a method to synchronize data-streams. Below you can find the abstract, pointers to the software under discussion and an author version of the article itself.
### Synchronizing Multimodal Recordings Using Audio-To-Audio Alignment
@article{six2015multimodal,
      author      = {Joren Six and Marc Leman},
      title       = {{Synchronizing Multimodal Recordings Using Audio-To-Audio Alignment}},
      issn        = {1783-7677},
      volume      = {9},
      number      = {3},
      pages       = {223-229},
      doi         = {10.1007/s12193-015-0196-1},
      journal     = {{Journal of Multimodal User Interfaces}},
      publisher   = {Springer Berlin Heidelberg},
      year        = 2015
 }
- [2015.synchronized-recording.pdf](https://0110.be/files/attachments/434/2015.synchronized-recording.pdf)
- [SyncDataset.zip](https://0110.be/files/attachments/434/SyncDataset.zip)
- [SyncSink-1.4.jar](https://0110.be/files/attachments/434/SyncSink-1.4.jar)
---
## [Control Audio Time Stretching and Pitch Shifting from Java using Rubber Band And JNI](https://0110.be/posts/Control_Audio_Time_Stretching_and_Pitch_Shifting_from_Java_using_Rubber_Band_And_JNI.md)
- Published: 2015-08-05T00:00:00Z
- Updated: 2025-11-29T19:46:33Z
- Author: Joren
- ID: 437
- Canonical: https://0110.be/posts/Control_Audio_Time_Stretching_and_Pitch_Shifting_from_Java_using_Rubber_Band_And_JNI
- Tags: [Code](https://0110.be/tags/Code.md), [TarsosDSP](https://0110.be/tags/TarsosDSP.md), [UGent](https://0110.be/tags/UGent.md)
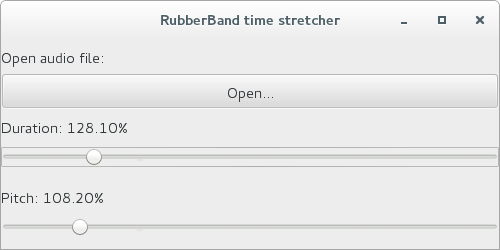
This post explains how to do real-time pitch-shifting and audio time-stretching in Java. It uses two components. The first component is [a high quality software C library for audio time-stretching and pitch-shifting C called Rubber Band](http://breakfastquay.com/rubberband/). The second component is a Java audio library called [TarsosDSP](https://github.com/JorenSix/TarsosDSP). To bridge the gap between the two JNI (Java Native Interface) is used. Rubber Band provides a JNI interface and starting from the currently unreleased version 1.8.2, makefiles are provided that make compiling and subsequently using the JNI version of Rubber Band relatively straightforward.
However, it still requires some effort to control real-time pitch-shifting and audio time-stretching from java. To make it more easy some example code and documentation is available in a GitHub repository called [RubberBandJNI](https://github.com/JorenSix/RubberBandJNI). It documents some of the configuration steps needed to get things working. It also offers precompiled libraries and documents how to compile those for the following systems:
- [Audio Time-Stretching vdia JNI on Debian](https://github.com/JorenSix/RubberBandJNI#compiling-the-rubber-band-jni-library-on-debian-linux)
- [Audio Time-Stretching via JNI on Mac OS X](https://github.com/JorenSix/RubberBandJNI#compiling-the-rubber-band-jni-library-on-mac-os-x)
- [Audio Time-Stretching via JNI for Android on Debian](https://github.com/JorenSix/RubberBandJNI#compiling-the-rubber-band-jni-library-on-debian-for-android)
If the instructions are followed rather precisely you are able to control the tempo of a song in real-time with the following Java code:
````java
float tempoFactor = 0.8f;
float pitchFactor = 1.0f;
AudioDispatcher adp = AudioDispatcherFactory.fromPipe("music.mp3", 44100, 4096, 0);
TarsosDSPAudioFormat format = adp.getFormat();
rbs = new RubberBandAudioProcessor(44100, tempoFactor, pitchFactor);
adp.addAudioProcessor(rbs);
adp.addAudioProcessor(new AudioPlayer(JVMAudioInputStream.toAudioFormat(format)));
new Thread(adp).start();
````
---
## [TeensyDAQ - Capture, Visualize and Record Analog Input Signals from Teensy](https://0110.be/posts/TeensyDAQ_-_Capture%2C_Visualize_and_Record_Analog_Input_Signals_from_Teensy.md)
- Published: 2015-07-09T00:00:00Z
- Updated: 2025-11-29T19:48:49Z
- Author: Joren
- ID: 436
- Canonical: https://0110.be/posts/TeensyDAQ_-_Capture%2C_Visualize_and_Record_Analog_Input_Signals_from_Teensy
- Tags: [Code](https://0110.be/tags/Code.md), [UGent](https://0110.be/tags/UGent.md)
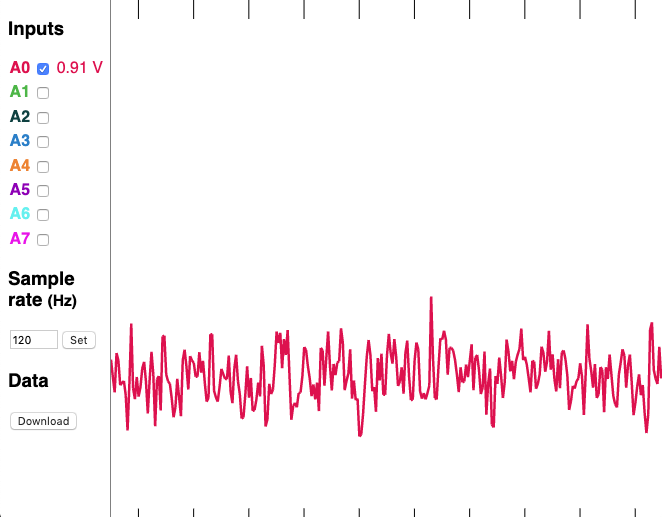
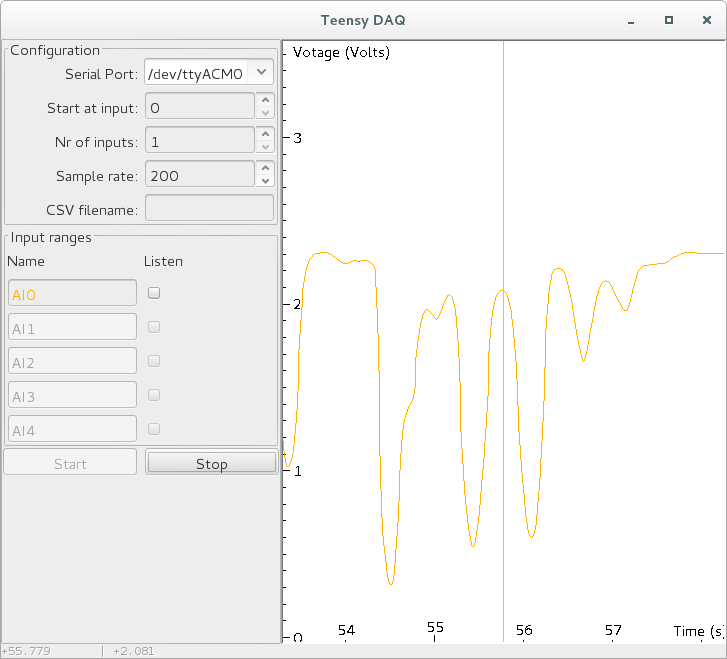
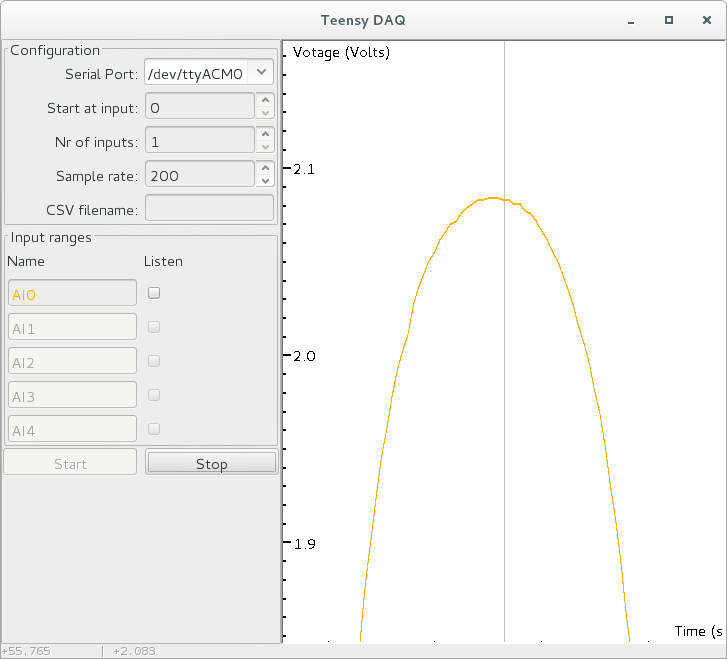
This post describes a tool to quickly visualize and record analog signals with a [Teensy micro-controller](https://www.pjrc.com/teensy/) and some custom software. It is mainly useful to quickly get an idea of how an analog sensor reacts to different stimuli. Since it is also able to capture and store analog input siginals it is also useful to generate test data recordings which then can be used for example to test a peak detection algorithm on. The tool is called TeensyDAQ hinting at the Data AcQuisition features and the micro-controller used.
Some of the features of the TeensyDAQ:
- Visualize up to five analog signals simultaneously in real-time.
- Capture analog input signals with sampling rates up to 8000Hz.
- Record analog input to a CSV-file and, using drag-and-drop, previously recorded CSV-files can be visualized.
- Works on Linux, Mac OS X and Windows.
- While a capture session is in progress you can going back in time and zoom, pan and drag to get a detailed view on your data.
- Allows you to listen to your input signal, this is especially practical with analog microphone input.
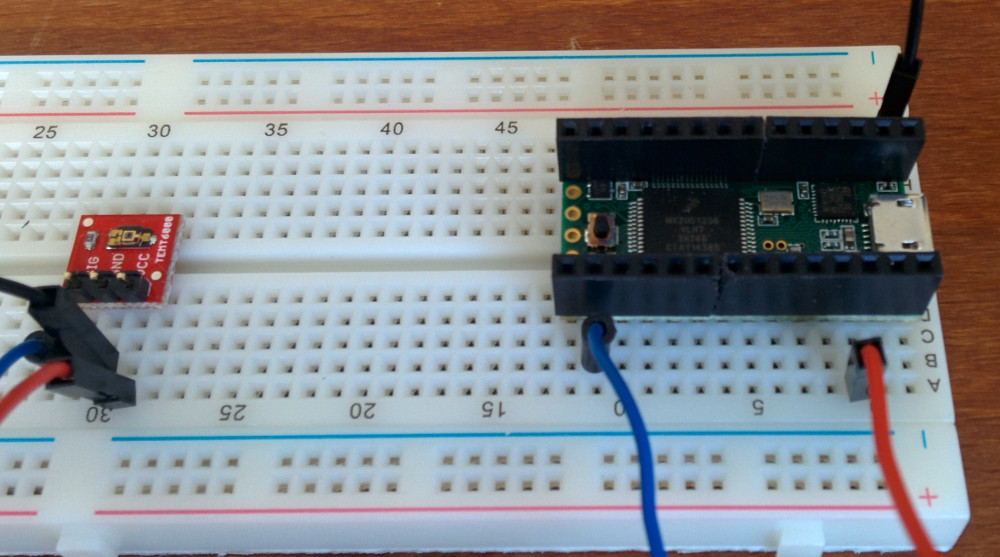
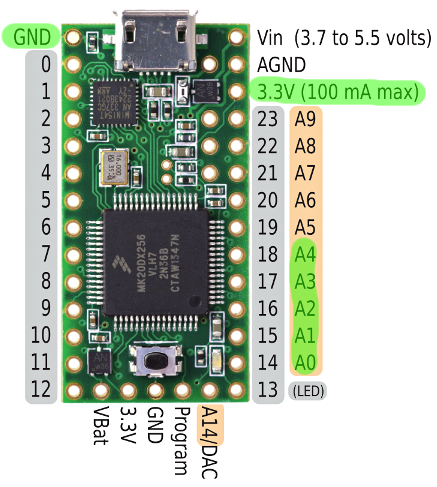
The system consists of two parts. A hardware and a software part. The hardware is a Teensy micro-controller running an Arduino sketch that ready analog input A0 to A4 at the requested sampling rate. A Teensy is used instead of a regular Arduino for two reasons. First the Teensy is capable of much higher data throughput, it is able to send five reading at 8000Hz, which is impossible on Arduino. The second reason is the 13bit analog read resolution. Classic Arduino only provides 10 bits.
The software part reads data from the serial port the Teensy is attached to. It interprets the data and stores it in an efficient data-structure. As quickly as possible the data is visualized. The software is written in Java. A recent Java runtime environment is needed to execute it.
Try out [the latest version of TeensyDAQ](https://0110.be/releases/TeensyDAQ/TeensyDAQ-latest/TeensyDAQ-latest.jar) or check out the source code on the [github TeensyDAQ source repository](https://github.com/JorenSix/TeensyDAQ).
- [TeensyDAQ-1.0.jar](https://0110.be/files/attachments/436/TeensyDAQ-1.0.jar)
- [TeensyAnalogRead.ino](https://0110.be/files/attachments/436/TeensyAnalogRead.ino)
---
## [Notifications from an RFduino over Bluetooth LE (4.0) on a Linux machine](https://0110.be/posts/Notifications_from_an_RFduino_over_Bluetooth_LE_%284.0%29_on_a_Linux_machine.md)
- Published: 2015-05-21T00:00:00Z
- Updated: 2025-11-29T20:15:07Z
- Author: Joren
- ID: 433
- Canonical: https://0110.be/posts/Notifications_from_an_RFduino_over_Bluetooth_LE_%284.0%29_on_a_Linux_machine
- Tags: [Code](https://0110.be/tags/Code.md), [Harde waren](https://0110.be/tags/Harde%20waren.md), [IPEM](https://0110.be/tags/IPEM.md), [UGent](https://0110.be/tags/UGent.md)
 This post describes how to get notifications from a Bluetooth LE (Low Energy) or Bluetooth v4.0 device on a Linux machine. Since it took me a while to get it going it is perhaps of interest to others.
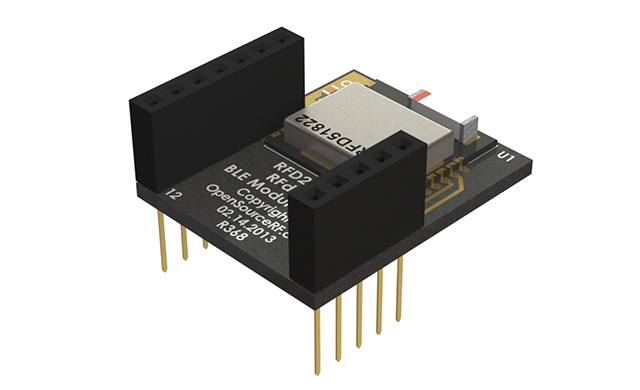
The hardware I used is an [RFduino](http://www.rfduino.com/) board and a Belikin mini Bluethooth v4.0 adapter. The RFduino was programmed to wait for an event with `RFduino_pinWake(pni, HIGH)`. When the pin is `HIGH` a count is incremented and this number is send to any device that is listening. In my case a Linux machine. The code is essentially the same as the button example included in the RDduino software distribution.
To install the Bluetooth stack on Debian the following command is executed `sudo apt-get install bluetooth bluez bluez-utils bluez-firmware`. A blog post describes more about the [Bluetooth tools](http://mike.saunby.net/2013/04/raspberry-pi-and-ti-cc2541-sensortag.html). Some other interesting reads are [Get started with Bluetooth Low Energy](http://www.jaredwolff.com/blog/get-started-with-bluetooth-low-energy/) and this [stackoverflow question](https://stackoverflow.com/questions/15657007/bluetooth-low-energy-listening-for-notifications-indications-in-linux). Once the stack is installed correctly the `lescan` utility should give an output like this:
````
$ sudo hcitool lescan
LE Scan ...
DC:87:CC:18:14:A5 RFduino
DC:87:CC:18:14:A5 (unknown)
````
Bluetooth LE works with the Generic Attribute Profile (GATT). A Bluetooth LE device can provide services by combining characteristics. These characteristics are the way to communicate with the device. Some characteristics are writable and are able to send notifications. To receive notifications one such characteristic (referred to with a hex handle) needs to be written. Write 0100 to get notifications, 0200 for indications (indications are notifications that are acknowledged), 0300 for both, or 0000 for nothing (default). With this in mind, the following command enables listening for notifications:
````
gatttool ---device=DC:87:CC:18:14:A5 ---char-write-req ---handle=0x000f ---value=0300 ---listen
````
With those commands working, the process can be automated with "a Ruby script to get Bluetooth LE notifications":\[bluetooth_notifications.rb\]. The script essentially calls `gatttool` with the correct parameters and parses and reacts to its output. To make it work `lescan` needs to be called before starting the script:
````
\$ sudo hcitool lescan && ruby bluetooth_notifications.rb
LE Scan ...
DC:87:CC:18:14:A5 RFduino
DC:87:CC:18:14:A5 (unknown)
Characteristic value was written successfully
Notification handle = 0x000e value: 41 decimal value: 65
Notification handle = 0x000e value: 42 decimal value: 66
Notification handle = 0x000e value: 43 decimal value: 67
Notification handle = 0x000e value: 44 decimal value: 68
Notification handle = 0x000e value: 45 decimal value: 69
Notification handle = 0x000e value: 46 decimal value: 70
````
- [rfd22102.jpg](https://0110.be/files/attachments/433/rfd22102.jpg)
- [bluetooth\_notifications.rb](https://0110.be/files/attachments/433/bluetooth_notifications.rb)
---
## [Access Features for Music Using AcoustID, Musicbrainz and AcousticBrainz](https://0110.be/posts/Access_Features_for_Music_Using_AcoustID%2C_Musicbrainz_and_AcousticBrainz.md)
- Published: 2015-05-08T00:00:00Z
- Updated: 2025-11-29T20:17:03Z
- Author: Joren
- ID: 432
- Canonical: https://0110.be/posts/Access_Features_for_Music_Using_AcoustID%2C_Musicbrainz_and_AcousticBrainz
- Tags: [Code](https://0110.be/tags/Code.md), [UGent](https://0110.be/tags/UGent.md)
This post describes how to get notifications from a Bluetooth LE (Low Energy) or Bluetooth v4.0 device on a Linux machine. Since it took me a while to get it going it is perhaps of interest to others.
The hardware I used is an [RFduino](http://www.rfduino.com/) board and a Belikin mini Bluethooth v4.0 adapter. The RFduino was programmed to wait for an event with `RFduino_pinWake(pni, HIGH)`. When the pin is `HIGH` a count is incremented and this number is send to any device that is listening. In my case a Linux machine. The code is essentially the same as the button example included in the RDduino software distribution.
To install the Bluetooth stack on Debian the following command is executed `sudo apt-get install bluetooth bluez bluez-utils bluez-firmware`. A blog post describes more about the [Bluetooth tools](http://mike.saunby.net/2013/04/raspberry-pi-and-ti-cc2541-sensortag.html). Some other interesting reads are [Get started with Bluetooth Low Energy](http://www.jaredwolff.com/blog/get-started-with-bluetooth-low-energy/) and this [stackoverflow question](https://stackoverflow.com/questions/15657007/bluetooth-low-energy-listening-for-notifications-indications-in-linux). Once the stack is installed correctly the `lescan` utility should give an output like this:
````
$ sudo hcitool lescan
LE Scan ...
DC:87:CC:18:14:A5 RFduino
DC:87:CC:18:14:A5 (unknown)
````
Bluetooth LE works with the Generic Attribute Profile (GATT). A Bluetooth LE device can provide services by combining characteristics. These characteristics are the way to communicate with the device. Some characteristics are writable and are able to send notifications. To receive notifications one such characteristic (referred to with a hex handle) needs to be written. Write 0100 to get notifications, 0200 for indications (indications are notifications that are acknowledged), 0300 for both, or 0000 for nothing (default). With this in mind, the following command enables listening for notifications:
````
gatttool ---device=DC:87:CC:18:14:A5 ---char-write-req ---handle=0x000f ---value=0300 ---listen
````
With those commands working, the process can be automated with "a Ruby script to get Bluetooth LE notifications":\[bluetooth_notifications.rb\]. The script essentially calls `gatttool` with the correct parameters and parses and reacts to its output. To make it work `lescan` needs to be called before starting the script:
````
\$ sudo hcitool lescan && ruby bluetooth_notifications.rb
LE Scan ...
DC:87:CC:18:14:A5 RFduino
DC:87:CC:18:14:A5 (unknown)
Characteristic value was written successfully
Notification handle = 0x000e value: 41 decimal value: 65
Notification handle = 0x000e value: 42 decimal value: 66
Notification handle = 0x000e value: 43 decimal value: 67
Notification handle = 0x000e value: 44 decimal value: 68
Notification handle = 0x000e value: 45 decimal value: 69
Notification handle = 0x000e value: 46 decimal value: 70
````
- [rfd22102.jpg](https://0110.be/files/attachments/433/rfd22102.jpg)
- [bluetooth\_notifications.rb](https://0110.be/files/attachments/433/bluetooth_notifications.rb)
---
## [Access Features for Music Using AcoustID, Musicbrainz and AcousticBrainz](https://0110.be/posts/Access_Features_for_Music_Using_AcoustID%2C_Musicbrainz_and_AcousticBrainz.md)
- Published: 2015-05-08T00:00:00Z
- Updated: 2025-11-29T20:17:03Z
- Author: Joren
- ID: 432
- Canonical: https://0110.be/posts/Access_Features_for_Music_Using_AcoustID%2C_Musicbrainz_and_AcousticBrainz
- Tags: [Code](https://0110.be/tags/Code.md), [UGent](https://0110.be/tags/UGent.md)
 This post describes how to *connect music in your library with precomputed features*. Say, for example, you are developing a DJ application and you want to facilitate mixing tracks. To provide a seamless mix you perhaps want information about beats and about the key the music in your library is in. Since vast databases of features are already available you probably want to access those, instead of using your own feature extractors and database. The problems that need to be addressed are:
1. Automatically identify the music in your library without relying on incomplete meta-data (tag information).
2. Connect the music with a data-base of meta-data. Preferably a large and well curated database.
3. Fetch pre-computed features for the music. The features should be extracted using algorithms that are currently state of the art or at least perform well. The features and the audio itself should be synchronized, otherwise beat information, for example, is not of much use.
To help with these task there are several open source tools and services available.
To identify music a condensed representation of musical audio is created. This process is known as acoustic fingerprinting. On the website [AcoustID](https://acoustid.org/) a tool is available to create such fingerprint. The library is called Chromaprint and the command line client is called `fpcalc`. Currently the latest version is [Chromaprint version 1.2](https://oxygene.sk/2014/08/chromaprint-1-2-released/) and static binaries for `fpcalc` are available on the [AcoustID website](https://acoustid.org/chromaprint). A packages for Debian (and probably Ubuntu) can be installed by calling `apt-get install libchromaprint-tools`. Once this tool is correctly installed a fingerprint for a piece of music can be created:
````
fpcalc music.mp3
FILE=music.mp3\
DURATION=168\
FINGERPRINT=AQADtEmi..hADAAOCGAQghZRgQByjAEAICSMWYME\
````
A fingerprint by itself is not of much use. The AcoustID webservice translates a fingerprint into one or more [MusicBrainz identifiers](https://musicbrainz.org/doc/MusicBrainz_Identifier). One fingerprint can result in multiple identifiers because the same audio can be released on several albums. There is [documentation for AcoustID webservice](https://acoustid.org/webservice) available. To use the webservice an API key is needed. Confusingly, the AcoustID service has two types of API keys. One for end-users and one for developers. The last type is needed to translate ID's. To request a developer API key, log in on the AcoustID website and "add an application", there you can find the correct API key. Substitute `dev_api_key` in the following URL. Also change the fingerprint and duration to match the information provided by the `fpcalc` application. The webservice should reply with a set of MusicBrainz identifiers:
`http://api.acoustid.org/v2/lookup?client=dev_api_key&duration=x&fingerprint=ADORIF...LKJE6&meta=recordingids`
[AcousticBrainz](http://acousticbrainz.org/) provides features for a subset of music that has a MusicBrainz identifier. Currently about a million tracks are analyzed but more are added every day. The API for the webservice is straightforward:
````
GET http://acousticbrainz.org/96685213-a25c-4678-9a13-abd9ec81cf35/low-level
GET http://acousticbrainz.org/96685213-a25c-4678-9a13-abd9ec81cf35/high-level
````
The low-level features include beat positions and chroma information. For the hypothetical DJ-application this is the information that would be used.
If you find the services useful please consider contributing to MusicBrainz, AcoustID and AcousticBrainz.
A small Ruby script to "automatically fetch features":\[mbid_lookup.rb\] for audio can be downloaded here. It needs Ruby and a RubyGems to parse JSON. On Debian this can be installed with `apt-get install ruby` and `rubygems install json`. Once these dependencies are installed the script can be ran as follows:
````
ruby mbid_lookup.rb example.mp3
Found 6 musicbrainz identifiers!
Not found in AcousticBrainz: 0afcd4a1-3709-499b-b76f-0d5491f839a5
Beat positions for 3d49fab8-fd08-42be-b0d2-9f1dc884d902: 0.522448956966,1.05650794506,1.57895684242,2.10140585899,2.61224484444,3.13469386101
Not found in AcousticBrainz: 448258f0-aa5a-4968-8efd-8c9348d5142e
Not found in AcousticBrainz: adcd7079-57d9-49bd-a36b-a20fa27b02b1
Beat positions for d1cd1321-0b66-4848-935e-f3afba6c7356: 0.441179126501,0.905578196049,1.369977355,1.83437633514,2.29877543449,2.76317453384
Not found in AcousticBrainz: e1f433be-af6b-4b5d-a969-4b53f014c395
````
---
## [SINGmaster Android App uses TarsosDSP](https://0110.be/posts/SINGmaster_Android_App_uses_TarsosDSP.md)
- Published: 2015-04-24T00:00:00Z
- Updated: 2015-07-10T12:09:11Z
- Author: Joren
- ID: 431
- Canonical: https://0110.be/posts/SINGmaster_Android_App_uses_TarsosDSP
- Tags: [Code](https://0110.be/tags/Code.md), [Java](https://0110.be/tags/Java.md), [Muziek](https://0110.be/tags/Muziek.md), [TarsosDSP](https://0110.be/tags/TarsosDSP.md), [UGent](https://0110.be/tags/UGent.md)
This post describes how to *connect music in your library with precomputed features*. Say, for example, you are developing a DJ application and you want to facilitate mixing tracks. To provide a seamless mix you perhaps want information about beats and about the key the music in your library is in. Since vast databases of features are already available you probably want to access those, instead of using your own feature extractors and database. The problems that need to be addressed are:
1. Automatically identify the music in your library without relying on incomplete meta-data (tag information).
2. Connect the music with a data-base of meta-data. Preferably a large and well curated database.
3. Fetch pre-computed features for the music. The features should be extracted using algorithms that are currently state of the art or at least perform well. The features and the audio itself should be synchronized, otherwise beat information, for example, is not of much use.
To help with these task there are several open source tools and services available.
To identify music a condensed representation of musical audio is created. This process is known as acoustic fingerprinting. On the website [AcoustID](https://acoustid.org/) a tool is available to create such fingerprint. The library is called Chromaprint and the command line client is called `fpcalc`. Currently the latest version is [Chromaprint version 1.2](https://oxygene.sk/2014/08/chromaprint-1-2-released/) and static binaries for `fpcalc` are available on the [AcoustID website](https://acoustid.org/chromaprint). A packages for Debian (and probably Ubuntu) can be installed by calling `apt-get install libchromaprint-tools`. Once this tool is correctly installed a fingerprint for a piece of music can be created:
````
fpcalc music.mp3
FILE=music.mp3\
DURATION=168\
FINGERPRINT=AQADtEmi..hADAAOCGAQghZRgQByjAEAICSMWYME\
````
A fingerprint by itself is not of much use. The AcoustID webservice translates a fingerprint into one or more [MusicBrainz identifiers](https://musicbrainz.org/doc/MusicBrainz_Identifier). One fingerprint can result in multiple identifiers because the same audio can be released on several albums. There is [documentation for AcoustID webservice](https://acoustid.org/webservice) available. To use the webservice an API key is needed. Confusingly, the AcoustID service has two types of API keys. One for end-users and one for developers. The last type is needed to translate ID's. To request a developer API key, log in on the AcoustID website and "add an application", there you can find the correct API key. Substitute `dev_api_key` in the following URL. Also change the fingerprint and duration to match the information provided by the `fpcalc` application. The webservice should reply with a set of MusicBrainz identifiers:
`http://api.acoustid.org/v2/lookup?client=dev_api_key&duration=x&fingerprint=ADORIF...LKJE6&meta=recordingids`
[AcousticBrainz](http://acousticbrainz.org/) provides features for a subset of music that has a MusicBrainz identifier. Currently about a million tracks are analyzed but more are added every day. The API for the webservice is straightforward:
````
GET http://acousticbrainz.org/96685213-a25c-4678-9a13-abd9ec81cf35/low-level
GET http://acousticbrainz.org/96685213-a25c-4678-9a13-abd9ec81cf35/high-level
````
The low-level features include beat positions and chroma information. For the hypothetical DJ-application this is the information that would be used.
If you find the services useful please consider contributing to MusicBrainz, AcoustID and AcousticBrainz.
A small Ruby script to "automatically fetch features":\[mbid_lookup.rb\] for audio can be downloaded here. It needs Ruby and a RubyGems to parse JSON. On Debian this can be installed with `apt-get install ruby` and `rubygems install json`. Once these dependencies are installed the script can be ran as follows:
````
ruby mbid_lookup.rb example.mp3
Found 6 musicbrainz identifiers!
Not found in AcousticBrainz: 0afcd4a1-3709-499b-b76f-0d5491f839a5
Beat positions for 3d49fab8-fd08-42be-b0d2-9f1dc884d902: 0.522448956966,1.05650794506,1.57895684242,2.10140585899,2.61224484444,3.13469386101
Not found in AcousticBrainz: 448258f0-aa5a-4968-8efd-8c9348d5142e
Not found in AcousticBrainz: adcd7079-57d9-49bd-a36b-a20fa27b02b1
Beat positions for d1cd1321-0b66-4848-935e-f3afba6c7356: 0.441179126501,0.905578196049,1.369977355,1.83437633514,2.29877543449,2.76317453384
Not found in AcousticBrainz: e1f433be-af6b-4b5d-a969-4b53f014c395
````
---
## [SINGmaster Android App uses TarsosDSP](https://0110.be/posts/SINGmaster_Android_App_uses_TarsosDSP.md)
- Published: 2015-04-24T00:00:00Z
- Updated: 2015-07-10T12:09:11Z
- Author: Joren
- ID: 431
- Canonical: https://0110.be/posts/SINGmaster_Android_App_uses_TarsosDSP
- Tags: [Code](https://0110.be/tags/Code.md), [Java](https://0110.be/tags/Java.md), [Muziek](https://0110.be/tags/Muziek.md), [TarsosDSP](https://0110.be/tags/TarsosDSP.md), [UGent](https://0110.be/tags/UGent.md)
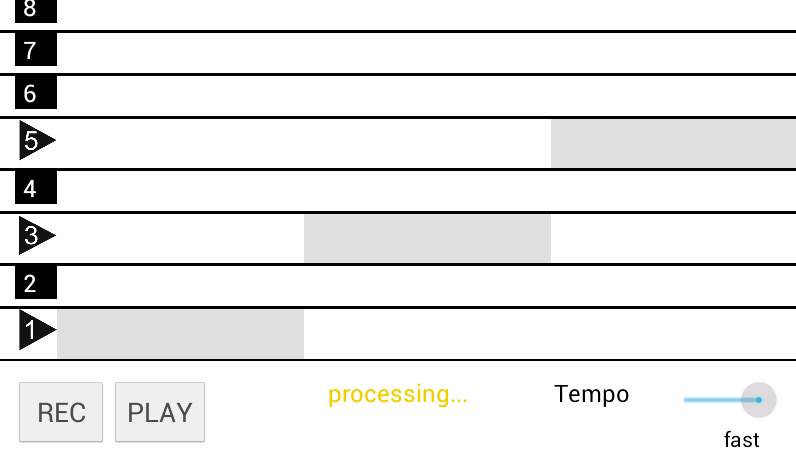
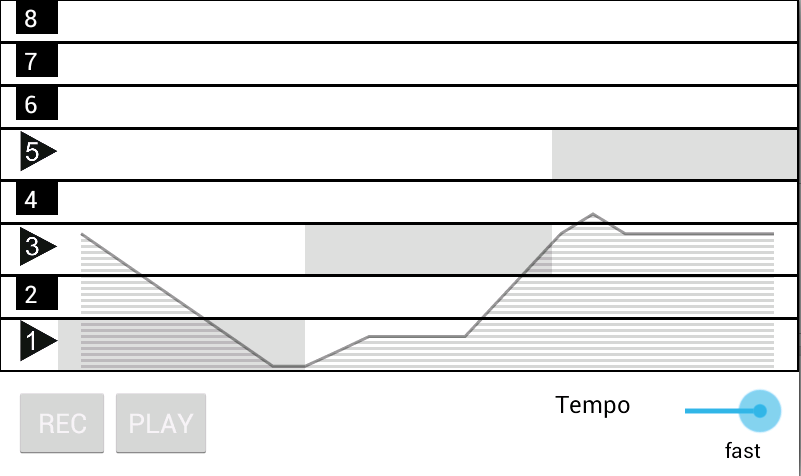
 TarsosDSP is a real-time audio processing library written in Java. Since version 2.0 it is compatible with Android. Judging by the number of forks of the [TarsosDSP GitHub repository](https://github.com/JorenSix/TarsosDSP) Android compatibility increased the popularity of the library. Now the first Android application which uses TarsosDSP has found its way to the Google Play store. Download and play with [SINGmaster](https://play.google.com/store/apps/details?id=bg.singmaster.gui) to see an application of the pitch tracking capabilities within TarsosDSP. The SINGmaster description:
> *"SING master is a smart phone app that helps you to learn how to sing. SING master presents a collection of practical exercises (on the most important building blocks of melodies). Colours and sounds guide you in the exercise. After recording, SING master gives visual feedback : you can see and hear your voice. This is important so that you can identify where your mistakes are."*
Another application in the Play Store that uses TarsosDSP is [CuePitcher](https://play.google.com/store/apps/details?id=io.github.mindosoft.cuepitcher).
- [singmaster\_logo.png](https://0110.be/files/attachments/431/singmaster_logo.png)
---
## [OSC in Matlab on Windows, Linux and Mac OS X using Java](https://0110.be/posts/OSC_in_Matlab_on_Windows%2C_Linux_and_Mac_OS_X_using_Java.md)
- Published: 2015-03-25T00:00:00Z
- Updated: 2025-11-29T21:40:18Z
- Author: Joren
- ID: 430
- Canonical: https://0110.be/posts/OSC_in_Matlab_on_Windows%2C_Linux_and_Mac_OS_X_using_Java
- Tags: [Code](https://0110.be/tags/Code.md), [UGent](https://0110.be/tags/UGent.md)
TarsosDSP is a real-time audio processing library written in Java. Since version 2.0 it is compatible with Android. Judging by the number of forks of the [TarsosDSP GitHub repository](https://github.com/JorenSix/TarsosDSP) Android compatibility increased the popularity of the library. Now the first Android application which uses TarsosDSP has found its way to the Google Play store. Download and play with [SINGmaster](https://play.google.com/store/apps/details?id=bg.singmaster.gui) to see an application of the pitch tracking capabilities within TarsosDSP. The SINGmaster description:
> *"SING master is a smart phone app that helps you to learn how to sing. SING master presents a collection of practical exercises (on the most important building blocks of melodies). Colours and sounds guide you in the exercise. After recording, SING master gives visual feedback : you can see and hear your voice. This is important so that you can identify where your mistakes are."*
Another application in the Play Store that uses TarsosDSP is [CuePitcher](https://play.google.com/store/apps/details?id=io.github.mindosoft.cuepitcher).


- [singmaster\_logo.png](https://0110.be/files/attachments/431/singmaster_logo.png)
---
## [OSC in Matlab on Windows, Linux and Mac OS X using Java](https://0110.be/posts/OSC_in_Matlab_on_Windows%2C_Linux_and_Mac_OS_X_using_Java.md)
- Published: 2015-03-25T00:00:00Z
- Updated: 2025-11-29T21:40:18Z
- Author: Joren
- ID: 430
- Canonical: https://0110.be/posts/OSC_in_Matlab_on_Windows%2C_Linux_and_Mac_OS_X_using_Java
- Tags: [Code](https://0110.be/tags/Code.md), [UGent](https://0110.be/tags/UGent.md)
 This post explains how to receive [OSC](http://opensoundcontrol.org/-messages) in a MatLab environment. It uses a platform independent Java library which should work on 64 and 32 bit versions of Windows, Unix and Mac OS X. Using Java makes installation relatively easy compared with other solutions.
The most used method to get OSC-messages in Matlab can be found [here](http://opensoundcontrol.org/implementation/matlab-osc). This method uses a library called [liblo](http://liblo.sourceforge.net/) which needs to be configured (compiled) correctly on your system. Especially on Windows this can be problematic. A brave soul documented his quest to [get OSC working with Matlab on Windows here](http://www.aboehler.at/doku/doku.php/blog:2009:0727_install_osc_for_matlab_on_windows). Obviously not for the faint of heart.
An alternative way leverages the [Matlab facilities to run Java](http://nl.mathworks.com/help/matlab/matlab_external/bringing-java-classes-and-methods-into-matlab-workspace.html#f46352). Since there is a [Java OSC](http://www.illposed.com/software/javaoscdoc/) library available ([JavaOSC on github](https://github.com/hoijui/JavaOSC)) it is relatively easy to bridge the two. To make the connection, I have written some [glue code](https://0110.be/files/attachments/430/MatlabOSCListener.java) and provide an easy to use [Jar-library](https://0110.be/files/attachments/430/javaosctomatlab.jar) here. Using the bridge is done as follows:
### How to make Matlab receive OSC-messages
1. Download the "JavaOSCtoMatlab Java library":\[javaosctomatlab.jar\] and store it in an easy to remember directory.
2. Download the "example Matlab OSC client Script":\[osc_java_test.m\] and store it in the same directory. The client is included below as well.
3. Start Matlab, modify the client script to fit your needs. You probably need to change the OSC method to listen to and the OSC port. Also make sure that the `cd` command points to the directory with the downloaded jar-file.
4. Run the client script and receive your OSC messages.
Note that there are three ways to receive the payload of a message. They are returned by the Java code as either `Object[]`, `double[]` or `String[]`. The last two are automatically understood by Matlab, so they are more easy to work with. Respectively to get the message data you need to call either `osc_listener.getMessageArguments()`, `osc_listener.getMessageArgumentsAsDouble()`, `osc_listener.getMessageArgumentsAsString()`.
I hope this is useful to some...
````
cd('C:/dir/with/jar/file/')
% Check your java version 1.6+ should be ok
version -java
% Load the jar file
javaaddpath('javaosctomatlab.jar');
% Import the needed java packages
import com.illposed.osc.\*;
import java.lang.String
% defines the OSC port to listen to
receiver = OSCPortIn(4000);
% defines the OSC method to listen to
osc_method = String('/ECG');
osc_listener = MatlabOSCListener();
receiver.addListener(osc_method,osc_listener);
receiver.startListening();
%infinite loop, receiving all non empty messages
while(1)
struct = osc_listener.getMessageArgumentsAsDouble();
if \~isempty(struct)
struct
end
end
receiver.stopListening();
receiver=0;
````
- [javaosctomatlab.jar](https://0110.be/files/attachments/430/javaosctomatlab.jar)
- [osc\_java\_test.m](https://0110.be/files/attachments/430/osc_java_test.m)
- [JavaOSCToMatlab.zip](https://0110.be/files/attachments/430/JavaOSCToMatlab.zip)
- [MatlabOSCListener.java](https://0110.be/files/attachments/430/MatlabOSCListener.java)
- [matlab.gif](https://0110.be/files/attachments/430/matlab.gif)
---
## [Measuring Audio Output Latency on Android Lollipop using an Arduino](https://0110.be/posts/Measuring_Audio_Output_Latency_on_Android_Lollipop_using_an_Arduino.md)
- Published: 2015-01-15T00:00:00Z
- Updated: 2025-11-29T21:42:12Z
- Author: Joren
- ID: 426
- Canonical: https://0110.be/posts/Measuring_Audio_Output_Latency_on_Android_Lollipop_using_an_Arduino
- Tags: [Code](https://0110.be/tags/Code.md), [UGent](https://0110.be/tags/UGent.md)
This post explains how to receive [OSC](http://opensoundcontrol.org/-messages) in a MatLab environment. It uses a platform independent Java library which should work on 64 and 32 bit versions of Windows, Unix and Mac OS X. Using Java makes installation relatively easy compared with other solutions.
The most used method to get OSC-messages in Matlab can be found [here](http://opensoundcontrol.org/implementation/matlab-osc). This method uses a library called [liblo](http://liblo.sourceforge.net/) which needs to be configured (compiled) correctly on your system. Especially on Windows this can be problematic. A brave soul documented his quest to [get OSC working with Matlab on Windows here](http://www.aboehler.at/doku/doku.php/blog:2009:0727_install_osc_for_matlab_on_windows). Obviously not for the faint of heart.
An alternative way leverages the [Matlab facilities to run Java](http://nl.mathworks.com/help/matlab/matlab_external/bringing-java-classes-and-methods-into-matlab-workspace.html#f46352). Since there is a [Java OSC](http://www.illposed.com/software/javaoscdoc/) library available ([JavaOSC on github](https://github.com/hoijui/JavaOSC)) it is relatively easy to bridge the two. To make the connection, I have written some [glue code](https://0110.be/files/attachments/430/MatlabOSCListener.java) and provide an easy to use [Jar-library](https://0110.be/files/attachments/430/javaosctomatlab.jar) here. Using the bridge is done as follows:
### How to make Matlab receive OSC-messages
1. Download the "JavaOSCtoMatlab Java library":\[javaosctomatlab.jar\] and store it in an easy to remember directory.
2. Download the "example Matlab OSC client Script":\[osc_java_test.m\] and store it in the same directory. The client is included below as well.
3. Start Matlab, modify the client script to fit your needs. You probably need to change the OSC method to listen to and the OSC port. Also make sure that the `cd` command points to the directory with the downloaded jar-file.
4. Run the client script and receive your OSC messages.
Note that there are three ways to receive the payload of a message. They are returned by the Java code as either `Object[]`, `double[]` or `String[]`. The last two are automatically understood by Matlab, so they are more easy to work with. Respectively to get the message data you need to call either `osc_listener.getMessageArguments()`, `osc_listener.getMessageArgumentsAsDouble()`, `osc_listener.getMessageArgumentsAsString()`.
I hope this is useful to some...
````
cd('C:/dir/with/jar/file/')
% Check your java version 1.6+ should be ok
version -java
% Load the jar file
javaaddpath('javaosctomatlab.jar');
% Import the needed java packages
import com.illposed.osc.\*;
import java.lang.String
% defines the OSC port to listen to
receiver = OSCPortIn(4000);
% defines the OSC method to listen to
osc_method = String('/ECG');
osc_listener = MatlabOSCListener();
receiver.addListener(osc_method,osc_listener);
receiver.startListening();
%infinite loop, receiving all non empty messages
while(1)
struct = osc_listener.getMessageArgumentsAsDouble();
if \~isempty(struct)
struct
end
end
receiver.stopListening();
receiver=0;
````
- [javaosctomatlab.jar](https://0110.be/files/attachments/430/javaosctomatlab.jar)
- [osc\_java\_test.m](https://0110.be/files/attachments/430/osc_java_test.m)
- [JavaOSCToMatlab.zip](https://0110.be/files/attachments/430/JavaOSCToMatlab.zip)
- [MatlabOSCListener.java](https://0110.be/files/attachments/430/MatlabOSCListener.java)
- [matlab.gif](https://0110.be/files/attachments/430/matlab.gif)
---
## [Measuring Audio Output Latency on Android Lollipop using an Arduino](https://0110.be/posts/Measuring_Audio_Output_Latency_on_Android_Lollipop_using_an_Arduino.md)
- Published: 2015-01-15T00:00:00Z
- Updated: 2025-11-29T21:42:12Z
- Author: Joren
- ID: 426
- Canonical: https://0110.be/posts/Measuring_Audio_Output_Latency_on_Android_Lollipop_using_an_Arduino
- Tags: [Code](https://0110.be/tags/Code.md), [UGent](https://0110.be/tags/UGent.md)
 This post explains how to measure audio output latency on Android devices. To measure audio latency USB-OTG(On The Go) and an Arduino is used. In the process it documents audio output latency on an LG Nexus 5 device running the most recent version of Android, which currently is Lollipop (5.0).
Audio latency is an important aspect of a system, especially if it is used for real-time sonification or for musical applications. Audio latency is the, preferably short, delay between audio entering a system and emerging from a system. Audio output latency is the time it takes between a signal (e.g. a button pressed) and when audio emerges. For sonification purposes audio output latency is more interesting than round-trip audio latency.
Android systems are often portable, generally available and relatively cheap. Android offers an attractive platform to develop sonifications or musical applications for. Unfortunately, audio latency on Android has not been a priority in the first versions. With [Android 4.1](https://source.android.com/devices/audio/latency.html) things started to change but due to hard- and software fragmentation it is still hard to find how much audio latency is expected. Even if the exact model (e.g. Nexus 5) and software version (stock Android 5.0) is known, exact numbers are, so it seems, nowhere to be found. For more information on the internal changes that make low latency audio on Android possible, watch the talk on [High Performance Audio](https://developers.google.com/events/io/sessions/325993827) from the 2013 Google I/O conference. Also note the lack of exact latency numbers in that talk. It is a very enjoyable talk by two Google engineers going after the culprits of high latency in true Sherlock/dr. Watson style.
Since audio output latency is generally not documented and since it is an important factor to decide if Android is a viable platform for real-time sonification or musical applications it needs to be measured. One way of [measuring audio output latency on Android](https://source.android.com/devices/audio/latency_measure.html) is documented by the people of Google. Unfortunately, the approach is not easily reproducible since it needs a custom circuit board, an oscilloscope and there is no source code available. Below a reproducible way to measure audio output latency for Android is documented.
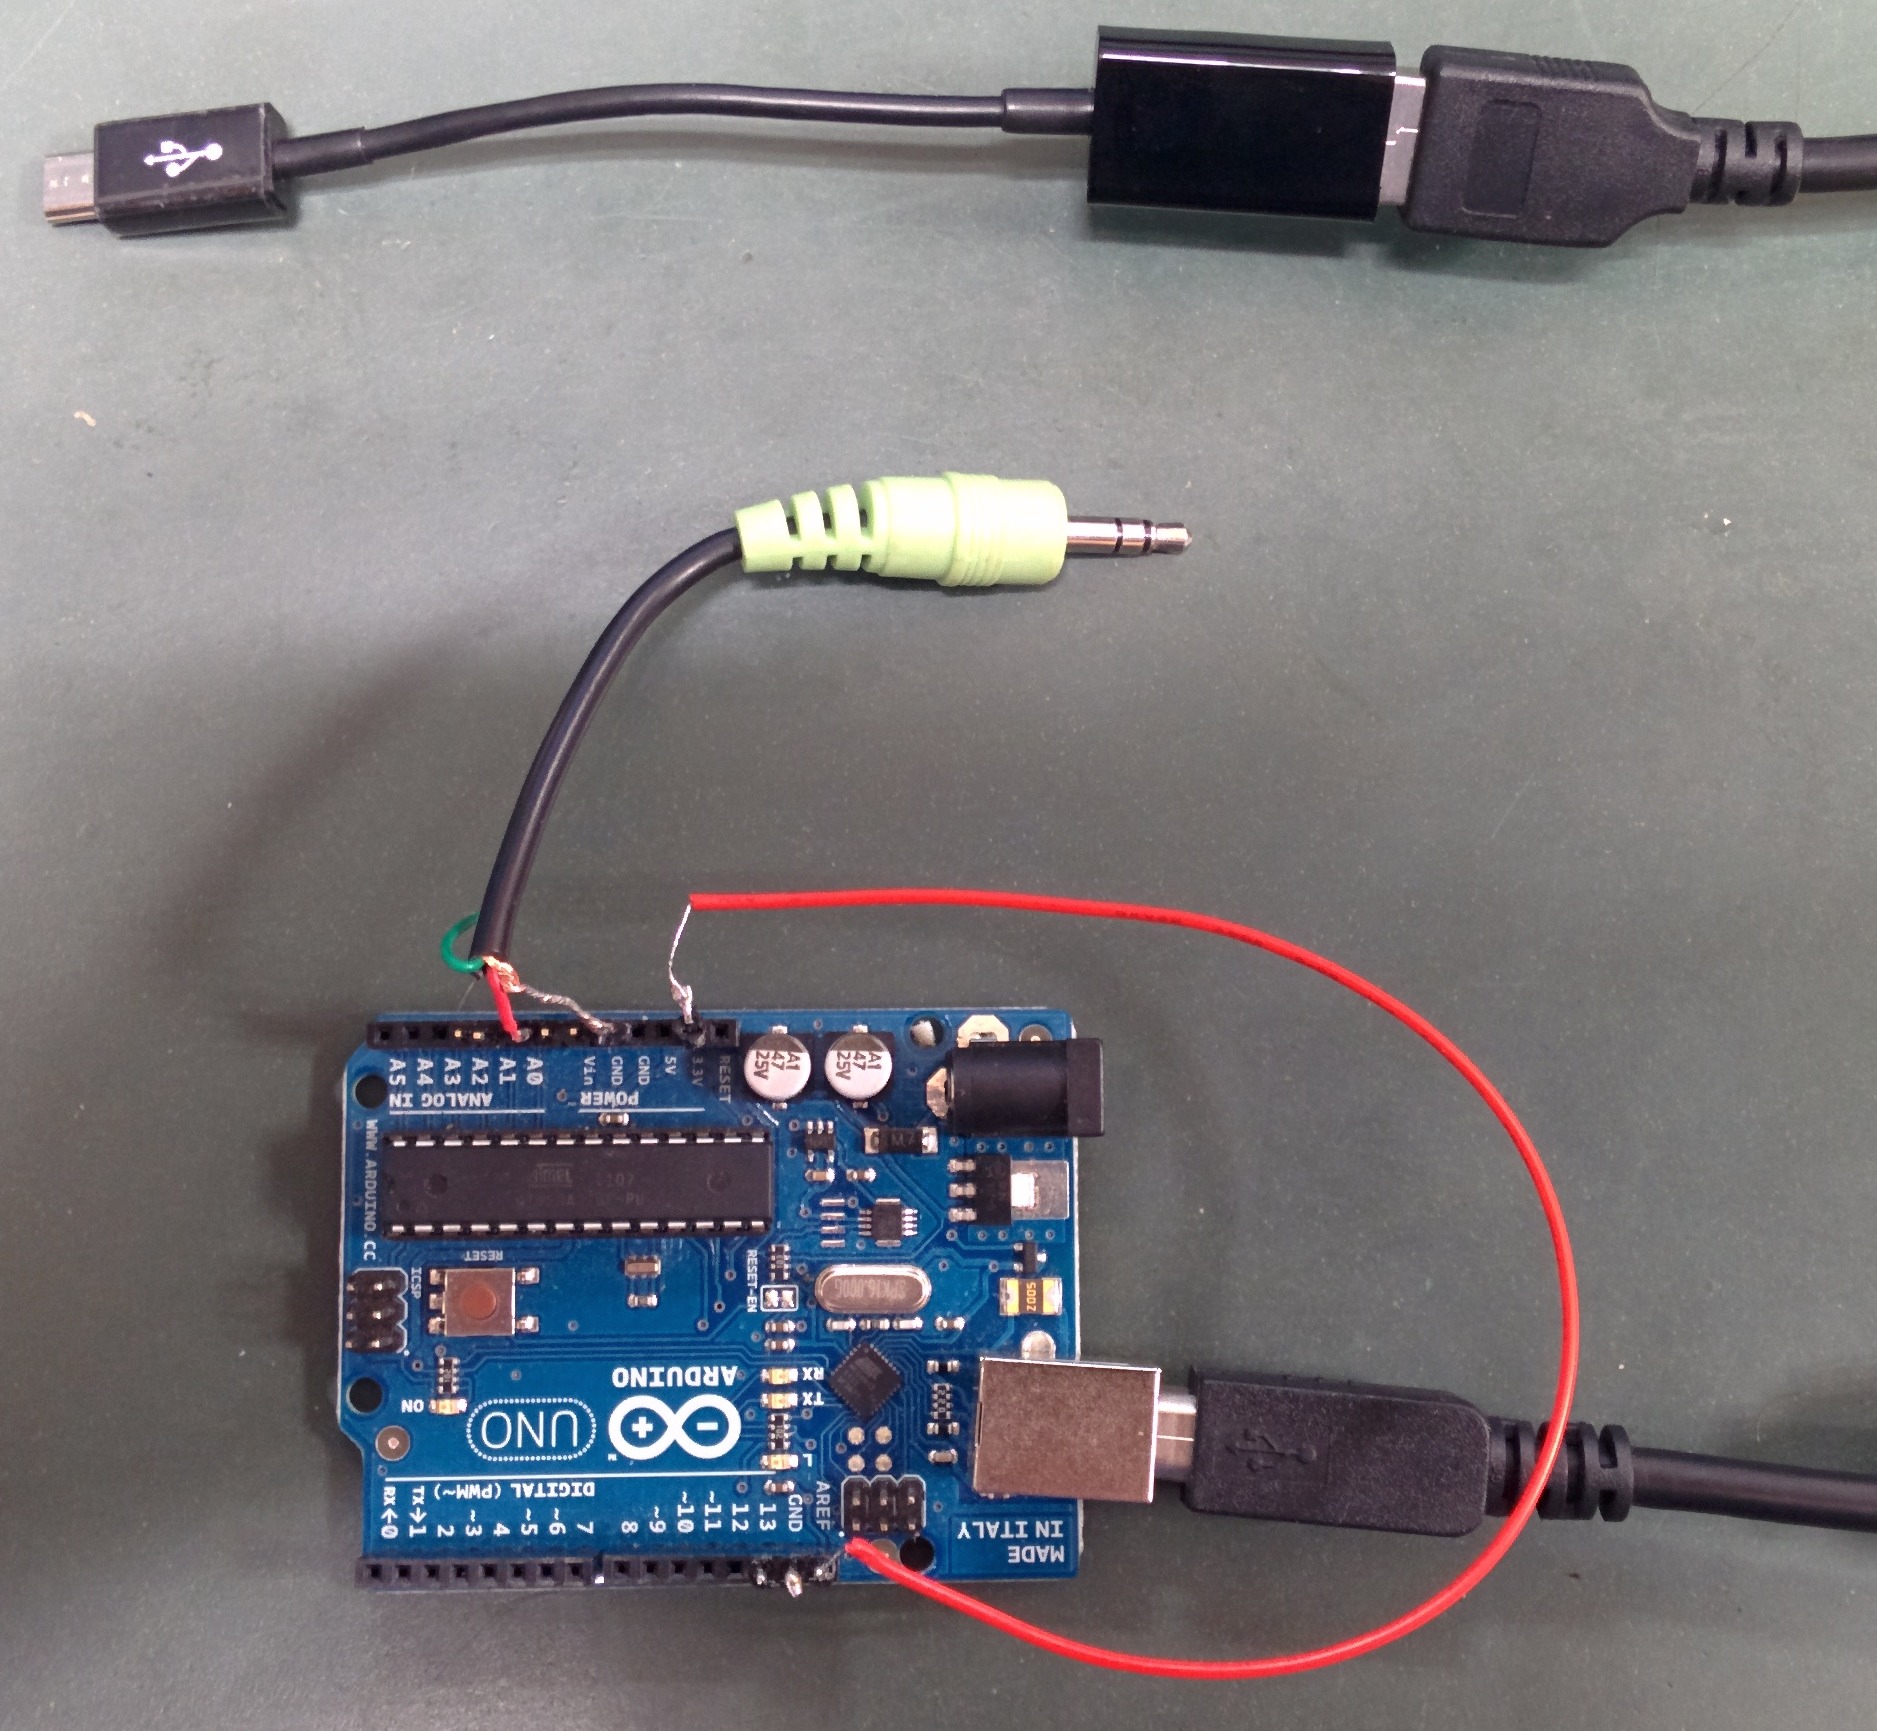
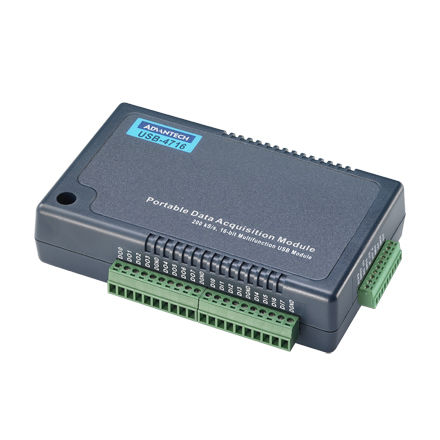
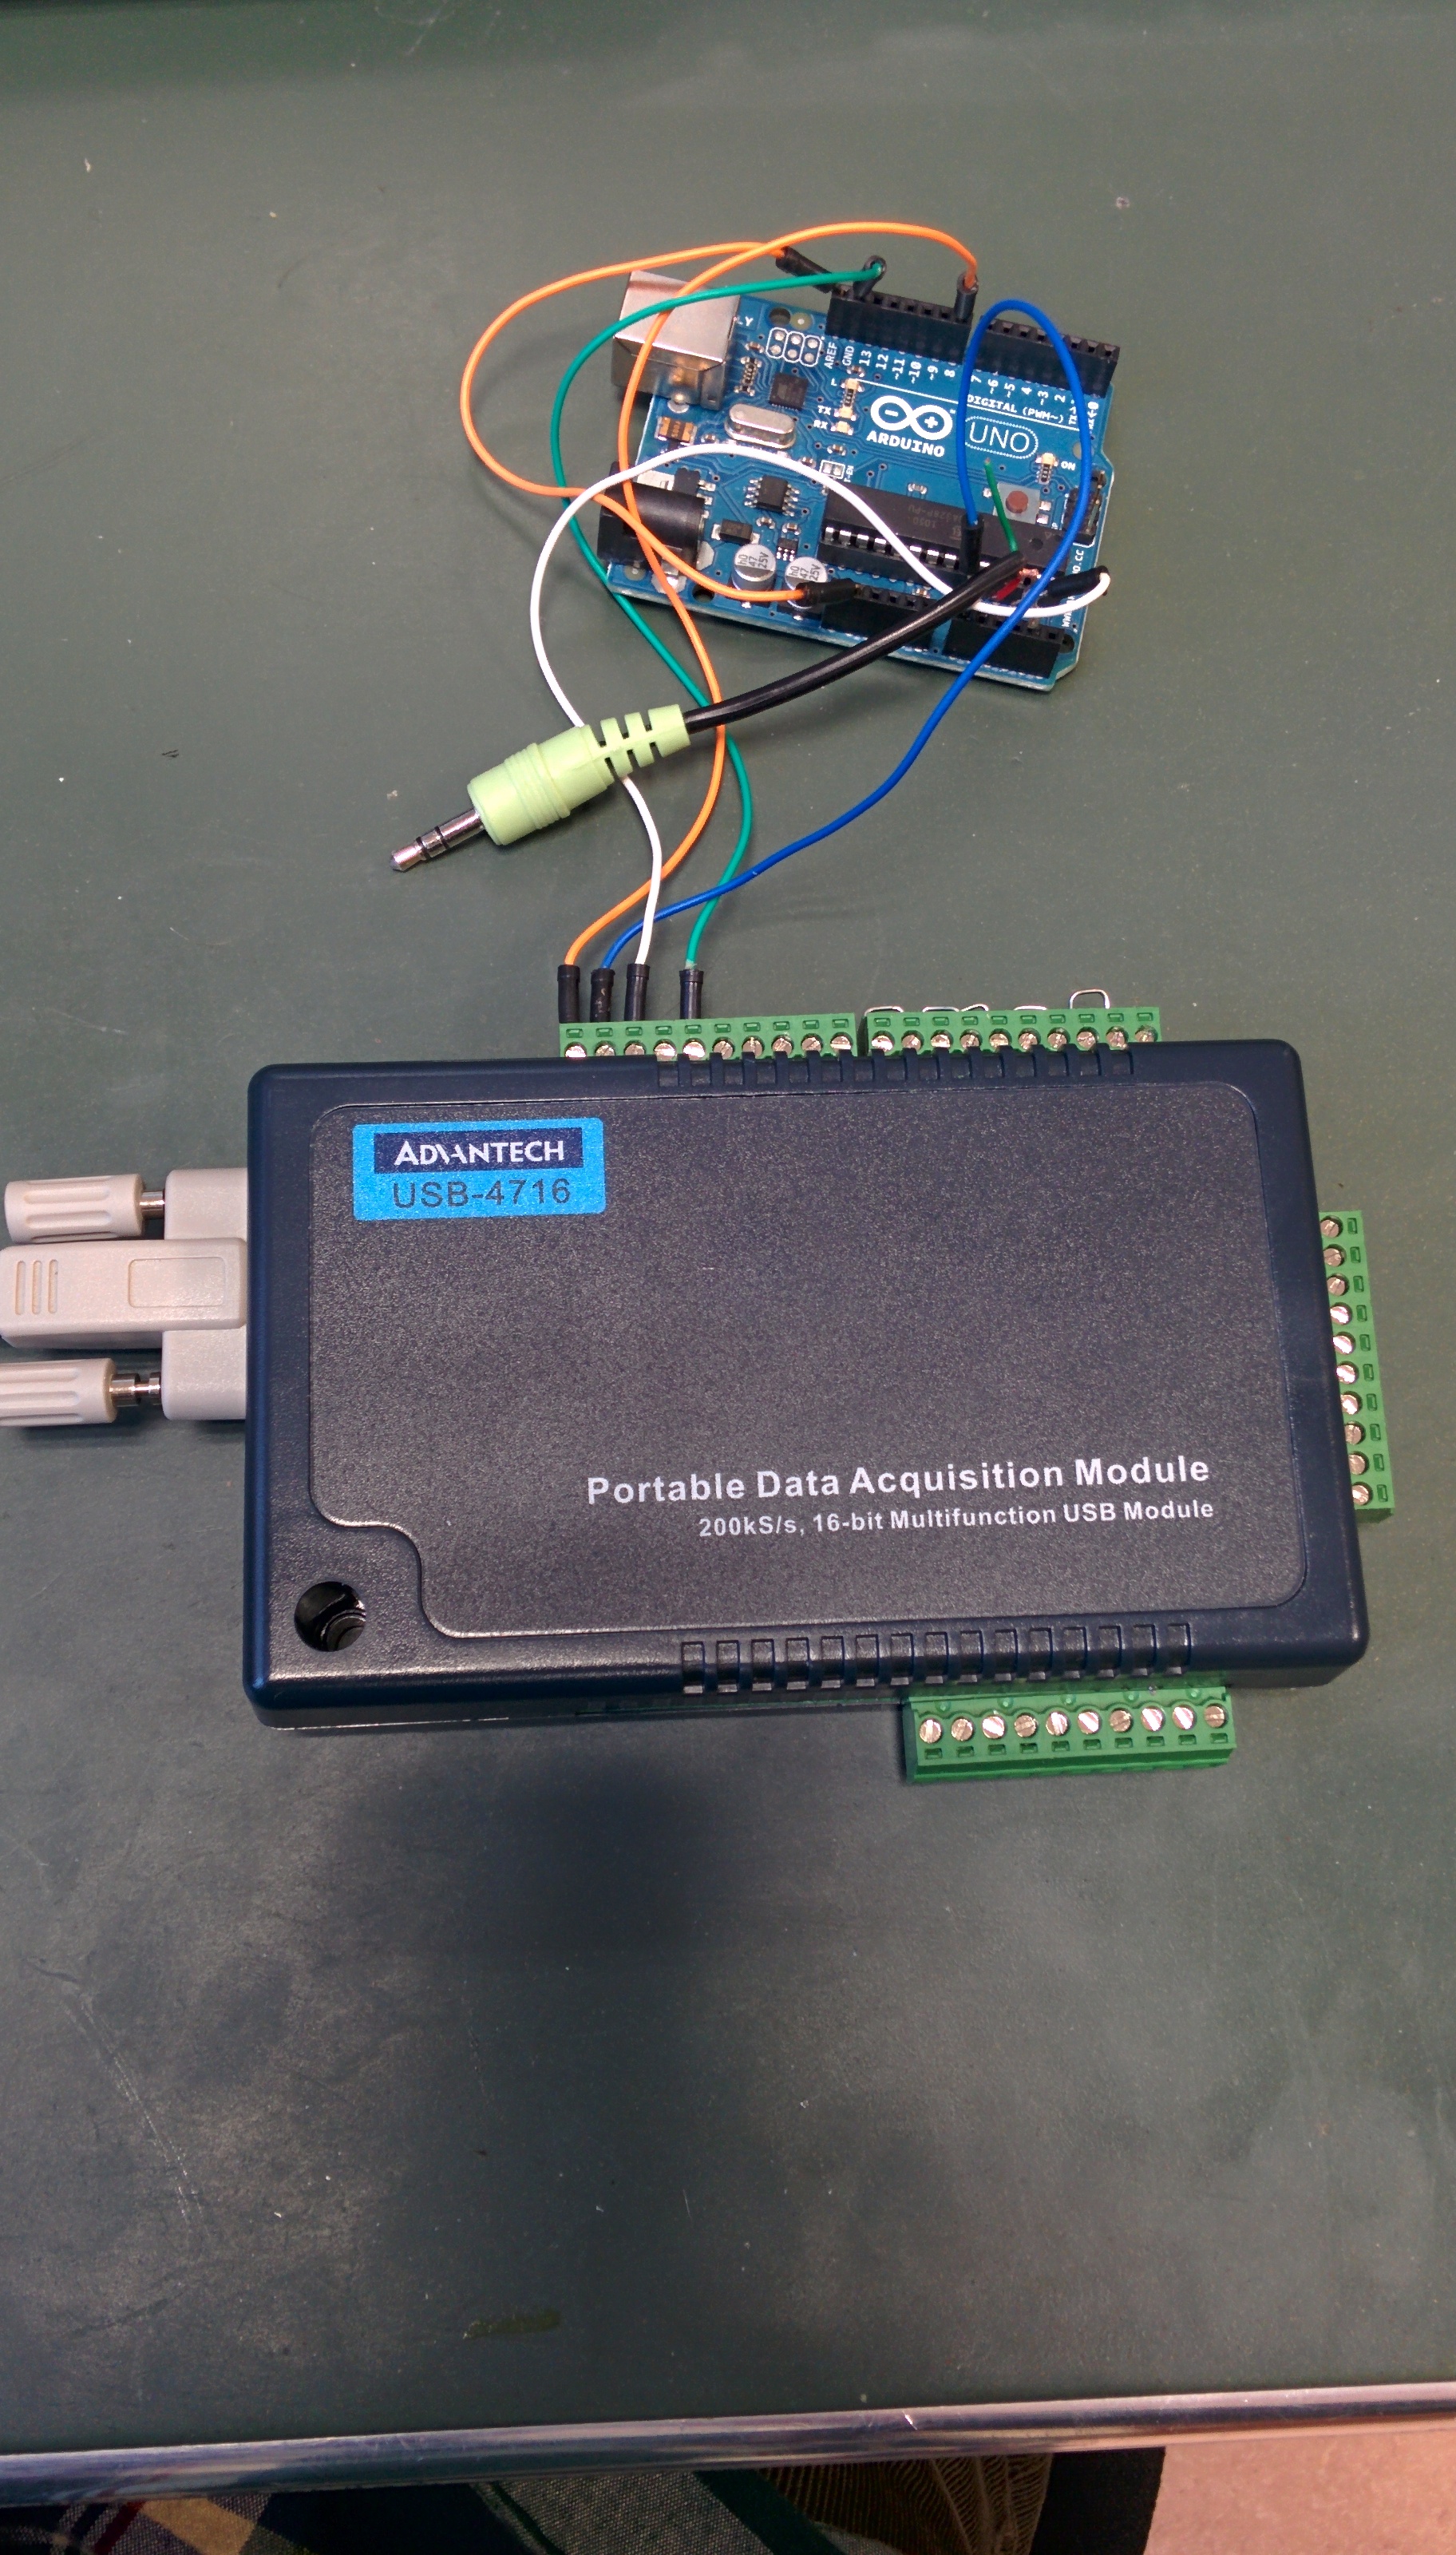
An Arduino, an Android device, an USB-OTG cable and a butchered mini-jack audio cable are needed together with the software provided here. Optionally, a data acquisition module can be used to visualize the signals. The measurement system works as follows:
1. An Arduino sends a signal over USB. The time at which the signal is send is stored for later use.
2. An Android device, connected to the Arduino via an USB-OTG-cable, receives the signal.
3. The Android device responds as quickly as possible, with the lowest latency as possible, by emitting a sound.
4. The sound is captured on an analog input port of the Arduino, via the mini-jack cable. The time the sound appears on the Arduino is stored.
5. By comparing the time when the signal was send with the time when the sound arrived, the audio output latency is measured and reported.
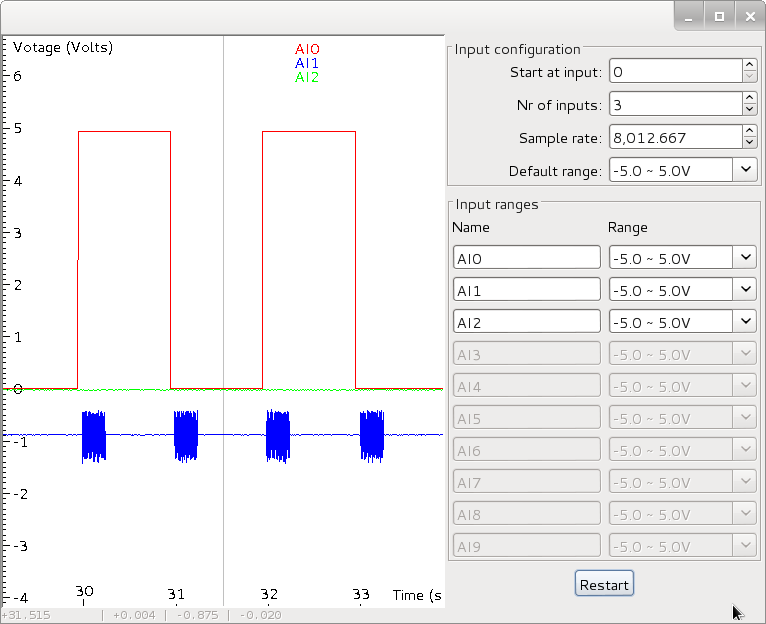
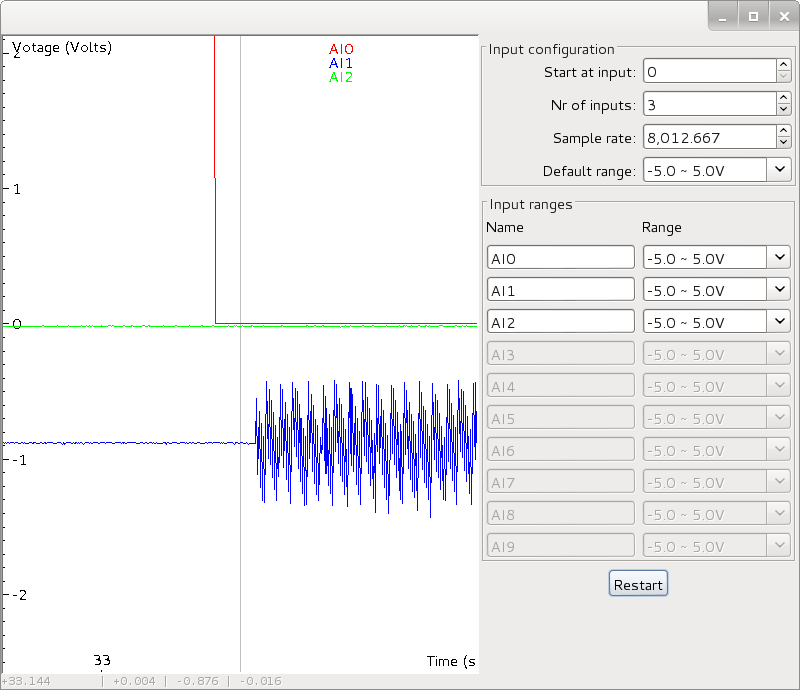
The previous steps are repeated every second to gain insights into the variability of the measurements. To generate microsecond accurate timing [interrupts](http://www.engblaze.com/microcontroller-tutorial-avr-and-arduino-timer-interrupts/) are used on the Arduino. For visualisation, a digital pin is toggled every time the Arduino sends a signal. The [Arduino sketch](https://0110.be/files/attachments/426/android_latency.ino) is attached to this post, as is the [source code](https://0110.be/files/attachments/426/SoundOutThree.zip) for the Android application. An already [compiled APK](https://0110.be/files/attachments/426/SoundOutThree.apk) is also available. With some luck - a recent Android version is needed, your device should support USB-OTG - it might work on your device.
### Results
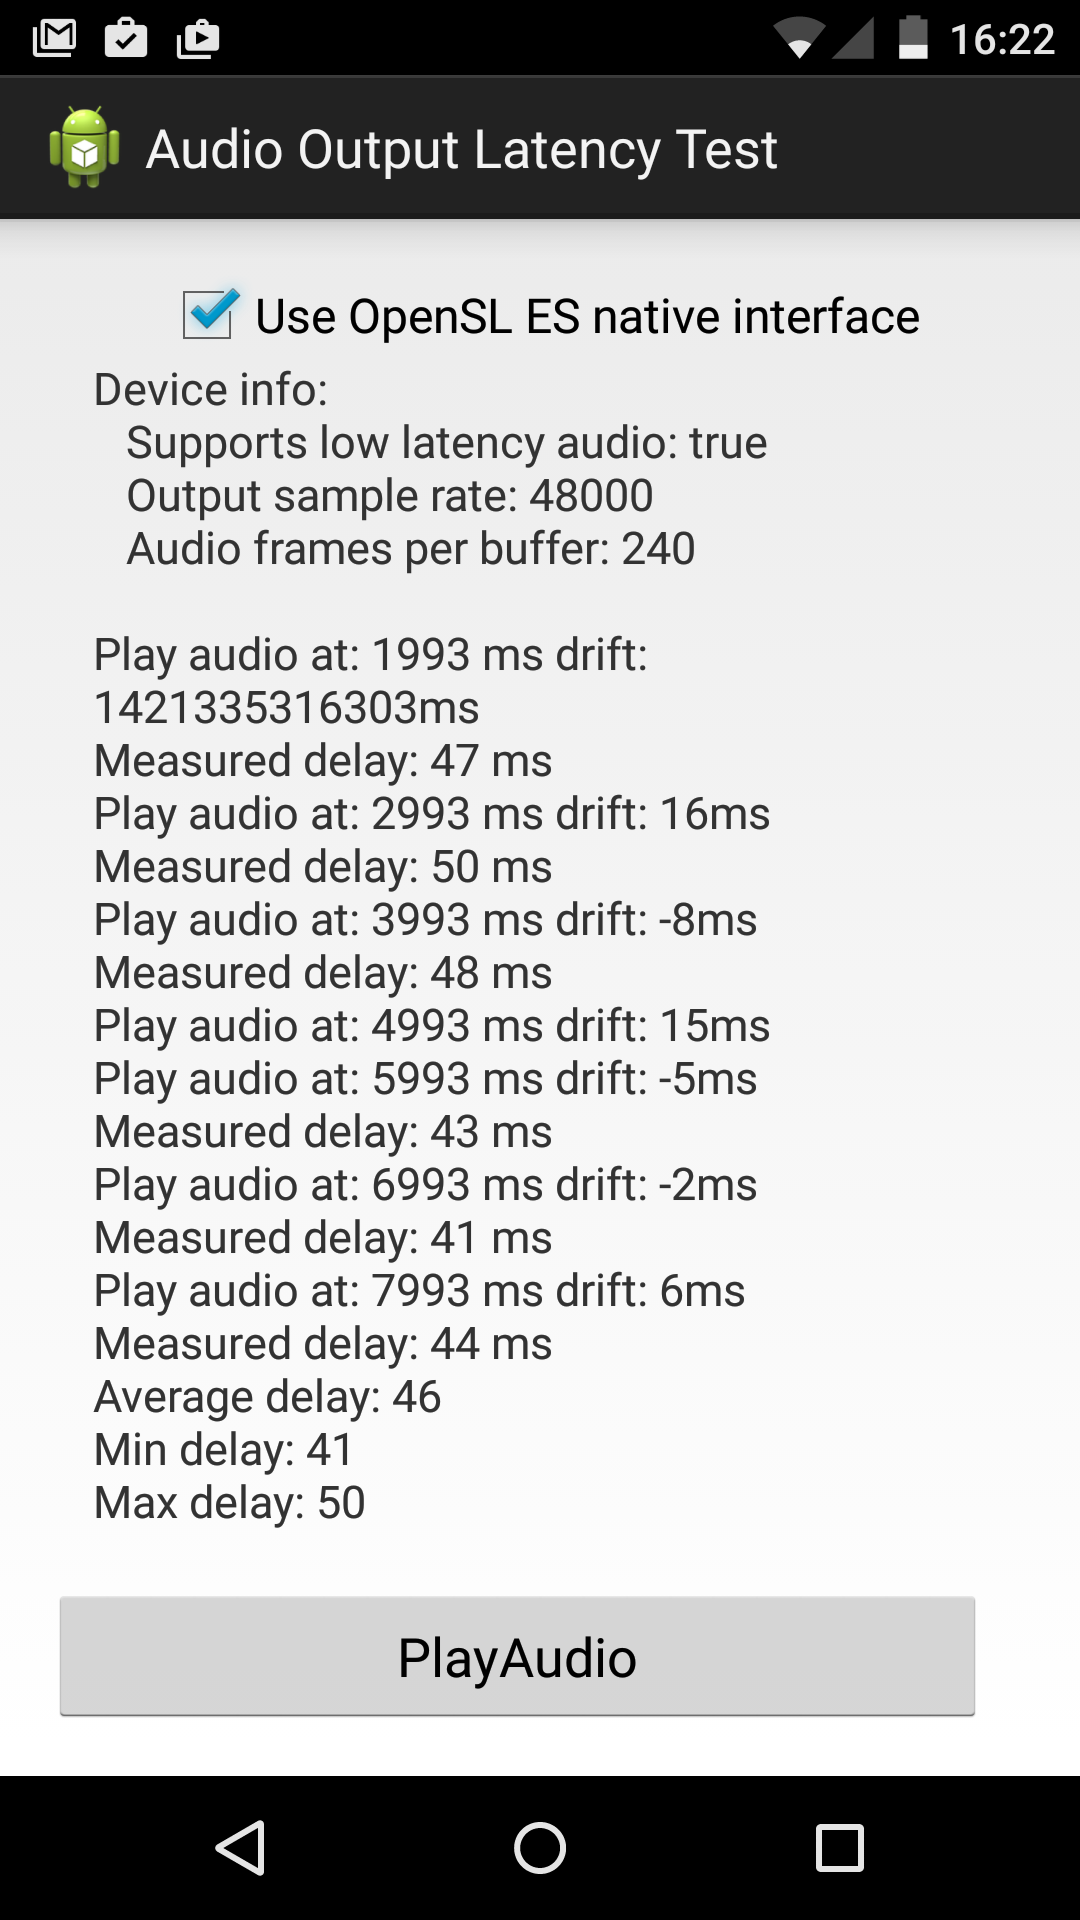
Using the OpenSL ES native interface on a Nexus 5 with Lollipop installed the USB input to audio output latency is on average about **48 milliseconds**. There is some variability but it is usually within 15 milliseconds. For music applications this latency is not great but, depending on the application, acceptable. For expert drummers latency should be in the range of 20ms but for many sonification tasks, 50ms suffices. It is clear that Android will never be able to compete with purpose built hardware running a real time operating system like [Axoloti](http://axoloti.be/) (Audio roundtrip latency 2ms, usb-audio 1.6ms) but for a general purpose device the measured latency is significantly better than what I expected (around 100ms).
The non-native audio interface is a lot slower. I have measured an average latency of about 85ms and a much larger variability (25ms).
With this post I hope others will report the latency for their devices as well, so that buyers that are interested in a low-latency Android devices can make an informed decision.
- [android\_lollipop\_waving.png](https://0110.be/files/attachments/426/android_lollipop_waving.png)
- [android\_latency.ino](https://0110.be/files/attachments/426/android_latency.ino)
- [SoundOutThree.zip](https://0110.be/files/attachments/426/SoundOutThree.zip)
- [SoundOutThree.apk](https://0110.be/files/attachments/426/SoundOutThree.apk)
---
## [TarsosLSH in a Photomosaic Web App](https://0110.be/posts/TarsosLSH_in_a_Photomosaic_Web_App.md)
- Published: 2015-01-07T00:00:00Z
- Updated: 2015-01-07T08:52:18Z
- Author: Joren
- ID: 428
- Canonical: https://0110.be/posts/TarsosLSH_in_a_Photomosaic_Web_App
- Tags: [0110.be](https://0110.be/tags/0110.be.md), [Code](https://0110.be/tags/Code.md), [HoGent](https://0110.be/tags/HoGent.md), [Java](https://0110.be/tags/Java.md), [UGent](https://0110.be/tags/UGent.md)
TarsosLSH is a Java library implementing Locality-sensitive Hashing (LSH), a practical nearest neighbor search algorithm for high dimensional vectors that operates in sublinear time. The open source software package is authored by me and is available on GitHub: [TarsosLSH on GitHub](https://github.com/JorenSix/TarsosLSH).
With TarsosLSH, Joseph Hwang and Nicholas Kwon from Rice University created an [Image Mosaic web application](http://image-mosaic.appspot.com/). The application chops an uploaded photo into small blocks. For each block, a color histogram is created and compared with an index of color histograms of reference images. Subsequently each block is replaced with one of the top three nearest neighbors, creating a mosaic. Since high dimensional nearest neighbor search is needed, this is an ideal application for TarsosLSH. The application somewhat proves that TarsosLSH can be used in practical applications, which is comforting.


---
## [Using the Advantech USB-4716 Data Acquisition Module on a Linux System](https://0110.be/posts/Using_the_Advantech_USB-4716__Data_Acquisition_Module_on_a_Linux_System.md)
- Published: 2014-12-15T00:00:00Z
- Updated: 2025-11-29T21:46:26Z
- Author: Joren
- ID: 427
- Canonical: https://0110.be/posts/Using_the_Advantech_USB-4716__Data_Acquisition_Module_on_a_Linux_System
- Tags: [Code](https://0110.be/tags/Code.md), [UGent](https://0110.be/tags/UGent.md)
Below some notes on installing and using the drivers for the Avandtech USB-4716 on Linux can be found. Since I was unable to find these instructions elsewhere and it took me some time to figure things out, it is perhaps of use to someone else. A similar approach should work for the following devices as well: pci1715, pci1724, pci1734, pci1752, pci1758, pcigpdc, usb4711a, usb4750, pci1711, pci1716, pci1727, pci1747, pci1753_mic3753_pcm3753i, pci1761_pcm3761i, pcm3810i, usb4716, usb4761, pci1714_pcie1744, pci1721, pci1730_pcm3730i, pci1750, pci1756, pci1762, usb4702_usb4704, usb4718
[Download the linux driver for the Avandtech USB-4716 DAQ](http://support.advantech.com/Support/DownloadSRDetail_New.aspx?SR_ID=1-LXHFQJ&Doc_Source=Download). If you are on a system that can install either `deb` or `rpm` use the `driver_package`. Unzip the package. The driver is split into two parts. A base driver `biokernbase` and a driver specific for the USB-4716 device, `bio4716`. The drivers are Linux kernel modules that need to installed. First the base driver needs to be installed, the order is important. After the base driver install the device specific `deb` kernel module. After a reboot or perhaps immediately this should be the result of executing `lsmod | grep bio`:
````
bio4716 23724 0
biokernbase 17983 1 bio4716
usbcore 128741 9 ehci_hcd,uhci_hcd,usbhid,usb_storage,snd_usbmidi_lib,snd_usb_audio,biokernbase,bio4716
````
A library to interface with the hardware is provided as a `deb` package as well. Install this library on your system.
Next download the [the examples for the Avandtech USB-4716 DAQ](http://support.advantech.com/Support/DownloadSRDetail_New.aspx?SR_ID=1-LXHFQJ&Doc_Source=Download). With the kernel modules installed the system is ready to test the examples in the provided `examples` directory. If you are using the Java code, make sure to set the [java.library.path](https://stackoverflow.com/questions/957700/how-to-set-the-java-library-path-from-eclipse) correctly.

---
## [Power Socket Control with Arduino](https://0110.be/posts/Power_Socket_Control_with_Arduino.md)
- Published: 2014-01-06T00:00:00Z
- Updated: 2014-08-21T21:28:40Z
- Author: Joren
- ID: 414
- Canonical: https://0110.be/posts/Power_Socket_Control_with_Arduino
- Tags: [Code](https://0110.be/tags/Code.md), [Hackerspace Ghent](https://0110.be/tags/Hackerspace%20Ghent.md), [Harde waren](https://0110.be/tags/Harde%20waren.md), [Projecten](https://0110.be/tags/Projecten.md)
This post contains some info on how do some basic home automation: it shows how cheap remote controlled power sockets can be managed using a computer. The aim is to power on or power off lights, a stereo or other devices remotely from a command shell.
The solution here uses an Arduino connected to a 433.33MHz transmitter. Via a Ruby script installed on the computer a command is send over serial to the Arduino. Subsequently the Arduino sends the command over the air to the power socket(s). If all goes well the power socket reacts by switching the connecting device on or off.
In the video below the process is shown. The command line interface controls the light via the Arduino. It should show the general idea.
This post explains how to measure audio output latency on Android devices. To measure audio latency USB-OTG(On The Go) and an Arduino is used. In the process it documents audio output latency on an LG Nexus 5 device running the most recent version of Android, which currently is Lollipop (5.0).
Audio latency is an important aspect of a system, especially if it is used for real-time sonification or for musical applications. Audio latency is the, preferably short, delay between audio entering a system and emerging from a system. Audio output latency is the time it takes between a signal (e.g. a button pressed) and when audio emerges. For sonification purposes audio output latency is more interesting than round-trip audio latency.
Android systems are often portable, generally available and relatively cheap. Android offers an attractive platform to develop sonifications or musical applications for. Unfortunately, audio latency on Android has not been a priority in the first versions. With [Android 4.1](https://source.android.com/devices/audio/latency.html) things started to change but due to hard- and software fragmentation it is still hard to find how much audio latency is expected. Even if the exact model (e.g. Nexus 5) and software version (stock Android 5.0) is known, exact numbers are, so it seems, nowhere to be found. For more information on the internal changes that make low latency audio on Android possible, watch the talk on [High Performance Audio](https://developers.google.com/events/io/sessions/325993827) from the 2013 Google I/O conference. Also note the lack of exact latency numbers in that talk. It is a very enjoyable talk by two Google engineers going after the culprits of high latency in true Sherlock/dr. Watson style.
Since audio output latency is generally not documented and since it is an important factor to decide if Android is a viable platform for real-time sonification or musical applications it needs to be measured. One way of [measuring audio output latency on Android](https://source.android.com/devices/audio/latency_measure.html) is documented by the people of Google. Unfortunately, the approach is not easily reproducible since it needs a custom circuit board, an oscilloscope and there is no source code available. Below a reproducible way to measure audio output latency for Android is documented.
An Arduino, an Android device, an USB-OTG cable and a butchered mini-jack audio cable are needed together with the software provided here. Optionally, a data acquisition module can be used to visualize the signals. The measurement system works as follows:
1. An Arduino sends a signal over USB. The time at which the signal is send is stored for later use.
2. An Android device, connected to the Arduino via an USB-OTG-cable, receives the signal.
3. The Android device responds as quickly as possible, with the lowest latency as possible, by emitting a sound.
4. The sound is captured on an analog input port of the Arduino, via the mini-jack cable. The time the sound appears on the Arduino is stored.
5. By comparing the time when the signal was send with the time when the sound arrived, the audio output latency is measured and reported.
The previous steps are repeated every second to gain insights into the variability of the measurements. To generate microsecond accurate timing [interrupts](http://www.engblaze.com/microcontroller-tutorial-avr-and-arduino-timer-interrupts/) are used on the Arduino. For visualisation, a digital pin is toggled every time the Arduino sends a signal. The [Arduino sketch](https://0110.be/files/attachments/426/android_latency.ino) is attached to this post, as is the [source code](https://0110.be/files/attachments/426/SoundOutThree.zip) for the Android application. An already [compiled APK](https://0110.be/files/attachments/426/SoundOutThree.apk) is also available. With some luck - a recent Android version is needed, your device should support USB-OTG - it might work on your device.
### Results
Using the OpenSL ES native interface on a Nexus 5 with Lollipop installed the USB input to audio output latency is on average about **48 milliseconds**. There is some variability but it is usually within 15 milliseconds. For music applications this latency is not great but, depending on the application, acceptable. For expert drummers latency should be in the range of 20ms but for many sonification tasks, 50ms suffices. It is clear that Android will never be able to compete with purpose built hardware running a real time operating system like [Axoloti](http://axoloti.be/) (Audio roundtrip latency 2ms, usb-audio 1.6ms) but for a general purpose device the measured latency is significantly better than what I expected (around 100ms).
The non-native audio interface is a lot slower. I have measured an average latency of about 85ms and a much larger variability (25ms).
With this post I hope others will report the latency for their devices as well, so that buyers that are interested in a low-latency Android devices can make an informed decision.






- [android\_lollipop\_waving.png](https://0110.be/files/attachments/426/android_lollipop_waving.png)
- [android\_latency.ino](https://0110.be/files/attachments/426/android_latency.ino)
- [SoundOutThree.zip](https://0110.be/files/attachments/426/SoundOutThree.zip)
- [SoundOutThree.apk](https://0110.be/files/attachments/426/SoundOutThree.apk)
---
## [TarsosLSH in a Photomosaic Web App](https://0110.be/posts/TarsosLSH_in_a_Photomosaic_Web_App.md)
- Published: 2015-01-07T00:00:00Z
- Updated: 2015-01-07T08:52:18Z
- Author: Joren
- ID: 428
- Canonical: https://0110.be/posts/TarsosLSH_in_a_Photomosaic_Web_App
- Tags: [0110.be](https://0110.be/tags/0110.be.md), [Code](https://0110.be/tags/Code.md), [HoGent](https://0110.be/tags/HoGent.md), [Java](https://0110.be/tags/Java.md), [UGent](https://0110.be/tags/UGent.md)
TarsosLSH is a Java library implementing Locality-sensitive Hashing (LSH), a practical nearest neighbor search algorithm for high dimensional vectors that operates in sublinear time. The open source software package is authored by me and is available on GitHub: [TarsosLSH on GitHub](https://github.com/JorenSix/TarsosLSH).
With TarsosLSH, Joseph Hwang and Nicholas Kwon from Rice University created an [Image Mosaic web application](http://image-mosaic.appspot.com/). The application chops an uploaded photo into small blocks. For each block, a color histogram is created and compared with an index of color histograms of reference images. Subsequently each block is replaced with one of the top three nearest neighbors, creating a mosaic. Since high dimensional nearest neighbor search is needed, this is an ideal application for TarsosLSH. The application somewhat proves that TarsosLSH can be used in practical applications, which is comforting.


---
## [Using the Advantech USB-4716 Data Acquisition Module on a Linux System](https://0110.be/posts/Using_the_Advantech_USB-4716__Data_Acquisition_Module_on_a_Linux_System.md)
- Published: 2014-12-15T00:00:00Z
- Updated: 2025-11-29T21:46:26Z
- Author: Joren
- ID: 427
- Canonical: https://0110.be/posts/Using_the_Advantech_USB-4716__Data_Acquisition_Module_on_a_Linux_System
- Tags: [Code](https://0110.be/tags/Code.md), [UGent](https://0110.be/tags/UGent.md)
Below some notes on installing and using the drivers for the Avandtech USB-4716 on Linux can be found. Since I was unable to find these instructions elsewhere and it took me some time to figure things out, it is perhaps of use to someone else. A similar approach should work for the following devices as well: pci1715, pci1724, pci1734, pci1752, pci1758, pcigpdc, usb4711a, usb4750, pci1711, pci1716, pci1727, pci1747, pci1753_mic3753_pcm3753i, pci1761_pcm3761i, pcm3810i, usb4716, usb4761, pci1714_pcie1744, pci1721, pci1730_pcm3730i, pci1750, pci1756, pci1762, usb4702_usb4704, usb4718
[Download the linux driver for the Avandtech USB-4716 DAQ](http://support.advantech.com/Support/DownloadSRDetail_New.aspx?SR_ID=1-LXHFQJ&Doc_Source=Download). If you are on a system that can install either `deb` or `rpm` use the `driver_package`. Unzip the package. The driver is split into two parts. A base driver `biokernbase` and a driver specific for the USB-4716 device, `bio4716`. The drivers are Linux kernel modules that need to installed. First the base driver needs to be installed, the order is important. After the base driver install the device specific `deb` kernel module. After a reboot or perhaps immediately this should be the result of executing `lsmod | grep bio`:
````
bio4716 23724 0
biokernbase 17983 1 bio4716
usbcore 128741 9 ehci_hcd,uhci_hcd,usbhid,usb_storage,snd_usbmidi_lib,snd_usb_audio,biokernbase,bio4716
````
A library to interface with the hardware is provided as a `deb` package as well. Install this library on your system.
Next download the [the examples for the Avandtech USB-4716 DAQ](http://support.advantech.com/Support/DownloadSRDetail_New.aspx?SR_ID=1-LXHFQJ&Doc_Source=Download). With the kernel modules installed the system is ready to test the examples in the provided `examples` directory. If you are using the Java code, make sure to set the [java.library.path](https://stackoverflow.com/questions/957700/how-to-set-the-java-library-path-from-eclipse) correctly.

---
## [Power Socket Control with Arduino](https://0110.be/posts/Power_Socket_Control_with_Arduino.md)
- Published: 2014-01-06T00:00:00Z
- Updated: 2014-08-21T21:28:40Z
- Author: Joren
- ID: 414
- Canonical: https://0110.be/posts/Power_Socket_Control_with_Arduino
- Tags: [Code](https://0110.be/tags/Code.md), [Hackerspace Ghent](https://0110.be/tags/Hackerspace%20Ghent.md), [Harde waren](https://0110.be/tags/Harde%20waren.md), [Projecten](https://0110.be/tags/Projecten.md)
This post contains some info on how do some basic home automation: it shows how cheap remote controlled power sockets can be managed using a computer. The aim is to power on or power off lights, a stereo or other devices remotely from a command shell.
The solution here uses an Arduino connected to a 433.33MHz transmitter. Via a Ruby script installed on the computer a command is send over serial to the Arduino. Subsequently the Arduino sends the command over the air to the power socket(s). If all goes well the power socket reacts by switching the connecting device on or off.
In the video below the process is shown. The command line interface controls the light via the Arduino. It should show the general idea.
git clone https://JorenSix@github.com/JorenSix/TarsosLSH.git
    cd TarsosLSH/build
    ant  #Builds the core TarsosLSH library
    ant javadoc #build the API documentation
\
When everything runs correctly you should be able to run the command line application, and have the latest version of the TarsosLSH library for inclusion in your projects. Also, the Javadoc documentation for the API should be available in TarsosLSH/doc. Drop me a line if you use TarsosLSH in your project. Always nice to hear how this software is used.
The fastest way to get something on your screen is executing this on your command line: `java - jar TarsosLSH.jar` this lets LSH run on a random data set. The full reference of the command line application is included below:
Name
TarsosLSH: finds the nearest neighbours in a data set quickly, using LSH.
Synopsis
java - jar TarsosLSH.jar [options] dataset.txt queries.txt
Description
Tries to find nearest neighbours for each vector in the
query file, using Euclidean (L2) distance by default.
Both dataset.txt and queries.txt have a similar format:
an optional identifier for the vector and a list of N
coordinates (which should be doubles).
[Identifier] coord1 coord2 ... coordN
[Identifier] coord1 coord2 ... coordN
For an example data set with two elements and 4 dimensions:
Hans 12 24 18.5 -45.6
Jane 13 19 -12.0 49.8
Options are:
-f cos|l1|l2
Defines the hash family to use:
l1 City block hash family (L1)
l2 Euclidean hash family(L2)
cos Cosine distance hash family
-r radius
Defines the radius in which near neighbours should
be found. Should be a double. By default a reasonable
radius is determined automatically.
-h n_hashes
An integer that determines the number of hashes to
use. By default 4, 32 for the cosine hash family.
-t n_tables
An integer that determines the number of hash tables,
each with n_hashes, to use. By default 4.
-n n_neighbours
Number of neighbours in the neighbourhood, defaults to 3.
-b
Benchmark the settings.
--help
Prints this helpful message.
Examples
Search for nearest neighbours using the l2 hash family with a radius of 500
and utilizing 5 hash tables, each with 3 hashes.
java - jar TarsosLSH.jar -f l2 -r 500 -h 3 -t 5 dataset.txt queries.txt
### Source Code Organization
The source tree is divided in three directories:
- `src` contains the source files of the core DSP libraries.
- `test` contains unit tests for some of the DSP functionality.
- `build` contains ANT build files. Either to build Java documentation or runnable JAR-files for the example applications.
### Further Reading
This section includes a links to resources used to implement this library.
- The [LSH-page](http://www.mit.edu/~andoni/LSH/) maintained by Alexandr Andoni contains pointers to good resources:
- [Locality-Sensitive Hashing Scheme Based on p-Stable Distributions](http://theory.lcs.mit.edu/~indyk/nips-nn.ps) a chapter by Alexandr Andoni, Mayur Datar, Nicole Immorlica, Piotr Indyk, and Vahab Mirrokni which appeared in the book Nearest Neighbor Methods in Learning and Vision: Theory and Practice, by T. Darrell and P. Indyk and G. Shakhnarovich (eds.), MIT Press, 2006.
- [Similarity Search in High Dimensions via Hashing](http://theory.csail.mit.edu/~indyk/vldb99.ps) The original LSH Paper for hamming distance by Gionis, Aristides and Indyk, Piotr and Motwani, Rajeev.
- [Locality-Sensitive Hashing for Finding Nearest Neighbors](http://www.slaney.org/malcolm/yahoo/Slaney2008-LSHTutorial.pdf) a good introduction of LSH by Malcom Slaney & Michael Casey
- [Finding Similar Items](http://i.stanford.edu/~ullman/mmds/ch3.pdf), Chapter Three of "Mining of Massive Datasets" by Anand Rajaraman and Jeff Ullman is a textbook introducing the LSH concept.
- [Szudzik pairing functions](http://szudzik.com/ElegantPairing.pdf) by Matthew Szudzik. Explains how integer hashes can be combined deterministically to form a reversible, unique new hash.
---
## [TarsosDSP Christmas Edition: Jingle Cats](https://0110.be/posts/TarsosDSP_Christmas_Edition%3A_Jingle_Cats.md)
- Published: 2012-12-21T14:38:52Z
- Updated: 2013-12-05T18:19:15Z
- Author: Joren
- ID: 373
- Canonical: https://0110.be/posts/TarsosDSP_Christmas_Edition%3A_Jingle_Cats
- Tags: [Code](https://0110.be/tags/Code.md), [HoGent](https://0110.be/tags/HoGent.md), [Java](https://0110.be/tags/Java.md)
The DSP library for Taros, aptly named TarsosDSP, now includes an example showing how to synthesize cat sounds. The inspration came from this [youtube video](http://www.youtube.com/watch?v=vEg4SEch27w)
To hear what exactly it does, listen to the following audio example.
There is also a command line interface, the following command does
\
java -jar Catify-latest.jar in.mid\
_______ _____ _____ _____
|__ __| | __ \ / ____| __ \
| | __ _ _ __ ___ ___ ___| | | | (___ | |__) |
| |/ _` | '__/ __|/ _ \/ __| | | |\___ \| ___/
| | (_| | | \__ \ (_) \__ \ |__| |____) | |
|_|\__,_|_| |___/\___/|___/_____/|_____/|_|
----------------------------------------------------
Name:
TarsosDSP catify'er
----------------------------------------------------
Synopsis:
java -jar Catify-latest.jar input.mid
----------------------------------------------------
Description:
The source code of the Java implementation of the catify'er can be found on the [TarsosDSP github page](https://github.com/JorenSix/TarsosDSP).
---
## [Pitch Shifting - Implementation in Pure Java with Resampling and Time Stretching](https://0110.be/posts/Pitch_Shifting_-_Implementation_in_Pure_Java_with_Resampling_and_Time_Stretching.md)
- Published: 2012-11-05T00:00:00Z
- Updated: 2020-11-17T09:07:53Z
- Author: Joren
- ID: 370
- Canonical: https://0110.be/posts/Pitch_Shifting_-_Implementation_in_Pure_Java_with_Resampling_and_Time_Stretching
- Tags: [Code](https://0110.be/tags/Code.md), [Command Line Application](https://0110.be/tags/Command%20Line%20Application.md), [HoGent](https://0110.be/tags/HoGent.md), [Java](https://0110.be/tags/Java.md), [TarsosDSP](https://0110.be/tags/TarsosDSP.md), [WSOLA](https://0110.be/tags/WSOLA.md), [featured](https://0110.be/tags/featured.md)
The DSP library for Taros, aptly named TarsosDSP, now includes an implementation of a *pitch shifting algorithm* (as of version 1.4). The goal of pitch shifting is to change the pitch of a piece of audio without affecting the duration. The algorithm implemented is a combination of resampling and time stretching. Resampling changes the pitch of the audio, but affects the total duration. Consecutively, the duration of the audio is stretched to the original (without affecting pitch) with time stretching. The result is very similar to [phase vocoding](http://en.wikipedia.org/wiki/Phase_vocoder).
The example application below shows how to pitch shift input from the microphone in real-time, or pitch shift a recorded track with the TarsosDSP library.
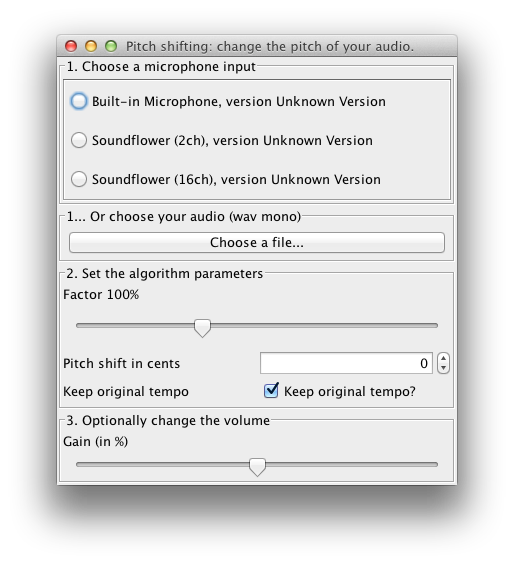
TarsosDSP is a collection of classes to do simple audio processing. It features an implementation of a percussion onset detector and two pitch detection algorithms: Yin and the Mcleod Pitch method. Also included is a Goertzel DTMF decoding algorithm and a time stretch algorithm (WSOLA).
Its aim is to provide a simple interface to some audio (signal) processing algorithms implemented in pure JAVA. Some TarsosDSP example applications are available.
The following example filters a band of frequencies of an input file testFile. It keeps the frequencies form startFrequency to stopFrequency.
AudioInputStream inputStream = AudioSystem.getAudioInputStream(testFile);
    AudioDispatcher dispatcher = new AudioDispatcher(inputStream,stepSize,overlap);
    dispatcher.addAudioProcessor(new HighPass(startFrequency, sampleRate, overlap));
    dispatcher.addAudioProcessor(new LowPassFS(stopFrequency, sampleRate, overlap));
    dispatcher.addAudioProcessor(new FloatConverter(format));
    dispatcher.addAudioProcessor(new WaveformWriter(format,stepSize, overlap, "filtered.wav"));
    dispatcher.run();
Head over to the TarsosDSP release repository and download the latest TarsosDSP library. To get up to speed quickly, check the TarsosDSP Example applications for inspiration and consult the API documentation. If you, for some reason, want to build from source, you need Apache Ant and git installed on your system. The following commands fetch the source and build the library and example jars:
git clone https://JorenSix@github.com/JorenSix/TarsosDSP.git
    cd TarsosDSP/build
    ant tarsos_dsp_library #Builds the core TarsosDSP library
    ant build_examples #Builds all the TarsosDSP examples
    ant javadoc #Creates the documentation in TarsosDSP/doc
\
When everything runs correctly you should be able to run all example applications and have the latest version of the TarsosDSP library for inclusion in your projects. Also the Javadoc documentation for the API should be available in TarsosDSP/doc. Drop me a line if you use TarsosDSP in your project. Always nice to hear how this software is used.
The source tree is divided in three directories:
src contains the source files of the core DSP libraries.
test contains unit tests for some of the DSP functionality.
build contains ANT build files. Either to build Java documentation or runnable JAR-files for the example applications.
examples contains a couple of example applications with a Java Swing user interface:
 This post is about a hack I did for the 2012 [Amsterdam music hack days](http://amsterdam.musichackday.org/2012/index.php?page=Main+page). From the website:
> The Amsterdam Music Hack Day is a full weekend of hacking in which participants will conceptualize, create and present their projects. Music + software + mobile + hardware + art + the web. Anything goes as long as it's music related
The hackathon was organized at the NiMK(Nederlands instituut voor Media Kunst) the 25th and 24th of May. My hack tries to let a phone start a conversation on its own. It does this by speaking a text and listening to the spoken text with speech recognition. The speech recognition introduces all kinds of interesting permutations of the original text. The recognized text is spoken again and so a dreamlike, unique nonsensical discussion starts. It lets you hear what goes on in the mind of the phone.
The idea is based on Alvin Lucier's *I am Sitting in a Room* form 1969 which is embedded below. He used analogue tapes to generate a similar recursive loop. It is a better implementation of [something I did a couple of years ago](http://0110.be/artikels/lees/Text_To_Speech_Recognition).
The implementation is done with Android and its API's. Both speech recognition and text to speech are available on android. Those API's are used and a user interface shows the recognized text. An example of a session can be found below:
To install the application you can download "Tryalogue.apk":\[Tryalogue.apk\] of use the QR-code below. You need Android 2.3 with Voice Recognition and TTS installed. Also needed is an internet connection. "The source":\[Tryalogue.zip\] is also up for grabs.
This post is about a hack I did for the 2012 [Amsterdam music hack days](http://amsterdam.musichackday.org/2012/index.php?page=Main+page). From the website:
> The Amsterdam Music Hack Day is a full weekend of hacking in which participants will conceptualize, create and present their projects. Music + software + mobile + hardware + art + the web. Anything goes as long as it's music related
The hackathon was organized at the NiMK(Nederlands instituut voor Media Kunst) the 25th and 24th of May. My hack tries to let a phone start a conversation on its own. It does this by speaking a text and listening to the spoken text with speech recognition. The speech recognition introduces all kinds of interesting permutations of the original text. The recognized text is spoken again and so a dreamlike, unique nonsensical discussion starts. It lets you hear what goes on in the mind of the phone.
The idea is based on Alvin Lucier's *I am Sitting in a Room* form 1969 which is embedded below. He used analogue tapes to generate a similar recursive loop. It is a better implementation of [something I did a couple of years ago](http://0110.be/artikels/lees/Text_To_Speech_Recognition).
The implementation is done with Android and its API's. Both speech recognition and text to speech are available on android. Those API's are used and a user interface shows the recognized text. An example of a session can be found below:
To install the application you can download "Tryalogue.apk":\[Tryalogue.apk\] of use the QR-code below. You need Android 2.3 with Voice Recognition and TTS installed. Also needed is an internet connection. "The source":\[Tryalogue.zip\] is also up for grabs.