---
title: Posts tagged 0110.be
canonical: https://0110.be/tags/0110.be
markdown_url: https://0110.be/tags/0110.be.md
page: 0
posts_per_page: 30
total_posts: 54
filters:
tag: 0110.be
previous:
next: https://0110.be/tags/0110.be.md?page=1
---
# Posts tagged 0110.be
## [Pompernikkel - the Interactive speaking pumpkin 🎃](https://0110.be/posts/Pompernikkel_-_the_Interactive_speaking_pumpkin_%F0%9F%8E%83.md)
- Published: 2025-11-03T00:00:00Z
- Updated: 2025-11-14T09:34:42Z
- Author: Joren
- ID: 570
- Canonical: https://0110.be/posts/Pompernikkel_-_the_Interactive_speaking_pumpkin_%F0%9F%8E%83
- Tags: [0110.be](https://0110.be/tags/0110.be.md), [Projecten](https://0110.be/tags/Projecten.md), [UGent](https://0110.be/tags/UGent.md)
The last few halloweens I have been building one-off interactive installations for visiting trick-or-treaters. I did not document the build of last year, but the year before I built an [interactive door bell with a jump scare door projection](https://0110.be/posts/Doorbell_triggered_Halloween_window_projection). This year I was trying to take it easy but my son came up with the idea of doing something with a talking pumpkin. I mumbled something about feasibility so he promptly invited all his friends to come over on Halloween to talk to a pumpkin. So I got to work and tried to build something. This blog post documents this build.
A talking pumkin needs a few functions. It needs to understand kids talking in Dutch, it needs to be able to respond with a somewhat logical respons and ideally have a memory about previous interactions. It also needs a way to do turn-taking: indicating who is speaking and listening. It also needs a face and a name. For the name we quickly settled on Pompernikkel.
For the face I tried a few interactive visualisations: a 3D implementation with three.js and a shader based approach but eventually setteled on an approach of using an SVG and CSS animations to make the face come alive. This approach makes it doable to control animations with javascript since animating a part of the pumkin means adding or removing a css class. See below for the result
The other functions I used the following components.
* A decent quality bluetooth speaker for audio output and clear voice projection
* A microphone setup to capture and record children's voices speaking to the pumpkin
* A glass door serving as a projection surface with a projector mounted behind it
* Speech-to-text recognition powered by nvidia/parakeet-tdt-0.6b-v3 (see [this paper](https://arxiv.org/pdf/2509.14128)), implemented via [transcribe-rs](https://github.com/cjpais/transcribe-rs) for transcribing Dutch speech
* Text-to-speech synthesis using the built-in macOS 'say' command to give Pompernikkel a voice
* A controllable interactive projection system displaying the animated SVG website mentioned above
* Response generation handled by the Gemma 3 12B large language model ([paper](https://arxiv.org/pdf/2503.19786)), running locally through [Ollama](https://ollama.com/) with a custom system prompt
* A real pumpkin augmented with an ESP32 microcontroller and capacitive touch sensor embedded inside to detect physical touch - the microphone would only activate while someone was touching the pumpkin
* A custom Ruby websocket driver orchestrating turn-taking behavior and managing the interactive loop of questions and responses
As an extra feature, I implemented a jump scare where a sudden movement would trigger lightning and thunder:
* [EMI-Kit](https://github.com/IPEM/EMI-kit) for responsive movement detection. The mDNS support really makes it easy to use together with [mot](https://github.com/JorenSix/mot).
* A 5V SK6812 LED strip controlled by an ESP32 programmed to react to EMI-Kit events, creating lightning effects synchronized with audio and visual elements on the HTML page
### Lessons learned
* Asking a code assisting LLM to add animations to a part of an SVG only works after manually adding identifiers to paths of the svg: eyes, mouth, nose, ... Once added, CSS animation are generated with ease. Understanding which svg path corresponds to which semantic object seems out of reach for now for state of the art systems.
* Gemma 3 is not a multilingual LLM. It generates responses in Dutch but these seem very *translated*: it seems that responses are generated in Eglish and translated to Dutch in the final step. This becomes very clear when the LLM attempts jokes. Of course these nonsensical jokes do work on a certain level.
* Gemma 3 has a personality that is difficult to get around if a system promt contains trigger words like dark or scary. In my case it responses became philosophical, nihilistic and very dark. Which was unexpectedly great.
* Parakeet speech to text in Dutch is faster than the several OpenAI Whisper based systems I managed to get running on my macOS. It also gave better results for short excerpts.
* The SK6812 RGBWW is not the best supported by the FastLED library. I managed to get it working with a hack found on GitHub, not ideal.
* There are a few end-to-end systems for voice chat with local LLMs on GitHub but they are not easy to get going with something else than CUDA/linux and almost never support other languages than English. For VAD and transcription the same holds.
* Looking closely to several speech to text or text to speech sysems, the default of CUDA/Linux is difficult to get around.
* The focus of open source models and tools on the English language is problematic, while Dutch is still relatively well represented many systems are limited to only English.
* While some kids interacted with the pumpkin, the jump scare lighting and thunder effect worked better in the environment.
* Websockets seems a decent way to do inter process communication, even without web technologies it could be considered. I never though of Websockets in this way. See the [Pompernikkel GitHub repository](https://github.com/JorenSix/Pompernikkel) for example Ruby scripts.
Most trick-or-treaters were at least intrigued by it, my son's friends were impressed, and I got to learn a couple of things, see above. Next year, however, I will try to take it easy.
---
## [Connecting two Bluetooth headsets to your Linux system: audio routing in PipeWire](https://0110.be/posts/Connecting_two_Bluetooth_headsets_to_your_Linux_system%3A_audio_routing_in_PipeWire.md)
- Published: 2024-10-23T00:00:00Z
- Updated: 2024-10-25T09:00:02Z
- Author: Joren
- ID: 552
- Canonical: https://0110.be/posts/Connecting_two_Bluetooth_headsets_to_your_Linux_system%3A_audio_routing_in_PipeWire
- Tags: [0110.be](https://0110.be/tags/0110.be.md), [UGent](https://0110.be/tags/UGent.md)
Imagine you want to stream a movie at home but also want to keep things quiet to avoid disturbing others. Evidently, this what headsets were invented for. Connecting one wireless Bluetooth headset is typically straightforward - aside from the occasional Bluetooth pairing issues. But what if you want to watch that movie with someone else, and you both want to use headsets? Connecting two Bluetooth headsets, or even combining wired and wireless headsets to share the same audio, isn’t as simple as it sounds. This blog post shows how to achieve this on modern Linux distributions.
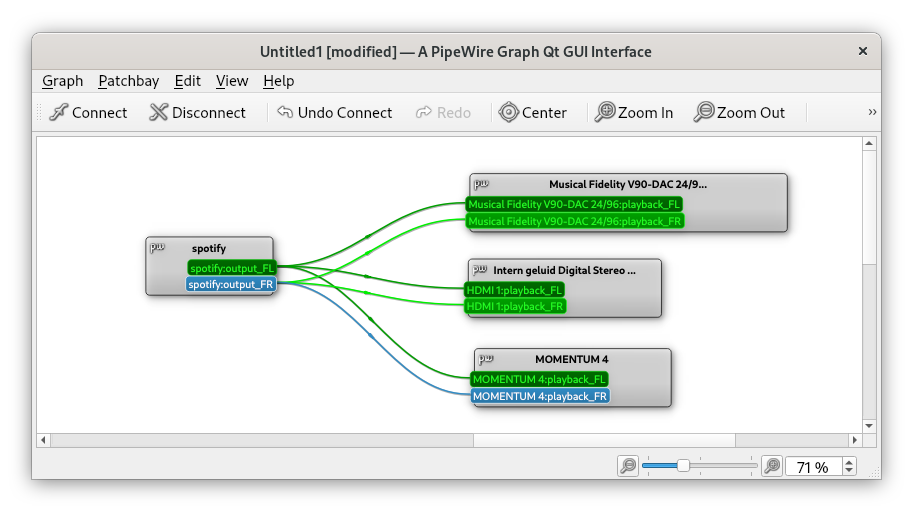
Fig: Connecting an audio source - Spotify - to multiple output devices by using audio routing with PipeWire and `qpwgraph`.
During the last years, several Linux distributions have started to support the PipeWire audio server. It is even the default audio server in Debian 12 and Ubuntu 22.10. With PipeWire, managing audio devices has become much easier. PipeWire enables flexible audio setups and supports audio routing: sending out audio from a single source to several output devices. This is exactly what we need to stream audio to multiple headsets.
If you use PipeWire on your system, `qpwgraph` provides an intuitive graphical interface that lets you visualize and control audio routing. To connect multiple headsets:
1. First install `qpwgraph` e.g via `apt install qpwgraph`
1. Startup `qpwgraph` which should show your current audio routing graph.
1. Pair your Bluetooth headsets to your machine. They will appear in the audio routing graph once paired successfully.
1. Connect the audio source to your headsets by connecting 'wires' from your media player to the headsets.
I was surprised how robust audio has become on Linux and how easy and user friendly it is to set up even more complex audio / MIDI configurations. Give it a try!
---
## [Printing a part of the world - a 3D-printed cityscape](https://0110.be/posts/Printing_a_part_of_the_world_-_a_3D-printed_cityscape.md)
- Published: 2024-01-09T00:00:00Z
- Updated: 2025-11-13T22:55:02Z
- Author: Joren
- ID: 537
- Canonical: https://0110.be/posts/Printing_a_part_of_the_world_-_a_3D-printed_cityscape
- Tags: [0110.be](https://0110.be/tags/0110.be.md), [GhentCDH](https://0110.be/tags/GhentCDH.md), [UGent](https://0110.be/tags/UGent.md)
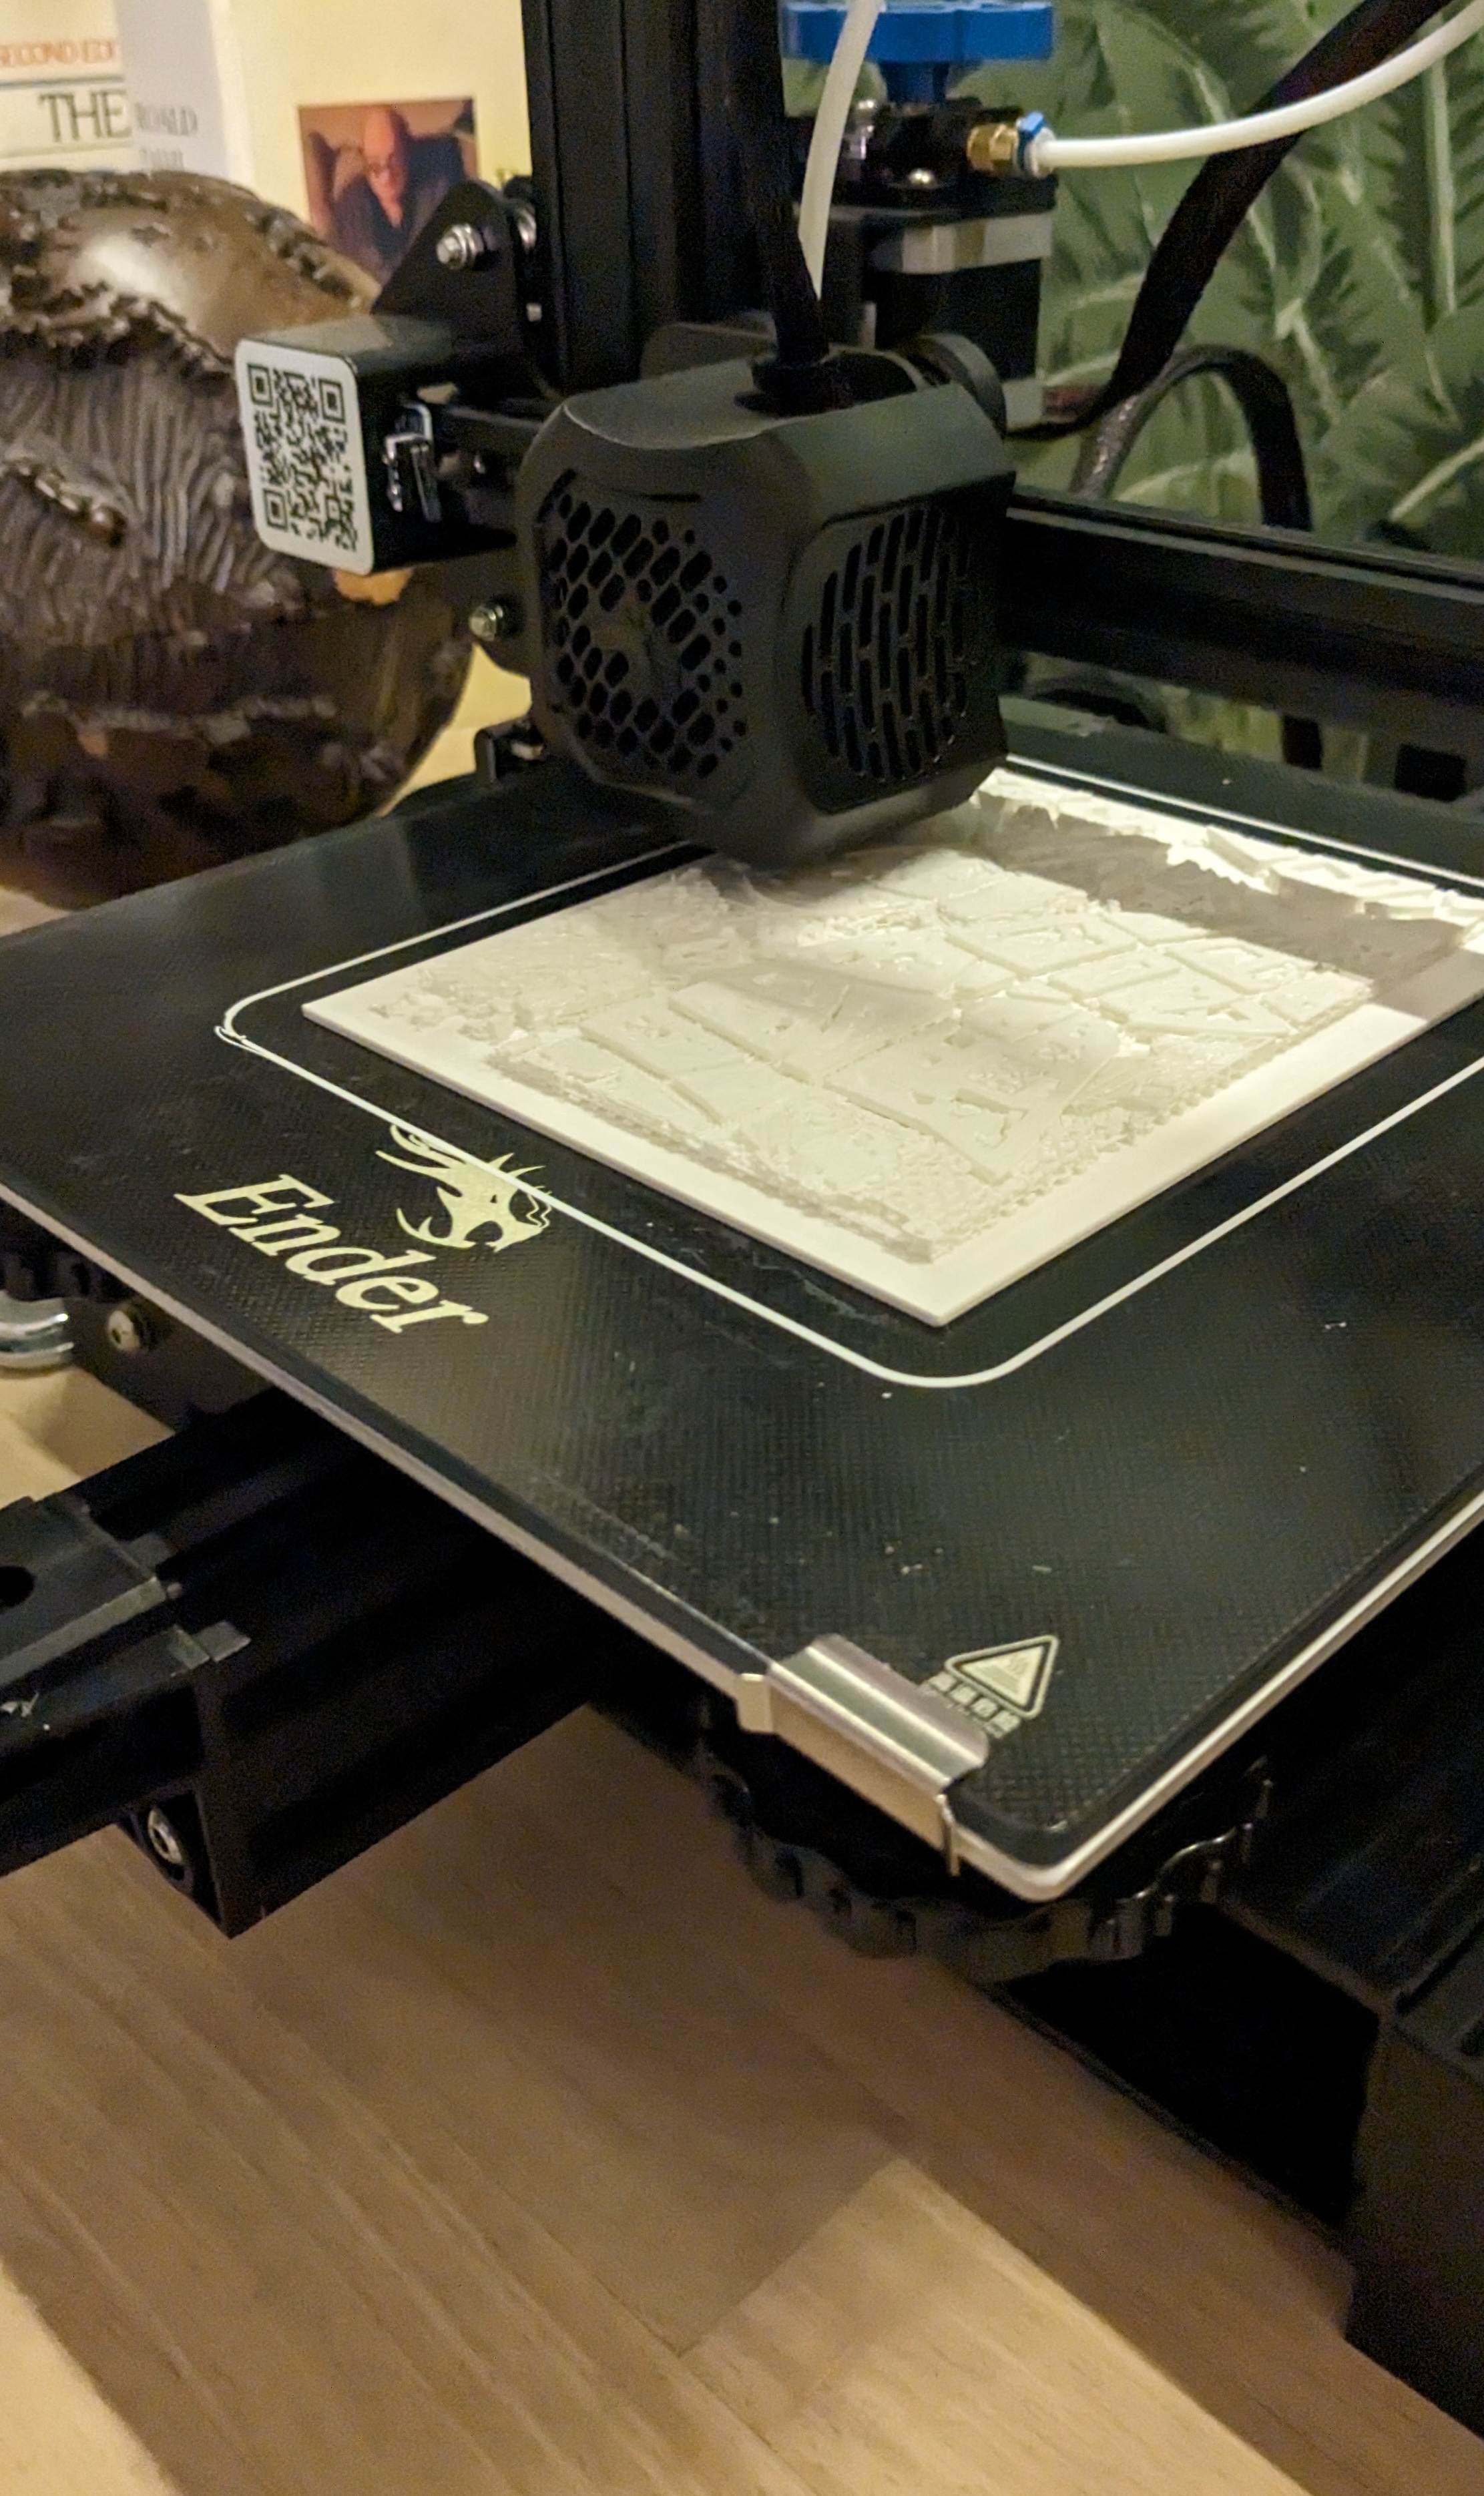
Fig: 3D printing your part of the world.
My ex-girlfriend and current wife likes maps. While looking for a gift for the new-years I got the idea to give her a 3D map of the nearby [historic city center of Ghent with its three iconic towers](https://earth.google.com/web/@51.05385689,3.72537111,16.45165093a,593.4748548d,35y,19.92318437h,59.99406466t,359.99999999r/data=OgMKATA). I have a 3D printer at home but still need to find a printable 3D model of Ghent.
Luckily, a couple of days ago a piece of software appeared to [capture Google Earth tiles -cubes- into a single 3D file](https://github.com/OmarShehata/google-earth-as-gltf). There you can select an area of interest via google maps and download a GLTF file which captures the landscape in 3D. The software needs an API key which can be requested via the Google Developer tools.
After downloading a GLTF file, the 3D model needs to be made 3D-printable. There are online [GLTF to STL converters](https://products.aspose.app/3d/conversion/gltf-to-stl) but a bit of care needs to be taken to end up with an actually **printable** STL. My selected area of interest only has slight height differences in the landscape which are handled by placing the STL file on a base which compensates for these differences. Your 3D slicer can also generate structure to support inclinations in the landscape.
The 3D model generated by Google Earth is quite noisy and can contain floating parts and holes. It may be needed to edit the STL mesh directly. Selecting a slightly shifted area of interest may also solve problems with the edges of the print: take care to chop less buildings in two.
Have fun printing your own piece of the world!
Fig: a 3D model for the Ghent city center visualized with an Three.js STL viewer.



---
## [Olaf in print - Elektor magazine article on Acoustic Fingerprinting](https://0110.be/posts/Olaf_in_print_-_Elektor_magazine_article_on_Acoustic_Fingerprinting.md)
- Published: 2023-12-24T00:00:00Z
- Updated: 2024-01-09T11:17:38Z
- Author: Joren
- ID: 538
- Canonical: https://0110.be/posts/Olaf_in_print_-_Elektor_magazine_article_on_Acoustic_Fingerprinting
- Tags: [0110.be](https://0110.be/tags/0110.be.md), [UGent](https://0110.be/tags/UGent.md)
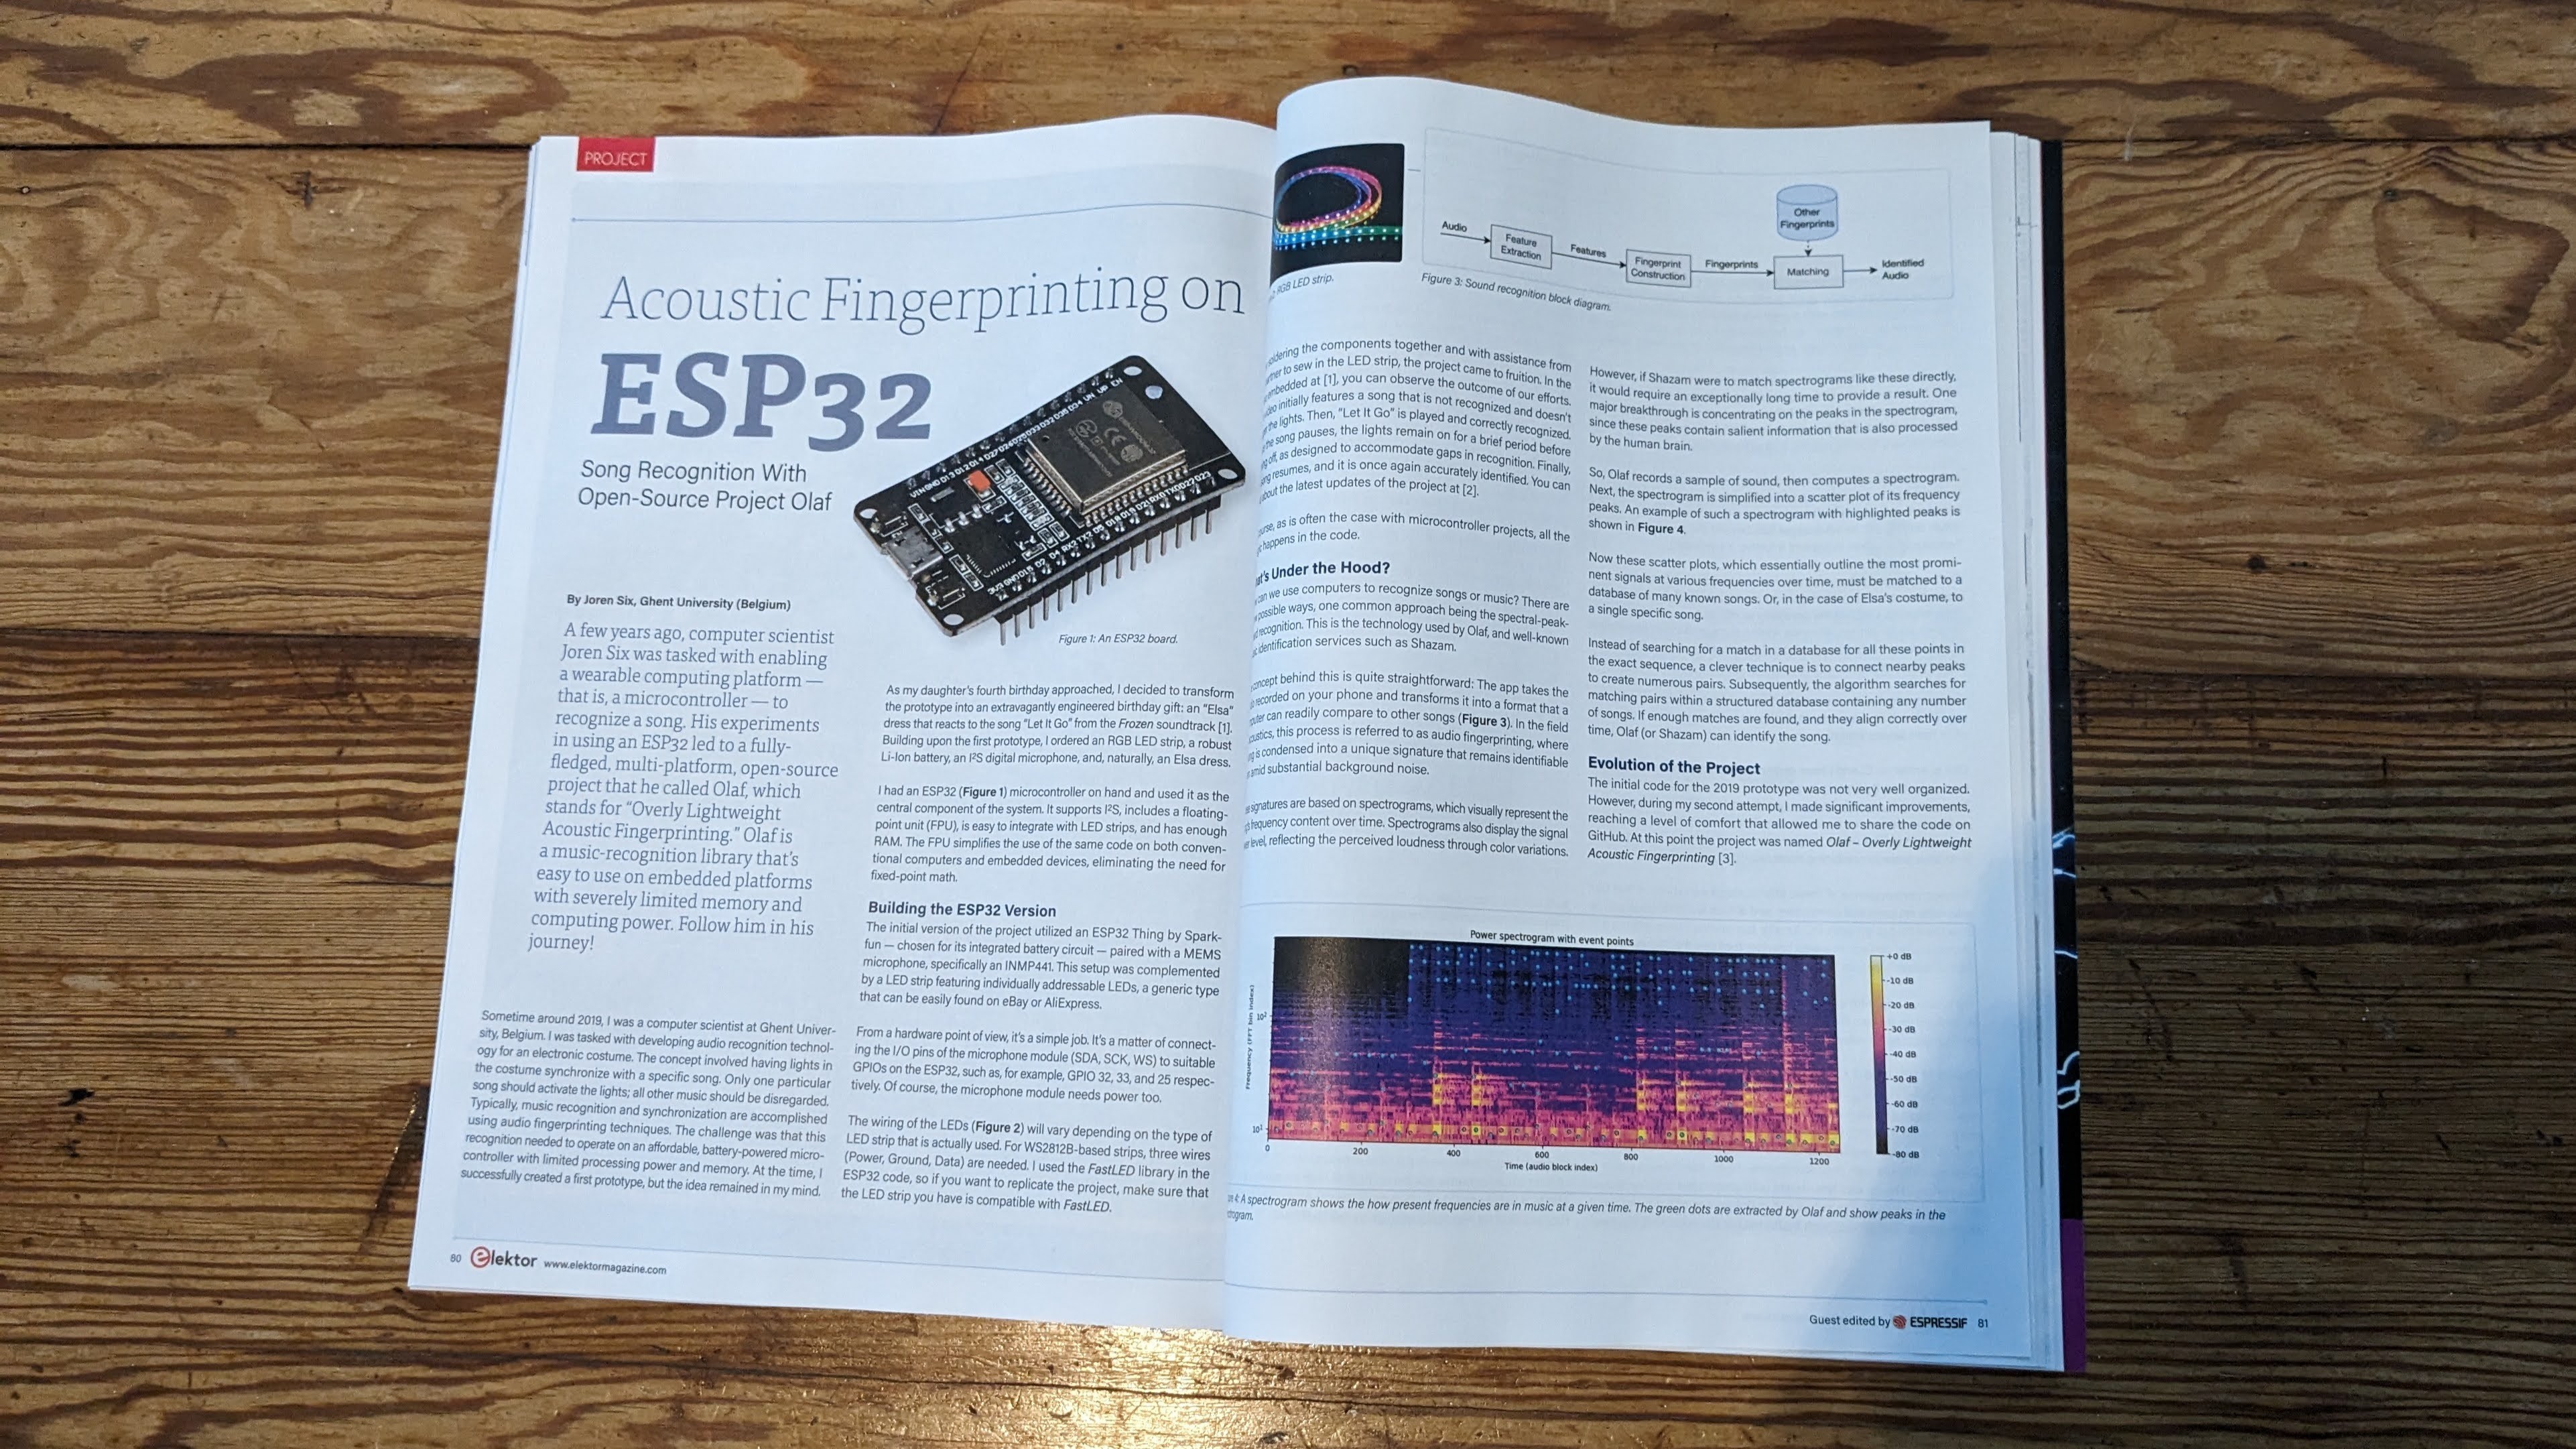
Fig: Olaf on the frontpage of Elektor!
[Elektor](https://www.elektor.com), a hobby electronics magazine, recently featured an article on acoustic fingerprinting using the ESP32. It is included in a special edition on Espressive products like the ESP32. This article includes content previously published on this blog and other writings about [Olaf](https://github.com/JorenSix/Olaf).
Since the article is based on my writings, there was an agreement to allow one of their writers to compose the magazine article under my name. This was my first experience with having a ghostwriter – quite convenient, I must say. Although it's somewhat apparent that the article is compiled from various sources, I am overall pleased with the outcome. It even made the front page!
Elektor has a rich history, dating back to the early 1960s when it was first published in Dutch as 'Elektuur'. I have fond memories of browsing Elektuur at my nerdy uncle's place. If anything, this article has certainly earned me some nerd credibility points in my uncle's eyes.
Please take a moment to read the [Espressive Special Edition of Elektor Magazine](https://www.elektor.com/elektor-special-espressif-guest-edition-2023-pdf-en).
---
## [Clap detection - Trigger your anything](https://0110.be/posts/Clap_detection_-_Trigger_your_anything.md)
- Published: 2023-12-15T00:00:00Z
- Updated: 2025-11-29T14:08:20Z
- Author: Joren
- ID: 531
- Canonical: https://0110.be/posts/Clap_detection_-_Trigger_your_anything
- Tags: [0110.be](https://0110.be/tags/0110.be.md), [Code](https://0110.be/tags/Code.md), [Projecten](https://0110.be/tags/Projecten.md), [UGent](https://0110.be/tags/UGent.md)
Fig: *Clap twice for light*.
There is something about surprising interfaces. Having a switch to turn on a light gets quite boring after a while. Turning on a light by clapping twice, on the other hand, has some kind of magic feel to it. In a recent Mr Beast video he and his gang visit a number of expensive houses and in one of those mansions there is a light operated by clapping twice. I am not sure about the blatant materialism, but it got me thinking on how to build a similar clap-operated light yourself.
So, what are the elements needed: first a microphone to pick up sound. Second an algorithm is needed that detects claps. And finally, something that reacts to claps: a light or something else.
Many devices have microphones so sound input is relatively easy, and with some creativity there are many things waiting to be 'clap triggered': vacuum robots, sunscreens, lights, in-house ventilation, ... The main difficulty is implementing a efficient clap-detection algorithm. Luckily there are already a few described in the literature. I have based my ANSI C implementation on 'Duxbury, C., et al (2003). *Complex domain onset detection for musical signals*'.
My version of the clap-detection algorithm has two parameters which might need adapting to fit your environment. The silence threshold determines the minimum loudness for a clap to be triggered. The onset threshold determines more or less how 'percussive' the sound needs to be: the idea is to only react to things sounding like a clap and not to e.g. a loud whistle or other sounds. This is what the onset threshold tries to control. You can try it out below:
Demo: click the 'start audio' to capture your microphone and try to clap clearly twice. Lower the parameters if nothing happens.
## Clap detection on a micro-controller
With this working we now can try to run this code on a micro-controller. Running it on a micro-controller makes it more practical in daily use to e.g. switch on lights. A low-cost ESP32 with a MEMS microphone is a good platform: these microcontrollers are easy to use and have WiFi connectivity which opens the possibility to trigger commands to smart sockets or other WiFi-enabled devices. The [pector GitHub repository](https://github.com/JorenSix/pector) contains an Arduino project to run the clap-detection algorithm on an ESP32 or similar device (Teensy, RP2040,... ).
## Clap detection in the command line
Next to the main clap detection software, there is a small script to trigger commands when a clap is detected. In this case, the script waits for a double clap and then pushes updates to a git repository. There are two reasons for this: the first is that it is fun, the second is for bragging rights. Not that many people can say they once pushed source code simply by clapping twice. It is, however, a challenge to find people who have the patience to listen to me explaining what I have done and who are impressed by this feat, so maybe there is only one reason: it is fun. Below a screen capture can be found pushing code to the [pector repository](https://github.com/JorenSix/pector).
Vid: pushing code by clapping
Have a look at the [pector GitHub repository](https://github.com/JorenSix/pector) for more info on how you can make your websites/apps/command line tools/devices clap controlled!
---
## [Doorbell triggered Halloween window projection](https://0110.be/posts/Doorbell_triggered_Halloween_window_projection.md)
- Published: 2023-10-25T00:00:00Z
- Updated: 2025-11-29T14:09:38Z
- Author: Joren
- ID: 532
- Canonical: https://0110.be/posts/Doorbell_triggered_Halloween_window_projection
- Tags: [0110.be](https://0110.be/tags/0110.be.md), [UGent](https://0110.be/tags/UGent.md)
Fig: *Door projection as imagined by DALL.E*.
I did a thing, and, similar to most stuff made here, it is quite a bit of effort and rather pointless. In that sense, it is a bit like life itself. Anyhow, it seems that the Halloween tradition of trick-or-treating has found a strong foothold in mainland Europe. Due to social embeddedness, I prepared Halloween themed projection that responds to my door-bell. I have a glass door, which is ideal for scary projections. The idea is to have a continuous door projection but with a twist: when kids press the doorbell a projected ghost reacts and rushes towards them along with a loud ghostly scream.
This blog post details the technical setup with the intention to inspire similar projects and serve as documentation for next year. First we need a way react to the doorbell.
## Doorbell trigger setup
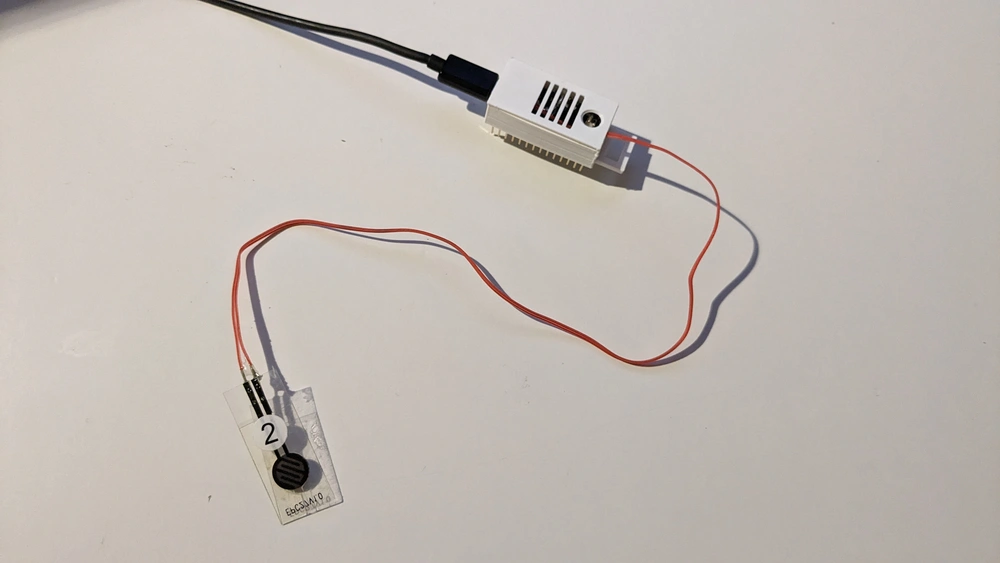
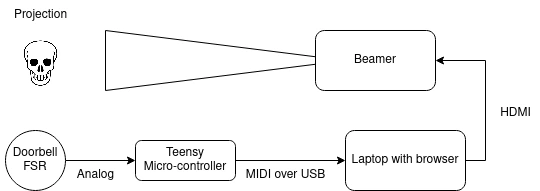
I sourced a couple of FSR (Force Sensitive Resistor)'s from a "sound book" that I had taken apart. Most of these sound books with e.g. animal sounds are meant for toddlers and have a some type of button and a small electronics circuit to make sound. Some of these books work with FSR 'buttons' which are similar in size to a doorbell. I took a single FSR from such a book.
I attached the FSR to a "Teensy LC" micro-controller with an additional resistor and put it in a small [3D-printed case](https://www.thingiverse.com/thing:4157853). The Teensy was programmed to emit a MIDI Note On event when the FSR/doorbell is pressed. A Note Off follows when the button is released. Once it is connected via USB to a computer it is essentially regarded as a digital piano with only a single key. Making a micro-controller pretend to be a standard MIDI device is very practical since the message passing protocol is standardized and well supported by many types of systems. MIDI is also optimized for low-latency communication. Via the Web MIDI API there is even support for MIDI in web browsers.
## Video projection
While software like Resolume allows for complex interactive video projections, my requirements are more modest: I need a continuous background video and I want the 'scare' video and audio to appear when the doorbell is triggered. I opted for a browser-based solution: multi-media capabilities, scripting and MIDI support are all present in modern browsers. Running things in a browser has advantages: there is no need for specialized software, it is easy to program, easy to run, relatively stable and future-proof. The proof-of-concept can be seen below. For the actual projection on a window or door you need to first cover the glass with a thin layer of white paper which lets most light through. A white paper tablecloth works well.
Demo: click the 'start video' to start the background video and click doorbell if you dare...
The code is not much special and a bit hacky but can be found attached. The download includes the "html, javascript, css, video, audio and the micro-controller software for a doorbell-triggered projection".
---
## [Dragon! Sound effects for board games](https://0110.be/posts/Dragon%21_Sound_effects_for_board_games.md)
- Published: 2023-09-01T00:00:00Z
- Updated: 2023-09-01T22:39:36Z
- Author: Joren
- ID: 521
- Canonical: https://0110.be/posts/Dragon%21_Sound_effects_for_board_games
- Tags: [0110.be](https://0110.be/tags/0110.be.md), [Code](https://0110.be/tags/Code.md), [Deep-learning](https://0110.be/tags/Deep-learning.md), [UGent](https://0110.be/tags/UGent.md)
Fig: *Rock & Troll* collaborative board game.
I often play board games with my kids. One of them is an absolute board game fan while the other is a sore loser and only wants to play collaborative games. These games are played 'against the board' and you win, or lose, together. I myself also still have problems losing games so I do understand this predicament. Genetics...
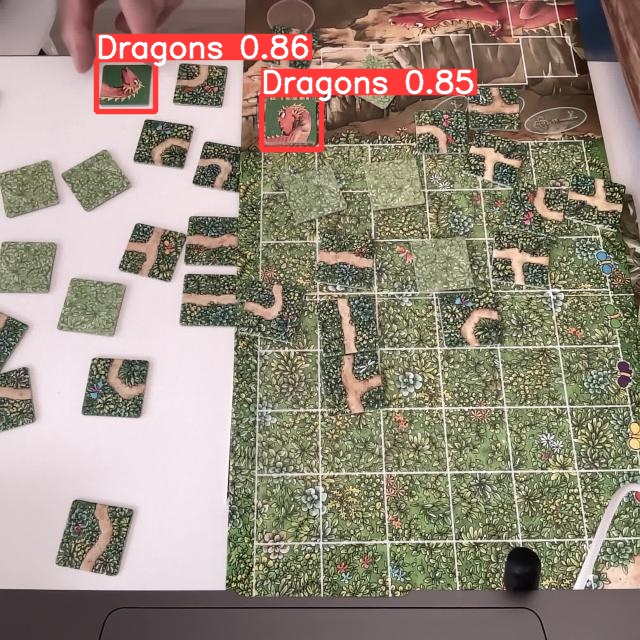
*Rock & Troll* is one of those games. It is a chance based game where you collaboratively try to build a path to a treasure before the dragon reaches it. Every player has to flip a tile which is either a part of the path (good) or a dragon (very bad). To increase engagement during play I often add sound effects. I was thinking: this can be improved and automated. For example, by doing this when a dragon tile is flipped:
The idea is to *unobtrusively* detect game state and add sound effects at critical moments. The sound effect should be playing without too much lag, ideally within about 200ms, so it feels immediate and connected to the game event. To implement this a camera based system with robust, fast object detection seemed like the way to go.
## Dragon detection
To detect dragons in a video stream I want to retrain an existing object-detection system. So two things need to happen: first a realistic, labeled dataset needs to be created. Then a system needs to be trained to detect the dragons. We do not want to label a massive dataset so we will use *transfer learning* to retrain an existing network. This existing network should already have learned basic features like edges, colors, geometries and other basic patterns. With the hope that this would result in robust detection, even with a limited dataset.
To create the dataset I wrote a small script which took a webcam picture every few seconds while I was manipulating the board and tiles. This resulted in about 130 pictures, some with no dragons and some with six, 300 labels in total. For annotating the dataset I used the free roboflow web-app which also hosts the final [dragon dataset](https://universe.roboflow.com/dragon-knngg/rockntroll/model/1). After augmentation, the size of the dataset can be tripled. The command to extract images from a webcam looks like this on my system:
`ffmpeg -y -r 30 -f avfoundation -i '0' -frames:v 1 snapshot.jpg`
After some consideration for alternatives I landed on the [YOLOv8 object-detection](https://github.com/ultralytics/ultralytics) system: a robust and fast object-detection system. Additionally, it is well-documented, pytorch-based, easy-to-use and it has support for video streams. The annotated roboflow dataset can be downloaded in a YOLOv8 compatible format as well. Transfer learning, was based on the `yolov8s.pt` weights, which are downloaded automatically. With the system installed correctly and the dataset dowloaded, a local GPU based training command might look like this:
`yolo train data=RocknTroll.v3i.yolov8/data.yaml epochs=30 model=yolov8s.pt device=mps imgsz=640 batch=32`
Once the system was trained - download the "model wheights here":\[dragons.pt\] - a bit of "glue code":\[rock_n_troll_v8.py\] is needed. The python script needs to stream images from a camera, here via open cv, and detect dragons in each image. Every time a new dragon is found, the sound effect is played. Note that the Roboflow website automatically trains a model as well which can be [tried out with a webcam](https://universe.roboflow.com/dragon-knngg/rockntroll/model/3/train/results?webcam=true).
There are a few ways improve the robustness of the system. During a game there are only more and more dragons: if the script detects less dragons than before it is probably a false negative or there is occlusion. Additionally, the dragon tiles remain in the same location once they are placed on the board. This means that new dragons are expected only in certain regions of the image. Both heuristics can be used to together to improve robustness.
## Notes
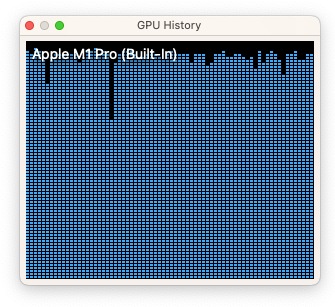
One of the reasons I bought a M1 mac with unified memory is for exactly these types of AI applications. After installing `pytorch 2.0`, the GPU acceleration resulted in a 10x training speed improvement. Training on a GeForce 1080 GTX from 2016 was still quite a bit faster, probably thanks to years of performance tuning targeting CUDA. It is clear that the mac GPU acceleration software ecosystem can use more effort, even system tools in macOS are limited: e.g. in the macOS activity monitor, GPU activity is very much an afterthought.
I am and hesitant to use cloud based GPU computing due to lack of control and privacy. I am not willing to send pictures from my kids to e.g. Google Cloud GPUs. The dependency on hardware of others might also limit the longevity of systems.
The ease-of-use, performance and accessibility of these deep-learning systems is great. Only a couple of years ago it would take months of hard work to maybe only approach similar detection performance. Adapting this idea for other board games and more types of tiles or board game events should be very possible.

- [315794\_\_bevibeldesign\_\_dragon-roar-distressed-7.mp3](https://0110.be/files/attachments/521/315794__bevibeldesign__dragon-roar-distressed-7.mp3)
- [rockntroll.webp](https://0110.be/files/attachments/521/rockntroll.webp)
- [rock\_n\_troll\_demo.mp4](https://0110.be/files/attachments/521/rock_n_troll_demo.mp4)
- [thumb\_rock\_n\_troll.webp](https://0110.be/files/attachments/521/thumb_rock_n_troll.webp)
- [dragons.pt](https://0110.be/files/attachments/521/dragons.pt)
- [rock\_n\_troll\_v8.py](https://0110.be/files/attachments/521/rock_n_troll_v8.py)
---
## [☀️ Solar sockets - Delivers power only on solar energy surplus](https://0110.be/posts/%E2%98%80%EF%B8%8F_Solar_sockets_-_Delivers_power_only_on_solar_energy_surplus.md)
- Published: 2023-08-23T00:00:00Z
- Updated: 2023-09-01T12:14:47Z
- Author: Joren
- ID: 516
- Canonical: https://0110.be/posts/%E2%98%80%EF%B8%8F_Solar_sockets_-_Delivers_power_only_on_solar_energy_surplus
- Tags: [0110.be](https://0110.be/tags/0110.be.md), [Harde waren](https://0110.be/tags/Harde%20waren.md), [UGent](https://0110.be/tags/UGent.md)
Fig: Solar socket.
I recently installed a couple of smart electrical sockets. The sockets only switch on *when there is a solar energy surplus*: when my rooftop solar panels produce more than the current energy consumption. I use these 'solar sockets' to charge the battery of an electric bike, for air conditioning and for charging other smaller devices. This post describes the components needed for such a system with the aim to inspire similar build.
1. Solar panels and a solar inverter with some form of readout.
2. A device to measure electrical energy use in a home.
3. Smart sockets with an easy to use API.
4. Some software to glue everything together.
### 1. ☀️ Solar panels and inverter
Most solar inverters have some form of API to readout the current solar panel output. In my case I use a SMA inverter which has two ways to extract this data: via Bluetooth and via wired ethernet. I found the wired ethernet solution to be the most reliable. The SMA inverter does use a somewhat annoying data formatting protocol but luckily there is an open source solution to decode the data: [SBFspot](https://github.com/SBFspot/SBFspot)
For SMA inverters, and possibly for others as well, there another option: the data is also automatically uploaded to a cloud based platform. This platform has an API which can be used to extract data on solar energy production. I do not like to be dependent on external cloud based software platforms, which might change at any time. Additionally, for real-time data cloud based platforms can be slow.
### 2. Measuring total electrical energy use
To measure total power use, I use an "Eastron SDM220M" measurement device which communicates with a server over a serial connection. There are adapters to translate serial Modbus to USB. The device is installed in my wiring closet by a professional: it is directly connected to the 60A mains and I would not advise to DIY it.
Alternatively, some places are equipped digital energy meters which might have a way for direct readout or readout via a cloud based API, after a few minutes. This might suffice for a solar socket install.
Energy use measurement might not be strictly needed for the 'solar sockets': if energy use is predictable it might be ok to simply switch the sockets on your average peak solar power. Perhaps combined with a local weather API. Finally we need to switch on some sockets.
### 3. Smart WiFi Socket
There are many smart WiFi sockets on the market. Most come with a smartphone app which allows you to control the socket from anywhere. Behind the scenes the sockets communicates with the vendor's cloud based system over the internet. Additionally there are some integrations with systems like Apple Home, Amazon Alexa en Google Assistant. For fundamental\
infrastructure like sockets in my home I want to avoid dependencies on a external cloud based systems. Next to the concerns about privacy and ownership there is a very practical concern: the cloud based system might just stop working in a few years. Especially [any dependency on a Google service](https://killedbygoogle.com/) is suspect. Also I am not convinced of [Amazon Alexa's](https://arstechnica.com/gadgets/2022/11/amazon-alexa-is-a-colossal-failure-on-pace-to-lose-10-billion-this-year/) future.
Luckily, there is *Tasmota* which provides open source firmware targeting many types of 'smart' devices including smart sockets. The tagline for Tasmota is *'Total local control with quick setup and updates'*. I bought a couple of [Nous A1T Tasmota Smart WiFi sockets](https://nous.technology/product/a1t4.html) which come with Tasmota firmware. Switching the socket on is done by sending an `HTTP GET` request to an url, which can be scripted easily. There is some
### 4. Control software
A script glues everything together: it logs energy usage and solar output. It switches on the solar sockets when a surplus is detected and switches again when the surplus is gone. There is some additional logic which ensures that the socket remains on for at least an hour even if there is no solar surplus. This to ensure that batteries are charged to a minimal usable state.
In summary, here we presented a couple of building blocks to build 'solar sockets' which are on only when there is a energy surplus. By using simple API's offered by Tasmota and locally running software, there is no dependency on (in the long term) unreliable cloud based systems which ensures the longevity of the build.
As an additional bonus, the solar sockets also serve as an indicator. A small LED shows when they are on, or, in other words, when there is solar energy surplus and when it is a good idea to switch on other electrical appliances.
---
## [The automatic HTTPS capabilities of Caddy](https://0110.be/posts/The_automatic_HTTPS_capabilities_of_Caddy.md)
- Published: 2023-01-18T00:00:00Z
- Updated: 2023-01-25T16:24:35Z
- Author: Joren
- ID: 502
- Canonical: https://0110.be/posts/The_automatic_HTTPS_capabilities_of_Caddy
- Tags: [0110.be](https://0110.be/tags/0110.be.md), [UGent](https://0110.be/tags/UGent.md)
This blog has been running on [Caddy](https://caddyserver.com/) for the last couple of months. Caddy is a http server with support for reverse proxies and automatic https. The automatic https feature takes care of requesting, installing and updating SSL certificates which means that you need much less configuration settings or maintenance compared with e.g. lighttpd or Nginx. The underlying [certmagic](https://github.com/caddyserver/certmagic) ACME client is responsible for requesting these certificates.
Before, it was using [lighttpd](https://www.lighttpd.net/) but the during the last decade the development of lighttpd has stalled. lighttpd version 2 has been in development for 7 years and the bump from `1.4` to `1.5` has been taking even longer. lighttpd started showing its age with limited or no support for modern features like websockets, http/3 and finicky configuration for e.g. https with virtual domains.
#### Caddy with Ruby on Rails
I really like Caddy's sensible defaults and the limited lines of configuration needed to get things working. Below you can find e.g. a reusable https enabled configuration for a Ruby on Rails application. This configuration does file caching, compression, http to https redirection and load balancing for two local application servers. It also serves static files directly and only passes non-file requests to the application servers.
(cachestaticfiles) {
@staticFiles {
file
}
header @staticFiles Cache-Control "public, max-age=604800, must-revalidate"
}
(railsdefaults) {
#compress responses
encode zstd gzip
#redirect from http to https
@http {
protocol http
}
redir @http https://{host}{uri}
@notStatic {
not file
}
import cachestaticfiles
reverse_proxy @notStatic localhost:{args.0} localhost:{args.1}
file_server
}
example.com {
root * /var/www/example.com/current/public
import railsdefaults 10000 10001
}
If you are self-hosting I think Caddy is a great match in all but the most exotic or demanding setups. I definitely am kicking myself for not checking out caddy sooner: it could have saved me countless hours installing and maintaining https certs or configuring lighttpd in general.
---
## [Sending audio over a network with ffmpeg](https://0110.be/posts/Sending_audio_over_a_network_with_ffmpeg.md)
- Published: 2022-08-30T00:00:00Z
- Updated: 2022-09-05T12:29:57Z
- Author: Joren
- ID: 492
- Canonical: https://0110.be/posts/Sending_audio_over_a_network_with_ffmpeg
- Tags: [0110.be](https://0110.be/tags/0110.be.md), [UGent](https://0110.be/tags/UGent.md)
Fig: stable diffusion imagining a networked music performance
This post describes how to send audio over a network using the [ffmpeg](http://ffmpeg.org) suite. Ffmpeg is the Swiss army knife for working with audio and video formats. It is a command line tool that supports almost all audio formats known to man and woman. `ffmpeg` also supports streaming media over networks.
Here, we want to send audio recorded by a microphone, over a network to a **single** receiver on the other end. We are not aiming for low latency. Also the audio is going only in a single direction. This can be of interest for, for example, a networked music performance. Note that `ffmpeg` needs to be installed on your system.
### The receiver - Alice
For the receiver we use `ffplay`, which is part of the `ffmpeg` tools. The command instructs the receiver to listen to `TCP` connections on a randomly chosen port `12345`. The `\?listen` is important since this keeps the program waiting for new connections. For streaming media over a network the stateless `UDP` protocol is often used. When `UDP` packets go missing they are simply dropped. If only a few packets are dropped this does not cause much harm for the audio quality. For `TCP` missing packets are resent which can cause delays and stuttering of audio. However, `TCP` is much more easy to tunnel and the stuttering can be compensated with a buffer. Using `TCP` it is also immediately clear if a connection can be made. With `UDP` packets are happily sent straight to the void and you need to resort to wiresniffing to know whether packets actually arrive.
`ffplay -nodisp -f mpegts tcp://0.0.0.0:12345\?listen`
In this example we use [MPEGTS](https://en.wikipedia.org/wiki/MPEG_transport_stream) over a plain `TCP` socket connection. Alteratively [RTMP](https://en.wikipedia.org/wiki/Real-Time_Messaging_Protocol) could be used (which also works over `TCP`). [RTP](https://en.wikipedia.org/wiki/Real-time_Transport_Protocol) , however is usually delivered over `UDP`.
The shorthand address `0.0.0.0` is used to bind the port to all available interfaces. Make sure that you are listening to the correct interface if you change the IP address.
### The sender - Björn
Björn, aka Bob, sends the audio. First we need to know from which microphone to use. To that end there is a way to list audio devices. In this example the macOS `avfoundation` system is used. For other operating systems there are similar provisions.
`ffmpeg -f avfoundation -list_devices true -i ""`
Once the index of the device is determined the command below sends incoming audio to the receiver (which should already be listening on the other end). The audio format used here is `MP3` which can be safely encapsulated into `mpegts`.
Note that the IP address `192.168.x.x` needs to be changed to the address of the receiver. Now if both devices are on the same network the incoming audio from Bob should arrive at the side of Alice.
### The tunnel
If sender and receiver are not on the same network it might be needed to do [Network Addres Translation (NAT) and port forwarding](https://www.geeksforgeeks.org/network-address-translation-nat/). Alternatively an ssh tunnel can be used to forward local tcp connections to a remote location. So on the sender the following command would send the incoming audio to a local port:
`ffmpeg -f avfoundation -i ":1" -acodec libmp3lame -ab 196k -f mpegts tcp://192.168.x.x:12345`
The connection to the receiver can be made using a local port forwarding tunnel. With ssh the TCP traffic on port 12345 is forwarded to the remote receiver via an intermediary (remote) host using the following command:
ssh -v -L 12345:192.168.x.x:12345 user@host -N
---
## [Workshop on ESP32 microcontroller](https://0110.be/posts/Workshop_on_ESP32_microcontroller.md)
- Published: 2017-04-08T00:00:00Z
- Updated: 2017-04-11T19:26:37Z
- Author: Joren
- ID: 453
- Canonical: https://0110.be/posts/Workshop_on_ESP32_microcontroller
- Tags: [0110.be](https://0110.be/tags/0110.be.md), [Hackerspace Ghent](https://0110.be/tags/Hackerspace%20Ghent.md)
On Saturday the eight of April I gave a workshop on the ESP 32 micro controller at [Newline](http://hackerspace.gent/newline), the yearly hackerspace conference of Hackerspace Ghent. The aim was to provide a hands-on introduction. The participants had to program to make the ESP execute the following:
- Blink
- Connecting to wifi
- Sending data from the ESP32
- Sending data using TCP
- Broadcast data over UDP
- Broadcast data using OSC over UDP
- Broadcasting sensor data over UDP and OSC
- Mesh Networking
At the start of the workshop I gave a "presention":\[2017.04.ESP32_intro.pdf\] as an introduction.
---
## [TarsosLSH in a Photomosaic Web App](https://0110.be/posts/TarsosLSH_in_a_Photomosaic_Web_App.md)
- Published: 2015-01-07T00:00:00Z
- Updated: 2015-01-07T08:52:18Z
- Author: Joren
- ID: 428
- Canonical: https://0110.be/posts/TarsosLSH_in_a_Photomosaic_Web_App
- Tags: [0110.be](https://0110.be/tags/0110.be.md), [Code](https://0110.be/tags/Code.md), [HoGent](https://0110.be/tags/HoGent.md), [Java](https://0110.be/tags/Java.md), [UGent](https://0110.be/tags/UGent.md)
TarsosLSH is a Java library implementing Locality-sensitive Hashing (LSH), a practical nearest neighbor search algorithm for high dimensional vectors that operates in sublinear time. The open source software package is authored by me and is available on GitHub: [TarsosLSH on GitHub](https://github.com/JorenSix/TarsosLSH).
With TarsosLSH, Joseph Hwang and Nicholas Kwon from Rice University created an [Image Mosaic web application](http://image-mosaic.appspot.com/). The application chops an uploaded photo into small blocks. For each block, a color histogram is created and compared with an index of color histograms of reference images. Subsequently each block is replaced with one of the top three nearest neighbors, creating a mosaic. Since high dimensional nearest neighbor search is needed, this is an ideal application for TarsosLSH. The application somewhat proves that TarsosLSH can be used in practical applications, which is comforting.


---
## [Spotify Music Quiz - With a Big Red Button](https://0110.be/posts/Spotify_Music_Quiz_-_With_a_Big_Red_Button.md)
- Published: 2013-02-21T00:00:00Z
- Updated: 2013-12-05T18:19:15Z
- Author: Joren
- ID: 325
- Canonical: https://0110.be/posts/Spotify_Music_Quiz_-_With_a_Big_Red_Button
- Tags: [0110.be](https://0110.be/tags/0110.be.md), [Projecten](https://0110.be/tags/Projecten.md)
This post documents how to implement a simple music quiz with the meta data provided by Spotify and a big red button.
During my last birthday party, organized at [Hackerspace Ghent](http://0x20.be) ,there was an ongoing Spotify music quiz. The concept was rather simple: If music that was playing was created in the same year as I was born, the guests could press a big red button and win a price! If they guessed incorrectly, they were publicly shamed with a [sad trombone](http://www.sadtrombone.com/?play=true). Only one guess for each\
song was allowed.
Below you can find a small videograph which shows the whole thing in action. The music quiz is simple: press the button if the song is created in 1984. In the video, at first a wrong answer is given, then a couple of invalid answers follow. Finally a good answer is given, the song "*The Killing Moon* by Echo & the Bunnymen" is from 1984! Woohoo!
Allright, what did I use to to implement the spotify music quiz:
- A big red Arduino button, attatched by USB to a laptop.
- A system with Spotify.
- A way to access the meta data of the currently playing song in Spotify.
- A Ruby script to connect al the parts and checks answers.
### The Red Button
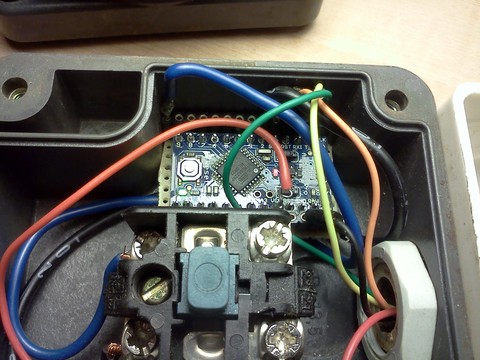
A nice big red button, which main features are that it is red and big, serves as the main input device for the quiz. To be able to connect the salvaged safety button to a computer via USB, an Arduino Nano is used. The Arduino is loaded with the code from the [debounce tutorial](http://arduino.cc/en/Tutorial/Debounce), basically unchanged. Unfortunately, I could not fit the the FTDI-chip, which provides the USB connection, in the original enclosure. An additional enclosure, the white one seen in the pictures below, was added.
When pressed, the button sends a signal over the serial line. See below how the Ruby Quiz script waits for, and handles such event.
### Get Meta Data from the Currently Playing Song in Spotify
Another requirement for the quiz to work is the ability to get information about the song currently playing in Spotify. On Linux this can be done with the dbus interface for Spotify. The script included below returns information about the artist, album and title of the song. It also detects if Spotify is running or not. Find it, fork it, use it, on [github](https://gist.github.com/JorenSix/5013099)
On Mac OS X, Spotify can be controlled using AppleScript. A script on github shows how to [get meta data about the currently playing song in Spotify, on Mac OS X](https://gist.github.com/JorenSix/5007452).
\`\`\`ruby\
#!/usr/bin/python\
\#
1. now_playing.py
2.
3. Python script to fetch the meta data of the currently playing
4. track in Spotify. This is tested on Ubuntu.
import dbus\
bus = dbus.SessionBus()\
try:\
spotify = bus.get_object('com.spotify.qt', '/')\
iface = dbus.Interface(spotify, 'org.freedesktop.MediaPlayer2')\
meta_data = iface.GetMetadata()\
artistname = ",".join(meta_data\['xesam:artist'\])\
trackname = meta_data\['xesam:title'\]\
albumname = meta_data\['xesam:album'\]\
#Other fields are:\
\# 'xesam:trackNumber', 'xesam:discNumber','mpris:trackid',\
\# 'mpris:length','mpris:artUrl','xesam:autoRating','xesam:contentCreated','xesam:url'\
print str(trackname + " \| " + artistname + " \| " + albumname + " \| Unknown")\
except dbus.exceptions.DBusException:\
print "Spotify is not running."\
\`\`\`
### The Quiz Ruby Script
With the individual part in order, we now need Ruby glue to paste it all together. The [complete music quiz script](https://gist.github.com/JorenSix/5014344) can be found on github. The main loop, below, waits for a button press. If it is pressed the "sad trombone":\[sad_trombone.wav\], "invalid answer":\[cheater.wav\] or "winner":\[winner.wav\] sound is played. The sounds are attached to this post.
\`\`\`ruby\
while true do\
\# Wait for a button press\
data = sp.readline\
\# Fetch meta data about the currently\
\# playing song\
result = \`#{now_playing_command}\`\
\# Parse the meta data\
title,artist,album = parse_result(result)\
#Title is hash key, should be unique within playlist\
key = title\
if responded_to.has_key? key\
puts "Already answered: you cheater"\
play cheater\
elsif correct_answers.has_key? key\
puts "Correct answers: woohoo"\
responded_to\[key\]=true\
play winner\
else\
puts "Incorrect answer: sad trombone"\
responded_to\[key\]=true\
play sad_trombone\
end\
end\
\`\`\`
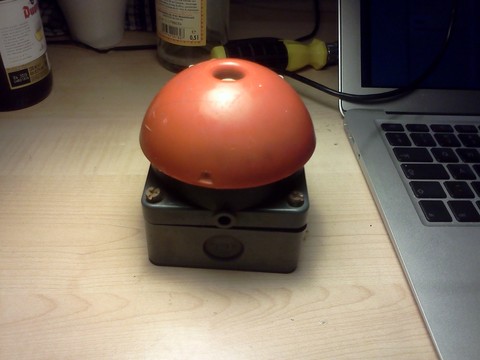
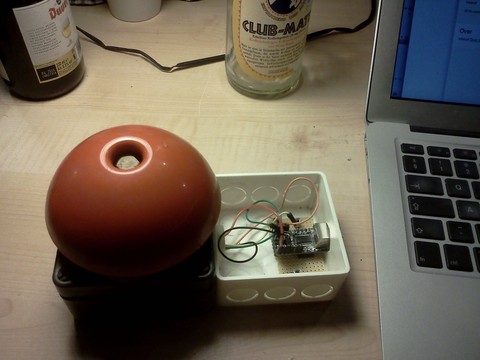
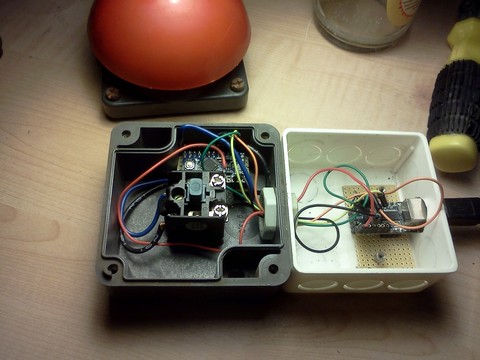
- [sad\_trombone.wav](https://0110.be/files/attachments/325/sad_trombone.wav)
- [winner.wav](https://0110.be/files/attachments/325/winner.wav)
- [cheater.wav](https://0110.be/files/attachments/325/cheater.wav)
---
## [Text to Speech to Speech Recognition - Am I Sitting in a Room?](https://0110.be/posts/Text_to_Speech_to_Speech_Recognition_-_Am_I_Sitting_in_a_Room%3F.md)
- Published: 2012-03-24T00:00:00Z
- Updated: 2013-12-05T18:19:15Z
- Author: Joren
- ID: 324
- Canonical: https://0110.be/posts/Text_to_Speech_to_Speech_Recognition_-_Am_I_Sitting_in_a_Room%3F
- Tags: [0110.be](https://0110.be/tags/0110.be.md), [Code](https://0110.be/tags/Code.md), [Hackerspace Ghent](https://0110.be/tags/Hackerspace%20Ghent.md), [Muziek](https://0110.be/tags/Muziek.md), [Poging tot humor](https://0110.be/tags/Poging%20tot%20humor.md), [Projecten](https://0110.be/tags/Projecten.md)
This post is about a hack I did for the 2012 [Amsterdam music hack days](http://amsterdam.musichackday.org/2012/index.php?page=Main+page). From the website:
> The Amsterdam Music Hack Day is a full weekend of hacking in which participants will conceptualize, create and present their projects. Music + software + mobile + hardware + art + the web. Anything goes as long as it's music related
The hackathon was organized at the NiMK(Nederlands instituut voor Media Kunst) the 25th and 24th of May. My hack tries to let a phone start a conversation on its own. It does this by speaking a text and listening to the spoken text with speech recognition. The speech recognition introduces all kinds of interesting permutations of the original text. The recognized text is spoken again and so a dreamlike, unique nonsensical discussion starts. It lets you hear what goes on in the mind of the phone.
The idea is based on Alvin Lucier's *I am Sitting in a Room* form 1969 which is embedded below. He used analogue tapes to generate a similar recursive loop. It is a better implementation of [something I did a couple of years ago](http://0110.be/artikels/lees/Text_To_Speech_Recognition).
The implementation is done with Android and its API's. Both speech recognition and text to speech are available on android. Those API's are used and a user interface shows the recognized text. An example of a session can be found below:
To install the application you can download "Tryalogue.apk":\[Tryalogue.apk\] of use the QR-code below. You need Android 2.3 with Voice Recognition and TTS installed. Also needed is an internet connection. "The source":\[Tryalogue.zip\] is also up for grabs.


- [screenshot.png](https://0110.be/files/attachments/324/screenshot.png)
- [Tryalogue.apk](https://0110.be/files/attachments/324/Tryalogue.apk)
- [Tryalogue.zip](https://0110.be/files/attachments/324/Tryalogue.zip)
- [apk.png](https://0110.be/files/attachments/324/apk.png)
---
## [Android Gingerbread 2.3.4 on LG GT540 Optimus](https://0110.be/posts/Android_Gingerbread_2.3.4_on_LG_GT540_Optimus.md)
- Published: 2011-07-19T00:00:00Z
- Updated: 2013-12-05T18:19:15Z
- Author: Joren
- ID: 323
- Canonical: https://0110.be/posts/Android_Gingerbread_2.3.4_on_LG_GT540_Optimus
- Tags: [0110.be](https://0110.be/tags/0110.be.md), [Hackerspace Ghent](https://0110.be/tags/Hackerspace%20Ghent.md), [Projecten](https://0110.be/tags/Projecten.md)
I have upgraded the operating system on my LG GT540 Optimus from the stock Android 1.6 to Android Gingerbread 2.3.4. I followed this [updgrade procedure](http://androidforums.com/optimus-gt540-all-things-root/352239-android-2-3-4-gingerbread-lg-gt540-new-method.html).
It is well worth it to spend some time upgrading the phone, especially from 1.6. Everything feels a lot faster and the upgraded applications, e.g. Gallery, are nicely improved.
The main reason I upgraded my phone is to get the open source accessory development kit (ADK) for Android working. I got the [DemoKit application](http://developer.android.com/guide/topics/usb/adk.html#running-demokit) working after some time but need to do some more experiments to see if the hardware actually works: I am waiting for a USB Host Shield for Arduino. To be continued...
---
## [TwinSeats heeft Apps For Ghent gewonnen!](https://0110.be/posts/TwinSeats_heeft_Apps_For_Ghent_gewonnen%21.md)
- Published: 2011-05-18T00:00:00Z
- Updated: 2013-12-05T18:19:15Z
- Author: Joren
- ID: 320
- Canonical: https://0110.be/posts/TwinSeats_heeft_Apps_For_Ghent_gewonnen%21
- Tags: [0110.be](https://0110.be/tags/0110.be.md), [Code](https://0110.be/tags/Code.md), [Hackerspace Ghent](https://0110.be/tags/Hackerspace%20Ghent.md), [Portfolio](https://0110.be/tags/Portfolio.md), [Projecten](https://0110.be/tags/Projecten.md)
Vorige zaterdag werd [Apps For Ghent](http://appsforghent.be/) georganiseerd: een activiteit om het belang van open data te onderstrepen in navolging van onder meer [Apps For Amsterdam](http://www.appsforamsterdam.nl/) en [New York City Big App](http://nycbigapps.com/). Tijdens de voormiddag kwamen er verschillende organisaties hun open gestelde data voorstellen de namiddag werd gereserveerd voor een wedstrijd. Het doel van de wedstrijd was om in enkele uren een concept uit te werken en meteen voor te stellen. Het uitgewerkte prototype moest gedeeltelijk functioneren en gebruik maken van (Gentse) open data.
Luk Verhelst en ikzelf hebben er TwinSeats voorgesteld.
> TwinSeats is een website / online initiatief om nieuwe mensen te leren kennen. Met hen deel je dezelfde culturele interesse en ga je vervolgens samen naar deze of gene voorstelling. Door events centraal te stellen kan TwinSeats uitzonderlijke cultuurburen zoeken. Leden vinden die cultuurburen dankzij een gezamenlijke voorliefde voor een artiest of attractie of eender welke bezigheid in de vrijetijdssfeer.
Het prototype is ondertussen terug te vinden op [TwinSeats.be](http://twinseats.be). Let wel dit is in enkele uren in elkaar geflanst en is verre van 'af', het achterliggende concept is belangrijker.
Samen met Wa Kank Doen van SumoCoders werden we door de jury tot winnaar uitgeroepen. Maandag verscheen er [een artikel in de Standaard over AppsForGhent met een vermelding van TwinSeats](http://www.standaard.be/artikel/detail.aspx?artikelid=IV3A3TCU). Op de Apps For Ghent site is uiteraard ook iets te vinden [over TwinSeats](http://appsforghent.be/?post_type=apps&p=161) ook het [juryverslag](http://appsforghent.be/?page_id=223) is er te vinden. Zoals het hoort bij die categorie evenementen werd ook wat [afgetweet](http://search.twitter.com/search?q=AppsforGhent).
Er is ook een publieksprijs verbonden aan AppsForGhent die wordt over enkele weken uitgereikt.
---
## [Find the MAC Address of your Android Device](https://0110.be/posts/Find_the_MAC_Address_of_your_Android_Device.md)
- Published: 2011-01-13T00:00:00Z
- Updated: 2013-12-05T18:19:15Z
- Author: Joren
- ID: 316
- Canonical: https://0110.be/posts/Find_the_MAC_Address_of_your_Android_Device
- Tags: [0110.be](https://0110.be/tags/0110.be.md), [Hackerspace Ghent](https://0110.be/tags/Hackerspace%20Ghent.md)
Just a quick hint. If you ever need to find the MAC address of your Android device, and who doesn't, check this file:
\`\`\`ruby\
/sys/devices/virtual/net/wlan0\
\`\`\`
You can read the file with the Astro File Manager.
---
## [Remote Port Forwarding with Ubuntu 8.04 and OpenSSH 4.7](https://0110.be/posts/Remote_Port_Forwarding_with_Ubuntu_8.04_and_OpenSSH_4.7.md)
- Published: 2011-01-10T00:00:00Z
- Updated: 2013-12-05T18:19:15Z
- Author: Joren
- ID: 315
- Canonical: https://0110.be/posts/Remote_Port_Forwarding_with_Ubuntu_8.04_and_OpenSSH_4.7
- Tags: [0110.be](https://0110.be/tags/0110.be.md), [Code](https://0110.be/tags/Code.md)
With this post I would like to draw attention to the fact that remote port forwarding with OpenSSH 4.7 on Ubuntu 8.04.1 does not work as expected.
If you follow the instructions of a [SSH remote port forwarding tutorial](http://www.debianadmin.com/howto-use-ssh-local-and-remote-port-forwarding.html) everything goes well until you want to allow everyone to access the forwarded port (not just localhost). The problem arises when binding the forwarded port to an interface. Even with `GatewayPorts yes` present in `/etc/ssh/sshd_config` the following command shows that it went wrong:
\`\`\`ruby\
user@local\$ssh -R 2222:localhost:22 user@remote\
user@remote\$sudo netstat -lntp #on the remote server\
Active Internet connections (only servers)\
Proto Recv-Q Send-Q Local Address Foreign Address State\
tcp6 0 0 ::1:2222 :::\* LISTEN\
\`\`\`
It listens only via IPv6 and only on localhost an not on every interface (as per request by defining `GatewayPorts yes`). The `netstat` command should yield this output:
\`\`\`ruby\
user@local\$ssh -R 2222:localhost:22 user@remote\
user@remote\$sudo netstat -lntp #on the remote server\
Active Internet connections (only servers)\
Proto Recv-Q Send-Q Local Address Foreign Address State\
tcp 0 0 0.0.0.0:2222 0.0.0.0:\* LISTEN\
\`\`\`
I do not really know here it goes wrong but there is an easy workaround. By defining both
\`\`\`ruby\
GatewayPorts yes\
AddressFamily inet\
\`\`\`
in `/etc/ssh/sshd_config` remote port forwarding works fine but you lose IPv6 connectivity (this due to the `AddressFamily` setting). Another solution is to use more up to date software: the bug is not present in Ubuntu 10.04 with OpenSSH 5.3 (I don't know if it is an Ubuntu or OpenSSH bug, or even a configuration issue.
I have been struggling with this issue for a couple of hours and, with this blog post, I hope I can prevent someone else from doing the same.
---
## [Oneliner to Install ssh-copy-id on Mac OS X](https://0110.be/posts/Oneliner_to_Install_ssh-copy-id_on_Mac_OS_X.md)
- Published: 2010-12-25T00:00:00Z
- Updated: 2013-12-05T18:19:15Z
- Author: Joren
- ID: 314
- Canonical: https://0110.be/posts/Oneliner_to_Install_ssh-copy-id_on_Mac_OS_X
- Tags: [0110.be](https://0110.be/tags/0110.be.md), [Code](https://0110.be/tags/Code.md), [Mac OS X](https://0110.be/tags/Mac%20OS%20X.md)
`ssh-copy-id` is a practical bash script, installed by default on Ubuntu. The script is used to distribute public keys. The following oneliner makes it available on Mac OS X:
\`\`\`ruby\
sudo bash \< \<( curl ---silent http://0110.be\[install-ssh-copy-id.bash\] )\
\`\`\`\
This oneliner does three things:
1. It copies `ssh-copy-id` from this website to `/bin/ssh-copy-id`.
2. It makes sure that `ssh-copy-id` is executable, using `chmod`.
3. There is no three
The install procedure needs superuser rights because it writes in the `/bin` folder. Executing scripts from untrusted sources with superuser rights is actually really, really, extremely dangerous. But in this case it is rather innocent.
The `ssh-copy-id` script is the one provided with Ubuntu and Debian, I assume it is GPL'ed. I have not modified it for Mac OS X but it seems to behave as expected. I have only tested the install script and behavior on 10.6.5, YMMV (Your Mileage May Vary).
- [ssh-copy-id.txt](https://0110.be/files/attachments/314/ssh-copy-id.txt)
- [install-ssh-copy-id.bash](https://0110.be/files/attachments/314/install-ssh-copy-id.bash)
- [install-ssh-copy-id.bash](https://0110.be/files/attachments/314/install-ssh-copy-id.bash)
---
## [How to Develop for LG GT540 Optimus on Ubuntu](https://0110.be/posts/How_to_Develop_for_LG_GT540_Optimus_on_Ubuntu.md)
- Published: 2010-09-17T00:00:00Z
- Updated: 2013-12-05T18:19:15Z
- Author: Joren
- ID: 312
- Canonical: https://0110.be/posts/How_to_Develop_for_LG_GT540_Optimus_on_Ubuntu
- Tags: [0110.be](https://0110.be/tags/0110.be.md), [Code](https://0110.be/tags/Code.md), [Hackerspace Ghent](https://0110.be/tags/Hackerspace%20Ghent.md)
This post describes a crucial aspect of how to connect an android phone, the LG GT540 Optimus, to an Ubunu Linux computer. The method is probably similar on different UNIX like platforms with different phones.
To recognize the phone when it is connected via usb you need to create an UDEV rule. Create the file `/etc/udev/rules.d/29.lg545.rules` with following contents:
\`\`\`ruby\
SUBSYSTEM\"usb\",ATTRS{idVendor}"1004",ATTRS{idProduct}=="61b4",MODE="0666"\
\`\`\`
On the phone you need to enable debugging using the settings and (this is rather important) make sure that the "mass storage only" setting is disabled.
[Rooting](http://android.modaco.com/content/lg-gt540-optimus-gt540-modaco-com/310737/how-to-root-your-lg-gt540/) the device makes sure you have superuser rights. Installing the android SDK is [well documented](http://developer.android.com/sdk/index.html).
Good luck!
---
## [OpenRD - A Low Power Server Running Debian on ARM](https://0110.be/posts/OpenRD_-_A_Low_Power_Server_Running_Debian_on_ARM.md)
- Published: 2010-08-05T00:00:00Z
- Updated: 2013-12-05T18:19:15Z
- Author: Joren
- ID: 54
- Canonical: https://0110.be/posts/OpenRD_-_A_Low_Power_Server_Running_Debian_on_ARM
- Tags: [0110.be](https://0110.be/tags/0110.be.md), [Harde waren](https://0110.be/tags/Harde%20waren.md), [Projecten](https://0110.be/tags/Projecten.md)
\
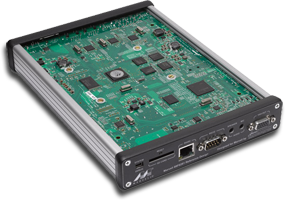
This blog post comments on using the Marvell OpenRD SoC(System on a Chip) as a low power multipurpose home server.
### The Hardware
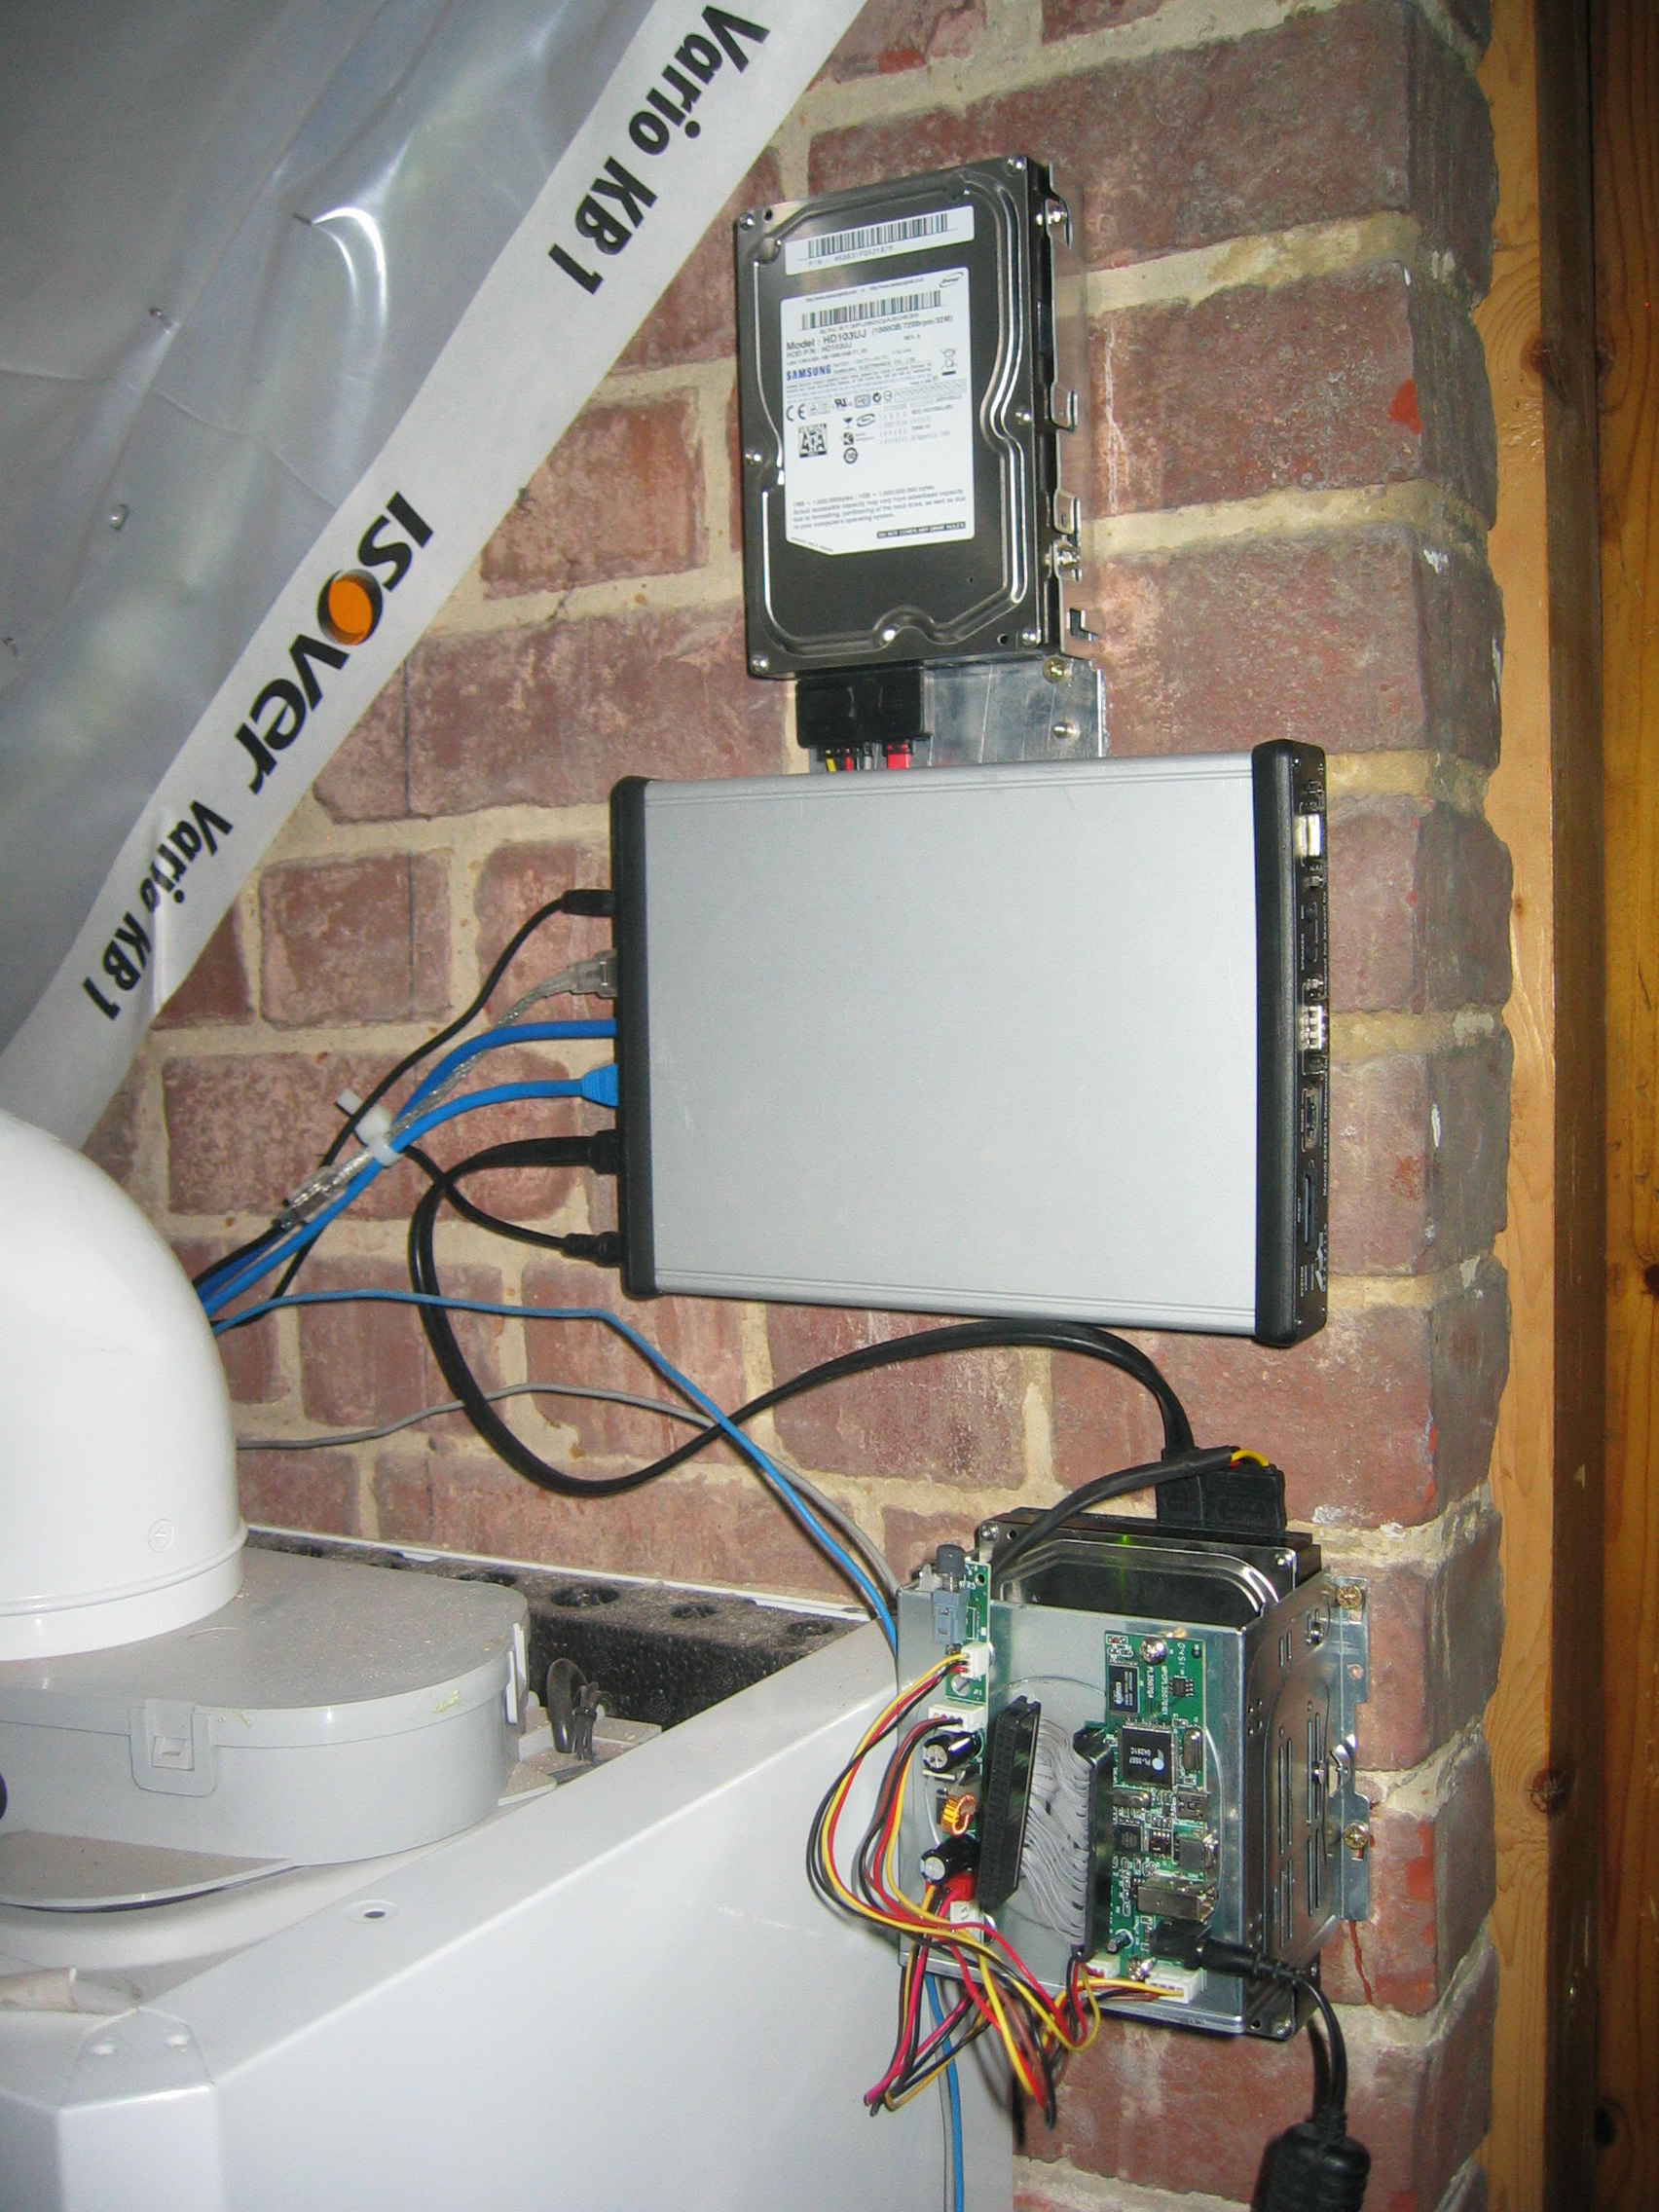
The specifications of the [OpenRD SoC](http://open-rd.org) are very similar to the better known [SheevaPlug](http://en.wikipedia.org/wiki/SheevaPlug) devices, so it has 512MB DDR2 RAM, an 1.2GHz ARM processor and 512MB internal flash. To be more precise the OpenRD SoC is essentially a SheevaPlug in a different form factor. The main advantage of this form factor is the number of available connections: 7xUSB, SATA, eSATA, 2xGb Ethernet, VGA, Audio, ... which make the device a lot more extendable and practical as a mulitpurpose home server.
### The Software
Thanks to the work of [Dr. Martin Michlmayr](http://www.cyrius.com) there is a Debian port for the Kirkwood platform readily available. He even wrote a tutorial on [how to install Debian on a SheevaPlug](http://www.cyrius.com/debian/kirkwood/sheevaplug/install.html). Installing Debian on an OpenRD is exactly the same except for one important detail: the `arcNumber` variable.
Once Debian is installed you can `apt-get` or `aptitude` almost all the software you are used to: webserver, samba, ruby, ...
### The Alternatives
- [Sheevaplug](http://en.wikipedia.org/wiki/SheevaPlug)
- [Beagle Board](http://beagleboard.org) or other [OMAP3 SoC's](http://processors.wiki.ti.com/index.php?title=OMAP3_Boards). The IGEPv2 e.g. has wireless and wired network connections.
- [Alix system Boards](http://www.pcengines.ch/alix.htm) are mostly x86 based.
- [NSLU2](http://en.wikipedia.org/wiki/NSLU2) An ARM platform.
---
## [Doorhacking: Opening a Door With Your Cellphone](https://0110.be/posts/Doorhacking%3A_Opening_a_Door_With_Your_Cellphone.md)
- Published: 2010-04-22T00:00:00Z
- Updated: 2013-12-05T18:19:15Z
- Author: Joren
- ID: 71
- Canonical: https://0110.be/posts/Doorhacking%3A_Opening_a_Door_With_Your_Cellphone
- Tags: [0110.be](https://0110.be/tags/0110.be.md), [Code](https://0110.be/tags/Code.md), [Hackerspace Ghent](https://0110.be/tags/Hackerspace%20Ghent.md), [Projecten](https://0110.be/tags/Projecten.md)
**The problem:** There is a group of people that want access to [Hackerspace Ghent](http://0x20.be) but there is only one remote to open the gate.
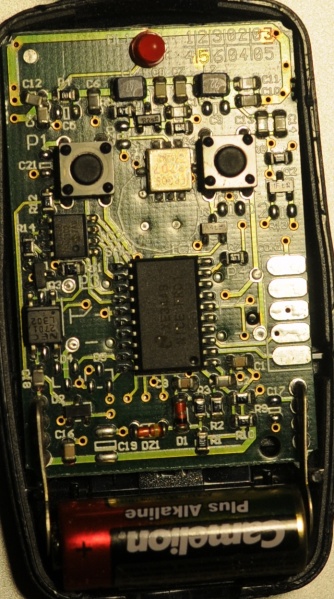
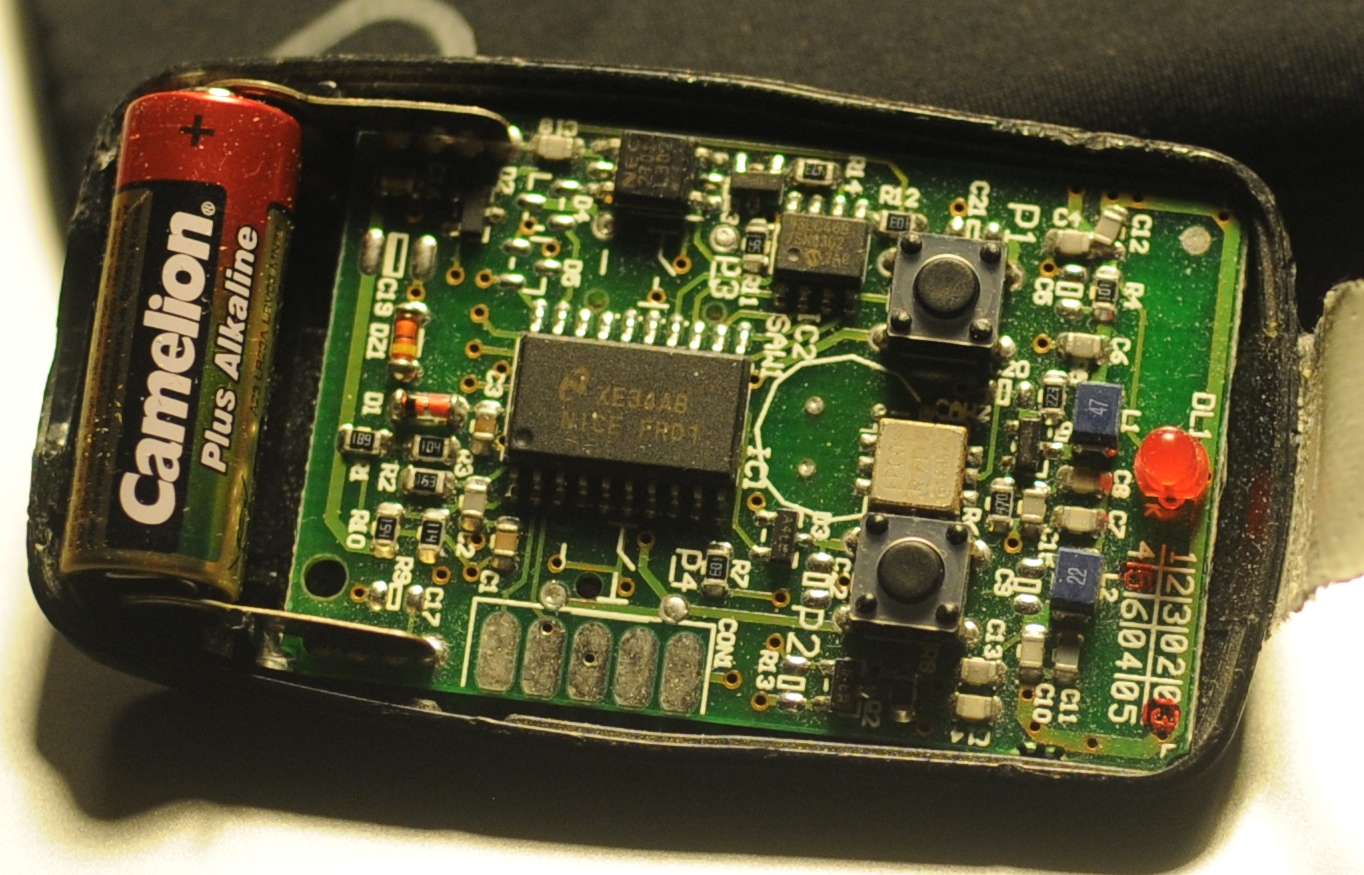
**The solution:** Build a system that reacts to a phone call by opening the gate if the number of the caller is whitelisted.
**What you need:**
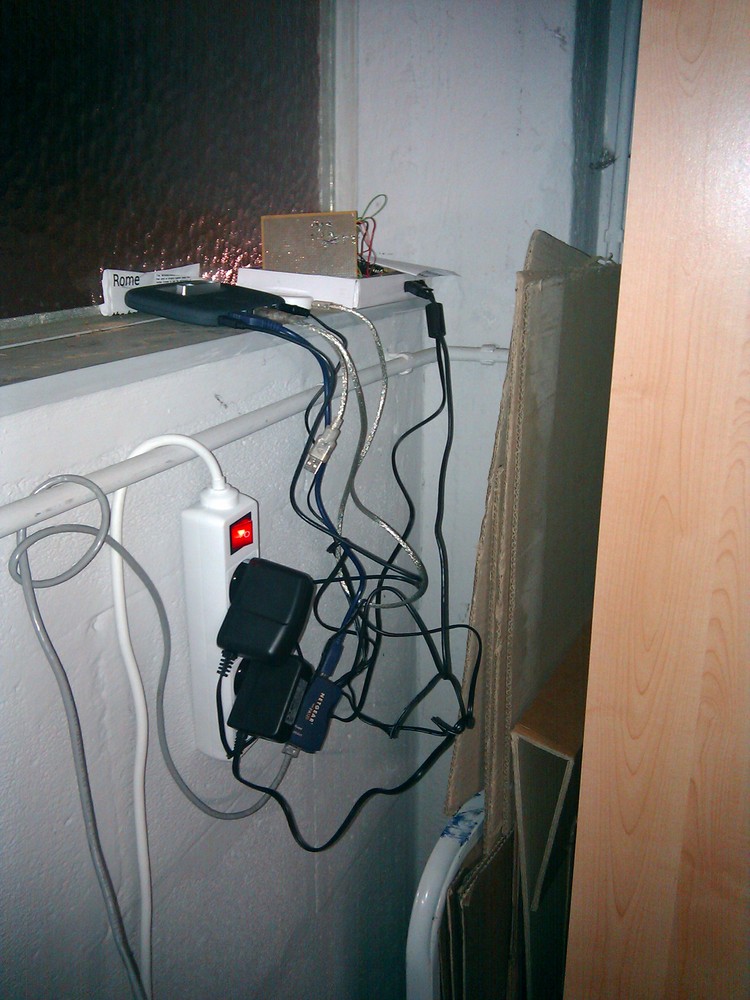
- A [BeagleBoard](http://beagleboard.org/) or some [BeagleBoard alternative](http://beagleboard.org/breeds) with a Linux distribution running on it. Any server running a unix like operating system should be usable.
- A Huaweii e220 or an alternative GSM that supports (a subset of) AT commands and has a USB port.
- A team of hackers that know how to solder something togeher. E.g. The hardware guys of hackerspace Ghent.
- A "python script":\[gatekeeper.py\] that reacts to calls.
**The Hack**: First of all try to get caller id working by following the [Caller ID with Linux and Huawei e220 tutorial](http://0110.be/artikels/lees/Caller_ID_with_Linux_and_Huawei_e220). If this works you can listen to the serial communication using [pySerial](http://pyserial.sourceforge.net/) and react to a call. The following python code shows the wait for call method:
\`\`\`ruby\
def wait_for_call(self):\
self.data_channel.open()\
call_id_pattern = re.compile('.**CLIP.**"\\+(\[0-9\]+)",.\*')\
while True:\
bytes = self.data_channel.inWaiting()\
buffer = self.data_channel.readline(bytes)\
call_id_match = call_id_pattern.match(buffer)\
if call_id_match:\
number = call_id_match.group(1)\
self.handle_call(number)\
\`\`\`
The `handle_call` method ... handles the call.
The second thing that is needed is [a way to send a signal from the beagle board](http://blog.makezine.com/archive/2009/02/blinking_leds_with_the_beagle_board.html) to the remote. Sending a signal from the beagle board using Linux is really simple. The following bash commands initialize, activate and deactivate a pin.
\`\`\`ruby\
echo 168 \> /sys/class/gpio/export\
echo "high" \> /sys/class/gpio/gpio168/direction\
echo "low" \> /sys/class/gpio/gpio168/direction\
\`\`\`
- [gatekeeper.py](https://0110.be/files/attachments/71/gatekeeper.py)
---
## [Caller ID with Linux and Huawei e220](https://0110.be/posts/Caller_ID_with_Linux_and_Huawei_e220.md)
- Published: 2010-04-11T00:00:00Z
- Updated: 2013-12-05T18:19:15Z
- Author: Joren
- ID: 49
- Canonical: https://0110.be/posts/Caller_ID_with_Linux_and_Huawei_e220
- Tags: [0110.be](https://0110.be/tags/0110.be.md), [Code](https://0110.be/tags/Code.md), [Hackerspace Ghent](https://0110.be/tags/Hackerspace%20Ghent.md), [Projecten](https://0110.be/tags/Projecten.md)
This is the scenario: you have a Huawei e220, a linux computer and you want to react to a call from a set of predefined numbers. E.g. [ordering a pizza](https://0110.be/artikels/lees/Order_Pizza_with_USB_Pizza_Button) when you receive a call from a certain number.
The Huawei e220 supports a subset of the [AT commands](http://en.wikipedia.org/wiki/AT_commands), which subset is [an enterprise secret](http://forum.huawei.com/jive4/thread.jspa?threadID=324487) of te Huawei company. So there is no documentation available for the device I bought, thanks Huawei. Anyhow when you attach the e220 to a Linux machine you should get two serial ports:
\`\`\`ruby\
/dev/ttyUSB0\
/dev/ttyUSB1\
\`\`\`
To connect to the devices you can use a serial client. [GNU Screen](http://www.gnu.org/software/screen/) can be used as a serial client like this: `screen /dev/ttyUSB0 115200`. The first device, `ttyUSB0` is used to control `ttyUSB1`, so to enable caller ID on te Huawei e220 you need to send this message to `ttyUSB0`:
\`\`\`ruby\
AT+CLIP=1\
\`\`\`
To check for calls you should listen to `ttyUSB1`. A serial session for `ttyUSB1` looks like:
\`\`\`ruby\
\^BOOT:44594282,0,0,0,6\
\^RSSI:18\
RING\
+CLIP: "+33499311152",145,,,,0\
\^BOOT:44594282,0,0,0,6\
\`\`\`
The `RING` and `CLIP` messages are the most interesting. The `RING` signifies an incoming call, the `CLIP` is the caller ID. The `BOOT` and `RSSI` are some kind of ping messages. The following Python script demonstrates a complete session that enables caller ID, waits for a phone call and prints the number of the caller.
\`\`\`python\
#!/usr/bin/env python\
import serial, re
command_channel = serial.Serial(\
port='/dev/ttyUSB0',\
baudrate=115200,\
parity=serial.PARITY_NONE,\
stopbits=serial.STOPBITS_ONE,\
bytesize=serial.EIGHTBITS\
)\
command_channel.open()\
#enable caller id\
command_channel.write("AT+CLIP=1" + "\\r\\n")\
command_channel.close()
ser = serial.Serial(\
port='/dev/ttyUSB1',\
baudrate=9600,\
parity=serial.PARITY_NONE,\
stopbits=serial.STOPBITS_ONE,\
bytesize=serial.EIGHTBITS\
)
ser.open()
pattern = re.compile('.**CLIP.**"\\+(\[0-9\]+)",.\*')
while 1:\
buffer = ser.read(ser.inWaiting()).strip()\
buffer = buffer.replace("\\n","")\
match = pattern.match(buffer)\
if match:\
number = match.group(1)\
print number\
\`\`\`
---
## [YIN Pitch Tracker in JAVA](https://0110.be/posts/YIN_Pitch_Tracker_in_JAVA.md)
- Published: 2010-04-09T00:00:00Z
- Updated: 2020-11-17T09:04:25Z
- Author: Joren
- ID: 66
- Canonical: https://0110.be/posts/YIN_Pitch_Tracker_in_JAVA
- Tags: [0110.be](https://0110.be/tags/0110.be.md), [Code](https://0110.be/tags/Code.md), [Cultuur](https://0110.be/tags/Cultuur.md), [Muziek](https://0110.be/tags/Muziek.md), [Projecten](https://0110.be/tags/Projecten.md)
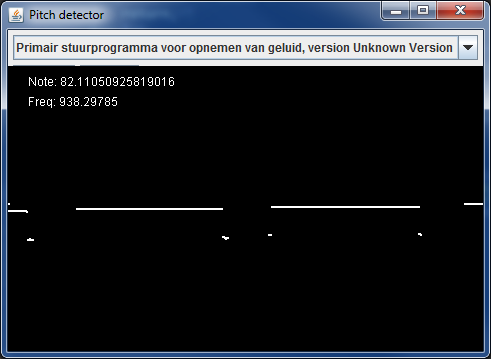
To make [Tarsos](http://0110.be/) more portable I wrote a pitch tracker in pure JAVA using the [YIN algorithm](http://recherche.ircam.fr/equipes/pcm/cheveign/ps/2002_JASA_YIN_proof.pdf) based on the implementation in C of [aubio](http://aubio.org). The implementation also uses some code written by Karl Helgasson and Teun de Lange of the [Jazzperiments project](http://www.jazzperiments.com/jazzperiments.html).
It can be used to perform real time pitch detection or to analyse files. To use it as a real time pitch detector just start the "JAR-file":\[pitch_detector_yin.jar\] by double clicking. To analyse a file execute one of the following. The first results in a list of annotations (text), the second shows the annotations graphically.
\`\`\`ruby\
java -jar pitch_detector_yin.jar flute.novib.mf.C5B5.wav\
java -jar pitch_detector_yin.jar ---file flute.novib.mf.C5B5.wav\
\`\`\`
The provided "flute sample":\[flute.novib.mf.C5B5.wav\] is from [*The Musical Samples* library of the University of Iowa](http://theremin.music.uiowa.edu/MIS.html) and converted to mono wav. The source code of the pitch tracker can be found below.
**Update:** the Yin implementation in Java has been incorporated into the [TarsosDSP project](https://github.com/JorenSix/TarsosDSP). An open source, Real-Time Audio Processing Framework in Java.
- [pitch\_detector\_yin.jar](https://0110.be/files/attachments/66/pitch_detector_yin.jar)
- [pitch\_detector\_yin\_src.zip](https://0110.be/files/attachments/66/pitch_detector_yin_src.zip)
- [flute.novib.mf.C5B5.wav](https://0110.be/files/attachments/66/flute.novib.mf.C5B5.wav)
---
## [Boids 3D with Processing](https://0110.be/posts/Boids_3D_with_Processing.md)
- Published: 2010-01-22T00:00:00Z
- Updated: 2013-12-05T18:19:14Z
- Author: Joren
- ID: 1
- Canonical: https://0110.be/posts/Boids_3D_with_Processing
- Tags: [0110.be](https://0110.be/tags/0110.be.md), [Code](https://0110.be/tags/Code.md), [Portfolio](https://0110.be/tags/Portfolio.md), [Projecten](https://0110.be/tags/Projecten.md)
- [boids\_windows.zip](https://0110.be/files/attachments/1/boids_windows.zip)
- [boids.png](https://0110.be/files/attachments/1/boids.png)
- [boids\_macosx.zip](https://0110.be/files/attachments/1/boids_macosx.zip)
- [boids\_linux.zip](https://0110.be/files/attachments/1/boids_linux.zip)
- [boids\_src.zip](https://0110.be/files/attachments/1/boids_src.zip)
- [peasycam.jar](https://0110.be/files/attachments/1/peasycam.jar)
- [Boids.jar](https://0110.be/files/attachments/1/Boids.jar)
- [core.jar](https://0110.be/files/attachments/1/core.jar)
- [loading.gif](https://0110.be/files/attachments/1/loading.gif)
---
## [Jobsopschool.be](https://0110.be/posts/Jobsopschool.be.md)
- Published: 2010-01-20T00:00:00Z
- Updated: 2013-12-05T18:19:15Z
- Author: Joren
- ID: 10
- Canonical: https://0110.be/posts/Jobsopschool.be
- Tags: [0110.be](https://0110.be/tags/0110.be.md)
[Jobsopschool.be](http://jobsopschool.be) werd door 0110.be ontwikkeld in opdracht van scholengemeenschap Sperregem. Het doel van die webapplicatie is om de administratieve rompslomp bij het zoeken naar en aanwerven van kandidaten voor vervangingen in het onderwijs te vereenvoudigen. Zoek je [vacatures in het basisonderwijs](http://jobsopschool.be?) Neem dan zeker een kijkje op Jobopschool.be.
---
## [Order Pizza with USB Pizza Button](https://0110.be/posts/Order_Pizza_with_USB_Pizza_Button.md)
- Published: 2009-11-11T00:00:00Z
- Updated: 2013-12-05T18:19:15Z
- Author: Joren
- ID: 188
- Canonical: https://0110.be/posts/Order_Pizza_with_USB_Pizza_Button
- Tags: [0110.be](https://0110.be/tags/0110.be.md), [Code](https://0110.be/tags/Code.md), [Hackerspace Ghent](https://0110.be/tags/Hackerspace%20Ghent.md), [Poging tot humor](https://0110.be/tags/Poging%20tot%20humor.md), [Projecten](https://0110.be/tags/Projecten.md)
Recently I bought a big shiny red USB-button. It is big, red and shiny. Initially I planned to use it to deploy new versions of websites to a server but I found a much better use: *ordering pizza*. Graphically the use case translates to something akin to:
If you would like to enhance your life quality leveraging the power of a USB pizza-button: you can! This is what you need:
1. A PC running Linux. This tutorial is specifically geared towards Debian-based distos. YMMV.
2. A big, shiny red USB button. Just google "USB panic button" if you want one.
3. A location where you can order pizzas via a website. I live in Ghent, Belgium and use just-eat.be. Other websites can be supported by modifying a Ruby script.
Technically we need **a driver** to check when the button was pushed, a way to **communicate** the fact that the button was pushed and lastly we need to be able to **react** to the request.
**The driver**: on the internets I found [a driver for the button](http://www.aeracode.org/2009/1/22/panic-button/). Another modification was done to make the driver process a daemon.
**The communication**: The original Python script executed another script on the local pc. A more flexible approach is possible using sockets. With sockets it is possible to notify any computer on a network.
\`\`\`ruby\
if PanicButton().pressed():\
\# create a TCP socket\
s = socket.socket(socket.AF_INET, socket.SOCK_STREAM)\
\# connect to server on the port\
s.connect((SERVER, SERVER_TCP_PORT))\
\# send the order (margherita at restaurant mario)\
s.send("mario: \[margherita_big\]\\n")\
\`\`\`
**The reaction**: a ruby TCP server waits for message from the driver. When it does it automates a HTTP session on a website. It executes a series of HTTP-GET's and POST's. It uses the [mechanize library](http://mechanize.rubyforge.org/mechanize/).
\`\`\`ruby\
login_url = "http://www.just-eat.be/pages/member/login.aspx"\
a = WWW::Mechanize.new\
a.get(login_url) do \|login_page\|\
#post login_form\
login_form = login_page.forms.first\
login_form.txtUser = "username"\
login_form.txtPass = "password"\
a.submit(login_form, login_form.buttons\[1\])\
end\
\`\`\`
Some libraries are needed. For python you need the usb library, the [python deamons lib](http://pypi.python.org/pypi/python-daemon/) needs to be installed seperatly. Setuptools are needed to install the deamons package.
\`\`\`ruby\
sudo apt-get install python-usb python-setuptools\
\`\`\`
Ruby needs rubygems to install the needed mechanize and daemons library. Mechanize needs the libxslt-dev package. You also need the build-essential package to build mechanize.
\`\`\`ruby\
sudo apt-get install rubygems libxslt-dev\
sudo gem install mechanize daemons\
\`\`\`
To automatically start the daemons on boot you can use the [crontab \@reboot directive](http://mkaz.com/ref/unix_cron.html) of the root user. E.g.:
\`\`\`ruby\
`reboot /opt/pizza_service/pizza_daemon.rb
`reboot /opt/pizza_service/pizza_button_driver.py\
\`\`\`
- [order\_pizza\_with\_panic\_button.jpg](https://0110.be/files/attachments/188/order_pizza_with_panic_button.jpg)
- [pizza\_daemon.rb.txt](https://0110.be/files/attachments/188/pizza_daemon.rb.txt)
- [pizza\_server.rb](https://0110.be/files/attachments/188/pizza_server.rb)
- [usb-panic-button.png](https://0110.be/files/attachments/188/usb-panic-button.png)
- [pizza\_button\_driver.py](https://0110.be/files/attachments/188/pizza_button_driver.py)
---
## [Touchatag RFID reader and Ubuntu Linux](https://0110.be/posts/Touchatag_RFID_reader_and_Ubuntu_Linux.md)
- Published: 2009-10-05T00:00:00Z
- Updated: 2013-12-05T18:19:15Z
- Author: Joren
- ID: 56
- Canonical: https://0110.be/posts/Touchatag_RFID_reader_and_Ubuntu_Linux
- Tags: [0110.be](https://0110.be/tags/0110.be.md), [Code](https://0110.be/tags/Code.md), [Harde waren](https://0110.be/tags/Harde%20waren.md), [Projecten](https://0110.be/tags/Projecten.md)

This blog post is about how to use the [Touchatag](http://www.touchatag.com) RFID reader hardware on Ubuntu Linux without using the Touchatag web service.
An RFID reader with tags can used to fire events. With a bit of scripting the events can be handled to do practically any task.
Normally a Touchatag reader is used together with the [Touchatag web service](http://www.touchatag.com/developer/tools/advanced-http-application) but for some RFID applications the web service is just not practical. E.g. for embedded Linux devices without an Internet connection. In this tutorial I wil document how I got the Touchatag hardware working under Ubuntu Linux.
To follow this tutorial you will need:
- Touchatag hardware: the USB reader and some tags
- A Ubuntu Linux computer (I tested 9.10 Karmic Koala and 8.04 )
- SVN to download source code from a repository
The touchatag USB reader works at 13.56MHz (High Frequency RFID) and has a readout distance of about 4 cm (1.5 inch) when used with the touchatag RFID tags. Internally it uses an ACS ACR122U reader with a SAM card. A Linux driver is readily available so when you plug it in `lsusb` you should get something like this:
\`\`\`ruby\
lsusb
Bus 007 Device 001: ID 1d6b:0001 Linux Foundation 1.1 root hub\
Bus 005 Device 004: ID 072e:90dd Advanced Card Systems, Ltd\
\`\`\`
lsusb recognizes the device incorrectly but that's [not a problem](http://code.google.com/p/tageventor/wiki/SupportedReadersAndTags). To read RFID-tags and respond to events additional software is needed: [tagEventor](http://code.google.com/p/tageventor/) is a software library that does just that. It can be downloaded using an svn command:
\`\`\`ruby\
svn export http://tageventor.googlecode.com svn/trunk/ tageventor\
\`\`\`
To compile tagEventor a couple of other software packages or header files should be available on your system. Te [tagEventor software dependencies](http://code.google.com/p/tageventor/wiki/SoftwareDependencies) are described on the [tagEventor wiki](http://code.google.com/p/tageventor/w/list). On Ubuntu (and possibly other Debian based distro's the installation is simple:
\`\`\`ruby\
sudo aptitude install build-essential libpcsclite-dev build-essential pcscd libccid\
#if you need gnome support\
#sudo aptitude install libgtk2.0-dev\
\`\`\`
Now the tricky part. Two header files of the pcsclite package need to be modified (update: this bug is fixed [see here](http://code.google.com/p/tageventor/issues/detail?id=2)). tagEventor builds and can be installed:
\`\`\`ruby\
cd tageventor\
make\
...\
tagEventor BUILT (./bin/Release/tagEventor)
sudo ./install.sh\
...\
\`\`\`
When tagEventor is correctly installed the only thing left is ... to build your application. When an event is fired tagEventor executes the `/etc/tageventor/generic` script with three parameters (see below). Using some kind of [IPC (Inter Process Communication)](http://en.wikipedia.org/wiki/Inter-process_communication) an application can react to events. A simple and flexible way to propagate events (inter-processes, over a network, platform and programming language independent) uses sockets. The code below is the `/etc/tageventor/generic` script (make sure it is executable), it communicates with the server: the second script. To run the server execute `ruby /name/of/server.rb`
\`\`\`ruby\
#!/usr/bin/ruby
1. \$1 = SAM (unique ID of the SAM chip in the smart card reader if exists, "NoSAM" otherwise
2. \$2 = UID (unique ID of the tag, as later we may use wildcard naming)
3. \$3 = Event Type (IN for new tag placed on reader, OUT for tag removed from reader)
require 'socket'
data = ARGV.join('\|')\
puts data
streamSock = TCPSocket.new( "127.0.0.1", 20000 )\
streamSock.send(data, 0)\
streamSock.close\
\`\`\`
\`\`\`ruby\
require "socket"\
dts = TCPServer.new('localhost', 20000)\
loop do\
Thread.start(dts.accept) do \|s\|\
puts s.gets\
s.close\
end\
end\
\`\`\`
The tagEventor software is made by [the Autelic Association](http://www.autelic.org/) a Non-Profit association dedicated to making technology easier to use for all. I would like to thank Andrew Mackenzie, the founder and president of the association for creating the software and the support.
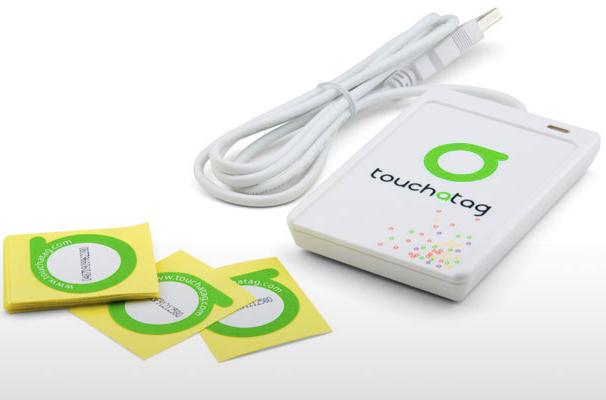
---
## [Jobsopschool](https://0110.be/posts/Jobsopschool.md)
- Published: 2009-03-01T00:00:00Z
- Updated: 2013-12-05T18:19:15Z
- Author: Joren
- ID: 11
- Canonical: https://0110.be/posts/Jobsopschool
- Tags: [0110.be](https://0110.be/tags/0110.be.md), [Code](https://0110.be/tags/Code.md), [Portfolio](https://0110.be/tags/Portfolio.md), [Projecten](https://0110.be/tags/Projecten.md)
Ik heb in opdracht van scholengroep Sperregem een website gemaakt die het vinden van kandidaten voor korte vervangingen vlotter doet verlopen. Mensen met interesse voor [vacatures in het onderwijs](http://jobsopschool.be) in West-Vlaanderen kunnen zich er op inschrijven.
De website heeft enkele voordelen voor verschillende scholen in de scholengroep:
- Het zoeken van kandidaten is erg eenvoudig: na het invoeren van een vacature komt er een lijst met kandidaten met een geschikt profiel die tijdens de vacature beschikbaar zijn.
- Er kunnen e-mail of SMS-berichten verstuurd worden om kandidaten op de hoogte te brengen van een vacature.
- Profielen van kandidaten zijn altijd up-to-date: de kandidaten zijn er zelf verantwoordelijk voor en kandidaten lange tijd niets van zich laten horen worden automatisch op non-actief gezet.
- De historiek van kandidaten wordt automatisch bijgehouden en kan opgezocht worden.
Ook voor de aspirant onderwijzers is de website handig:
- De vacatures zijn publiek zichtbaar, kandidaten kunnen dus actief solliciteren.
- Ze kunnen zelf hun profiel beheren en bijvoorbeeld een vernieuwde versie van hun C.V. uploaden.
- Voor elke kandidaat is een gepersonaliseerde lijst met vacatures beschikbaar (ook via RSS), afgestemd op hun profiel.
Daarnaast is het ook voor de personeelsdienst een handige tool: die kan nu een beter overzicht bewaren over de vacatures en de invulling ervan in de verschillende scholen.
Hieronder staan enkele screenshots.
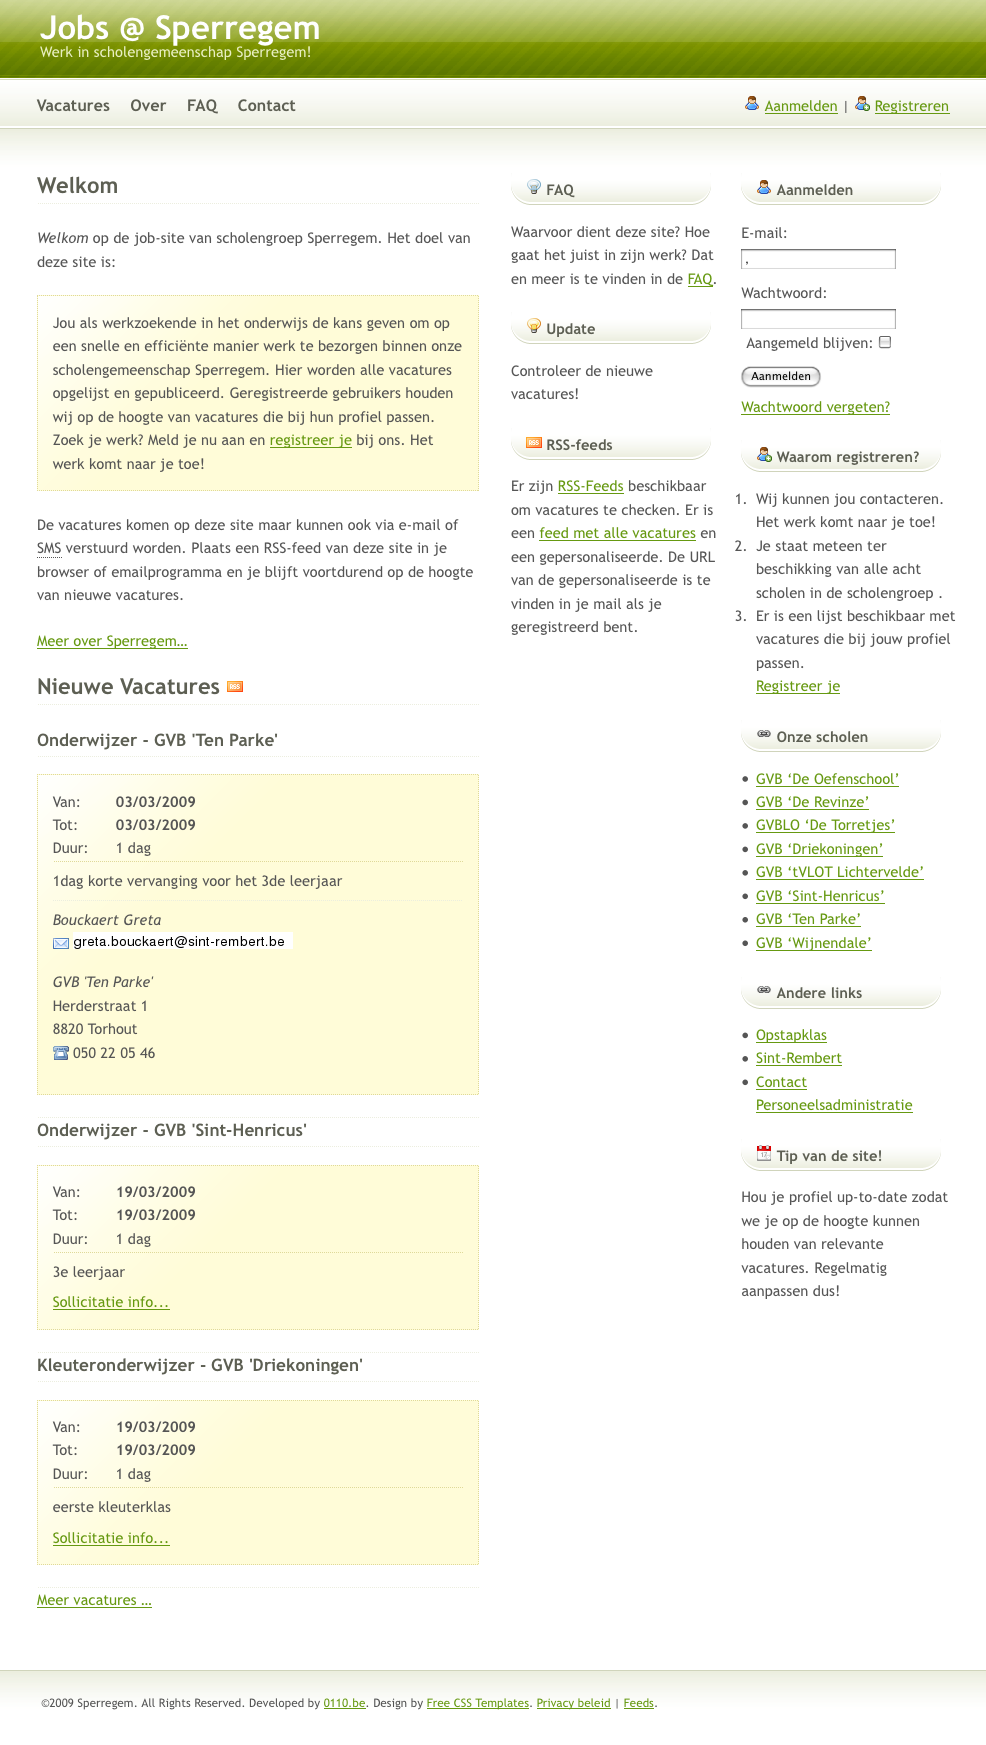
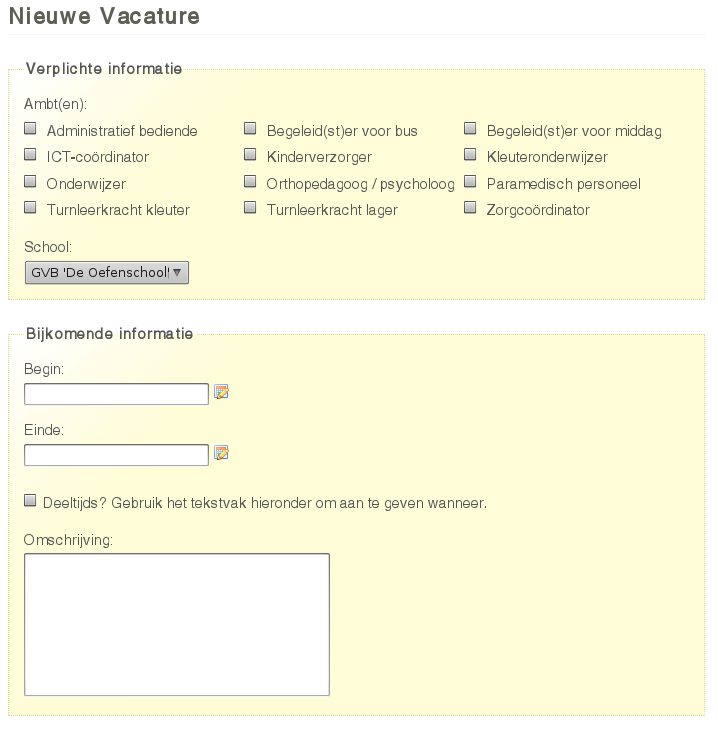
---
## [Vooruit.be vernieuwd](https://0110.be/posts/Vooruit.be_vernieuwd.md)
- Published: 2009-02-27T00:00:00Z
- Updated: 2013-12-05T18:19:15Z
- Author: Joren
- ID: 271
- Canonical: https://0110.be/posts/Vooruit.be_vernieuwd
- Tags: [0110.be](https://0110.be/tags/0110.be.md), [Code](https://0110.be/tags/Code.md), [Cultuur](https://0110.be/tags/Cultuur.md), [Vooruit](https://0110.be/tags/Vooruit.md)

Vandaag is de vernieuwde vooruitwebsite gelanceerd:
> We bieden je nog meer video's, foto's, audiotracks en tekstmateriaal en hebben ook jouw persoonlijke voordelen uitgebreid. Wanneer [je lid wordt van www.vooruit.be](http://vooruit.be/nl/signup), kan je nog steeds je kalender aanvullen, vrienden maken en reacties posten, maar daarnaast krijg je ook *aanbevelingen op maat*, kan je voorstellingen tippen en kan je berichten sturen naar vrienden [\*](http://vooruit.be/nl/headlines/244).
Het gepersonaliseerde aanbevelingssysteem is door Greet Dolvelde en mezelf in het kader van onze thesis: [Collaborative Filtering: Onderzoek & implementatie](https://0110.be/artikels/lees/Collaborative_Filtering%253A_Onderzoek_%2526_implementatie) \[pdf\] ontwikkeld. Dus waar wacht je nog op? [Word lid](http://vooruit.be/nl/signup), check de [aanbevelingen bij concerten](http://vooruit.be/nl/event/1759?genre=concerts) en vooral je gepersonaliseerde aanbevelingen.
Voor de iets minder enthousiaste doorklikkikkers staan hieronder wat screenshots van de verschillende soorten aanbevelingen op [www.vooruit.be](http://vooruit.be):





---
[Older posts](https://0110.be/tags/0110.be.md?page=1)
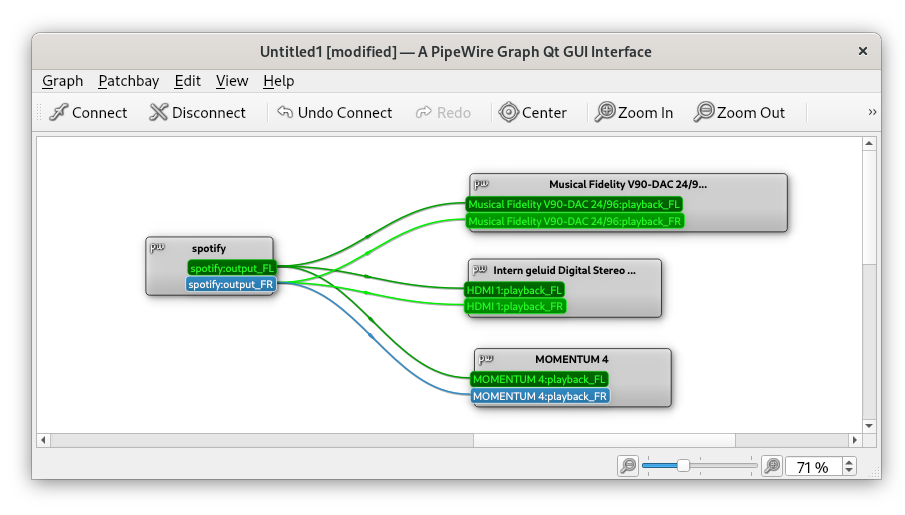


 Fig: *Door projection as imagined by DALL.E*.

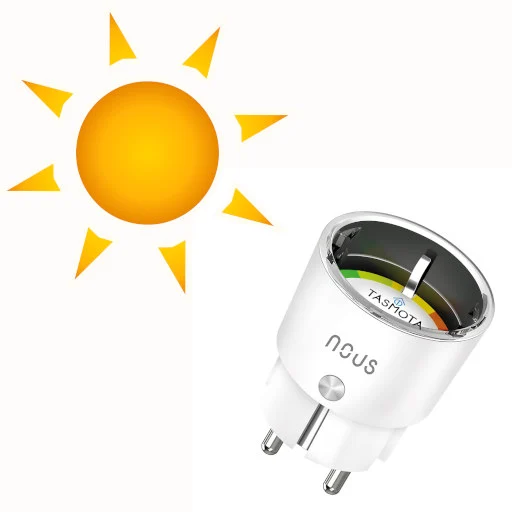

 Fig: stable diffusion imagining a networked music performance
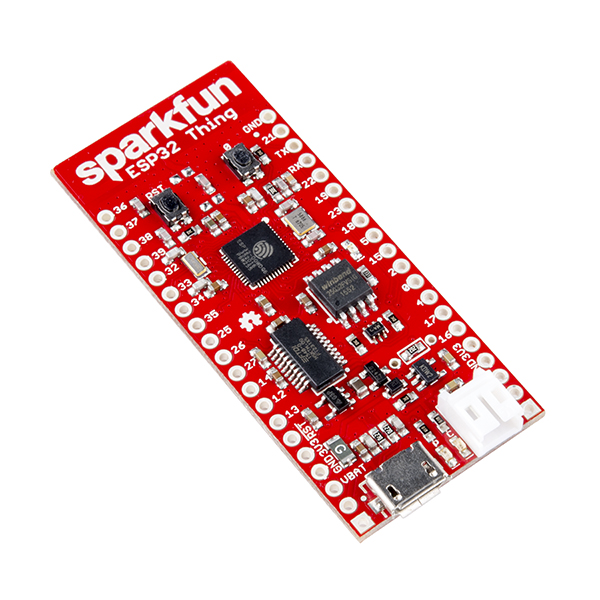 On Saturday the eight of April I gave a workshop on the ESP 32 micro controller at [Newline](http://hackerspace.gent/newline), the yearly hackerspace conference of Hackerspace Ghent. The aim was to provide a hands-on introduction. The participants had to program to make the ESP execute the following:
- Blink
- Connecting to wifi
- Sending data from the ESP32
- Sending data using TCP
- Broadcast data over UDP
- Broadcast data using OSC over UDP
- Broadcasting sensor data over UDP and OSC
- Mesh Networking
At the start of the workshop I gave a "presention":\[2017.04.ESP32_intro.pdf\] as an introduction.
---
## [TarsosLSH in a Photomosaic Web App](https://0110.be/posts/TarsosLSH_in_a_Photomosaic_Web_App.md)
- Published: 2015-01-07T00:00:00Z
- Updated: 2015-01-07T08:52:18Z
- Author: Joren
- ID: 428
- Canonical: https://0110.be/posts/TarsosLSH_in_a_Photomosaic_Web_App
- Tags: [0110.be](https://0110.be/tags/0110.be.md), [Code](https://0110.be/tags/Code.md), [HoGent](https://0110.be/tags/HoGent.md), [Java](https://0110.be/tags/Java.md), [UGent](https://0110.be/tags/UGent.md)
TarsosLSH is a Java library implementing Locality-sensitive Hashing (LSH), a practical nearest neighbor search algorithm for high dimensional vectors that operates in sublinear time. The open source software package is authored by me and is available on GitHub: [TarsosLSH on GitHub](https://github.com/JorenSix/TarsosLSH).
With TarsosLSH, Joseph Hwang and Nicholas Kwon from Rice University created an [Image Mosaic web application](http://image-mosaic.appspot.com/). The application chops an uploaded photo into small blocks. For each block, a color histogram is created and compared with an index of color histograms of reference images. Subsequently each block is replaced with one of the top three nearest neighbors, creating a mosaic. Since high dimensional nearest neighbor search is needed, this is an ideal application for TarsosLSH. The application somewhat proves that TarsosLSH can be used in practical applications, which is comforting.


---
## [Spotify Music Quiz - With a Big Red Button](https://0110.be/posts/Spotify_Music_Quiz_-_With_a_Big_Red_Button.md)
- Published: 2013-02-21T00:00:00Z
- Updated: 2013-12-05T18:19:15Z
- Author: Joren
- ID: 325
- Canonical: https://0110.be/posts/Spotify_Music_Quiz_-_With_a_Big_Red_Button
- Tags: [0110.be](https://0110.be/tags/0110.be.md), [Projecten](https://0110.be/tags/Projecten.md)
This post documents how to implement a simple music quiz with the meta data provided by Spotify and a big red button.
During my last birthday party, organized at [Hackerspace Ghent](http://0x20.be) ,there was an ongoing Spotify music quiz. The concept was rather simple: If music that was playing was created in the same year as I was born, the guests could press a big red button and win a price! If they guessed incorrectly, they were publicly shamed with a [sad trombone](http://www.sadtrombone.com/?play=true). Only one guess for each\
song was allowed.
Below you can find a small videograph which shows the whole thing in action. The music quiz is simple: press the button if the song is created in 1984. In the video, at first a wrong answer is given, then a couple of invalid answers follow. Finally a good answer is given, the song "*The Killing Moon* by Echo & the Bunnymen" is from 1984! Woohoo!
Allright, what did I use to to implement the spotify music quiz:
- A big red Arduino button, attatched by USB to a laptop.
- A system with Spotify.
- A way to access the meta data of the currently playing song in Spotify.
- A Ruby script to connect al the parts and checks answers.
### The Red Button
A nice big red button, which main features are that it is red and big, serves as the main input device for the quiz. To be able to connect the salvaged safety button to a computer via USB, an Arduino Nano is used. The Arduino is loaded with the code from the [debounce tutorial](http://arduino.cc/en/Tutorial/Debounce), basically unchanged. Unfortunately, I could not fit the the FTDI-chip, which provides the USB connection, in the original enclosure. An additional enclosure, the white one seen in the pictures below, was added.
When pressed, the button sends a signal over the serial line. See below how the Ruby Quiz script waits for, and handles such event.
### Get Meta Data from the Currently Playing Song in Spotify
Another requirement for the quiz to work is the ability to get information about the song currently playing in Spotify. On Linux this can be done with the dbus interface for Spotify. The script included below returns information about the artist, album and title of the song. It also detects if Spotify is running or not. Find it, fork it, use it, on [github](https://gist.github.com/JorenSix/5013099)
On Mac OS X, Spotify can be controlled using AppleScript. A script on github shows how to [get meta data about the currently playing song in Spotify, on Mac OS X](https://gist.github.com/JorenSix/5007452).
\`\`\`ruby\
#!/usr/bin/python\
\#
1. now_playing.py
2.
3. Python script to fetch the meta data of the currently playing
4. track in Spotify. This is tested on Ubuntu.
import dbus\
bus = dbus.SessionBus()\
try:\
spotify = bus.get_object('com.spotify.qt', '/')\
iface = dbus.Interface(spotify, 'org.freedesktop.MediaPlayer2')\
meta_data = iface.GetMetadata()\
artistname = ",".join(meta_data\['xesam:artist'\])\
trackname = meta_data\['xesam:title'\]\
albumname = meta_data\['xesam:album'\]\
#Other fields are:\
\# 'xesam:trackNumber', 'xesam:discNumber','mpris:trackid',\
\# 'mpris:length','mpris:artUrl','xesam:autoRating','xesam:contentCreated','xesam:url'\
print str(trackname + " \| " + artistname + " \| " + albumname + " \| Unknown")\
except dbus.exceptions.DBusException:\
print "Spotify is not running."\
\`\`\`
### The Quiz Ruby Script
With the individual part in order, we now need Ruby glue to paste it all together. The [complete music quiz script](https://gist.github.com/JorenSix/5014344) can be found on github. The main loop, below, waits for a button press. If it is pressed the "sad trombone":\[sad_trombone.wav\], "invalid answer":\[cheater.wav\] or "winner":\[winner.wav\] sound is played. The sounds are attached to this post.
\`\`\`ruby\
while true do\
\# Wait for a button press\
data = sp.readline\
\# Fetch meta data about the currently\
\# playing song\
result = \`#{now_playing_command}\`\
\# Parse the meta data\
title,artist,album = parse_result(result)\
#Title is hash key, should be unique within playlist\
key = title\
if responded_to.has_key? key\
puts "Already answered: you cheater"\
play cheater\
elsif correct_answers.has_key? key\
puts "Correct answers: woohoo"\
responded_to\[key\]=true\
play winner\
else\
puts "Incorrect answer: sad trombone"\
responded_to\[key\]=true\
play sad_trombone\
end\
end\
\`\`\`




- [sad\_trombone.wav](https://0110.be/files/attachments/325/sad_trombone.wav)
- [winner.wav](https://0110.be/files/attachments/325/winner.wav)
- [cheater.wav](https://0110.be/files/attachments/325/cheater.wav)
---
## [Text to Speech to Speech Recognition - Am I Sitting in a Room?](https://0110.be/posts/Text_to_Speech_to_Speech_Recognition_-_Am_I_Sitting_in_a_Room%3F.md)
- Published: 2012-03-24T00:00:00Z
- Updated: 2013-12-05T18:19:15Z
- Author: Joren
- ID: 324
- Canonical: https://0110.be/posts/Text_to_Speech_to_Speech_Recognition_-_Am_I_Sitting_in_a_Room%3F
- Tags: [0110.be](https://0110.be/tags/0110.be.md), [Code](https://0110.be/tags/Code.md), [Hackerspace Ghent](https://0110.be/tags/Hackerspace%20Ghent.md), [Muziek](https://0110.be/tags/Muziek.md), [Poging tot humor](https://0110.be/tags/Poging%20tot%20humor.md), [Projecten](https://0110.be/tags/Projecten.md)
On Saturday the eight of April I gave a workshop on the ESP 32 micro controller at [Newline](http://hackerspace.gent/newline), the yearly hackerspace conference of Hackerspace Ghent. The aim was to provide a hands-on introduction. The participants had to program to make the ESP execute the following:
- Blink
- Connecting to wifi
- Sending data from the ESP32
- Sending data using TCP
- Broadcast data over UDP
- Broadcast data using OSC over UDP
- Broadcasting sensor data over UDP and OSC
- Mesh Networking
At the start of the workshop I gave a "presention":\[2017.04.ESP32_intro.pdf\] as an introduction.
---
## [TarsosLSH in a Photomosaic Web App](https://0110.be/posts/TarsosLSH_in_a_Photomosaic_Web_App.md)
- Published: 2015-01-07T00:00:00Z
- Updated: 2015-01-07T08:52:18Z
- Author: Joren
- ID: 428
- Canonical: https://0110.be/posts/TarsosLSH_in_a_Photomosaic_Web_App
- Tags: [0110.be](https://0110.be/tags/0110.be.md), [Code](https://0110.be/tags/Code.md), [HoGent](https://0110.be/tags/HoGent.md), [Java](https://0110.be/tags/Java.md), [UGent](https://0110.be/tags/UGent.md)
TarsosLSH is a Java library implementing Locality-sensitive Hashing (LSH), a practical nearest neighbor search algorithm for high dimensional vectors that operates in sublinear time. The open source software package is authored by me and is available on GitHub: [TarsosLSH on GitHub](https://github.com/JorenSix/TarsosLSH).
With TarsosLSH, Joseph Hwang and Nicholas Kwon from Rice University created an [Image Mosaic web application](http://image-mosaic.appspot.com/). The application chops an uploaded photo into small blocks. For each block, a color histogram is created and compared with an index of color histograms of reference images. Subsequently each block is replaced with one of the top three nearest neighbors, creating a mosaic. Since high dimensional nearest neighbor search is needed, this is an ideal application for TarsosLSH. The application somewhat proves that TarsosLSH can be used in practical applications, which is comforting.


---
## [Spotify Music Quiz - With a Big Red Button](https://0110.be/posts/Spotify_Music_Quiz_-_With_a_Big_Red_Button.md)
- Published: 2013-02-21T00:00:00Z
- Updated: 2013-12-05T18:19:15Z
- Author: Joren
- ID: 325
- Canonical: https://0110.be/posts/Spotify_Music_Quiz_-_With_a_Big_Red_Button
- Tags: [0110.be](https://0110.be/tags/0110.be.md), [Projecten](https://0110.be/tags/Projecten.md)
This post documents how to implement a simple music quiz with the meta data provided by Spotify and a big red button.
During my last birthday party, organized at [Hackerspace Ghent](http://0x20.be) ,there was an ongoing Spotify music quiz. The concept was rather simple: If music that was playing was created in the same year as I was born, the guests could press a big red button and win a price! If they guessed incorrectly, they were publicly shamed with a [sad trombone](http://www.sadtrombone.com/?play=true). Only one guess for each\
song was allowed.
Below you can find a small videograph which shows the whole thing in action. The music quiz is simple: press the button if the song is created in 1984. In the video, at first a wrong answer is given, then a couple of invalid answers follow. Finally a good answer is given, the song "*The Killing Moon* by Echo & the Bunnymen" is from 1984! Woohoo!
Allright, what did I use to to implement the spotify music quiz:
- A big red Arduino button, attatched by USB to a laptop.
- A system with Spotify.
- A way to access the meta data of the currently playing song in Spotify.
- A Ruby script to connect al the parts and checks answers.
### The Red Button
A nice big red button, which main features are that it is red and big, serves as the main input device for the quiz. To be able to connect the salvaged safety button to a computer via USB, an Arduino Nano is used. The Arduino is loaded with the code from the [debounce tutorial](http://arduino.cc/en/Tutorial/Debounce), basically unchanged. Unfortunately, I could not fit the the FTDI-chip, which provides the USB connection, in the original enclosure. An additional enclosure, the white one seen in the pictures below, was added.
When pressed, the button sends a signal over the serial line. See below how the Ruby Quiz script waits for, and handles such event.
### Get Meta Data from the Currently Playing Song in Spotify
Another requirement for the quiz to work is the ability to get information about the song currently playing in Spotify. On Linux this can be done with the dbus interface for Spotify. The script included below returns information about the artist, album and title of the song. It also detects if Spotify is running or not. Find it, fork it, use it, on [github](https://gist.github.com/JorenSix/5013099)
On Mac OS X, Spotify can be controlled using AppleScript. A script on github shows how to [get meta data about the currently playing song in Spotify, on Mac OS X](https://gist.github.com/JorenSix/5007452).
\`\`\`ruby\
#!/usr/bin/python\
\#
1. now_playing.py
2.
3. Python script to fetch the meta data of the currently playing
4. track in Spotify. This is tested on Ubuntu.
import dbus\
bus = dbus.SessionBus()\
try:\
spotify = bus.get_object('com.spotify.qt', '/')\
iface = dbus.Interface(spotify, 'org.freedesktop.MediaPlayer2')\
meta_data = iface.GetMetadata()\
artistname = ",".join(meta_data\['xesam:artist'\])\
trackname = meta_data\['xesam:title'\]\
albumname = meta_data\['xesam:album'\]\
#Other fields are:\
\# 'xesam:trackNumber', 'xesam:discNumber','mpris:trackid',\
\# 'mpris:length','mpris:artUrl','xesam:autoRating','xesam:contentCreated','xesam:url'\
print str(trackname + " \| " + artistname + " \| " + albumname + " \| Unknown")\
except dbus.exceptions.DBusException:\
print "Spotify is not running."\
\`\`\`
### The Quiz Ruby Script
With the individual part in order, we now need Ruby glue to paste it all together. The [complete music quiz script](https://gist.github.com/JorenSix/5014344) can be found on github. The main loop, below, waits for a button press. If it is pressed the "sad trombone":\[sad_trombone.wav\], "invalid answer":\[cheater.wav\] or "winner":\[winner.wav\] sound is played. The sounds are attached to this post.
\`\`\`ruby\
while true do\
\# Wait for a button press\
data = sp.readline\
\# Fetch meta data about the currently\
\# playing song\
result = \`#{now_playing_command}\`\
\# Parse the meta data\
title,artist,album = parse_result(result)\
#Title is hash key, should be unique within playlist\
key = title\
if responded_to.has_key? key\
puts "Already answered: you cheater"\
play cheater\
elsif correct_answers.has_key? key\
puts "Correct answers: woohoo"\
responded_to\[key\]=true\
play winner\
else\
puts "Incorrect answer: sad trombone"\
responded_to\[key\]=true\
play sad_trombone\
end\
end\
\`\`\`




- [sad\_trombone.wav](https://0110.be/files/attachments/325/sad_trombone.wav)
- [winner.wav](https://0110.be/files/attachments/325/winner.wav)
- [cheater.wav](https://0110.be/files/attachments/325/cheater.wav)
---
## [Text to Speech to Speech Recognition - Am I Sitting in a Room?](https://0110.be/posts/Text_to_Speech_to_Speech_Recognition_-_Am_I_Sitting_in_a_Room%3F.md)
- Published: 2012-03-24T00:00:00Z
- Updated: 2013-12-05T18:19:15Z
- Author: Joren
- ID: 324
- Canonical: https://0110.be/posts/Text_to_Speech_to_Speech_Recognition_-_Am_I_Sitting_in_a_Room%3F
- Tags: [0110.be](https://0110.be/tags/0110.be.md), [Code](https://0110.be/tags/Code.md), [Hackerspace Ghent](https://0110.be/tags/Hackerspace%20Ghent.md), [Muziek](https://0110.be/tags/Muziek.md), [Poging tot humor](https://0110.be/tags/Poging%20tot%20humor.md), [Projecten](https://0110.be/tags/Projecten.md)
 This post is about a hack I did for the 2012 [Amsterdam music hack days](http://amsterdam.musichackday.org/2012/index.php?page=Main+page). From the website:
> The Amsterdam Music Hack Day is a full weekend of hacking in which participants will conceptualize, create and present their projects. Music + software + mobile + hardware + art + the web. Anything goes as long as it's music related
The hackathon was organized at the NiMK(Nederlands instituut voor Media Kunst) the 25th and 24th of May. My hack tries to let a phone start a conversation on its own. It does this by speaking a text and listening to the spoken text with speech recognition. The speech recognition introduces all kinds of interesting permutations of the original text. The recognized text is spoken again and so a dreamlike, unique nonsensical discussion starts. It lets you hear what goes on in the mind of the phone.
The idea is based on Alvin Lucier's *I am Sitting in a Room* form 1969 which is embedded below. He used analogue tapes to generate a similar recursive loop. It is a better implementation of [something I did a couple of years ago](http://0110.be/artikels/lees/Text_To_Speech_Recognition).
The implementation is done with Android and its API's. Both speech recognition and text to speech are available on android. Those API's are used and a user interface shows the recognized text. An example of a session can be found below:
To install the application you can download "Tryalogue.apk":\[Tryalogue.apk\] of use the QR-code below. You need Android 2.3 with Voice Recognition and TTS installed. Also needed is an internet connection. "The source":\[Tryalogue.zip\] is also up for grabs.
This post is about a hack I did for the 2012 [Amsterdam music hack days](http://amsterdam.musichackday.org/2012/index.php?page=Main+page). From the website:
> The Amsterdam Music Hack Day is a full weekend of hacking in which participants will conceptualize, create and present their projects. Music + software + mobile + hardware + art + the web. Anything goes as long as it's music related
The hackathon was organized at the NiMK(Nederlands instituut voor Media Kunst) the 25th and 24th of May. My hack tries to let a phone start a conversation on its own. It does this by speaking a text and listening to the spoken text with speech recognition. The speech recognition introduces all kinds of interesting permutations of the original text. The recognized text is spoken again and so a dreamlike, unique nonsensical discussion starts. It lets you hear what goes on in the mind of the phone.
The idea is based on Alvin Lucier's *I am Sitting in a Room* form 1969 which is embedded below. He used analogue tapes to generate a similar recursive loop. It is a better implementation of [something I did a couple of years ago](http://0110.be/artikels/lees/Text_To_Speech_Recognition).
The implementation is done with Android and its API's. Both speech recognition and text to speech are available on android. Those API's are used and a user interface shows the recognized text. An example of a session can be found below:
To install the application you can download "Tryalogue.apk":\[Tryalogue.apk\] of use the QR-code below. You need Android 2.3 with Voice Recognition and TTS installed. Also needed is an internet connection. "The source":\[Tryalogue.zip\] is also up for grabs.

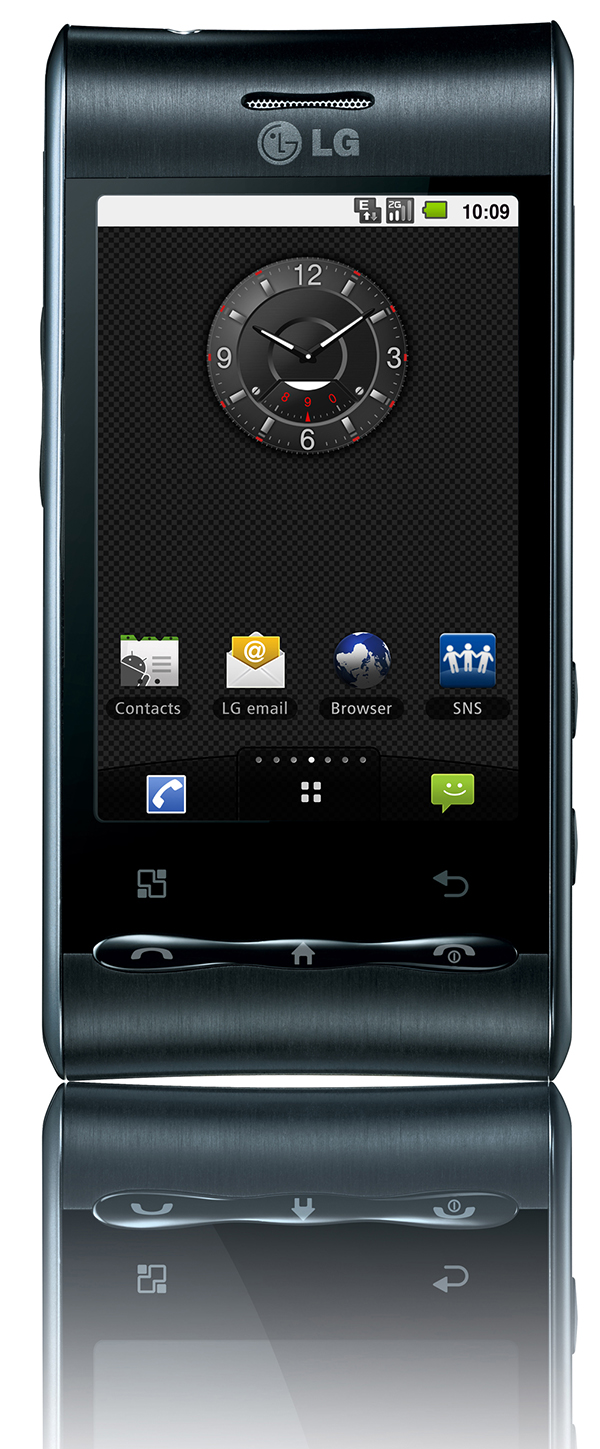 I have upgraded the operating system on my LG GT540 Optimus from the stock Android 1.6 to Android Gingerbread 2.3.4. I followed this [updgrade procedure](http://androidforums.com/optimus-gt540-all-things-root/352239-android-2-3-4-gingerbread-lg-gt540-new-method.html).
It is well worth it to spend some time upgrading the phone, especially from 1.6. Everything feels a lot faster and the upgraded applications, e.g. Gallery, are nicely improved.
The main reason I upgraded my phone is to get the open source accessory development kit (ADK) for Android working. I got the [DemoKit application](http://developer.android.com/guide/topics/usb/adk.html#running-demokit) working after some time but need to do some more experiments to see if the hardware actually works: I am waiting for a USB Host Shield for Arduino. To be continued...
I have upgraded the operating system on my LG GT540 Optimus from the stock Android 1.6 to Android Gingerbread 2.3.4. I followed this [updgrade procedure](http://androidforums.com/optimus-gt540-all-things-root/352239-android-2-3-4-gingerbread-lg-gt540-new-method.html).
It is well worth it to spend some time upgrading the phone, especially from 1.6. Everything feels a lot faster and the upgraded applications, e.g. Gallery, are nicely improved.
The main reason I upgraded my phone is to get the open source accessory development kit (ADK) for Android working. I got the [DemoKit application](http://developer.android.com/guide/topics/usb/adk.html#running-demokit) working after some time but need to do some more experiments to see if the hardware actually works: I am waiting for a USB Host Shield for Arduino. To be continued...
 TwinSeats is een website / online initiatief om nieuwe mensen te leren kennen. Met hen deel je dezelfde culturele interesse en ga je vervolgens samen naar deze of gene voorstelling. Door events centraal te stellen kan TwinSeats uitzonderlijke cultuurburen zoeken. Leden vinden die cultuurburen dankzij een gezamenlijke voorliefde voor een artiest of attractie of eender welke bezigheid in de vrijetijdssfeer.
Het prototype is ondertussen terug te vinden op [TwinSeats.be](http://twinseats.be). Let wel dit is in enkele uren in elkaar geflanst en is verre van 'af', het achterliggende concept is belangrijker.
Samen met Wa Kank Doen van SumoCoders werden we door de jury tot winnaar uitgeroepen. Maandag verscheen er [een artikel in de Standaard over AppsForGhent met een vermelding van TwinSeats](http://www.standaard.be/artikel/detail.aspx?artikelid=IV3A3TCU). Op de Apps For Ghent site is uiteraard ook iets te vinden [over TwinSeats](http://appsforghent.be/?post_type=apps&p=161) ook het [juryverslag](http://appsforghent.be/?page_id=223) is er te vinden. Zoals het hoort bij die categorie evenementen werd ook wat [afgetweet](http://search.twitter.com/search?q=AppsforGhent).
Er is ook een publieksprijs verbonden aan AppsForGhent die wordt over enkele weken uitgereikt.
---
## [Find the MAC Address of your Android Device](https://0110.be/posts/Find_the_MAC_Address_of_your_Android_Device.md)
- Published: 2011-01-13T00:00:00Z
- Updated: 2013-12-05T18:19:15Z
- Author: Joren
- ID: 316
- Canonical: https://0110.be/posts/Find_the_MAC_Address_of_your_Android_Device
- Tags: [0110.be](https://0110.be/tags/0110.be.md), [Hackerspace Ghent](https://0110.be/tags/Hackerspace%20Ghent.md)
Just a quick hint. If you ever need to find the MAC address of your Android device, and who doesn't, check this file:
\`\`\`ruby\
/sys/devices/virtual/net/wlan0\
\`\`\`
You can read the file with the Astro File Manager.
---
## [Remote Port Forwarding with Ubuntu 8.04 and OpenSSH 4.7](https://0110.be/posts/Remote_Port_Forwarding_with_Ubuntu_8.04_and_OpenSSH_4.7.md)
- Published: 2011-01-10T00:00:00Z
- Updated: 2013-12-05T18:19:15Z
- Author: Joren
- ID: 315
- Canonical: https://0110.be/posts/Remote_Port_Forwarding_with_Ubuntu_8.04_and_OpenSSH_4.7
- Tags: [0110.be](https://0110.be/tags/0110.be.md), [Code](https://0110.be/tags/Code.md)
TwinSeats is een website / online initiatief om nieuwe mensen te leren kennen. Met hen deel je dezelfde culturele interesse en ga je vervolgens samen naar deze of gene voorstelling. Door events centraal te stellen kan TwinSeats uitzonderlijke cultuurburen zoeken. Leden vinden die cultuurburen dankzij een gezamenlijke voorliefde voor een artiest of attractie of eender welke bezigheid in de vrijetijdssfeer.
Het prototype is ondertussen terug te vinden op [TwinSeats.be](http://twinseats.be). Let wel dit is in enkele uren in elkaar geflanst en is verre van 'af', het achterliggende concept is belangrijker.
Samen met Wa Kank Doen van SumoCoders werden we door de jury tot winnaar uitgeroepen. Maandag verscheen er [een artikel in de Standaard over AppsForGhent met een vermelding van TwinSeats](http://www.standaard.be/artikel/detail.aspx?artikelid=IV3A3TCU). Op de Apps For Ghent site is uiteraard ook iets te vinden [over TwinSeats](http://appsforghent.be/?post_type=apps&p=161) ook het [juryverslag](http://appsforghent.be/?page_id=223) is er te vinden. Zoals het hoort bij die categorie evenementen werd ook wat [afgetweet](http://search.twitter.com/search?q=AppsforGhent).
Er is ook een publieksprijs verbonden aan AppsForGhent die wordt over enkele weken uitgereikt.
---
## [Find the MAC Address of your Android Device](https://0110.be/posts/Find_the_MAC_Address_of_your_Android_Device.md)
- Published: 2011-01-13T00:00:00Z
- Updated: 2013-12-05T18:19:15Z
- Author: Joren
- ID: 316
- Canonical: https://0110.be/posts/Find_the_MAC_Address_of_your_Android_Device
- Tags: [0110.be](https://0110.be/tags/0110.be.md), [Hackerspace Ghent](https://0110.be/tags/Hackerspace%20Ghent.md)
Just a quick hint. If you ever need to find the MAC address of your Android device, and who doesn't, check this file:
\`\`\`ruby\
/sys/devices/virtual/net/wlan0\
\`\`\`
You can read the file with the Astro File Manager.
---
## [Remote Port Forwarding with Ubuntu 8.04 and OpenSSH 4.7](https://0110.be/posts/Remote_Port_Forwarding_with_Ubuntu_8.04_and_OpenSSH_4.7.md)
- Published: 2011-01-10T00:00:00Z
- Updated: 2013-12-05T18:19:15Z
- Author: Joren
- ID: 315
- Canonical: https://0110.be/posts/Remote_Port_Forwarding_with_Ubuntu_8.04_and_OpenSSH_4.7
- Tags: [0110.be](https://0110.be/tags/0110.be.md), [Code](https://0110.be/tags/Code.md)
 With this post I would like to draw attention to the fact that remote port forwarding with OpenSSH 4.7 on Ubuntu 8.04.1 does not work as expected.
If you follow the instructions of a [SSH remote port forwarding tutorial](http://www.debianadmin.com/howto-use-ssh-local-and-remote-port-forwarding.html) everything goes well until you want to allow everyone to access the forwarded port (not just localhost). The problem arises when binding the forwarded port to an interface. Even with `GatewayPorts yes` present in `/etc/ssh/sshd_config` the following command shows that it went wrong:
\`\`\`ruby\
user@local\$ssh -R 2222:localhost:22 user@remote\
user@remote\$sudo netstat -lntp #on the remote server\
Active Internet connections (only servers)\
Proto Recv-Q Send-Q Local Address Foreign Address State\
tcp6 0 0 ::1:2222 :::\* LISTEN\
\`\`\`
It listens only via IPv6 and only on localhost an not on every interface (as per request by defining `GatewayPorts yes`). The `netstat` command should yield this output:
\`\`\`ruby\
user@local\$ssh -R 2222:localhost:22 user@remote\
user@remote\$sudo netstat -lntp #on the remote server\
Active Internet connections (only servers)\
Proto Recv-Q Send-Q Local Address Foreign Address State\
tcp 0 0 0.0.0.0:2222 0.0.0.0:\* LISTEN\
\`\`\`
I do not really know here it goes wrong but there is an easy workaround. By defining both
\`\`\`ruby\
GatewayPorts yes\
AddressFamily inet\
\`\`\`
in `/etc/ssh/sshd_config` remote port forwarding works fine but you lose IPv6 connectivity (this due to the `AddressFamily` setting). Another solution is to use more up to date software: the bug is not present in Ubuntu 10.04 with OpenSSH 5.3 (I don't know if it is an Ubuntu or OpenSSH bug, or even a configuration issue.
I have been struggling with this issue for a couple of hours and, with this blog post, I hope I can prevent someone else from doing the same.
---
## [Oneliner to Install ssh-copy-id on Mac OS X](https://0110.be/posts/Oneliner_to_Install_ssh-copy-id_on_Mac_OS_X.md)
- Published: 2010-12-25T00:00:00Z
- Updated: 2013-12-05T18:19:15Z
- Author: Joren
- ID: 314
- Canonical: https://0110.be/posts/Oneliner_to_Install_ssh-copy-id_on_Mac_OS_X
- Tags: [0110.be](https://0110.be/tags/0110.be.md), [Code](https://0110.be/tags/Code.md), [Mac OS X](https://0110.be/tags/Mac%20OS%20X.md)
`ssh-copy-id` is a practical bash script, installed by default on Ubuntu. The script is used to distribute public keys. The following oneliner makes it available on Mac OS X:
\`\`\`ruby\
sudo bash \< \<( curl ---silent http://0110.be\[install-ssh-copy-id.bash\] )\
\`\`\`\
This oneliner does three things:
1. It copies `ssh-copy-id` from this website to `/bin/ssh-copy-id`.
2. It makes sure that `ssh-copy-id` is executable, using `chmod`.
3. There is no three
The install procedure needs superuser rights because it writes in the `/bin` folder. Executing scripts from untrusted sources with superuser rights is actually really, really, extremely dangerous. But in this case it is rather innocent.
The `ssh-copy-id` script is the one provided with Ubuntu and Debian, I assume it is GPL'ed. I have not modified it for Mac OS X but it seems to behave as expected. I have only tested the install script and behavior on 10.6.5, YMMV (Your Mileage May Vary).
- [ssh-copy-id.txt](https://0110.be/files/attachments/314/ssh-copy-id.txt)
- [install-ssh-copy-id.bash](https://0110.be/files/attachments/314/install-ssh-copy-id.bash)
- [install-ssh-copy-id.bash](https://0110.be/files/attachments/314/install-ssh-copy-id.bash)
---
## [How to Develop for LG GT540 Optimus on Ubuntu](https://0110.be/posts/How_to_Develop_for_LG_GT540_Optimus_on_Ubuntu.md)
- Published: 2010-09-17T00:00:00Z
- Updated: 2013-12-05T18:19:15Z
- Author: Joren
- ID: 312
- Canonical: https://0110.be/posts/How_to_Develop_for_LG_GT540_Optimus_on_Ubuntu
- Tags: [0110.be](https://0110.be/tags/0110.be.md), [Code](https://0110.be/tags/Code.md), [Hackerspace Ghent](https://0110.be/tags/Hackerspace%20Ghent.md)
This post describes a crucial aspect of how to connect an android phone, the LG GT540 Optimus, to an Ubunu Linux computer. The method is probably similar on different UNIX like platforms with different phones.
To recognize the phone when it is connected via usb you need to create an UDEV rule. Create the file `/etc/udev/rules.d/29.lg545.rules` with following contents:
\`\`\`ruby\
SUBSYSTEM\"usb\",ATTRS{idVendor}"1004",ATTRS{idProduct}=="61b4",MODE="0666"\
\`\`\`
On the phone you need to enable debugging using the settings and (this is rather important) make sure that the "mass storage only" setting is disabled.
[Rooting](http://android.modaco.com/content/lg-gt540-optimus-gt540-modaco-com/310737/how-to-root-your-lg-gt540/) the device makes sure you have superuser rights. Installing the android SDK is [well documented](http://developer.android.com/sdk/index.html).
Good luck!
---
## [OpenRD - A Low Power Server Running Debian on ARM](https://0110.be/posts/OpenRD_-_A_Low_Power_Server_Running_Debian_on_ARM.md)
- Published: 2010-08-05T00:00:00Z
- Updated: 2013-12-05T18:19:15Z
- Author: Joren
- ID: 54
- Canonical: https://0110.be/posts/OpenRD_-_A_Low_Power_Server_Running_Debian_on_ARM
- Tags: [0110.be](https://0110.be/tags/0110.be.md), [Harde waren](https://0110.be/tags/Harde%20waren.md), [Projecten](https://0110.be/tags/Projecten.md)
With this post I would like to draw attention to the fact that remote port forwarding with OpenSSH 4.7 on Ubuntu 8.04.1 does not work as expected.
If you follow the instructions of a [SSH remote port forwarding tutorial](http://www.debianadmin.com/howto-use-ssh-local-and-remote-port-forwarding.html) everything goes well until you want to allow everyone to access the forwarded port (not just localhost). The problem arises when binding the forwarded port to an interface. Even with `GatewayPorts yes` present in `/etc/ssh/sshd_config` the following command shows that it went wrong:
\`\`\`ruby\
user@local\$ssh -R 2222:localhost:22 user@remote\
user@remote\$sudo netstat -lntp #on the remote server\
Active Internet connections (only servers)\
Proto Recv-Q Send-Q Local Address Foreign Address State\
tcp6 0 0 ::1:2222 :::\* LISTEN\
\`\`\`
It listens only via IPv6 and only on localhost an not on every interface (as per request by defining `GatewayPorts yes`). The `netstat` command should yield this output:
\`\`\`ruby\
user@local\$ssh -R 2222:localhost:22 user@remote\
user@remote\$sudo netstat -lntp #on the remote server\
Active Internet connections (only servers)\
Proto Recv-Q Send-Q Local Address Foreign Address State\
tcp 0 0 0.0.0.0:2222 0.0.0.0:\* LISTEN\
\`\`\`
I do not really know here it goes wrong but there is an easy workaround. By defining both
\`\`\`ruby\
GatewayPorts yes\
AddressFamily inet\
\`\`\`
in `/etc/ssh/sshd_config` remote port forwarding works fine but you lose IPv6 connectivity (this due to the `AddressFamily` setting). Another solution is to use more up to date software: the bug is not present in Ubuntu 10.04 with OpenSSH 5.3 (I don't know if it is an Ubuntu or OpenSSH bug, or even a configuration issue.
I have been struggling with this issue for a couple of hours and, with this blog post, I hope I can prevent someone else from doing the same.
---
## [Oneliner to Install ssh-copy-id on Mac OS X](https://0110.be/posts/Oneliner_to_Install_ssh-copy-id_on_Mac_OS_X.md)
- Published: 2010-12-25T00:00:00Z
- Updated: 2013-12-05T18:19:15Z
- Author: Joren
- ID: 314
- Canonical: https://0110.be/posts/Oneliner_to_Install_ssh-copy-id_on_Mac_OS_X
- Tags: [0110.be](https://0110.be/tags/0110.be.md), [Code](https://0110.be/tags/Code.md), [Mac OS X](https://0110.be/tags/Mac%20OS%20X.md)
`ssh-copy-id` is a practical bash script, installed by default on Ubuntu. The script is used to distribute public keys. The following oneliner makes it available on Mac OS X:
\`\`\`ruby\
sudo bash \< \<( curl ---silent http://0110.be\[install-ssh-copy-id.bash\] )\
\`\`\`\
This oneliner does three things:
1. It copies `ssh-copy-id` from this website to `/bin/ssh-copy-id`.
2. It makes sure that `ssh-copy-id` is executable, using `chmod`.
3. There is no three
The install procedure needs superuser rights because it writes in the `/bin` folder. Executing scripts from untrusted sources with superuser rights is actually really, really, extremely dangerous. But in this case it is rather innocent.
The `ssh-copy-id` script is the one provided with Ubuntu and Debian, I assume it is GPL'ed. I have not modified it for Mac OS X but it seems to behave as expected. I have only tested the install script and behavior on 10.6.5, YMMV (Your Mileage May Vary).
- [ssh-copy-id.txt](https://0110.be/files/attachments/314/ssh-copy-id.txt)
- [install-ssh-copy-id.bash](https://0110.be/files/attachments/314/install-ssh-copy-id.bash)
- [install-ssh-copy-id.bash](https://0110.be/files/attachments/314/install-ssh-copy-id.bash)
---
## [How to Develop for LG GT540 Optimus on Ubuntu](https://0110.be/posts/How_to_Develop_for_LG_GT540_Optimus_on_Ubuntu.md)
- Published: 2010-09-17T00:00:00Z
- Updated: 2013-12-05T18:19:15Z
- Author: Joren
- ID: 312
- Canonical: https://0110.be/posts/How_to_Develop_for_LG_GT540_Optimus_on_Ubuntu
- Tags: [0110.be](https://0110.be/tags/0110.be.md), [Code](https://0110.be/tags/Code.md), [Hackerspace Ghent](https://0110.be/tags/Hackerspace%20Ghent.md)
This post describes a crucial aspect of how to connect an android phone, the LG GT540 Optimus, to an Ubunu Linux computer. The method is probably similar on different UNIX like platforms with different phones.
To recognize the phone when it is connected via usb you need to create an UDEV rule. Create the file `/etc/udev/rules.d/29.lg545.rules` with following contents:
\`\`\`ruby\
SUBSYSTEM\"usb\",ATTRS{idVendor}"1004",ATTRS{idProduct}=="61b4",MODE="0666"\
\`\`\`
On the phone you need to enable debugging using the settings and (this is rather important) make sure that the "mass storage only" setting is disabled.
[Rooting](http://android.modaco.com/content/lg-gt540-optimus-gt540-modaco-com/310737/how-to-root-your-lg-gt540/) the device makes sure you have superuser rights. Installing the android SDK is [well documented](http://developer.android.com/sdk/index.html).
Good luck!
---
## [OpenRD - A Low Power Server Running Debian on ARM](https://0110.be/posts/OpenRD_-_A_Low_Power_Server_Running_Debian_on_ARM.md)
- Published: 2010-08-05T00:00:00Z
- Updated: 2013-12-05T18:19:15Z
- Author: Joren
- ID: 54
- Canonical: https://0110.be/posts/OpenRD_-_A_Low_Power_Server_Running_Debian_on_ARM
- Tags: [0110.be](https://0110.be/tags/0110.be.md), [Harde waren](https://0110.be/tags/Harde%20waren.md), [Projecten](https://0110.be/tags/Projecten.md)
 \
This blog post comments on using the Marvell OpenRD SoC(System on a Chip) as a low power multipurpose home server.
### The Hardware
The specifications of the [OpenRD SoC](http://open-rd.org) are very similar to the better known [SheevaPlug](http://en.wikipedia.org/wiki/SheevaPlug) devices, so it has 512MB DDR2 RAM, an 1.2GHz ARM processor and 512MB internal flash. To be more precise the OpenRD SoC is essentially a SheevaPlug in a different form factor. The main advantage of this form factor is the number of available connections: 7xUSB, SATA, eSATA, 2xGb Ethernet, VGA, Audio, ... which make the device a lot more extendable and practical as a mulitpurpose home server.
### The Software
Thanks to the work of [Dr. Martin Michlmayr](http://www.cyrius.com) there is a Debian port for the Kirkwood platform readily available. He even wrote a tutorial on [how to install Debian on a SheevaPlug](http://www.cyrius.com/debian/kirkwood/sheevaplug/install.html). Installing Debian on an OpenRD is exactly the same except for one important detail: the `arcNumber` variable.
Once Debian is installed you can `apt-get` or `aptitude` almost all the software you are used to: webserver, samba, ruby, ...
### The Alternatives
- [Sheevaplug](http://en.wikipedia.org/wiki/SheevaPlug)
- [Beagle Board](http://beagleboard.org) or other [OMAP3 SoC's](http://processors.wiki.ti.com/index.php?title=OMAP3_Boards). The IGEPv2 e.g. has wireless and wired network connections.
- [Alix system Boards](http://www.pcengines.ch/alix.htm) are mostly x86 based.
- [NSLU2](http://en.wikipedia.org/wiki/NSLU2) An ARM platform.


---
## [Doorhacking: Opening a Door With Your Cellphone](https://0110.be/posts/Doorhacking%3A_Opening_a_Door_With_Your_Cellphone.md)
- Published: 2010-04-22T00:00:00Z
- Updated: 2013-12-05T18:19:15Z
- Author: Joren
- ID: 71
- Canonical: https://0110.be/posts/Doorhacking%3A_Opening_a_Door_With_Your_Cellphone
- Tags: [0110.be](https://0110.be/tags/0110.be.md), [Code](https://0110.be/tags/Code.md), [Hackerspace Ghent](https://0110.be/tags/Hackerspace%20Ghent.md), [Projecten](https://0110.be/tags/Projecten.md)
**The problem:** There is a group of people that want access to [Hackerspace Ghent](http://0x20.be) but there is only one remote to open the gate.
**The solution:** Build a system that reacts to a phone call by opening the gate if the number of the caller is whitelisted.
**What you need:**
- A [BeagleBoard](http://beagleboard.org/) or some [BeagleBoard alternative](http://beagleboard.org/breeds) with a Linux distribution running on it. Any server running a unix like operating system should be usable.
- A Huaweii e220 or an alternative GSM that supports (a subset of) AT commands and has a USB port.
- A team of hackers that know how to solder something togeher. E.g. The hardware guys of hackerspace Ghent.
- A "python script":\[gatekeeper.py\] that reacts to calls.
**The Hack**: First of all try to get caller id working by following the [Caller ID with Linux and Huawei e220 tutorial](http://0110.be/artikels/lees/Caller_ID_with_Linux_and_Huawei_e220). If this works you can listen to the serial communication using [pySerial](http://pyserial.sourceforge.net/) and react to a call. The following python code shows the wait for call method:
\`\`\`ruby\
def wait_for_call(self):\
self.data_channel.open()\
call_id_pattern = re.compile('.**CLIP.**"\\+(\[0-9\]+)",.\*')\
while True:\
bytes = self.data_channel.inWaiting()\
buffer = self.data_channel.readline(bytes)\
call_id_match = call_id_pattern.match(buffer)\
if call_id_match:\
number = call_id_match.group(1)\
self.handle_call(number)\
\`\`\`
The `handle_call` method ... handles the call.
The second thing that is needed is [a way to send a signal from the beagle board](http://blog.makezine.com/archive/2009/02/blinking_leds_with_the_beagle_board.html) to the remote. Sending a signal from the beagle board using Linux is really simple. The following bash commands initialize, activate and deactivate a pin.
\`\`\`ruby\
echo 168 \> /sys/class/gpio/export\
echo "high" \> /sys/class/gpio/gpio168/direction\
echo "low" \> /sys/class/gpio/gpio168/direction\
\`\`\`



- [gatekeeper.py](https://0110.be/files/attachments/71/gatekeeper.py)
---
## [Caller ID with Linux and Huawei e220](https://0110.be/posts/Caller_ID_with_Linux_and_Huawei_e220.md)
- Published: 2010-04-11T00:00:00Z
- Updated: 2013-12-05T18:19:15Z
- Author: Joren
- ID: 49
- Canonical: https://0110.be/posts/Caller_ID_with_Linux_and_Huawei_e220
- Tags: [0110.be](https://0110.be/tags/0110.be.md), [Code](https://0110.be/tags/Code.md), [Hackerspace Ghent](https://0110.be/tags/Hackerspace%20Ghent.md), [Projecten](https://0110.be/tags/Projecten.md)
\
This blog post comments on using the Marvell OpenRD SoC(System on a Chip) as a low power multipurpose home server.
### The Hardware
The specifications of the [OpenRD SoC](http://open-rd.org) are very similar to the better known [SheevaPlug](http://en.wikipedia.org/wiki/SheevaPlug) devices, so it has 512MB DDR2 RAM, an 1.2GHz ARM processor and 512MB internal flash. To be more precise the OpenRD SoC is essentially a SheevaPlug in a different form factor. The main advantage of this form factor is the number of available connections: 7xUSB, SATA, eSATA, 2xGb Ethernet, VGA, Audio, ... which make the device a lot more extendable and practical as a mulitpurpose home server.
### The Software
Thanks to the work of [Dr. Martin Michlmayr](http://www.cyrius.com) there is a Debian port for the Kirkwood platform readily available. He even wrote a tutorial on [how to install Debian on a SheevaPlug](http://www.cyrius.com/debian/kirkwood/sheevaplug/install.html). Installing Debian on an OpenRD is exactly the same except for one important detail: the `arcNumber` variable.
Once Debian is installed you can `apt-get` or `aptitude` almost all the software you are used to: webserver, samba, ruby, ...
### The Alternatives
- [Sheevaplug](http://en.wikipedia.org/wiki/SheevaPlug)
- [Beagle Board](http://beagleboard.org) or other [OMAP3 SoC's](http://processors.wiki.ti.com/index.php?title=OMAP3_Boards). The IGEPv2 e.g. has wireless and wired network connections.
- [Alix system Boards](http://www.pcengines.ch/alix.htm) are mostly x86 based.
- [NSLU2](http://en.wikipedia.org/wiki/NSLU2) An ARM platform.


---
## [Doorhacking: Opening a Door With Your Cellphone](https://0110.be/posts/Doorhacking%3A_Opening_a_Door_With_Your_Cellphone.md)
- Published: 2010-04-22T00:00:00Z
- Updated: 2013-12-05T18:19:15Z
- Author: Joren
- ID: 71
- Canonical: https://0110.be/posts/Doorhacking%3A_Opening_a_Door_With_Your_Cellphone
- Tags: [0110.be](https://0110.be/tags/0110.be.md), [Code](https://0110.be/tags/Code.md), [Hackerspace Ghent](https://0110.be/tags/Hackerspace%20Ghent.md), [Projecten](https://0110.be/tags/Projecten.md)
**The problem:** There is a group of people that want access to [Hackerspace Ghent](http://0x20.be) but there is only one remote to open the gate.
**The solution:** Build a system that reacts to a phone call by opening the gate if the number of the caller is whitelisted.
**What you need:**
- A [BeagleBoard](http://beagleboard.org/) or some [BeagleBoard alternative](http://beagleboard.org/breeds) with a Linux distribution running on it. Any server running a unix like operating system should be usable.
- A Huaweii e220 or an alternative GSM that supports (a subset of) AT commands and has a USB port.
- A team of hackers that know how to solder something togeher. E.g. The hardware guys of hackerspace Ghent.
- A "python script":\[gatekeeper.py\] that reacts to calls.
**The Hack**: First of all try to get caller id working by following the [Caller ID with Linux and Huawei e220 tutorial](http://0110.be/artikels/lees/Caller_ID_with_Linux_and_Huawei_e220). If this works you can listen to the serial communication using [pySerial](http://pyserial.sourceforge.net/) and react to a call. The following python code shows the wait for call method:
\`\`\`ruby\
def wait_for_call(self):\
self.data_channel.open()\
call_id_pattern = re.compile('.**CLIP.**"\\+(\[0-9\]+)",.\*')\
while True:\
bytes = self.data_channel.inWaiting()\
buffer = self.data_channel.readline(bytes)\
call_id_match = call_id_pattern.match(buffer)\
if call_id_match:\
number = call_id_match.group(1)\
self.handle_call(number)\
\`\`\`
The `handle_call` method ... handles the call.
The second thing that is needed is [a way to send a signal from the beagle board](http://blog.makezine.com/archive/2009/02/blinking_leds_with_the_beagle_board.html) to the remote. Sending a signal from the beagle board using Linux is really simple. The following bash commands initialize, activate and deactivate a pin.
\`\`\`ruby\
echo 168 \> /sys/class/gpio/export\
echo "high" \> /sys/class/gpio/gpio168/direction\
echo "low" \> /sys/class/gpio/gpio168/direction\
\`\`\`



- [gatekeeper.py](https://0110.be/files/attachments/71/gatekeeper.py)
---
## [Caller ID with Linux and Huawei e220](https://0110.be/posts/Caller_ID_with_Linux_and_Huawei_e220.md)
- Published: 2010-04-11T00:00:00Z
- Updated: 2013-12-05T18:19:15Z
- Author: Joren
- ID: 49
- Canonical: https://0110.be/posts/Caller_ID_with_Linux_and_Huawei_e220
- Tags: [0110.be](https://0110.be/tags/0110.be.md), [Code](https://0110.be/tags/Code.md), [Hackerspace Ghent](https://0110.be/tags/Hackerspace%20Ghent.md), [Projecten](https://0110.be/tags/Projecten.md)
 This is the scenario: you have a Huawei e220, a linux computer and you want to react to a call from a set of predefined numbers. E.g. [ordering a pizza](https://0110.be/artikels/lees/Order_Pizza_with_USB_Pizza_Button) when you receive a call from a certain number.
The Huawei e220 supports a subset of the [AT commands](http://en.wikipedia.org/wiki/AT_commands), which subset is [an enterprise secret](http://forum.huawei.com/jive4/thread.jspa?threadID=324487) of te Huawei company. So there is no documentation available for the device I bought, thanks Huawei. Anyhow when you attach the e220 to a Linux machine you should get two serial ports:
\`\`\`ruby\
/dev/ttyUSB0\
/dev/ttyUSB1\
\`\`\`
To connect to the devices you can use a serial client. [GNU Screen](http://www.gnu.org/software/screen/) can be used as a serial client like this: `screen /dev/ttyUSB0 115200`. The first device, `ttyUSB0` is used to control `ttyUSB1`, so to enable caller ID on te Huawei e220 you need to send this message to `ttyUSB0`:
\`\`\`ruby\
AT+CLIP=1\
\`\`\`
To check for calls you should listen to `ttyUSB1`. A serial session for `ttyUSB1` looks like:
\`\`\`ruby\
\^BOOT:44594282,0,0,0,6\
\^RSSI:18\
RING\
+CLIP: "+33499311152",145,,,,0\
\^BOOT:44594282,0,0,0,6\
\`\`\`
The `RING` and `CLIP` messages are the most interesting. The `RING` signifies an incoming call, the `CLIP` is the caller ID. The `BOOT` and `RSSI` are some kind of ping messages. The following Python script demonstrates a complete session that enables caller ID, waits for a phone call and prints the number of the caller.
\`\`\`python\
#!/usr/bin/env python\
import serial, re
command_channel = serial.Serial(\
port='/dev/ttyUSB0',\
baudrate=115200,\
parity=serial.PARITY_NONE,\
stopbits=serial.STOPBITS_ONE,\
bytesize=serial.EIGHTBITS\
)\
command_channel.open()\
#enable caller id\
command_channel.write("AT+CLIP=1" + "\\r\\n")\
command_channel.close()
ser = serial.Serial(\
port='/dev/ttyUSB1',\
baudrate=9600,\
parity=serial.PARITY_NONE,\
stopbits=serial.STOPBITS_ONE,\
bytesize=serial.EIGHTBITS\
)
ser.open()
pattern = re.compile('.**CLIP.**"\\+(\[0-9\]+)",.\*')
while 1:\
buffer = ser.read(ser.inWaiting()).strip()\
buffer = buffer.replace("\\n","")\
match = pattern.match(buffer)\
if match:\
number = match.group(1)\
print number\
\`\`\`
---
## [YIN Pitch Tracker in JAVA](https://0110.be/posts/YIN_Pitch_Tracker_in_JAVA.md)
- Published: 2010-04-09T00:00:00Z
- Updated: 2020-11-17T09:04:25Z
- Author: Joren
- ID: 66
- Canonical: https://0110.be/posts/YIN_Pitch_Tracker_in_JAVA
- Tags: [0110.be](https://0110.be/tags/0110.be.md), [Code](https://0110.be/tags/Code.md), [Cultuur](https://0110.be/tags/Cultuur.md), [Muziek](https://0110.be/tags/Muziek.md), [Projecten](https://0110.be/tags/Projecten.md)
To make [Tarsos](http://0110.be/) more portable I wrote a pitch tracker in pure JAVA using the [YIN algorithm](http://recherche.ircam.fr/equipes/pcm/cheveign/ps/2002_JASA_YIN_proof.pdf) based on the implementation in C of [aubio](http://aubio.org). The implementation also uses some code written by Karl Helgasson and Teun de Lange of the [Jazzperiments project](http://www.jazzperiments.com/jazzperiments.html).
It can be used to perform real time pitch detection or to analyse files. To use it as a real time pitch detector just start the "JAR-file":\[pitch_detector_yin.jar\] by double clicking. To analyse a file execute one of the following. The first results in a list of annotations (text), the second shows the annotations graphically.
\`\`\`ruby\
java -jar pitch_detector_yin.jar flute.novib.mf.C5B5.wav\
java -jar pitch_detector_yin.jar ---file flute.novib.mf.C5B5.wav\
\`\`\`
The provided "flute sample":\[flute.novib.mf.C5B5.wav\] is from [*The Musical Samples* library of the University of Iowa](http://theremin.music.uiowa.edu/MIS.html) and converted to mono wav. The source code of the pitch tracker can be found below.
**Update:** the Yin implementation in Java has been incorporated into the [TarsosDSP project](https://github.com/JorenSix/TarsosDSP). An open source, Real-Time Audio Processing Framework in Java.

- [pitch\_detector\_yin.jar](https://0110.be/files/attachments/66/pitch_detector_yin.jar)
- [pitch\_detector\_yin\_src.zip](https://0110.be/files/attachments/66/pitch_detector_yin_src.zip)
- [flute.novib.mf.C5B5.wav](https://0110.be/files/attachments/66/flute.novib.mf.C5B5.wav)
---
## [Boids 3D with Processing](https://0110.be/posts/Boids_3D_with_Processing.md)
- Published: 2010-01-22T00:00:00Z
- Updated: 2013-12-05T18:19:14Z
- Author: Joren
- ID: 1
- Canonical: https://0110.be/posts/Boids_3D_with_Processing
- Tags: [0110.be](https://0110.be/tags/0110.be.md), [Code](https://0110.be/tags/Code.md), [Portfolio](https://0110.be/tags/Portfolio.md), [Projecten](https://0110.be/tags/Projecten.md)
- [boids\_windows.zip](https://0110.be/files/attachments/1/boids_windows.zip)
- [boids.png](https://0110.be/files/attachments/1/boids.png)
- [boids\_macosx.zip](https://0110.be/files/attachments/1/boids_macosx.zip)
- [boids\_linux.zip](https://0110.be/files/attachments/1/boids_linux.zip)
- [boids\_src.zip](https://0110.be/files/attachments/1/boids_src.zip)
- [peasycam.jar](https://0110.be/files/attachments/1/peasycam.jar)
- [Boids.jar](https://0110.be/files/attachments/1/Boids.jar)
- [core.jar](https://0110.be/files/attachments/1/core.jar)
- [loading.gif](https://0110.be/files/attachments/1/loading.gif)
---
## [Jobsopschool.be](https://0110.be/posts/Jobsopschool.be.md)
- Published: 2010-01-20T00:00:00Z
- Updated: 2013-12-05T18:19:15Z
- Author: Joren
- ID: 10
- Canonical: https://0110.be/posts/Jobsopschool.be
- Tags: [0110.be](https://0110.be/tags/0110.be.md)
[Jobsopschool.be](http://jobsopschool.be) werd door 0110.be ontwikkeld in opdracht van scholengemeenschap Sperregem. Het doel van die webapplicatie is om de administratieve rompslomp bij het zoeken naar en aanwerven van kandidaten voor vervangingen in het onderwijs te vereenvoudigen. Zoek je [vacatures in het basisonderwijs](http://jobsopschool.be?) Neem dan zeker een kijkje op Jobopschool.be.
This is the scenario: you have a Huawei e220, a linux computer and you want to react to a call from a set of predefined numbers. E.g. [ordering a pizza](https://0110.be/artikels/lees/Order_Pizza_with_USB_Pizza_Button) when you receive a call from a certain number.
The Huawei e220 supports a subset of the [AT commands](http://en.wikipedia.org/wiki/AT_commands), which subset is [an enterprise secret](http://forum.huawei.com/jive4/thread.jspa?threadID=324487) of te Huawei company. So there is no documentation available for the device I bought, thanks Huawei. Anyhow when you attach the e220 to a Linux machine you should get two serial ports:
\`\`\`ruby\
/dev/ttyUSB0\
/dev/ttyUSB1\
\`\`\`
To connect to the devices you can use a serial client. [GNU Screen](http://www.gnu.org/software/screen/) can be used as a serial client like this: `screen /dev/ttyUSB0 115200`. The first device, `ttyUSB0` is used to control `ttyUSB1`, so to enable caller ID on te Huawei e220 you need to send this message to `ttyUSB0`:
\`\`\`ruby\
AT+CLIP=1\
\`\`\`
To check for calls you should listen to `ttyUSB1`. A serial session for `ttyUSB1` looks like:
\`\`\`ruby\
\^BOOT:44594282,0,0,0,6\
\^RSSI:18\
RING\
+CLIP: "+33499311152",145,,,,0\
\^BOOT:44594282,0,0,0,6\
\`\`\`
The `RING` and `CLIP` messages are the most interesting. The `RING` signifies an incoming call, the `CLIP` is the caller ID. The `BOOT` and `RSSI` are some kind of ping messages. The following Python script demonstrates a complete session that enables caller ID, waits for a phone call and prints the number of the caller.
\`\`\`python\
#!/usr/bin/env python\
import serial, re
command_channel = serial.Serial(\
port='/dev/ttyUSB0',\
baudrate=115200,\
parity=serial.PARITY_NONE,\
stopbits=serial.STOPBITS_ONE,\
bytesize=serial.EIGHTBITS\
)\
command_channel.open()\
#enable caller id\
command_channel.write("AT+CLIP=1" + "\\r\\n")\
command_channel.close()
ser = serial.Serial(\
port='/dev/ttyUSB1',\
baudrate=9600,\
parity=serial.PARITY_NONE,\
stopbits=serial.STOPBITS_ONE,\
bytesize=serial.EIGHTBITS\
)
ser.open()
pattern = re.compile('.**CLIP.**"\\+(\[0-9\]+)",.\*')
while 1:\
buffer = ser.read(ser.inWaiting()).strip()\
buffer = buffer.replace("\\n","")\
match = pattern.match(buffer)\
if match:\
number = match.group(1)\
print number\
\`\`\`
---
## [YIN Pitch Tracker in JAVA](https://0110.be/posts/YIN_Pitch_Tracker_in_JAVA.md)
- Published: 2010-04-09T00:00:00Z
- Updated: 2020-11-17T09:04:25Z
- Author: Joren
- ID: 66
- Canonical: https://0110.be/posts/YIN_Pitch_Tracker_in_JAVA
- Tags: [0110.be](https://0110.be/tags/0110.be.md), [Code](https://0110.be/tags/Code.md), [Cultuur](https://0110.be/tags/Cultuur.md), [Muziek](https://0110.be/tags/Muziek.md), [Projecten](https://0110.be/tags/Projecten.md)
To make [Tarsos](http://0110.be/) more portable I wrote a pitch tracker in pure JAVA using the [YIN algorithm](http://recherche.ircam.fr/equipes/pcm/cheveign/ps/2002_JASA_YIN_proof.pdf) based on the implementation in C of [aubio](http://aubio.org). The implementation also uses some code written by Karl Helgasson and Teun de Lange of the [Jazzperiments project](http://www.jazzperiments.com/jazzperiments.html).
It can be used to perform real time pitch detection or to analyse files. To use it as a real time pitch detector just start the "JAR-file":\[pitch_detector_yin.jar\] by double clicking. To analyse a file execute one of the following. The first results in a list of annotations (text), the second shows the annotations graphically.
\`\`\`ruby\
java -jar pitch_detector_yin.jar flute.novib.mf.C5B5.wav\
java -jar pitch_detector_yin.jar ---file flute.novib.mf.C5B5.wav\
\`\`\`
The provided "flute sample":\[flute.novib.mf.C5B5.wav\] is from [*The Musical Samples* library of the University of Iowa](http://theremin.music.uiowa.edu/MIS.html) and converted to mono wav. The source code of the pitch tracker can be found below.
**Update:** the Yin implementation in Java has been incorporated into the [TarsosDSP project](https://github.com/JorenSix/TarsosDSP). An open source, Real-Time Audio Processing Framework in Java.

- [pitch\_detector\_yin.jar](https://0110.be/files/attachments/66/pitch_detector_yin.jar)
- [pitch\_detector\_yin\_src.zip](https://0110.be/files/attachments/66/pitch_detector_yin_src.zip)
- [flute.novib.mf.C5B5.wav](https://0110.be/files/attachments/66/flute.novib.mf.C5B5.wav)
---
## [Boids 3D with Processing](https://0110.be/posts/Boids_3D_with_Processing.md)
- Published: 2010-01-22T00:00:00Z
- Updated: 2013-12-05T18:19:14Z
- Author: Joren
- ID: 1
- Canonical: https://0110.be/posts/Boids_3D_with_Processing
- Tags: [0110.be](https://0110.be/tags/0110.be.md), [Code](https://0110.be/tags/Code.md), [Portfolio](https://0110.be/tags/Portfolio.md), [Projecten](https://0110.be/tags/Projecten.md)
- [boids\_windows.zip](https://0110.be/files/attachments/1/boids_windows.zip)
- [boids.png](https://0110.be/files/attachments/1/boids.png)
- [boids\_macosx.zip](https://0110.be/files/attachments/1/boids_macosx.zip)
- [boids\_linux.zip](https://0110.be/files/attachments/1/boids_linux.zip)
- [boids\_src.zip](https://0110.be/files/attachments/1/boids_src.zip)
- [peasycam.jar](https://0110.be/files/attachments/1/peasycam.jar)
- [Boids.jar](https://0110.be/files/attachments/1/Boids.jar)
- [core.jar](https://0110.be/files/attachments/1/core.jar)
- [loading.gif](https://0110.be/files/attachments/1/loading.gif)
---
## [Jobsopschool.be](https://0110.be/posts/Jobsopschool.be.md)
- Published: 2010-01-20T00:00:00Z
- Updated: 2013-12-05T18:19:15Z
- Author: Joren
- ID: 10
- Canonical: https://0110.be/posts/Jobsopschool.be
- Tags: [0110.be](https://0110.be/tags/0110.be.md)
[Jobsopschool.be](http://jobsopschool.be) werd door 0110.be ontwikkeld in opdracht van scholengemeenschap Sperregem. Het doel van die webapplicatie is om de administratieve rompslomp bij het zoeken naar en aanwerven van kandidaten voor vervangingen in het onderwijs te vereenvoudigen. Zoek je [vacatures in het basisonderwijs](http://jobsopschool.be?) Neem dan zeker een kijkje op Jobopschool.be.

 **The communication**: The original Python script executed another script on the local pc. A more flexible approach is possible using sockets. With sockets it is possible to notify any computer on a network.
\`\`\`ruby\
if PanicButton().pressed():\
\# create a TCP socket\
s = socket.socket(socket.AF_INET, socket.SOCK_STREAM)\
\# connect to server on the port\
s.connect((SERVER, SERVER_TCP_PORT))\
\# send the order (margherita at restaurant mario)\
s.send("mario: \[margherita_big\]\\n")\
\`\`\`
**The reaction**: a ruby TCP server waits for message from the driver. When it does it automates a HTTP session on a website. It executes a series of HTTP-GET's and POST's. It uses the [mechanize library](http://mechanize.rubyforge.org/mechanize/).
\`\`\`ruby\
login_url = "http://www.just-eat.be/pages/member/login.aspx"\
a = WWW::Mechanize.new\
a.get(login_url) do \|login_page\|\
#post login_form\
login_form = login_page.forms.first\
login_form.txtUser = "username"\
login_form.txtPass = "password"\
a.submit(login_form, login_form.buttons\[1\])\
end\
\`\`\`
Some libraries are needed. For python you need the usb library, the [python deamons lib](http://pypi.python.org/pypi/python-daemon/) needs to be installed seperatly. Setuptools are needed to install the deamons package.
\`\`\`ruby\
sudo apt-get install python-usb python-setuptools\
\`\`\`
Ruby needs rubygems to install the needed mechanize and daemons library. Mechanize needs the
**The communication**: The original Python script executed another script on the local pc. A more flexible approach is possible using sockets. With sockets it is possible to notify any computer on a network.
\`\`\`ruby\
if PanicButton().pressed():\
\# create a TCP socket\
s = socket.socket(socket.AF_INET, socket.SOCK_STREAM)\
\# connect to server on the port\
s.connect((SERVER, SERVER_TCP_PORT))\
\# send the order (margherita at restaurant mario)\
s.send("mario: \[margherita_big\]\\n")\
\`\`\`
**The reaction**: a ruby TCP server waits for message from the driver. When it does it automates a HTTP session on a website. It executes a series of HTTP-GET's and POST's. It uses the [mechanize library](http://mechanize.rubyforge.org/mechanize/).
\`\`\`ruby\
login_url = "http://www.just-eat.be/pages/member/login.aspx"\
a = WWW::Mechanize.new\
a.get(login_url) do \|login_page\|\
#post login_form\
login_form = login_page.forms.first\
login_form.txtUser = "username"\
login_form.txtPass = "password"\
a.submit(login_form, login_form.buttons\[1\])\
end\
\`\`\`
Some libraries are needed. For python you need the usb library, the [python deamons lib](http://pypi.python.org/pypi/python-daemon/) needs to be installed seperatly. Setuptools are needed to install the deamons package.
\`\`\`ruby\
sudo apt-get install python-usb python-setuptools\
\`\`\`
Ruby needs rubygems to install the needed mechanize and daemons library. Mechanize needs the