---
title: Blog - 0110.be
canonical: https://0110.be/Blog?page=1
markdown_url: https://0110.be/Blog.md?page=1
page: 1
posts_per_page: 30
total_posts: 260
filters:
content_page: Blog
tags:
- 0110 concerten
- 0110.be
- ARIP
- Code
- Collaborative Filtering
- Command Line Application
- Computational ethnomusicology
- Computational musicology
- Cultuur
- Dutch
- Film
- Folk Music Analysis (FMA) conference
- Hackerspace Ghent
- Harde waren
- HoGent
- ISMIR
- JNMR
- Java
- Jazz
- Jongleren
- Joren In Halmstad
- LaTeX
- Mac OS X
- Music Information Retrieval
- Muziek
- PeachNote Piano
- Poging tot humor
- Portfolio
- Presentation
- Projecten
- Reizen
- Research papers
- School
- Schoolwijs
- Tarsos
- TarsosDSP
- TarsosTranscoder
- Thesis
- UGent
- Vooruit
- WSOLA
- featured
- français
previous: https://0110.be/Blog.md
next: https://0110.be/Blog.md?page=2
---
# Blog - 0110.be
## [Printing a part of the world - a 3D-printed cityscape](https://0110.be/posts/Printing_a_part_of_the_world_-_a_3D-printed_cityscape.md)
- Published: 2024-01-09T00:00:00Z
- Updated: 2025-11-13T22:55:02Z
- Author: Joren
- ID: 537
- Canonical: https://0110.be/posts/Printing_a_part_of_the_world_-_a_3D-printed_cityscape
- Tags: [0110.be](https://0110.be/tags/0110.be.md), [GhentCDH](https://0110.be/tags/GhentCDH.md), [UGent](https://0110.be/tags/UGent.md)
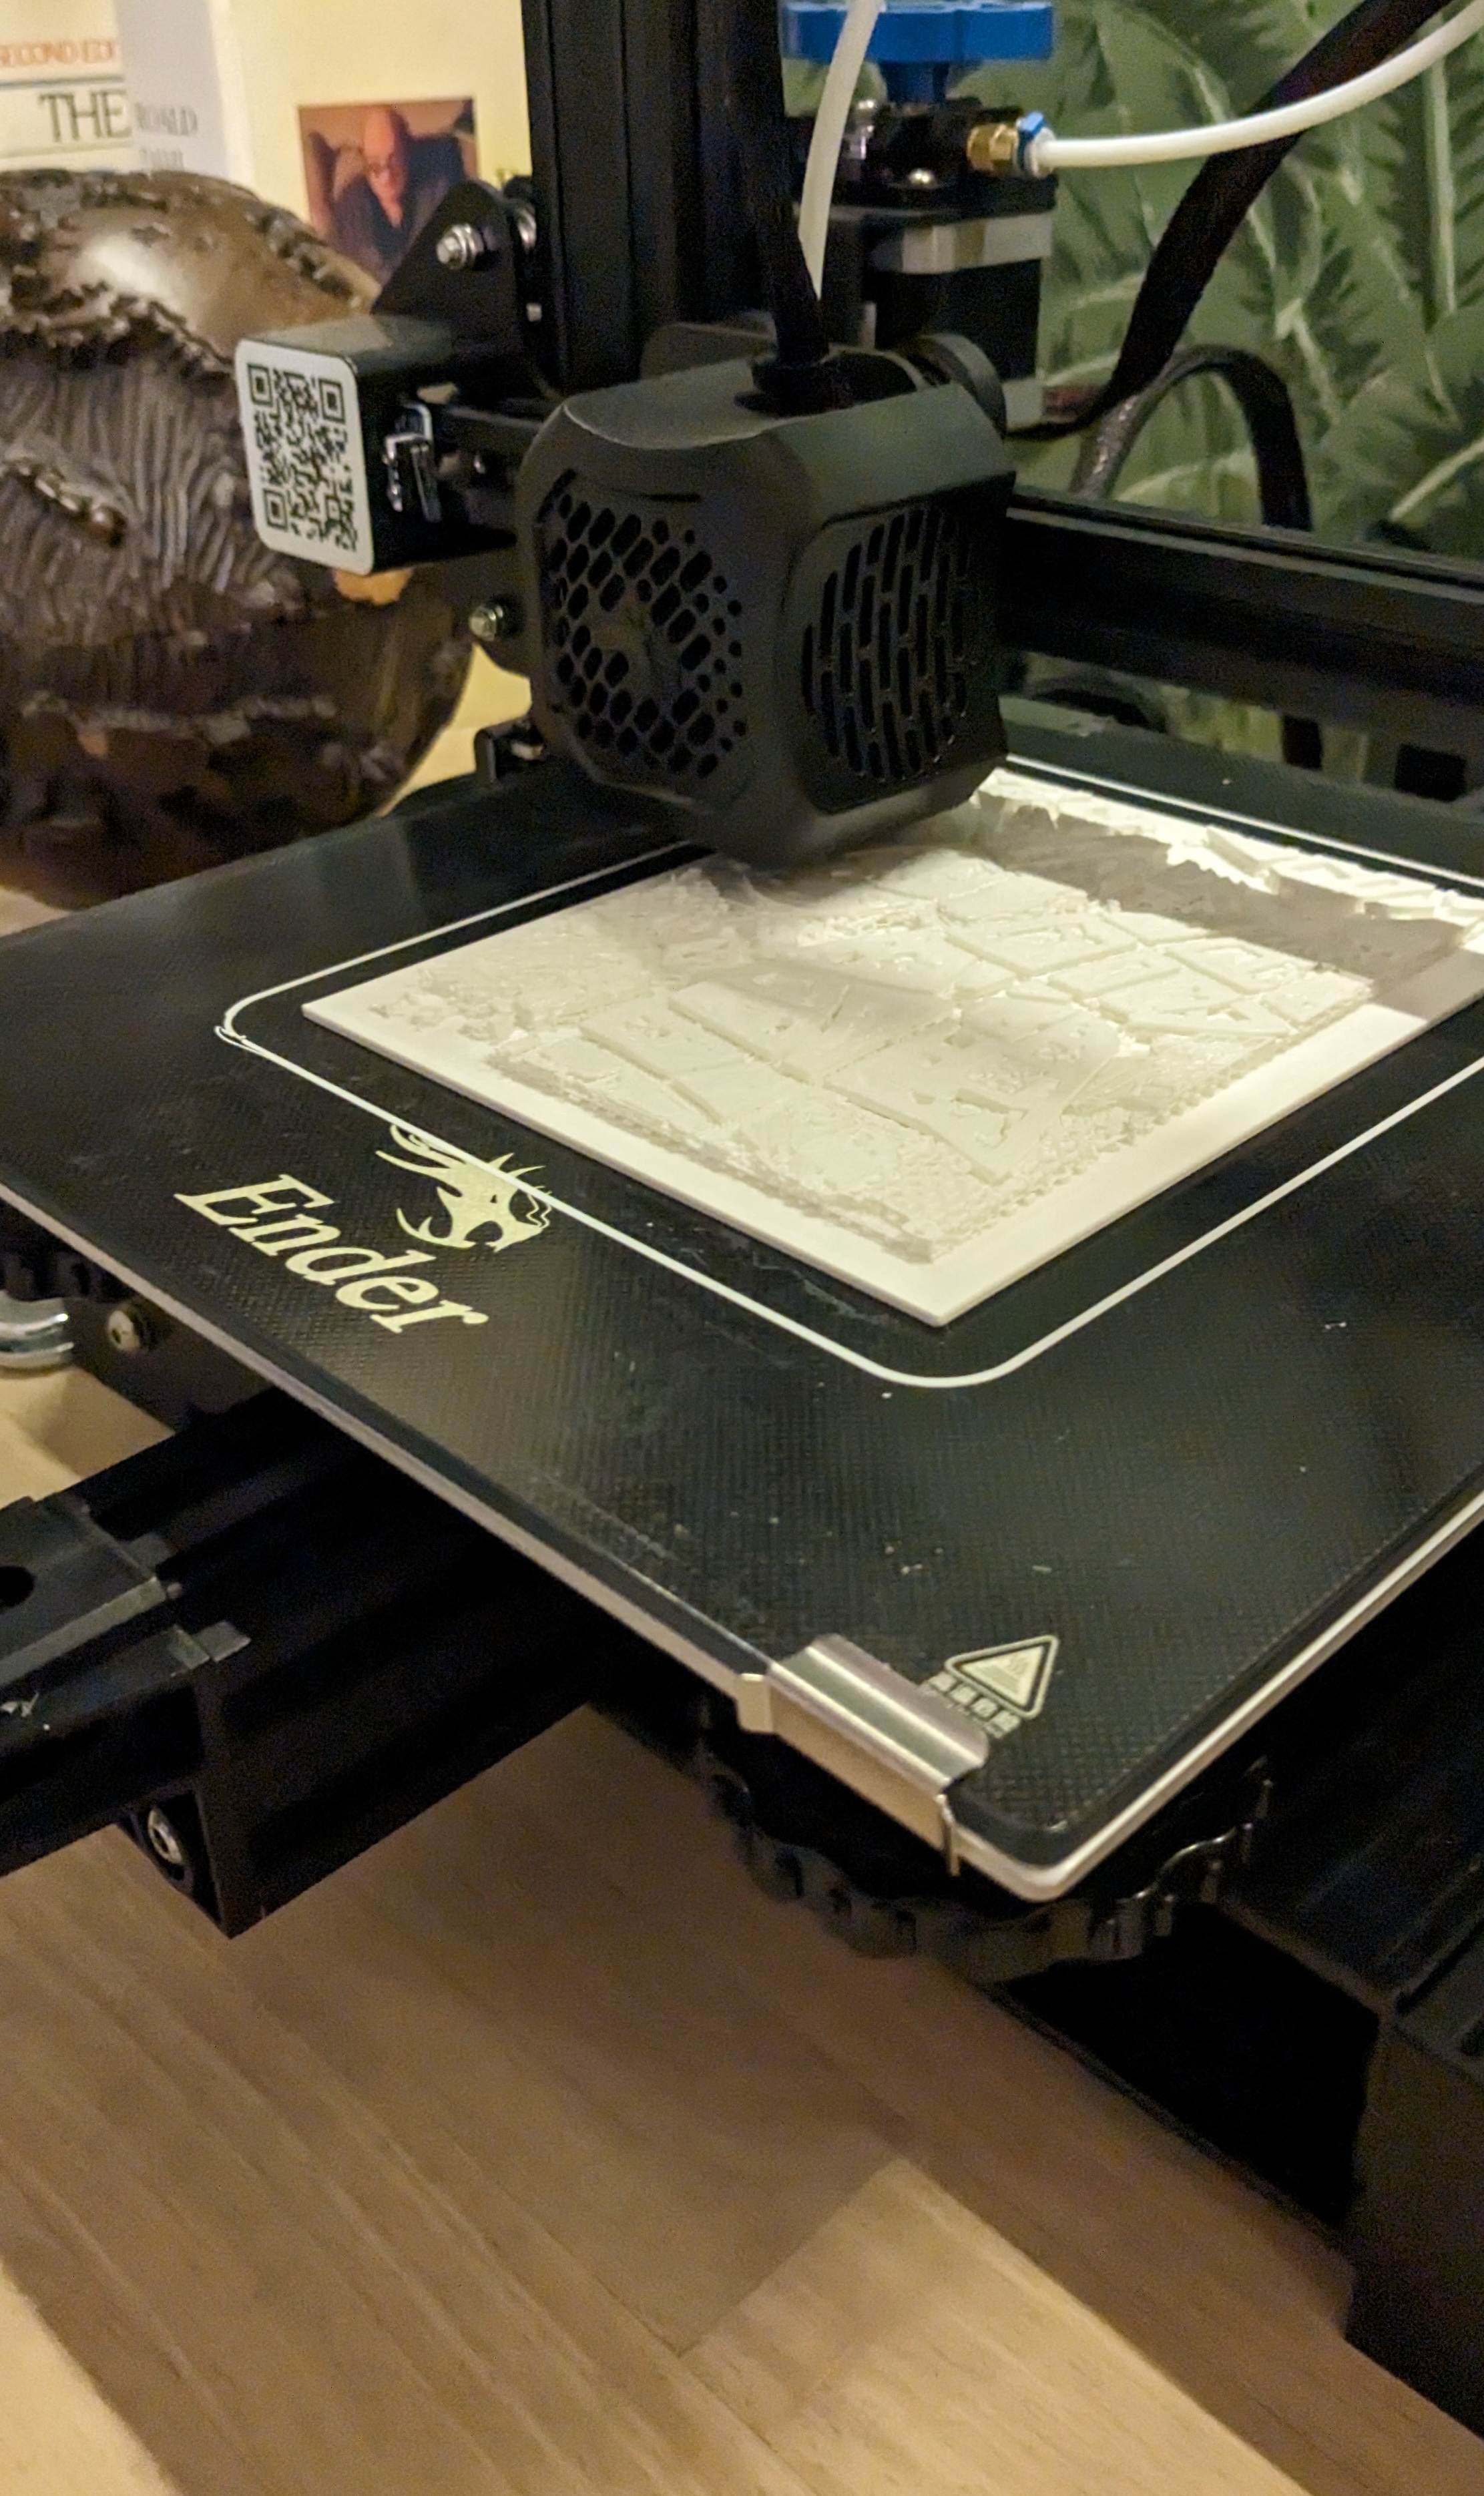
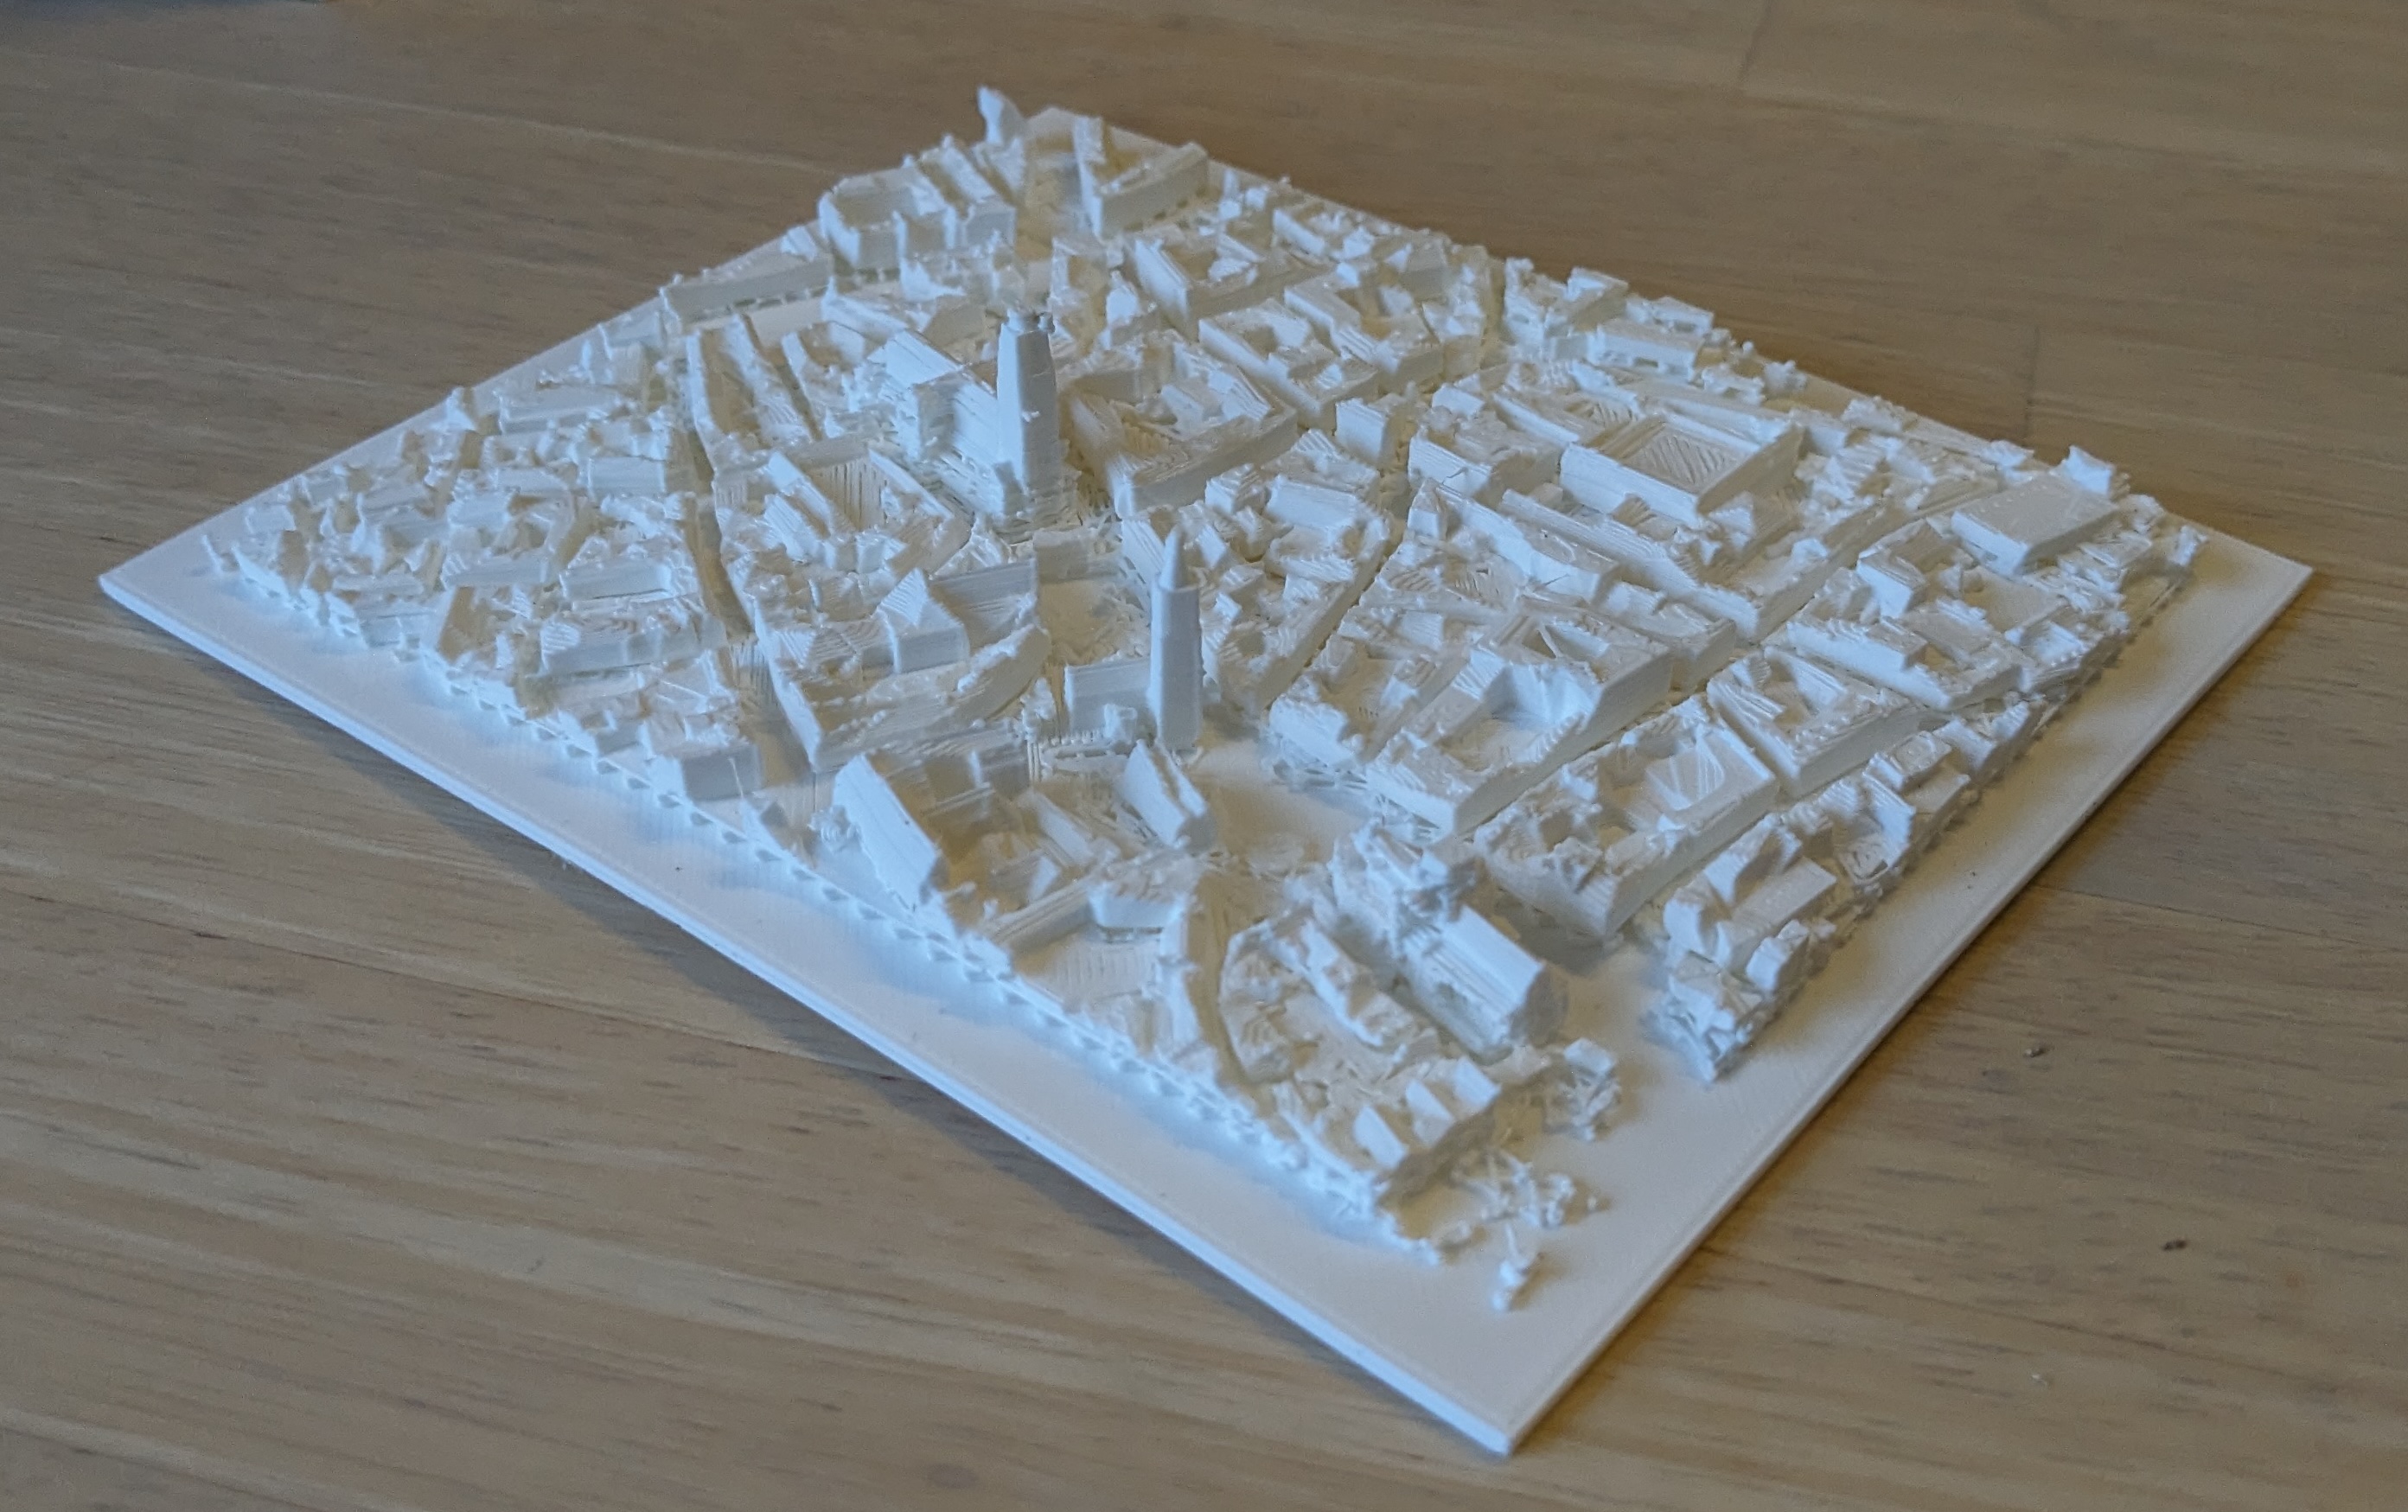
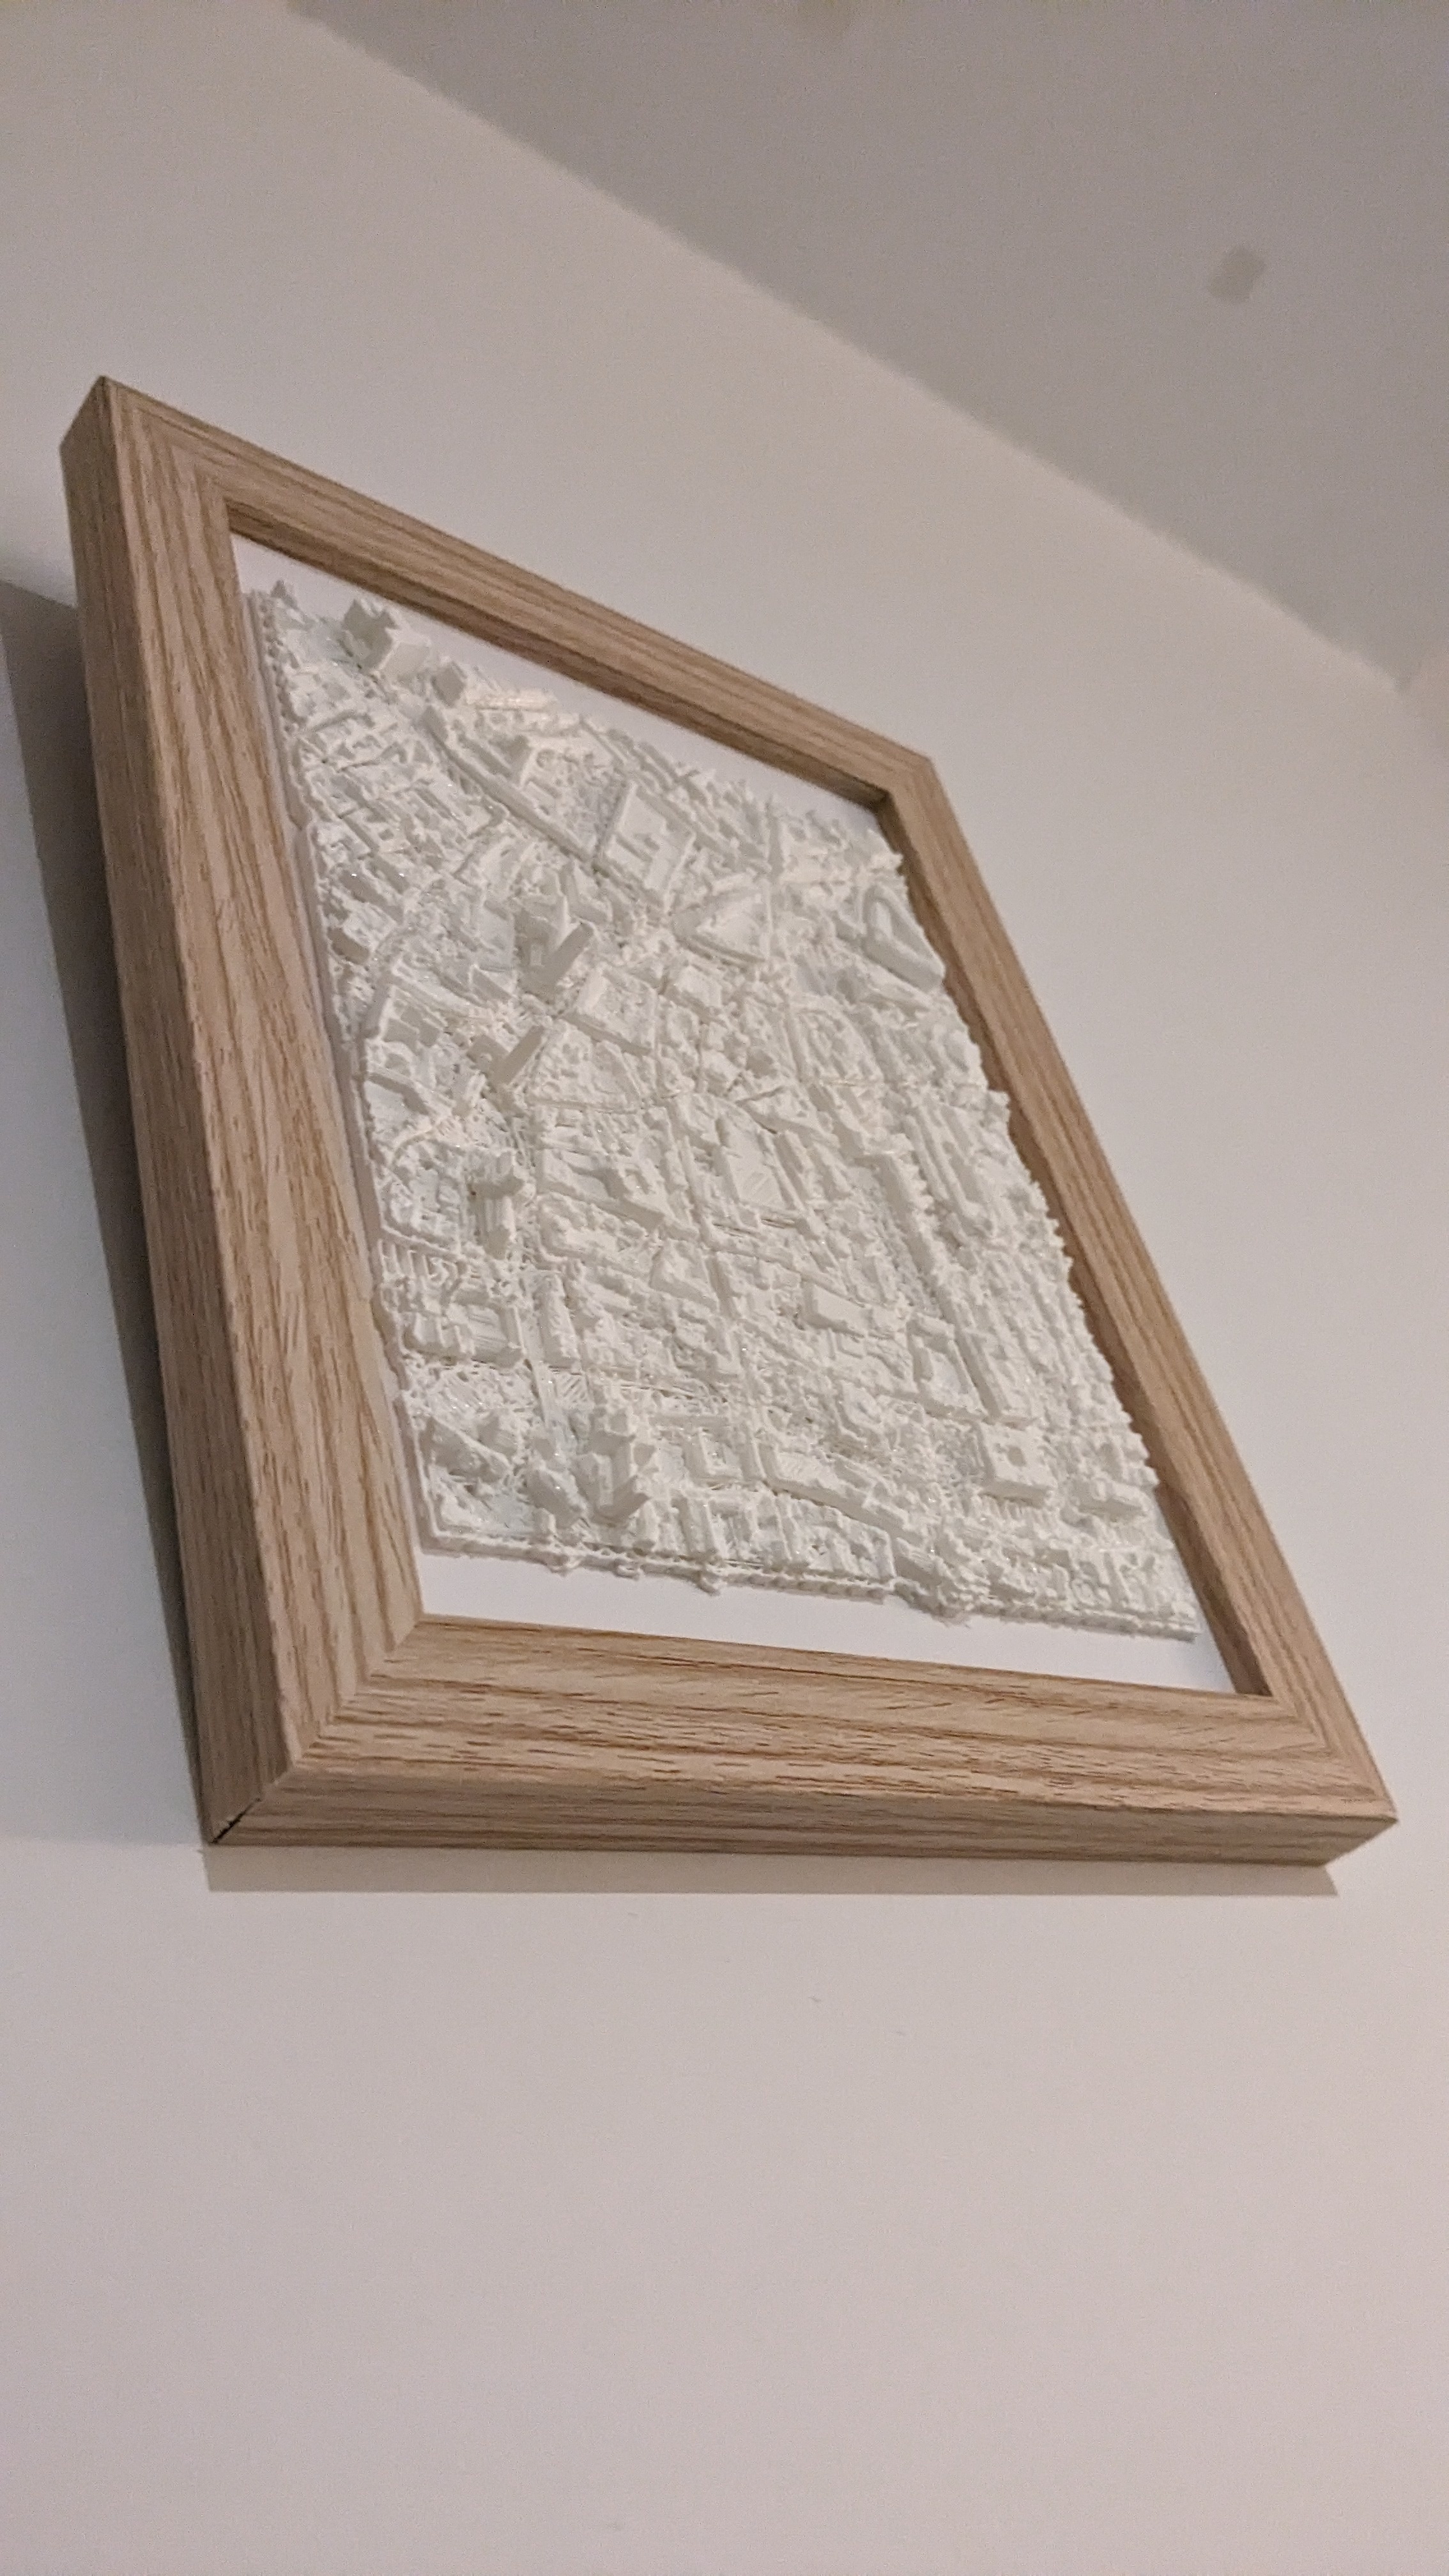
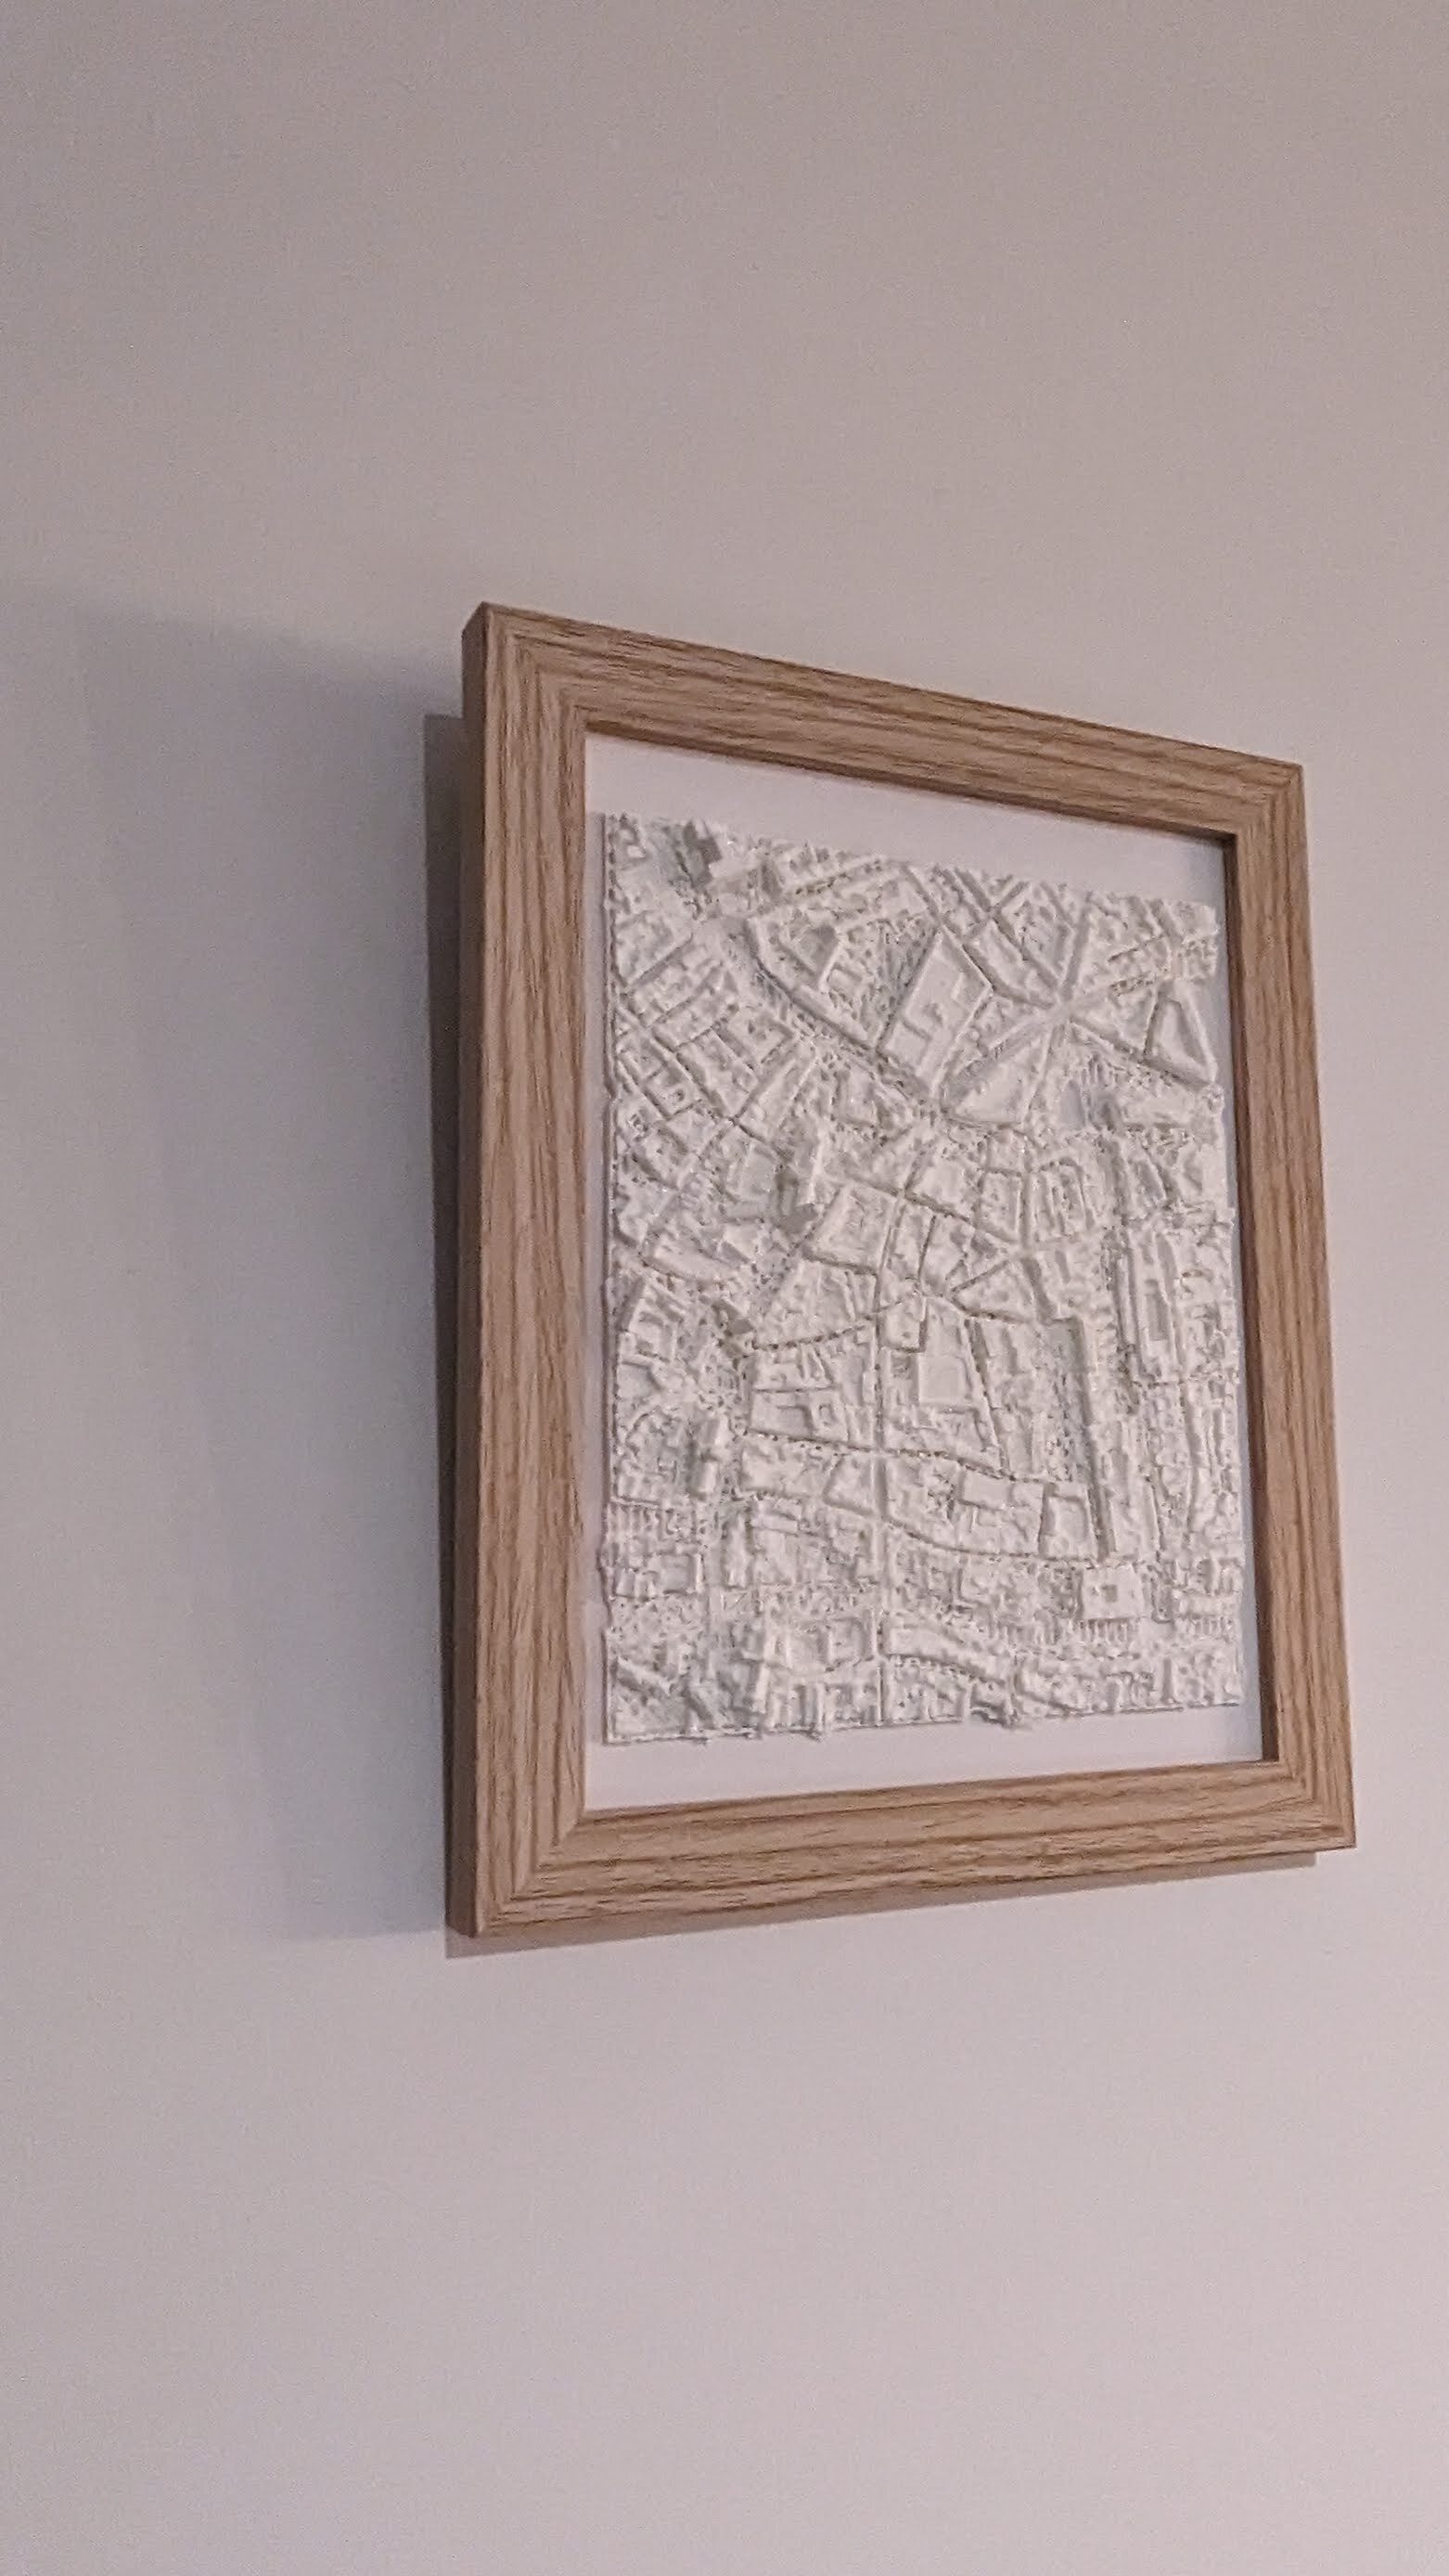
Fig: 3D printing your part of the world.
My ex-girlfriend and current wife likes maps. While looking for a gift for the new-years I got the idea to give her a 3D map of the nearby [historic city center of Ghent with its three iconic towers](https://earth.google.com/web/@51.05385689,3.72537111,16.45165093a,593.4748548d,35y,19.92318437h,59.99406466t,359.99999999r/data=OgMKATA). I have a 3D printer at home but still need to find a printable 3D model of Ghent.
Luckily, a couple of days ago a piece of software appeared to [capture Google Earth tiles -cubes- into a single 3D file](https://github.com/OmarShehata/google-earth-as-gltf). There you can select an area of interest via google maps and download a GLTF file which captures the landscape in 3D. The software needs an API key which can be requested via the Google Developer tools.
After downloading a GLTF file, the 3D model needs to be made 3D-printable. There are online [GLTF to STL converters](https://products.aspose.app/3d/conversion/gltf-to-stl) but a bit of care needs to be taken to end up with an actually **printable** STL. My selected area of interest only has slight height differences in the landscape which are handled by placing the STL file on a base which compensates for these differences. Your 3D slicer can also generate structure to support inclinations in the landscape.
The 3D model generated by Google Earth is quite noisy and can contain floating parts and holes. It may be needed to edit the STL mesh directly. Selecting a slightly shifted area of interest may also solve problems with the edges of the print: take care to chop less buildings in two.
Have fun printing your own piece of the world!
Fig: a 3D model for the Ghent city center visualized with an Three.js STL viewer.
---
## [Olaf in print - Elektor magazine article on Acoustic Fingerprinting](https://0110.be/posts/Olaf_in_print_-_Elektor_magazine_article_on_Acoustic_Fingerprinting.md)
- Published: 2023-12-24T00:00:00Z
- Updated: 2024-01-09T11:17:38Z
- Author: Joren
- ID: 538
- Canonical: https://0110.be/posts/Olaf_in_print_-_Elektor_magazine_article_on_Acoustic_Fingerprinting
- Tags: [0110.be](https://0110.be/tags/0110.be.md), [UGent](https://0110.be/tags/UGent.md)
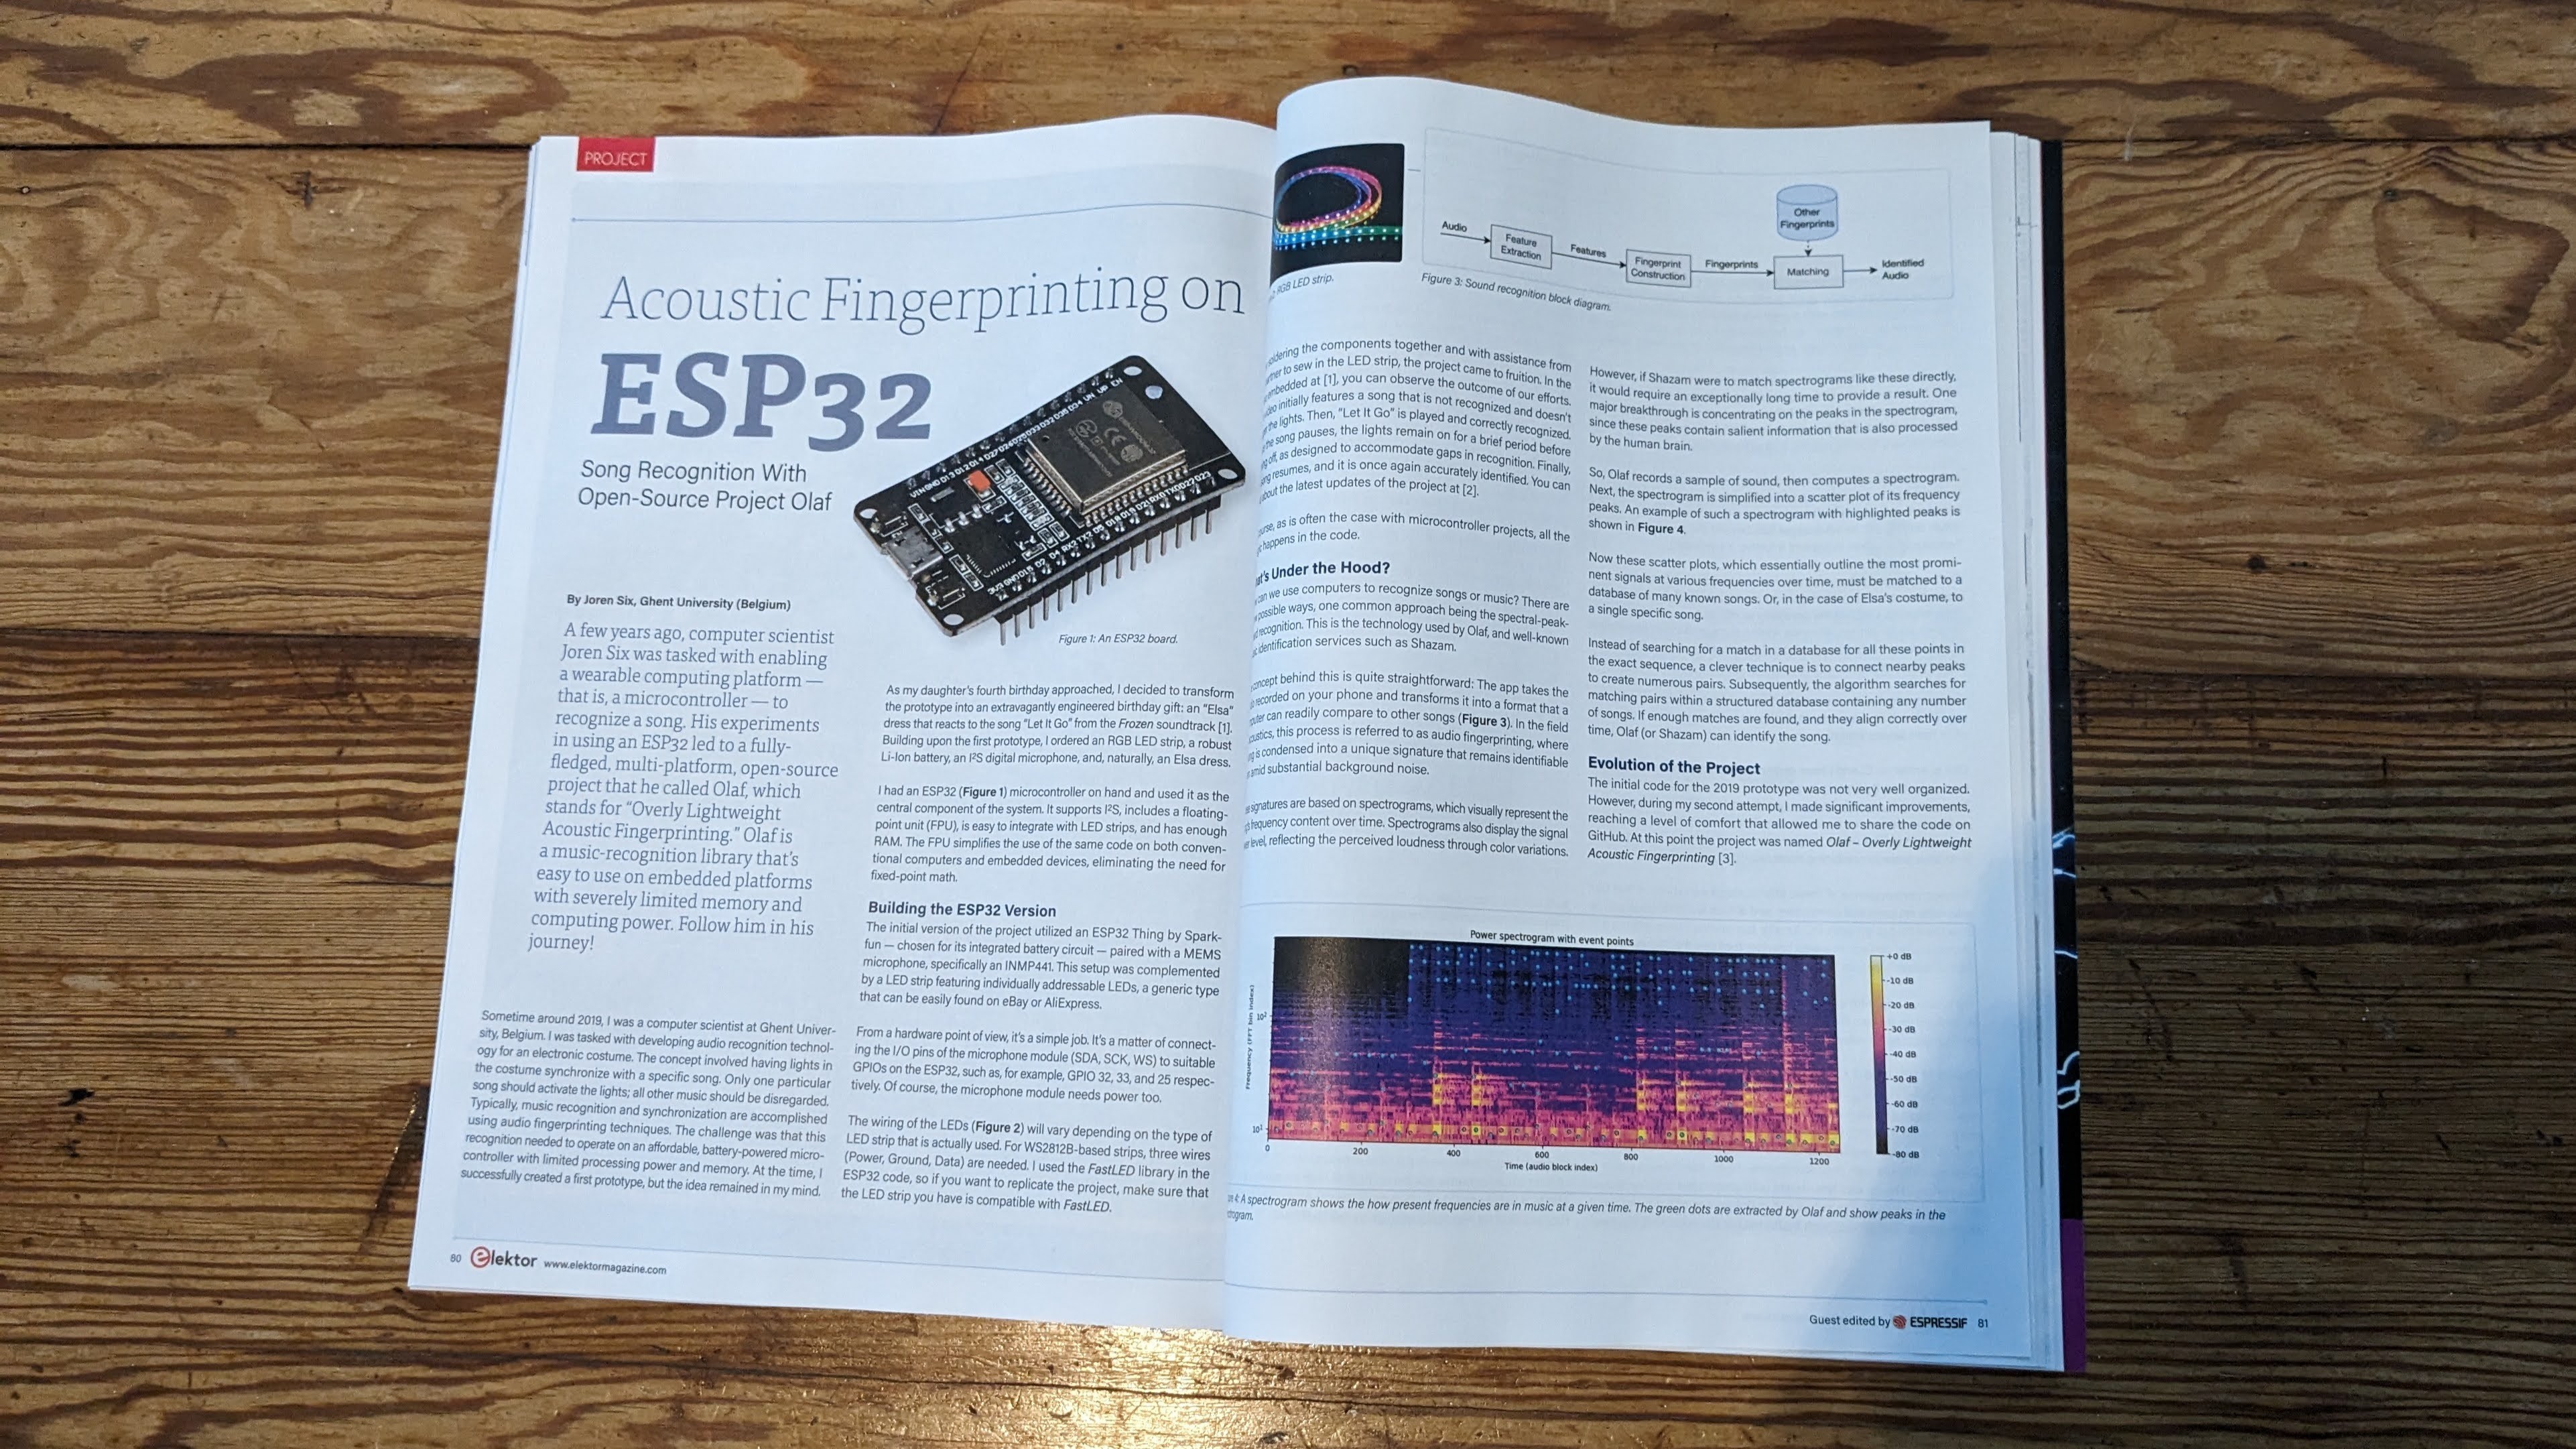
Fig: Olaf on the frontpage of Elektor!
[Elektor](https://www.elektor.com), a hobby electronics magazine, recently featured an article on acoustic fingerprinting using the ESP32. It is included in a special edition on Espressive products like the ESP32. This article includes content previously published on this blog and other writings about [Olaf](https://github.com/JorenSix/Olaf).
Since the article is based on my writings, there was an agreement to allow one of their writers to compose the magazine article under my name. This was my first experience with having a ghostwriter – quite convenient, I must say. Although it's somewhat apparent that the article is compiled from various sources, I am overall pleased with the outcome. It even made the front page!
Elektor has a rich history, dating back to the early 1960s when it was first published in Dutch as 'Elektuur'. I have fond memories of browsing Elektuur at my nerdy uncle's place. If anything, this article has certainly earned me some nerd credibility points in my uncle's eyes.
Please take a moment to read the [Espressive Special Edition of Elektor Magazine](https://www.elektor.com/elektor-special-espressif-guest-edition-2023-pdf-en).
---
## [Look, Ma! No Javascript! A case against the overuse of Javascript](https://0110.be/posts/Look%2C_Ma%21_No_Javascript%21_A_case_against_the_overuse_of_Javascript.md)
- Published: 2023-12-20T00:00:00Z
- Updated: 2023-12-21T07:59:13Z
- Author: Joren
- ID: 534
- Canonical: https://0110.be/posts/Look%2C_Ma%21_No_Javascript%21_A_case_against_the_overuse_of_Javascript
- Tags: [Code](https://0110.be/tags/Code.md), [GhentCDH](https://0110.be/tags/GhentCDH.md), [UGent](https://0110.be/tags/UGent.md)
Fig: Hammer vs. screw. Not the right tool for the job.
For the last couple of years this blog has not been using any Javascript. During the last decade this has become quite rare. Only [1.2% of websites do not use Javascript](https://w3techs.com/technologies/details/cp-javascript) I see this as a problem. In this text I want to argue that Javascript is perhaps not always the right tool for the job. Especially for web-pages which visitors simply want to read and where *no explicit interactive actions* are wanted from a user perspective, I see Javascript as detrimental.
I was triggered to write this by a few observations. One is by a Rails frontend framework which claims that [*"the only technology we should be using to create web UI is JavaScript"*](https://github.com/rage-rb/rage). This implies that the whole DOM should be rendered by Javascript. On the other hand there are frameworks which now advertise server side rendering as new feature like [Blazor](https://community.devexpress.com/blogs/aspnet/archive/2023/12/13/blazor-new-net-8-render-modes-v23-2.aspx) and [Nuxt](https://v2.nuxt.com/docs/concepts/server-side-rendering/). The old thing is new again.
Let's look at a few examples. Take visiting news website. On a news site, a user expects to be able to read current news, reviews, opinions, .. and there is no expectation of interactivity. Basically, a news site could work equally well on physical paper, as was the case for the last century or more. Ideally, a news site is a static HTML page with an easy to follow layout and some images, perhaps some static ads, with information flowing in a single direction.
If we look at, for example, the Guardian, we do not get this ideal experience, instead 82 Javascript files are loaded and the full website takes six full seconds to load on a fast fiber connection. The site even tries to load files from other domains. This bloat results in 8 website programming errors and [CORS](https://en.wikipedia.org/wiki/Cross-origin_resource_sharing)-issues. The Guardian website is far from the worst example of this sprawl of Javascript, the [front-end for the Guaridan](https://github.com/guardian/frontend) is even developed in the open.
Another news site is [Hacker News](https://news.ycombinator.com/). With its focus on Sillicon valley and technical news, this site has probably one of the most tech-savvy readers and ... it does not rely on Javascript for functioning. There is a [single small, **readable** 150 line script](https://news.ycombinator.com/hn.js) to improve usability but that is it. The makes the the website fast, easily indexable, straightforward to maintain, accessible, future-proof, failsafe, and compatible with even the most basic browsers and screen-readers.
Similarly, this blog is a dynamic [Rails](https://rubyonrails.org/) site but thanks to extensive use of server-side rendering and caching it behaves more like a static site generator: once everything is cached, the application mostly serves static HTML fragments. The client-side requirements are minimal as well: since no Javascript is used to modify the DOM - or even at all - lay-outing is straightforward.
Note that some blog posts feature advanced web *application* prototypes which do use a boatload of Javascript e.g. to [convert audio](https://0110.be/posts/An_audio_focused_ffmpeg_build_for_the_web), [visualize audio](https://0110.be/posts/Gabber_-_Visualizing_constant-Q_transform_in_the_browser), [interact with micro-controllers or MIDI instruments](https://0110.be/posts/mot_-_MIDI_and_OSC_Tools_-_Sending_UDP_messages_from_the_browser),... . These prototypes use many of the available browser APIs like the Web Audio API, WebAssembly, Web MIDI API, Web Bluetooth API, WebGL, .... I really do like targeting modern browsers with offer many possibilities to build easy-to-use *applications*. But that is exactly a distinction that needs to be made: *applications versus pages*. Javascript versus No Javascript.
---
## [Clap detection - Trigger your anything](https://0110.be/posts/Clap_detection_-_Trigger_your_anything.md)
- Published: 2023-12-15T00:00:00Z
- Updated: 2025-11-29T14:08:20Z
- Author: Joren
- ID: 531
- Canonical: https://0110.be/posts/Clap_detection_-_Trigger_your_anything
- Tags: [0110.be](https://0110.be/tags/0110.be.md), [Code](https://0110.be/tags/Code.md), [Projecten](https://0110.be/tags/Projecten.md), [UGent](https://0110.be/tags/UGent.md)
Fig: *Clap twice for light*.
There is something about surprising interfaces. Having a switch to turn on a light gets quite boring after a while. Turning on a light by clapping twice, on the other hand, has some kind of magic feel to it. In a recent Mr Beast video he and his gang visit a number of expensive houses and in one of those mansions there is a light operated by clapping twice. I am not sure about the blatant materialism, but it got me thinking on how to build a similar clap-operated light yourself.
So, what are the elements needed: first a microphone to pick up sound. Second an algorithm is needed that detects claps. And finally, something that reacts to claps: a light or something else.
Many devices have microphones so sound input is relatively easy, and with some creativity there are many things waiting to be 'clap triggered': vacuum robots, sunscreens, lights, in-house ventilation, ... The main difficulty is implementing a efficient clap-detection algorithm. Luckily there are already a few described in the literature. I have based my ANSI C implementation on 'Duxbury, C., et al (2003). *Complex domain onset detection for musical signals*'.
My version of the clap-detection algorithm has two parameters which might need adapting to fit your environment. The silence threshold determines the minimum loudness for a clap to be triggered. The onset threshold determines more or less how 'percussive' the sound needs to be: the idea is to only react to things sounding like a clap and not to e.g. a loud whistle or other sounds. This is what the onset threshold tries to control. You can try it out below:
Demo: click the 'start audio' to capture your microphone and try to clap clearly twice. Lower the parameters if nothing happens.
## Clap detection on a micro-controller
With this working we now can try to run this code on a micro-controller. Running it on a micro-controller makes it more practical in daily use to e.g. switch on lights. A low-cost ESP32 with a MEMS microphone is a good platform: these microcontrollers are easy to use and have WiFi connectivity which opens the possibility to trigger commands to smart sockets or other WiFi-enabled devices. The [pector GitHub repository](https://github.com/JorenSix/pector) contains an Arduino project to run the clap-detection algorithm on an ESP32 or similar device (Teensy, RP2040,... ).
## Clap detection in the command line
Next to the main clap detection software, there is a small script to trigger commands when a clap is detected. In this case, the script waits for a double clap and then pushes updates to a git repository. There are two reasons for this: the first is that it is fun, the second is for bragging rights. Not that many people can say they once pushed source code simply by clapping twice. It is, however, a challenge to find people who have the patience to listen to me explaining what I have done and who are impressed by this feat, so maybe there is only one reason: it is fun. Below a screen capture can be found pushing code to the [pector repository](https://github.com/JorenSix/pector).
Vid: pushing code by clapping
Have a look at the [pector GitHub repository](https://github.com/JorenSix/pector) for more info on how you can make your websites/apps/command line tools/devices clap controlled!
---
## [Introduction on Music Information Retrieval](https://0110.be/posts/Introduction_on_Music_Information_Retrieval.md)
- Published: 2023-11-13T00:00:00Z
- Updated: 2023-12-06T08:30:30Z
- Author: Joren
- ID: 535
- Canonical: https://0110.be/posts/Introduction_on_Music_Information_Retrieval
- Tags: [Code](https://0110.be/tags/Code.md), [Music Information Retrieval](https://0110.be/tags/Music%20Information%20Retrieval.md), [UGent](https://0110.be/tags/UGent.md)
I have been asked to give a guest lecture introducing Music Information Retrieval for the course *'Foundations of Musical Acoustics and Sonology'* at Ghent University. The lecture slides include interactive demos with live sound visualization and can be found below.
> *As we delve into the intricacies of how machines can analyze and understand musical content, students will gain insights into the cutting-edge research field that underpins modern music technology. From the algorithms powering music recommendation systems to the challenges of extracting meaningful information from audio signals, the lecture aims to ignite curiosity and inspire the next generation of musicologists in both music and technology. Get ready for an engaging session that promises to unlock the doors to a world where the science of sound meets the art of music.*
Thanks to ChatGTP for the slightly over-the-top intro text above. Anyway, here you can find my [introduction to Music Information Retrieval slides](https://0110.be/attachment/cors/2023.11.Music-Information-Retrieval-Intro/) . Especially the interactive slides are perhaps of interest. The lecture was given in the [Art-Science Interaction Lab (ASIL)](https://asil.ugent.be/) which has a seven meter wide screen, which affects the slide design a bit.
Fig: Click the screenshot to go to the 'Introduction to Music Information Retrieval' slides.
- [MIR-intro-screenshot.png](https://0110.be/files/attachments/535/MIR-intro-screenshot.png)
- [MIR\_intro.pdf](https://0110.be/files/attachments/535/MIR_intro.pdf)
---
## [NextCube, IRCAM Musical Workstation Demo @ Science Day](https://0110.be/posts/NextCube%2C_IRCAM_Musical_Workstation_Demo_%40_Science_Day.md)
- Published: 2023-11-13T00:00:00Z
- Updated: 2025-11-29T13:50:08Z
- Author: Joren
- ID: 533
- Canonical: https://0110.be/posts/NextCube%2C_IRCAM_Musical_Workstation_Demo_%40_Science_Day
- Tags: [IPEM](https://0110.be/tags/IPEM.md), [UGent](https://0110.be/tags/UGent.md)
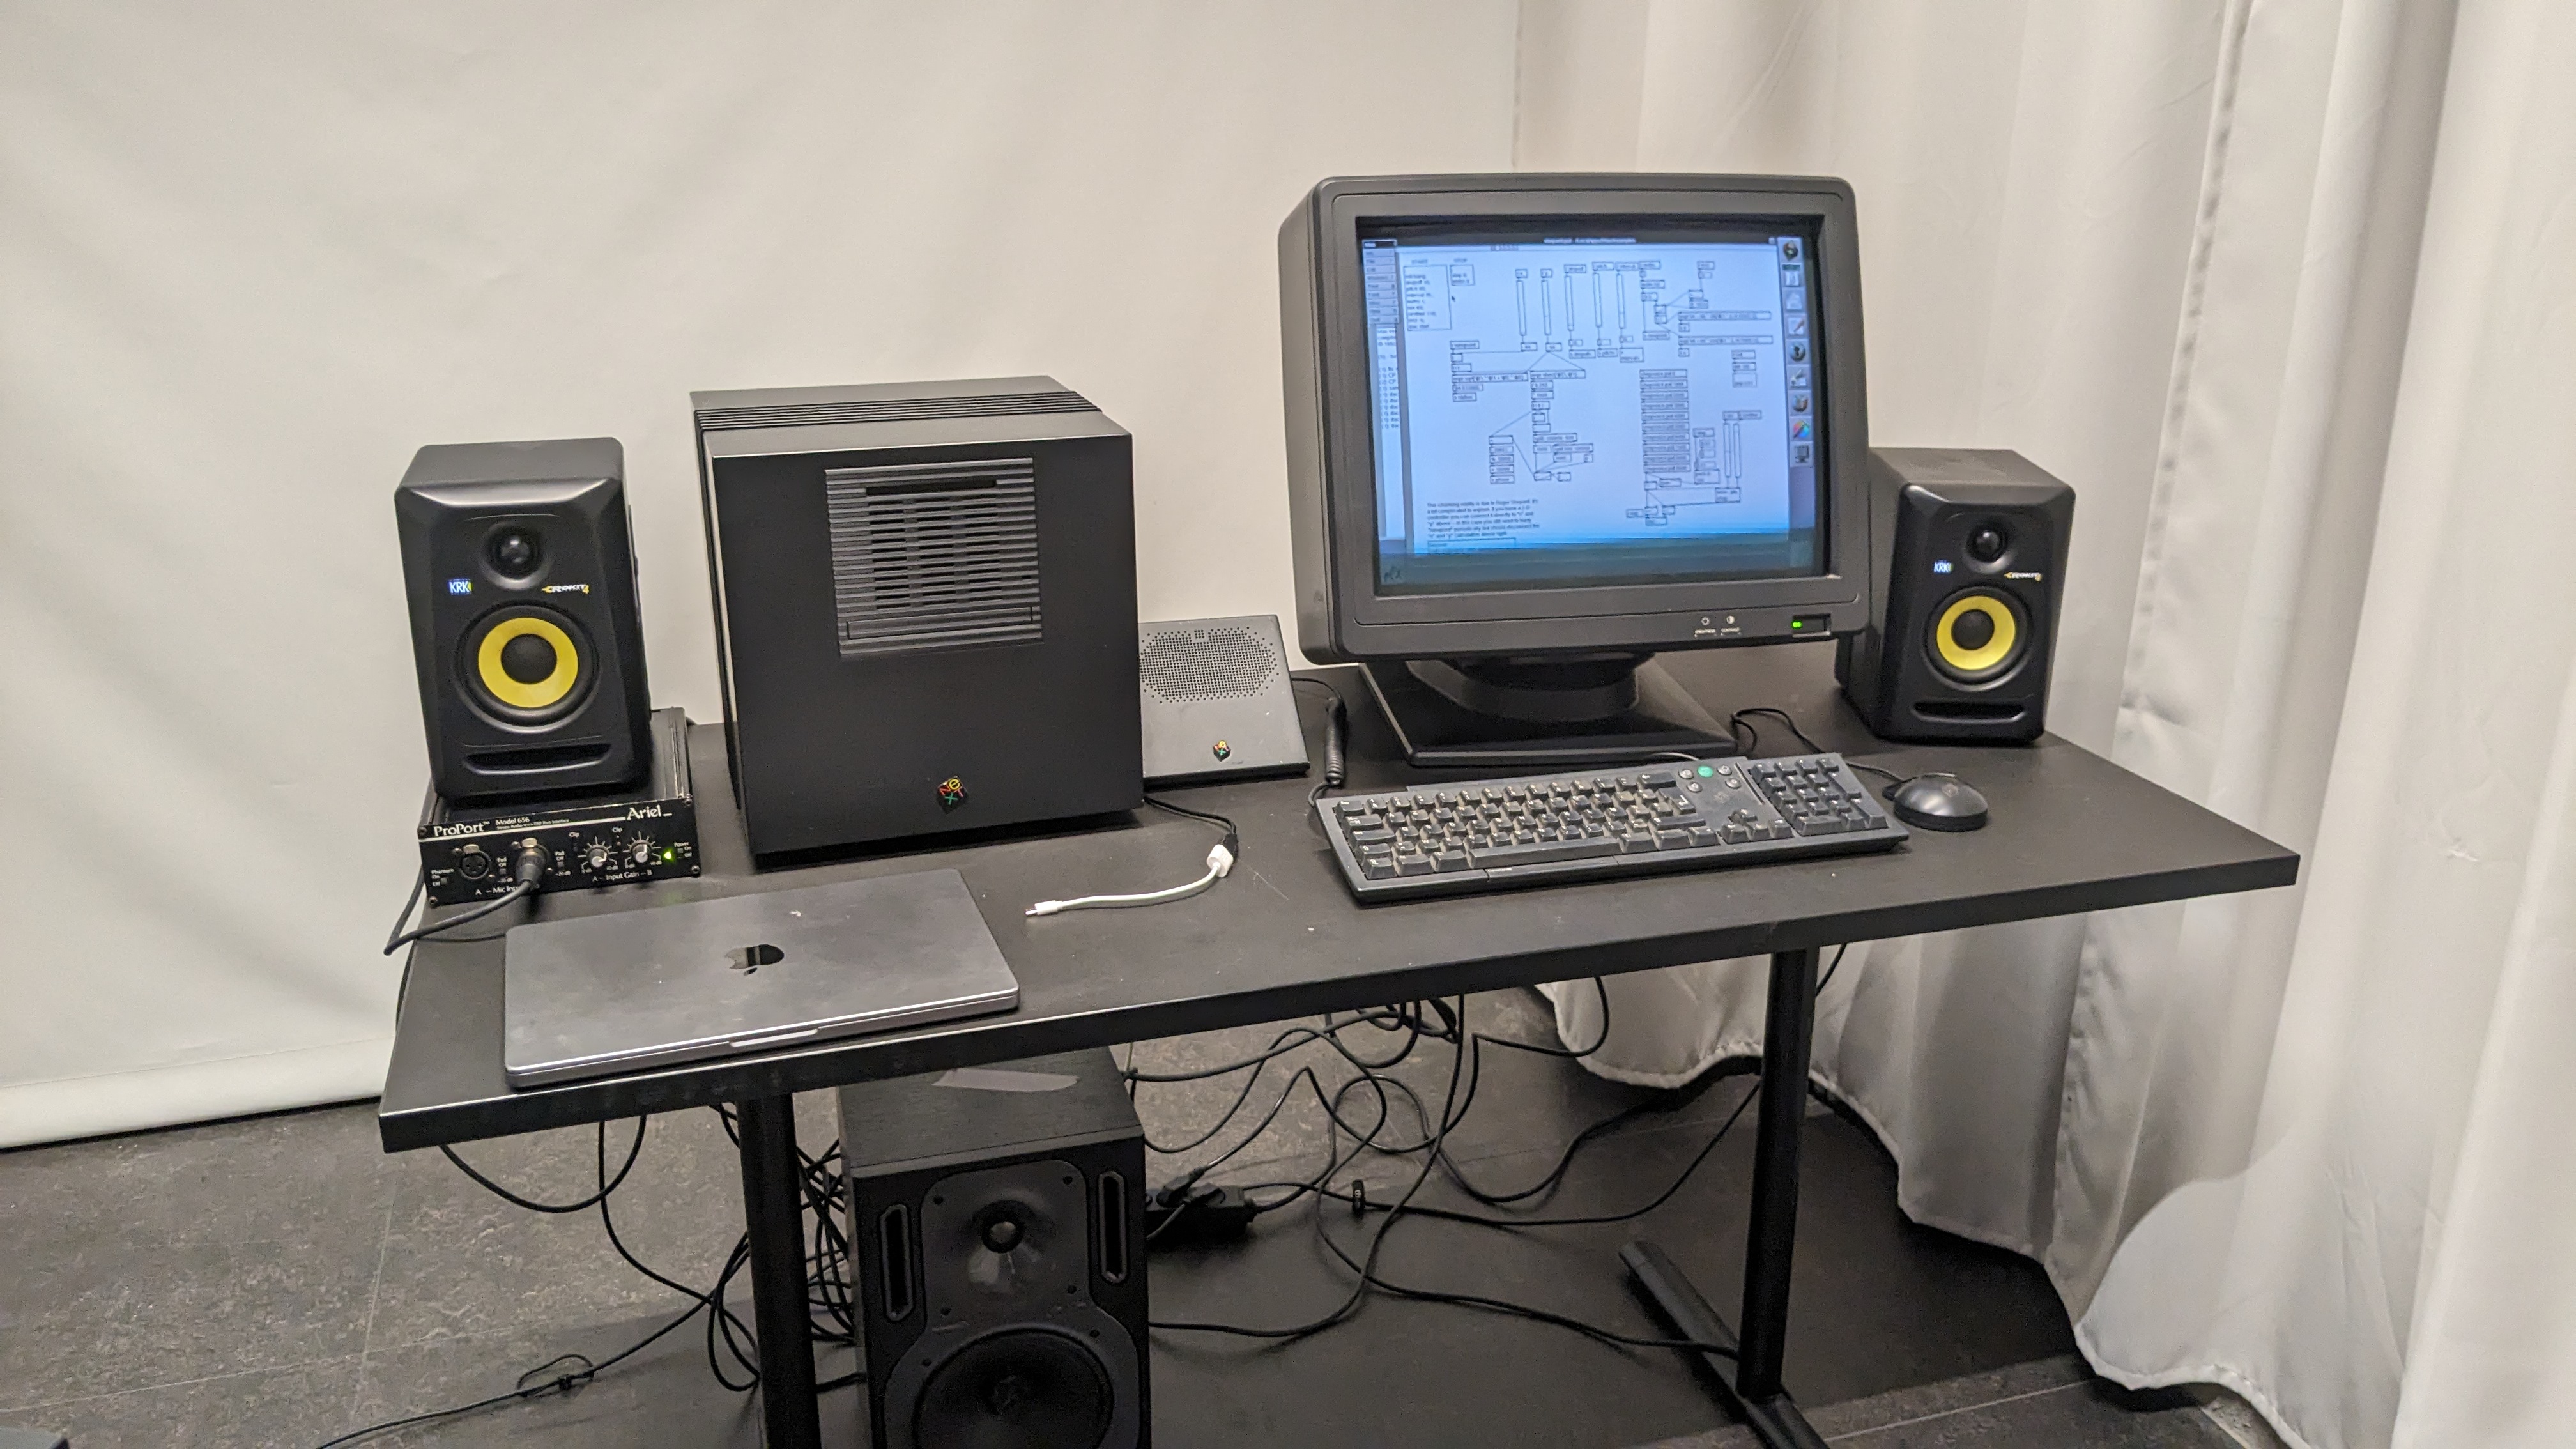
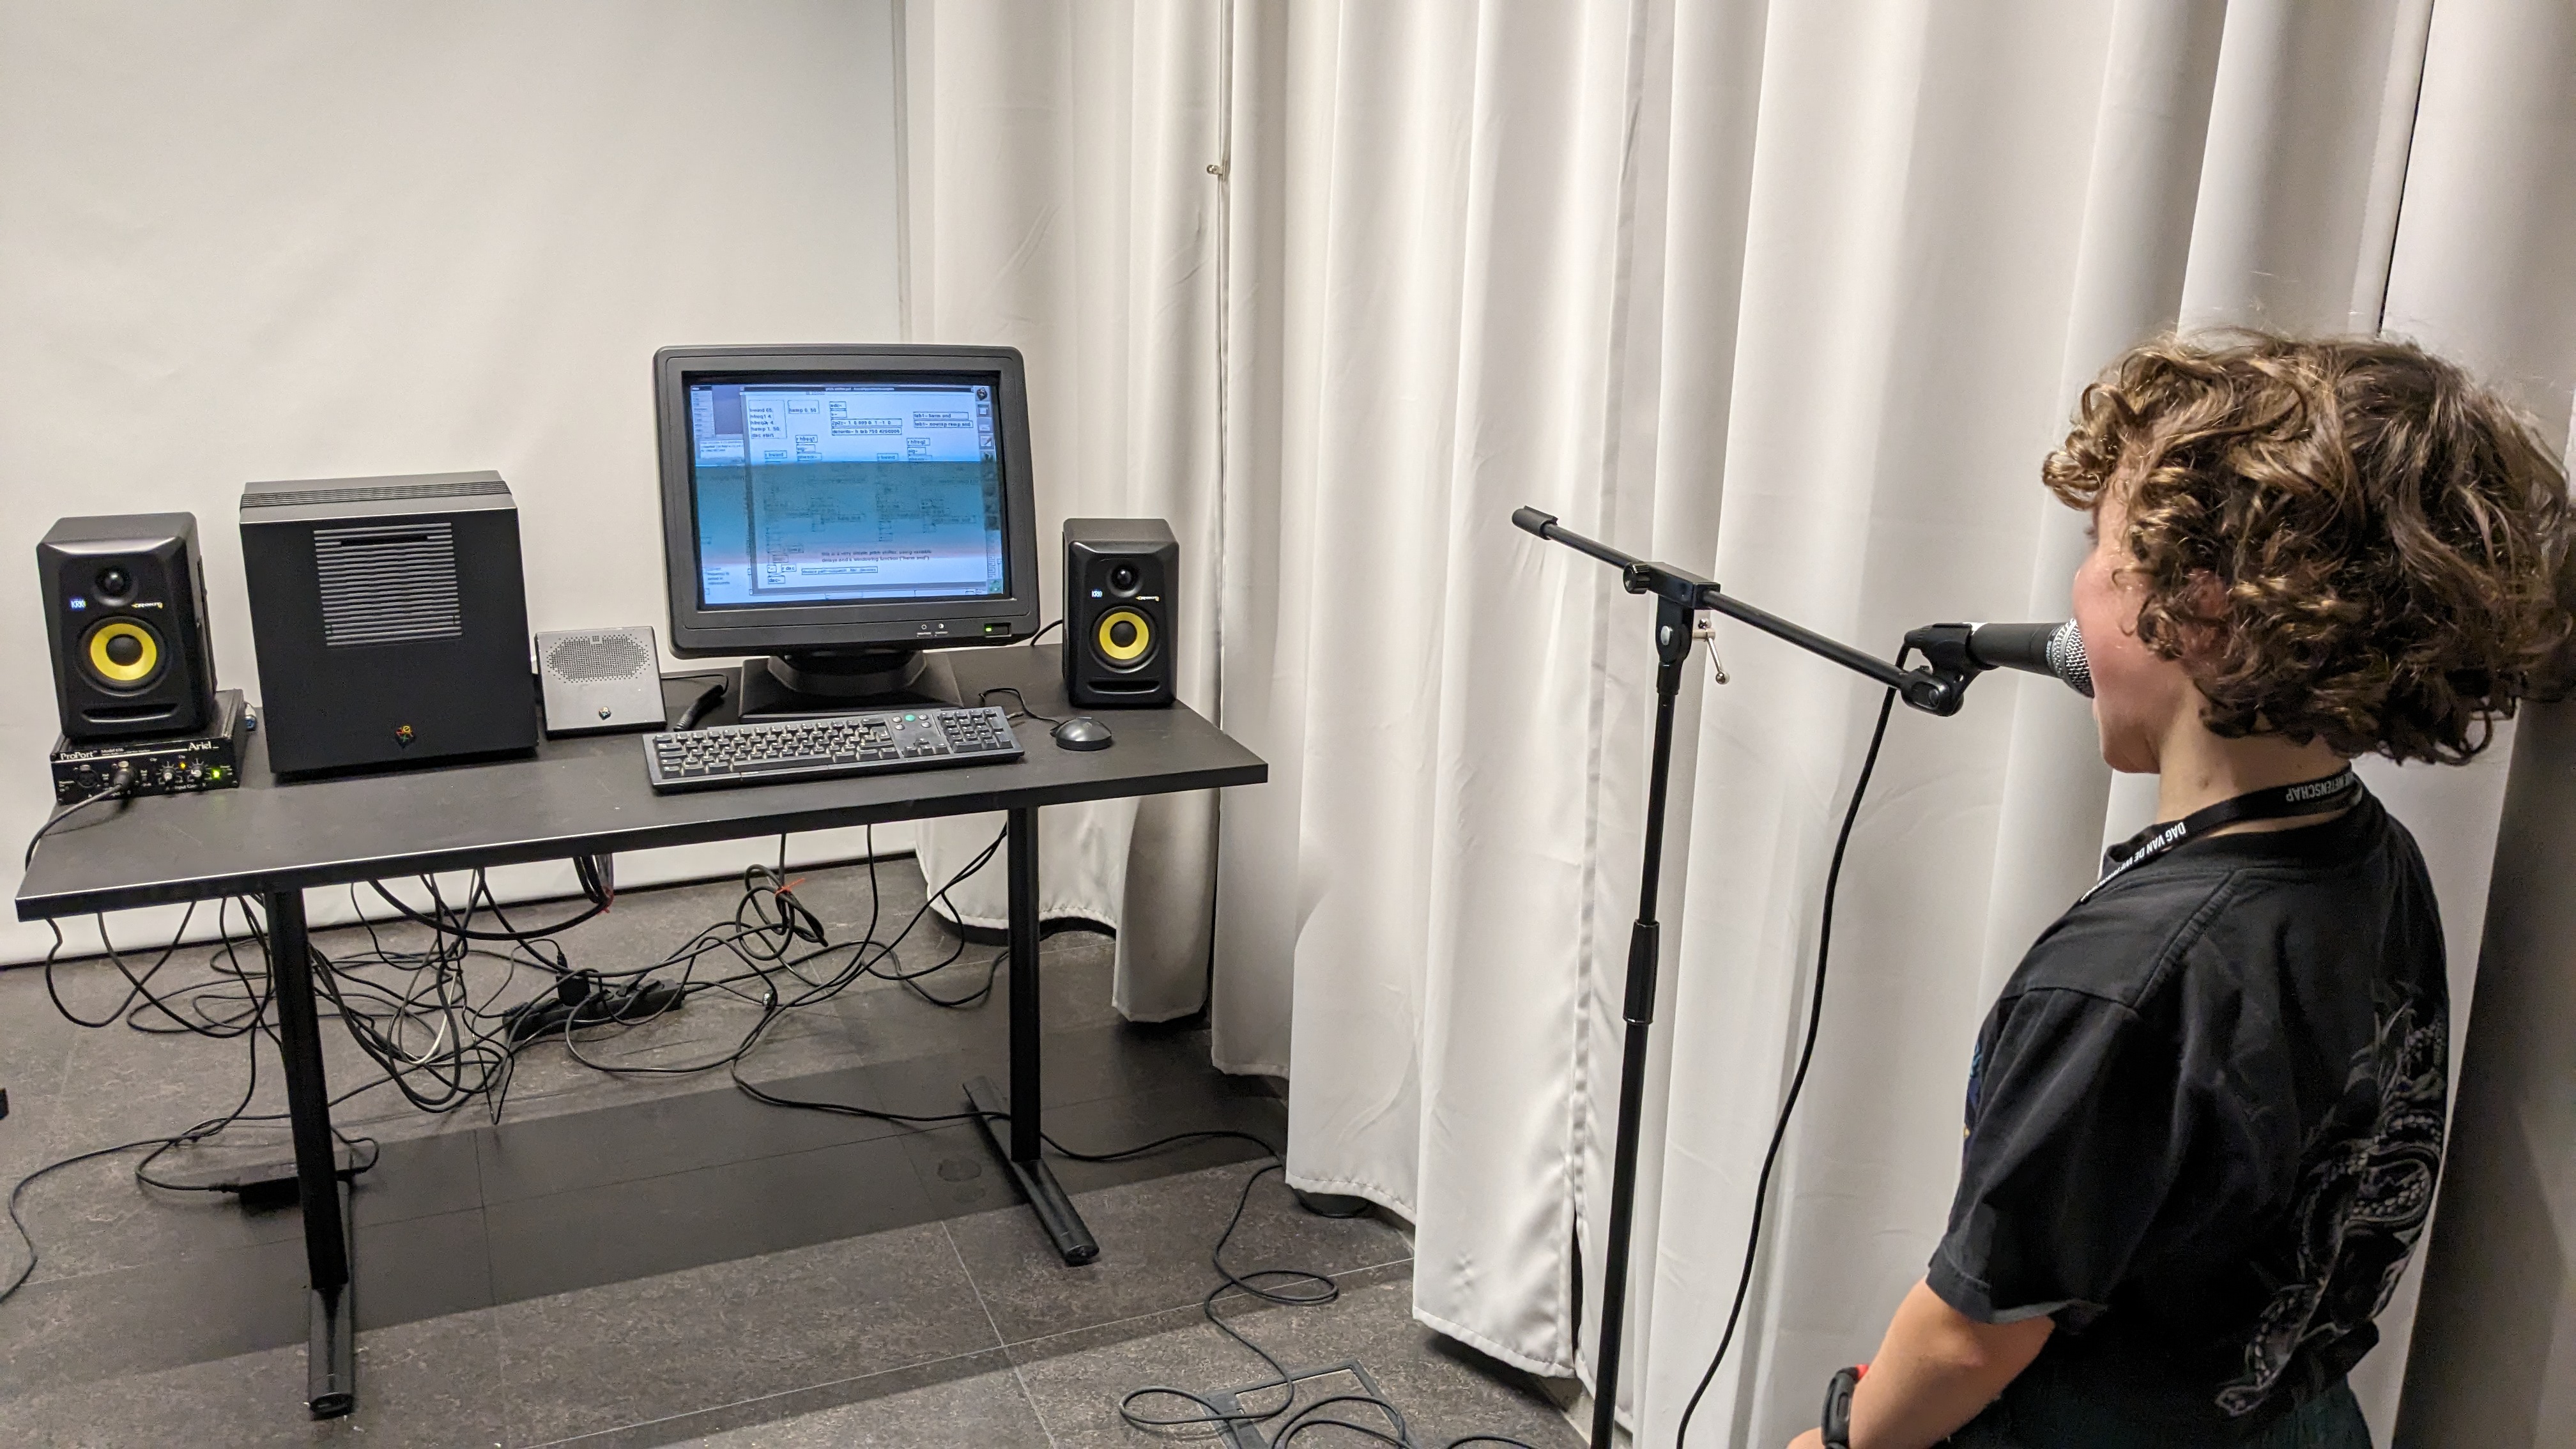
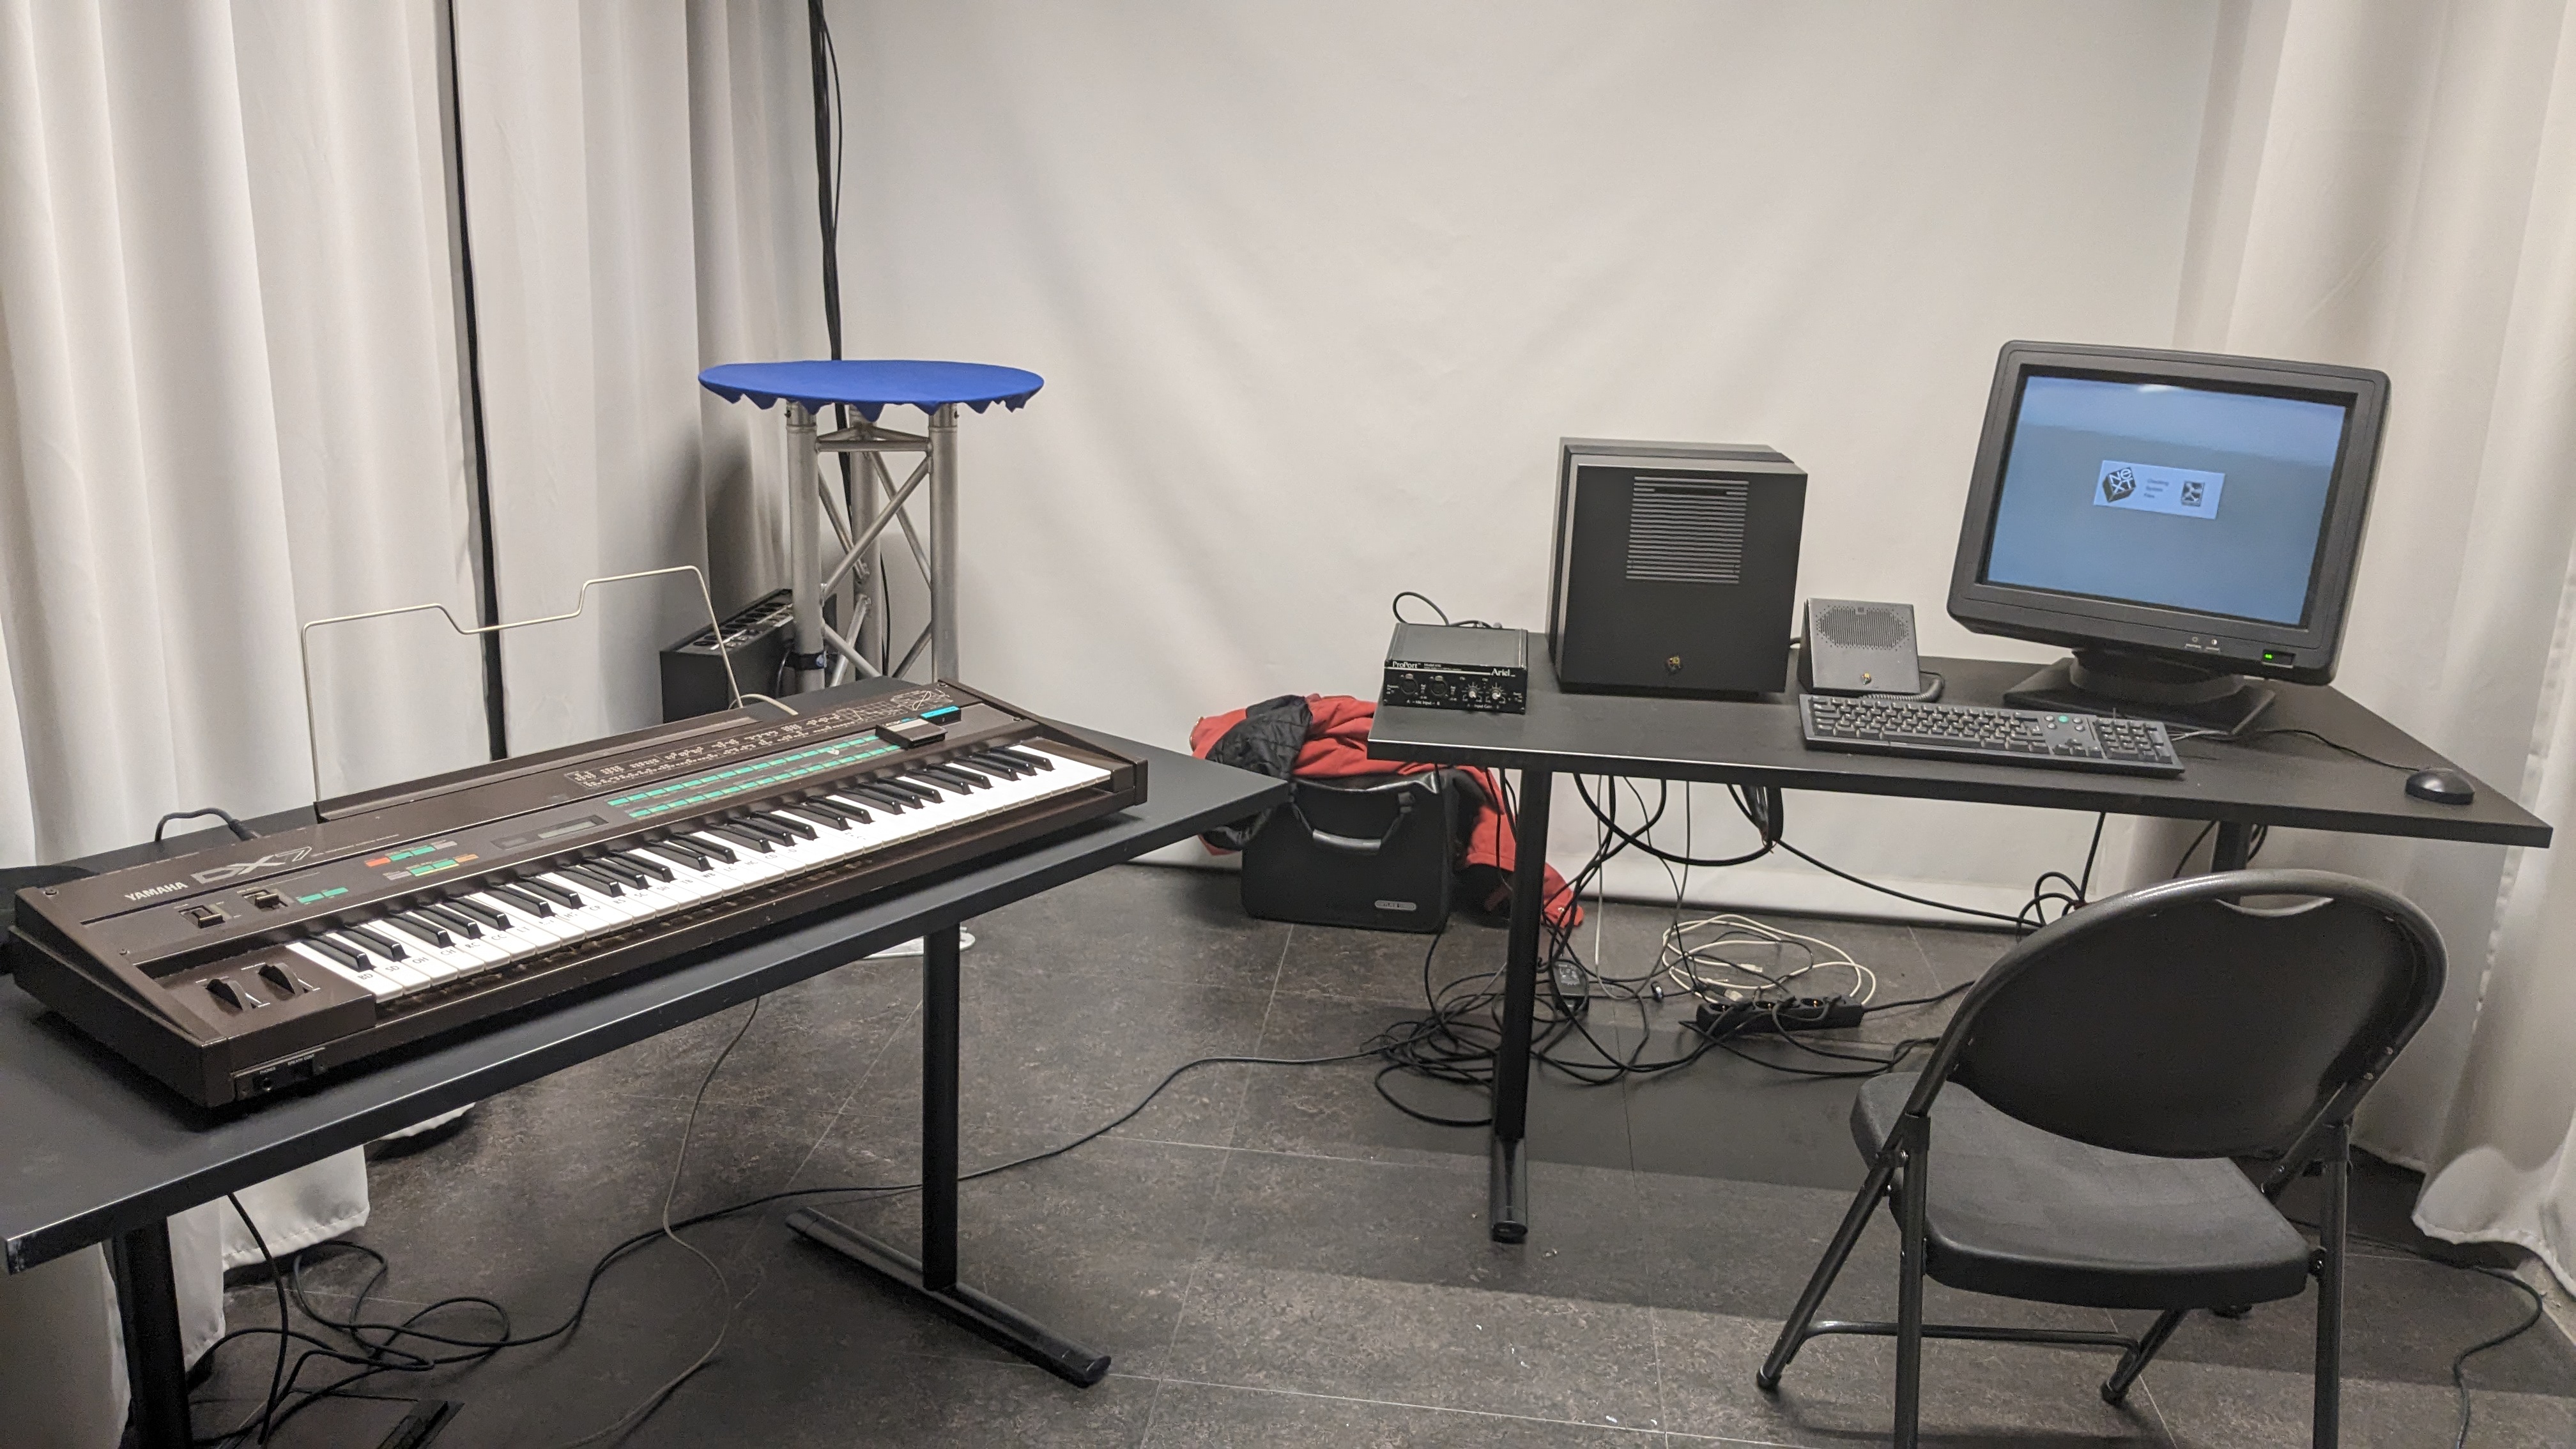
I will be demoing an early digital music workstation at the [Flanders 2023 Science Day](https://www.dagvandewetenschap.be/activiteiten/universiteit-gent-bespeelbare-erfgoed-synthesisers-op-locatie). During the Science Day there will be demonstrations of several of the [electronic music heritage instruments](https://asil.ugent.be/projects/#heritageinstruments) of the collection of IPEM, which used to be an early electronic music production studio. In the collection is a vintage analog synthesizer (an EMS Synthi 100), a Yamaha DX7, an analog plate reverb audio effect processor and, finally, a NeXTcube with a unique sound-card and early digital music workstation software.
The NeXTcube is an influential machine in computing history. The NeXTcube, with an additional soundcard, was also one of the first off-the-shelf devices for high-quality, real-time music applications. I have restored a NeXTcube to run an early version of MAX, an environment for interactive music applications. This combination of software and hardware was developed at [IRCAM](https://www.ircam.fr/) and was known as the IRCAM Musical Workstation or [IRCAM Signal Processing Workstation (ISPW)](https://en.wikipedia.org/wiki/ISPW). See my previous blog posts on [Electronic Music and the NeXTcube](https://0110.be/posts/Electronic_Music_and_the_NeXTcube_-_Running_MAX_on_the_IRCAM_Musical_Workstation) and [USB MIDI interface for the NeXTCube](https://0110.be/posts/USB_MIDI_interface_for_the_NeXTCube_-_ISPW_board)
Fig: the NeXTcube's design stood out compared to the contemporary beige box PCs.`
The IPEM collection of electronic music instruments is unique with the aim to reintroduce the instruments into daily music practice an turn them into living heritage`. For example in 2020, the Dewaele Brothers released the [album made exclusively on the IPEM 'EMS Synthi 100' synthesizer](https://store.deeweestudio.com/products/deewee-sessions-vol-01). The NeXTcube demo will be hands-on as well. See you there!
---
## [Doorbell triggered Halloween window projection](https://0110.be/posts/Doorbell_triggered_Halloween_window_projection.md)
- Published: 2023-10-25T00:00:00Z
- Updated: 2025-11-29T14:09:38Z
- Author: Joren
- ID: 532
- Canonical: https://0110.be/posts/Doorbell_triggered_Halloween_window_projection
- Tags: [0110.be](https://0110.be/tags/0110.be.md), [UGent](https://0110.be/tags/UGent.md)
Fig: *Door projection as imagined by DALL.E*.
I did a thing, and, similar to most stuff made here, it is quite a bit of effort and rather pointless. In that sense, it is a bit like life itself. Anyhow, it seems that the Halloween tradition of trick-or-treating has found a strong foothold in mainland Europe. Due to social embeddedness, I prepared Halloween themed projection that responds to my door-bell. I have a glass door, which is ideal for scary projections. The idea is to have a continuous door projection but with a twist: when kids press the doorbell a projected ghost reacts and rushes towards them along with a loud ghostly scream.
This blog post details the technical setup with the intention to inspire similar projects and serve as documentation for next year. First we need a way react to the doorbell.
## Doorbell trigger setup
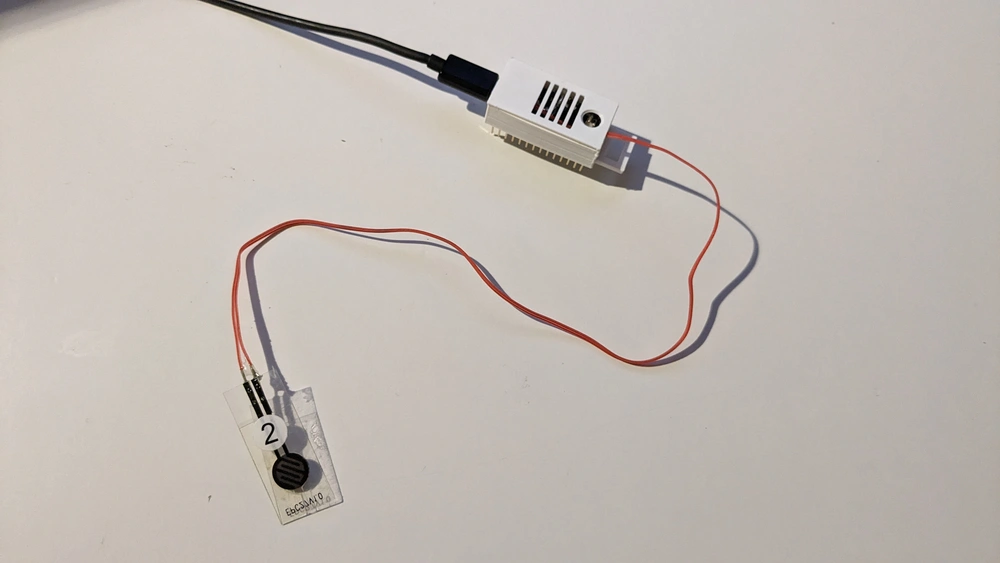
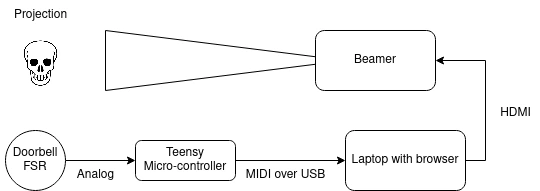
I sourced a couple of FSR (Force Sensitive Resistor)'s from a "sound book" that I had taken apart. Most of these sound books with e.g. animal sounds are meant for toddlers and have a some type of button and a small electronics circuit to make sound. Some of these books work with FSR 'buttons' which are similar in size to a doorbell. I took a single FSR from such a book.
I attached the FSR to a "Teensy LC" micro-controller with an additional resistor and put it in a small [3D-printed case](https://www.thingiverse.com/thing:4157853). The Teensy was programmed to emit a MIDI Note On event when the FSR/doorbell is pressed. A Note Off follows when the button is released. Once it is connected via USB to a computer it is essentially regarded as a digital piano with only a single key. Making a micro-controller pretend to be a standard MIDI device is very practical since the message passing protocol is standardized and well supported by many types of systems. MIDI is also optimized for low-latency communication. Via the Web MIDI API there is even support for MIDI in web browsers.
## Video projection
While software like Resolume allows for complex interactive video projections, my requirements are more modest: I need a continuous background video and I want the 'scare' video and audio to appear when the doorbell is triggered. I opted for a browser-based solution: multi-media capabilities, scripting and MIDI support are all present in modern browsers. Running things in a browser has advantages: there is no need for specialized software, it is easy to program, easy to run, relatively stable and future-proof. The proof-of-concept can be seen below. For the actual projection on a window or door you need to first cover the glass with a thin layer of white paper which lets most light through. A white paper tablecloth works well.
Demo: click the 'start video' to start the background video and click doorbell if you dare...
The code is not much special and a bit hacky but can be found attached. The download includes the "html, javascript, css, video, audio and the micro-controller software for a doorbell-triggered projection".
---
## [Started at the Ghent Centre for Digital Humanities](https://0110.be/posts/Started_at_the_Ghent_Centre_for_Digital_Humanities.md)
- Published: 2023-10-03T00:00:00Z
- Updated: 2023-10-09T07:28:42Z
- Author: Joren
- ID: 530
- Canonical: https://0110.be/posts/Started_at_the_Ghent_Centre_for_Digital_Humanities
- Tags: [UGent](https://0110.be/tags/UGent.md)
Fig: *Gent Gemapt, an recent GhentCDH project*.
From the first of October I started at the [Ghent Centre for Digital Humanities (GhentCDH)](https://www.ghentcdh.ugent.be/) as research software engineer. GhentCDH " engages in the field of 'Digital Humanities' at Ghent University, ranging from archaeology and geography to linguistics and cultural studies. GhentCDH develops DH collaboration and supports research projects, teaching activities and infrastructure projects across the faculties".
I will be helping with the many projects they are involved in: ranging form public research valorization to internal research tools. I am sure I will learn a lot by discussing projects with a diverse range of researchers and hope to consolidate my expertise in the area of mulitimedia analysis and annotation in some ways. The current areas of expertise can be found on their website:
- **Collaborative databases:** offering advice and support for collaborative databases at Ghent University. It helps researchers to develop a database instance, powered by e.g. Nodegoat. It provides advice regarding data standards and linked data.
- **Digital text analysis:** aiming to improve digital text analysis at Ghent University by offering support and information to researchers. You can contact us for advice on TEI and digital editions, working with digital text analysis tools, and using computer-assisted qualitative data analysis.
- **Geospatial analysis:** offering advice, support and training regarding geospatial data management, analysis and visualisation to the humanities and social sciences researchers at the Ghent University.
- **Digital heritage:** offering support in regards to digital heritage, participation and virtual expositions. GhentCDH helps researchers, teachers and students to create, manage and enrich their own digital collections and set up virtual exhibitions around them.
A recent GhentCDH project is [Gent Gemapt or Ghent mapped](https://gentgemapt.be/) *'an interatcive platform which connects places, historical maps and heritage collections which each other and the wider audience'*.
---
## [Resampling audio via a Web Audio API Audio Worklet](https://0110.be/posts/Resampling_audio_via_a_Web_Audio_API_Audio_Worklet.md)
- Published: 2023-09-27T00:00:00Z
- Updated: 2023-09-28T07:50:17Z
- Author: Joren
- ID: 529
- Canonical: https://0110.be/posts/Resampling_audio_via_a_Web_Audio_API_Audio_Worklet
- Tags: [Code](https://0110.be/tags/Code.md), [UGent](https://0110.be/tags/UGent.md)
The Web Audio API offers some great functionality for web based audio applications. The API also has a couple of quirks and is not always easy to use. One of those quirks is the limited support for resampling audio. When requesting a microphone stream of a certain sample rate the API only allows configurations your hardware supports. Ideally there should be an option to resample the incoming stream to a requested sample rate (and format) independent of hardware.
On macOS and Chrome the issue becomes even more confusing: when using multiple `AudioContexts` they can only have the same sample rate. E.g. starting a microphone on 16kHz by itself is possible but not when there is also audio playback on the same page, then everything switches over to 48kHz. There even seems to be an effect of different browser tabs. Other browsers and platforms have similar issues. This is problematic when you need audio in a fixed sample rate.
The solution is to resample audio incoming samples in your code or use the `OfflineAudioContext` as a resampler. The `OfflineAudioContext` way needs a lot of code and, crucially, only works on the main browser thread and not in an `AudioWorklet`. The `AudioWorklet` should be the place for computationally intensive audio processing like resampling. To solve the resampling problem I have glued together an `AudioWorklet` and [libsamplerate-js](https://github.com/aolsenjazz/libsamplerate-js) to provide an easy to use audio resampling solution which is demo'd below:
The demo does not seem to do much but it reads incoming microphone data and uses a [high quality audio resampling library](http://www.mega-nerd.com/SRC/) to resample an audio stream into a requested audio sampling rate. The browser development console shows some info on this process. To get this working in an audio worklet, the libsamplerate-js needed to be recompiled and directly included in the `AudioWorklet`. To inspect the source, check the "Web Audio API AudioWorklet resampler":\[web-audio-api-resample.zip\].
The resampling issue came up in development the browser based component of [Olaf, an audio fingerprinting solution](https://github.com/JorenSix/Olaf).
- [web-audio-api-resample.zip](https://0110.be/files/attachments/529/web-audio-api-resample.zip)
---
## [Acoustic fingerprinting in the browser with Olaf](https://0110.be/posts/Acoustic_fingerprinting_in_the_browser_with_Olaf.md)
- Published: 2023-09-27T00:00:00Z
- Updated: 2023-10-03T13:06:53Z
- Author: Joren
- ID: 506
- Canonical: https://0110.be/posts/Acoustic_fingerprinting_in_the_browser_with_Olaf
- Tags: [Code](https://0110.be/tags/Code.md), [UGent](https://0110.be/tags/UGent.md)
The recent version of the OLAF (Overly Lightweight Acoustic Fingerprinting) audio fingerprinting system also includes an updated WASM build which deserves a bit more attention.
The browser version of Olaf enables [audio fingerprinting in the browser](https://0110.be/attachment/cors/2023.09.olaf-wasm-demo/basic.html). This can be used to e.g. react to music playing in the environment, so called *second screen applications* or to synchronize several devices to an audio stream.
The goal of the demo below is to play music aloud - not using headphones - using the controls on the left. You can either play the reference track or an unrelated distractor. Next, the Olaf fingerpinter system needs to be started using the button on the right which captures the microphone of your device. Then Olaf tries match the incoming sound of the microphone and the reference track. Once a match is found the exact time in the match is displayed until the sound matches no more. Note that there is no direct information flowing between the left and right part. You can also play the reference on another device to be sure.
Reference:
\
Distractor:
To get this demo working with the Web Audio API and use `AudioWorklet` objects, to process audio in the background an not on the main browser thread. There is surprisingly little info to find on how to combine WASM libraries - I used both [Olaf](https://github.com/JorenSix/Olaf) and [libsamplerate-js](https://github.com/aolsenjazz/libsamplerate-js) - and the AudioWorklet environment. Thanks to one of the very few resources on [combining WASM, emscripten and AudioWorklets](https://timdaub.github.io/2021/02/25/emscripten-wasm/) led me in the right direction.
For more information, check the [Olaf acoustic fingerpinter system](https://github.com/JorenSix/Olaf) source code repository.
---
## [ESP32 I2S WiFi Microphone](https://0110.be/posts/ESP32_I2S_WiFi_Microphone.md)
- Published: 2023-09-26T00:00:00Z
- Updated: 2025-11-29T14:13:54Z
- Author: Joren
- ID: 528
- Canonical: https://0110.be/posts/ESP32_I2S_WiFi_Microphone
- Tags: [Code](https://0110.be/tags/Code.md), [UGent](https://0110.be/tags/UGent.md)
Fig: *Audio over WiFi*.
Getting MEMS microphones to work on microcontroller platforms as the ESP32 is challenging. In theory, the I2S protocol provides a standardised, easy way to receive audio from a microphone and send stereo audio to a DAC. In practice, the many parameters make I2S not straightforwards to use. As with most protocols and standards, the mismatch between limitations and quirks of specific hardware and software implementations can cause issues. To debug I2S microphones on ESP32 or the RP2040 I have prepared a small Arduino program.
The [IS2 WiFi microphone](https://github.com/JorenSix/Olaf/blob/master/ESP32/esp32_inmp441_wifi_mic/esp32_inmp441_wifi_mic.ino) program sends audio from the microphone over WiFi to a computer which listen to the microphone: this make sure that the microphone works as expected and audio samples are correctly interpreted. It validates the I2S settings like buffer sizes, sample rates, audio formats, stereo or mono settings, ... After configuring an SSID, password and IP-address it becomes possible to listen --- in real-time --- to the microphone which also allows the listener to sense the microphone quality.
````c
size_t bytesIn = 0;
esp_err_t result = i2s_read(I2S_PORT, &sBuffer, bufferLen, &bytesIn, portMAX_DELAY);
int16_t *sample_buffer = (int16_t *)sBuffer;
int16_t samples_read = bytesIn / 2;
float audio_block_float[samples_read];
for (size_t i = 0; i < samples_read; i++) {
sample_buffer[i] = gain_factor * sample_buffer[i];
// Max for signed int16_t is 2^15
audio_block_float[i] = sample_buffer[i] / 32768.f;
}
// Send raw audio 32bit float samples over UDP
Udp.beginPacket(outIp, outPort);
Udp.write((const uint8_t *)audio_block_float, bytesIn * 2);
Udp.endPacket();
````
Fig: The main part of reading i2s audio from a microphone and sending an UDP packet.
To listen to the incoming audio an UDP port needs to be captured and subsequently send to a program that can interpret and play or store audio. With [netcat](https://en.wikipedia.org/wiki/Netcat) UDP data can be captured. With [ffmpeg and ffplay](https://ffmpeg.org) audio can be payed or stored. In practice the receiving computer might run the following commands to decode UDP packages and hear the microphone:
# for playback, receive UDP packages and interpret raw audio
nc -l -u 3000 | ffplay -f f32le -ar 16000 -ac 1 -
# for playback, receive UDP packages and store in a wav file
nc -l -u 3000 | ffmpeg -f f32le -ar 16000 -ac 1 -i pipe: microphone.wav
The ESP32 WiFi microphone has been developed during the development of [Olaf, an audio search system](https://github.com/JorenSix/Olaf) which also works for embedded devices. There is a page with [more info on Olaf on ESP32](https://github.com/JorenSix/Olaf/tree/master/ESP32).
- [audio\_over\_wifi.webp](https://0110.be/files/attachments/528/audio_over_wifi.webp)
- [esp32\_inmp441\_wifi\_mic.ino](https://0110.be/files/attachments/528/esp32_inmp441_wifi_mic.ino)
---
## [ESP32 Olaf - Overly Lightweight Acoustic Fingerprinting on the ESP32](https://0110.be/posts/ESP32_Olaf_-_Overly_Lightweight_Acoustic_Fingerprinting_on_the_ESP32.md)
- Published: 2023-09-26T00:00:00Z
- Updated: 2023-09-28T08:43:42Z
- Author: Joren
- ID: 527
- Canonical: https://0110.be/posts/ESP32_Olaf_-_Overly_Lightweight_Acoustic_Fingerprinting_on_the_ESP32
- Tags: [Code](https://0110.be/tags/Code.md), [UGent](https://0110.be/tags/UGent.md)
Fig: In Dutch 'ESP 32' means 32 Hams...
Olaf is an acoustic fingerprinting system designed with embedded devices in mind. It has a low memory use and computational requirements which are compatible with e.g. the ESP32 line of microcontrollers devices like the [SparkFun ESP32 Thing](https://www.sparkfun.com/products/13907) or [devices based on the RP2040 chip](https://docs.arduino.cc/hardware/nano-rp2040-connect). Recently I have prepared a demo with the newest version of Olaf running on an ESP32 which deserves some attention.
To match audio, Olaf needs access to streaming audio. This can be audio read from an SD-card but, more likely, audio comes from a microphone. Digital microphones have some great features: a low-noise floor, great at picking up omnidirectional sound and they are inexpensive. I have prepared a demo of Olaf which shows how to use [Olaf on an ESP32 with an INMP441 MEMS microphone](https://github.com/JorenSix/Olaf/blob/master/ESP32/esp32_inmp441_olaf/esp32_inmp441_olaf.ino). To test the MEMS microphone I also made a [MEMS microphone to WiFi program](https://0110.be/posts/ESP32_I2S_WiFi_Microphone) which sends incoming sound on the ESP32 over WiFi to a computer where the sound quality can be verified.
The example provides a scaffold for *embedded music-reactive applications*. Once the microcontroller knows which song is playing and where in the song the match is found it can trigger LED's (or explosions, fireworks, lyrics, other effects...) which should happen in sync with the music. See the example below to get the idea, this demo runs an older version of Olaf but the idea stays the same:
The main difference between the current and previous versions of Olaf is that now the ESP32 version, the browser version and the PC version are all *running the exact same code*. No hacks are needed any more to support a platform. This means that testing and debugging can be done on a computer and, if everything goes well, the code should work as expected on the embedded device (or browser).
If you want to know more about Olaf, read the [paper on the Olaf audio search](https://joss.theoj.org/papers/10.21105/joss.05459), check out the [Olaf source code repository](https://github.com/JorenSix/Olaf) or consult the [Olaf on ESP32 readme](https://github.com/JorenSix/Olaf/blob/master/ESP32).
---
## [A Python wrapper for Olaf - Acoustic fingerprinting in Python](https://0110.be/posts/A_Python_wrapper_for_Olaf_-_Acoustic_fingerprinting_in_Python.md)
- Published: 2023-09-22T00:00:00Z
- Updated: 2023-09-26T08:38:34Z
- Author: Joren
- ID: 526
- Canonical: https://0110.be/posts/A_Python_wrapper_for_Olaf_-_Acoustic_fingerprinting_in_Python
- Tags: [Code](https://0110.be/tags/Code.md), [Command Line Application](https://0110.be/tags/Command%20Line%20Application.md), [UGent](https://0110.be/tags/UGent.md)
Fig: *Python wrapping C*.
I have just released a Python wrapper for the Olaf acoustic fingerprinting library. Olaf is a scalable audio search system based on indexing . Olaf is programmed in C but a wrapper now makes its functionality available in Python.
The python wrapper should make it more accessible for developers to get started with it and makes it compatible with other Python libraries. A few notable libraries are the *[librosa python package for music and audio analysis](https://librosa.org/doc/latest/index.html__),*[nnAudio, A fast GPU audio processing toolbox](https://nnaudio.readthedocs.io/en/latest/intro.html__) and other more general plotting, data processing and machine learning libraries. Despite Python's many flaws, its rich library ecosystem is unmatched.
The associated [GitHub repository](https://github.com/JorenSix/Olaf) contains [documentation on how to use the Olaf python wrapper](https://github.com/JorenSix/Olaf/tree/master/python-wrapper) and also contains examples. The first shows how to index a song into the database and subsequently query the database. The second visualises the event points extracted by Olaf. The figure below shows shows the resulting event points, extracted with Olaf, plotted on a magnitude spectrogram, calculated with Olaf. The spectrogram on top is calculated using librosa and is meant to be very similar to Olaf.
\
Fig: *A power spectrum from librosa and one from Olaf, with event points marked*.
The wrapper was made with [Python CFFI](https://cffi.readthedocs.io/en/latest/) which works reasonably well. The automatically generated wrapper library support a large part of the C language but it needs a compilation step for each platform. Currently, the instructions assume a POSIX-like system, but technically, the wrapper can also function on Windows, albeit with the potential need for Windows-equivalent instructions in place of certain POSIX ones. The wrapper is wrapped in an easy to use python class called `Olaf.py`:
\`\`\`python\
from olaf import Olaf, OlafCommand\
import librosa
1. Store the first ten seconds of an audio file\
audio_file = librosa.ex('choice')\
Olaf(OlafCommand.STORE,audio_file).do(duration=10.0)
1. Query for a part of the same file (with an offset of 7 seconds), but change volume\
y, sr = librosa.load(audio_file,mono=True, sr=16000,duration=10,offset=7.0)\
y = y \* 0.8 #change the volume\
results = Olaf(OlafCommand.QUERY,audio_file).do(y=y)
1. We expect a match between the stored and partially overlapping query\
print(results)\
\`\`\`
---
## [Installing a self-hosted UniFi Network Server on Debian 11](https://0110.be/posts/Installing_a_self-hosted_UniFi_Network_Server_on_Debian_11.md)
- Published: 2023-09-08T00:00:00Z
- Updated: 2023-09-08T12:28:25Z
- Author: Joren
- ID: 524
- Canonical: https://0110.be/posts/Installing_a_self-hosted_UniFi_Network_Server_on_Debian_11
- Tags: [UGent](https://0110.be/tags/UGent.md)
Fig: UniFi manager.
I have been using a couple of UniFi devices in my home network for a couple of years. These devices proved to be reliable and full-featured, especially considering the relatively low price point. To manage UniFi devices a self-hosted instance of the UniFi network server is practical, especially when you already have a home server.
Unfortunately, the [official installation instructions for UniFi](https://help.ui.com/hc/en-us/articles/360012282453-Self-Hosting-a-UniFi-Network-Server) miss a crucial step for installation on Debian 11. The network manager is not compatible with newer versions of [mongodb](https://www.mongodb.com/). To install a version of mongodb compatible with UniFi on Debian 11, use the following commands:
wget -qO - https://www.mongodb.org/static/pgp/server-3.6.asc | sudo apt-key add -
echo "deb http://repo.mongodb.org/apt/debian stretch/mongodb-org/3.6 main" | sudo tee /etc/apt/sources.list.d/mongodb-org-3.6.list
sudo apt-get install mongodb-org=3.6.23
sudo apt-get install mongodb-org-server=3.6.23
---
## [How Shazam IDs songs ](https://0110.be/posts/How_Shazam_IDs_songs_.md)
- Published: 2023-09-04T00:00:00Z
- Updated: 2023-09-08T12:49:55Z
- Author: Joren
- ID: 522
- Canonical: https://0110.be/posts/How_Shazam_IDs_songs_
- Tags: [UGent](https://0110.be/tags/UGent.md)
The Wall Street Journal made a video on the internals Shazam fingerprinter. The visuals and technical explanation serves as a very good introduction in spectral-peak-based audio fingerprinting. For those who want a more in depth view or want to try out such systems: I have implemented extensions on the Shazam technique in two open-source systems.
[Olaf](https://github.com/JorenSix/Olaf) is a spectral-peak based fingerprinter aimed at embedded systems, traditional computers and browsers. [Panako](https://github.com/JorenSix/Panako) is implemented in Java and has robustness against pitch-shifting and time-stretching which is briefly mentioned in the video below as well:
I often play board games with my kids. One of them is an absolute board game fan while the other is a sore loser and only wants to play collaborative games. These games are played 'against the board' and you win, or lose, together. I myself also still have problems losing games so I do understand this predicament. Genetics...
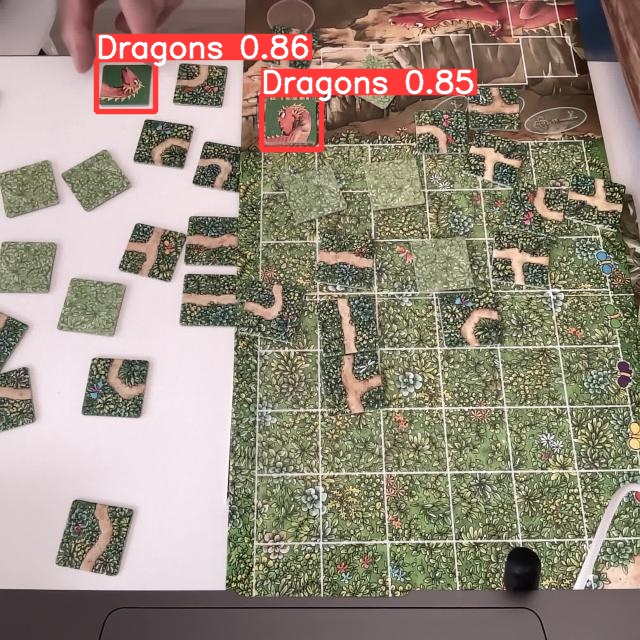
*Rock & Troll* is one of those games. It is a chance based game where you collaboratively try to build a path to a treasure before the dragon reaches it. Every player has to flip a tile which is either a part of the path (good) or a dragon (very bad). To increase engagement during play I often add sound effects. I was thinking: this can be improved and automated. For example, by doing this when a dragon tile is flipped:
The idea is to *unobtrusively* detect game state and add sound effects at critical moments. The sound effect should be playing without too much lag, ideally within about 200ms, so it feels immediate and connected to the game event. To implement this a camera based system with robust, fast object detection seemed like the way to go.
## Dragon detection
To detect dragons in a video stream I want to retrain an existing object-detection system. So two things need to happen: first a realistic, labeled dataset needs to be created. Then a system needs to be trained to detect the dragons. We do not want to label a massive dataset so we will use *transfer learning* to retrain an existing network. This existing network should already have learned basic features like edges, colors, geometries and other basic patterns. With the hope that this would result in robust detection, even with a limited dataset.
To create the dataset I wrote a small script which took a webcam picture every few seconds while I was manipulating the board and tiles. This resulted in about 130 pictures, some with no dragons and some with six, 300 labels in total. For annotating the dataset I used the free roboflow web-app which also hosts the final [dragon dataset](https://universe.roboflow.com/dragon-knngg/rockntroll/model/1). After augmentation, the size of the dataset can be tripled. The command to extract images from a webcam looks like this on my system:
`ffmpeg -y -r 30 -f avfoundation -i '0' -frames:v 1 snapshot.jpg`
After some consideration for alternatives I landed on the [YOLOv8 object-detection](https://github.com/ultralytics/ultralytics) system: a robust and fast object-detection system. Additionally, it is well-documented, pytorch-based, easy-to-use and it has support for video streams. The annotated roboflow dataset can be downloaded in a YOLOv8 compatible format as well. Transfer learning, was based on the `yolov8s.pt` weights, which are downloaded automatically. With the system installed correctly and the dataset dowloaded, a local GPU based training command might look like this:
`yolo train data=RocknTroll.v3i.yolov8/data.yaml epochs=30 model=yolov8s.pt device=mps imgsz=640 batch=32`
Once the system was trained - download the "model wheights here":\[dragons.pt\] - a bit of "glue code":\[rock_n_troll_v8.py\] is needed. The python script needs to stream images from a camera, here via open cv, and detect dragons in each image. Every time a new dragon is found, the sound effect is played. Note that the Roboflow website automatically trains a model as well which can be [tried out with a webcam](https://universe.roboflow.com/dragon-knngg/rockntroll/model/3/train/results?webcam=true).
There are a few ways improve the robustness of the system. During a game there are only more and more dragons: if the script detects less dragons than before it is probably a false negative or there is occlusion. Additionally, the dragon tiles remain in the same location once they are placed on the board. This means that new dragons are expected only in certain regions of the image. Both heuristics can be used to together to improve robustness.
## Notes
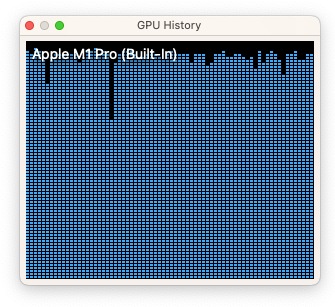
One of the reasons I bought a M1 mac with unified memory is for exactly these types of AI applications. After installing `pytorch 2.0`, the GPU acceleration resulted in a 10x training speed improvement. Training on a GeForce 1080 GTX from 2016 was still quite a bit faster, probably thanks to years of performance tuning targeting CUDA. It is clear that the mac GPU acceleration software ecosystem can use more effort, even system tools in macOS are limited: e.g. in the macOS activity monitor, GPU activity is very much an afterthought.
I am and hesitant to use cloud based GPU computing due to lack of control and privacy. I am not willing to send pictures from my kids to e.g. Google Cloud GPUs. The dependency on hardware of others might also limit the longevity of systems.
The ease-of-use, performance and accessibility of these deep-learning systems is great. Only a couple of years ago it would take months of hard work to maybe only approach similar detection performance. Adapting this idea for other board games and more types of tiles or board game events should be very possible.

- [315794\_\_bevibeldesign\_\_dragon-roar-distressed-7.mp3](https://0110.be/files/attachments/521/315794__bevibeldesign__dragon-roar-distressed-7.mp3)
- [rockntroll.webp](https://0110.be/files/attachments/521/rockntroll.webp)
- [rock\_n\_troll\_demo.mp4](https://0110.be/files/attachments/521/rock_n_troll_demo.mp4)
- [thumb\_rock\_n\_troll.webp](https://0110.be/files/attachments/521/thumb_rock_n_troll.webp)
- [dragons.pt](https://0110.be/files/attachments/521/dragons.pt)
- [rock\_n\_troll\_v8.py](https://0110.be/files/attachments/521/rock_n_troll_v8.py)
---
## [☀️ Solar sockets - Delivers power only on solar energy surplus](https://0110.be/posts/%E2%98%80%EF%B8%8F_Solar_sockets_-_Delivers_power_only_on_solar_energy_surplus.md)
- Published: 2023-08-23T00:00:00Z
- Updated: 2023-09-01T12:14:47Z
- Author: Joren
- ID: 516
- Canonical: https://0110.be/posts/%E2%98%80%EF%B8%8F_Solar_sockets_-_Delivers_power_only_on_solar_energy_surplus
- Tags: [0110.be](https://0110.be/tags/0110.be.md), [Harde waren](https://0110.be/tags/Harde%20waren.md), [UGent](https://0110.be/tags/UGent.md)
Fig: Solar socket.
I recently installed a couple of smart electrical sockets. The sockets only switch on *when there is a solar energy surplus*: when my rooftop solar panels produce more than the current energy consumption. I use these 'solar sockets' to charge the battery of an electric bike, for air conditioning and for charging other smaller devices. This post describes the components needed for such a system with the aim to inspire similar build.
1. Solar panels and a solar inverter with some form of readout.
2. A device to measure electrical energy use in a home.
3. Smart sockets with an easy to use API.
4. Some software to glue everything together.
### 1. ☀️ Solar panels and inverter
Most solar inverters have some form of API to readout the current solar panel output. In my case I use a SMA inverter which has two ways to extract this data: via Bluetooth and via wired ethernet. I found the wired ethernet solution to be the most reliable. The SMA inverter does use a somewhat annoying data formatting protocol but luckily there is an open source solution to decode the data: [SBFspot](https://github.com/SBFspot/SBFspot)
For SMA inverters, and possibly for others as well, there another option: the data is also automatically uploaded to a cloud based platform. This platform has an API which can be used to extract data on solar energy production. I do not like to be dependent on external cloud based software platforms, which might change at any time. Additionally, for real-time data cloud based platforms can be slow.
### 2. Measuring total electrical energy use
To measure total power use, I use an "Eastron SDM220M" measurement device which communicates with a server over a serial connection. There are adapters to translate serial Modbus to USB. The device is installed in my wiring closet by a professional: it is directly connected to the 60A mains and I would not advise to DIY it.
Alternatively, some places are equipped digital energy meters which might have a way for direct readout or readout via a cloud based API, after a few minutes. This might suffice for a solar socket install.
Energy use measurement might not be strictly needed for the 'solar sockets': if energy use is predictable it might be ok to simply switch the sockets on your average peak solar power. Perhaps combined with a local weather API. Finally we need to switch on some sockets.
### 3. Smart WiFi Socket
There are many smart WiFi sockets on the market. Most come with a smartphone app which allows you to control the socket from anywhere. Behind the scenes the sockets communicates with the vendor's cloud based system over the internet. Additionally there are some integrations with systems like Apple Home, Amazon Alexa en Google Assistant. For fundamental\
infrastructure like sockets in my home I want to avoid dependencies on a external cloud based systems. Next to the concerns about privacy and ownership there is a very practical concern: the cloud based system might just stop working in a few years. Especially [any dependency on a Google service](https://killedbygoogle.com/) is suspect. Also I am not convinced of [Amazon Alexa's](https://arstechnica.com/gadgets/2022/11/amazon-alexa-is-a-colossal-failure-on-pace-to-lose-10-billion-this-year/) future.
Luckily, there is *Tasmota* which provides open source firmware targeting many types of 'smart' devices including smart sockets. The tagline for Tasmota is *'Total local control with quick setup and updates'*. I bought a couple of [Nous A1T Tasmota Smart WiFi sockets](https://nous.technology/product/a1t4.html) which come with Tasmota firmware. Switching the socket on is done by sending an `HTTP GET` request to an url, which can be scripted easily. There is some
### 4. Control software
A script glues everything together: it logs energy usage and solar output. It switches on the solar sockets when a surplus is detected and switches again when the surplus is gone. There is some additional logic which ensures that the socket remains on for at least an hour even if there is no solar surplus. This to ensure that batteries are charged to a minimal usable state.
In summary, here we presented a couple of building blocks to build 'solar sockets' which are on only when there is a energy surplus. By using simple API's offered by Tasmota and locally running software, there is no dependency on (in the long term) unreliable cloud based systems which ensures the longevity of the build.
As an additional bonus, the solar sockets also serve as an indicator. A small LED shows when they are on, or, in other words, when there is solar energy surplus and when it is a good idea to switch on other electrical appliances.
---
## [Is a frequency present in a signal? A C implementation. ](https://0110.be/posts/Is_a_frequency_present_in_a_signal%3F_A_C_implementation._.md)
- Published: 2023-07-27T00:00:00Z
- Updated: 2025-11-29T14:12:30Z
- Author: Joren
- ID: 520
- Canonical: https://0110.be/posts/Is_a_frequency_present_in_a_signal%3F_A_C_implementation._
- Tags: [Code](https://0110.be/tags/Code.md), [Command Line Application](https://0110.be/tags/Command%20Line%20Application.md), [UGent](https://0110.be/tags/UGent.md)
This post is an efficient way to determine whether a predefined frequency is present in a signal. If such an algorithm can be found, it can serve as a basis for a modem. With a modem data is modulated and demodulated at the receiving side. The modulation allows data to be send over a transmission channel.
With the ability to detect the presence of audible frequencies a modem can transform symbols into a combination of frequencies and send data over sound. This is exactly what happens with [DTMF](https://nl.wikipedia.org/wiki/DTMF) in the sound below. DTMF is also used in [the dailup sound](https://www.windytan.com/2012/11/the-sound-of-dialup-pictured.html).
Audio: dail tone sequence: which numbers are pressed?
Typically, determining the presence of frequencies in a signal is done with an FFT: an FFT divides a signal into e.g. 512 linearly spaced frequency bands and determines the magnitude of each of these frequencies. The annoying thing is that a probe frequency can be right in between two bands: sample rate, FFT size and the frequency to look for need to be carefully chosen to reliably detect a frequency. Also, it is computationally inefficient to calculate the magnitudes for all frequency bands if *only one band* is actually needed.
Luckily there is an alternative approach which looks like the calculating the FFT but for only one predetermined frequencies. This algorithm is known as the [Goertzel algorithm](https://en.wikipedia.org/wiki/Goertzel_algorithm) and is used in [DTMF dail tone encoding and decoding](https://nl.wikipedia.org/wiki/DTMF). With the standard Goertzel algorithm it is still needed to consider sample rate and the frequency of interest.
Finally there is the "Generalized Goertzel": algorithm. In this version of the algorithm employs a couple of tricks to allow an arbitrary frequency and sample rate while still respecting the [Kotelnikov frequency limit, better known as the Nyquist frequency](https://iopscience.iop.org/article/10.1070/PU2006v049n07ABEH006160/pdf).
Recenlty I needed a piece of ANSI c code to detect the magnitude of an arbitrary frequency for a project. The following is a C implementation of this algorithm. It uses the C support for complex numbers in the `complex.h` header:
````c
#include
#include
#include
float detect_frequency(float frequency_to_detect,
float audio_sample_rate,
float *audio_block,
float *window,
size_t audio_block_size) {
float audio_block_sizef = (float)audio_block_size;
float indvec = frequency_to_detect / audio_sample_rate * audio_block_sizef;
float pik_term = 2 * M_PI * indvec / audio_block_sizef;
float cos_pik_term2 = cosf(pik_term) * 2;
float s0 = 0;
float s1 = 0;
float s2 = 0;
for (size_t i = 0; i < audio_block_size; i++) {
// potential improvement: expect windowed samples
float windowed_audio_sample = window[i] * audio_block[i];
s0 = windowed_audio_sample + cos_pik_term2 * s1 - s2;
s2 = s1;
s1 = s0;
}
s0 = cos_pik_term2 * s1 - s2;
float complex cc = cexpf(0 + -1.0f * pik_term * I);
float complex neg_s1 = -s1 + 0 * I;
float complex pos_s0 = s0 + 0 * I;
float power = cabsf(cc * neg_s1 + pos_s0);
return power;
}
````
## Demo
Below you can try out the algorithm. You can choose a frequency to detect and a playback frequency. The magnitude of the frequency is reported via the slider. The demo uses a javascript translation of the code above.
## Dual-tone Multi-Frequency - DTMF
DTMF in the browser.
On the right you can find a demo of dual tone frequency modulation and demodulation. A combination of frequencies is played and immediately detected.
The green bars show which frequencies have been detected. If for example 1209 Hz is detected together with 770 Hz then this means that we are looking for the symbol in the first column on the second row. Both the first column and the second row are highlighted in green. At that spot we see `4` so we can decode a `4`. By using 2 combinations of four frequencies a total number of 16 symbols can be encoded.
Note that this code does not simply highlight the button press directly but encodes the symbol in audio, feeds it into an Web Audio API format and decodes audio, the result of the decoding step highlights the row and column detected.
---
## [Olaf: a lightweight, portable audio search system](https://0110.be/posts/Olaf%3A_a_lightweight%2C_portable_audio_search_system.md)
- Published: 2023-07-04T00:00:00Z
- Updated: 2023-07-12T09:52:54Z
- Author: Joren
- ID: 519
- Canonical: https://0110.be/posts/Olaf%3A_a_lightweight%2C_portable_audio_search_system
- Tags: [Command Line Application](https://0110.be/tags/Command%20Line%20Application.md), [Music Information Retrieval](https://0110.be/tags/Music%20Information%20Retrieval.md), [Research papers](https://0110.be/tags/Research%20papers.md), [UGent](https://0110.be/tags/UGent.md)
Fig: Some AI imagining audio search.
Recently I have published a paper titled [*'Olaf: a lightweight, portable audio search system'*](https://joss.theoj.org/papers/10.21105/joss.05459) in the Journal of Open Source Software (JOSS). The journal is [a 'hack' to circumvent the focus on citable papers](https://www.arfon.org/announcing-the-journal-of-open-source-software) in the academic world: getting recognition for publishing software as a researcher is not straightforward.
Both Ghent University's research output tracking system and Flanders FWO academic profile do not allow to enter software as research output. The focus is still solely on papers, even when custom developed research software has become a fundamental aspect in many research areas. My role is somewhere between that of a 'pure' researcher and that of a [research software engineer](https://www.nature.com/articles/d41586-022-01516-2) which makes this focus on papers quite relevant to me.
The paper aims to make the recent development on [Olaf](https://github.com/JorenSix/Olaf) *'count'*. Thanks to the JOSS review process the Olaf software was improved considerably: CI, unit tests, documentation, containerization,... The paper was a good reason to improve on all these areas which are all too easy to neglect. The paper itself is a short, rather general overview of Olaf:
> "*Olaf stands for **Overly Lightweight Acoustic Fingerprinting** and solves the problem of finding short audio fragments in large digital audio archives. The content-based audio search algorithm implemented in Olaf can identify a short audio query in a large database of thousands of hours of audio using an acoustic fingerprinting technique.*"
---
## [Identifying memory leaks in C](https://0110.be/posts/Identifying_memory_leaks_in_C.md)
- Published: 2023-06-29T00:00:00Z
- Updated: 2025-11-29T14:15:58Z
- Author: Joren
- ID: 517
- Canonical: https://0110.be/posts/Identifying_memory_leaks_in_C
- Tags: [Code](https://0110.be/tags/Code.md), [Command Line Application](https://0110.be/tags/Command%20Line%20Application.md), [UGent](https://0110.be/tags/UGent.md)
Fig: Memory leaks.
The C programming language is deceptively simple. The syntax is straightforward, C has a limited amount of keywords and a small standard library. The first edition of the classic book 'The C Programming Language' is only about 200 pages. And yet, when programming in C, it is hard to avoid the many exiting footguns: integer type conversions, unchecked indexes and memory leaks can all cause subtle problems. This is part of the appeal of C: shooting yourself in the foot does make you feel alive. Here I want to focus on ways to check for memory leaks for C programs.
Memory leaks come about when memory is claimed but is never released again. If this is done in a loop or during a long running program, the claimed memory adds up and eventually the system may run out of memory. A memory leak is less a problem if a program forgets to free a small amount of memory it only claims once: after program shut down, the operating system reclaims all memory anyhow. However, it does feels very dirty to not clean up after oneself. And I for one, am not a dirty boy.
Another reason to look for memory use and leaks is when you are programming for embedded devices. For these systems memory is very limited: in that world 500kB RAM is considered a massive amount of memory. I have been busy programming a scalable [audio search system called Olaf](https://github.com/JorenSix/Olaf) which targets both traditional computers, embedded systems and browsers (via WebAssembly). It is clear that memory use --- and memory leaks --- need to be kept in check to pull this of.
Now, these memory leaks might not be easy to spot by inspecting the code. There are tools which help to spot memory management problems. One of these is [valgrind](https://valgrind.org/) which is currently not easy to use on Apple system with ARM processors. Luckily there is an alternative which is probably already installed on macOS via the *XCode Command Line Tools* a command line tool aptly called `leaks`. To quote the [apple documentation on leaks](https://developer.apple.com/library/archive/documentation/Performance/Conceptual/ManagingMemory/Articles/FindingLeaks.html), leaks reports:
- the address of the leaked memory
- the size of the leak (in bytes)
- the contents of the leaked buffer
The most straightforward use of `leaks` is to run a program and generate a report after program shutdown. See below to run a memory leak inspection, in this case for the `bin/olaf_c` program which indexes an audio file in a key-value store. For [CI](https://en.wikipedia.org/wiki/Continuous_integration) purposes it is practical to know that `leaks` has an exit status of zero only when no leaks have been found. The exit status can be used in an automated test script to break a build if a leak is detected. The `--quiet` option can be practical in such setting.
```bash
leaks --atExit -- bin/olaf_c store audio.raw audio
```
In the case of Olaf I made a classic mistake: I had called `free()` on hash table but I needed to call the hash table destructor: `hash_table_destroy()` which freed not only the hash table itself but also all memory associated with the hash table entries. After a quick fix the `leaks` command showed no more leaks!
```
leaks Report Version: 4.0, multi-line stacks
Process 35293: 2200395 nodes malloced for 135146 KB
Process 35293: 2200171 leaks for 138371200 total leaked bytes.
STACK OF 1 INSTANCE OF 'ROOT LEAK: ':
5 dyld 0x1a16dbf28 ...
4 olaf_c 0x100db145c main ...
3 olaf_c 0x100db53c8 olaf_...
2 olaf_c 0x100db4400 olaf_...
1 olaf_c 0x100da5788 hash_...
0 libsystem_malloc.dylib 0x1a1874d88 _mall...
2200171 (132M) ROOT LEAK: [64]
2200170 (132M) [50348032]
2 (80 bytes) [32]
1 (48 bytes) [48]
```
Output of the `leaks` command which shows where a memory leak can be found.
## General takaways
- `leaks` is an easy to use memory leak inspector provided by Apple. It is an alternative for valgrind.
- Memory leaks can be checked automatically using the `leaks` exit status in a CI-script. This makes spotting leaks timely and more straightforward to fix.
- Programmers should at least once try to target embedded devices. It makes you conscious of the wealth of resources available when targeting modern computing devices.



---
## [Optimizing C code with profiling, algorithmic optimizations and 'ChatGPT SIMD'](https://0110.be/posts/Optimizing_C_code_with_profiling%2C_algorithmic_optimizations_and_%27ChatGPT_SIMD%27.md)
- Published: 2023-06-26T00:00:00Z
- Updated: 2025-11-29T14:17:26Z
- Author: Joren
- ID: 518
- Canonical: https://0110.be/posts/Optimizing_C_code_with_profiling%2C_algorithmic_optimizations_and_%27ChatGPT_SIMD%27
- Tags: [Code](https://0110.be/tags/Code.md), [Command Line Application](https://0110.be/tags/Command%20Line%20Application.md), [Music Information Retrieval](https://0110.be/tags/Music%20Information%20Retrieval.md), [UGent](https://0110.be/tags/UGent.md)
This post details how I went about optimizing a C application. This is about an audio search system called [Olaf](https://github.com/JorenSix/Olaf) which was made about **10 times faster** but contains some generally applicable steps for optimizing C code or even other systems. Note that it is not the aim to provide a detailed how-to: I want to provide the reader with a more high-level understanding and enough keywords to find a good how-to for the specific tool you might want to use. I see a few general optimization steps:
The zeroth step of optimization is to properly **question the need** and balance the potential performance gains against added code complexity and maintainability.
Once ensured of the need, the first step is to **measure the systems performance**. Every optimization needs to be measured and compared with the original state, having automazation helps.
Thirdly, the second step is to **find performance bottle necks**, which should give you an idea where optimizations make sense.
The third step is to **implement and apply** an optimization and measuring its effect.
Lastly, **repeat** steps zero to three until optimization targets are reached.
More specifically, for the [Olaf audio search system](https://github.com/JorenSix/Olaf) there is a need for optimization. Olaf indexes and searches through years of audio so a small speedup in indexing really adds up. So going for the next item on the list above: measure the performance. Olaf by default reports how quickly audio is indexed. It is expressed in the audio duration it can process in a single second: so if it reports `156 times realtime`, it means that 156 seconds of audio can be indexed in a second.
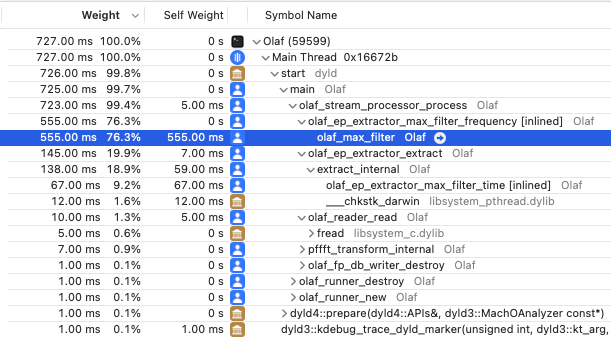
The next step is to find performance bottlenecks. A profiler is a piece of software to find such bottle necks. There are many options [gprof](https://en.wikipedia.org/wiki/Gprof) is a command line solution which is generally available. I am developing on macOS and have XCode available which includes the "Instruments - Time Profiler". Whichever tool used, the result of a profiling session should yield the time it takes to run each functions. For Olaf it is very clear which function needs optimization:
\
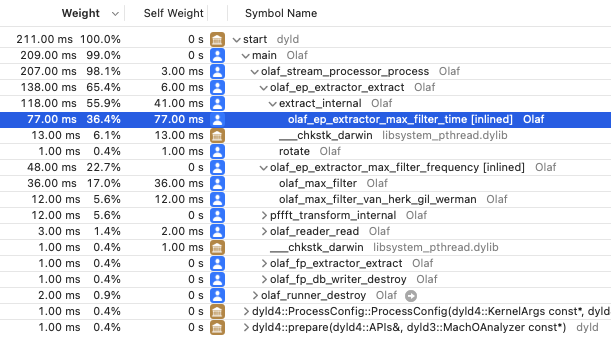
Fig: The results of profiling Olaf in XCode's time profiler. Almost all time is spend in a single function which is the prime target for optimization.
The function is a *max filter* which is ran many, many times. The implementation is using a naive approach to max filtering. There are more efficient algorithms available. In this case looking into the literature and implementing a more efficient algorithm makes sense. A very practical [paper by Lemire](https://arxiv.org/pdf/cs/0610046.pdf) lists several contenders and the 'van Herk' algorithm hits the sweet spot between being easy to implement and needing only a tiny extra amount of memory. The Lemire paper even comes with [example c max-filters](https://github.com/lemire/runningmaxmin). With only a slight change, [the code fits in Olaf](https://github.com/JorenSix/Olaf/blob/master/src/olaf_max_filter_perceptual_van_herk.c).
After implementing the change two checks need to be done: is the implementation correct and is it faster. Olaf comes with a number of functional and unit checks which provide some assurance of correctness and a built in performance indicator. Olaf improved from processing audio 156 times realtime to 583 times: a couple of times faster.
After running the profiler again, another method came up as the slowest:
````c
//Naive implementation
float olaf_ep_extractor_max_filter_time(float *array, size_t array_size) {
float max = -10000000;
for (size_t i = 0; i < array_size; i++) {
if (array[i] > max) max = array[i];
}
return max;
}
````
src: naive implementation of finding the max value of an array.
This is another part of the 2D max filter used in Olaf. Unfortunately here it is not easy to improve the algorithmic complexity: to find the maximum in a list, each value needs to be checked. It is however a good contender for [SIMD](https://en.wikipedia.org/wiki/Single_instruction,_multiple_data) optimization. With SIMD multiple data elements are processed in a single CPU instruction. With 32bit floats it can be possible to process 4 floats in a single step, potentially leading to a 4x speed increase - without including overhead by data loading.
Olaf targets microcontrollers which run an ARM instruction set. The SIMD version that makes most sense is the ARM Neon set of instructions. Apple Sillicon also provides support for ARM Neon which is a nice bonus. I asked ChatGPT to provide a ARM Neon improved version and it came up with the code below. Note that these type of simple functions are ideal for ChatGPT to generate since it is easily testable and there must be many similar functions in the ChatGPT training set. Also there are less ethical issues with 'trivial' functions: more involved code has a higher risk of plagiarization and improper attribution. The new average audio indexing speed is 832 times realtime.
````c
#if defined(__ARM_NEON)
#include
// ARM NEON implementation
float olaf_ep_extractor_max_filter_time(float *array, size_t array_size) {
assert(array_size % 4 == 0);
float32x4_t vec_max = vld1q_f32(array);
for (size_t j = 4; j < array_size; j += 4) {
float32x4_t vec = vld1q_f32(array + j);
vec_max = vmaxq_f32(vec_max, vec);
}
float32x2_t max_val = vpmax_f32(vget_low_f32(vec_max), vget_high_f32(vec_max));
max_val = vpmax_f32(max_val, max_val);
return vget_lane_f32(max_val, 0);
}
#else
//Naive implementation
#endif
````
src: a ARM Neon SIMD implementation of a function finding the max value of an array, generated by ChatGPT, licence unknown, informed consent unclear, correct attribution impossible.
Next, I asked ChatGPT for an SSE SIMD version targeting the x86 processors but this resulted in noticable *slowdown*. This might be related to the time it takes to load small vectors in SIMD registers. I did not pursue the SIMD SSE optimization since it is less relevant to Olaf and the first performance optimization was the most significant.
Finally, I went over the code again to see whether it would be possible exit a loop and simply skip calling `olaf_ep_extractor_max_filter_time` in most cases. I found a **condition which prevents most of the calls** without affecting the total results. This proved to be the most significant speedup: almost doubling the speed from about 800 times realtime to around 1500 times realtime. This is actually what I should have done before resorting to SIMD.
In the end Olaf was made about **ten times faster** with only two local, testable, targeted optimizations.
## General takeways
- Only think about optimization **if there is a need** and set a target: otherwise it is infinite.
- Try to **find a balance** between complexity, maintainability and performance.
- Changing **a naive algorithm to a more intelligent one** can have a significant performance increase. Check the literature for inspiration.
- Check for conditions to skip hot code paths **before trying fancy optimization** techniques.
- **Profilers** are crucial to identify where to optimize your code. Applying optimizations blindly is a waste of time.
- Try to keep optimizations **local and testable**. Sprinkling your code with small, hard to test performance oriented improvements might not be worthwile.
- **SIMD generated by ChatGPT** can be a very quick way to optimize critical, hot code paths. I would advise to only let ChatGPT generate small, common, easily testable code: e.g. finding the maximum in an array.
- Having only localized 'trivial' ChatGPT parts means you can **take them out** once it is clear that [you have copied code without proper attribution or licensing](https://www.reuters.com/technology/google-one-ais-biggest-backers-warns-own-staff-about-chatbots-2023-06-15/).
- The **use of SIMD can slow down** your code if you are not careful, measure the effects of your 'optimizations'!
---
## [Running MAX/FTS for NeXTStep in an emulator](https://0110.be/posts/Running_MAX%2FFTS_for_NeXTStep_in_an_emulator.md)
- Published: 2023-05-22T00:00:00Z
- Updated: 2024-01-12T14:10:50Z
- Author: Joren
- ID: 513
- Canonical: https://0110.be/posts/Running_MAX%2FFTS_for_NeXTStep_in_an_emulator
- Tags: [UGent](https://0110.be/tags/UGent.md)
The aptly named emulator [Previous](https://previous.unixdude.net/) allows you to emulate NeXT hardware on modern platforms. It allows you to run NeXTStep and run software made for this environment. I have prepared a downloadable disk image for this emulator to experiment with an early version of MAX, a visual programming environment for music applications.
I am interested in the early days of MAX an influential visual programming environment geared towards music applications. This software originated at [IRCAM](https://ircam.fr) and an early version was build for the NeXTcube and required a specialized soundcard (ISPW). I have been lucky to have been able to restore a [NeXTCube with an ISPW soundcard](https://0110.be/posts/Electronic_Music_and_the_NeXTcube_-_Running_MAX_on_the_IRCAM_Musical_Workstation) but this hardware is *extremely rare*.
A functioning NeXTcube is already a rare collectors item and the ISPW soundcard is even more uncommon. The card was developed at IRCAM and later commercialised by Ariel Inc. which brought it to market right when NeXT announced to phase out hardware production. Overnight, the market for NeXT peripheral hardware collapsed and nobody wanted to buy an expensive soundcard for an obsolete hardware platform. The soundcard was never mass-produced: there are only the prototype boards made at IRCAM and a few batches of the commercial version. The total number ISPW soundcards must have been around a few dozen worldwide, in 1992. Now, over 30 years later, it is virtually impossible to find an ISPW card. Running an early version of MAX on original hardware is nearly impossible.
\
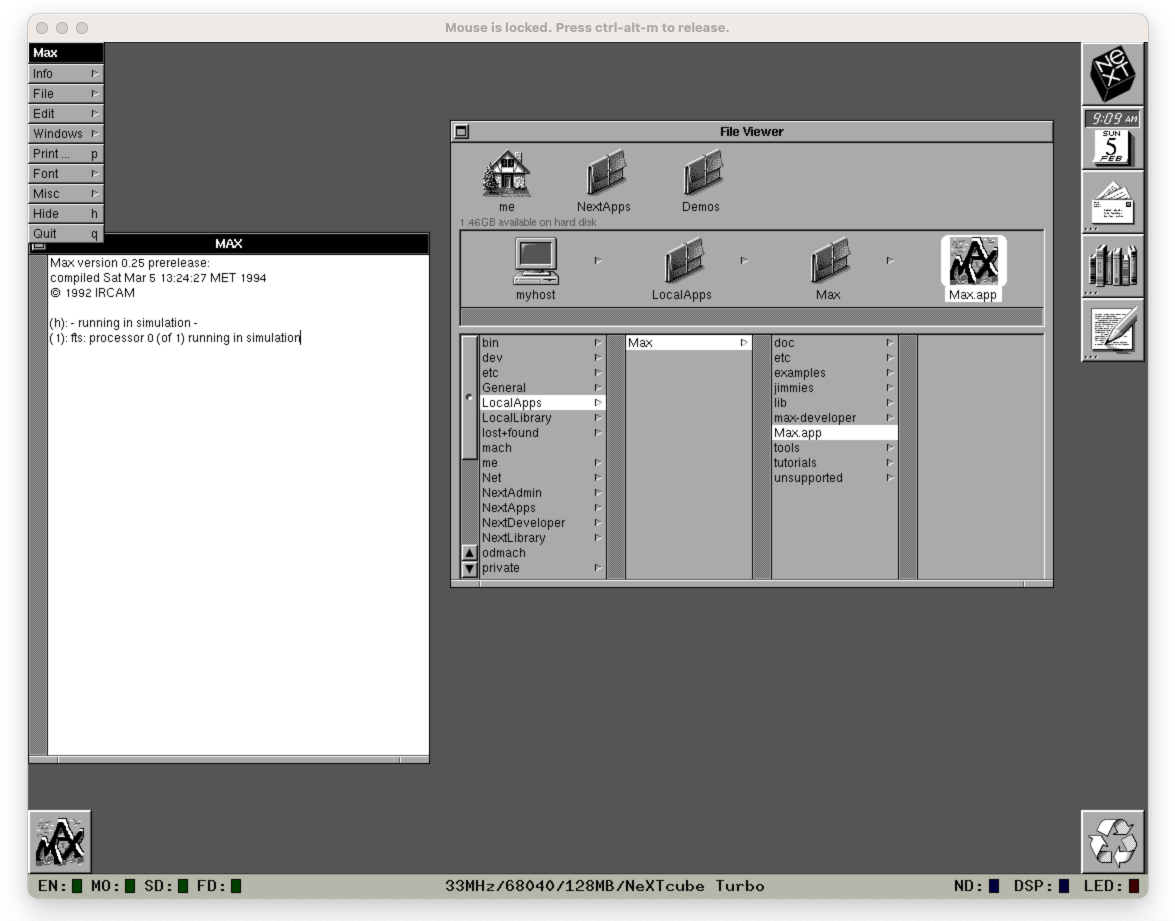
Fig: MAX 0.25 running in the Previous emulator on a modern MacOS system.
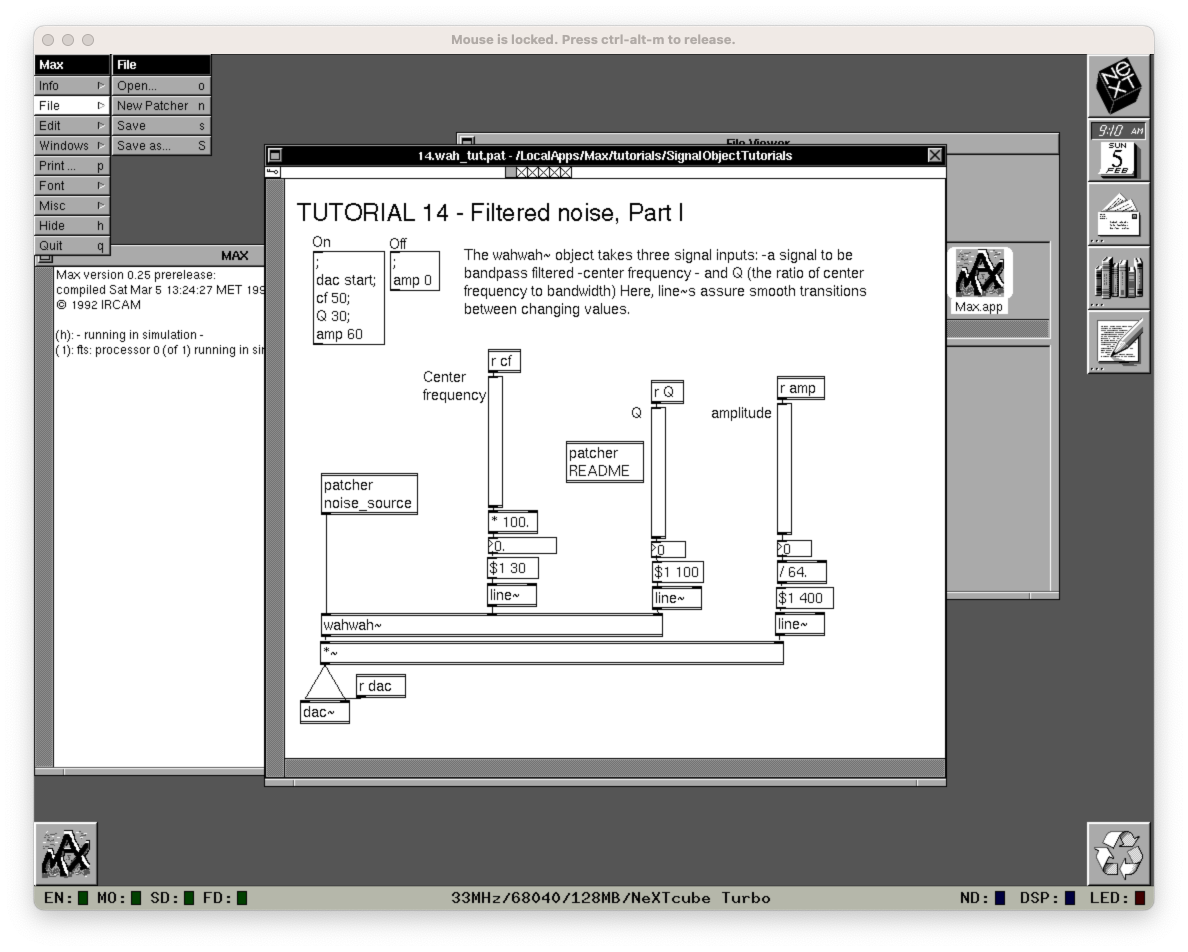
To make experiencing an early version of MAX more accessible I have prepared a disk image for the Previous emulator. The emulator emulates several NeXT machines and lets you run NeXT software on modern machines. The disc image uses NeXTStep 3.3 for OS and has MAX 0.25 pre-installed. Several NeXT machines can be emulated by Previous but, crucially for MAX, the ISPW soundcard is not emulated. This puts a severe limitation on MAX: there is no audio or MIDI input or output. However, you can start MAX in simulation mode and experience the patcher and see the original documentation and have a feel for the original supplied patches and follow the logic of patches.
To run MAX, [download the disc image with NeXTStep and MAX \[about 100MB\]](https://0110.be/files/attachments/513/nextstep_max_emulation.zip). By downloading this material you *agree to use it only for academic, educational, historic or documentary use* and not for commercial or other purposes. The zip-file also contains some information on how to get started and boot the system. Note that it has only been tested on an M1 mac.
For some more context please listen to [Philippe Manoury on 'Informatique musicale' (1992)](https://medias.ircam.fr/x7170d8_philippe-manoury-informatique-musicale) for insights into the ISPW at IRCAM. Read *"Steve Jobs & the Next Big Thing (1993)"* by Randall E. Stross which paints the commercially bleak history of NeXT and the (managereal, commercial, emotional) incompetence of Steve Jobs. It complements the *"Steve Jobs (2011)"* biography by Walter Isaacson nicely. Also see [Electronic Music and the NeXTcube - Running MAX on the IRCAM Musical Workstation](https://0110.be/posts/Electronic_Music_and_the_NeXTcube_-_Running_MAX_on_the_IRCAM_Musical_Workstation) and [USB MIDI interface for the NeXTCube - ISPW board](https://0110.be/posts/USB_MIDI_interface_for_the_NeXTCube_-_ISPW_board)
- [max\_running.png](https://0110.be/files/attachments/513/max_running.png)
- [nextstep\_max\_emulation.zip](https://0110.be/files/attachments/513/nextstep_max_emulation.zip)
---
## [USB MIDI interface for the NeXTCube - ISPW board](https://0110.be/posts/USB_MIDI_interface_for_the_NeXTCube_-_ISPW_board.md)
- Published: 2023-05-05T00:00:00Z
- Updated: 2025-11-29T14:18:42Z
- Author: Joren
- ID: 514
- Canonical: https://0110.be/posts/USB_MIDI_interface_for_the_NeXTCube_-_ISPW_board
- Tags: [Code](https://0110.be/tags/Code.md), [Harde waren](https://0110.be/tags/Harde%20waren.md), [Muziek](https://0110.be/tags/Muziek.md), [UGent](https://0110.be/tags/UGent.md)
I have recently [restored a NeXTCube with an ISPW Ariel soundcard](https://0110.be/posts/Electronic_Music_and_the_NeXTcube_-_Running_MAX_on_the_IRCAM_Musical_Workstation) with the aim to put it in the hands of artists and researchers in the context of a [living electronic music instrument heritage project](https://asil.ugent.be/projects/#heritageinstruments). To make the cube talk to keyboards, synths or other audio workstations I have built a *MIDI interface for the NeXTcube*.
Fig: the NeXTCube with the Ariel ProPort and MIDI input/output interface.
Recently, I was able to restore a NeXTCube and install an early version of MAX - a graphical music programming environment. However, a crucial part of the system was missing: there was no way to do [MIDI input/output](https://en.wikipedia.org/wiki/MIDI). MIDI is used to connect controllers, keyboards, synthesizers or other musical instruments to the audio workstation. The NeXTCube itself has [a serial port which allows users to connect MIDI devices](https://www.nextcomputers.org/NeXTfiles/Docs/connectivity.pdf). Next to the serial port on the mainboard, the NeXTCube I am working with also has a RS-422 serial port on the ISPW 'soundcard'. The serial port uses RS-422 and mini DIN 8 connectors which provide MIDI input and output. While the MIDI data bytes are transmitted according to spec, the *connector and the electrical signals are not compatible with standard MIDI*.
Fig: the IRCAM/Ariel ISPW soundcard with mini DIN-8 RS-433 serial port on the right.
For MIDI I/O we need a device which allows to connect the RS-422 MIDI to both legacy MIDI devices and to computers via USB MIDI. If a MIDI event arrives from the NeXTCube's RS-422 it needs to be passed through to the USB and legacy MIDI ports and the other way around. The [Teensy platform](https://www.pjrc.com/teensy/) is ideal: it supports hardware serial and USB MIDI. In this retro-computing project, it seems wasteful to use the 600MHz Teensy 4.0 only for message passing: the Teensy has much more computing power than NeXTcube but it is cheap, easy to program, available and practical.
The RS-422 serial port uses --6V to 6V logic which needs to be transformed to the 0V to 3.3V logic for the Teensy microcontroller. A PCB provides this capability and is connected to a hardware serial port of the Teensy. The pinout of the RS-422 port was measured via a scope and matched the [documentation](https://allpinouts.org/pinouts/connectors/serial/apple-macintosh-rs-422-serial/). The Teensy has an `usbMIDI` mode and can present itself as a standard MIDI device to a PC. Two [opto-isolated legacy MIDI DIN-5 ports](https://www.sparkfun.com/products/12898) were connected to another hardware serial port. The software on the Teensy conducts the "three-way MIDI message passing":\[midi_passthrough.ino\].
Vid: Max/FTS FM synth reacting to USB MIDI input.
The electronics were fixed into a reused metal enclosure. The front panel of the enclosure was replaced by a custom 3D printed panel. The front contains the RS-422 port, two MIDI DIN 5 ports and a micro usb port either for power alone or MIDI messages and power. Feel free to check out the "OpenSCAD design with a level MINI DIN8 hole":\[midi_box.scad\].
With a working MIDI interface for the NeXTcube allows interfacing with MIDI keyboards and controllers. It can also be used to measure roundtrip latency. MIDI to sound latency determines how long it takes between pressing a MIDI key and hearing sound. MIDI to MIDI roundtrip latency determines how long it takes to process, parse and return a MIDI message. For a responsive, reliable system both types of latencies should be constant and preferably in the range of 10ms or below.
Fig: Measured MIDI roundtrip latency on the ISPW board for the NeXTCube.
Measuring the MIDI roundtrip latency shows that the system is able to respond in 3.6+--0.4 ms (N=300). A combination of a MAX patch and "Teensy firmware":\[next_midi_roundtrip_latency.ino\] was used to measure this automatically. The MIDI-to-audio latency was measured a few times manually and always was around 13ms. These figures show that the system is ideal for low-latency real-time music making in its default configuration. In MAX the audio buffer sizes could be reduced to achieve an even lower latency but with the risk of running into buffer underruns and audio glitches.
Small [discussion the USB MIDI interface for the NeXTCube on Hackaday](https://hackaday.com/2023/05/16/midi-interface-for-nextcube-plugs-into-the-past/#comments)
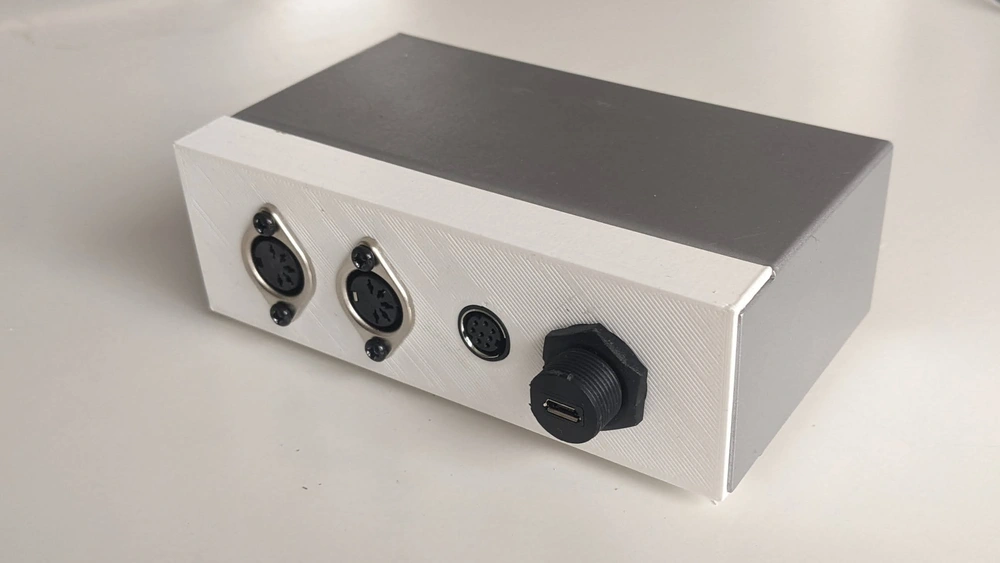
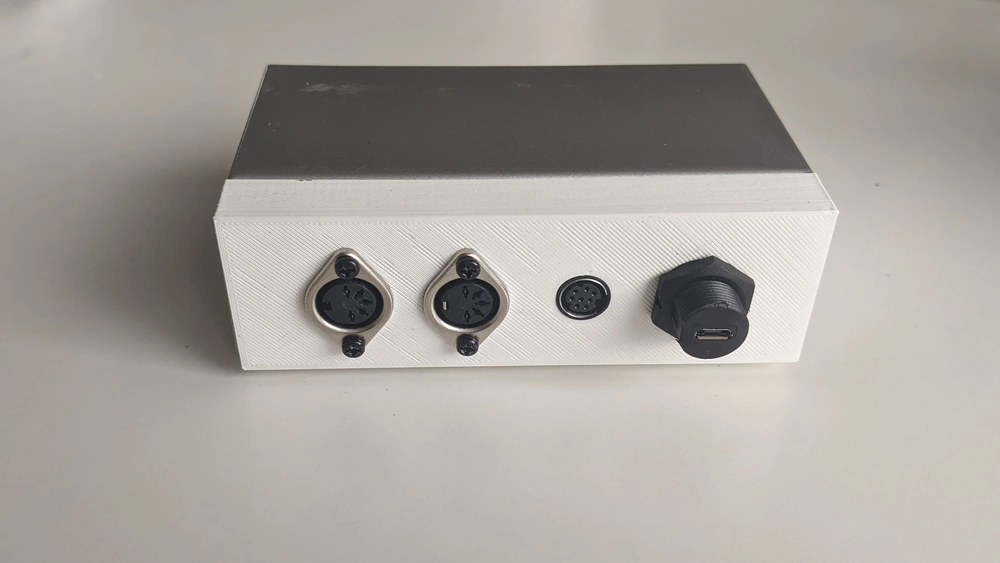
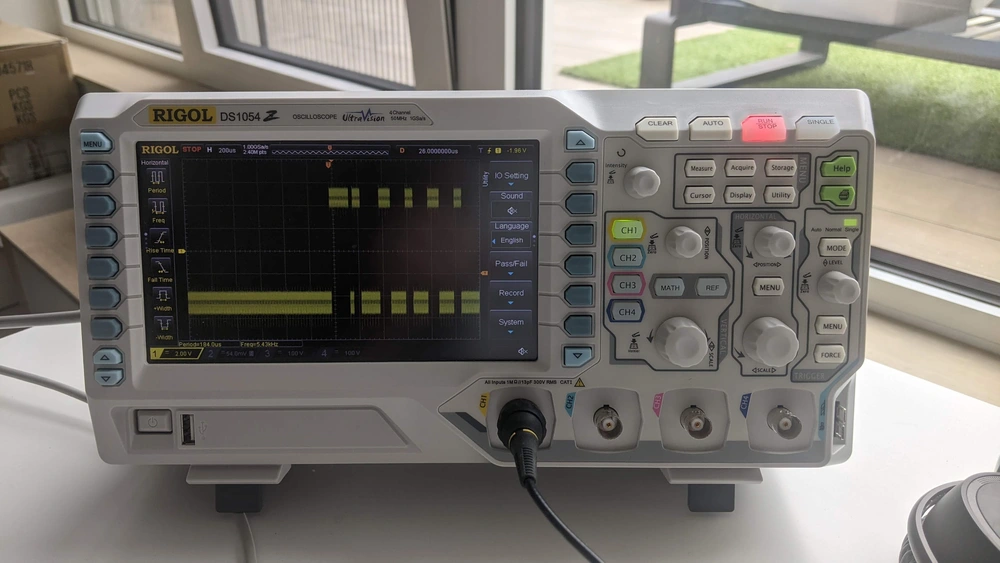
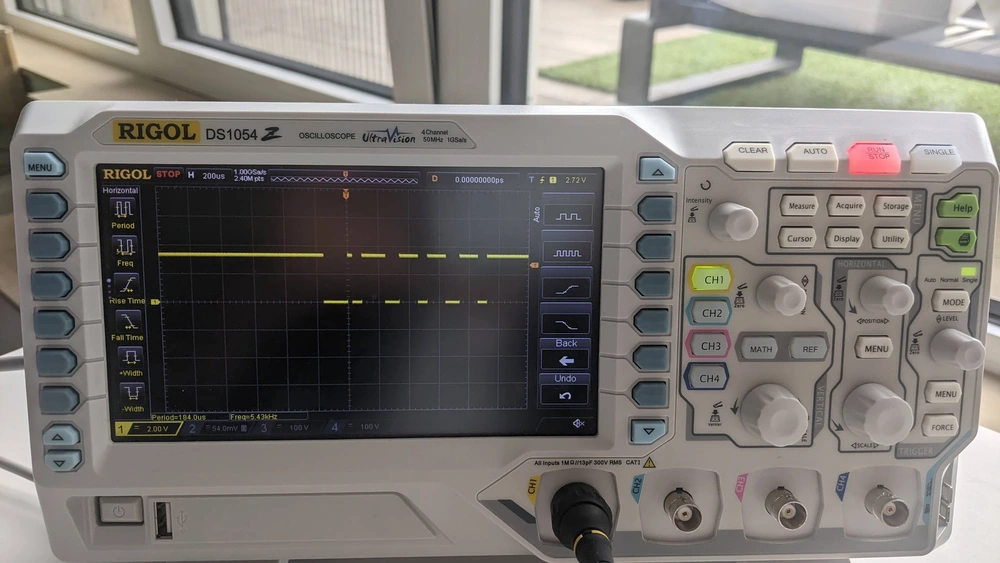

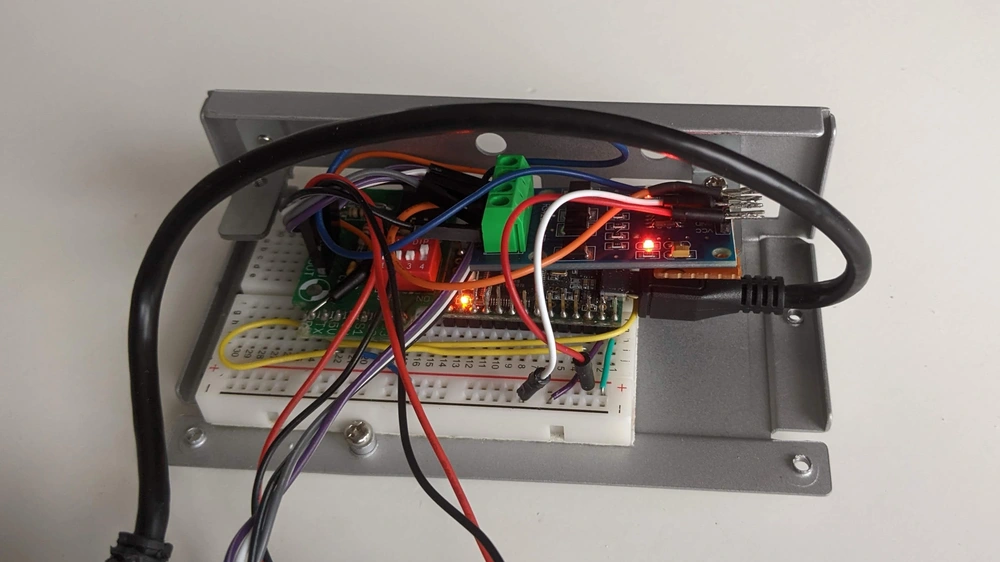
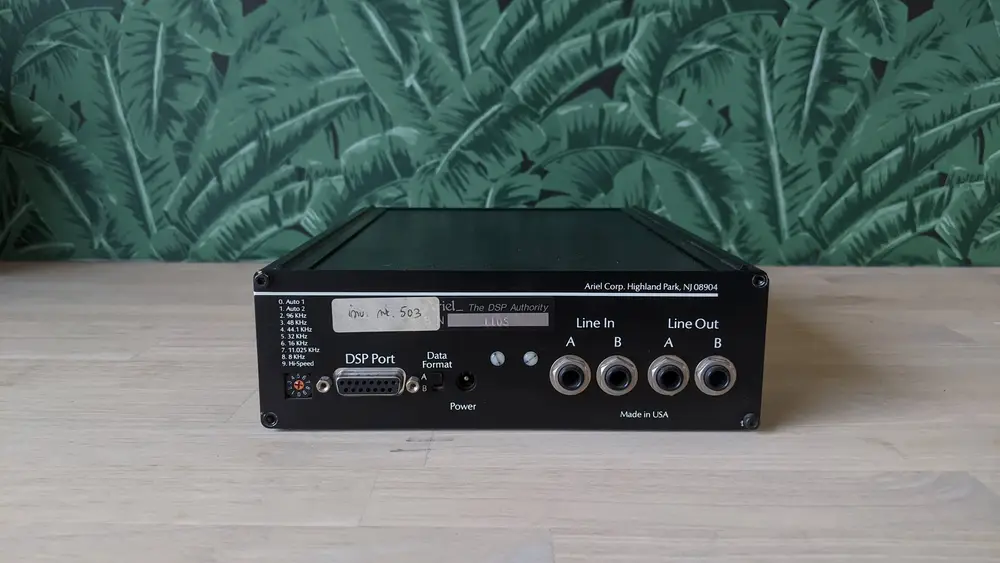
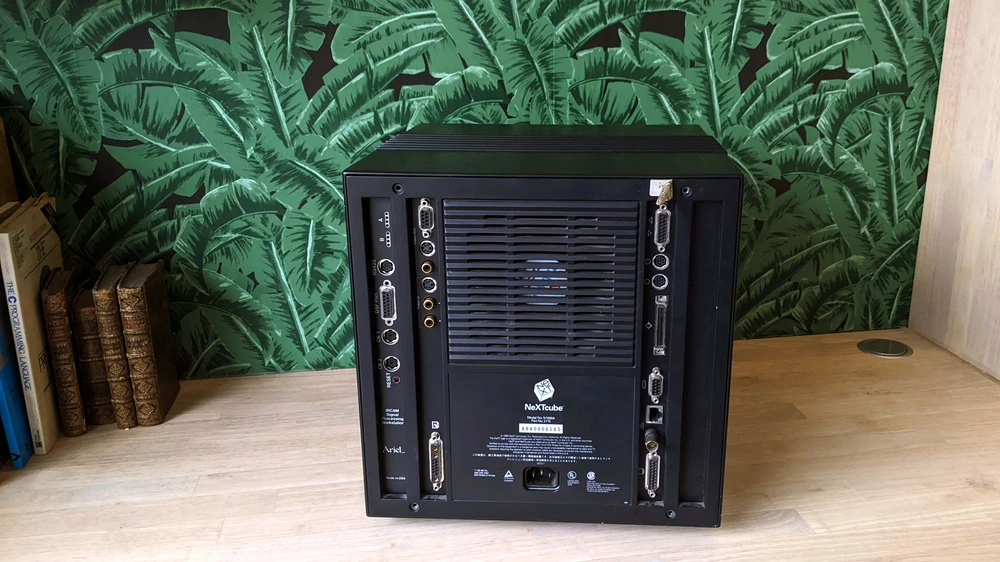
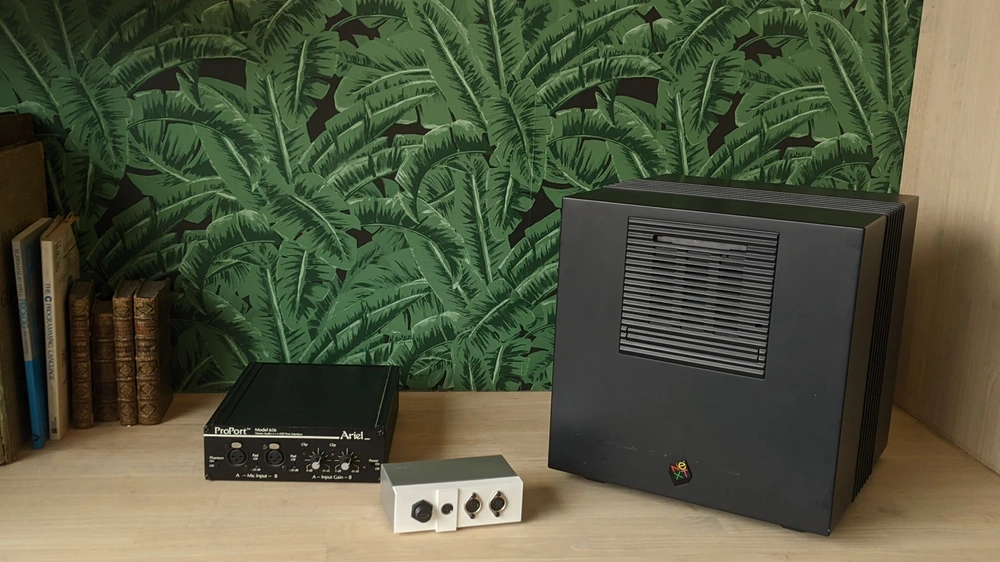
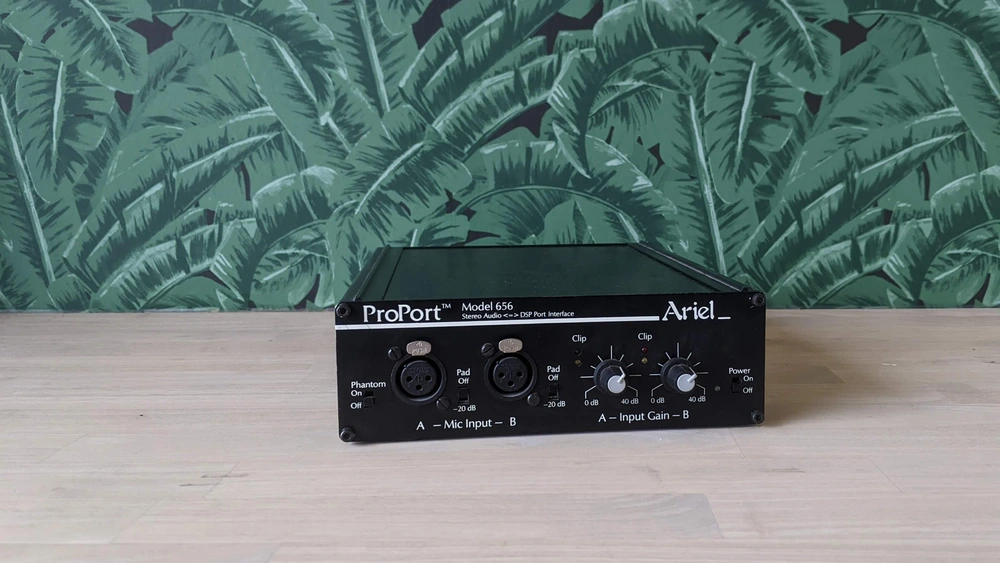
- [ariel\_soundcard\_IRCAM\_ISPW.jpg](https://0110.be/files/attachments/514/ariel_soundcard_IRCAM_ISPW.jpg)
- [midi\_box.scad](https://0110.be/files/attachments/514/midi_box.scad)
- [midi\_roundtrip\_latency.svg](https://0110.be/files/attachments/514/midi_roundtrip_latency.svg)
- [midi\_passthrough.ino](https://0110.be/files/attachments/514/midi_passthrough.ino)
- [next\_midi\_roundtrip\_latency.ino](https://0110.be/files/attachments/514/next_midi_roundtrip_latency.ino)
- [midi\_roundtrip\_test.pat](https://0110.be/files/attachments/514/midi_roundtrip_test.pat)
- [nextcube\_midi\_proport.webp](https://0110.be/files/attachments/514/nextcube_midi_proport.webp)
- [midi\_box\_example\_web.webp](https://0110.be/files/attachments/514/midi_box_example_web.webp)
- [midi\_box\_example\_web.mp4](https://0110.be/files/attachments/514/midi_box_example_web.mp4)
---
## [Electronic Music and the NeXTcube - Running MAX on the IRCAM Musical Workstation](https://0110.be/posts/Electronic_Music_and_the_NeXTcube_-_Running_MAX_on_the_IRCAM_Musical_Workstation.md)
- Published: 2023-05-02T00:00:00Z
- Updated: 2025-12-19T13:49:45Z
- Author: Joren
- ID: 512
- Canonical: https://0110.be/posts/Electronic_Music_and_the_NeXTcube_-_Running_MAX_on_the_IRCAM_Musical_Workstation
- Tags: [Harde waren](https://0110.be/tags/Harde%20waren.md), [Music Information Retrieval](https://0110.be/tags/Music%20Information%20Retrieval.md), [Muziek](https://0110.be/tags/Muziek.md), [UGent](https://0110.be/tags/UGent.md)
The NeXTcube is an influential machine in computing history. The NeXTcube, with an additional soundcard, was also one of the first off-the-shelf devices for high-quality, real-time music applications. I have restored a NeXTcube to run an early version of MAX, an environment for interactive music applications.
### The NeXTcube context and the *IRCAM Musical Workstation*
In 1990 NeXT started selling the NeXTcube, a high-end workstation. It introduced or brought together many concepts (objective-c, the Mach kernel, postscript, an app store) which are still in use today. The NeXTcube's influence is especially felt in the Apple ecosystem with Mac OS X, iPhones and iPads being direct decedents of NeXT's line of computers.
Due to its high price, the NeXTcube was not a commercial success. It mainly ended up at companies or in the hands of researchers. Two of those researchers, Tim Berners-Lee and [Robert Cailliau](https://en.wikipedia.org/wiki/Robert_Cailliau) created the first [`http` server and web browser](https://cds.cern.ch/record/1547556) at CERN on a NeXTcube. Coincidently, [the http software was publicly released exactly 30 years ago](https://web30.web.cern.ch/web-history.html) today. Famously, the cube was also used to develop games like the original Doom and Quake. So yes, the NeXTcube runs Doom.
Fig: the NeXTcube's design stood out compared to the contemporary beige box PCs.
Less well known is the fact that the NeXTcube is also one of the first computing devices capable enough for real-time, high-quality interactive music applications. In the mid 1980s this was still a dream at [IRCAM](https://www.ircam.fr/), a French research institute with the aim to *'contribute to the renewal of musical expression through science and technology'*. The bespoke hardware and software systems for music applications from the mid 80s were further developed and commercialised in the early 90s. Together these developments resulted in a commercially available version of the "*IRCAM Musical Workstation (IMW)*", an early, if not the first, off-the-shelf computer for interactive music applications.
The IRCAM Musical Workstation (IMW), sometimes called the IRCAM Signal Processing Workstation (ISPW), consisted of several hard and software modules working together to enable interactive music applications. An important component was a 'soundcard' which had two beefy 40MHz [i860 intel CPUs](https://en.wikipedia.org/wiki/Intel_i860) for DSP. When installed in the NeXTcube, the soundcard had more computing power than the rest of the computer. This is similar to modern computers where some graphics cards have more raw computing power than the main CPU. The soundcard was developed at IRCAM and commercialized by Ariel inc. under the name "Ariel ProPort".
The IRCAM Ariel DSP coprocessor, soundcard.
A few software environments were developed at IRCAM which made use of the new hardware. One was Animal, another, was the much more influential MAX. MAX provides a graphical programming environment specific for music applications. Descendants of MAX are still used today, see [Ableton Max for Live](https://www.ableton.com/en/live/max-for-live/) and [Pure Data](https://puredata.info). I consider the *introduction of MAX as a pivotal point in electronic music history*. Up until the introduction of MAX, creating a new electronic music instrument meant bespoke hardware development. With MAX, this is done purely in software. This made electronic sound or instrument design not only faster but also accessible to a much wider audience of composers, artists and thinkerers.
### The NeXTcube at IPEM
IPEM was an early electronic music production studio embedded at Ghent University, Belgium. Now it is active as a internationally acclaimed [research center for interdisciplinary music research](https://www.ugent.be/lw/kunstwetenschappen/ipem/en). In the early 90s IPEM acquired a [NeXTcube Turbo](https://en.wikipedia.org/wiki/NeXTcube_Turbo) with an internal diskette drive, SCSI hard disk, NextDimension color graphics card and an Ariel ProPort DSP/ISPW module. The cube was preserved well and came with many of the original software, books and manuals. I have been trying to get this machine working and configure it as an "*IRCAM Musical Workstation*".
IPEM's NeXTcube with IRCAM Ariel ProPort.
There were a few practical issues: the mouse was broken, the hard drive unreliable and the main system fan loud and full of dust. The mouse had a broken cable which was fixed, the hard drive was replaced by a [SCSI2SD](https://www.scsi2sd.com) setup and the fan was replaced with a new one. On the software side of things, the Internet Archive hosts [NeXTStep 3.3](https://archive.org/details/NeXTSTEP33CISC) which, after many attempts, was installed on the cube. Unfortunately there seemed to be a compatibility issue. The Ariel ProPort kernel module did not work. I started over installed NeXTStep 3.1, with the same result. Finally, I installed NeXTStep 3.0 which was compatible with the kernel module and MAX/FTS!
Vid: Max/FTS with a commercial Ariel soundcard running on a NeXTcube Turbo.
The restoration of the IRCAM Signal Processing Workstation instruments fits in a [university project on living heritage](https://asil.ugent.be/projects/#heritageinstruments) The idea is to get key historic electronic music instruments into the hands of researchers and artists to pull the fading knowledge on these devices back into a living culture of interaction. This idea already resulted in an album: [DEEWEE Sessions vol. 01](https://store.deeweestudio.com/products/deewee-sessions-vol-01). Currently the collection includes a 1960s reverb plate, an EMS Synti 100 analog synthesizer from the 70s, a Yamaha DX7 (80s) and finally the NeXTCube/ISPW represents the early 90s and the departure of physical instruments to immaterial software based systems.
**Acknowledgements & Further reading**
This project was made possible with the support of the Belgian [Music Instrument Museum](https://mim.be) and [IPEM, Ghent University](https://www.ugent.be/lw/kunstwetenschappen/ipem/en). I was fortunate to get assistance by Ivan Schepers and Marc Leman at IPEM but also by the main developers of MAX: [Miller Puckette](http://msp.ucsd.edu/). I would also like to thank Anthony Agnello formerly at Ariel Corp for additional image material and info. I also found the [WinWorld](https://winworldpc.com/product/nextstep/3x) and [NeXTComputers](https://www.nextcomputers.org/NeXTfiles/Images/Rare_NeXT_Hardware/NeXTcube/ISPW/) communities and resources extremely helpful. Below a picture from the [CERN public archives]( https://cds.cern.ch/record/1547556?ln=en) and Ghent University Archive is included. Thanks a lot!
See also the [discussion on this article at Hacker News](https://news.ycombinator.com/item?id=35800380 )\
Lindemann, E., Dechelle, F., Smith, B., & Starkier, M. (1991). [*The Architecture of the IRCAM Musical Workstation*](https://doi.org/10.2307/3680764) - Computer Music Journal, 15(3), 41--49. \
Puckette, M. (1991). [*FTS: A Real-Time Monitor for Multiprocessor Music Synthesis*](https://doi.org/10.2307/3680766). Computer Music Journal, 15(3), 58--67. \
Puckette, M. 1988. [*The Patcher*](http://msp.ucsd.edu/Publications/icmc88.pdf), Proceedings, ICMC. San Francisco: International Computer Music Association, pp. 420-429. \
Puckette, M. 1991. [*Combining Event and Signal Processing in the MAX Graphical Programming Environment.*](http://msp.ucsd.edu/Publications/cmj91-max.ps) Computer Music Journal 15(3): 68-77.\
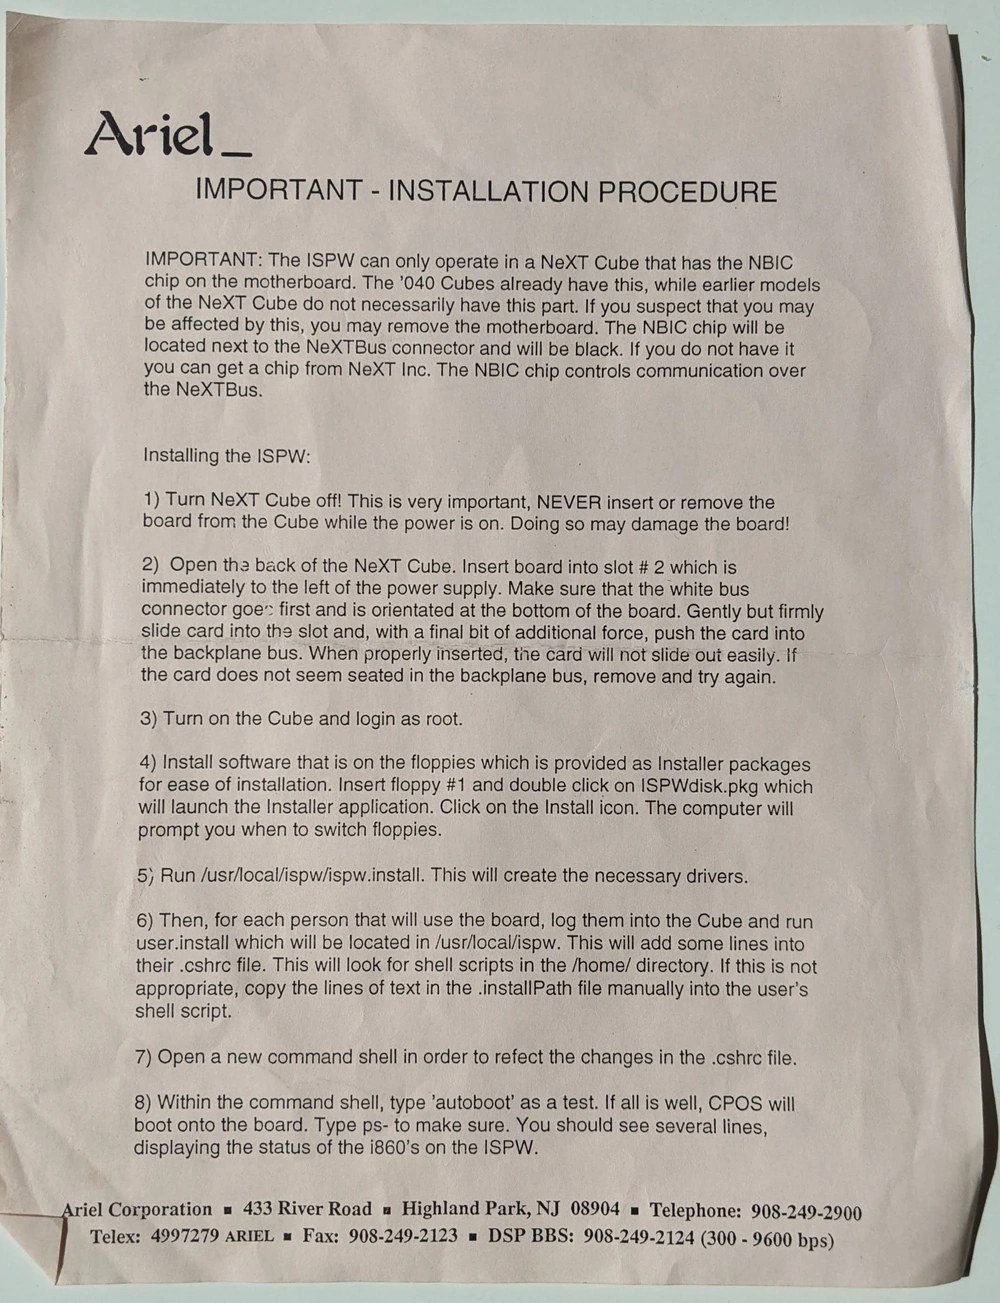
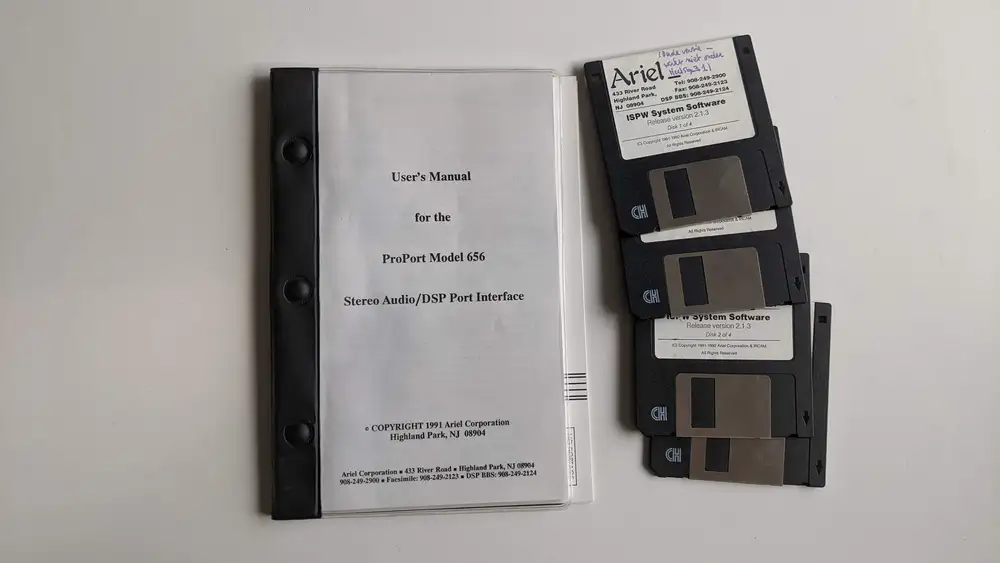
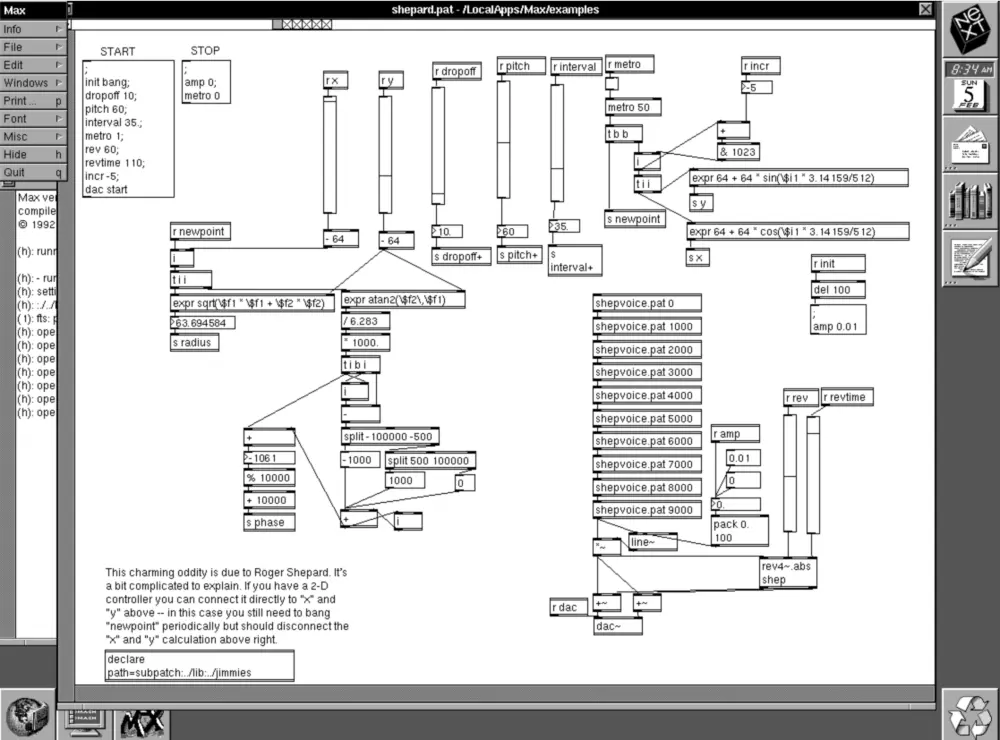
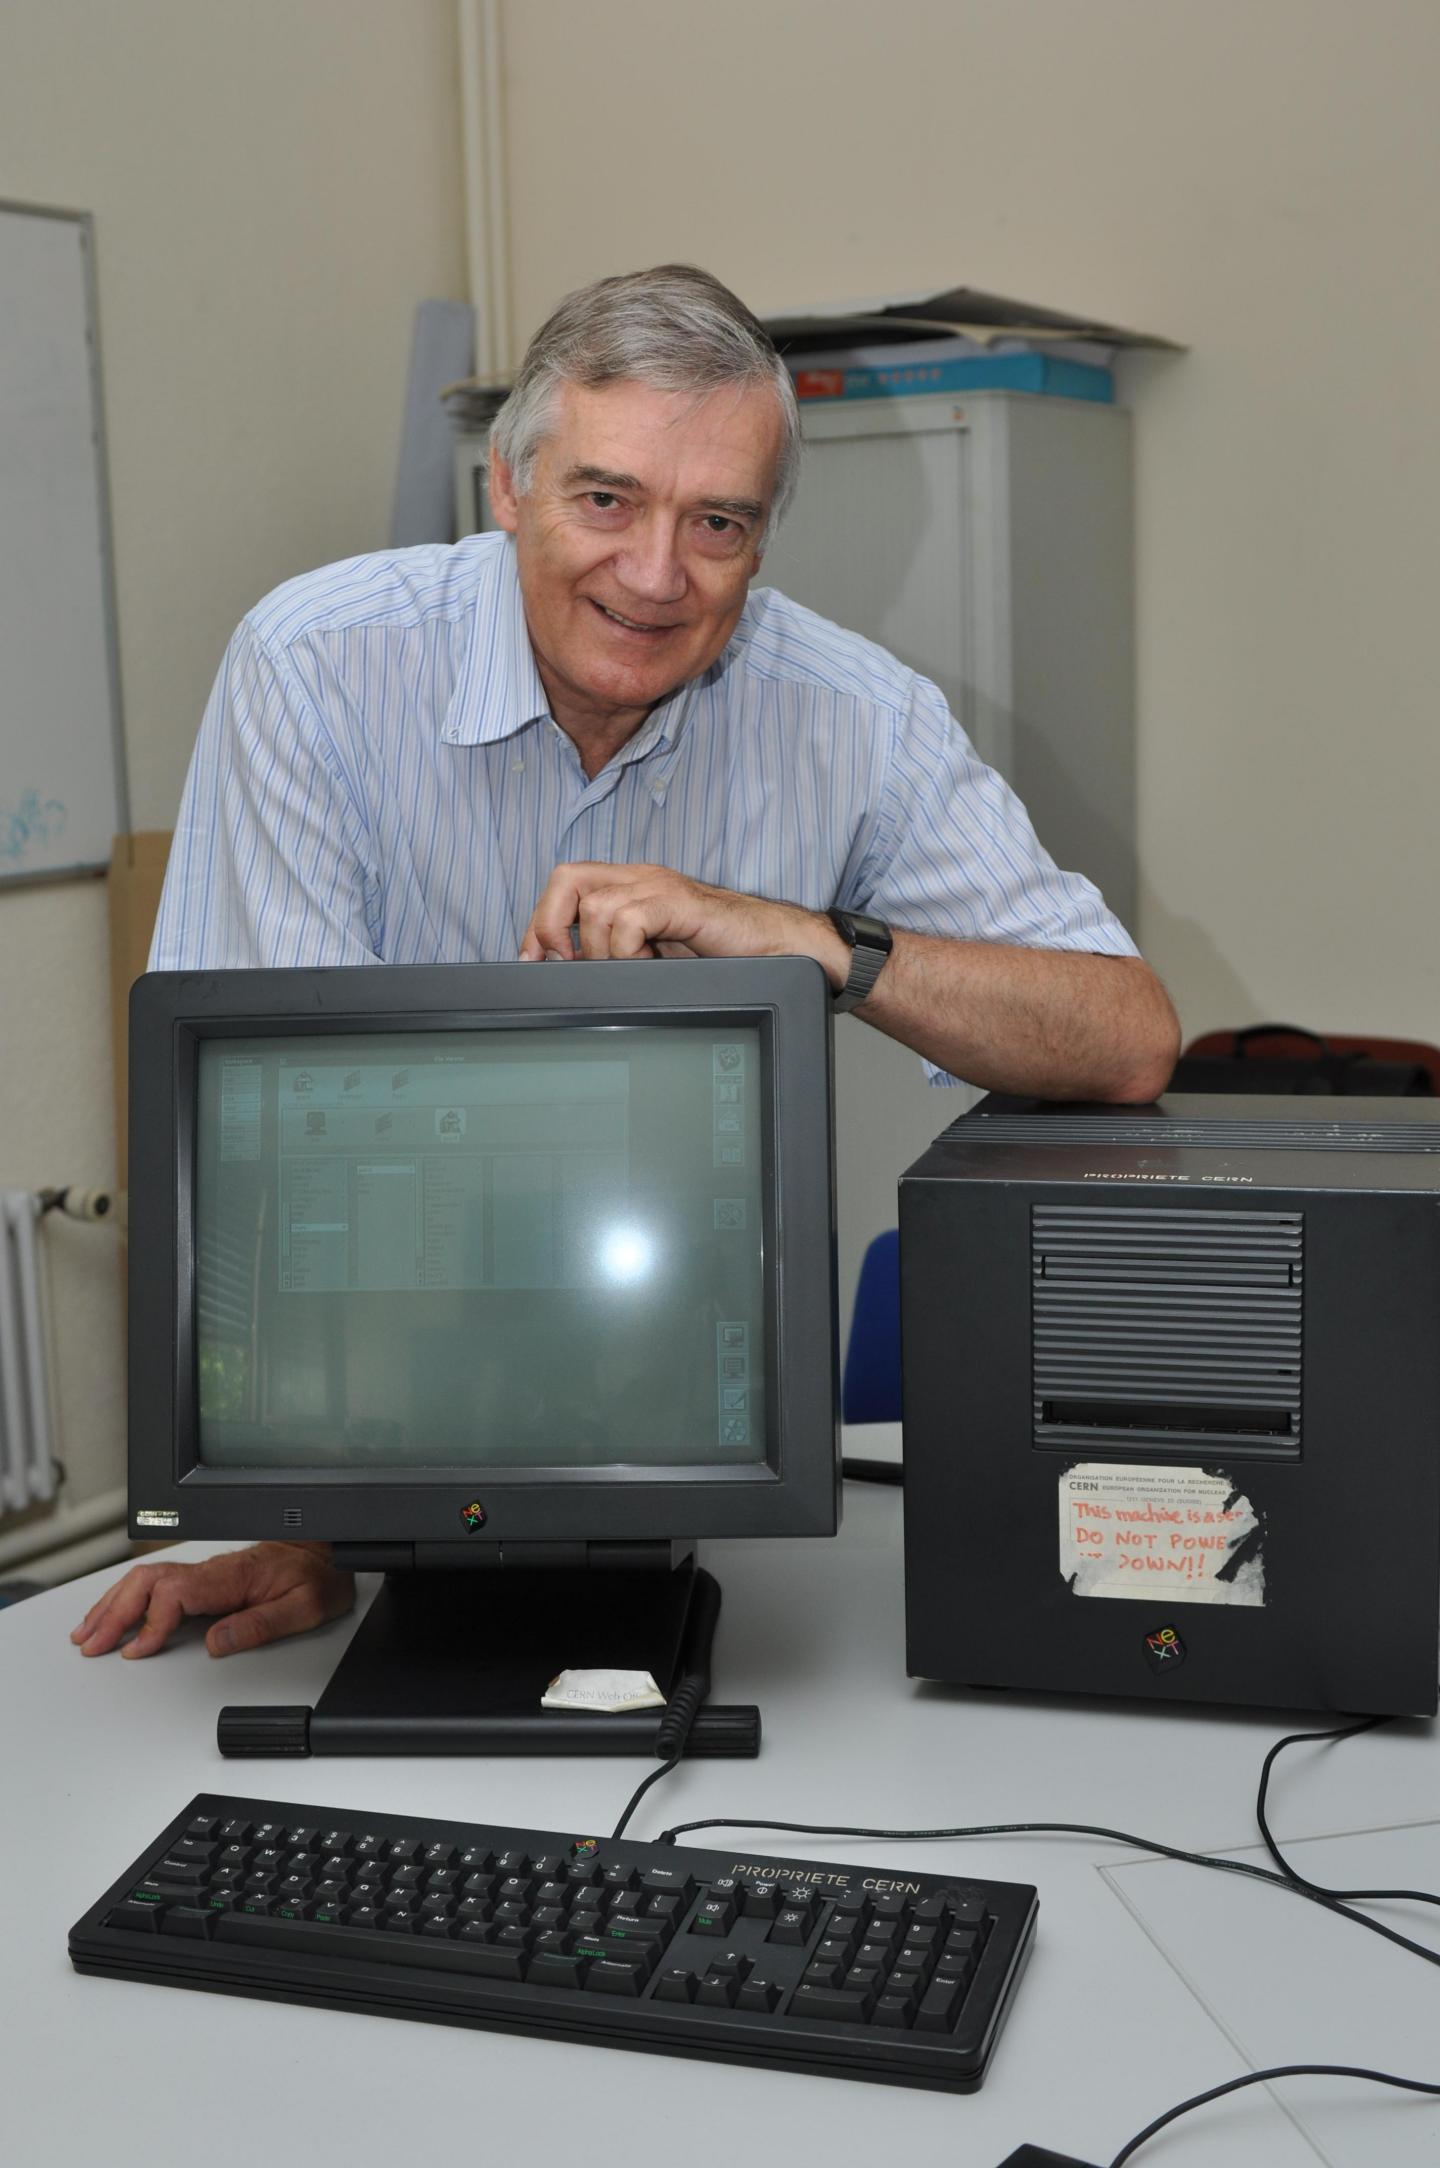

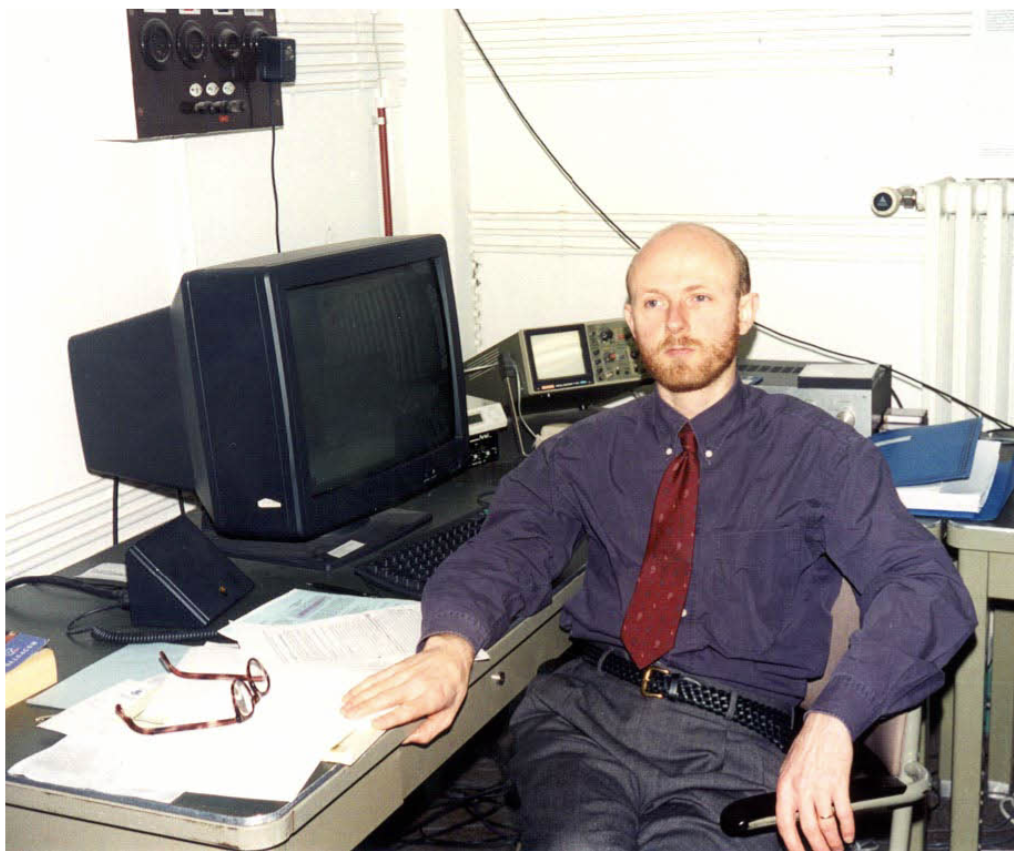
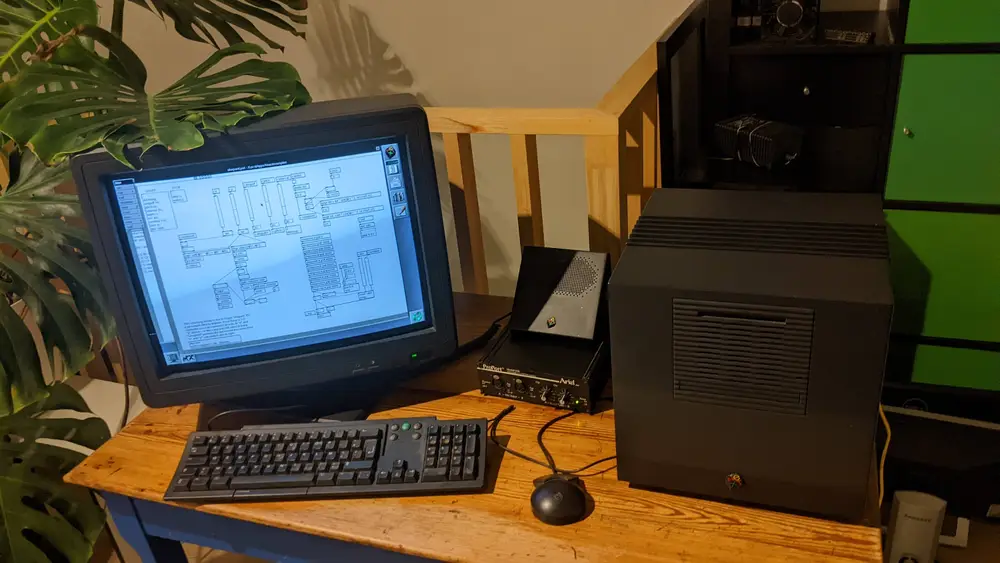
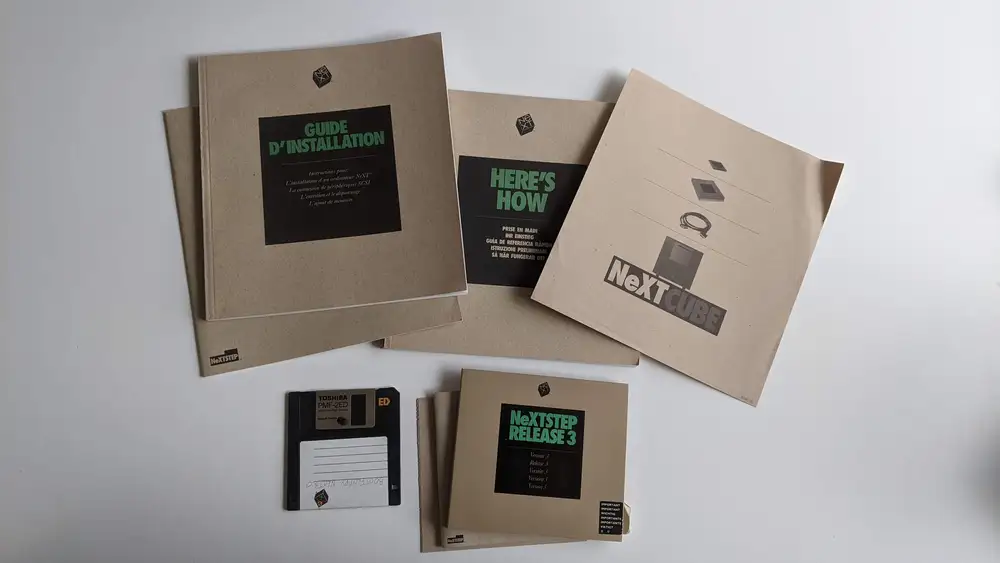
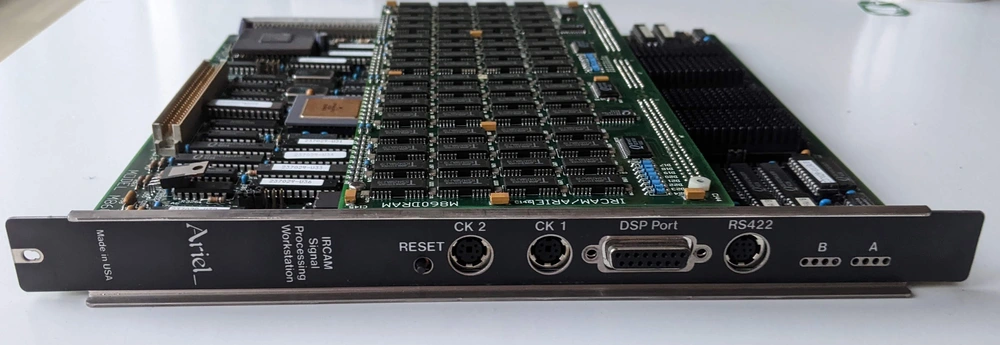
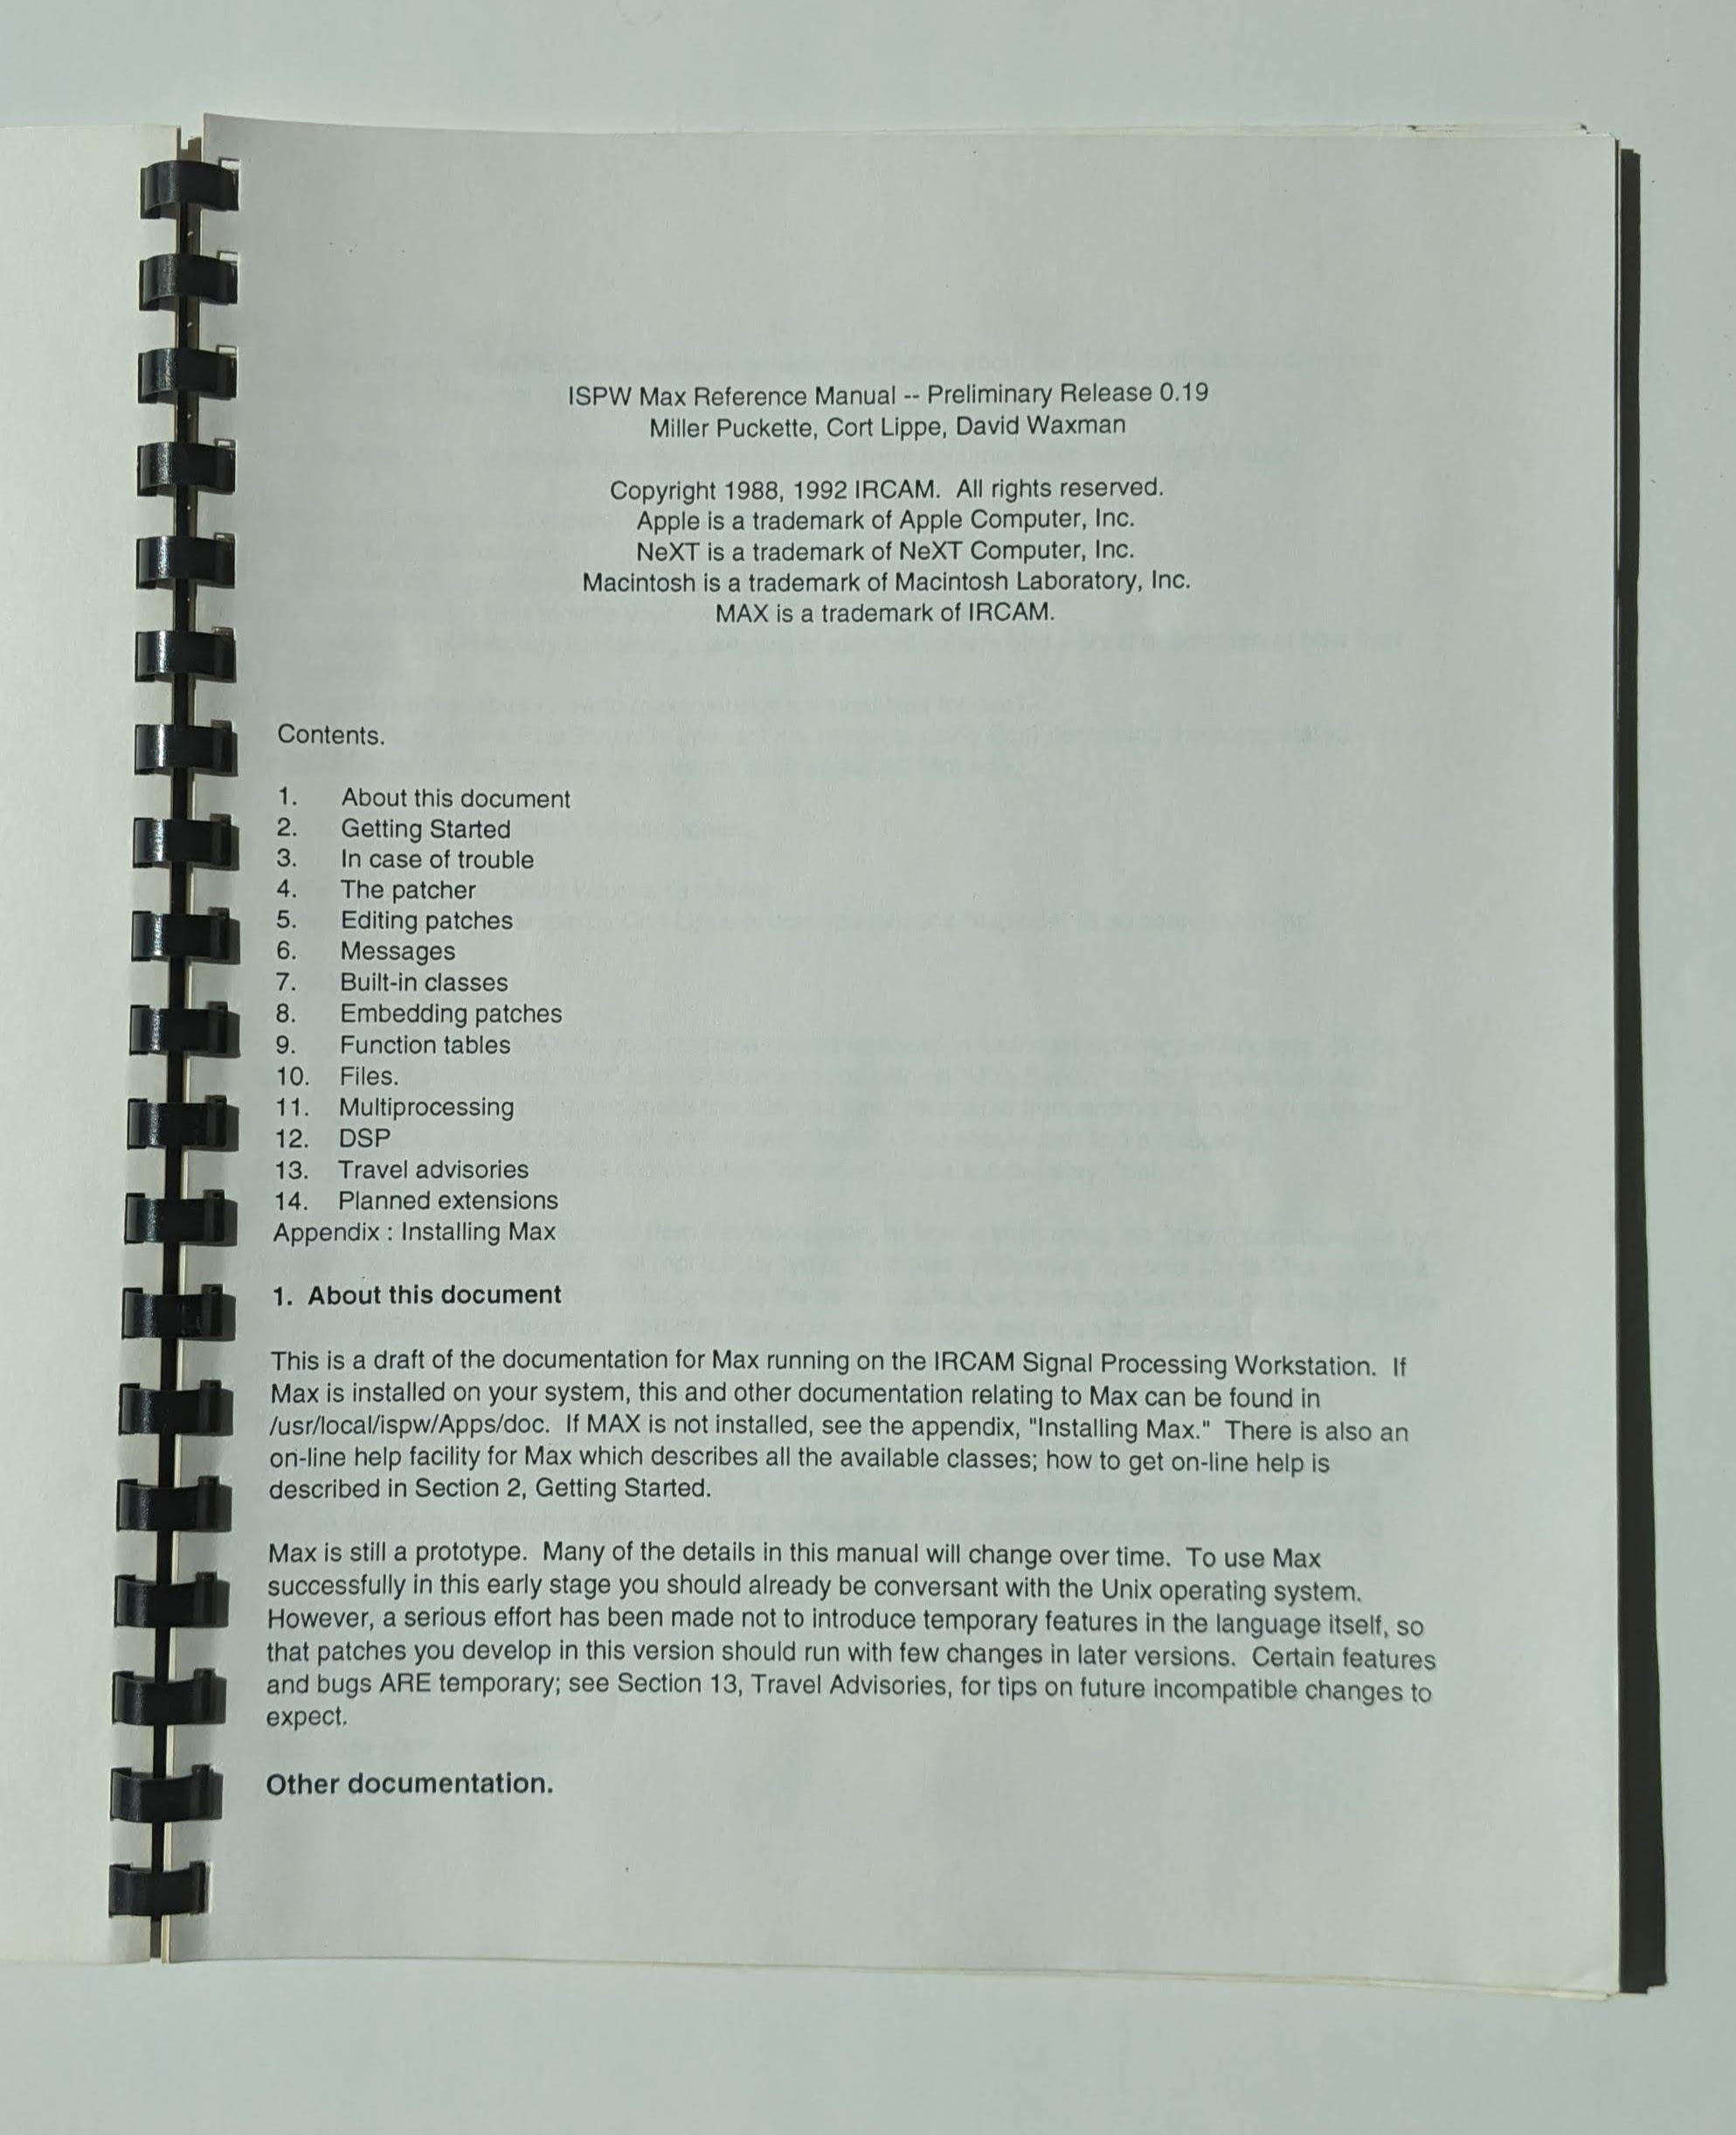
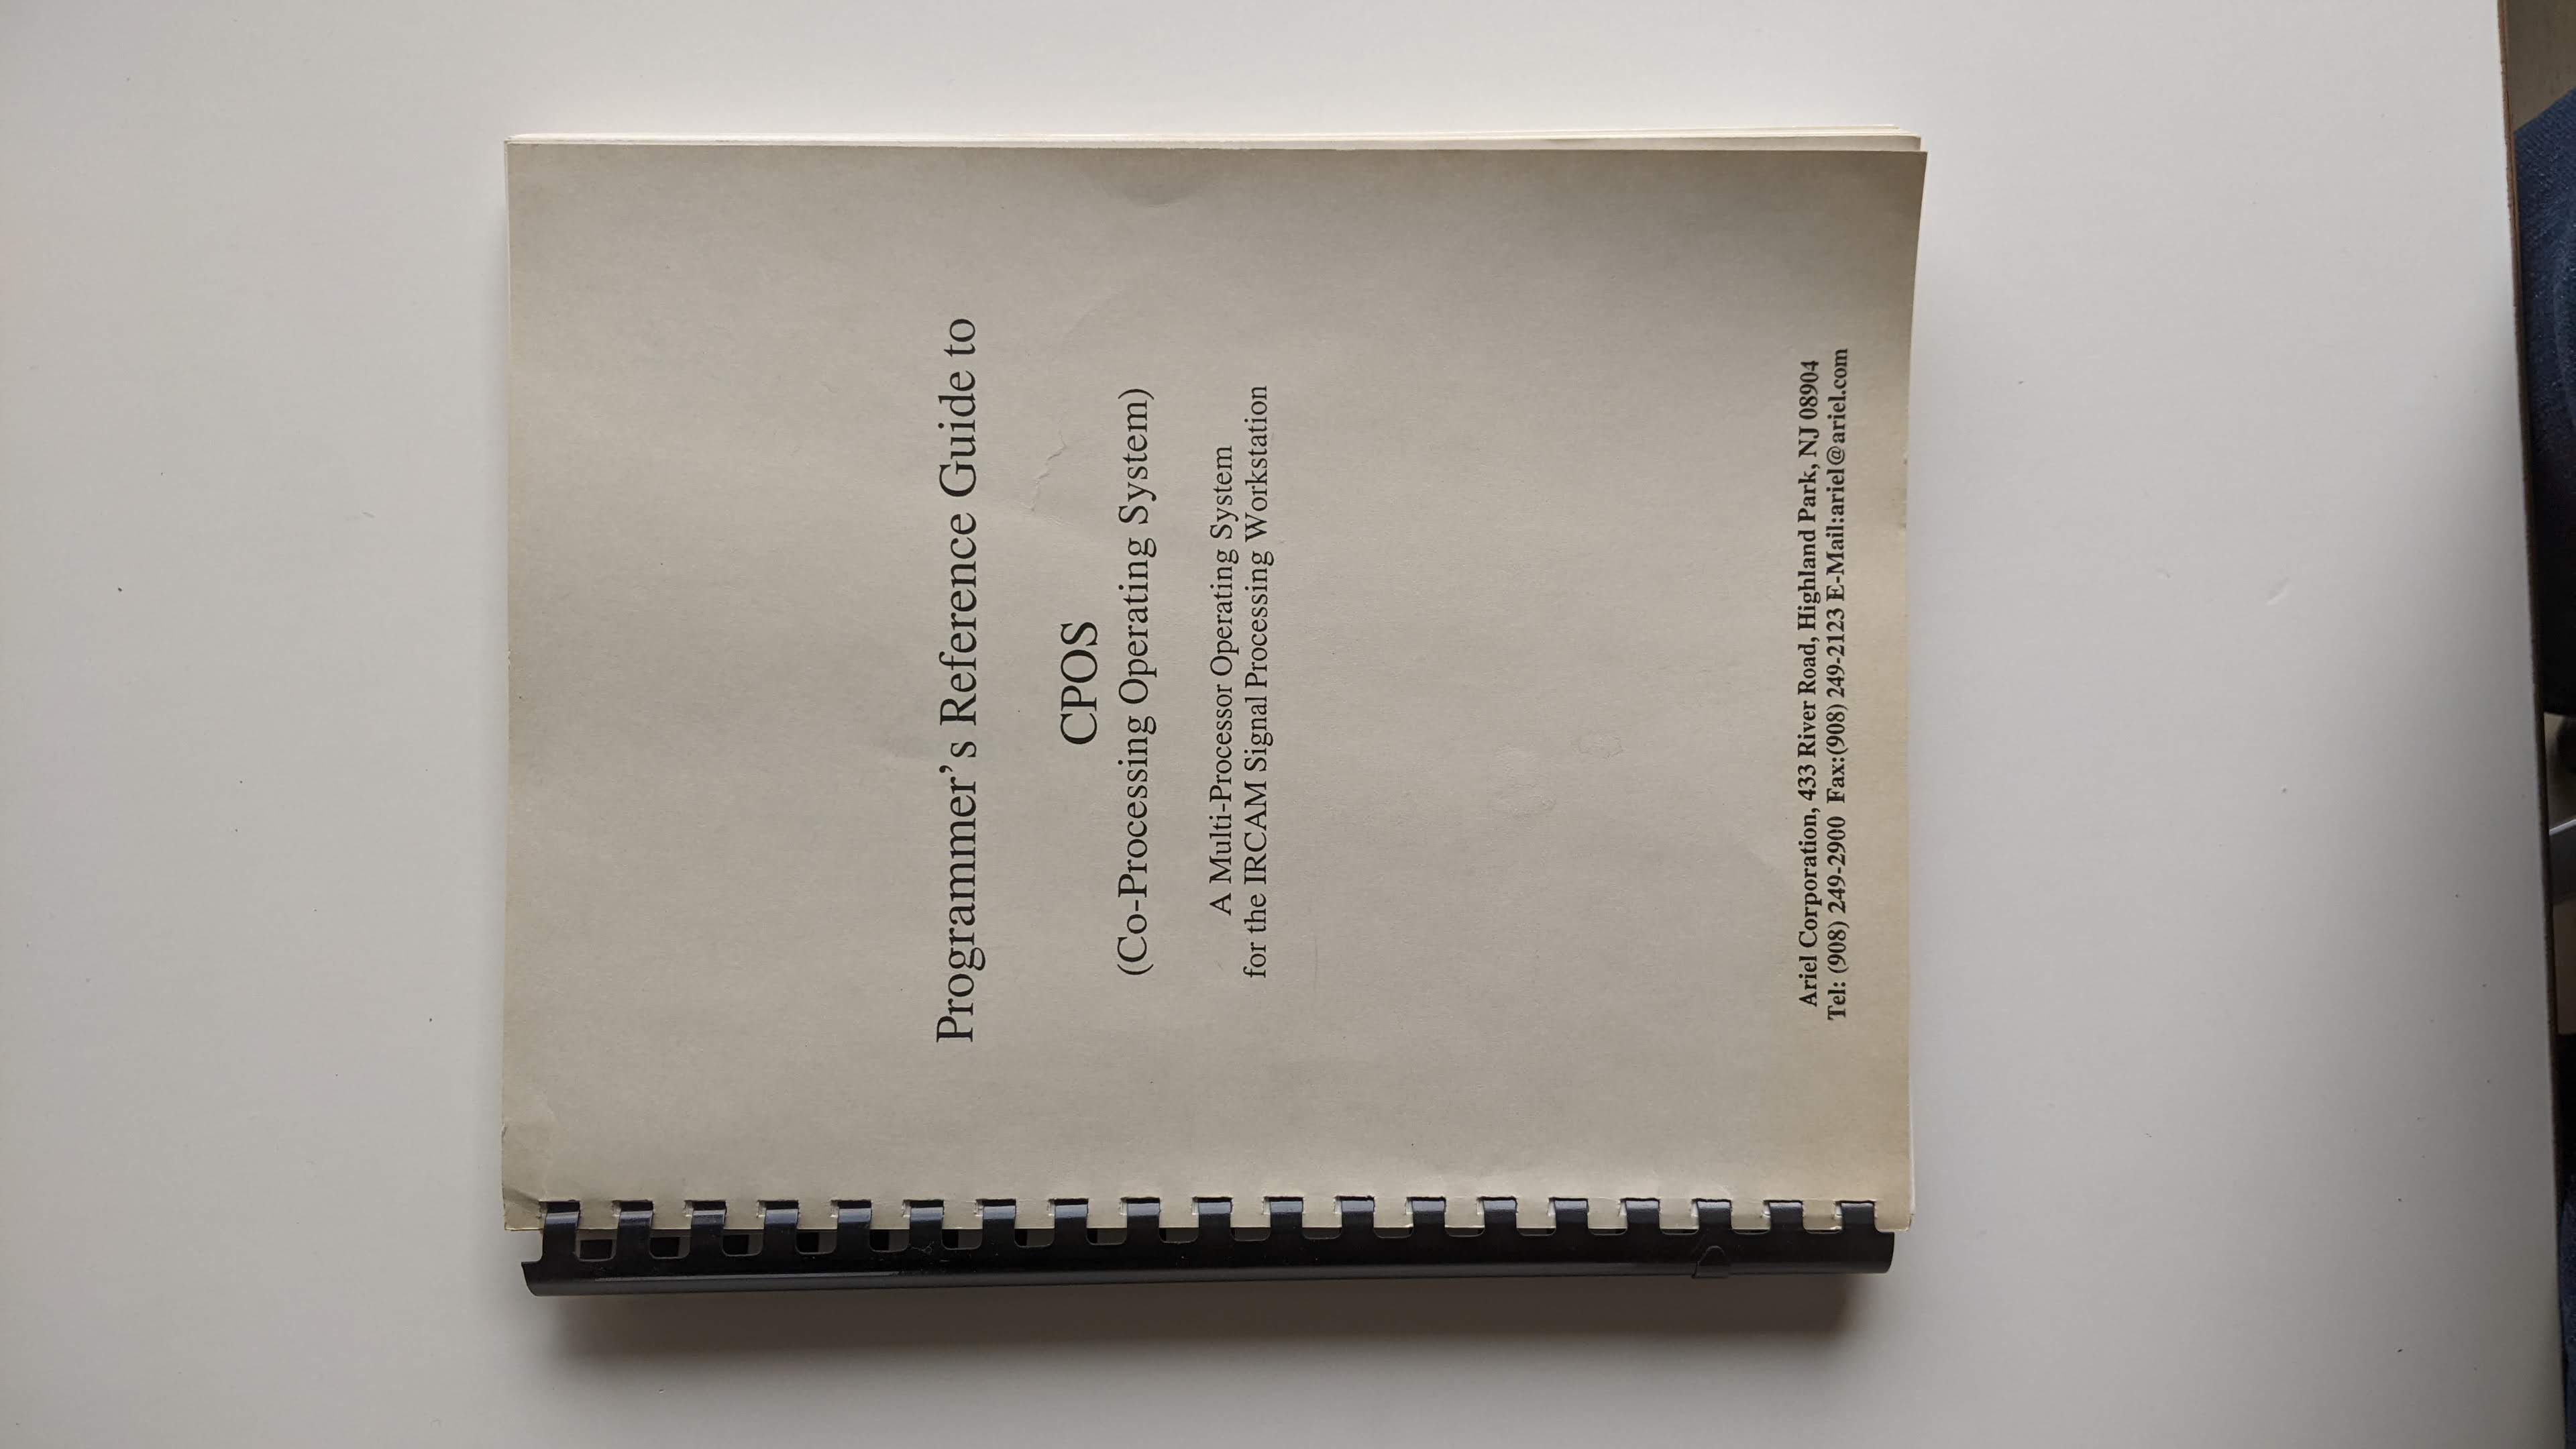

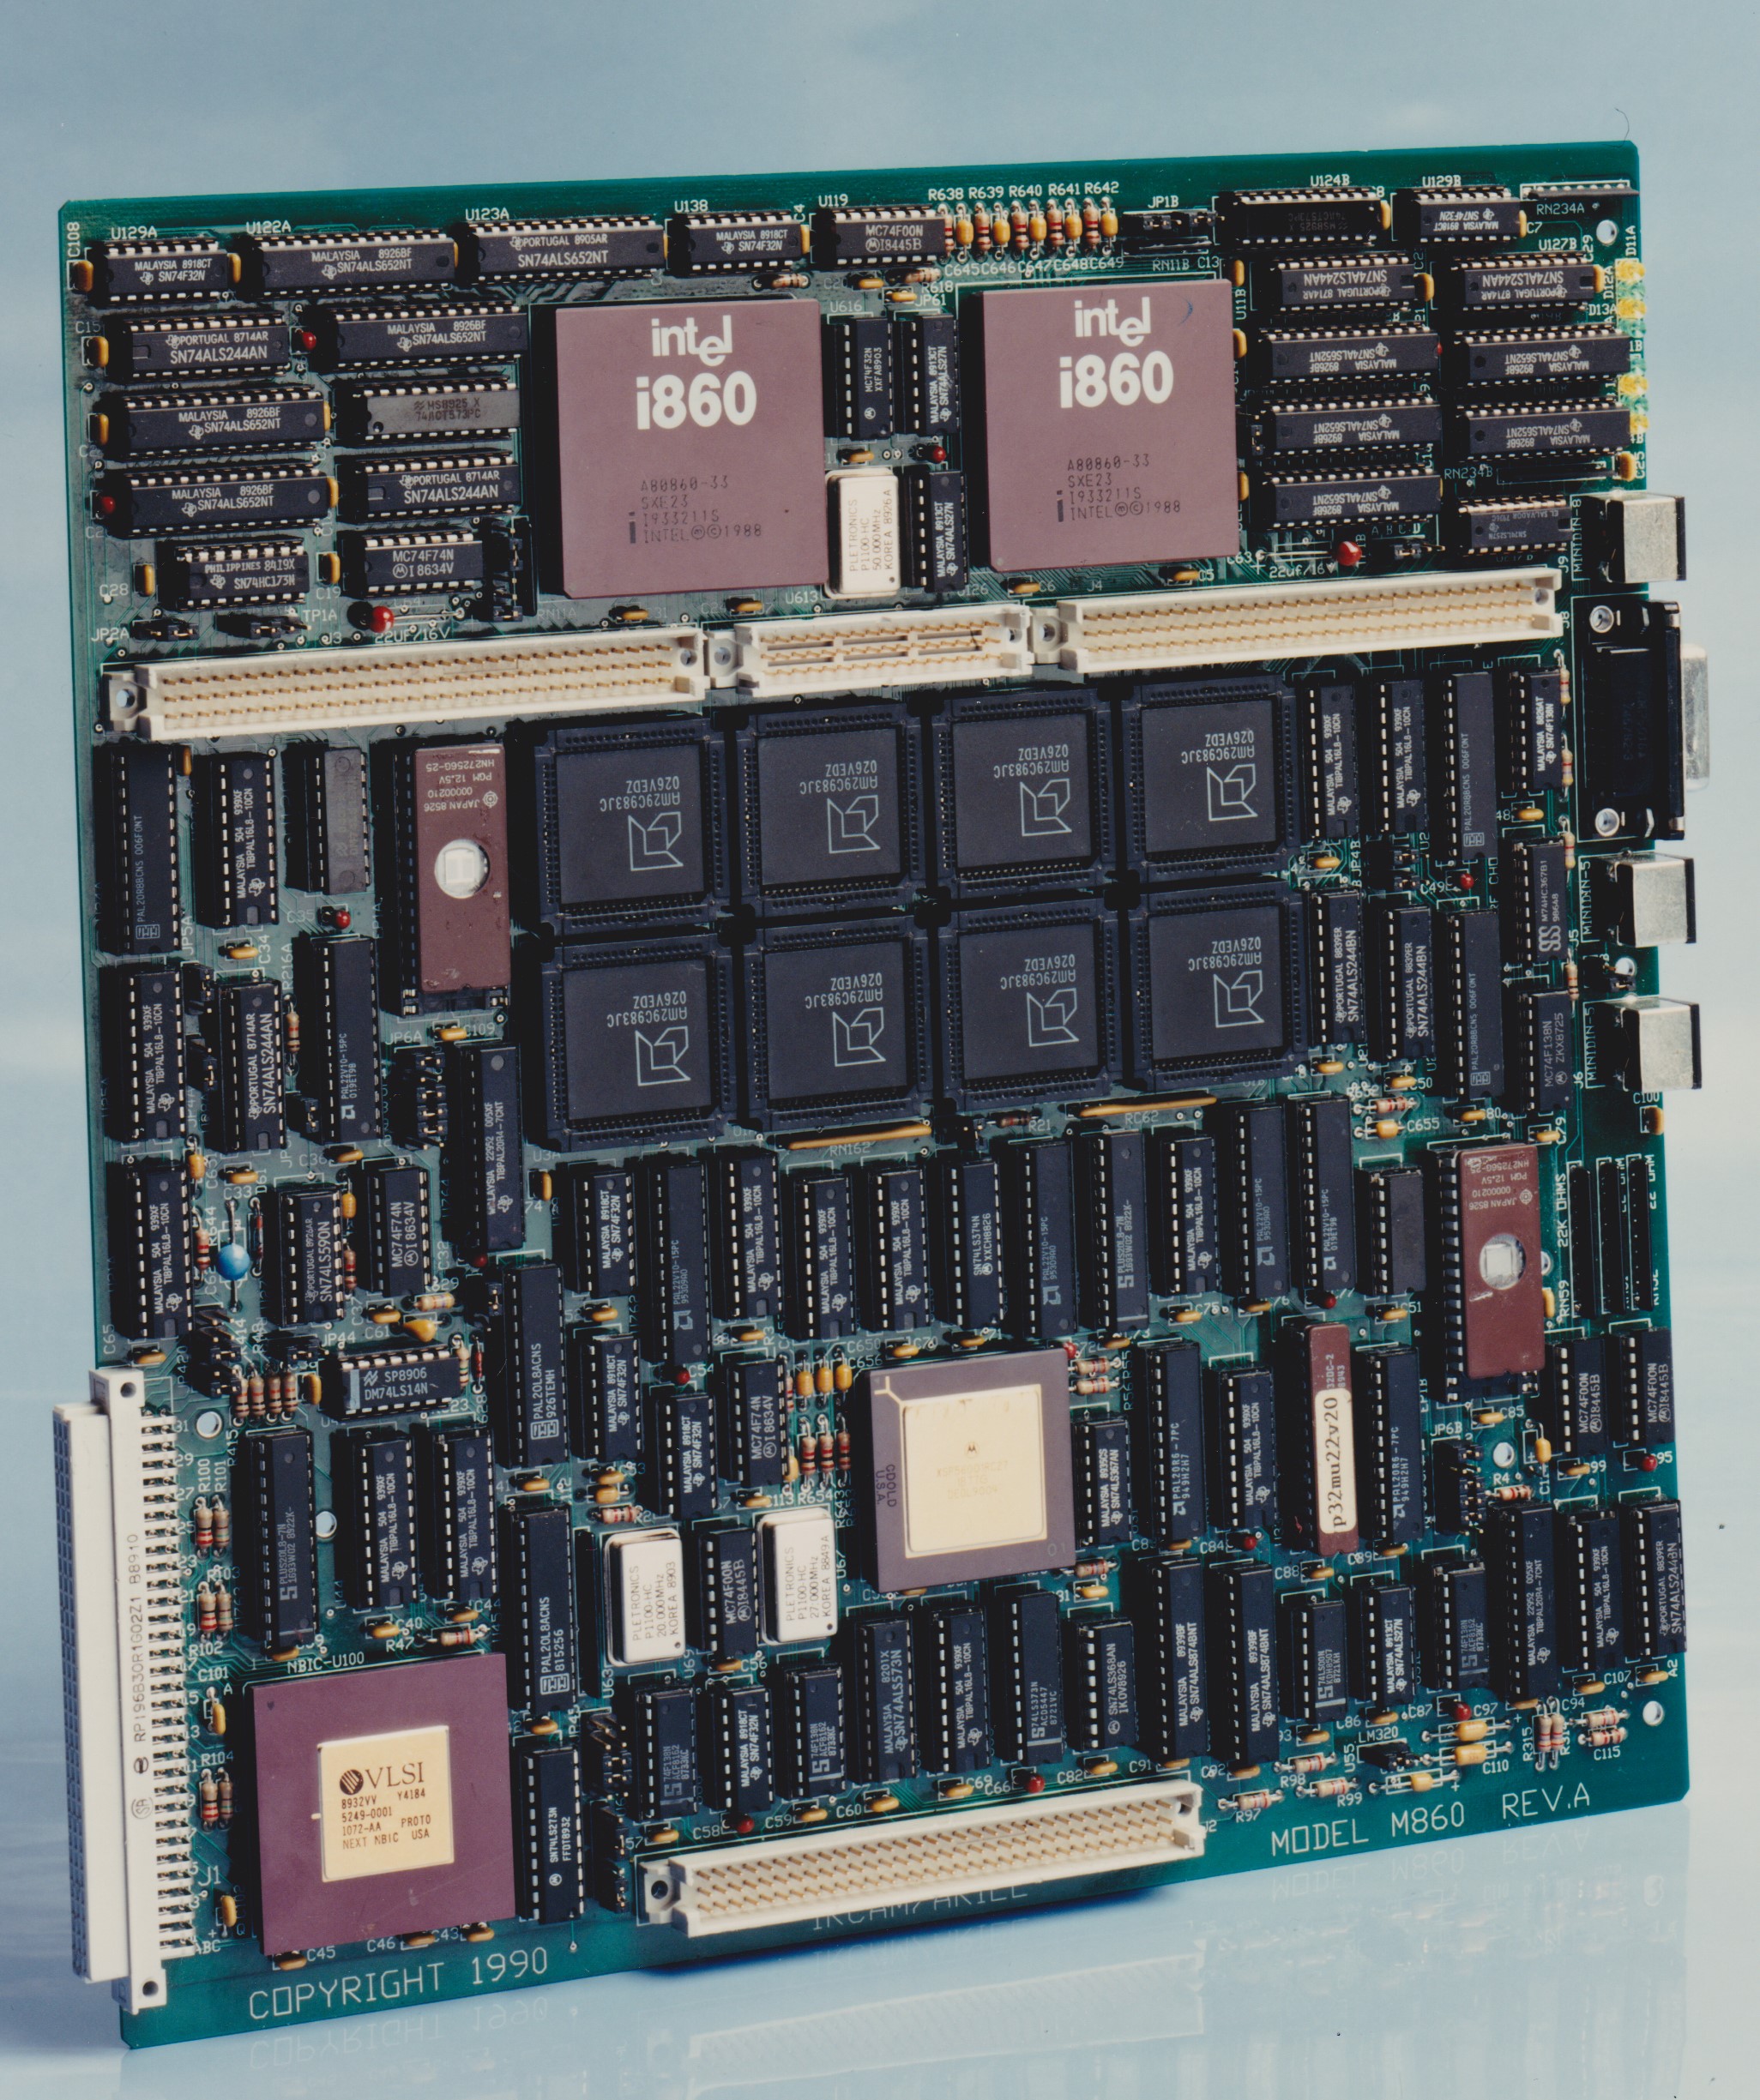
---
## [An Arduino Trigger Box](https://0110.be/posts/An_Arduino_Trigger_Box.md)
- Published: 2023-03-31T00:00:00Z
- Updated: 2025-11-29T14:20:05Z
- Author: Joren
- ID: 510
- Canonical: https://0110.be/posts/An_Arduino_Trigger_Box
- Tags: [Harde waren](https://0110.be/tags/Harde%20waren.md), [UGent](https://0110.be/tags/UGent.md)
Vid: the trigger box set in recording mode via a button or a MIDI key press.
A while back I have build a trigger box. Such device can be used for various synchronisation tasks. It can be used to synchronise camera's, capture devices and sensors. All compatible devices have a 5V `TTL` input, often a `BNC` connector. For a camera, `TTL` input could control the *shutter time*. For a sensor a `TTL` clock could determine the *sample time* or simply be registered along side an other data stream. The trigger box allows to either pass-through (or block) an incoming `TTL` clock. It also outputs a recording level.
There are two ways to use the trigger box. The first is by operating a *manual switch* to start (and later stop) a recording. When recording, the recording level output is set to 5V and the clock at the `CLOCK IN` is passed through to the `CLOCK OUT` port. The second way to set the recording state is by *`MIDI` over `USB`*. While a `MIDI` key is pressed, the recording state is high, when the key is released the state is low. The `MIDI` key input makes it compatible and controllable from any `DAW`. Both ways are shown in the video.
For practical reasons there are two microcontrollers in the device, a Teensy 3.2 and an Arduino. The Arduino is there for its 5V capabilities and is essentially a rather beefy level-shifter. The Teensy is there for the `USB` `MIDI` compatibility and controls everything.
For aesthetic reasons the trigger box has been build into a 1950s '*Sieger portable explosive gas detector*'. I did not feel too bad about gutting the original electronics since a battery leak had destroyed most of it. Also, the late WII era knobs are still unmatched for durability and tactile satisfaction.
The code running on the microcontrollers and some documentation can be found on the [Trigger Box github repository.](https://github.com/ArtScienceLab/ARDUINO_TriggerBox)
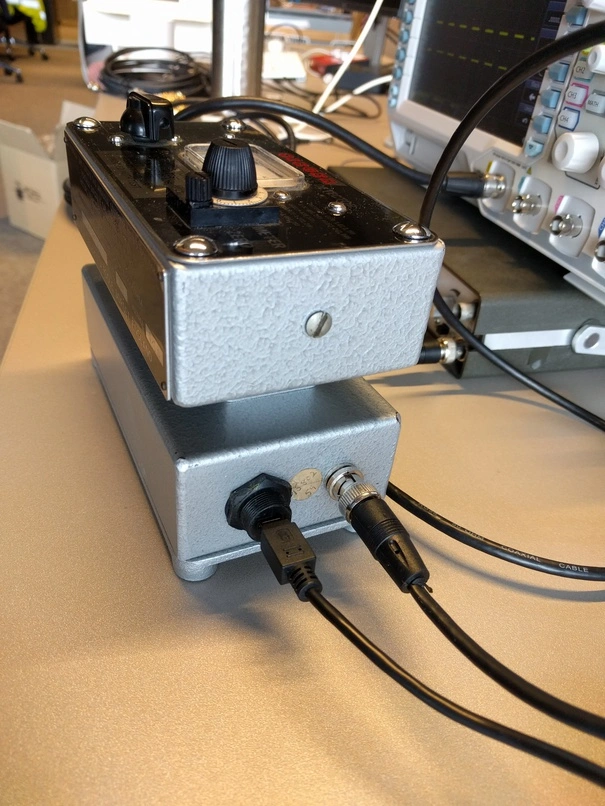
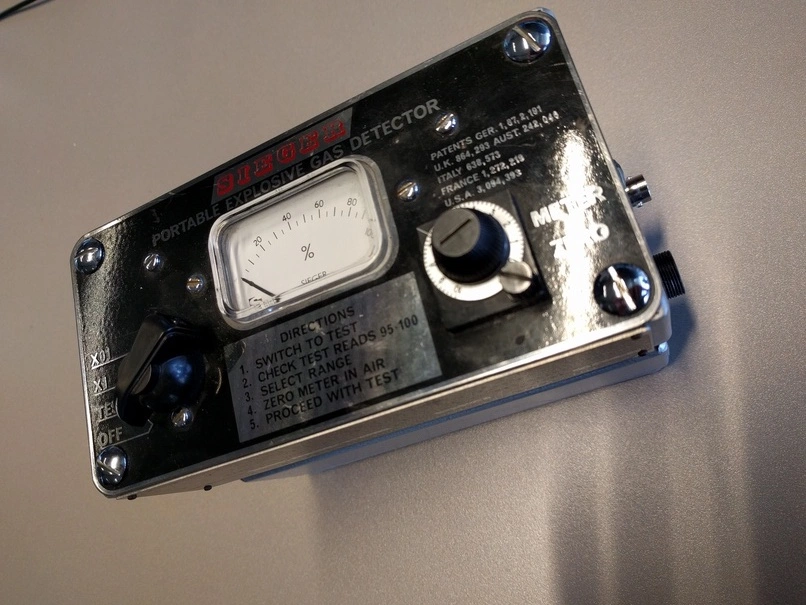
---
## [Gabber - Visualizing constant-Q transform in the browser](https://0110.be/posts/Gabber_-_Visualizing_constant-Q_transform_in_the_browser.md)
- Published: 2023-03-01T00:00:00Z
- Updated: 2023-03-02T10:44:09Z
- Author: Joren
- ID: 509
- Canonical: https://0110.be/posts/Gabber_-_Visualizing_constant-Q_transform_in_the_browser
- Tags: [UGent](https://0110.be/tags/UGent.md)
Today I have released [Gabber](https://github.com/JorenSix/Gabber) a bit of code to transform audio from the time domain to a constant-Q frequency domain in the browser. To be more precise it does a constant-Q non-stationary Gabor transform. The heavy-lifting is done by ['the gaborator', a C library by Andreas Gustafsson](https://gaborator.com/).
I have compiled the Gaborator library to WebAssembly, added some glue code to bridge the Javascript and WASM worlds, implemented a Web Audio [`AudioWorkletProcessor`](https://developer.mozilla.org/en-US/docs/Web/API/AudioWorkletProcessor) to transform audio in the background and and finally visualized the results via [WebGL2](https://github.com/google/swissgl/).
There is a [Gabber live demo](https://0110.be/attachment/cors/2023.02-gabber/gabber.html) below. If you press start and grant microphone access, incoming audio is transformed and plotted onto a canvas. Thanks to WebAssembly and WebGL2 this should run relatively smoothly even on less powerful devices. Please do play around with the perspective slider.
While Gabber is currently a proof of concept, with some attention the library could be used as a front end for browser based music information retrieval applications. My main goal with Gabber is to use it in educational settings to explain the properties of sound, and more concretely pitch, via spectrograms and interactive demos. Also I plan to use it in a browser based tool to extract pitch patterns from music.
The name Gabber, refers to both [Dennis Gabor](https://en.wikipedia.org/wiki/Dennis_Gabor) and an infamous, mainly [Dutch style of music](https://en.wikipedia.org/wiki/Gabber) which was popular when I was young. More information can be found in the GitHub repository: [Gabber-High resolution spectral transforms for the web](https://github.com/JorenSix/Gabber).
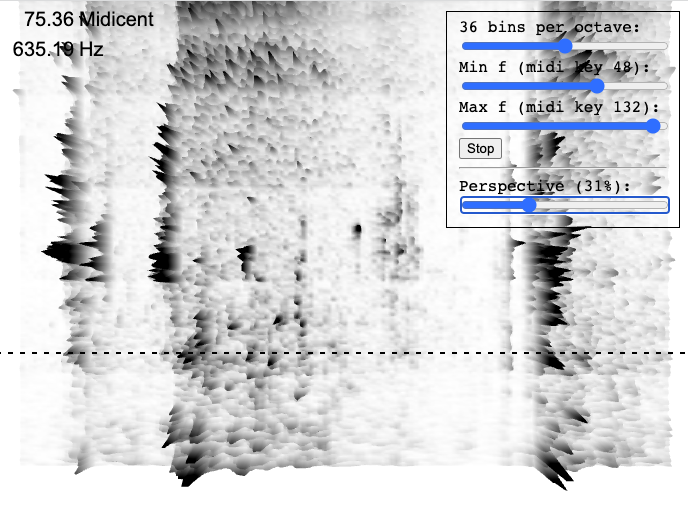
---
## [Pitch content on historic field recordings](https://0110.be/posts/Pitch_content_on_historic_field_recordings.md)
- Published: 2023-02-20T00:00:00Z
- Updated: 2023-02-20T10:02:14Z
- Author: Joren
- ID: 508
- Canonical: https://0110.be/posts/Pitch_content_on_historic_field_recordings
- Tags: [UGent](https://0110.be/tags/UGent.md)
Wednesday the 15th of February I presented a collaboration with [Olmo Cornelis](https://olmocornelis.be/) titled [*Pitch content on historic field recordings: Analyzing 400 wax cylinder recordings* at ULB, Brussels](https://lam.centresphisoc.ulb.be/fr/evenement/15-fev-23-pitch-content-historic-field-recordings). The session was organized by the Belgian branch of [ICTM (International Council for Traditional Music)\
](http://ictmusic.org/)
The presentation is linked below and is interactive: it contains music analysis software being discussed within the presentation itself.
Thanks to ICTM Belgium for the invitation and the platform! The Ghent University BOF funded project PaPiOM allows me work on these topics.
---
## [DiscStitch at Deezer HQ](https://0110.be/posts/DiscStitch_at_Deezer_HQ.md)
- Published: 2023-02-08T00:00:00Z
- Updated: 2023-02-09T09:40:47Z
- Author: Joren
- ID: 507
- Canonical: https://0110.be/posts/DiscStitch_at_Deezer_HQ
- Tags: [Music Information Retrieval](https://0110.be/tags/Music%20Information%20Retrieval.md), [UGent](https://0110.be/tags/UGent.md)
I have presented DiscStitch at the MIR (Music Information Retrieval) get together at the Deezer headquarters in Paris.
DiscStitch is a solution to identify, align and mix digitized audio originating from (overlapping) laquer discs. The main contribution lays in the novel audio to audio alignment algorithm which is robust against some speed differences and variabilities.
Below a presentation can be found introducing DiscStitch. You can also try out the browser based DiscStitch audio-to-audio alignment page.


---
## [Updates for Olaf - The Overly Lightweight Acoustic Fingerprinting system](https://0110.be/posts/Updates_for_Olaf_-__The_Overly_Lightweight_Acoustic_Fingerprinting_system.md)
- Published: 2023-01-31T00:00:00Z
- Updated: 2023-02-06T09:07:27Z
- Author: Joren
- ID: 505
- Canonical: https://0110.be/posts/Updates_for_Olaf_-__The_Overly_Lightweight_Acoustic_Fingerprinting_system
- Tags: [Music Information Retrieval](https://0110.be/tags/Music%20Information%20Retrieval.md), [UGent](https://0110.be/tags/UGent.md)
Fig: Olaf fingerprinter.
I have updated [Olaf - the Overly Lightweight Acoustic Fingerprinting system](https://github.com/JorenSix/Olaf). Olaf is a piece of technology that uses digital signal processing to identify audio files by analyzing unique, robust, and compact audio characteristics - or *"fingerprints"*. The fingerprints are stored in a database for efficient comparison and matching. The database index allows for fast and accurate audio recognition, even in the presence of distortions, noise, and other variations.
Olaf is unique because it works on traditional computing devices, embedded microprocessors and in the browser. To this end tried to use ANSI C. C is a relatively small programming language but has very little safeguards and is full of exiting footguns. I enjoy the limitations of C: limitations foster creativity. I also made ample use of the many footguns C has to offer: buffer overflows, memory leaks, ... However, with the current update I think most serious bugs have been found. Some of the changes to Olaf include:
- Fixed a rather nasty [**array out of bounds**](https://github.com/JorenSix/Olaf/issues/21) bug. The bug remained elusive due to the fact that a segfault was rare on macOS. Linux seems to be more diligent in that regard.
- Added a quick way to **skip already indexed files**. Which improves usability significantly when working with larger datasets.
- **Improved command line output** and fixed incorrectly reported times. The reported start and stop time of a query was wrong and is now fixed.
- Olaf now supports **caching** fingerprints in simple text files. This makes fingerprint extraction much faster since all cores of the system can be used to extract fingerprints and dump them to text files. Writing prints to the database from multiple threads is slow since they need to wait for access to the locked database. There is also a command to store all cashed fingerprints in a single go.
- Added support for **basic profiling** with `gprof`. The profiler shows where optimizations can have the most impact.
- Olaf now includes an algorithm for **efficient max-filtering**. The [min-max filter algorithm by Daniel Lemire](https://arxiv.org/abs/cs/0610046) is implemented. The profiler showed that most time was spend during max-filtering: replacing the naive max-filter with the Lemire max-filter improved performance drastically.
- **CI** with Github Actions which checks if checked in sources compile and tests some of the basic functionality automatically.
- Updated the **Zig build** script for cross-compilation and updated the pre-build Windows version.
- Tested the system with **larger databases**. The [FMA-full](https://github.com/mdeff/fma) datasets, which comprises almost a full *year* of audio was indexed and queried without problems on a single pc. The limits of Olaf with respect to indexed size is probably a few times larger.
- Tested, fixed and improved the 'memory database' version. Also added documentation to the readme.
- Made a **basic web example** to call the WASM version of Olaf.
- Added an **ESP32 example**, showing how Olaf can run on this microprocessor. It runs without an external microphone but uses a test audio file. Previously some small changes were needed to Olaf to run on the ESP32, now the exact same code is used.
Anyhow, what originally started as a rather quick and dirty hack has been improved quite a bit. The takeaway message: in the world of software it does seem possible to polish a turd.
---
## [mot - MIDI and OSC Tools - Sending UDP messages from the browser](https://0110.be/posts/mot_-_MIDI_and_OSC_Tools_-_Sending_UDP_messages_from_the_browser.md)
- Published: 2023-01-26T00:00:00Z
- Updated: 2025-12-03T14:20:31Z
- Author: Joren
- ID: 504
- Canonical: https://0110.be/posts/mot_-_MIDI_and_OSC_Tools_-_Sending_UDP_messages_from_the_browser
- Tags: [Code](https://0110.be/tags/Code.md), [UGent](https://0110.be/tags/UGent.md)
As a way to get to know the [Rust programming language](https://www.rust-lang.org/) I have developed a couple of practical tools for OSC and MIDI debugging. OSC and MIDI are protocols which are almost always used for applications dealing with music. In these applications latency should be kept in check. Languages with garbage collection (Java, Go) and scripting languages (Ruby, Python, ...) are hard to tune for low-latency applications and do not really have real-time guarantees. Rust, as a modern alternative for C/C, is a better fit for cross platform CLI low-latency applications.
The [MIDI and OSC Tools (mot)](https://github.com/JorenSix/mot) are bundled in a single CLI application. The application includes:
- `midi_echo` prints MIDI messages coming from a connected MIDI device.
- `osc_echo` prints OSC messages arriving at a certain UDP port.
- `midi_to_osc` a MIDI to OSC bridge which sends MIDI messages coming from a connected MIDI device to an OSC target.
- `osc_to_mid` an OSC to MIDI bridge which receives OSC messages and sends them to a connected MIDI device.
- `midi_roundtrip_latency` measure MIDI round-trip latency.
This opens a couple of possibilities which are discussed below.
#### Sending UDP messages from the browser
One of the ways to send OSC messages from a browser to a local network is by using the MIDI out capability of browsers and - using mot - translating MIDI to OSC an example can be seen below.
Fig: sending an UDP message to a network from a Browser using a the mot MIDI to OSC bridge, click the image for a better readable version.
#### Measuring UDP message latency
Both MIDI and OSC can be seen as rather general data encapsulation protocols with wide support in terms of libraries and cross platform support. Their value goes beyond mere musical applications. The same holds for `mot`. In this example we are using `mot` to measure UDP message latency between two hosts.
On the first host we send MIDI messages from MIDI device 0 over OSC to another host with e.g. `mot midi_to_osc 192.168.1.12:3000 /m 0`. At the other host we receive the OSC messages and send them to a virtual device: `mot osc_to_midi 192.168.1.12:3000 /m 6666`.
At the second host we return messages from the virtual device to the first host: `mot midi_to_osc 192.168.1.4:5000 /m 1`. Perhaps you first need to do `mot midi_to_osc -l` to find the index of the virtual device. As a final step the messages can be received at the first host and returned to the original midi device. On the first host: `mot osc_to_midi 192.168.1.4:5000 /m 0`.
If the original MIDI device is a Teensy running the "roundtrip patch" then finally the roundtrip time is accurately measured and shown in the serial console. I am sure the previous text is cromulent, totally not contrived and not confusing. Anyway, to make it more confusing: this is what happens when you use a single host to do midi to osc to midi to osc to midi and use the loopback networking device:
Fig: MIDI to OSC to MIDI to OSC to MIDI roundtrip latency.
#### Visualizing sensor data in the browser
Fig: Sensor data as MIDI.
When capturing sensor data on microcontrollers, data can be encoded into MIDI. This makes almost any sensor practically useful in Ableton Live or similar environments. It also makes it compatible with all other MIDI supporting devices. With `mot` it becomes trivial to send MIDI encoded sensor data over OSC e.g. to a central place to log that data.
Another use case is to visualize the incoming data in real-time. A single web page which reads and visualizes incoming MIDI-sensor data becomes much more useful if streams from other devices can be visualized as well with the `mot midi_to_osc` and `mot osc_to_midi` commands.
#### Cross-platform support
With the Rust compiler it is relatively easy to cross-compile for different targets. There is however an important limitation in `mot`. Windows has no support for virtual MIDI ports which limits the usefulness of `mot` on that platform.
Check the [mot - MIDI and OSC Tools GitHub repository](https://github.com/JorenSix/mot) for the software. Perhaps also of interest for MIDI debugging are [VMPK](https://vmpk.sourceforge.io/), [MIDI Monitor](https://www.snoize.com/midimonitor/) and [the web MIDI tools](https://arachsys.github.io/webmidi/).
---
[Newer posts](https://0110.be/Blog.md)
[Older posts](https://0110.be/Blog.md?page=2)
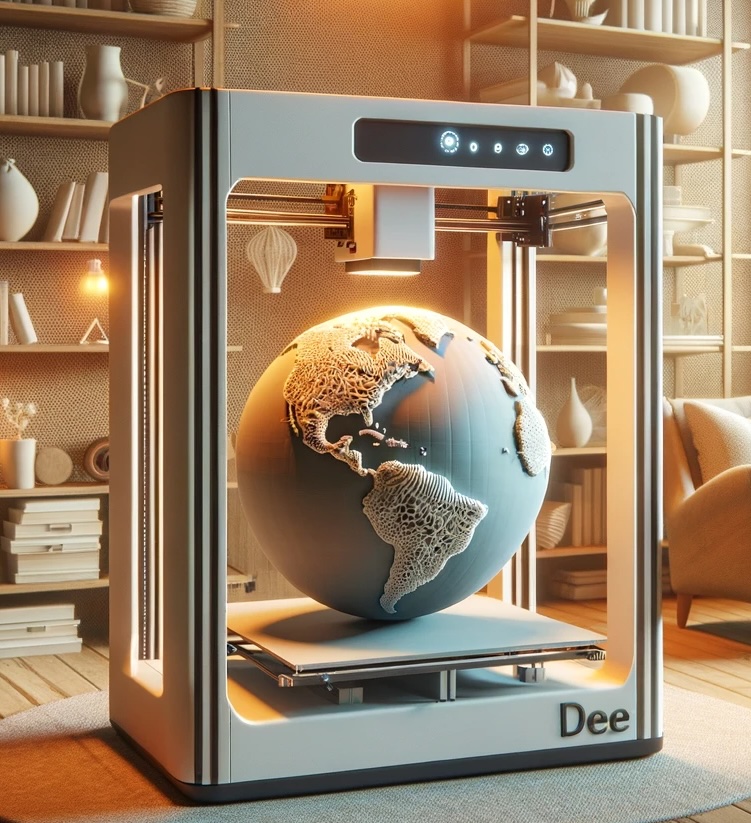
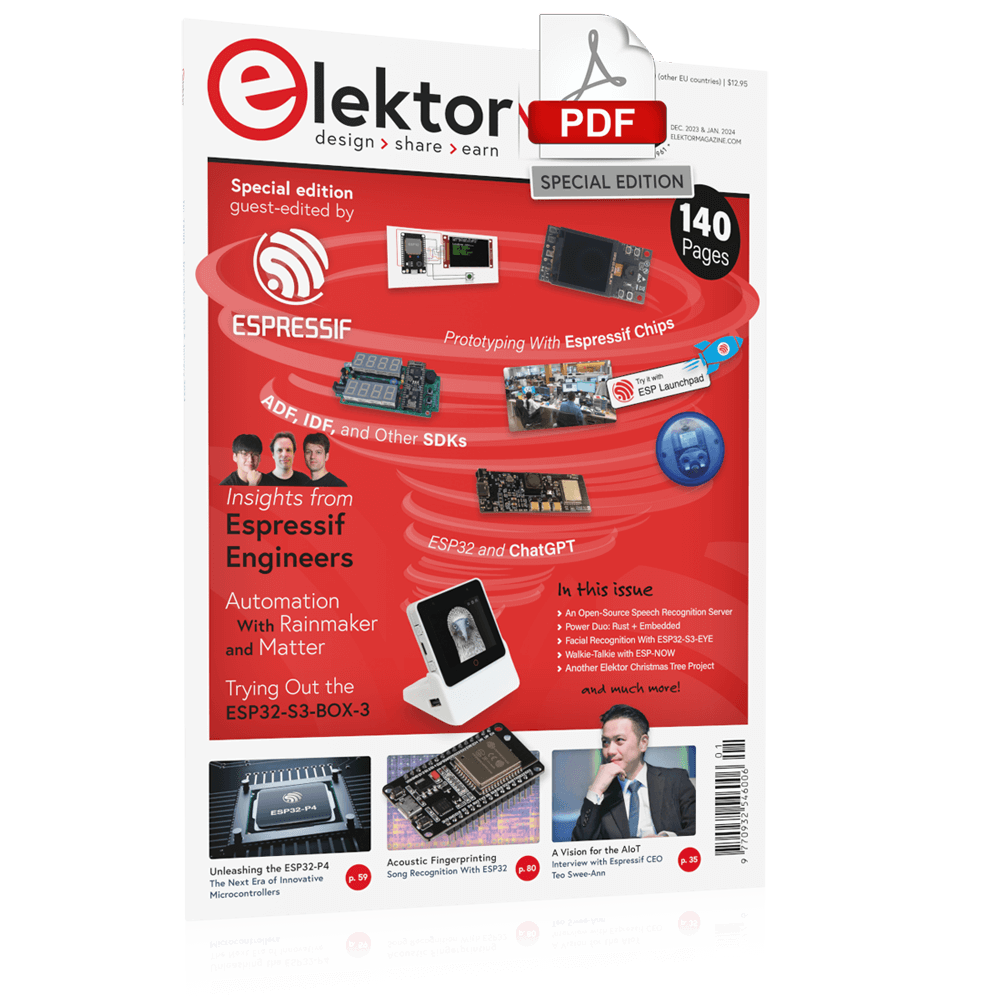

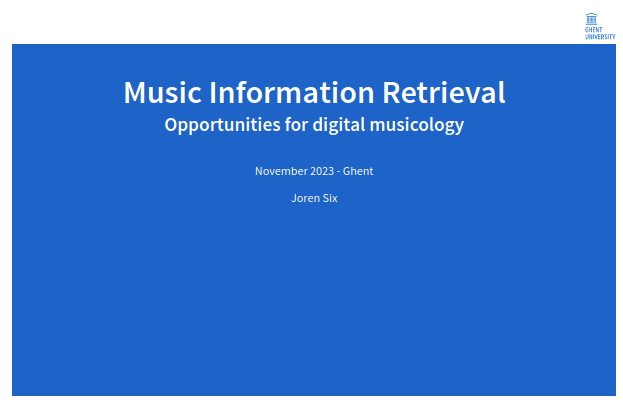
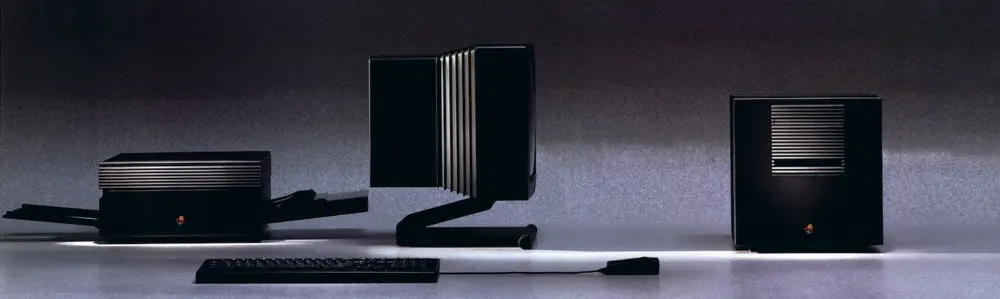
 Fig: *Door projection as imagined by DALL.E*.



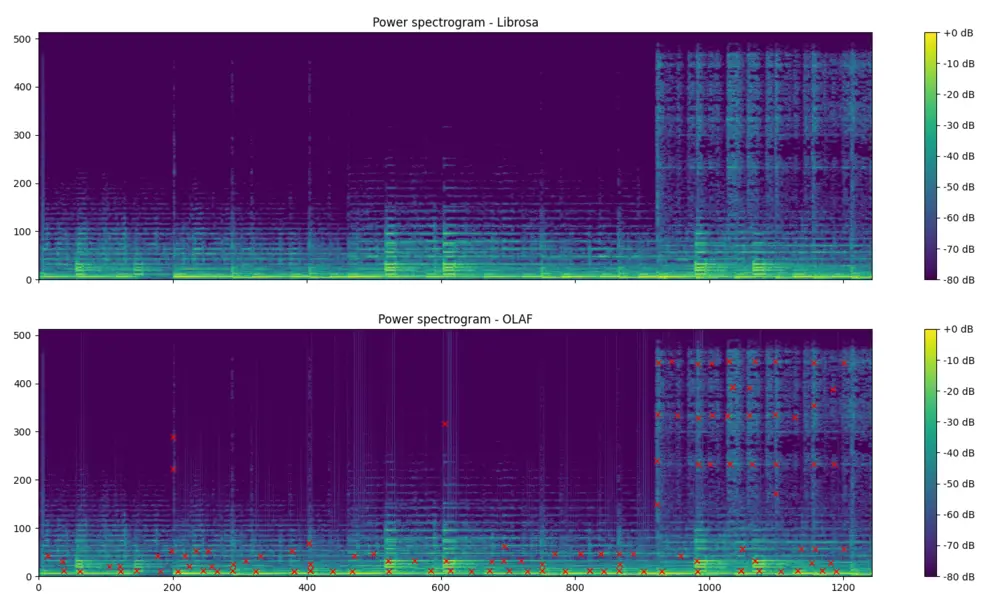 \
\
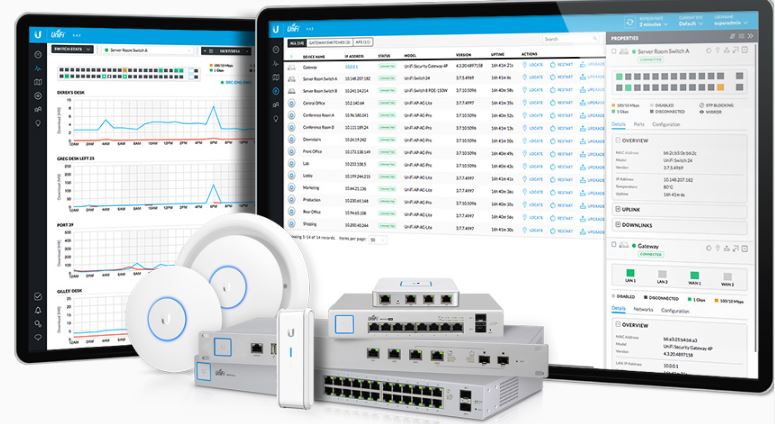

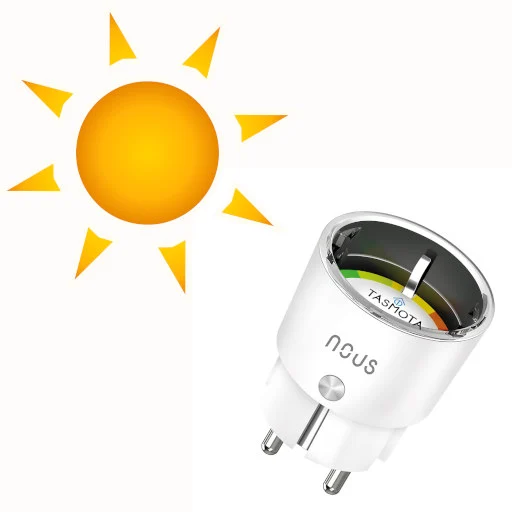
 Fig: Some AI imagining audio search.

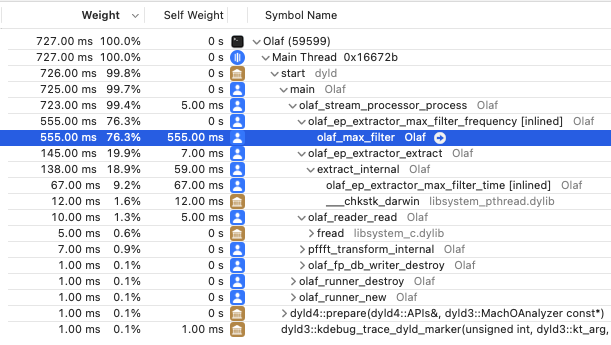 \
Fig: The results of profiling Olaf in XCode's time profiler. Almost all time is spend in a single function which is the prime target for optimization.
\
Fig: The results of profiling Olaf in XCode's time profiler. Almost all time is spend in a single function which is the prime target for optimization.
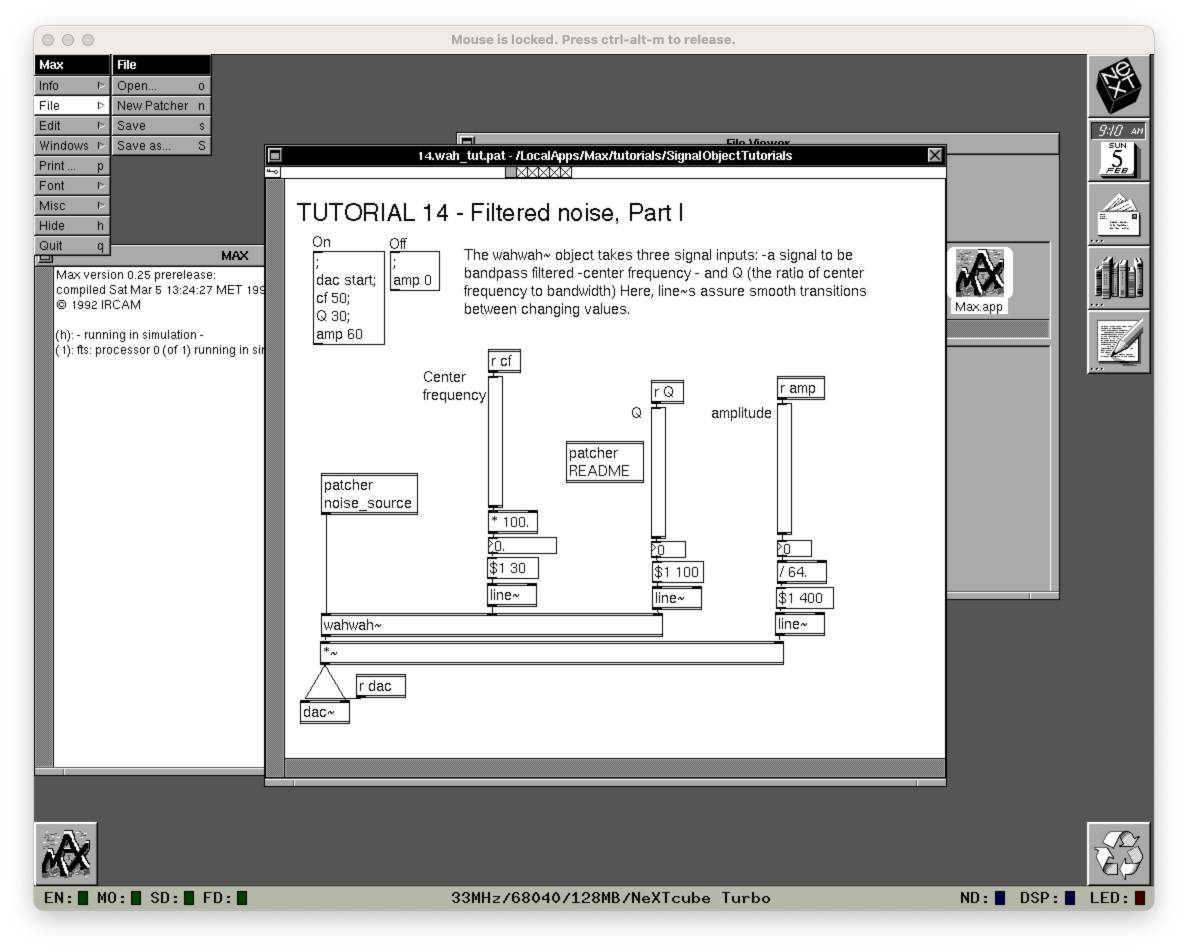 \
Fig: MAX 0.25 running in the Previous emulator on a modern MacOS system.
\
Fig: MAX 0.25 running in the Previous emulator on a modern MacOS system.
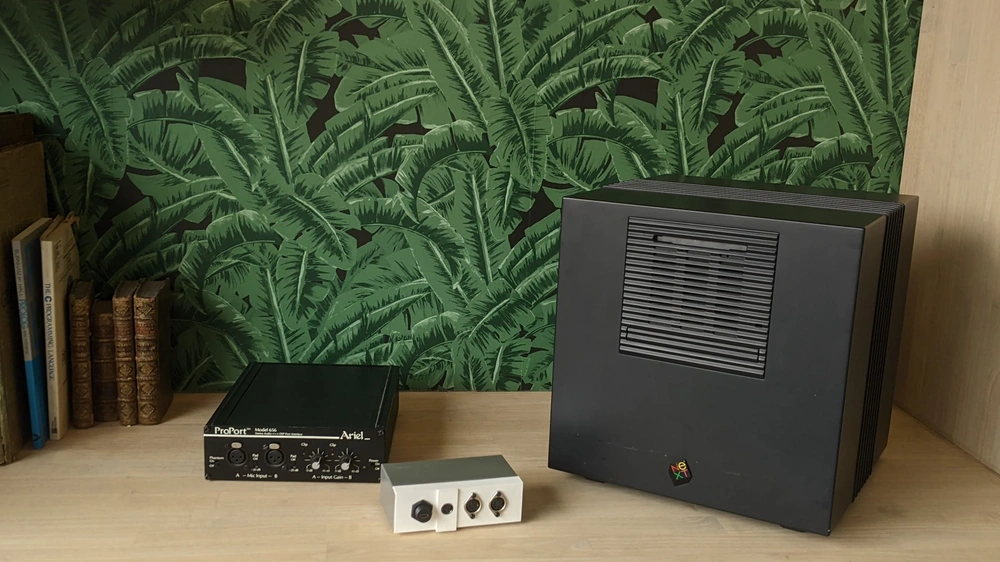


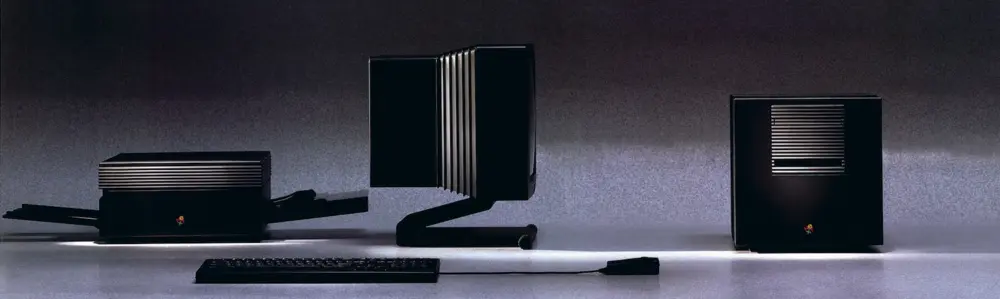

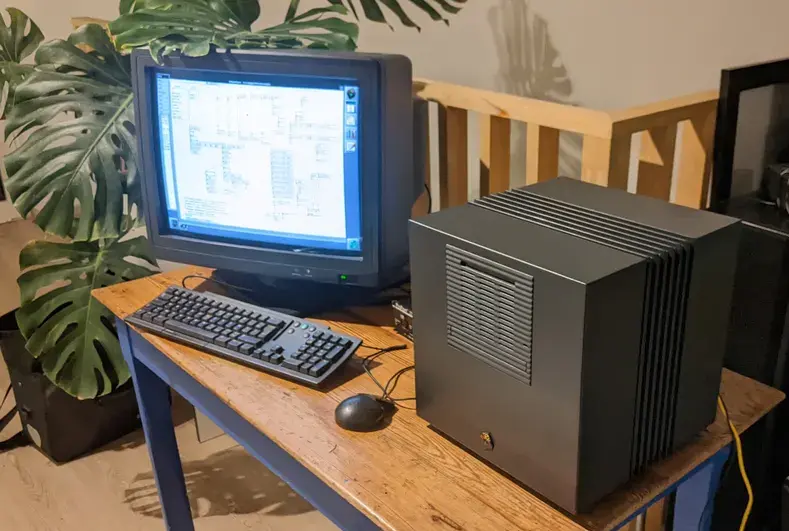
 \
\


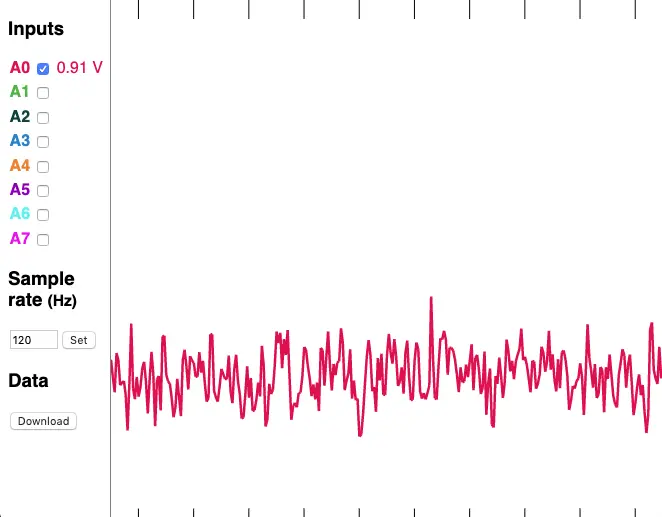 Fig: Sensor data as MIDI.