---
title: Posts tagged Code
canonical: https://0110.be/tags/Code
markdown_url: https://0110.be/tags/Code.md
page: 0
posts_per_page: 30
total_posts: 106
filters:
tag: Code
previous:
next: https://0110.be/tags/Code.md?page=1
---
# Posts tagged Code
## [Sampo-UI Meets Ontop: Publishing Relational Digital Humanities Data - Semantics 2026](https://0110.be/posts/Sampo-UI_Meets_Ontop%3A_Publishing_Relational_Digital_Humanities_Data_-_Semantics_2026.md)
- Published: 2026-09-16T00:00:00Z
- Updated: 2026-09-16T07:46:02Z
- Author: Joren
- ID: 582
- Canonical: https://0110.be/posts/Sampo-UI_Meets_Ontop%3A_Publishing_Relational_Digital_Humanities_Data_-_Semantics_2026
- Tags: [Code](https://0110.be/tags/Code.md), [GhentCDH](https://0110.be/tags/GhentCDH.md), [Presentation](https://0110.be/tags/Presentation.md), [UGent](https://0110.be/tags/UGent.md)
The [SEMANTiCS conference](https://2026-eu.semantics.cc/) took place in Ghent from 15 to 17 September 2026. Our contribution was a collaboration between GhentCDH and the Semantic Computing Research Group at Aalto University on publishing humanities data with Sampo-UI and Ontop.
> *[Sampo-UI Meets Ontop: Publishing Relational Digital Humanities Data on the Semantic Web](https://0110.be/files/attachments/582/semantics-poster-sampo-ui.pdf)*, Joren Six¹, Jahid Chetti¹, Annastiina Ahola², Frederic Lamsens¹, Heikki Rantala², Eero Hyvönen²
> ¹ Ghent University, Ghent Centre for Digital Humanities ([GhentCDH](https://www.ghentcdh.ugent.be))
> ² Aalto University, Department of Computer Science, Semantic Computing Research Group ([SeCo](https://seco.cs.aalto.fi))
At GhentCDH, we often publish research datasets in the digital humanities. Several projects need similar search filters, map visualizations and data exports. Sampo-UI makes it possible to reuse these components when the data is available as Linked Data. In collaboration with the original Sampo-UI team, we worked on modernizing the framework. Our first contribution separates the shared core from project-specific configuration, making updates and reuse more manageable. The second uses Ontop to expose existing *relational databases* through a SPARQL endpoint. This lets us use Sampo-UI while keeping the database infrastructure and tooling we already have. Having one fewer database system to maintain is welcome.
> **Abstract**: *The Sampo model and its Sampo-UI framework have become an established approach for publishing Cultural Heritage and Digital Humanities data on the Semantic Web. Sampo-UI enables exploration of data originating from SPARQL endpoints through faceted search across multiple views with seamlessly integrated visualization and data analytic tools. Here, we present two contributions to the Sampo-UI ecosystem: (i) a separation of Sampo-UI core from application-specific configuration; decoupling core and application simplifies updates and facilitates reuse of efforts, and (ii) the use of Ontop --- a virtual knowledge graph system --- to expose relational databases through a SPARQL endpoint and Sampo-UI. The use of relational databases and reuse of tooling and expertise around relational databases lower the operational burden of publishing small-to-medium-sized datasets typical of digital humanities projects. These contributions originated outside the original Sampo-UI team but were developed in collaboration with it, and are being prepared for upstream integration. We illustrate the approach with two projects at Ghent University: one on Roman coin finds in Belgium (NuMAD) and one on historic Belgian company data (BelHisFirm). Both portals run the same Sampo-UI core with a different configuration, and operate on existing institutional relational database infrastructure without a dedicated graph database.*
The demo below shows the NuMAD portal for exploring Roman coin finds in Belgium through the modernized Sampo-UI. Another [demo presents historical records of Belgian companies](https://0110.be/files/attachments/582/belhisfirm_demo.mp4) through the BelHisFirm portal. Both portals run the same Sampo-UI core with different configurations, demonstrating the flexibility of the system.
Alongside the [Sampo-UI Meets Ontop paper](https://0110.be/files/attachments/582/sampo-ui_ontop-semantics_2026.pdf), a [conference poster on Sampo-UI](https://0110.be/files/attachments/582/semantics-poster-sampo-ui.pdf) that I prepared is also available.
Video: NuMAD — exploring Roman coin finds in Belgium.
---
## [The age of AI exploits is here](https://0110.be/posts/The_age_of_AI_exploits_is_here.md)
- Published: 2026-05-18T00:00:00Z
- Updated: 2026-05-19T06:48:39Z
- Author: Joren
- ID: 580
- Canonical: https://0110.be/posts/The_age_of_AI_exploits_is_here
- Tags: [Code](https://0110.be/tags/Code.md), [UGent](https://0110.be/tags/UGent.md)
Fig: Gemini imagining the age of AI exploits.
The following text puts into words a change that I have seen happening the last month. At the Ghent Centre for Digital Humanities we manage a fleet of virtual servers on the Ghent University network and have first-hand experience with security incidents appearing regularly now. It has a different tone than other posts here: it was sent in as a letter for a newspaper but was not published. Let's see in a few years if the tone was too alarmist or if it holds up:
> *The newest generation of AI coding tools is a great asset for software developers. They help with understanding complex codebases, and assist in writing code. Used properly, AI coding tools increase software quality and developer productivity. Unfortunately, these powerful tools can also be used with bad intentions. AI coding tools are now sufficiently advanced to find and exploit bugs in software. They pose a threat to essentially all computing systems that form the underpinning of modern infrastructure: banking, aviation, industry, and education.*
>
> *While [earlier reports](https://www.theguardian.com/technology/2026/apr/22/what-is-anthropic-mythos-ai-threat-global-cybersecurity) still used conditional terms to describe these threats, now — only a couple of weeks later — the first effects are already here. With the help of AI coding tools, three bugs were found in Linux, an open-source operating system: [Copy.fail](https://copy.fail/), [Dirty Frag](https://github.com/V4bel/dirtyfrag), and [Fragnesia](https://ubuntu.com/blog/fragnesia-linux-vulnerability-fixes-available). These first AI-discovered exploits in a broadly deployed system form a watershed moment. The bugs led to service outages, but diligent IT teams quickly patched systems, limiting the impact. The effects of Mythos — widely considered the most capable system for finding bugs in software — are now also clear. Mozilla reported [finding and fixing around four hundred bugs](https://hacks.mozilla.org/2026/05/behind-the-scenes-hardening-firefox/) last month, where in a typical month around twenty similar bugs are discovered and patched. Not every bug is exploitable, but every exploit starts with a bug. The age of AI exploits is here.*
>
> *The transition to this new age will be painful. Many unmaintained systems are connected to the internet and will not receive security updates: IoT devices, orphaned servers, smartphones and proprietary systems locked in time. It will become easier to gain illegitimate access to these machines. The skills needed to break into such systems are diminishing. What previously required highly specialized experts or state actors is now within reach of a much broader pool of bad actors, due to the very tools that are meant to help developers.*
>
> *What can be done? Companies need more stringent cybersecurity policies today. The broader public needs awareness of this evolution and basic cybersecurity hygiene to keep devices up to date. And we need a regulatory framework that holds producers of computing systems responsible for updates over a longer lifespan. Unfortunately, we can not afford to collectively ignore this emerging reality*.
---
## [FFmpeg with Whisper support on macOS via Homebrew](https://0110.be/posts/FFmpeg_with_Whisper_support_on_macOS_via_Homebrew.md)
- Published: 2025-10-22T00:00:00Z
- Updated: 2025-11-03T13:40:09Z
- Author: Joren
- ID: 568
- Canonical: https://0110.be/posts/FFmpeg_with_Whisper_support_on_macOS_via_Homebrew
- Tags: [Code](https://0110.be/tags/Code.md), [UGent](https://0110.be/tags/UGent.md)
Since a couple of months FFmpeg supports audio transcription via OpenAI Whisper and Wisper-cpp. This allows to automatically transcribe interviews and podcasts or generate subtitles for videos. Most packaged versions of the command line tool `ffmpeg` do not ship with this option enabled. Here we show how to do this on macOS with the Homebrew package manager. On other platforms similar configuration will apply.
On macOS there is a prepared Homebrew keg which allows to enable or disable the many `ffmpeg` options. If you already have `ffmpeg` without options installed you may need to uninstall the current version and install a version with chosen options. See below on how to do this:
```bash
# check if you already have ffmpeg with whisper enabled
ffmpeg --help filter=whisper
# uninstall current ffmpeg, it will be replaced with a version with whisper
brew uninstall ffmpeg
# add a brew tap which provides options to install ffmpeg from source
brew tap homebrew-ffmpeg/ffmpeg
# this commands adds most common functionality and other default functions
brew install homebrew-ffmpeg/ffmpeg/ffmpeg \
--with-fdk-aac \
--with-jpeg-xl \
--with-libgsm \
--with-libplacebo \
--with-librist \
--with-librsvg \
--with-libsoxr \
--with-libssh \
--with-libvidstab \
--with-libxml2 \
--with-openal-soft \
--with-openapv \
--with-openh264 \
--with-openjpeg \
--with-openssl \
--with-rav1e \
--with-rtmpdump \
--with-rubberband \
--with-speex \
--with-srt \
--with-webp \
--with-whisper-cpp
```
Installation will take a while since many dependencies are required for the many options. Once the build is finished the `whisper` filter should be available in FFmpeg. See below on how this should look, once correctly installed:
```
ffmpeg version 8.0 Copyright (c) 2000-2025 the FFmpeg developers
built with Apple clang version
...
Filter whisper
Transcribe audio using whisper.cpp.
Inputs:
#0: default (audio)
Outputs:
#0: default (audio)
whisper AVOptions:
model ..F.A...... Path to the whisper.cpp model file
language ..F.A...... Language for transcription ('auto' for auto-detect) (default "auto")
queue ..F.A...... Audio queue size (default 3)
use_gpu ..F.A...... Use GPU for processing (default true)
gpu_device ..F.A...... GPU device to use (from 0 to INT_MAX) (default 0)
destination ..F.A...... Output destination (default "")
format ..F.A...... Output format (text|srt|json) (default "text")
vad_model ..F.A...... Path to the VAD model file
vad_threshold ..F.A...... VAD threshold (from 0 to 1) (default 0.5)
vad_min_speech_duration ..F.A...... Minimum speech duration for VAD (default 0.1)
vad_min_silence_duration ..F.A...... Minimum silence duration for VAD (default 0.5)
```
---
## [MuTechLab - Music Technology Workshop in Luxembourg](https://0110.be/posts/MuTechLab_-_Music_Technology_Workshop_in_Luxembourg.md)
- Published: 2025-10-02T00:00:00Z
- Updated: 2025-10-06T13:21:03Z
- Author: Joren
- ID: 567
- Canonical: https://0110.be/posts/MuTechLab_-_Music_Technology_Workshop_in_Luxembourg
- Tags: [Code](https://0110.be/tags/Code.md), [Projecten](https://0110.be/tags/Projecten.md), [UGent](https://0110.be/tags/UGent.md)
Last Friday, I had the pleasure of facilitating a hands-on workshop in Luxembourg as part of [MuTechLab workshop series](https://www.uni.lu/fhse-en/research-projects/mutechlab/), organized by [Luc Nijs](https://www.uni.lu/fhse-en/people/luc-nijs/) at the University of Luxembourg. Together with Bart Moens from [XRHIL](https://xrhil.ugent.be) and [IPEM](https://www.ugent.be/lw/kunstwetenschappen/ipem/en), we presented a system to control musical parameters with body movement.
MuTechLab is a series of workshops for music teachers who wish to dive into the world of music technology. Funded by the Luxembourgish National Research Fund (FNR, PSP-Classic), the initiative brings together educators eager to explore how technology can enhance music education and creative practice.
### What we built and presented
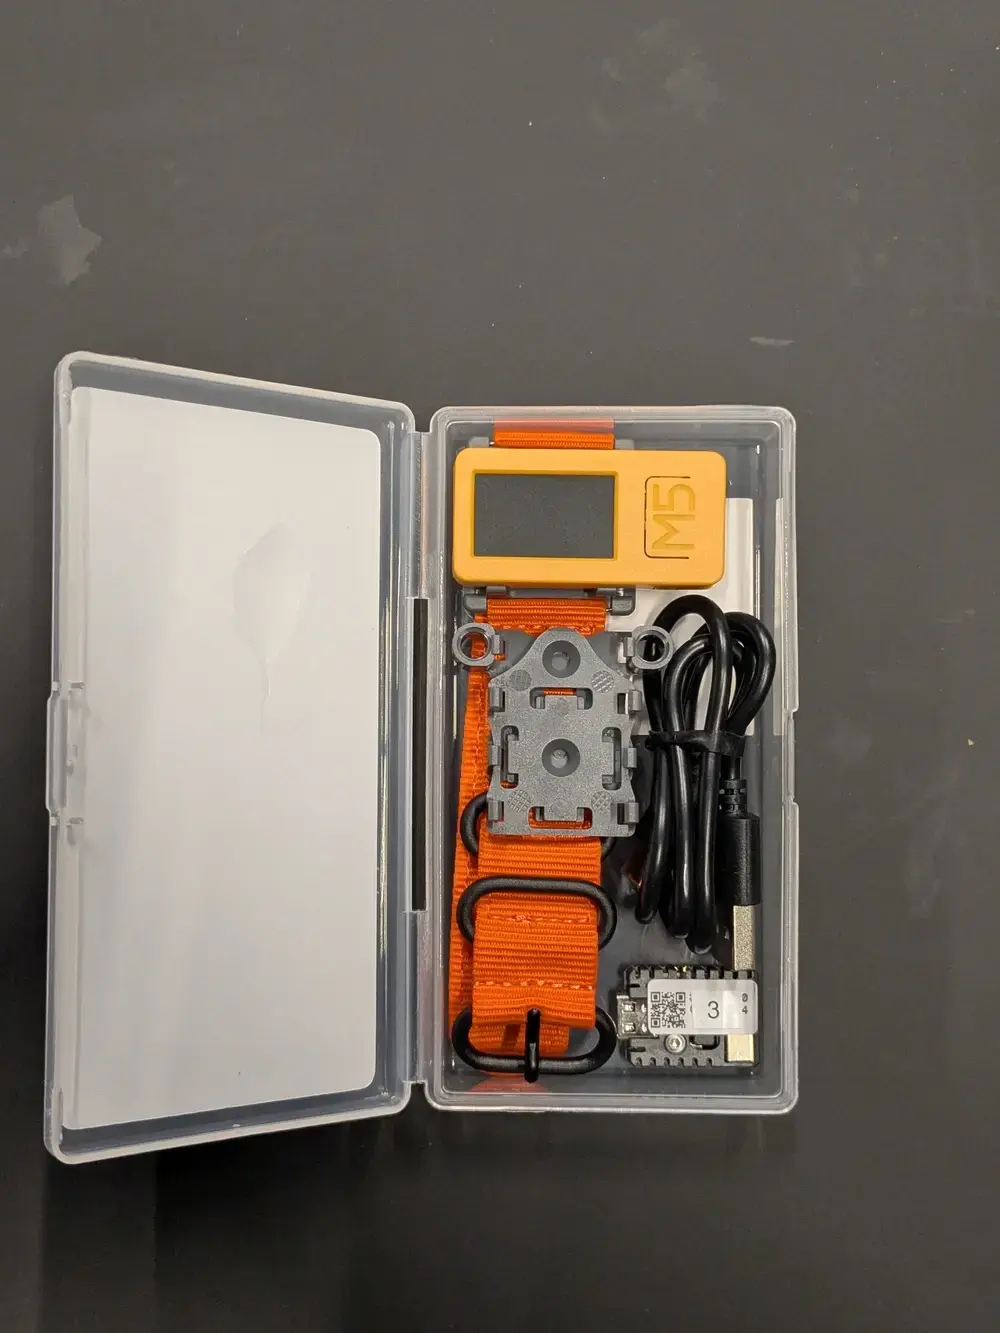
During the workshop, participants got hands-on experience with the [EMI-Kit](https://github.com/IPEM/EMI-kit) (Embodied Music Interface Kit) – an open-source, low-cost system that allows musicians to control Digital Audio Workstation (DAW) parameters through body movement.
The EMI-Kit consists of:
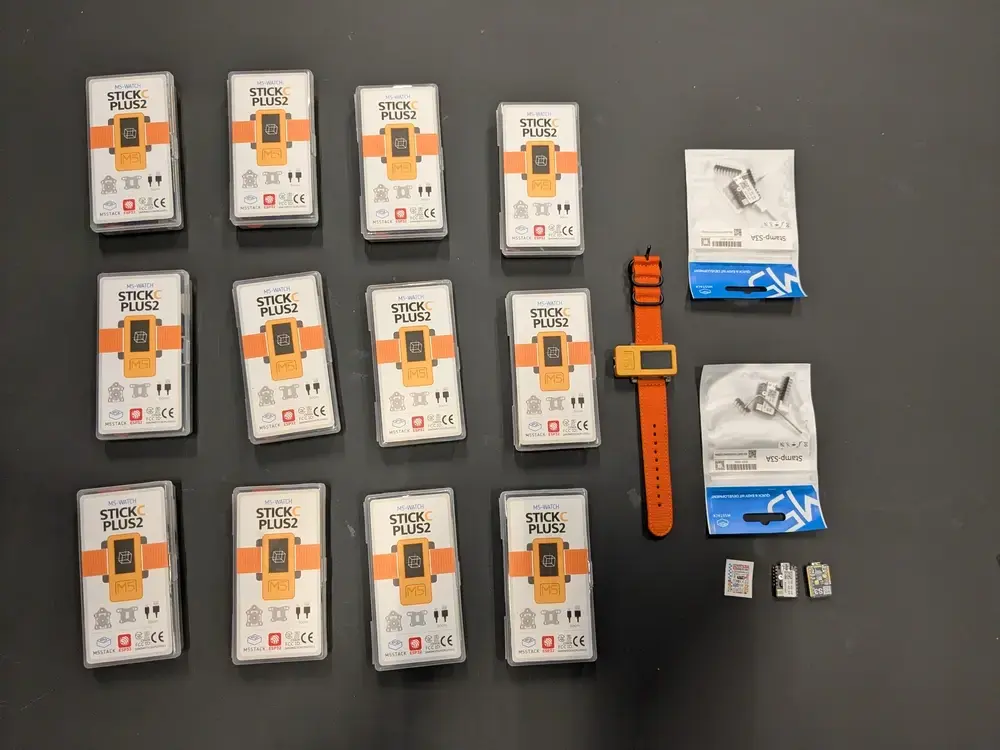
- **A wearable sensor device** (M5StickC Plus2) that captures body orientation and gestures
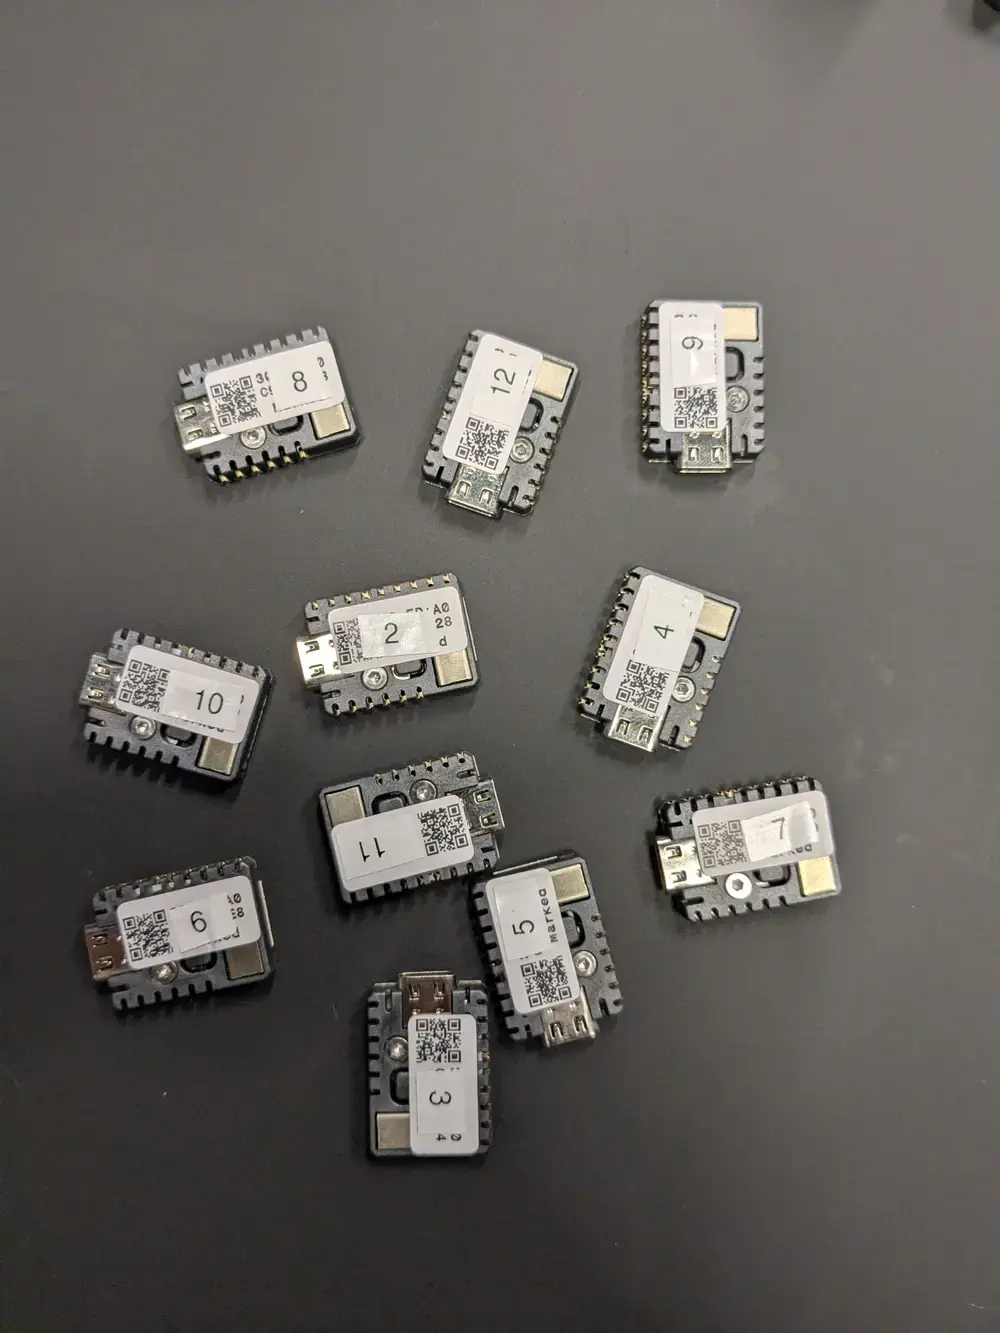
- **A receiver unit** (M5Stack STAMP S3A) that converts sensor data to MIDI messages
Unlike expensive commercial alternatives, EMI-Kit is fully open source, customizable, and designed specifically for creative music practice and embodied music interaction practice and research.
### The Experience
Teachers experimented with mapping natural body movements – pitch, yaw, roll, and tap gestures – to various musical parameters in their DAWs. The low-latency wireless system made it possible to move and control sound, opening up new possibilities for expressive musical performance and pedagogy.
### Learn More
Interested in exploring embodied music interaction yourself? Check out:
- [MuTechLab Project Page](https://www.uni.lu/fhse-en/research-projects/mutechlab/)
- [EMI-Kit on GitHub](https://github.com/IPEM/EMI-kit)
The EMI-Kit project as-is is a demonstrator to inspire educators to embrace these tools and imagine new ways of teaching and creating music. The EMI-Kit as a platform can - with some additional programming - be a good basis to control musical parameters using various sensors. Have fun with checking out the EMI-Kit.
---
## [MIDI and OSC tools improvements - MIDI processing and mDNS support](https://0110.be/posts/MIDI_and_OSC_tools_improvements__-_MIDI_processing_and_mDNS_support.md)
- Published: 2025-10-02T00:00:00Z
- Updated: 2025-10-06T13:54:28Z
- Author: Joren
- ID: 566
- Canonical: https://0110.be/posts/MIDI_and_OSC_tools_improvements__-_MIDI_processing_and_mDNS_support
- Tags: [Code](https://0110.be/tags/Code.md), [Music Information Retrieval](https://0110.be/tags/Music%20Information%20Retrieval.md), [UGent](https://0110.be/tags/UGent.md)
I've just pushed some updates to [mot](https://github.com/JorenSix/mot) — a command-line application for working with OSC and MIDI messages. My LLM tells me that these are exciting updates but I am not entirely sure that this is the case. Let me know if this ticks your box and seek professional help.
### 1. Scriptable MIDI Processor via Lua
I have implemented a **MIDI processor** that lets you transform, filter, and generate MIDI messages using [Lua](https://www.lua.org/about.html) scripts.
**Why is this useful?** MIDI processors act as middlemen between your input devices and output destinations.You can do the following on incoming MIDI messages:
- **Transform** - Transpose notes, generate chords, map velocity curves
- **Filter** - Block unwanted messages - channels - or select specific ranges
- **Route** - Send different notes to different channel
- **Generate** - Create complex patterns from simple input
The processor reads incoming MIDI from a physical device, processes it through your Lua script, and outputs the modified messages to a virtual MIDI port that your DAW or synth can receive. Some examples:
```ruby
# Generate chords from single notes
mot midi_processor --script scripts/chord_generator.lua 0 6666
# Transpose notes up by one octave
mot midi_processor --script scripts/example_processor.lua 0 6666
```
### 2. Network Discovery via mDNS
OSC receivers now **advertise themselves on the network** using mDNS/Bonjour with the `_osc._udp` service type.
This makes mot compatible with the [EMI-kit](https://github.com/IPEM/EMI-kit) — the Embodied Music Interface Kit developed at IPEM, Ghent University. OSC-enabled devices can automatically discover mot receivers on your network, eliminating manual configuration if the OSC sources add this functionality.
### Get started
Installation via Rust's cargo:
```ruby
git clone https://github.com/JorenSix/mot.git
cd mot
cargo install --path .
mot midi_processor -h
```
Check out the [mot repository](https://github.com/JorenSix/mot) for full documentation and example Lua scripts!
---
## [Powering low current electronics projects with power banks](https://0110.be/posts/Powering_low_current_electronics_projects_with_power_banks.md)
- Published: 2025-01-26T00:00:00Z
- Updated: 2025-02-01T10:13:55Z
- Author: Joren
- ID: 558
- Canonical: https://0110.be/posts/Powering_low_current_electronics_projects_with_power_banks
- Tags: [Code](https://0110.be/tags/Code.md), [Projecten](https://0110.be/tags/Projecten.md), [UGent](https://0110.be/tags/UGent.md)
Power banks have become a staple for charging smartphones, tablets, and other devices on the go. They seem ideal to power small microcontroller projects but, they often pose a problem for low-current applications. Most modern power banks include an auto-shutdown feature to conserve energy when they detect a current draw below a specific threshold, often around 50–200mA. The idea being that the power bank can shut off after charging a smartphone. However, if you rely on power banks to power DIY electronics projects or remote applications with low current draw, this auto-off feature can be a significant inconvenience.
To address this issue, consider using power banks designed with an “always-on” or “low-current” mode. These power banks are engineered to sustain power delivery even when the current draw is minimal. Look for models that explicitly mention support for low-power devices in their specifications. If replacing a power bank isn’t an option, you can add a small load resistor or a USB dummy load to artificially increase the current draw. It works, but feels wrong and dirty.
For a [previous electronics project](https://0110.be/posts/When_both_tech_and_nature_call%3A_a_DIY_motion_sensor_to_activate_birdsong) I bought a power bank randomly. After a bit of testing, I determined that the minimal power draw was around 150mA, so I added a resistor to increase current draw. Only afterwards did I check the [manual of the power bank](https://mojogear.eu/cdn/shop/files/Manual-MG-10.pdf?v=683883965702775870) and noticed, luckily, that there was a low-current mode. I removed the resistor and improved the battery life of the project considerably. If you want to power your DIY Arduino or electronics project, first check the manual of the power bank you want to use!
Edit: after further testing it seemed that the low current mode of this specific power bank still shuts down after a couple of hours. Your mileage may vary, and the main point of this post still holds: check the manual of your power bank. Eventually I went with a [solution designed for electronics projects](https://www.az-delivery.de/nl/products/battery-expansion-shield-18650-v3-inkl-usb-kabel).
---
## [Tasmota for custom ESP32 smart home devices](https://0110.be/posts/Tasmota_for_custom__ESP32_smart_home_devices.md)
- Published: 2025-01-03T00:00:00Z
- Updated: 2025-01-08T20:12:39Z
- Author: Joren
- ID: 555
- Canonical: https://0110.be/posts/Tasmota_for_custom__ESP32_smart_home_devices
- Tags: [Code](https://0110.be/tags/Code.md), [Projecten](https://0110.be/tags/Projecten.md), [UGent](https://0110.be/tags/UGent.md)
In my house, I have a few smart home features: to control ventilation, to open and close solar screens, and to switch a few smart sockets. Up until a couple of days ago, the ventilation and screen controllers operated using custom software running on an ESP32. However, configuring, maintaining, upgrading, and integrating with this custom software gradually became a headache.
Recently, I switched from custom software to Tasmota, an open-source smart home platform targeting ESP32 devices. Tasmota includes a web UI, flexible configuration options, OTA upgrades, and scripting features. The scripting functionality allows devices to be extended with additional commands, which is especially practical for controlling my solar screens. These screens use pulses to toggle between up-stop-down-stop states. By default, Tasmota only supports enabling or disabling a relay, not enabling it for a very brief period (e.g., 150 milliseconds). With a short ‘Berry’ script, such functionality is quickly added.
I appreciate the effort of the Tasmota team to lower the entry barrier for users. They provide ample documentation and a web installer, making setup straightforward. Simply connect your ESP32 via USB, flash it with Tasmota, and configure it—all from your browser. It’s a surprisingly simple process compared to installing a dedicated toolchain. While this might not be what Tim Berners-Lee envisioned 35 years ago, it certainly simplifies the user experience. Lowering the entry barrier even further, some manufacturers even offer smart home devices with Tasmota preinstalled, such as the Nous A1 smart sockets. Eternal september is here.
If you’re managing custom ESP32 smart home devices, consider switching to Tasmota. Its robust features, ease of setup, and active community support make it an excellent choice for both beginners and advanced users.
---
## [Making a flute controlled mouse](https://0110.be/posts/Making_a_flute_controlled_mouse.md)
- Published: 2024-04-22T00:00:00Z
- Updated: 2024-05-15T10:22:18Z
- Author: Joren
- ID: 539
- Canonical: https://0110.be/posts/Making_a_flute_controlled_mouse
- Tags: [Code](https://0110.be/tags/Code.md), [UGent](https://0110.be/tags/UGent.md)
There is something about surprising interfaces: clapping to switch on lights is more fun than a flipping a switch. [Pressing a panic-button to order a pizza](https://0110.be/posts/Order_Pizza_with_USB_Pizza_Button) is more fun than ordering via an app. Recently I came across [this surprising interface](https://www.reddit.com/r/JustGuysBeingDudes/comments/195gqnm/imagine_losing_to_this_dude/): a flute controlled mouse cursor for a first person shooter. I recognize a good idea when I see one, and immediately wanted replicate the idea and make it freely available. So I got to work:
Vid: a microcontroller controlling mouse movements based on pitch detection.
What do we need for **flute-based mouse**? First we need a way to determine if a note is being played and if a note is produced, we need to be able to determine which note is being played by the musician. Next, we need to hijack and control a cursor via the detected note and trigger a click event when a specific note is played. Finally we need to play a flute, preferably a recorder, to move the mouse cursor in an obviously superior and relaxed fashion. It is not strictly required to use a recorder but a recorder is [very much advised](https://www.youtube.com/watch?v=QuFTCirwmoM&list=PLhJfRNMFx-hX7NUhYaintwbFGMs6lmvmQ).
The note determination can be done by a fundamental frequency detector. A detector returns a frequency in Hertz and a confidence score which tells you how reliable the detection is. With some filtering, this is exactly what we need. If the frequency is close enough to a configured value, a note is detected. The confidence score tells us to either accept or ignore the detection. With this info it is possible to connect a note-detection to an action - like moving a cursor left or right, up or down.
Finally we need to move the mouse cursor. There are a few ways to do this.
## 🪈 An micro-controller-based solution - Pitch perfect pointer positioning - PiPePoPo
Fig: Flute-based web-browsing as envisioned by its developer.
A portable way to move a mouse cursor is to let a micro-controller impersonate as a standard mouse, a __'USB Human Interface Device'__. Once the micro-controller is attached via USB it registers as a mouse and allows to move the cursor and register click events. To build a flute-based mouse, the micro-controller then needs a microphone and a pitch estimator to finally send cursor events.
I based my project on an RP2040 - a [*micro-controller chip designed by Raspberry Pi*](https://www.raspberrypi.com/products/rp2040/specifications/) - since it offers a simple way to present itself to an operating system as a mouse. Just include `PluggableUSBHID.h` and `USBMouse.h` and use the Mouse API to control the mouse. For me it only behaved as a standard mouse if `Serial` is not used at the same time: in other words the dual USB profile does not seem to work reliably.
Sending mouse events from your code looks, for example, like ` Mouse.move(-4, 7)` to move the mouse minus four units in the horizontal and seven units in the vertical direction. Click events have a similarly straightforward API. The RP2040 also has a built-in microphone, which makes it ideal for audio applications, or so it seems.
Unfortunately, the RP2040 chip performs poorly for computationally heavy audio processing workloads. Such applications need to perform many floating point operations per second, but the RP2040 lacks a hardware floating point unit (FPU) which makes it [relatively slow](https://github.com/tana/pico_float_bench). When attempting to run a pitch-detection algorithm, the RP2040 was too slow to run the algorithm in real-time. After profiling the pitch estimation algorithm there was a clear place where most float operations occurred. Replacing those with much quicker fixed point operations makes the algorithm faster than real-time and usable on the RP2040.lt
To give a sens of the difference in speed between fixed point and floating point operations on the RP2040: with the default arduino build process, a million floating point operations take over 883 000 microseconds, a million fixed point operations take 8 microseconds. Fixed point operations are around 5 orders of magnitude faster!
I have named released the code under the name [Pitch perfect pointer positioning or PiPePoPo](https://github.com/JorenSix/PiPePoPo) for short. For the details, please do check the source code repository. Perhaps the most intresting, reusable component is the [ANSI C implementation of the YIN pitch estimator](https://github.com/JorenSix/PiPePoPo/blob/main/RP2040/PiPePoPo/yin_fixed.c), both in floating point and sped up with fixed point operations.
## 🪈 A browser extension - Pitch perfect pointer positioning - PiPePoPo
The hardware based solution works reliably but, evidently, it needs a piece of hardware. To make sure everybody can enjoy a solution in software is provided in this section in the form of a chrome browser extension.
Moving a cursor is not possible in a browser: if a pointer location could be modified it would open a whole range of possibilities for abuse. A surprisingly easy workaround, however, is to hide the actual cursor and show a replacement cursor-like icon. This fake cursor can be moved programmatically. With the position of this fake cursor known, a click event can be triggered and result in, for example, following a link.
To take this idea to its logical next step, I implemented a chrome browser plug-in for flute-based web-browsing. I also relased this on GitHub under the Pitch perfect Pointer Positioning or PiPePoPo brand. Check the installation instructions in the [PiPePoPo repository](https://github.com/JorenSix/PiPePoPo). Perhaps most of interest is how audio processing is handled by a Web Audio API Audio Worklet.
Vid: Controlling a cursor via a browser extension.
Join the flute-based web-browsing revolution today and experience web browsing like never before and install PiPePoPo.
I am not sure how but PiPePoPo was also featured on [HackADay](https://hackaday.com/2024/04/24/flute-now-included-on-list-of-human-interface-devices) and the official [Arduino Blog](https://blog.arduino.cc/2024/04/28/this-arduino-nano-rp2040-connect-powered-flute-blows-your-pcs-mouse-away/).
---
## [3D modeling with ChatGPT - Solidified ephemerality](https://0110.be/posts/3D_modeling_with_ChatGPT_-_Solidified_ephemerality.md)
- Published: 2024-02-21T00:00:00Z
- Updated: 2025-12-10T13:04:12Z
- Author: Joren
- ID: 541
- Canonical: https://0110.be/posts/3D_modeling_with_ChatGPT_-_Solidified_ephemerality
- Tags: [Code](https://0110.be/tags/Code.md), [UGent](https://0110.be/tags/UGent.md)
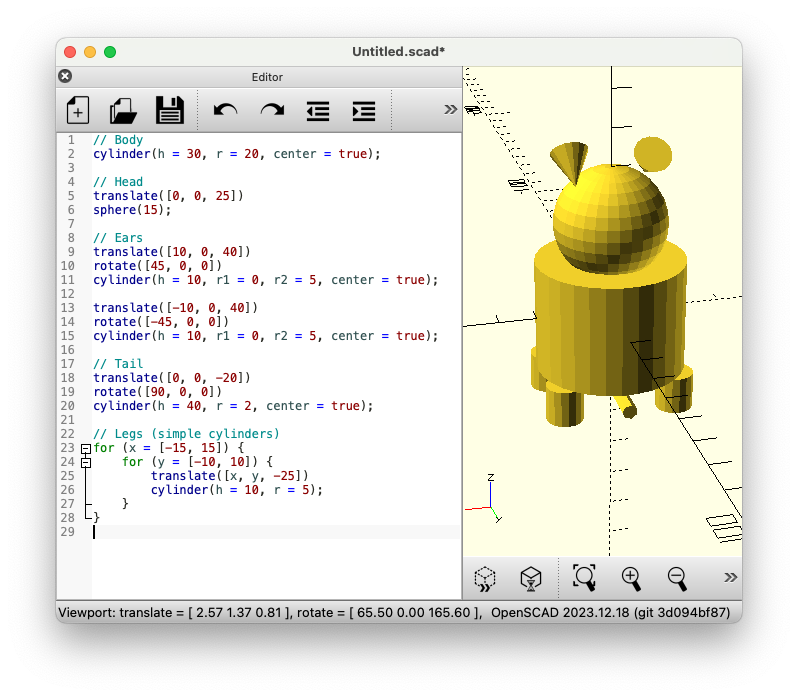
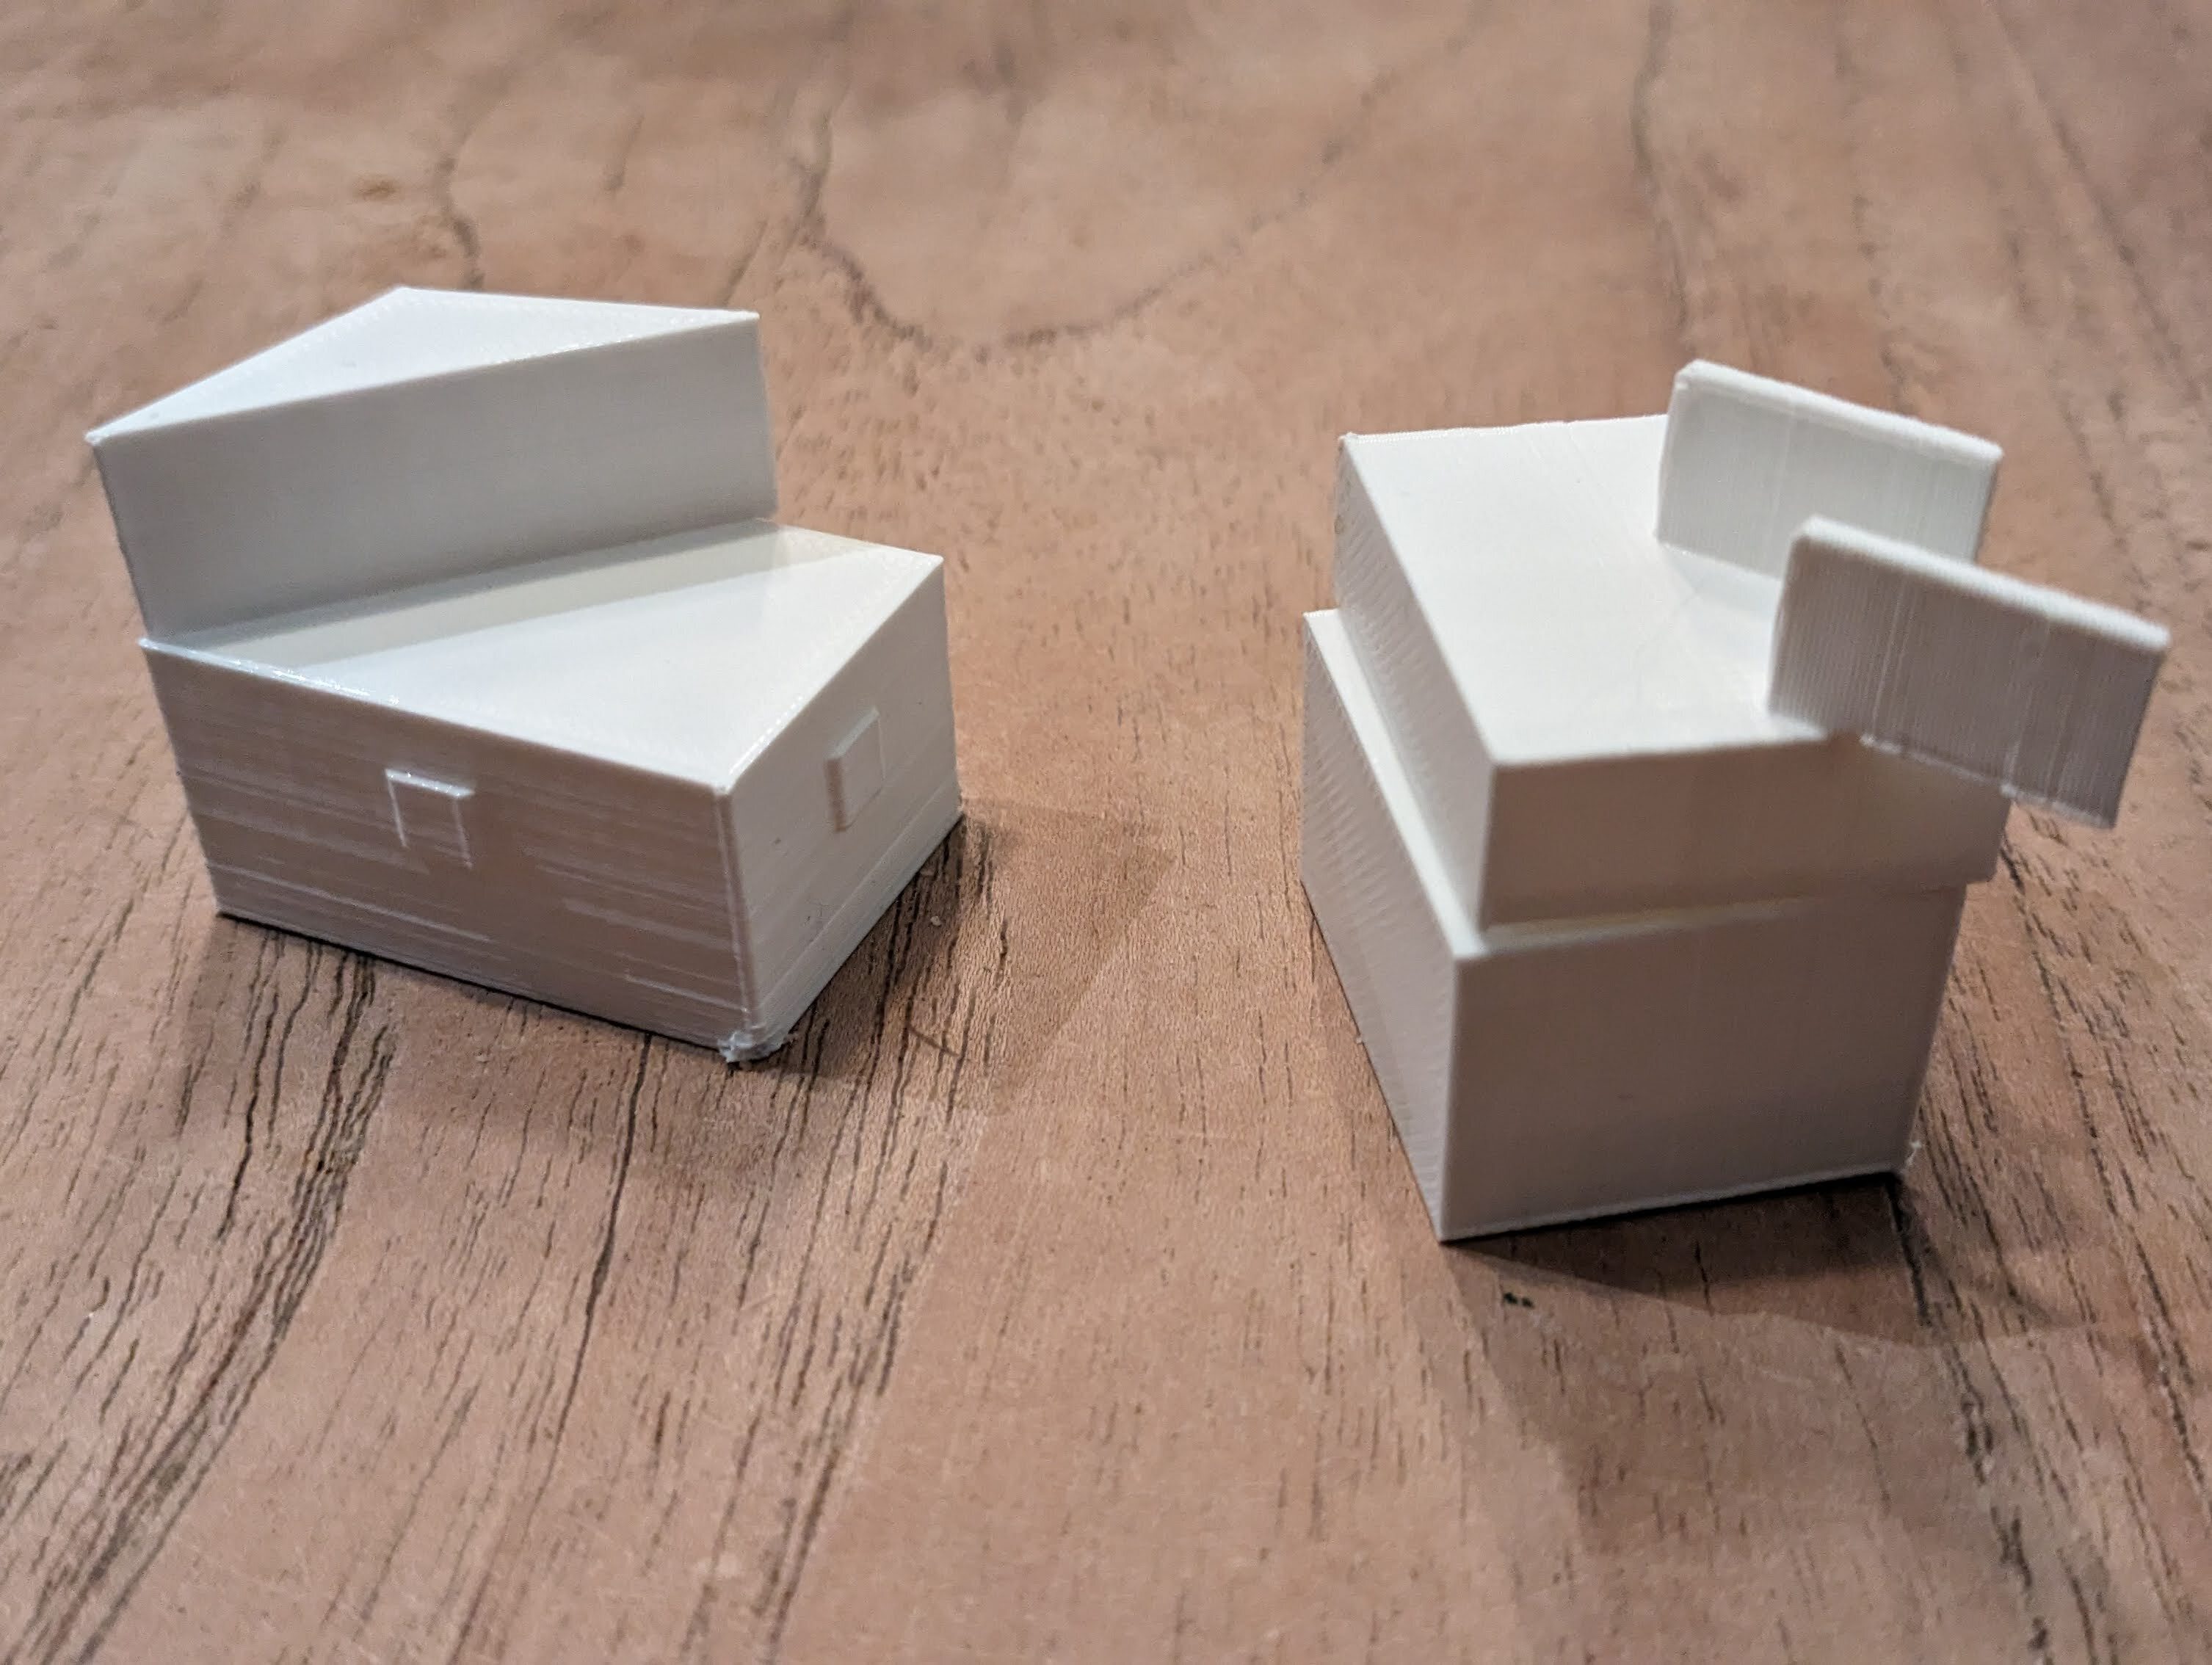
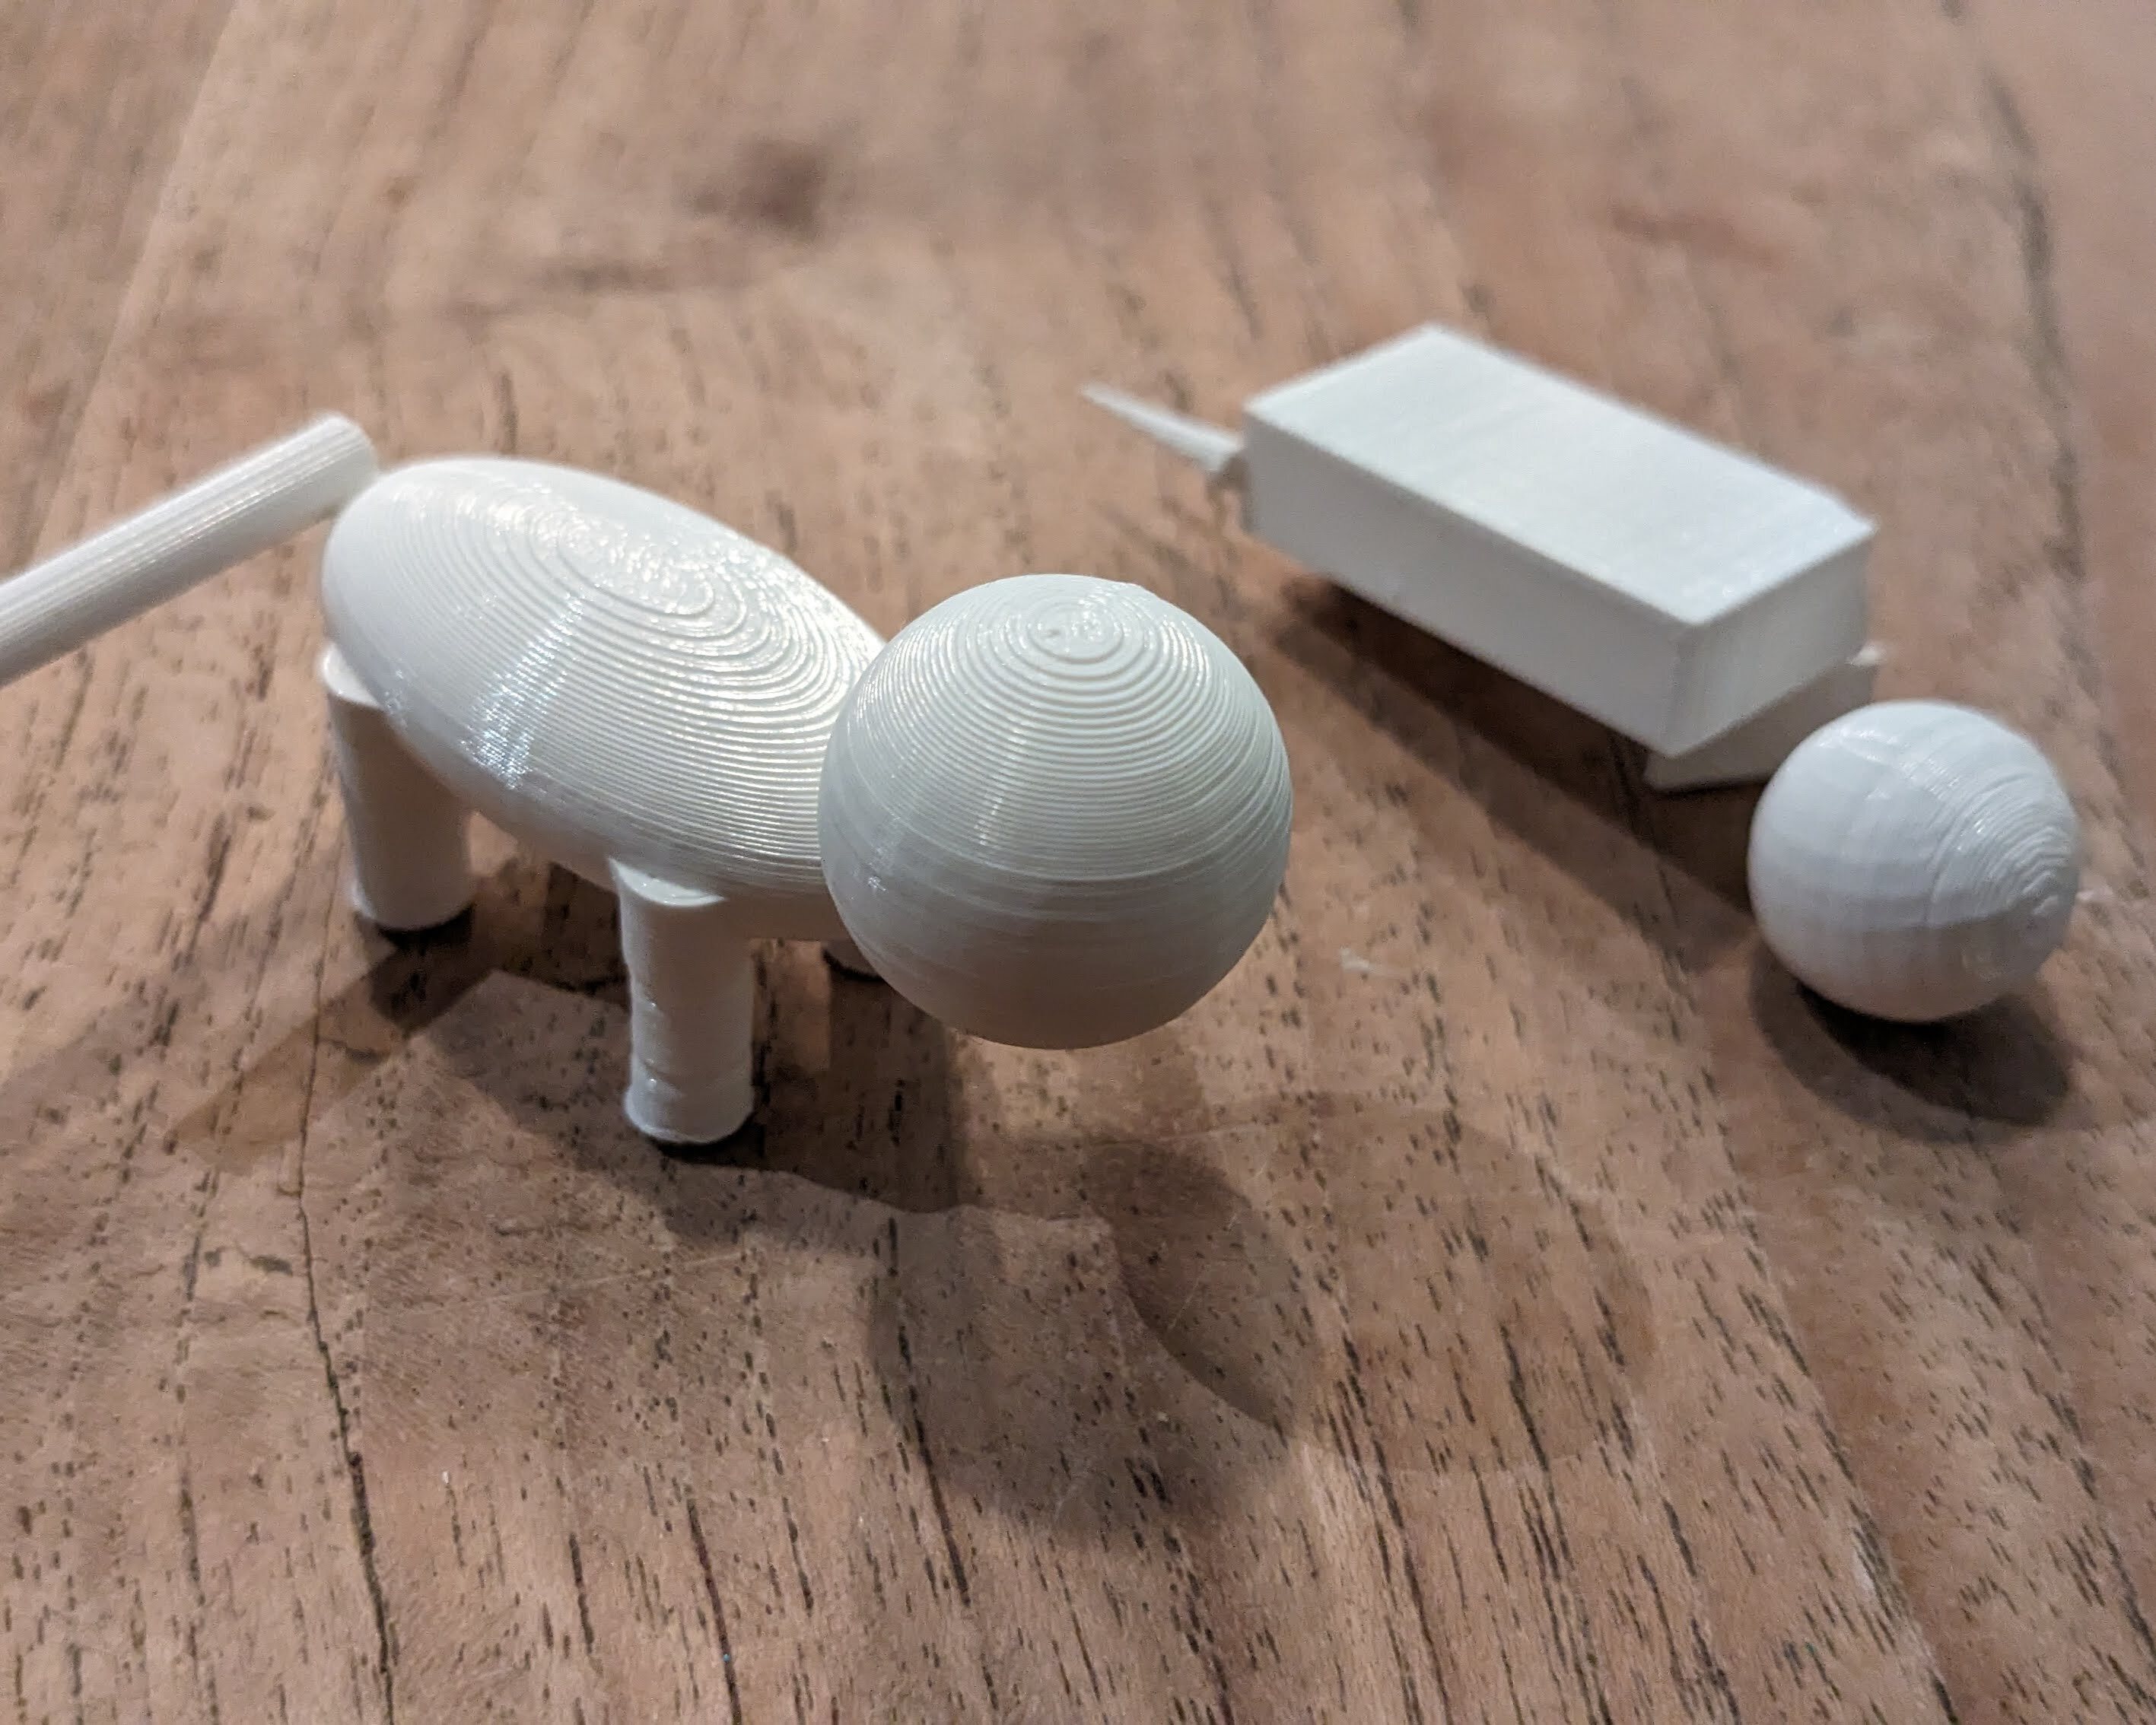
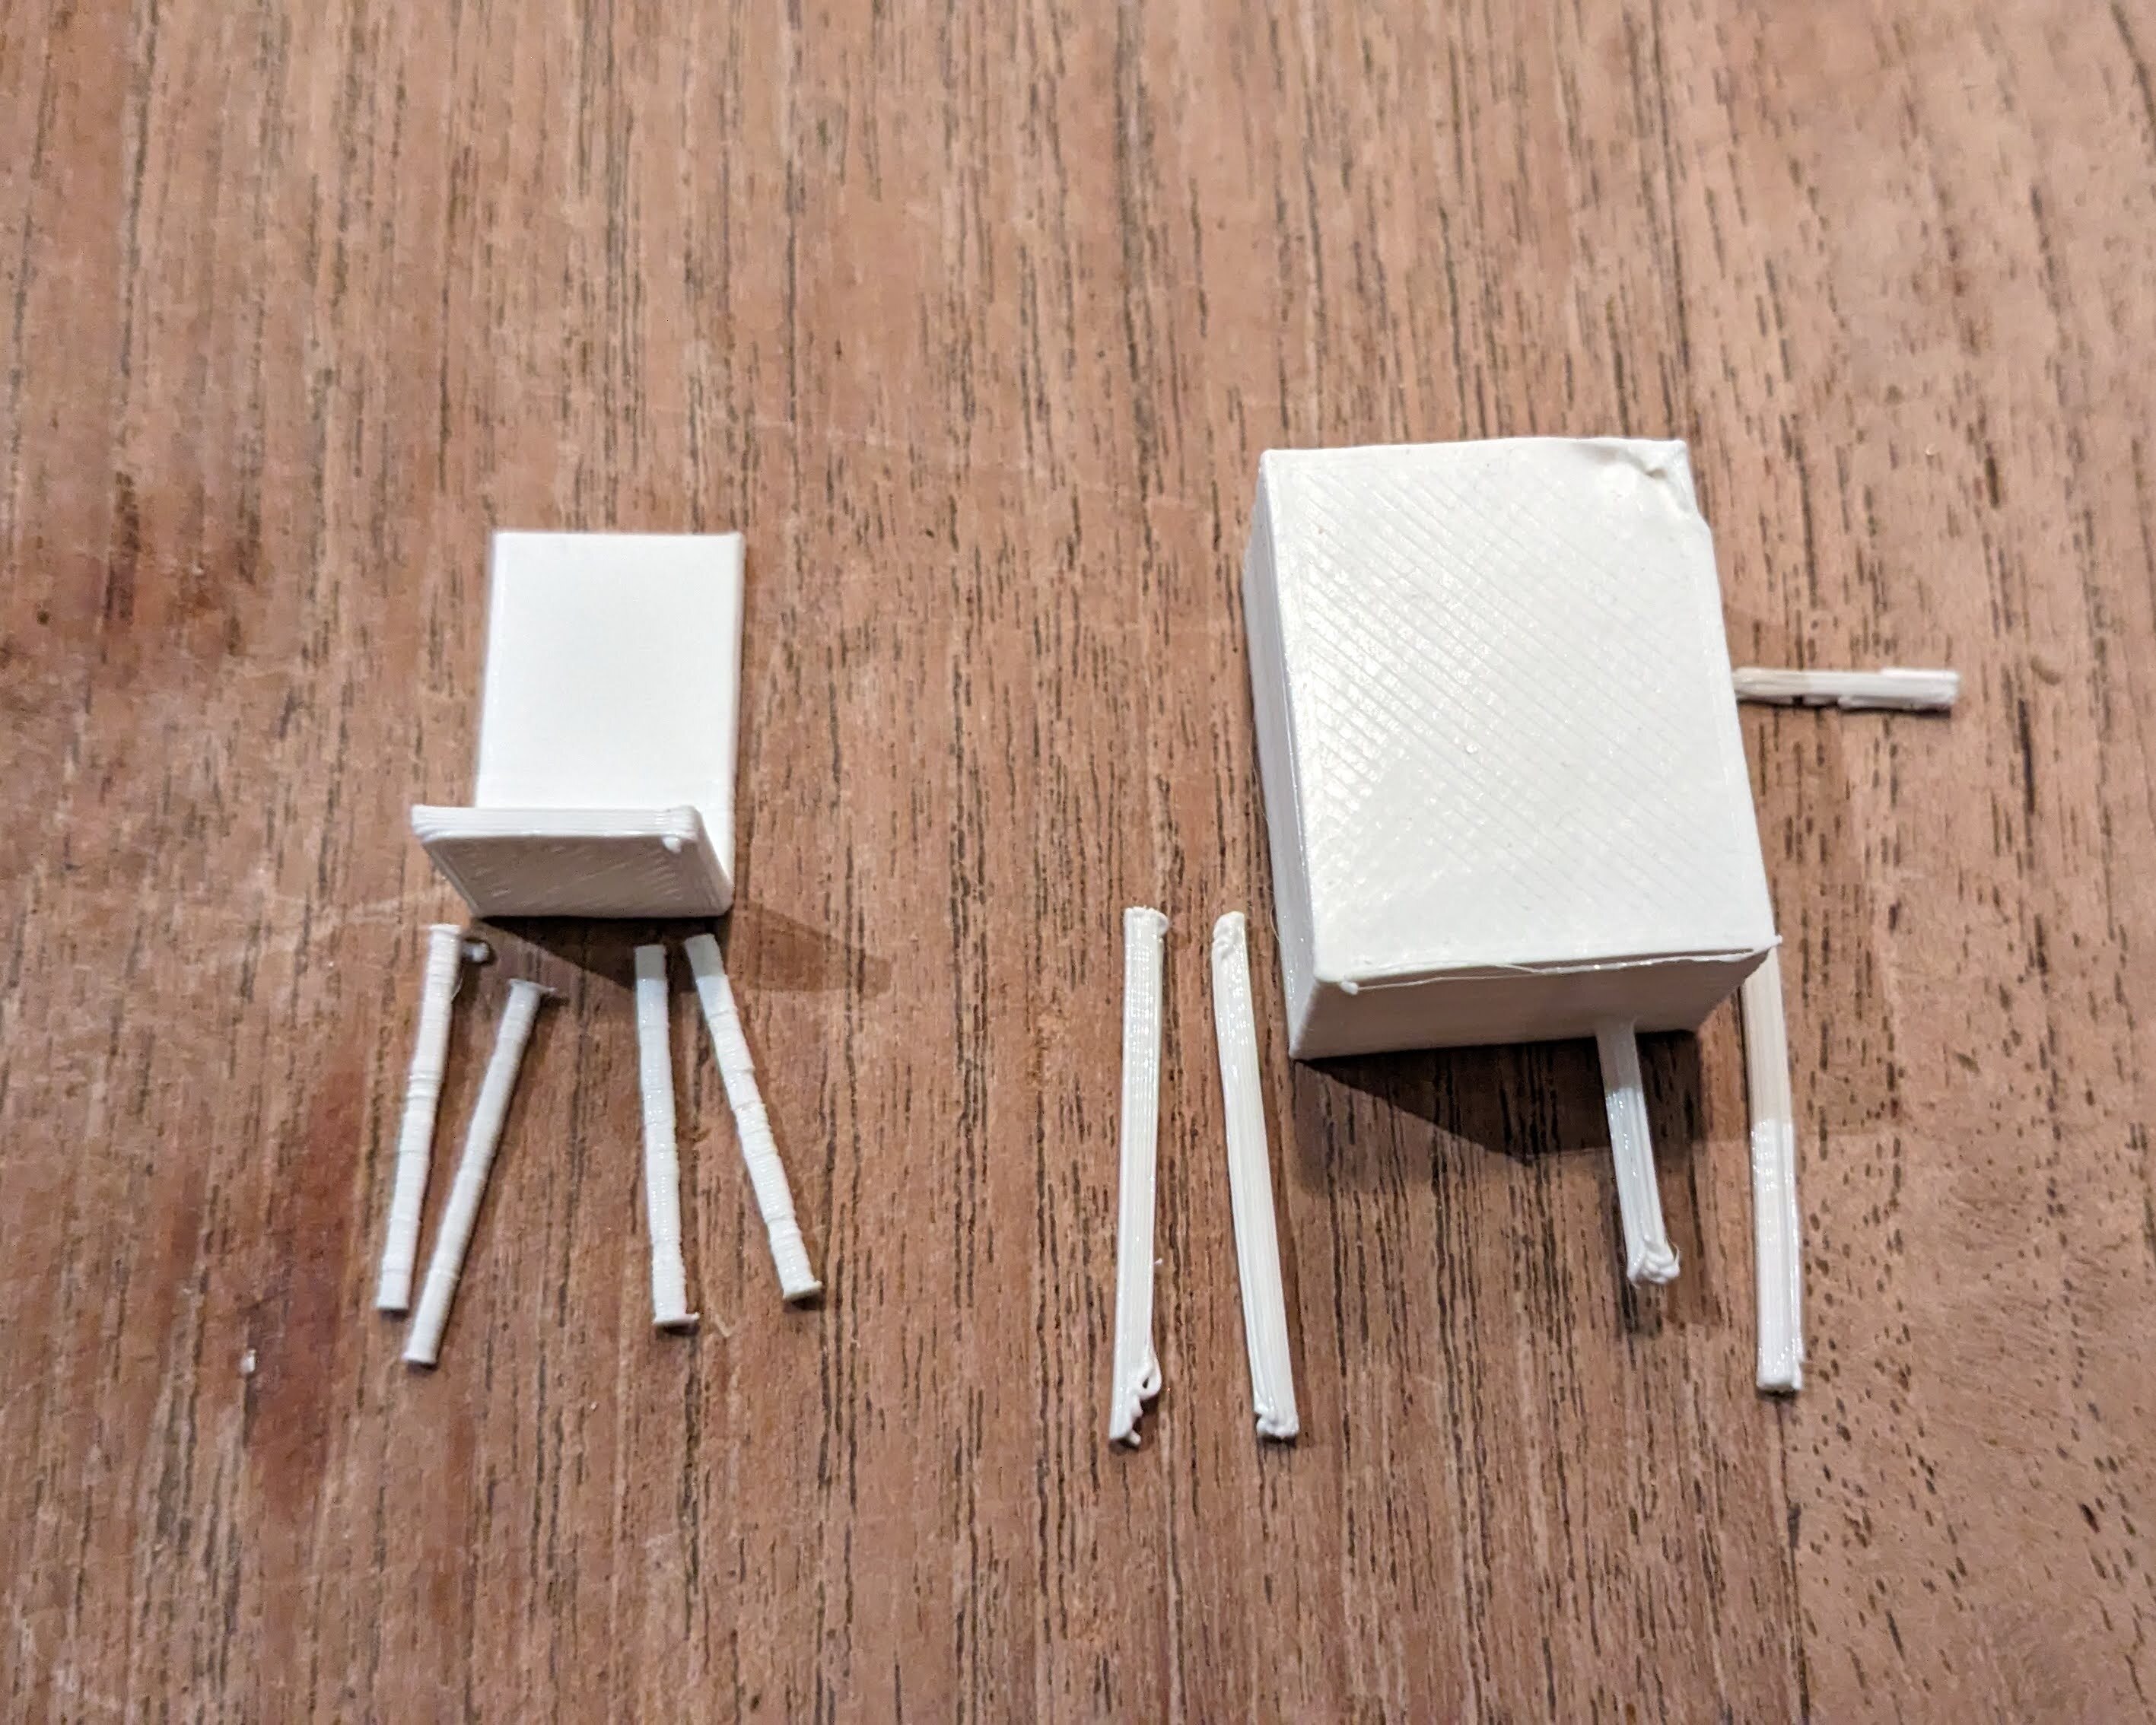
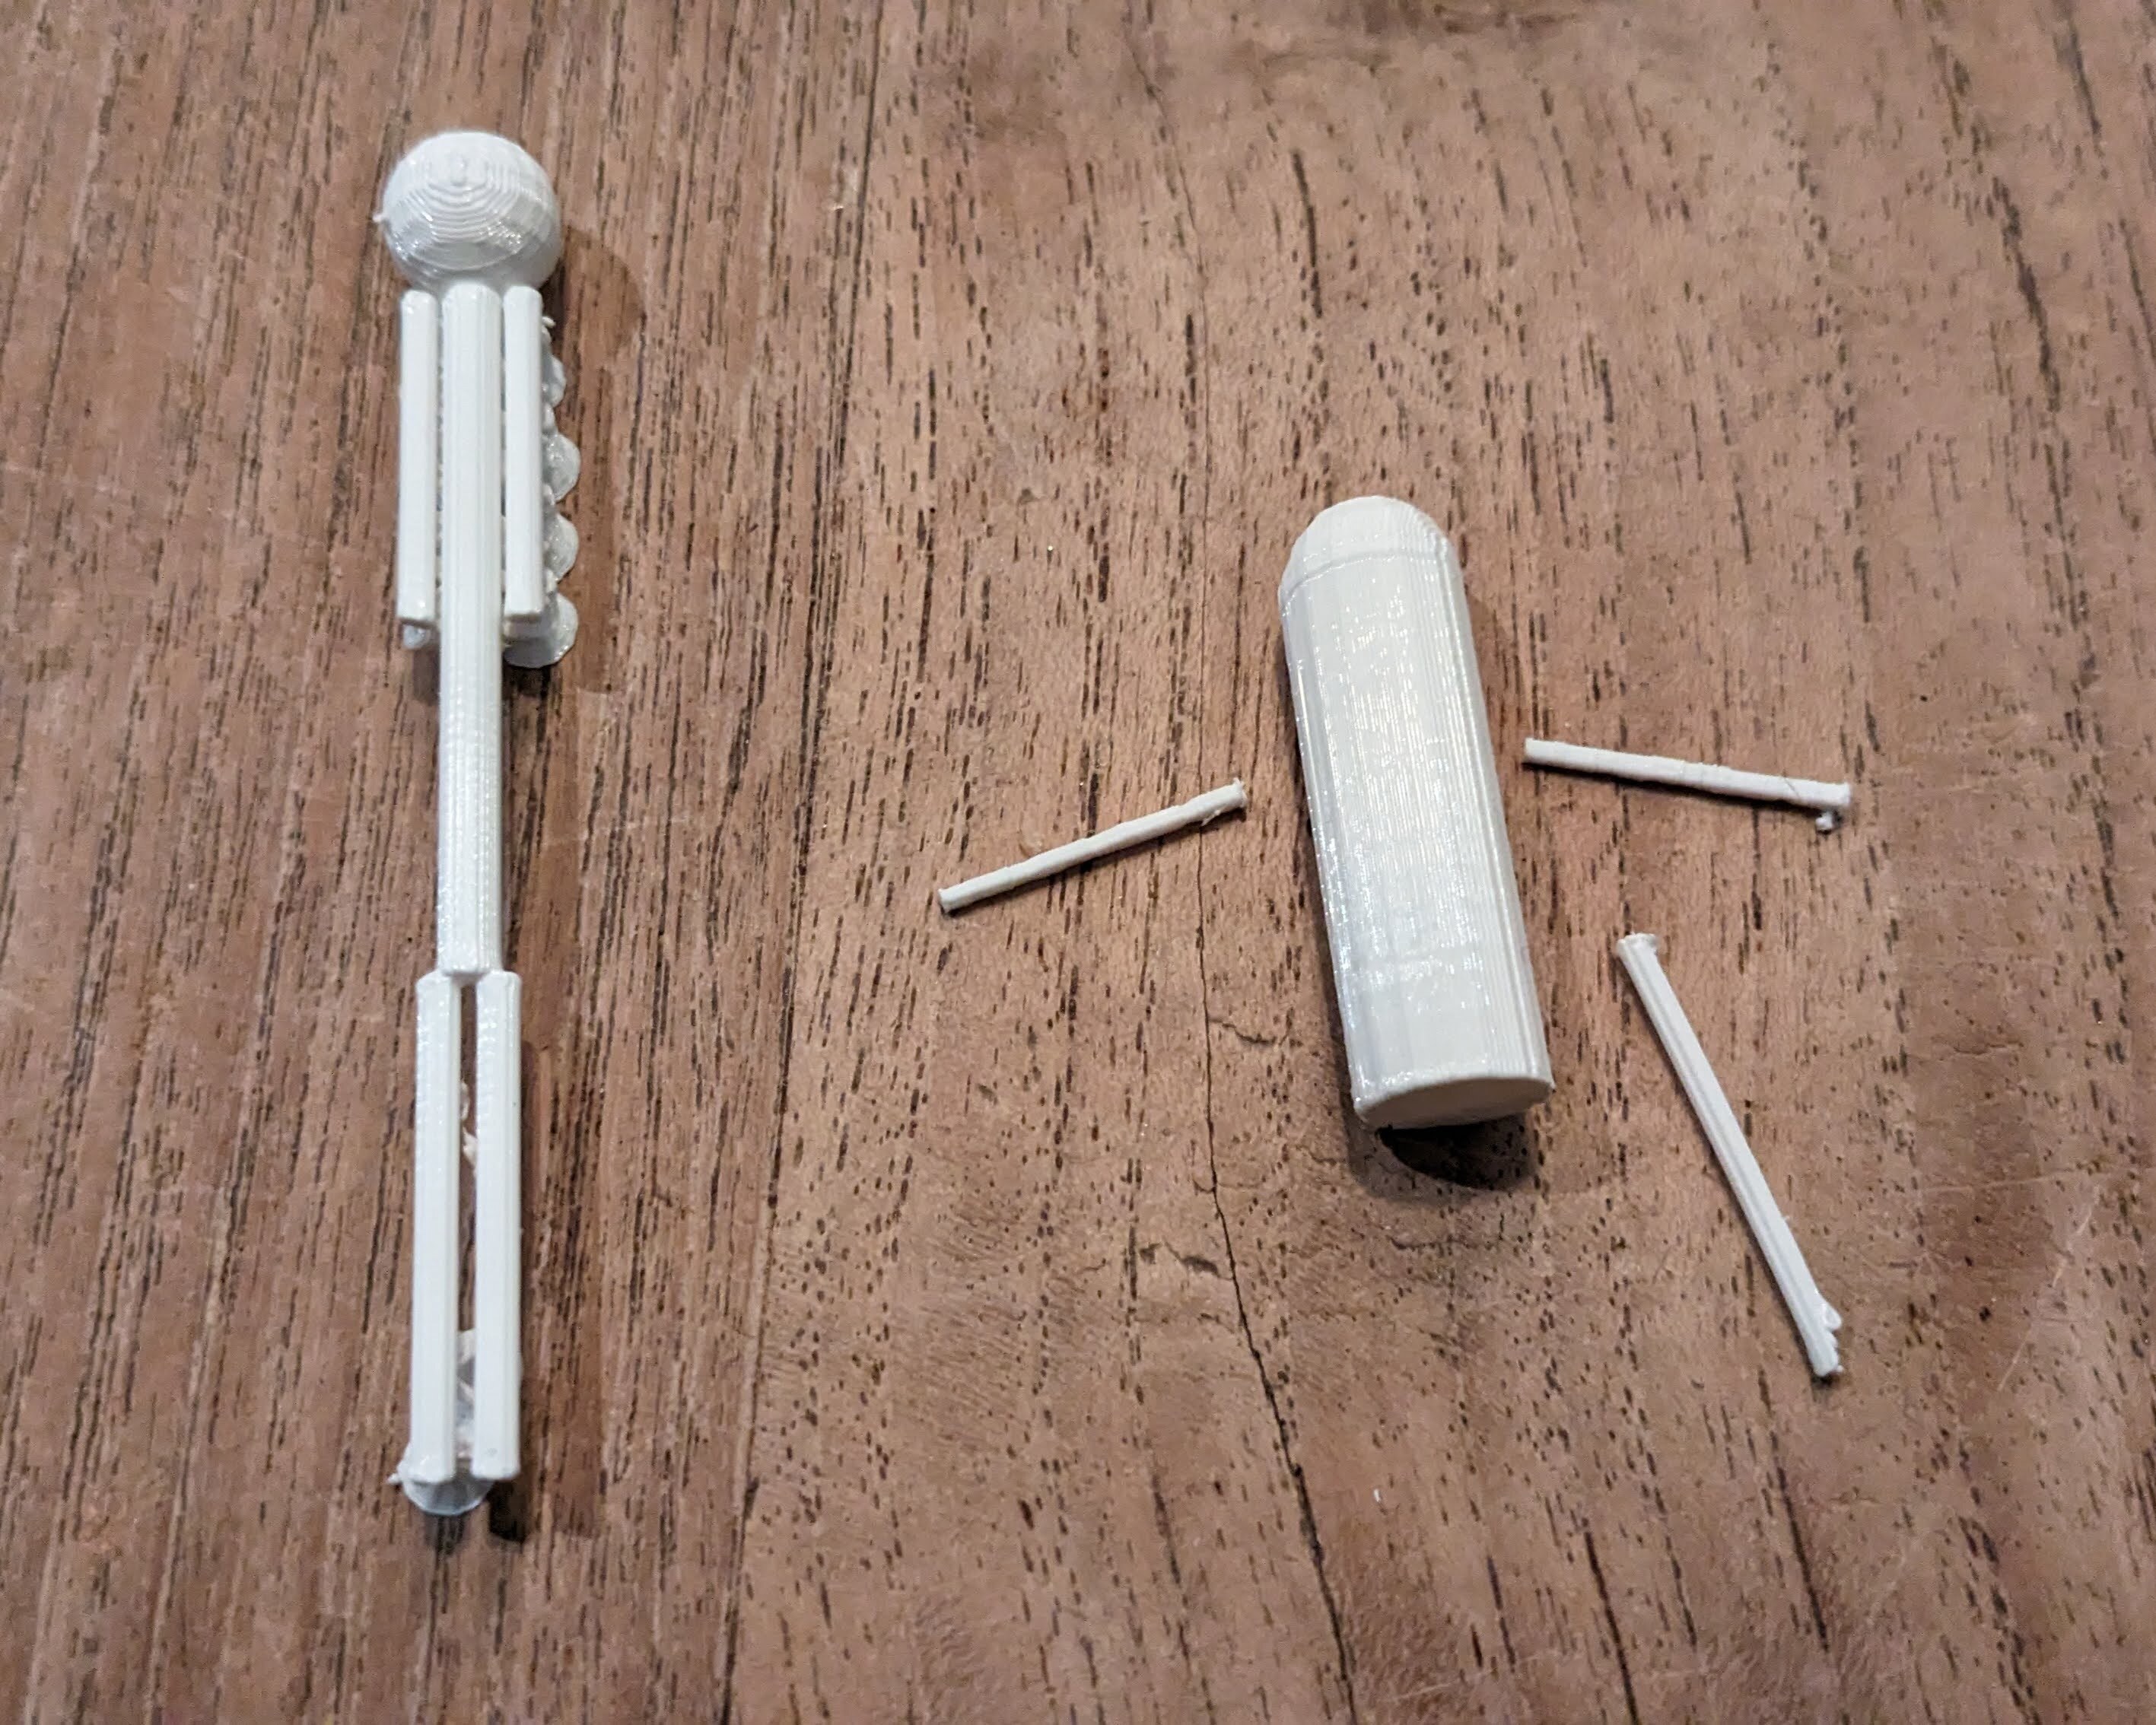
I have asked ChatGPT to generate 3D models. ChatGPT can not generate 3D models directly but 3D models can generated via intermediary [OpenSCAD](https://openscad.org/news.html) scripts: OpenSCAD provides a scripting language to describe objects which can be combined to form 3D models. ChatGPT understands the syntax of this scripting language and generates perfectly cromulent scripts. I have asked two versions of ChatGPT to generate a 3D model of a house, a cat, a stick figure, a chair and a tree. The results are interesting...
The models immediately make the difference between ChatGPT 3.5 Turbo and ChatGPT 4.0 clear: 4.0 generates much better models with, at least, recognizable elements: a chair has four legs, a cat has a head and a tail. It is impressive that reasonable 3D models are generated but there is still room for improvement: proportions are not respected and elements are not always connected. Anyway, if __the 3D-models can be seen as a way to visualize code quality__, then 4.0 is a clear improvement and it makes me curious about future ChatGPT versions. It also made me reflect on a couple of aspects of LLMs in general.
Fig: a black box generating 3D models.
* **ephemerality** The response of a LLM to a prompt is ephemeral: the same prompt causes a different response depending on context, randomness and the position of heavenly bodies - or so it seems. Traditional software systems follow a strict set of clear rules and provide deterministic, predictable and reliable results. The inverse is true for LLMs which takes some getting used to. As a user, an LLM is effectively a [vantablack](https://en.wikipedia.org/wiki/Vantablack) box - there is no way to know why a certain response was given instead of another.
* **Updates** LLMs services - and SaaS in general - have an additional feature which makes them even more unpredictable: updates to systems can happen without notice. After a recent unannounced update, for example, [ChatGPT 4 started to produce gibberish](https://status.openai.com/incidents/ssg8fh7sfyz3). This adds another layer to the already uncontrollable and ephemeral nature of responses to LLM prompts.
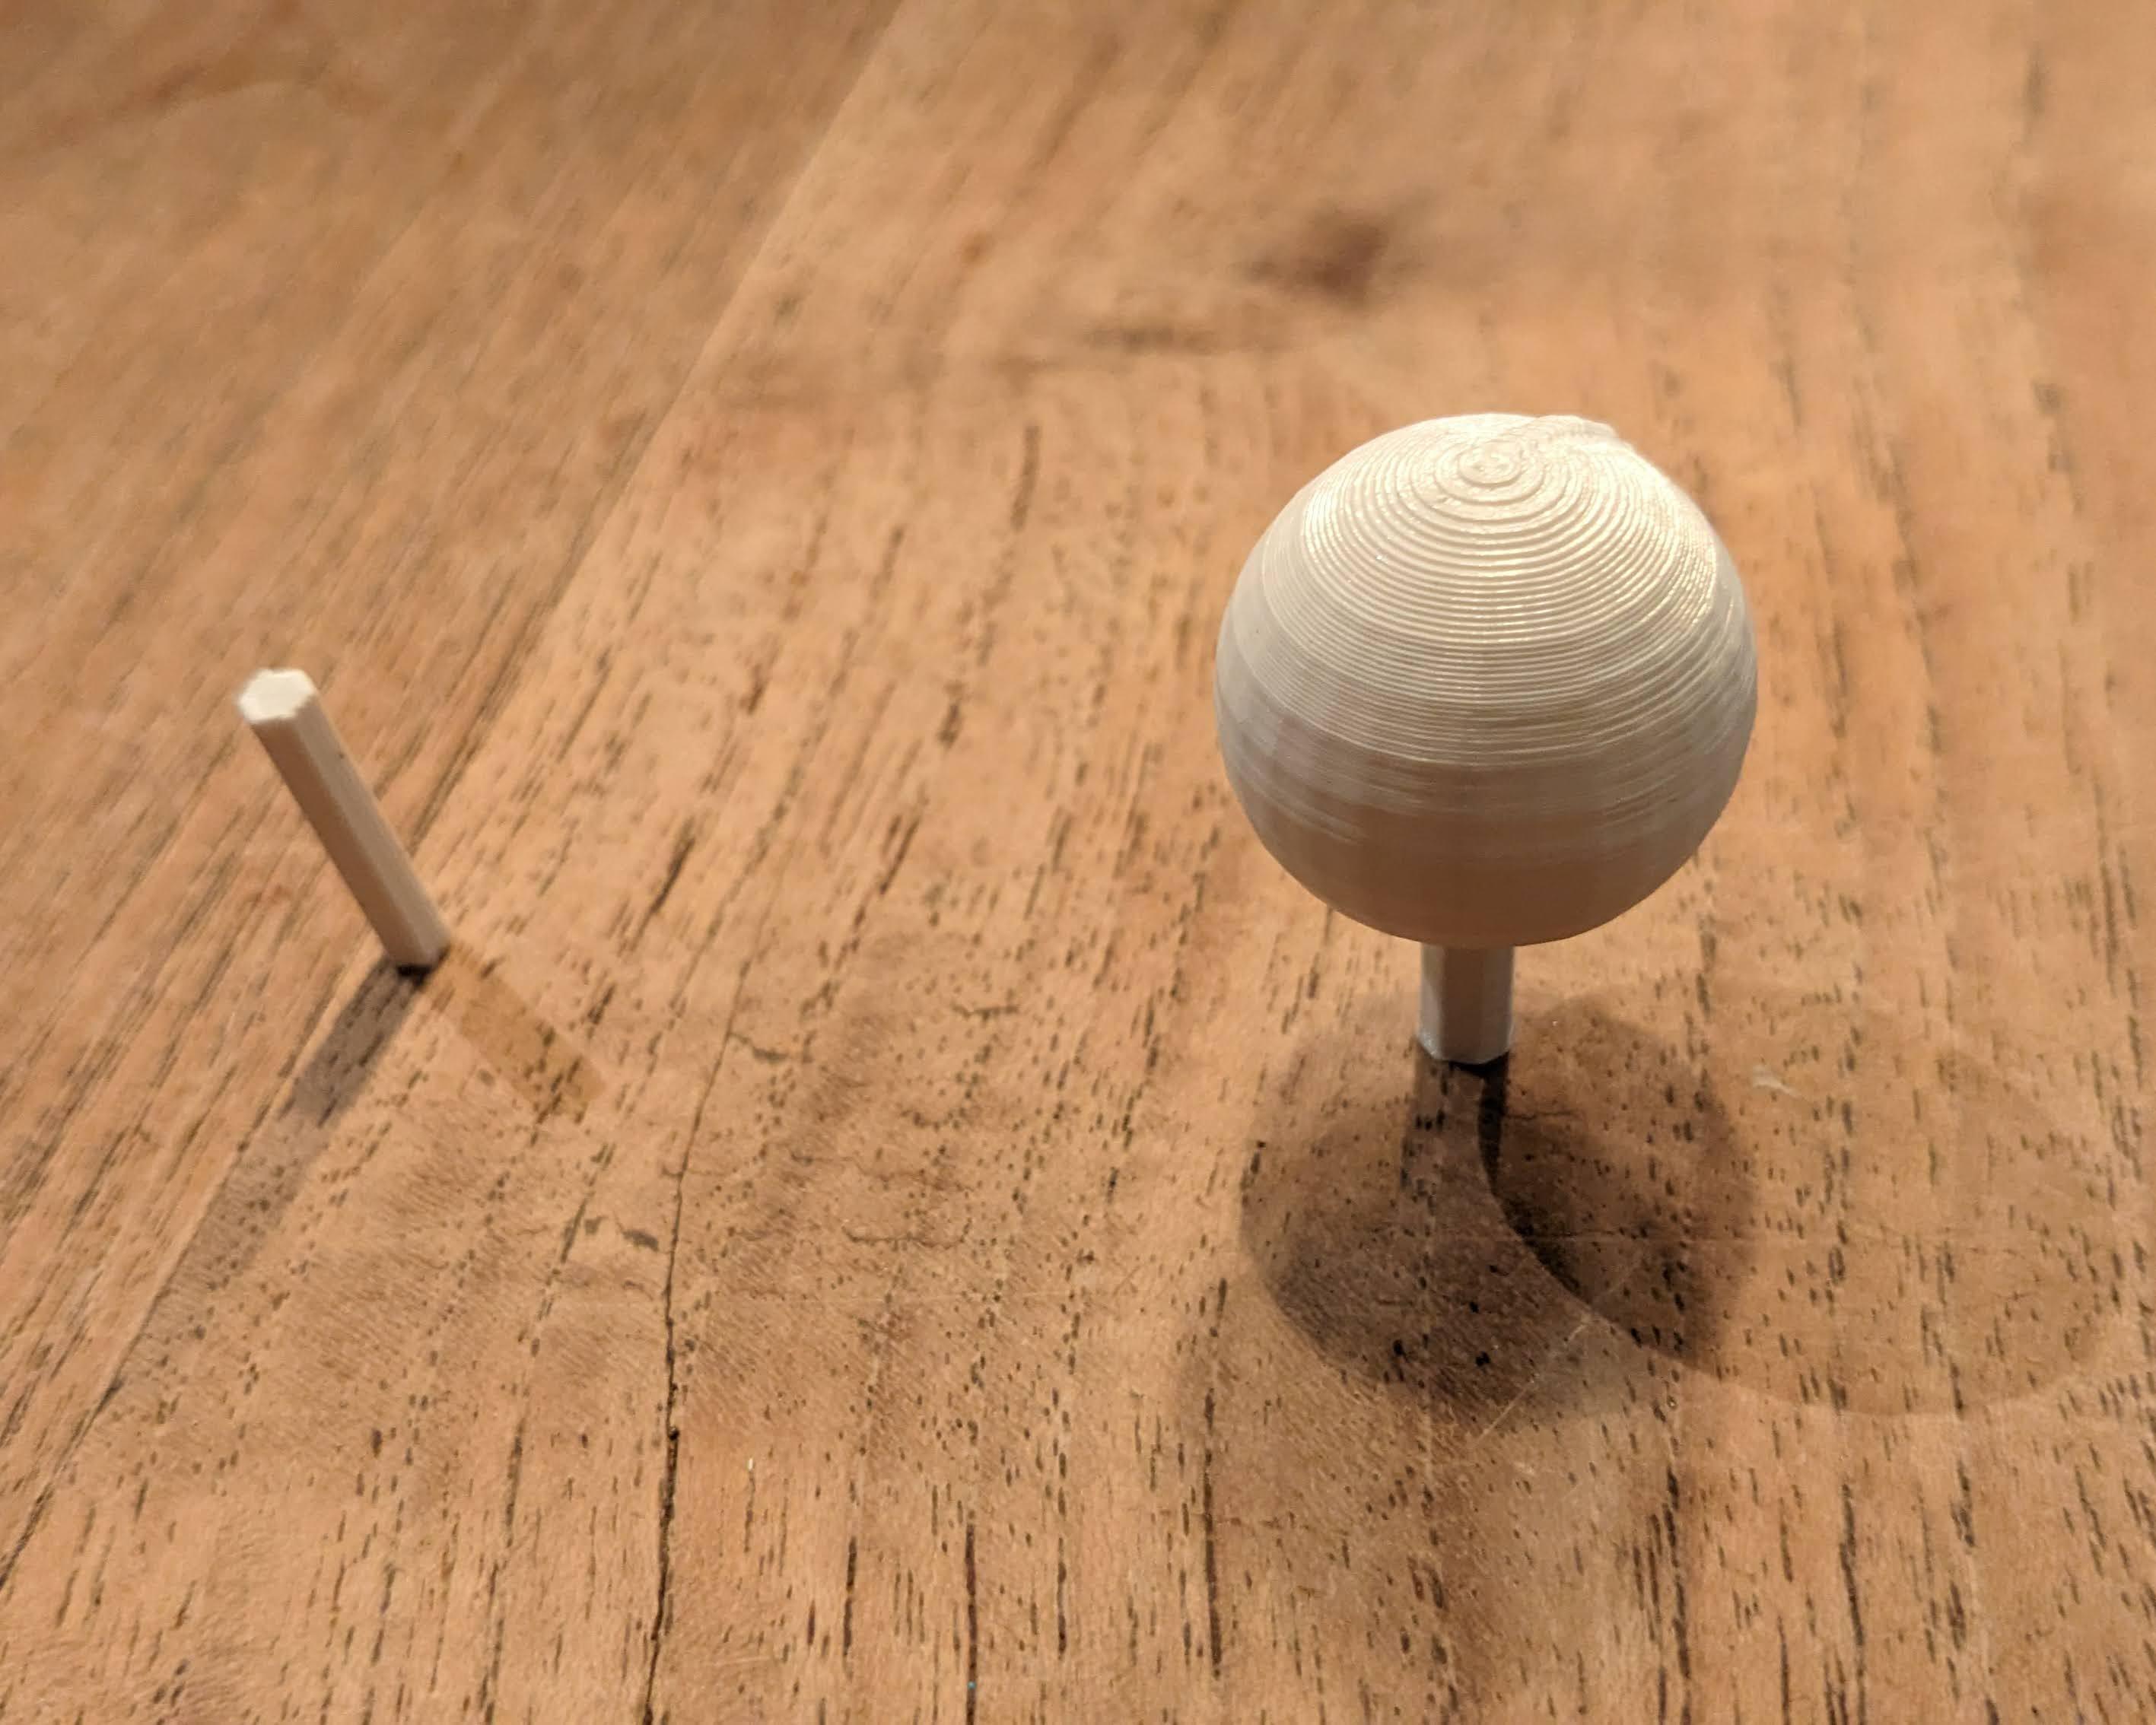
To counter the ephemeral quality of prompt responses, I have 3D printed the generated [3D models](https://0110.be/files/attachments/541/ChatGPT3D.zip). Some pictures can be found below. I find that these physical, tangible, immutable objects provide a comforting counterbalance to the digital, ephemeral nature of LLM responses. Additionally, it highlights the absurdity of the generated models.
There are other ways to solidify ephemerality: [crochet patterns](https://www.theguardian.com/technology/2023/feb/26/chatgpt-generated-crochet-pattern-results), juggling patterns, guitar tablature, music notation all have some kind of structured text representation which LLMs can generate and which can have a physical representation. I would encourage people to bring prompt responses to the physical world: it really makes the - current - limitations of LLMs very clear.
---
## [Look, Ma! No Javascript! A case against the overuse of Javascript](https://0110.be/posts/Look%2C_Ma%21_No_Javascript%21_A_case_against_the_overuse_of_Javascript.md)
- Published: 2023-12-20T00:00:00Z
- Updated: 2023-12-21T07:59:13Z
- Author: Joren
- ID: 534
- Canonical: https://0110.be/posts/Look%2C_Ma%21_No_Javascript%21_A_case_against_the_overuse_of_Javascript
- Tags: [Code](https://0110.be/tags/Code.md), [GhentCDH](https://0110.be/tags/GhentCDH.md), [UGent](https://0110.be/tags/UGent.md)
Fig: Hammer vs. screw. Not the right tool for the job.
For the last couple of years this blog has not been using any Javascript. During the last decade this has become quite rare. Only [1.2% of websites do not use Javascript](https://w3techs.com/technologies/details/cp-javascript) I see this as a problem. In this text I want to argue that Javascript is perhaps not always the right tool for the job. Especially for web-pages which visitors simply want to read and where *no explicit interactive actions* are wanted from a user perspective, I see Javascript as detrimental.
I was triggered to write this by a few observations. One is by a Rails frontend framework which claims that [*"the only technology we should be using to create web UI is JavaScript"*](https://github.com/rage-rb/rage). This implies that the whole DOM should be rendered by Javascript. On the other hand there are frameworks which now advertise server side rendering as new feature like [Blazor](https://community.devexpress.com/blogs/aspnet/archive/2023/12/13/blazor-new-net-8-render-modes-v23-2.aspx) and [Nuxt](https://v2.nuxt.com/docs/concepts/server-side-rendering/). The old thing is new again.
Let's look at a few examples. Take visiting news website. On a news site, a user expects to be able to read current news, reviews, opinions, .. and there is no expectation of interactivity. Basically, a news site could work equally well on physical paper, as was the case for the last century or more. Ideally, a news site is a static HTML page with an easy to follow layout and some images, perhaps some static ads, with information flowing in a single direction.
If we look at, for example, the Guardian, we do not get this ideal experience, instead 82 Javascript files are loaded and the full website takes six full seconds to load on a fast fiber connection. The site even tries to load files from other domains. This bloat results in 8 website programming errors and [CORS](https://en.wikipedia.org/wiki/Cross-origin_resource_sharing)-issues. The Guardian website is far from the worst example of this sprawl of Javascript, the [front-end for the Guaridan](https://github.com/guardian/frontend) is even developed in the open.
Another news site is [Hacker News](https://news.ycombinator.com/). With its focus on Sillicon valley and technical news, this site has probably one of the most tech-savvy readers and ... it does not rely on Javascript for functioning. There is a [single small, **readable** 150 line script](https://news.ycombinator.com/hn.js) to improve usability but that is it. The makes the the website fast, easily indexable, straightforward to maintain, accessible, future-proof, failsafe, and compatible with even the most basic browsers and screen-readers.
Similarly, this blog is a dynamic [Rails](https://rubyonrails.org/) site but thanks to extensive use of server-side rendering and caching it behaves more like a static site generator: once everything is cached, the application mostly serves static HTML fragments. The client-side requirements are minimal as well: since no Javascript is used to modify the DOM - or even at all - lay-outing is straightforward.
Note that some blog posts feature advanced web *application* prototypes which do use a boatload of Javascript e.g. to [convert audio](https://0110.be/posts/An_audio_focused_ffmpeg_build_for_the_web), [visualize audio](https://0110.be/posts/Gabber_-_Visualizing_constant-Q_transform_in_the_browser), [interact with micro-controllers or MIDI instruments](https://0110.be/posts/mot_-_MIDI_and_OSC_Tools_-_Sending_UDP_messages_from_the_browser),... . These prototypes use many of the available browser APIs like the Web Audio API, WebAssembly, Web MIDI API, Web Bluetooth API, WebGL, .... I really do like targeting modern browsers with offer many possibilities to build easy-to-use *applications*. But that is exactly a distinction that needs to be made: *applications versus pages*. Javascript versus No Javascript.
---
## [Clap detection - Trigger your anything](https://0110.be/posts/Clap_detection_-_Trigger_your_anything.md)
- Published: 2023-12-15T00:00:00Z
- Updated: 2025-11-29T14:08:20Z
- Author: Joren
- ID: 531
- Canonical: https://0110.be/posts/Clap_detection_-_Trigger_your_anything
- Tags: [0110.be](https://0110.be/tags/0110.be.md), [Code](https://0110.be/tags/Code.md), [Projecten](https://0110.be/tags/Projecten.md), [UGent](https://0110.be/tags/UGent.md)
Fig: *Clap twice for light*.
There is something about surprising interfaces. Having a switch to turn on a light gets quite boring after a while. Turning on a light by clapping twice, on the other hand, has some kind of magic feel to it. In a recent Mr Beast video he and his gang visit a number of expensive houses and in one of those mansions there is a light operated by clapping twice. I am not sure about the blatant materialism, but it got me thinking on how to build a similar clap-operated light yourself.
So, what are the elements needed: first a microphone to pick up sound. Second an algorithm is needed that detects claps. And finally, something that reacts to claps: a light or something else.
Many devices have microphones so sound input is relatively easy, and with some creativity there are many things waiting to be 'clap triggered': vacuum robots, sunscreens, lights, in-house ventilation, ... The main difficulty is implementing a efficient clap-detection algorithm. Luckily there are already a few described in the literature. I have based my ANSI C implementation on 'Duxbury, C., et al (2003). *Complex domain onset detection for musical signals*'.
My version of the clap-detection algorithm has two parameters which might need adapting to fit your environment. The silence threshold determines the minimum loudness for a clap to be triggered. The onset threshold determines more or less how 'percussive' the sound needs to be: the idea is to only react to things sounding like a clap and not to e.g. a loud whistle or other sounds. This is what the onset threshold tries to control. You can try it out below:
Demo: click the 'start audio' to capture your microphone and try to clap clearly twice. Lower the parameters if nothing happens.
## Clap detection on a micro-controller
With this working we now can try to run this code on a micro-controller. Running it on a micro-controller makes it more practical in daily use to e.g. switch on lights. A low-cost ESP32 with a MEMS microphone is a good platform: these microcontrollers are easy to use and have WiFi connectivity which opens the possibility to trigger commands to smart sockets or other WiFi-enabled devices. The [pector GitHub repository](https://github.com/JorenSix/pector) contains an Arduino project to run the clap-detection algorithm on an ESP32 or similar device (Teensy, RP2040,... ).
## Clap detection in the command line
Next to the main clap detection software, there is a small script to trigger commands when a clap is detected. In this case, the script waits for a double clap and then pushes updates to a git repository. There are two reasons for this: the first is that it is fun, the second is for bragging rights. Not that many people can say they once pushed source code simply by clapping twice. It is, however, a challenge to find people who have the patience to listen to me explaining what I have done and who are impressed by this feat, so maybe there is only one reason: it is fun. Below a screen capture can be found pushing code to the [pector repository](https://github.com/JorenSix/pector).
Vid: pushing code by clapping
Have a look at the [pector GitHub repository](https://github.com/JorenSix/pector) for more info on how you can make your websites/apps/command line tools/devices clap controlled!
---
## [Introduction on Music Information Retrieval](https://0110.be/posts/Introduction_on_Music_Information_Retrieval.md)
- Published: 2023-11-13T00:00:00Z
- Updated: 2023-12-06T08:30:30Z
- Author: Joren
- ID: 535
- Canonical: https://0110.be/posts/Introduction_on_Music_Information_Retrieval
- Tags: [Code](https://0110.be/tags/Code.md), [Music Information Retrieval](https://0110.be/tags/Music%20Information%20Retrieval.md), [UGent](https://0110.be/tags/UGent.md)
I have been asked to give a guest lecture introducing Music Information Retrieval for the course *'Foundations of Musical Acoustics and Sonology'* at Ghent University. The lecture slides include interactive demos with live sound visualization and can be found below.
> *As we delve into the intricacies of how machines can analyze and understand musical content, students will gain insights into the cutting-edge research field that underpins modern music technology. From the algorithms powering music recommendation systems to the challenges of extracting meaningful information from audio signals, the lecture aims to ignite curiosity and inspire the next generation of musicologists in both music and technology. Get ready for an engaging session that promises to unlock the doors to a world where the science of sound meets the art of music.*
Thanks to ChatGTP for the slightly over-the-top intro text above. Anyway, here you can find my [introduction to Music Information Retrieval slides](https://0110.be/attachment/cors/2023.11.Music-Information-Retrieval-Intro/) . Especially the interactive slides are perhaps of interest. The lecture was given in the [Art-Science Interaction Lab (ASIL)](https://asil.ugent.be/) which has a seven meter wide screen, which affects the slide design a bit.
Fig: Click the screenshot to go to the 'Introduction to Music Information Retrieval' slides.
- [MIR-intro-screenshot.png](https://0110.be/files/attachments/535/MIR-intro-screenshot.png)
- [MIR\_intro.pdf](https://0110.be/files/attachments/535/MIR_intro.pdf)
---
## [Resampling audio via a Web Audio API Audio Worklet](https://0110.be/posts/Resampling_audio_via_a_Web_Audio_API_Audio_Worklet.md)
- Published: 2023-09-27T00:00:00Z
- Updated: 2023-09-28T07:50:17Z
- Author: Joren
- ID: 529
- Canonical: https://0110.be/posts/Resampling_audio_via_a_Web_Audio_API_Audio_Worklet
- Tags: [Code](https://0110.be/tags/Code.md), [UGent](https://0110.be/tags/UGent.md)
The Web Audio API offers some great functionality for web based audio applications. The API also has a couple of quirks and is not always easy to use. One of those quirks is the limited support for resampling audio. When requesting a microphone stream of a certain sample rate the API only allows configurations your hardware supports. Ideally there should be an option to resample the incoming stream to a requested sample rate (and format) independent of hardware.
On macOS and Chrome the issue becomes even more confusing: when using multiple `AudioContexts` they can only have the same sample rate. E.g. starting a microphone on 16kHz by itself is possible but not when there is also audio playback on the same page, then everything switches over to 48kHz. There even seems to be an effect of different browser tabs. Other browsers and platforms have similar issues. This is problematic when you need audio in a fixed sample rate.
The solution is to resample audio incoming samples in your code or use the `OfflineAudioContext` as a resampler. The `OfflineAudioContext` way needs a lot of code and, crucially, only works on the main browser thread and not in an `AudioWorklet`. The `AudioWorklet` should be the place for computationally intensive audio processing like resampling. To solve the resampling problem I have glued together an `AudioWorklet` and [libsamplerate-js](https://github.com/aolsenjazz/libsamplerate-js) to provide an easy to use audio resampling solution which is demo'd below:
The demo does not seem to do much but it reads incoming microphone data and uses a [high quality audio resampling library](http://www.mega-nerd.com/SRC/) to resample an audio stream into a requested audio sampling rate. The browser development console shows some info on this process. To get this working in an audio worklet, the libsamplerate-js needed to be recompiled and directly included in the `AudioWorklet`. To inspect the source, check the "Web Audio API AudioWorklet resampler":\[web-audio-api-resample.zip\].
The resampling issue came up in development the browser based component of [Olaf, an audio fingerprinting solution](https://github.com/JorenSix/Olaf).
- [web-audio-api-resample.zip](https://0110.be/files/attachments/529/web-audio-api-resample.zip)
---
## [Acoustic fingerprinting in the browser with Olaf](https://0110.be/posts/Acoustic_fingerprinting_in_the_browser_with_Olaf.md)
- Published: 2023-09-27T00:00:00Z
- Updated: 2023-10-03T13:06:53Z
- Author: Joren
- ID: 506
- Canonical: https://0110.be/posts/Acoustic_fingerprinting_in_the_browser_with_Olaf
- Tags: [Code](https://0110.be/tags/Code.md), [UGent](https://0110.be/tags/UGent.md)
The recent version of the OLAF (Overly Lightweight Acoustic Fingerprinting) audio fingerprinting system also includes an updated WASM build which deserves a bit more attention.
The browser version of Olaf enables [audio fingerprinting in the browser](https://0110.be/attachment/cors/2023.09.olaf-wasm-demo/basic.html). This can be used to e.g. react to music playing in the environment, so called *second screen applications* or to synchronize several devices to an audio stream.
The goal of the demo below is to play music aloud - not using headphones - using the controls on the left. You can either play the reference track or an unrelated distractor. Next, the Olaf fingerpinter system needs to be started using the button on the right which captures the microphone of your device. Then Olaf tries match the incoming sound of the microphone and the reference track. Once a match is found the exact time in the match is displayed until the sound matches no more. Note that there is no direct information flowing between the left and right part. You can also play the reference on another device to be sure.
Reference:
\
Distractor:
To get this demo working with the Web Audio API and use `AudioWorklet` objects, to process audio in the background an not on the main browser thread. There is surprisingly little info to find on how to combine WASM libraries - I used both [Olaf](https://github.com/JorenSix/Olaf) and [libsamplerate-js](https://github.com/aolsenjazz/libsamplerate-js) - and the AudioWorklet environment. Thanks to one of the very few resources on [combining WASM, emscripten and AudioWorklets](https://timdaub.github.io/2021/02/25/emscripten-wasm/) led me in the right direction.
For more information, check the [Olaf acoustic fingerpinter system](https://github.com/JorenSix/Olaf) source code repository.
---
## [ESP32 I2S WiFi Microphone](https://0110.be/posts/ESP32_I2S_WiFi_Microphone.md)
- Published: 2023-09-26T00:00:00Z
- Updated: 2025-11-29T14:13:54Z
- Author: Joren
- ID: 528
- Canonical: https://0110.be/posts/ESP32_I2S_WiFi_Microphone
- Tags: [Code](https://0110.be/tags/Code.md), [UGent](https://0110.be/tags/UGent.md)
Fig: *Audio over WiFi*.
Getting MEMS microphones to work on microcontroller platforms as the ESP32 is challenging. In theory, the I2S protocol provides a standardised, easy way to receive audio from a microphone and send stereo audio to a DAC. In practice, the many parameters make I2S not straightforwards to use. As with most protocols and standards, the mismatch between limitations and quirks of specific hardware and software implementations can cause issues. To debug I2S microphones on ESP32 or the RP2040 I have prepared a small Arduino program.
The [IS2 WiFi microphone](https://github.com/JorenSix/Olaf/blob/master/ESP32/esp32_inmp441_wifi_mic/esp32_inmp441_wifi_mic.ino) program sends audio from the microphone over WiFi to a computer which listen to the microphone: this make sure that the microphone works as expected and audio samples are correctly interpreted. It validates the I2S settings like buffer sizes, sample rates, audio formats, stereo or mono settings, ... After configuring an SSID, password and IP-address it becomes possible to listen --- in real-time --- to the microphone which also allows the listener to sense the microphone quality.
````c
size_t bytesIn = 0;
esp_err_t result = i2s_read(I2S_PORT, &sBuffer, bufferLen, &bytesIn, portMAX_DELAY);
int16_t *sample_buffer = (int16_t *)sBuffer;
int16_t samples_read = bytesIn / 2;
float audio_block_float[samples_read];
for (size_t i = 0; i < samples_read; i++) {
sample_buffer[i] = gain_factor * sample_buffer[i];
// Max for signed int16_t is 2^15
audio_block_float[i] = sample_buffer[i] / 32768.f;
}
// Send raw audio 32bit float samples over UDP
Udp.beginPacket(outIp, outPort);
Udp.write((const uint8_t *)audio_block_float, bytesIn * 2);
Udp.endPacket();
````
Fig: The main part of reading i2s audio from a microphone and sending an UDP packet.
To listen to the incoming audio an UDP port needs to be captured and subsequently send to a program that can interpret and play or store audio. With [netcat](https://en.wikipedia.org/wiki/Netcat) UDP data can be captured. With [ffmpeg and ffplay](https://ffmpeg.org) audio can be payed or stored. In practice the receiving computer might run the following commands to decode UDP packages and hear the microphone:
# for playback, receive UDP packages and interpret raw audio
nc -l -u 3000 | ffplay -f f32le -ar 16000 -ac 1 -
# for playback, receive UDP packages and store in a wav file
nc -l -u 3000 | ffmpeg -f f32le -ar 16000 -ac 1 -i pipe: microphone.wav
The ESP32 WiFi microphone has been developed during the development of [Olaf, an audio search system](https://github.com/JorenSix/Olaf) which also works for embedded devices. There is a page with [more info on Olaf on ESP32](https://github.com/JorenSix/Olaf/tree/master/ESP32).
- [audio\_over\_wifi.webp](https://0110.be/files/attachments/528/audio_over_wifi.webp)
- [esp32\_inmp441\_wifi\_mic.ino](https://0110.be/files/attachments/528/esp32_inmp441_wifi_mic.ino)
---
## [ESP32 Olaf - Overly Lightweight Acoustic Fingerprinting on the ESP32](https://0110.be/posts/ESP32_Olaf_-_Overly_Lightweight_Acoustic_Fingerprinting_on_the_ESP32.md)
- Published: 2023-09-26T00:00:00Z
- Updated: 2023-09-28T08:43:42Z
- Author: Joren
- ID: 527
- Canonical: https://0110.be/posts/ESP32_Olaf_-_Overly_Lightweight_Acoustic_Fingerprinting_on_the_ESP32
- Tags: [Code](https://0110.be/tags/Code.md), [UGent](https://0110.be/tags/UGent.md)
Fig: In Dutch 'ESP 32' means 32 Hams...
Olaf is an acoustic fingerprinting system designed with embedded devices in mind. It has a low memory use and computational requirements which are compatible with e.g. the ESP32 line of microcontrollers devices like the [SparkFun ESP32 Thing](https://www.sparkfun.com/products/13907) or [devices based on the RP2040 chip](https://docs.arduino.cc/hardware/nano-rp2040-connect). Recently I have prepared a demo with the newest version of Olaf running on an ESP32 which deserves some attention.
To match audio, Olaf needs access to streaming audio. This can be audio read from an SD-card but, more likely, audio comes from a microphone. Digital microphones have some great features: a low-noise floor, great at picking up omnidirectional sound and they are inexpensive. I have prepared a demo of Olaf which shows how to use [Olaf on an ESP32 with an INMP441 MEMS microphone](https://github.com/JorenSix/Olaf/blob/master/ESP32/esp32_inmp441_olaf/esp32_inmp441_olaf.ino). To test the MEMS microphone I also made a [MEMS microphone to WiFi program](https://0110.be/posts/ESP32_I2S_WiFi_Microphone) which sends incoming sound on the ESP32 over WiFi to a computer where the sound quality can be verified.
The example provides a scaffold for *embedded music-reactive applications*. Once the microcontroller knows which song is playing and where in the song the match is found it can trigger LED's (or explosions, fireworks, lyrics, other effects...) which should happen in sync with the music. See the example below to get the idea, this demo runs an older version of Olaf but the idea stays the same:
The main difference between the current and previous versions of Olaf is that now the ESP32 version, the browser version and the PC version are all *running the exact same code*. No hacks are needed any more to support a platform. This means that testing and debugging can be done on a computer and, if everything goes well, the code should work as expected on the embedded device (or browser).
If you want to know more about Olaf, read the [paper on the Olaf audio search](https://joss.theoj.org/papers/10.21105/joss.05459), check out the [Olaf source code repository](https://github.com/JorenSix/Olaf) or consult the [Olaf on ESP32 readme](https://github.com/JorenSix/Olaf/blob/master/ESP32).
---
## [A Python wrapper for Olaf - Acoustic fingerprinting in Python](https://0110.be/posts/A_Python_wrapper_for_Olaf_-_Acoustic_fingerprinting_in_Python.md)
- Published: 2023-09-22T00:00:00Z
- Updated: 2023-09-26T08:38:34Z
- Author: Joren
- ID: 526
- Canonical: https://0110.be/posts/A_Python_wrapper_for_Olaf_-_Acoustic_fingerprinting_in_Python
- Tags: [Code](https://0110.be/tags/Code.md), [Command Line Application](https://0110.be/tags/Command%20Line%20Application.md), [UGent](https://0110.be/tags/UGent.md)
Fig: *Python wrapping C*.
I have just released a Python wrapper for the Olaf acoustic fingerprinting library. Olaf is a scalable audio search system based on indexing . Olaf is programmed in C but a wrapper now makes its functionality available in Python.
The python wrapper should make it more accessible for developers to get started with it and makes it compatible with other Python libraries. A few notable libraries are the *[librosa python package for music and audio analysis](https://librosa.org/doc/latest/index.html__),*[nnAudio, A fast GPU audio processing toolbox](https://nnaudio.readthedocs.io/en/latest/intro.html__) and other more general plotting, data processing and machine learning libraries. Despite Python's many flaws, its rich library ecosystem is unmatched.
The associated [GitHub repository](https://github.com/JorenSix/Olaf) contains [documentation on how to use the Olaf python wrapper](https://github.com/JorenSix/Olaf/tree/master/python-wrapper) and also contains examples. The first shows how to index a song into the database and subsequently query the database. The second visualises the event points extracted by Olaf. The figure below shows shows the resulting event points, extracted with Olaf, plotted on a magnitude spectrogram, calculated with Olaf. The spectrogram on top is calculated using librosa and is meant to be very similar to Olaf.
\
Fig: *A power spectrum from librosa and one from Olaf, with event points marked*.
The wrapper was made with [Python CFFI](https://cffi.readthedocs.io/en/latest/) which works reasonably well. The automatically generated wrapper library support a large part of the C language but it needs a compilation step for each platform. Currently, the instructions assume a POSIX-like system, but technically, the wrapper can also function on Windows, albeit with the potential need for Windows-equivalent instructions in place of certain POSIX ones. The wrapper is wrapped in an easy to use python class called `Olaf.py`:
\`\`\`python\
from olaf import Olaf, OlafCommand\
import librosa
1. Store the first ten seconds of an audio file\
audio_file = librosa.ex('choice')\
Olaf(OlafCommand.STORE,audio_file).do(duration=10.0)
1. Query for a part of the same file (with an offset of 7 seconds), but change volume\
y, sr = librosa.load(audio_file,mono=True, sr=16000,duration=10,offset=7.0)\
y = y \* 0.8 #change the volume\
results = Olaf(OlafCommand.QUERY,audio_file).do(y=y)
1. We expect a match between the stored and partially overlapping query\
print(results)\
\`\`\`
---
## [Dragon! Sound effects for board games](https://0110.be/posts/Dragon%21_Sound_effects_for_board_games.md)
- Published: 2023-09-01T00:00:00Z
- Updated: 2023-09-01T22:39:36Z
- Author: Joren
- ID: 521
- Canonical: https://0110.be/posts/Dragon%21_Sound_effects_for_board_games
- Tags: [0110.be](https://0110.be/tags/0110.be.md), [Code](https://0110.be/tags/Code.md), [Deep-learning](https://0110.be/tags/Deep-learning.md), [UGent](https://0110.be/tags/UGent.md)
Fig: *Rock & Troll* collaborative board game.
I often play board games with my kids. One of them is an absolute board game fan while the other is a sore loser and only wants to play collaborative games. These games are played 'against the board' and you win, or lose, together. I myself also still have problems losing games so I do understand this predicament. Genetics...
*Rock & Troll* is one of those games. It is a chance based game where you collaboratively try to build a path to a treasure before the dragon reaches it. Every player has to flip a tile which is either a part of the path (good) or a dragon (very bad). To increase engagement during play I often add sound effects. I was thinking: this can be improved and automated. For example, by doing this when a dragon tile is flipped:
The idea is to *unobtrusively* detect game state and add sound effects at critical moments. The sound effect should be playing without too much lag, ideally within about 200ms, so it feels immediate and connected to the game event. To implement this a camera based system with robust, fast object detection seemed like the way to go.
## Dragon detection
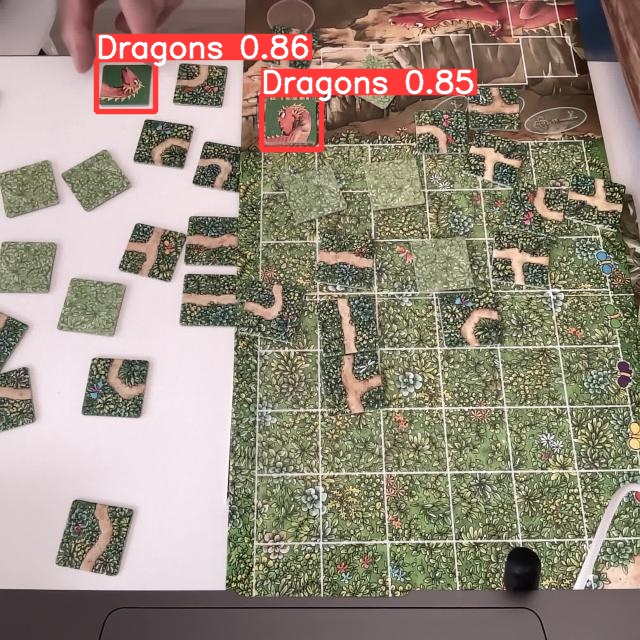
To detect dragons in a video stream I want to retrain an existing object-detection system. So two things need to happen: first a realistic, labeled dataset needs to be created. Then a system needs to be trained to detect the dragons. We do not want to label a massive dataset so we will use *transfer learning* to retrain an existing network. This existing network should already have learned basic features like edges, colors, geometries and other basic patterns. With the hope that this would result in robust detection, even with a limited dataset.
To create the dataset I wrote a small script which took a webcam picture every few seconds while I was manipulating the board and tiles. This resulted in about 130 pictures, some with no dragons and some with six, 300 labels in total. For annotating the dataset I used the free roboflow web-app which also hosts the final [dragon dataset](https://universe.roboflow.com/dragon-knngg/rockntroll/model/1). After augmentation, the size of the dataset can be tripled. The command to extract images from a webcam looks like this on my system:
`ffmpeg -y -r 30 -f avfoundation -i '0' -frames:v 1 snapshot.jpg`
After some consideration for alternatives I landed on the [YOLOv8 object-detection](https://github.com/ultralytics/ultralytics) system: a robust and fast object-detection system. Additionally, it is well-documented, pytorch-based, easy-to-use and it has support for video streams. The annotated roboflow dataset can be downloaded in a YOLOv8 compatible format as well. Transfer learning, was based on the `yolov8s.pt` weights, which are downloaded automatically. With the system installed correctly and the dataset dowloaded, a local GPU based training command might look like this:
`yolo train data=RocknTroll.v3i.yolov8/data.yaml epochs=30 model=yolov8s.pt device=mps imgsz=640 batch=32`
Once the system was trained - download the "model wheights here":\[dragons.pt\] - a bit of "glue code":\[rock_n_troll_v8.py\] is needed. The python script needs to stream images from a camera, here via open cv, and detect dragons in each image. Every time a new dragon is found, the sound effect is played. Note that the Roboflow website automatically trains a model as well which can be [tried out with a webcam](https://universe.roboflow.com/dragon-knngg/rockntroll/model/3/train/results?webcam=true).
There are a few ways improve the robustness of the system. During a game there are only more and more dragons: if the script detects less dragons than before it is probably a false negative or there is occlusion. Additionally, the dragon tiles remain in the same location once they are placed on the board. This means that new dragons are expected only in certain regions of the image. Both heuristics can be used to together to improve robustness.
## Notes
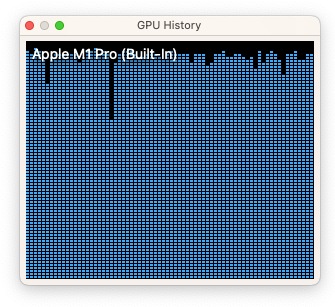
One of the reasons I bought a M1 mac with unified memory is for exactly these types of AI applications. After installing `pytorch 2.0`, the GPU acceleration resulted in a 10x training speed improvement. Training on a GeForce 1080 GTX from 2016 was still quite a bit faster, probably thanks to years of performance tuning targeting CUDA. It is clear that the mac GPU acceleration software ecosystem can use more effort, even system tools in macOS are limited: e.g. in the macOS activity monitor, GPU activity is very much an afterthought.
I am and hesitant to use cloud based GPU computing due to lack of control and privacy. I am not willing to send pictures from my kids to e.g. Google Cloud GPUs. The dependency on hardware of others might also limit the longevity of systems.
The ease-of-use, performance and accessibility of these deep-learning systems is great. Only a couple of years ago it would take months of hard work to maybe only approach similar detection performance. Adapting this idea for other board games and more types of tiles or board game events should be very possible.

- [315794\_\_bevibeldesign\_\_dragon-roar-distressed-7.mp3](https://0110.be/files/attachments/521/315794__bevibeldesign__dragon-roar-distressed-7.mp3)
- [rockntroll.webp](https://0110.be/files/attachments/521/rockntroll.webp)
- [rock\_n\_troll\_demo.mp4](https://0110.be/files/attachments/521/rock_n_troll_demo.mp4)
- [thumb\_rock\_n\_troll.webp](https://0110.be/files/attachments/521/thumb_rock_n_troll.webp)
- [dragons.pt](https://0110.be/files/attachments/521/dragons.pt)
- [rock\_n\_troll\_v8.py](https://0110.be/files/attachments/521/rock_n_troll_v8.py)
---
## [Is a frequency present in a signal? A C implementation. ](https://0110.be/posts/Is_a_frequency_present_in_a_signal%3F_A_C_implementation._.md)
- Published: 2023-07-27T00:00:00Z
- Updated: 2025-11-29T14:12:30Z
- Author: Joren
- ID: 520
- Canonical: https://0110.be/posts/Is_a_frequency_present_in_a_signal%3F_A_C_implementation._
- Tags: [Code](https://0110.be/tags/Code.md), [Command Line Application](https://0110.be/tags/Command%20Line%20Application.md), [UGent](https://0110.be/tags/UGent.md)
This post is an efficient way to determine whether a predefined frequency is present in a signal. If such an algorithm can be found, it can serve as a basis for a modem. With a modem data is modulated and demodulated at the receiving side. The modulation allows data to be send over a transmission channel.
With the ability to detect the presence of audible frequencies a modem can transform symbols into a combination of frequencies and send data over sound. This is exactly what happens with [DTMF](https://nl.wikipedia.org/wiki/DTMF) in the sound below. DTMF is also used in [the dailup sound](https://www.windytan.com/2012/11/the-sound-of-dialup-pictured.html).
Audio: dail tone sequence: which numbers are pressed?
Typically, determining the presence of frequencies in a signal is done with an FFT: an FFT divides a signal into e.g. 512 linearly spaced frequency bands and determines the magnitude of each of these frequencies. The annoying thing is that a probe frequency can be right in between two bands: sample rate, FFT size and the frequency to look for need to be carefully chosen to reliably detect a frequency. Also, it is computationally inefficient to calculate the magnitudes for all frequency bands if *only one band* is actually needed.
Luckily there is an alternative approach which looks like the calculating the FFT but for only one predetermined frequencies. This algorithm is known as the [Goertzel algorithm](https://en.wikipedia.org/wiki/Goertzel_algorithm) and is used in [DTMF dail tone encoding and decoding](https://nl.wikipedia.org/wiki/DTMF). With the standard Goertzel algorithm it is still needed to consider sample rate and the frequency of interest.
Finally there is the "Generalized Goertzel": algorithm. In this version of the algorithm employs a couple of tricks to allow an arbitrary frequency and sample rate while still respecting the [Kotelnikov frequency limit, better known as the Nyquist frequency](https://iopscience.iop.org/article/10.1070/PU2006v049n07ABEH006160/pdf).
Recenlty I needed a piece of ANSI c code to detect the magnitude of an arbitrary frequency for a project. The following is a C implementation of this algorithm. It uses the C support for complex numbers in the `complex.h` header:
````c
#include
#include
#include
float detect_frequency(float frequency_to_detect,
float audio_sample_rate,
float *audio_block,
float *window,
size_t audio_block_size) {
float audio_block_sizef = (float)audio_block_size;
float indvec = frequency_to_detect / audio_sample_rate * audio_block_sizef;
float pik_term = 2 * M_PI * indvec / audio_block_sizef;
float cos_pik_term2 = cosf(pik_term) * 2;
float s0 = 0;
float s1 = 0;
float s2 = 0;
for (size_t i = 0; i < audio_block_size; i++) {
// potential improvement: expect windowed samples
float windowed_audio_sample = window[i] * audio_block[i];
s0 = windowed_audio_sample + cos_pik_term2 * s1 - s2;
s2 = s1;
s1 = s0;
}
s0 = cos_pik_term2 * s1 - s2;
float complex cc = cexpf(0 + -1.0f * pik_term * I);
float complex neg_s1 = -s1 + 0 * I;
float complex pos_s0 = s0 + 0 * I;
float power = cabsf(cc * neg_s1 + pos_s0);
return power;
}
````
## Demo
Below you can try out the algorithm. You can choose a frequency to detect and a playback frequency. The magnitude of the frequency is reported via the slider. The demo uses a javascript translation of the code above.
## Dual-tone Multi-Frequency - DTMF
DTMF in the browser.
On the right you can find a demo of dual tone frequency modulation and demodulation. A combination of frequencies is played and immediately detected.
The green bars show which frequencies have been detected. If for example 1209 Hz is detected together with 770 Hz then this means that we are looking for the symbol in the first column on the second row. Both the first column and the second row are highlighted in green. At that spot we see `4` so we can decode a `4`. By using 2 combinations of four frequencies a total number of 16 symbols can be encoded.
Note that this code does not simply highlight the button press directly but encodes the symbol in audio, feeds it into an Web Audio API format and decodes audio, the result of the decoding step highlights the row and column detected.
---
## [Identifying memory leaks in C](https://0110.be/posts/Identifying_memory_leaks_in_C.md)
- Published: 2023-06-29T00:00:00Z
- Updated: 2025-11-29T14:15:58Z
- Author: Joren
- ID: 517
- Canonical: https://0110.be/posts/Identifying_memory_leaks_in_C
- Tags: [Code](https://0110.be/tags/Code.md), [Command Line Application](https://0110.be/tags/Command%20Line%20Application.md), [UGent](https://0110.be/tags/UGent.md)
Fig: Memory leaks.
The C programming language is deceptively simple. The syntax is straightforward, C has a limited amount of keywords and a small standard library. The first edition of the classic book 'The C Programming Language' is only about 200 pages. And yet, when programming in C, it is hard to avoid the many exiting footguns: integer type conversions, unchecked indexes and memory leaks can all cause subtle problems. This is part of the appeal of C: shooting yourself in the foot does make you feel alive. Here I want to focus on ways to check for memory leaks for C programs.
Memory leaks come about when memory is claimed but is never released again. If this is done in a loop or during a long running program, the claimed memory adds up and eventually the system may run out of memory. A memory leak is less a problem if a program forgets to free a small amount of memory it only claims once: after program shut down, the operating system reclaims all memory anyhow. However, it does feels very dirty to not clean up after oneself. And I for one, am not a dirty boy.
Another reason to look for memory use and leaks is when you are programming for embedded devices. For these systems memory is very limited: in that world 500kB RAM is considered a massive amount of memory. I have been busy programming a scalable [audio search system called Olaf](https://github.com/JorenSix/Olaf) which targets both traditional computers, embedded systems and browsers (via WebAssembly). It is clear that memory use --- and memory leaks --- need to be kept in check to pull this of.
Now, these memory leaks might not be easy to spot by inspecting the code. There are tools which help to spot memory management problems. One of these is [valgrind](https://valgrind.org/) which is currently not easy to use on Apple system with ARM processors. Luckily there is an alternative which is probably already installed on macOS via the *XCode Command Line Tools* a command line tool aptly called `leaks`. To quote the [apple documentation on leaks](https://developer.apple.com/library/archive/documentation/Performance/Conceptual/ManagingMemory/Articles/FindingLeaks.html), leaks reports:
- the address of the leaked memory
- the size of the leak (in bytes)
- the contents of the leaked buffer
The most straightforward use of `leaks` is to run a program and generate a report after program shutdown. See below to run a memory leak inspection, in this case for the `bin/olaf_c` program which indexes an audio file in a key-value store. For [CI](https://en.wikipedia.org/wiki/Continuous_integration) purposes it is practical to know that `leaks` has an exit status of zero only when no leaks have been found. The exit status can be used in an automated test script to break a build if a leak is detected. The `--quiet` option can be practical in such setting.
```bash
leaks --atExit -- bin/olaf_c store audio.raw audio
```
In the case of Olaf I made a classic mistake: I had called `free()` on hash table but I needed to call the hash table destructor: `hash_table_destroy()` which freed not only the hash table itself but also all memory associated with the hash table entries. After a quick fix the `leaks` command showed no more leaks!
```
leaks Report Version: 4.0, multi-line stacks
Process 35293: 2200395 nodes malloced for 135146 KB
Process 35293: 2200171 leaks for 138371200 total leaked bytes.
STACK OF 1 INSTANCE OF 'ROOT LEAK: ':
5 dyld 0x1a16dbf28 ...
4 olaf_c 0x100db145c main ...
3 olaf_c 0x100db53c8 olaf_...
2 olaf_c 0x100db4400 olaf_...
1 olaf_c 0x100da5788 hash_...
0 libsystem_malloc.dylib 0x1a1874d88 _mall...
2200171 (132M) ROOT LEAK: [64]
2200170 (132M) [50348032]
2 (80 bytes) [32]
1 (48 bytes) [48]
```
Output of the `leaks` command which shows where a memory leak can be found.
## General takaways
- `leaks` is an easy to use memory leak inspector provided by Apple. It is an alternative for valgrind.
- Memory leaks can be checked automatically using the `leaks` exit status in a CI-script. This makes spotting leaks timely and more straightforward to fix.
- Programmers should at least once try to target embedded devices. It makes you conscious of the wealth of resources available when targeting modern computing devices.



---
## [Optimizing C code with profiling, algorithmic optimizations and 'ChatGPT SIMD'](https://0110.be/posts/Optimizing_C_code_with_profiling%2C_algorithmic_optimizations_and_%27ChatGPT_SIMD%27.md)
- Published: 2023-06-26T00:00:00Z
- Updated: 2025-11-29T14:17:26Z
- Author: Joren
- ID: 518
- Canonical: https://0110.be/posts/Optimizing_C_code_with_profiling%2C_algorithmic_optimizations_and_%27ChatGPT_SIMD%27
- Tags: [Code](https://0110.be/tags/Code.md), [Command Line Application](https://0110.be/tags/Command%20Line%20Application.md), [Music Information Retrieval](https://0110.be/tags/Music%20Information%20Retrieval.md), [UGent](https://0110.be/tags/UGent.md)
This post details how I went about optimizing a C application. This is about an audio search system called [Olaf](https://github.com/JorenSix/Olaf) which was made about **10 times faster** but contains some generally applicable steps for optimizing C code or even other systems. Note that it is not the aim to provide a detailed how-to: I want to provide the reader with a more high-level understanding and enough keywords to find a good how-to for the specific tool you might want to use. I see a few general optimization steps:
The zeroth step of optimization is to properly **question the need** and balance the potential performance gains against added code complexity and maintainability.
Once ensured of the need, the first step is to **measure the systems performance**. Every optimization needs to be measured and compared with the original state, having automazation helps.
Thirdly, the second step is to **find performance bottle necks**, which should give you an idea where optimizations make sense.
The third step is to **implement and apply** an optimization and measuring its effect.
Lastly, **repeat** steps zero to three until optimization targets are reached.
More specifically, for the [Olaf audio search system](https://github.com/JorenSix/Olaf) there is a need for optimization. Olaf indexes and searches through years of audio so a small speedup in indexing really adds up. So going for the next item on the list above: measure the performance. Olaf by default reports how quickly audio is indexed. It is expressed in the audio duration it can process in a single second: so if it reports `156 times realtime`, it means that 156 seconds of audio can be indexed in a second.
The next step is to find performance bottlenecks. A profiler is a piece of software to find such bottle necks. There are many options [gprof](https://en.wikipedia.org/wiki/Gprof) is a command line solution which is generally available. I am developing on macOS and have XCode available which includes the "Instruments - Time Profiler". Whichever tool used, the result of a profiling session should yield the time it takes to run each functions. For Olaf it is very clear which function needs optimization:
\
Fig: The results of profiling Olaf in XCode's time profiler. Almost all time is spend in a single function which is the prime target for optimization.
The function is a *max filter* which is ran many, many times. The implementation is using a naive approach to max filtering. There are more efficient algorithms available. In this case looking into the literature and implementing a more efficient algorithm makes sense. A very practical [paper by Lemire](https://arxiv.org/pdf/cs/0610046.pdf) lists several contenders and the 'van Herk' algorithm hits the sweet spot between being easy to implement and needing only a tiny extra amount of memory. The Lemire paper even comes with [example c max-filters](https://github.com/lemire/runningmaxmin). With only a slight change, [the code fits in Olaf](https://github.com/JorenSix/Olaf/blob/master/src/olaf_max_filter_perceptual_van_herk.c).
After implementing the change two checks need to be done: is the implementation correct and is it faster. Olaf comes with a number of functional and unit checks which provide some assurance of correctness and a built in performance indicator. Olaf improved from processing audio 156 times realtime to 583 times: a couple of times faster.
After running the profiler again, another method came up as the slowest:
````c
//Naive implementation
float olaf_ep_extractor_max_filter_time(float *array, size_t array_size) {
float max = -10000000;
for (size_t i = 0; i < array_size; i++) {
if (array[i] > max) max = array[i];
}
return max;
}
````
src: naive implementation of finding the max value of an array.
This is another part of the 2D max filter used in Olaf. Unfortunately here it is not easy to improve the algorithmic complexity: to find the maximum in a list, each value needs to be checked. It is however a good contender for [SIMD](https://en.wikipedia.org/wiki/Single_instruction,_multiple_data) optimization. With SIMD multiple data elements are processed in a single CPU instruction. With 32bit floats it can be possible to process 4 floats in a single step, potentially leading to a 4x speed increase - without including overhead by data loading.
Olaf targets microcontrollers which run an ARM instruction set. The SIMD version that makes most sense is the ARM Neon set of instructions. Apple Sillicon also provides support for ARM Neon which is a nice bonus. I asked ChatGPT to provide a ARM Neon improved version and it came up with the code below. Note that these type of simple functions are ideal for ChatGPT to generate since it is easily testable and there must be many similar functions in the ChatGPT training set. Also there are less ethical issues with 'trivial' functions: more involved code has a higher risk of plagiarization and improper attribution. The new average audio indexing speed is 832 times realtime.
````c
#if defined(__ARM_NEON)
#include
// ARM NEON implementation
float olaf_ep_extractor_max_filter_time(float *array, size_t array_size) {
assert(array_size % 4 == 0);
float32x4_t vec_max = vld1q_f32(array);
for (size_t j = 4; j < array_size; j += 4) {
float32x4_t vec = vld1q_f32(array + j);
vec_max = vmaxq_f32(vec_max, vec);
}
float32x2_t max_val = vpmax_f32(vget_low_f32(vec_max), vget_high_f32(vec_max));
max_val = vpmax_f32(max_val, max_val);
return vget_lane_f32(max_val, 0);
}
#else
//Naive implementation
#endif
````
src: a ARM Neon SIMD implementation of a function finding the max value of an array, generated by ChatGPT, licence unknown, informed consent unclear, correct attribution impossible.
Next, I asked ChatGPT for an SSE SIMD version targeting the x86 processors but this resulted in noticable *slowdown*. This might be related to the time it takes to load small vectors in SIMD registers. I did not pursue the SIMD SSE optimization since it is less relevant to Olaf and the first performance optimization was the most significant.
Finally, I went over the code again to see whether it would be possible exit a loop and simply skip calling `olaf_ep_extractor_max_filter_time` in most cases. I found a **condition which prevents most of the calls** without affecting the total results. This proved to be the most significant speedup: almost doubling the speed from about 800 times realtime to around 1500 times realtime. This is actually what I should have done before resorting to SIMD.
In the end Olaf was made about **ten times faster** with only two local, testable, targeted optimizations.
## General takeways
- Only think about optimization **if there is a need** and set a target: otherwise it is infinite.
- Try to **find a balance** between complexity, maintainability and performance.
- Changing **a naive algorithm to a more intelligent one** can have a significant performance increase. Check the literature for inspiration.
- Check for conditions to skip hot code paths **before trying fancy optimization** techniques.
- **Profilers** are crucial to identify where to optimize your code. Applying optimizations blindly is a waste of time.
- Try to keep optimizations **local and testable**. Sprinkling your code with small, hard to test performance oriented improvements might not be worthwile.
- **SIMD generated by ChatGPT** can be a very quick way to optimize critical, hot code paths. I would advise to only let ChatGPT generate small, common, easily testable code: e.g. finding the maximum in an array.
- Having only localized 'trivial' ChatGPT parts means you can **take them out** once it is clear that [you have copied code without proper attribution or licensing](https://www.reuters.com/technology/google-one-ais-biggest-backers-warns-own-staff-about-chatbots-2023-06-15/).
- The **use of SIMD can slow down** your code if you are not careful, measure the effects of your 'optimizations'!
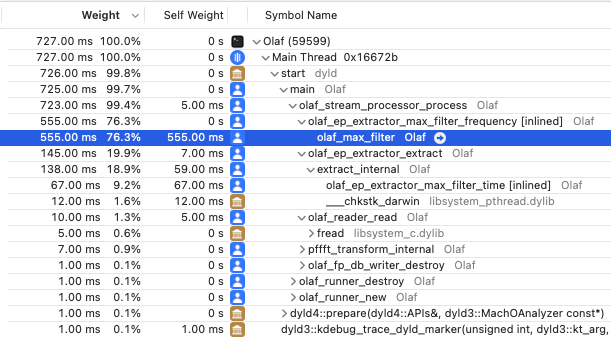
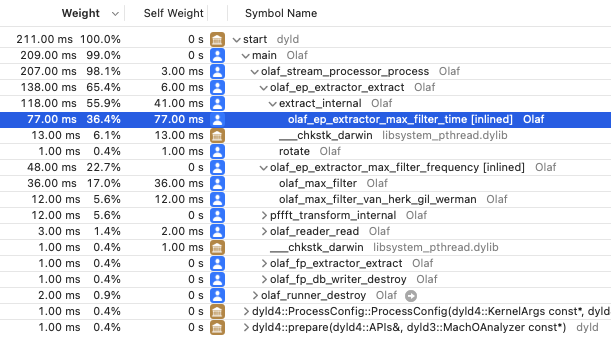
---
## [USB MIDI interface for the NeXTCube - ISPW board](https://0110.be/posts/USB_MIDI_interface_for_the_NeXTCube_-_ISPW_board.md)
- Published: 2023-05-05T00:00:00Z
- Updated: 2025-11-29T14:18:42Z
- Author: Joren
- ID: 514
- Canonical: https://0110.be/posts/USB_MIDI_interface_for_the_NeXTCube_-_ISPW_board
- Tags: [Code](https://0110.be/tags/Code.md), [Harde waren](https://0110.be/tags/Harde%20waren.md), [Muziek](https://0110.be/tags/Muziek.md), [UGent](https://0110.be/tags/UGent.md)
I have recently [restored a NeXTCube with an ISPW Ariel soundcard](https://0110.be/posts/Electronic_Music_and_the_NeXTcube_-_Running_MAX_on_the_IRCAM_Musical_Workstation) with the aim to put it in the hands of artists and researchers in the context of a [living electronic music instrument heritage project](https://asil.ugent.be/projects/#heritageinstruments). To make the cube talk to keyboards, synths or other audio workstations I have built a *MIDI interface for the NeXTcube*.
Fig: the NeXTCube with the Ariel ProPort and MIDI input/output interface.
Recently, I was able to restore a NeXTCube and install an early version of MAX - a graphical music programming environment. However, a crucial part of the system was missing: there was no way to do [MIDI input/output](https://en.wikipedia.org/wiki/MIDI). MIDI is used to connect controllers, keyboards, synthesizers or other musical instruments to the audio workstation. The NeXTCube itself has [a serial port which allows users to connect MIDI devices](https://www.nextcomputers.org/NeXTfiles/Docs/connectivity.pdf). Next to the serial port on the mainboard, the NeXTCube I am working with also has a RS-422 serial port on the ISPW 'soundcard'. The serial port uses RS-422 and mini DIN 8 connectors which provide MIDI input and output. While the MIDI data bytes are transmitted according to spec, the *connector and the electrical signals are not compatible with standard MIDI*.
Fig: the IRCAM/Ariel ISPW soundcard with mini DIN-8 RS-433 serial port on the right.
For MIDI I/O we need a device which allows to connect the RS-422 MIDI to both legacy MIDI devices and to computers via USB MIDI. If a MIDI event arrives from the NeXTCube's RS-422 it needs to be passed through to the USB and legacy MIDI ports and the other way around. The [Teensy platform](https://www.pjrc.com/teensy/) is ideal: it supports hardware serial and USB MIDI. In this retro-computing project, it seems wasteful to use the 600MHz Teensy 4.0 only for message passing: the Teensy has much more computing power than NeXTcube but it is cheap, easy to program, available and practical.
The RS-422 serial port uses --6V to 6V logic which needs to be transformed to the 0V to 3.3V logic for the Teensy microcontroller. A PCB provides this capability and is connected to a hardware serial port of the Teensy. The pinout of the RS-422 port was measured via a scope and matched the [documentation](https://allpinouts.org/pinouts/connectors/serial/apple-macintosh-rs-422-serial/). The Teensy has an `usbMIDI` mode and can present itself as a standard MIDI device to a PC. Two [opto-isolated legacy MIDI DIN-5 ports](https://www.sparkfun.com/products/12898) were connected to another hardware serial port. The software on the Teensy conducts the "three-way MIDI message passing":\[midi_passthrough.ino\].
Vid: Max/FTS FM synth reacting to USB MIDI input.
The electronics were fixed into a reused metal enclosure. The front panel of the enclosure was replaced by a custom 3D printed panel. The front contains the RS-422 port, two MIDI DIN 5 ports and a micro usb port either for power alone or MIDI messages and power. Feel free to check out the "OpenSCAD design with a level MINI DIN8 hole":\[midi_box.scad\].
With a working MIDI interface for the NeXTcube allows interfacing with MIDI keyboards and controllers. It can also be used to measure roundtrip latency. MIDI to sound latency determines how long it takes between pressing a MIDI key and hearing sound. MIDI to MIDI roundtrip latency determines how long it takes to process, parse and return a MIDI message. For a responsive, reliable system both types of latencies should be constant and preferably in the range of 10ms or below.
Fig: Measured MIDI roundtrip latency on the ISPW board for the NeXTCube.
Measuring the MIDI roundtrip latency shows that the system is able to respond in 3.6+--0.4 ms (N=300). A combination of a MAX patch and "Teensy firmware":\[next_midi_roundtrip_latency.ino\] was used to measure this automatically. The MIDI-to-audio latency was measured a few times manually and always was around 13ms. These figures show that the system is ideal for low-latency real-time music making in its default configuration. In MAX the audio buffer sizes could be reduced to achieve an even lower latency but with the risk of running into buffer underruns and audio glitches.
Small [discussion the USB MIDI interface for the NeXTCube on Hackaday](https://hackaday.com/2023/05/16/midi-interface-for-nextcube-plugs-into-the-past/#comments)
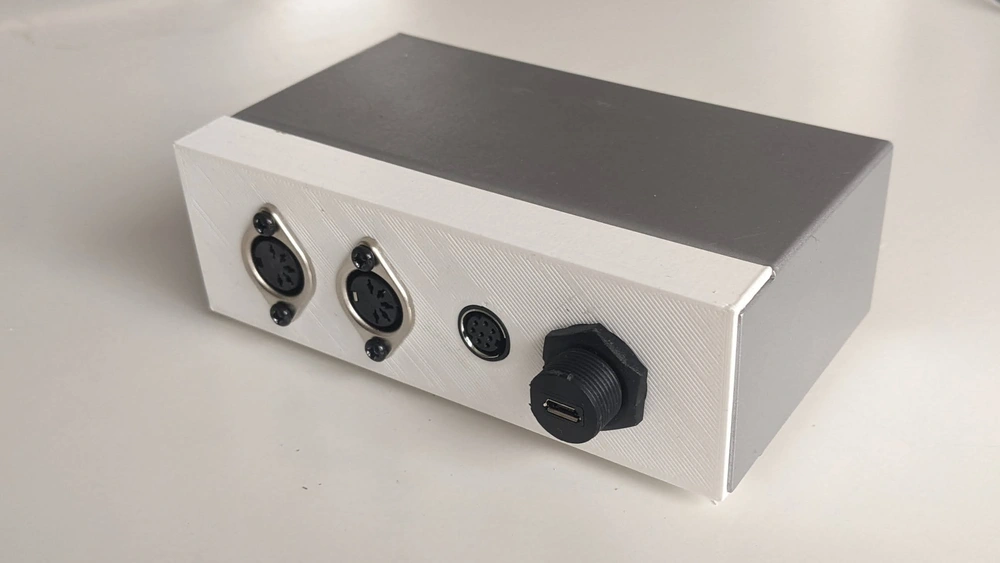
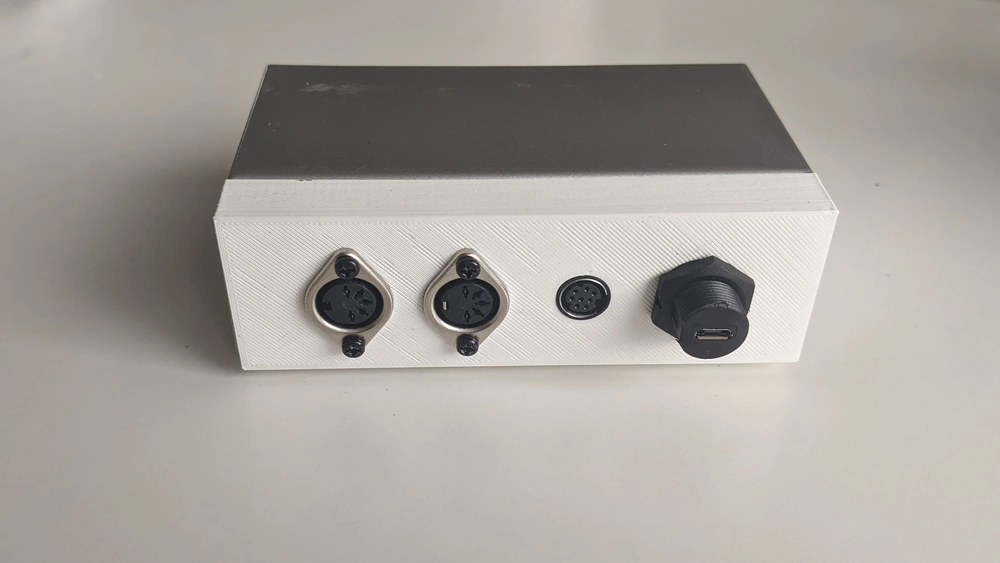
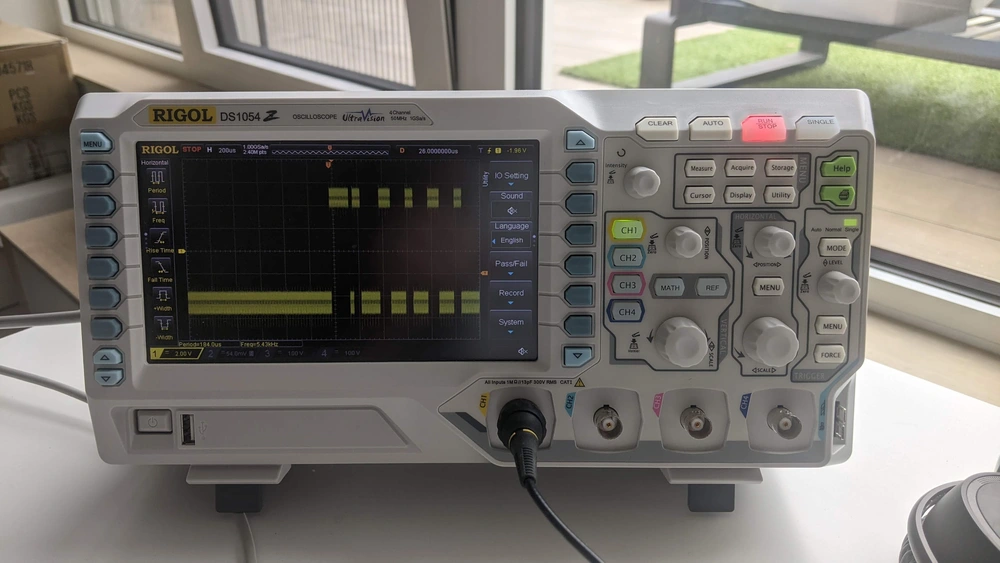
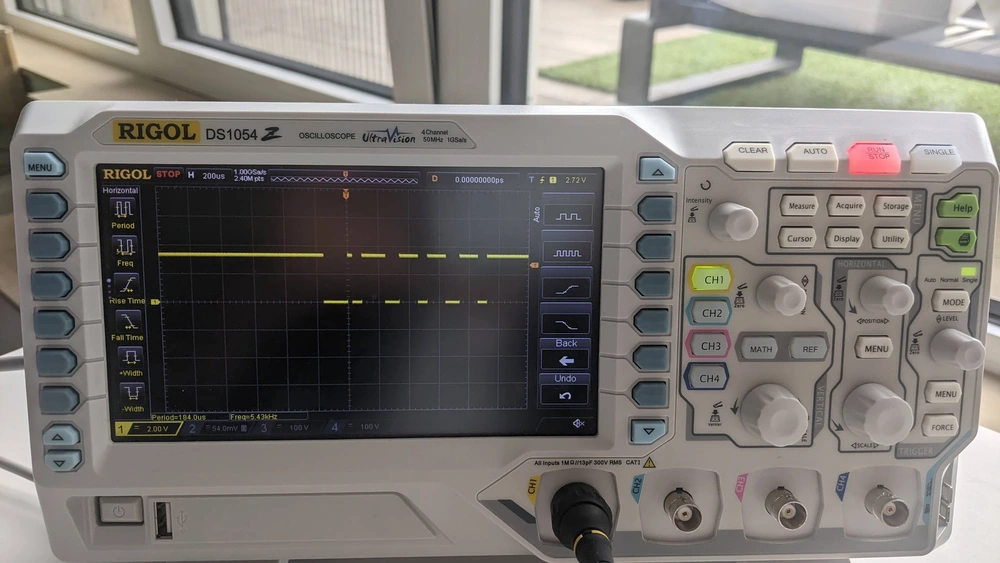
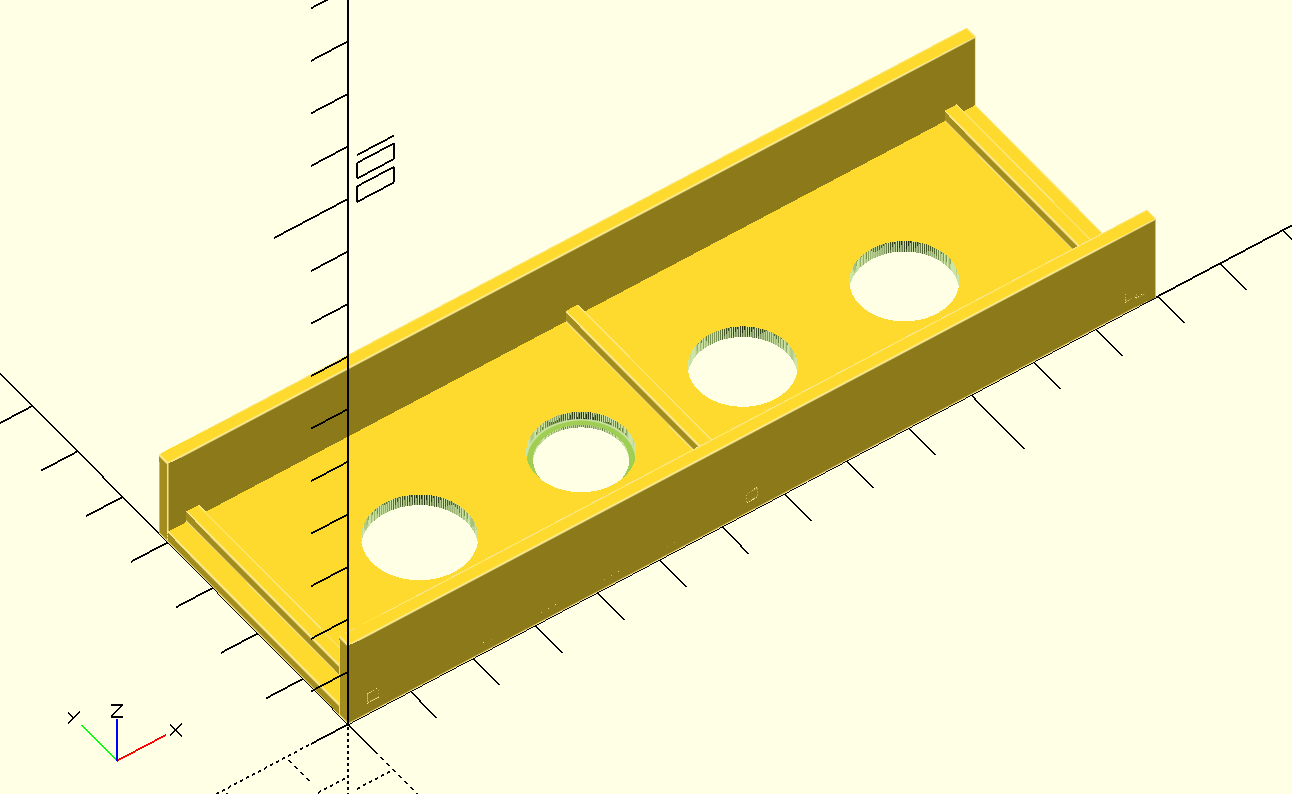

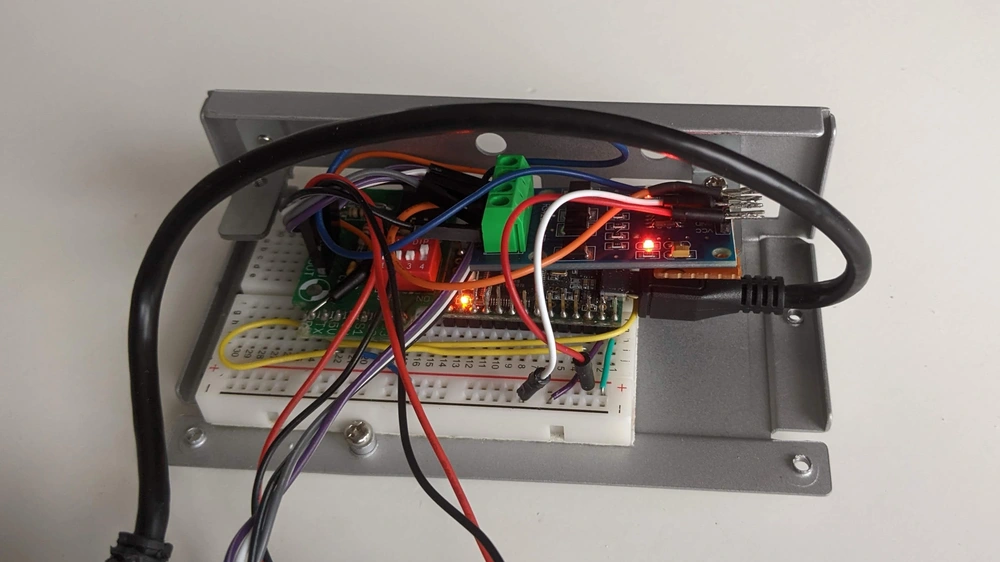
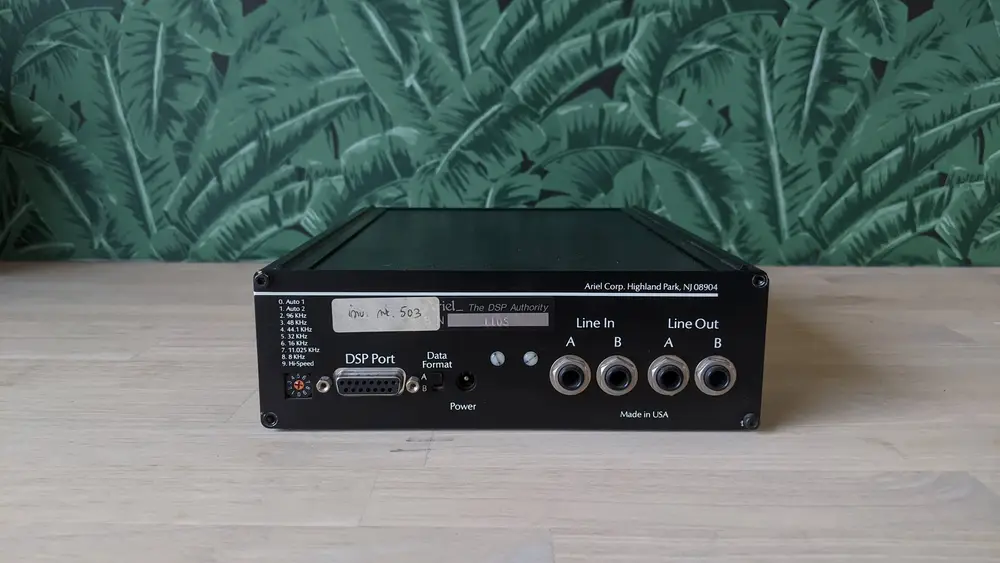
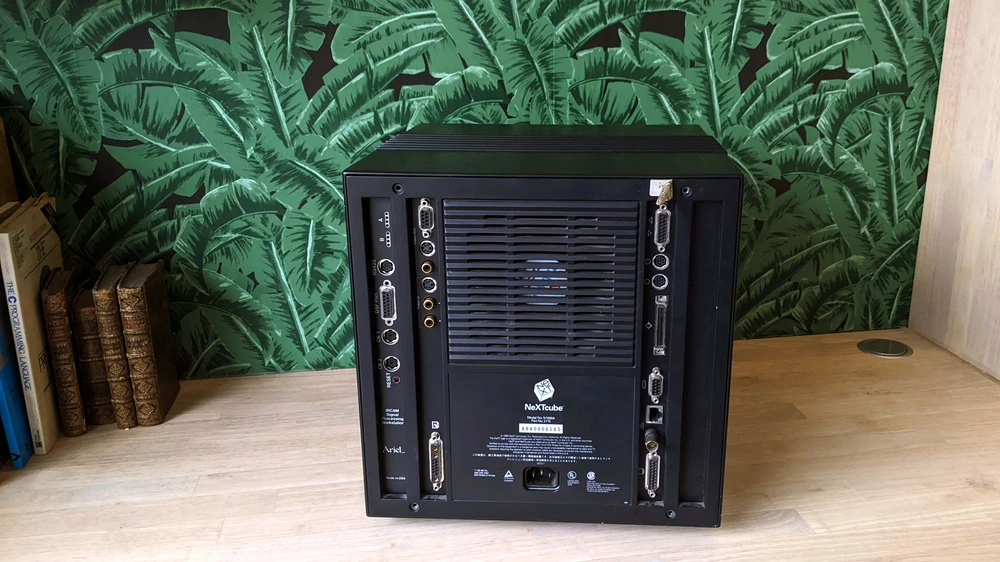
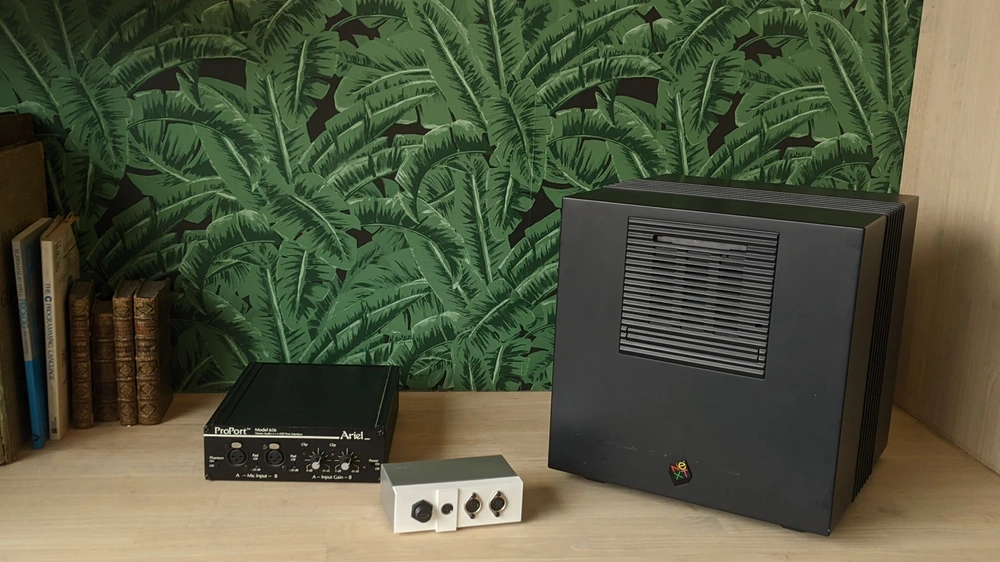
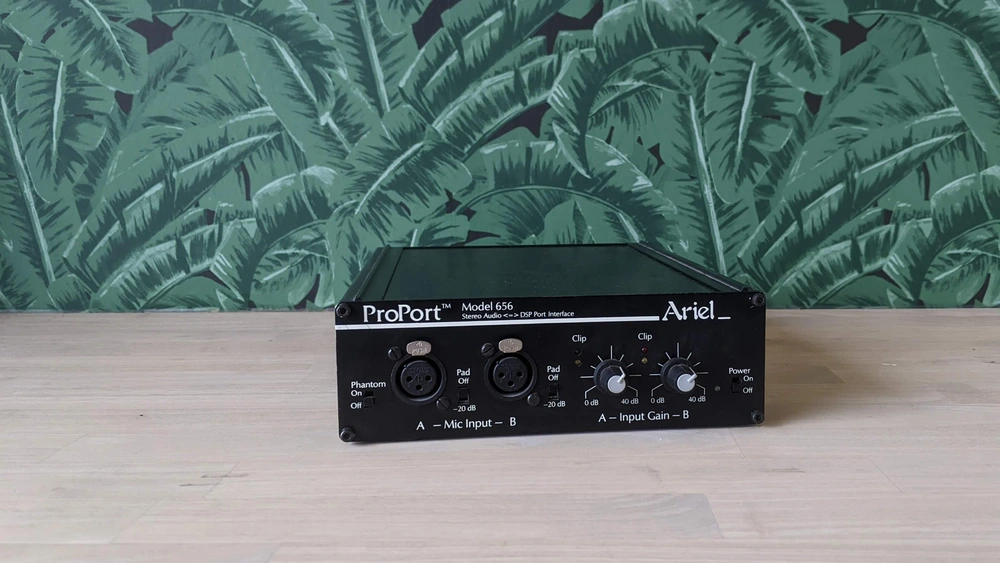
- [ariel\_soundcard\_IRCAM\_ISPW.jpg](https://0110.be/files/attachments/514/ariel_soundcard_IRCAM_ISPW.jpg)
- [midi\_box.scad](https://0110.be/files/attachments/514/midi_box.scad)
- [midi\_roundtrip\_latency.svg](https://0110.be/files/attachments/514/midi_roundtrip_latency.svg)
- [midi\_passthrough.ino](https://0110.be/files/attachments/514/midi_passthrough.ino)
- [next\_midi\_roundtrip\_latency.ino](https://0110.be/files/attachments/514/next_midi_roundtrip_latency.ino)
- [midi\_roundtrip\_test.pat](https://0110.be/files/attachments/514/midi_roundtrip_test.pat)
- [nextcube\_midi\_proport.webp](https://0110.be/files/attachments/514/nextcube_midi_proport.webp)
- [midi\_box\_example\_web.webp](https://0110.be/files/attachments/514/midi_box_example_web.webp)
- [midi\_box\_example\_web.mp4](https://0110.be/files/attachments/514/midi_box_example_web.mp4)
---
## [mot - MIDI and OSC Tools - Sending UDP messages from the browser](https://0110.be/posts/mot_-_MIDI_and_OSC_Tools_-_Sending_UDP_messages_from_the_browser.md)
- Published: 2023-01-26T00:00:00Z
- Updated: 2025-12-03T14:20:31Z
- Author: Joren
- ID: 504
- Canonical: https://0110.be/posts/mot_-_MIDI_and_OSC_Tools_-_Sending_UDP_messages_from_the_browser
- Tags: [Code](https://0110.be/tags/Code.md), [UGent](https://0110.be/tags/UGent.md)
As a way to get to know the [Rust programming language](https://www.rust-lang.org/) I have developed a couple of practical tools for OSC and MIDI debugging. OSC and MIDI are protocols which are almost always used for applications dealing with music. In these applications latency should be kept in check. Languages with garbage collection (Java, Go) and scripting languages (Ruby, Python, ...) are hard to tune for low-latency applications and do not really have real-time guarantees. Rust, as a modern alternative for C/C, is a better fit for cross platform CLI low-latency applications.
The [MIDI and OSC Tools (mot)](https://github.com/JorenSix/mot) are bundled in a single CLI application. The application includes:
- `midi_echo` prints MIDI messages coming from a connected MIDI device.
- `osc_echo` prints OSC messages arriving at a certain UDP port.
- `midi_to_osc` a MIDI to OSC bridge which sends MIDI messages coming from a connected MIDI device to an OSC target.
- `osc_to_mid` an OSC to MIDI bridge which receives OSC messages and sends them to a connected MIDI device.
- `midi_roundtrip_latency` measure MIDI round-trip latency.
This opens a couple of possibilities which are discussed below.
#### Sending UDP messages from the browser
One of the ways to send OSC messages from a browser to a local network is by using the MIDI out capability of browsers and - using mot - translating MIDI to OSC an example can be seen below.
Fig: sending an UDP message to a network from a Browser using a the mot MIDI to OSC bridge, click the image for a better readable version.
#### Measuring UDP message latency
Both MIDI and OSC can be seen as rather general data encapsulation protocols with wide support in terms of libraries and cross platform support. Their value goes beyond mere musical applications. The same holds for `mot`. In this example we are using `mot` to measure UDP message latency between two hosts.
On the first host we send MIDI messages from MIDI device 0 over OSC to another host with e.g. `mot midi_to_osc 192.168.1.12:3000 /m 0`. At the other host we receive the OSC messages and send them to a virtual device: `mot osc_to_midi 192.168.1.12:3000 /m 6666`.
At the second host we return messages from the virtual device to the first host: `mot midi_to_osc 192.168.1.4:5000 /m 1`. Perhaps you first need to do `mot midi_to_osc -l` to find the index of the virtual device. As a final step the messages can be received at the first host and returned to the original midi device. On the first host: `mot osc_to_midi 192.168.1.4:5000 /m 0`.
If the original MIDI device is a Teensy running the "roundtrip patch" then finally the roundtrip time is accurately measured and shown in the serial console. I am sure the previous text is cromulent, totally not contrived and not confusing. Anyway, to make it more confusing: this is what happens when you use a single host to do midi to osc to midi to osc to midi and use the loopback networking device:
Fig: MIDI to OSC to MIDI to OSC to MIDI roundtrip latency.
#### Visualizing sensor data in the browser
Fig: Sensor data as MIDI.
When capturing sensor data on microcontrollers, data can be encoded into MIDI. This makes almost any sensor practically useful in Ableton Live or similar environments. It also makes it compatible with all other MIDI supporting devices. With `mot` it becomes trivial to send MIDI encoded sensor data over OSC e.g. to a central place to log that data.
Another use case is to visualize the incoming data in real-time. A single web page which reads and visualizes incoming MIDI-sensor data becomes much more useful if streams from other devices can be visualized as well with the `mot midi_to_osc` and `mot osc_to_midi` commands.
#### Cross-platform support
With the Rust compiler it is relatively easy to cross-compile for different targets. There is however an important limitation in `mot`. Windows has no support for virtual MIDI ports which limits the usefulness of `mot` on that platform.
Check the [mot - MIDI and OSC Tools GitHub repository](https://github.com/JorenSix/mot) for the software. Perhaps also of interest for MIDI debugging are [VMPK](https://vmpk.sourceforge.io/), [MIDI Monitor](https://www.snoize.com/midimonitor/) and [the web MIDI tools](https://arachsys.github.io/webmidi/).
---
## [Updates for TarsosDSP](https://0110.be/posts/Updates_for_TarsosDSP.md)
- Published: 2023-01-20T00:00:00Z
- Updated: 2023-01-27T15:51:31Z
- Author: Joren
- ID: 503
- Canonical: https://0110.be/posts/Updates_for_TarsosDSP
- Tags: [Code](https://0110.be/tags/Code.md), [Music Information Retrieval](https://0110.be/tags/Music%20Information%20Retrieval.md), [TarsosDSP](https://0110.be/tags/TarsosDSP.md), [UGent](https://0110.be/tags/UGent.md)
TarsosDSP is a Java library for audio processing I have started working on more than 10 years ago. The aim of TarsosDSP is to provide an easy-to-use interface to practical music processing algorithms. Obviously, I have been using it myself over the years as my go-to library for audio-processing in Java. However, a number of gradual changes in the java ecosystem made TarsosDSP more and more difficult to use.
Since I have apparently not been the only one using it, there was a need to give it some attention. During the last couple of weeks I have found the time to give it this much needed attention. This resulted in a number of updates, some of the changes include:
- Change of the build system from Apache Ant to Gradle
- Make use of Java Modules to make TarsosDSP compatible with the ModulePath introduced in Java 9.
- Packaged the software into a maven compatible format, which makes it easy to use as a dependency.
- CI with GitHub actions to automatically build and test the software.
- Updated some examples shipped with the TarsosDSP. I have still still some examples to verify.
- Improved handling of errors on reading audio via ffmpeg
\
Fig: The updated TarsosDSP release contains many CLI and GUI example applications.
Notably **the code of TarsosDSP has not changed much** apart from some cosmetic changes. This backwards compatibility is one of the strong points of Java. With this update I am quite confident that TarsosDSP will also be usable during the next decade as well.
Please check out the updated [TarsosDSP repository on GitHub](https://github.com/JorenSix/TarsosDSP).
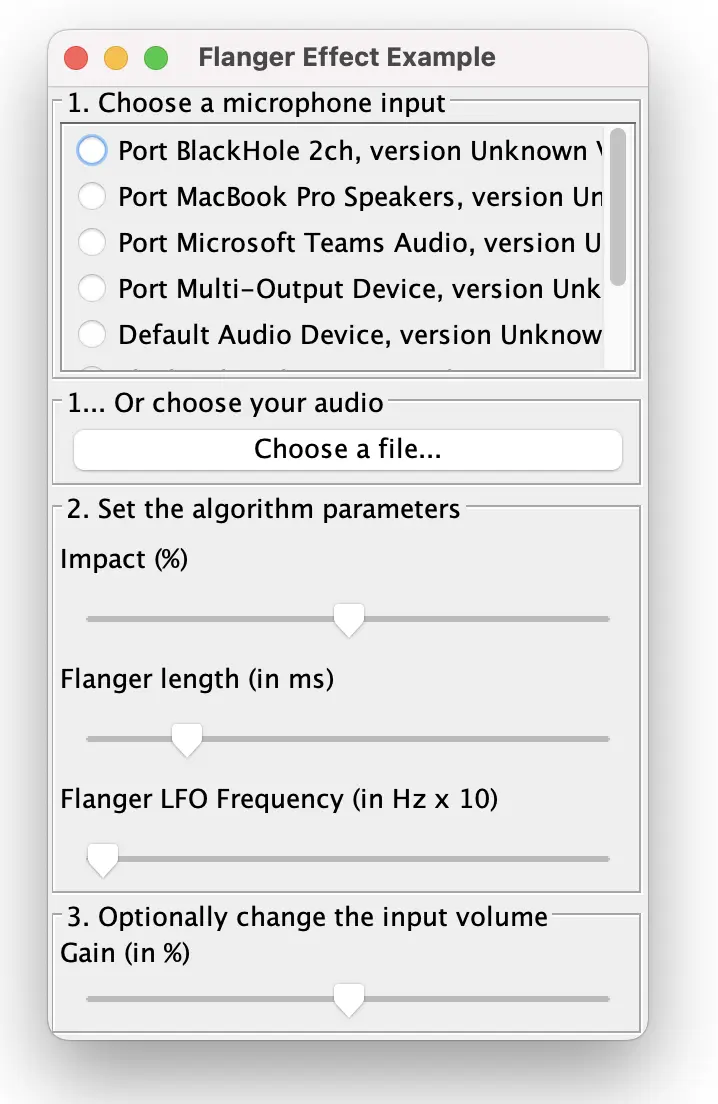
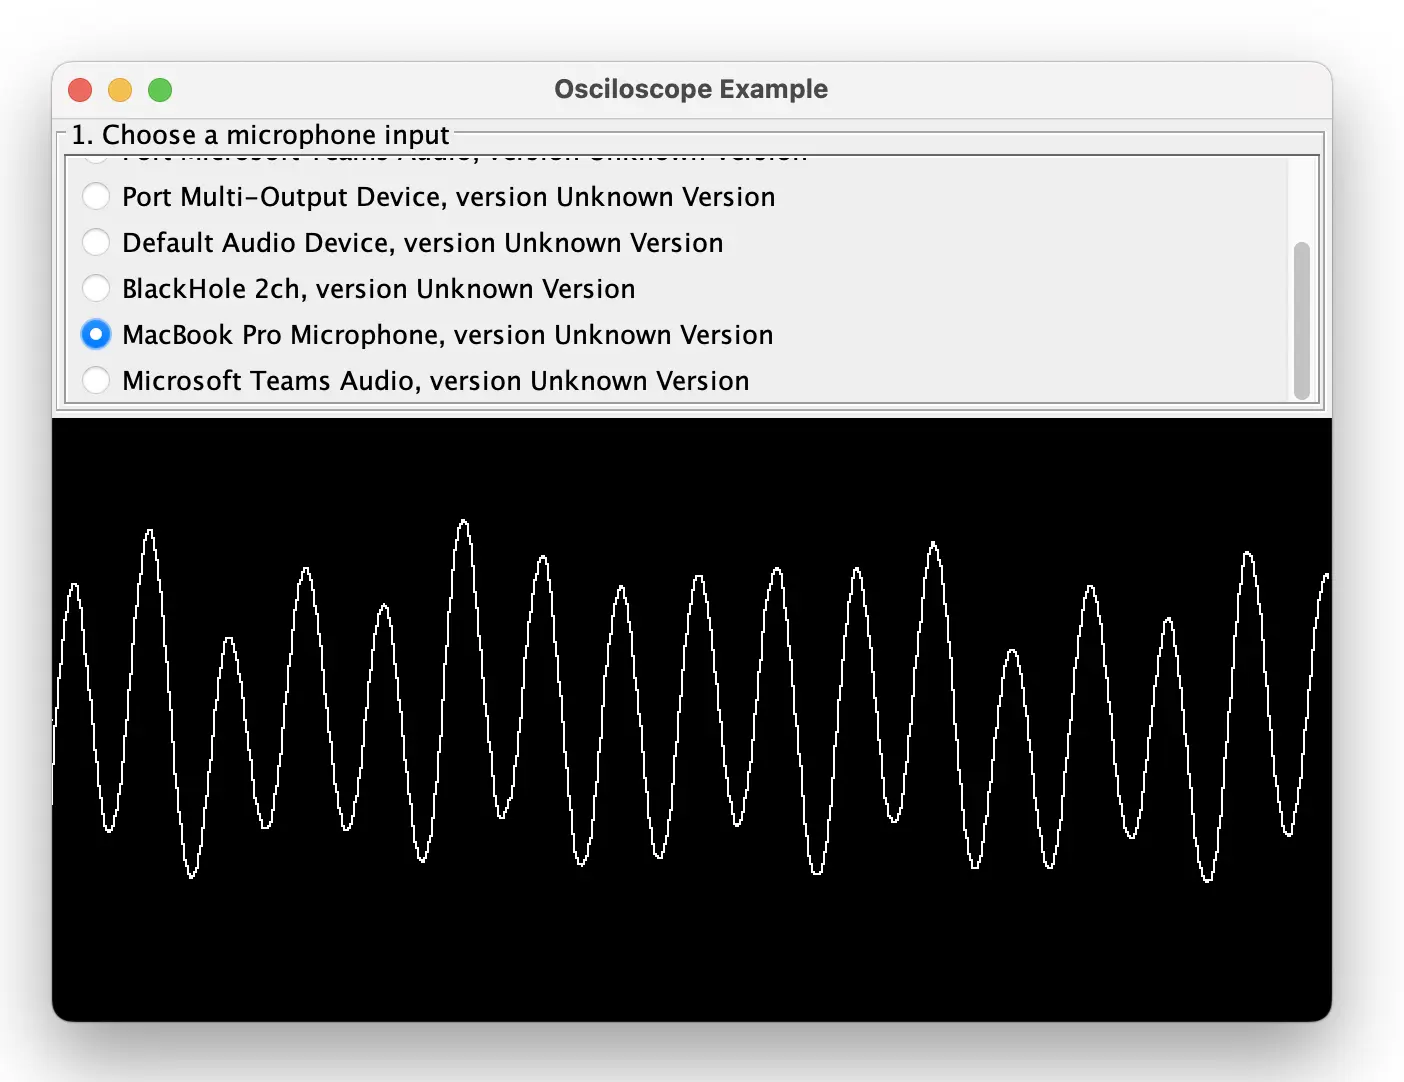

---
## [Crossplatform JNI builds with Zig](https://0110.be/posts/Crossplatform_JNI_builds_with_Zig.md)
- Published: 2023-01-13T00:00:00Z
- Updated: 2023-01-19T16:33:16Z
- Author: Joren
- ID: 500
- Canonical: https://0110.be/posts/Crossplatform_JNI_builds_with_Zig
- Tags: [Code](https://0110.be/tags/Code.md), [Music Information Retrieval](https://0110.be/tags/Music%20Information%20Retrieval.md), [UGent](https://0110.be/tags/UGent.md)
JNI is a way to use C or C code from Java and allows developers to reuse and integrate C/C in Java software. In contrast to the Java code, C/C code is *platform dependent and needs to be compiled for each platform/architecture*. Also it is generally not a good idea to make users compile a C/C library: it is best provide precompiled libraries. As a developer it is, however, a pain to provide binaries for each platform.
With the dominance of x86 processors receding the problem of having to compile software for many platforms is becoming more pressing. It is not unthinkable to want to support, for example, intel and M1 macOS, ARM and x86_64 Linux and Windows. To support these platforms you would either need access to such a machine with a compiler or configure a cross-compiler for each system: *both are unpractical*. Typically setting up a cross-compiler can be time consuming and finicky and virtual machines can be tough to setup. There is however an alternative.
[Zig](https://ziglang.org) is a programming language but, thanks to its support for C/C, it also ships with an *easy-to-use cross-compiler which is of interest here even if you have no intention to write a single line of Zig code*. The built-in cross-compiler allows to [target many platforms](https://ziglang.org/download/0.8.0/release-notes.html#Support-Table) easily.
#### The Zig cross-compiler in practice
Cross compilation of C code is possible by simply *replacing the `gcc` command with `zig cc`* and adding a target argument, e.g. for targeting a Windows. There is more general information on [zig as a cross-compiler here](https://zig.news/kristoff/cross-compile-a-c-c-project-with-zig-3599).
*Cross-compiling a JNI library is not different to compiling other libraries.* To make things concrete we will cross-compile a library from a typical JNI project: [JGaborator](https://github.com/JorenSix/JGaborator) packs [the C/C library gaborator](https://gaborator.com). In this case the C/C code does a computationally intensive spectral transformation of time domain data. The commands below create an x86_64 Windows DLL from a macOS with zig installed:
``` {style="overflow-x:scroll"}
bash
#wget https://aka.ms/download-jdk/microsoft-jdk-17.0.5-windows-x64.zip
#unzip microsoft-jdk-17.0.5-windows-x64.zip
#export JAVA_HOME=`pwd`/jdk-17.0.5+8/
git clone --depth 1 https://github.com/JorenSix/JGaborator
cd JGaborator/gaborator
echo $JAVA_HOME
JNI_INCLUDES=-I"$JAVA_HOME/include"\ -I"$JAVA_HOME/include/win32"
zig cc  -target x86_64-windows-gnu -c -O3 -ffast-math -fPIC pffft/pffft.c -o pffft/pffft.o
zig cc  -target x86_64-windows-gnu -c -O3 -ffast-math -fPIC -DFFTPACK_DOUBLE_PRECISION pffft/fftpack.c -o pffft/fftpack.o
zig c++ -target x86_64-windows-gnu -I"pffft" -I"gaborator-1.7"  $JNI_INCLUDES -O3\
        -ffast-math -DGABORATOR_USE_PFFFT  -o jgaborator.dll jgaborator.cc pffft/pffft.o pffft/fftpack.o
file jgaborator.dll
# jgaborator.dll: PE32+ executable (console) x86-64, for MS Windows
```
Note that, when cross-compiling from macOS, *to target Windows a Windows JDK is needed*. The windows JDK has other header files like `jni.h`. Some commands to download and use the JDK are commented out in the example above. Also note that targeting Linux from macOS seems to work with the standard macOS JDK. This is probably due to shared conventions regarding compilation of libraries.
To target other platforms, e.g. ARM Linux, there are *only two things that need to be changed*: the `-target` switch should be changed to `aarch64-linux-gnu` and the name of the output library should be (by Linux convention) changed to `libjgaborator.so`. During the build step of JGaborator a list of target platforms it iterated and a total of 9 builds are packaged into a single Jar file. There is also a bit of supporting code to load the correct version of the library.
Using a GitHub action or similar CI tools this cross compilation with zig can be automated to run on a software release. For Github the [Setup Zig](https://github.com/marketplace/actions/setup-zig) action is practical.
#### Loading the correct library
In a first attempt I tried to detect the operating system and architecture of the environment to then load the library but eventually decided against this approach. Mainly because you then need to keep an exhaustive list of supporting platforms and this is *difficult, error prone and decidedly not future-proof*.
In my second attempt I simply *try to load each precompiled library* limited to the sensible ones - only dll's on windows - until a matching one is loaded. The rationale here is that the system itself knows best which library works and failing to load a library is computationally cheap. There is [some code to iterate all precompiled libraries in a JAR-file](https://github.com/JorenSix/JGaborator/blob/master/src/main/java/be/ugent/jgaborator/util/ZigNativeUtils.java#L106) so supporting an additional platform amounts to adding a [precompiled library in the JAR folder](https://github.com/JorenSix/JGaborator/tree/master/src/main/resources/jni): there is no need to be explicit in the Java code about architectures or OSes.
Trying multiple libraries has an additional advantage: this allows to ship multiple versions targeting the same architecture: e.g. one with additional acceleration libraries enabled and one without. By sorting the libraries alphabetically the first, then, should be the one with acceleration and the fallback without. In the case of JGaborator for mac aarch64 there is one compiled with `-framework Accelerate` and one compiled by the Zig cross-compiler without.
#### Takehome messages
- If you find yourself cross-compiling C or C for many platforms, **consider the Zig cross-compiler**. Even when you have no intention to write a single line of Zig code.
- For JNI and Java the [JGaborator source code](https://github.com/JorenSix/JGaborator) might offer some **inspiration to pre-compile and load libraries** for many platforms with little effort.
- CI tools can help to verify builds and **automate Zig cross-compilation**.
- If you build for Windows make sure to include windows header-files even when there are no compilation errors using UNIX-header files.
If you find this valuable [consider sponsoring the work on Zig](https://github.com/sponsors/ziglang)
---
## [SyncSink.wasm - Synchronize media files by audio-to-audio alignment](https://0110.be/posts/SyncSink.wasm_-_Synchronize_media_files_by_audio-to-audio_alignment.md)
- Published: 2022-09-06T00:00:00Z
- Updated: 2025-11-29T14:23:54Z
- Author: Joren
- ID: 493
- Canonical: https://0110.be/posts/SyncSink.wasm_-_Synchronize_media_files_by_audio-to-audio_alignment
- Tags: [Code](https://0110.be/tags/Code.md), [ISMIR](https://0110.be/tags/ISMIR.md), [UGent](https://0110.be/tags/UGent.md)
I have built a tool for audio-to-audio alignment. It has applications for synchronization of media files. It works in the browser and you can [synchronize your media files here with SyncSink.wasm](https://0110.be/attachment/cors/sync/sync.html). SyncSink.wasm does the following:
1. From an incoming media-file audio is extracted, downmixed to mono and and resampled. This is done with [ffmpeg.audio.wasm](https://github.com/JorenSix/ffmpeg.audio.wasm) a wasm version of ffmpeg.
2. For each audio track, fingerprints are extracted. These fingerprints reduce the the search space for alignment drastically.
3. Each list of fingerprints is aligned with the list of fingerprints from the reference. Resulting in a rough alignment
4. Cross correlation is done to refine the alignment resulting in sample accurate results.
Fig: media synchronization with audio-to-audio alignment.
It supports small time-scale adjustments of around 5%: audio alignment can still be found if audio speed differs a bit.
Some potential use cases where it might be of use:
- To stitch partially overlapping audio recordings together resulting in a single long audio recording.
- To synchronize multiple independent video recordings of the same event each with an audio recording of the environment.
- To align a high quality microphone recording with video/low-quality audio recording of the same event. The low quality audio recorded with a camera can then be replaced with the high quality microphone audio.
The code can be found in the [SyncSink.wasm GitHub repository](https://github.com/JorenSix/SyncSink.wasm)
- [media\_sync\_recording.apng](https://0110.be/files/attachments/493/media_sync_recording.apng)
---
## [Using Java LMDB on Apple Sillicon or other unsupported platforms](https://0110.be/posts/Using_Java_LMDB_on_Apple_Sillicon_or_other_unsupported_platforms.md)
- Published: 2022-05-25T00:00:00Z
- Updated: 2022-05-31T07:28:10Z
- Author: Joren
- ID: 491
- Canonical: https://0110.be/posts/Using_Java_LMDB_on_Apple_Sillicon_or_other_unsupported_platforms
- Tags: [Code](https://0110.be/tags/Code.md), [UGent](https://0110.be/tags/UGent.md)
[LMDB](http://www.lmdb.tech/doc/) is a fast key value store, ideal to store and query sorted data with small keys and values. LMDB is a pure C library but often used from other programming languages via some type of bindings. These bindings are 'bridges' between languages and are automatically present on supported platform. On new or unsupported platforms, however, you need to build a this bridge yourself.
This blog post is about getting [java-lmdb](https://github.com/lmdbjava/lmdbjava) working on such unsupported platform: arm64. The arm64 platform is much more popular since the introduction of the Apple silicon - M1 platform. On Apple M1 the default architecture of Docker images is also aarch64.
The java-lmdb project uses [JNR-FFI](https://github.com/jnr/jnr-ffi) in the background. This is only [one of the many ways to bridge Java and other programming languages](https://developer.okta.com/blog/2022/04/08/state-of-ffi-java). The new version of JNR-FFI supports the arm64. Currently, only the ['SNAPSHOT' version of java-lmdb](https://oss.sonatype.org/content/repositories/snapshots/org/lmdbjava/) uses this version. So the dependencies need to be changed to e.g. (when using Gradle):
repositories {
mavenCentral()
maven { url 'https://oss.sonatype.org/content/repositories/snapshots' }
}
dependencies {
implementation group: 'org.lmdbjava', name: 'lmdbjava', version: '0.8.3-SNAPSHOT'
}
Next you need to build the `lmdb` library for your platform and copy it to a location where Java looks for it. This only works when compilers are already available on your system. In macOS you might need to install the XCode command line tools:
#xcode-select --install
git clone --depth 1 https://git.openldap.org/openldap/openldap.git
cd openldap/libraries/liblmdb
make -e SOEXT=.dylib
cp liblmdb.dylib ~/Library/Java/Extensions
On Debian `aarch64` the procedure is similar but a different extension is used (`.so`):
#apt install build-essential
git clone --depth 1 https://git.openldap.org/openldap/openldap.git
cd openldap/libraries/liblmdb
make
mv liblmdb.so /lib
Finally, to use the library in a JAR-file is might be needed to allow lmdbjava to access some parts of the JRE:
java -jar your_jar.jar --add-opens=java.base/java.nio=ALL-UNNAMED --add-opens=java.base/sun.nio.ch=ALL-UNNAMED
A very similar setup was needed for the [docker version of Panako](https://github.com/JorenSix/Panako/blob/master/resources/scripts/Dockerfile).
---
## [An audio focused ffmpeg build for the web](https://0110.be/posts/An_audio_focused_ffmpeg_build_for_the_web.md)
- Published: 2022-02-24T00:00:00Z
- Updated: 2025-11-29T14:24:41Z
- Author: Joren
- ID: 488
- Canonical: https://0110.be/posts/An_audio_focused_ffmpeg_build_for_the_web
- Tags: [Code](https://0110.be/tags/Code.md), [Command Line Application](https://0110.be/tags/Command%20Line%20Application.md), [UGent](https://0110.be/tags/UGent.md)
I have prepared **an audio focused ffmpeg build for the web** which facilitates browser based audio applications. I have prepared three demos:
1. [Audio transcoding and playback demo](https://0110.be/attachment/cors/ffmpeg.audio.wasm/transcode.html): converts any media file into audio compatible with the Web Audio API for in-browser playback or analysis.
2. [High quality time-stretching or pitch-shifting](https://0110.be/attachment/cors/ffmpeg.audio.wasm/pitch_speed_tempo_mod.html): demonstrates how pitch and tempo can be modified independently thanks to the [Rubber Band Library](https://breakfastquay.com/rubberband/audio).
3. [Basic media info](https://0110.be/attachment/cors/ffmpeg.audio.wasm/basic_media_info.html): gives information about the streams and encodings used in a media file.
Fig: [audio transcodinging in the browser](https://0110.be/attachment/cors/ffmpeg.audio.wasm/transcode.html). A `wav` file is converted to an `mp3`.
A bit more about the rationale behind this effort: Browsers have become practical platforms for audio processing applications thanks to the combination of [Web Audio API](https://developer.mozilla.org/en-US/docs/Web/API/Web_Audio_API) , performant Javascript environment and [WebAssembly](https://webassembly.org/). Have a look, for example, at [essentia.JS](https://mtg.github.io/essentia.js).
However, browsers only support a small subset of audio formats and container formats. Dealing with many (legacy) audio formats is often a rather painful experience since there are so many media container formats which can contain a surprising variation of audio (and video) encodings. In short, decoding audio for in-browser analysis or playback is often problematic.
Luckily there is [FFmpeg](https://ffmpeg.org) which claims to be *'a complete, cross-platform solution to record, convert and stream audio and video'*. It is, indeed, capable to decode almost any audio encoding known to man from about any container. Additionally, it also contains tools to filter, manipulate, resample, stretch, ... audio. FFmpeg is a must-have when working with audio. It would be ideal to have FFmpeg running in a browser...
Thanks to [WebAssembly](https://webassembly.org/) ffmpeg can be compiled for use in the browser. There have been [efforts](https://github.com/ffmpegwasm/ffmpeg.wasm-core) [to](https://github.com/ffmpegwasm/ffmpeg.wasm) [get](https://github.com/wide-video/ffmpeg-wasm) ffmpeg working in the browser. These efforts have been focusing on the complete ffmpeg suite. Now I have prepared **an audio focused ffmpeg build for the web** based on these efforts. I have selected only audio parts which makes the resulting .wasm binary four to five times smaller (from \~20MB to \~5MB). I also provided a simplified Javascript wrapper. The project brings audio decoding to the browser but also audio filtering, transcoding, pitch-shifting, sample rate conversions, audio channel manipulation, and so forth. It is also capable to extract audio streams from video container formats.
Next to the pure functionality of ffmpeg there are general advantages to run audio analysis software in the browser at client-side:
- **Ease-of-use**: no software needs to be installed. The runtime comes with a compatible browser.
- **Privacy**: Since media files are not transferred it is impossible for the system running the service to make unauthorised copies of these files. There is no need to trust the service since all processing happens locally, in the browser.
- **Speed**: Downloading and especially uploading large media files takes a while. When files are kept locally, processing can start immediately and no time is wasted sending bytes over the internet. This results in a snappy user experience.
- **Computational load**: the computational load of transcoding is distributed over the clients and not centralised on a (single) server. The server does not do any computing and only serves static files, so it can handle as many concurrent clients as its bandwidth allows.
Check out the [audio focused ffmpeg build for the web](https://github.com/JorenSix/ffmpeg.audio.wasm) on GitHub.
---
## [pffft.wasm: an FFT library for the web](https://0110.be/posts/pffft.wasm%3A_an_FFT_library_for_the_web.md)
- Published: 2022-02-10T00:00:00Z
- Updated: 2022-06-30T18:55:49Z
- Author: Joren
- ID: 487
- Canonical: https://0110.be/posts/pffft.wasm%3A_an_FFT_library_for_the_web
- Tags: [Code](https://0110.be/tags/Code.md), [UGent](https://0110.be/tags/UGent.md)
[PFFFT](https://bitbucket.org/jpommier/pffft/src/master/README.md) is a small, pretty fast FFT library programmed in C with a BSD-like license. I have taken it upon myself to compile a WebAssembly version of PFFFT to make it available for browsers and node.js environments. It is called [pffft.wasm](https://github.com/JorenSix/pffft.wasm) and available on GitHub.
The pffft.wasm library comes in two flavours. One is compiled with [SIMD](https://en.wikipedia.org/wiki/Single_instruction,_multiple_data) instructions while the other comes without these instructions. SIMD stands for 'single instruction, multiple data' and does what it advertises: in a single step it processes multiple datapoints. The aim of SIMD is to make calculations several times faster. Especially for workloads where the same calculations are repeated over and over again on similar data, SIMD optimisation is relevant. FFT calculation is such a workload.
Evidently the SIMD version is much faster but there is no need to take my word for it. Below you can benchmark the SIMD version of pffft.wasm and compare it with the non-SIMD version on your machine. A pure Javascript FFT library called [FFT.js](https://github.com/indutny/fft.js/) serves as a baseline.
When running the same benchmark on Firefox and on Chrome it becomes clear that FFT.js on Chrome is *about twice as fast* thanks to its superior Javascript engine for this workload. The performance of the WebAssembly versions in Chrome and Firefox is nearly identical. Safari unfortunately does not (yet) support SIMD WebAssembly binaries and fails to complete the benchmark.
The source code, the limitations and other info can be found at the [pffft.wasm GitHub repository](https://github.com/JorenSix/pffft.wasm)
Edit: [PulseFFT](https://github.com/AWSM-WASM/PulseFFT) might be of interest as well: a (as far as I can tell non-SIMD) WASM version of KissFFT.

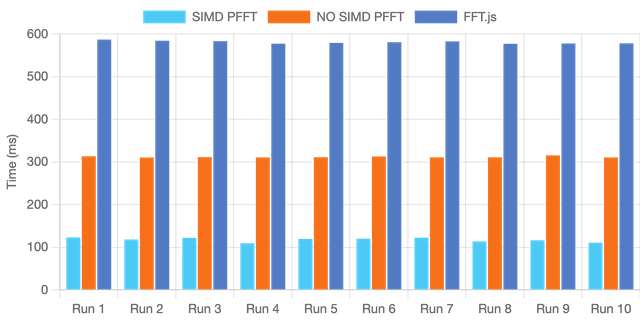

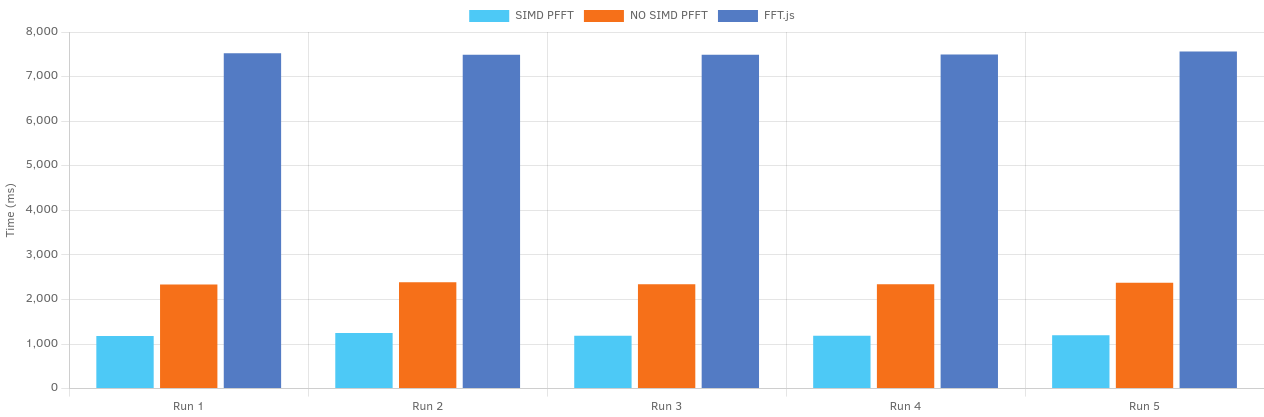
---
## [Decoding LTC and SMPTE on Teensy - Now using interrupts](https://0110.be/posts/Decoding_LTC_and__SMPTE_on_Teensy_-_Now_using_interrupts.md)
- Published: 2021-09-24T00:00:00Z
- Updated: 2023-03-15T10:09:13Z
- Author: Joren
- ID: 484
- Canonical: https://0110.be/posts/Decoding_LTC_and__SMPTE_on_Teensy_-_Now_using_interrupts
- Tags: [Code](https://0110.be/tags/Code.md), [UGent](https://0110.be/tags/UGent.md)
Have you ever found yourself wondering how to build an accurate, low-latency [LTC](https://en.wikipedia.org/wiki/Linear_timecode) decoder with a common micro-controller? Well! Wonder no more and read on! Or, stop reading and do go read something that is more appealing to your predispositions.
[SMPTE timecodes](https://en.wikipedia.org/wiki/SMPTE_timecode) were originally used to synchronize audio and video material. SMPTE timecode data is often encoded into audio using LTC or linear time code. This special audio stream can be recorded together with other audio and video material. By decoding the LTC audio afterwards and working back to SMPTE timecodes, synchronization of multiple camera angles and audio material becomes straightforward. This concept tagging data streams with SMPTE timecodes is also used for other types of data.
\
Fig: LTC is a 'self-clocking' protocol for which a period can be found automatically. Once the period is found, transitions within the period are counted. A period with a transition translates to a 1, a period without any transitions to a 0.
SMPTE timecodes supports up to 30 frames per second and this resolution might not be sufficient for some data streams. It helps if the frames could be split up and 60 or 120 frames per second could be generated. With a low latency LTC decoder it would be possible to support this case and, for example, provide four pulses for every SMPTE frame. To be more precise: a SMPTE frame consists of 80 bits and in this case we would send a pulse exactly when decoding bit 0, bit 20, bit 40 and bit 60. We would then be able to sample at 120Hz while staying in sync with the SMPTE.
My [first attempt](https://0110.be/posts/LTC_-_SMPTE_Decoder_on_Teensy) was to treat the signal like audio and use a ready built library for [LTC audio decoding](https://github.com/x42/libltc) The problem there is that sampling is done which might not exactly match the SMPTE bit transition period and relatively large buffers are used to decode LTC. The bit exact decoding is not possible using this method: the latency is too large, the method also uses excessive computational power and memory.
Fig: Biasing circuit to offset voltages
In my second attempt, the current iteration, interrupts are used to detect rising and falling edges in the LTC stream. By counting the number of microseconds between these edges a bit string is constructed. Effectively decoding LTC without any wasted computational power or memory and at a very low latency. If the LTC stream is well-formed, following each incoming bit and reacting to it becomes straightforward. Finally, after gently massaging the LTC bit string, SMPTE timecodes ooze out of the system at a low latency.
I have implemented [a low latency LTC and SMPTE timecode data decoder](https://github.com/ArtScienceLab/ARDUINO_LTC_DECODER/blob/master/LTCInterruptDecoder/LTCInterruptDecoder.ino) for a Teensy microcontroller. One of the current limitations is that only 30fps SMPTE without skipped frames is supported. Another limitation is that the precision of the derived 120Hz clock is dependent on the sampling rate of the encoded audio signal: if e.g. only 8000Hz is used, transitions can only be precise up until 125µs. The derived clock will jitter slightly but will not drift.
There is still a slight problem with audio and Teensy input: audio is generally transmitted from ~~1.8V to +1.8V and not~~ as a Teensy would expect - from 0 to 3.3V. To make this change a small [biasing circuit](https://electronics.stackexchange.com/questions/445142/how-can-i-vertically-shift-the-voltage-of-a-zero-centered-signal-such-that-i-can) is placed before the Teensy input. In my case two 100k resistors and a 0.1uF capacitor worked best. The interrupt is relatively robust against signals that are a clipping (outside the 0 - 3.3V) or slightly too silent. If the signal becomes too small LTC decoding obviously fails.
For more information and updates see the [GitHub Repository for the low latency LTC and SMPTE timecode data decoder](https://github.com/ArtScienceLab/ARDUINO_LTC_DECODER/blob/master/LTCInterruptDecoder/LTCInterruptDecoder.ino).
---
[Older posts](https://0110.be/tags/Code.md?page=1)
 Fig: Gemini imagining the age of AI exploits.
  Last Friday, I had the pleasure of facilitating a hands-on workshop in Luxembourg as part of [MuTechLab workshop series](https://www.uni.lu/fhse-en/research-projects/mutechlab/), organized by [Luc Nijs](https://www.uni.lu/fhse-en/people/luc-nijs/) at the University of Luxembourg. Together with Bart Moens from [XRHIL](https://xrhil.ugent.be) and [IPEM](https://www.ugent.be/lw/kunstwetenschappen/ipem/en), we presented a system to control musical parameters with body movement.
MuTechLab is a series of workshops for music teachers who wish to dive into the world of music technology. Funded by the Luxembourgish National Research Fund (FNR, PSP-Classic), the initiative brings together educators eager to explore how technology can enhance music education and creative practice.
### What we built and presented
During the workshop, participants got hands-on experience with the [EMI-Kit](https://github.com/IPEM/EMI-kit) (Embodied Music Interface Kit) – an open-source, low-cost system that allows musicians to control Digital Audio Workstation (DAW) parameters through body movement.
The EMI-Kit consists of:
- **A wearable sensor device** (M5StickC Plus2) that captures body orientation and gestures
- **A receiver unit** (M5Stack STAMP S3A) that converts sensor data to MIDI messages
Unlike expensive commercial alternatives, EMI-Kit is fully open source, customizable, and designed specifically for creative music practice and embodied music interaction practice and research.
### The Experience
Teachers experimented with mapping natural body movements – pitch, yaw, roll, and tap gestures – to various musical parameters in their DAWs. The low-latency wireless system made it possible to move and control sound, opening up new possibilities for expressive musical performance and pedagogy.
### Learn More
Interested in exploring embodied music interaction yourself? Check out:
- [MuTechLab Project Page](https://www.uni.lu/fhse-en/research-projects/mutechlab/)
- [EMI-Kit on GitHub](https://github.com/IPEM/EMI-kit)
The EMI-Kit project as-is is a demonstrator to inspire educators to embrace these tools and imagine new ways of teaching and creating music. The EMI-Kit as a platform can - with some additional programming - be a good basis to control musical parameters using various sensors. Have fun with checking out the EMI-Kit.



---
## [MIDI and OSC tools improvements - MIDI processing and mDNS support](https://0110.be/posts/MIDI_and_OSC_tools_improvements__-_MIDI_processing_and_mDNS_support.md)
- Published: 2025-10-02T00:00:00Z
- Updated: 2025-10-06T13:54:28Z
- Author: Joren
- ID: 566
- Canonical: https://0110.be/posts/MIDI_and_OSC_tools_improvements__-_MIDI_processing_and_mDNS_support
- Tags: [Code](https://0110.be/tags/Code.md), [Music Information Retrieval](https://0110.be/tags/Music%20Information%20Retrieval.md), [UGent](https://0110.be/tags/UGent.md)
I've just pushed some updates to [mot](https://github.com/JorenSix/mot) — a command-line application for working with OSC and MIDI messages. My LLM tells me that these are exciting updates but I am not entirely sure that this is the case. Let me know if this ticks your box and seek professional help.
### 1. Scriptable MIDI Processor via Lua
I have implemented a **MIDI processor** that lets you transform, filter, and generate MIDI messages using [Lua](https://www.lua.org/about.html) scripts.
**Why is this useful?** MIDI processors act as middlemen between your input devices and output destinations.You can do the following on incoming MIDI messages:
- **Transform** - Transpose notes, generate chords, map velocity curves
- **Filter** - Block unwanted messages - channels - or select specific ranges
- **Route** - Send different notes to different channel
- **Generate** - Create complex patterns from simple input
The processor reads incoming MIDI from a physical device, processes it through your Lua script, and outputs the modified messages to a virtual MIDI port that your DAW or synth can receive. Some examples:
```ruby
# Generate chords from single notes
mot midi_processor --script scripts/chord_generator.lua 0 6666
# Transpose notes up by one octave
mot midi_processor --script scripts/example_processor.lua 0 6666
```
### 2. Network Discovery via mDNS
OSC receivers now **advertise themselves on the network** using mDNS/Bonjour with the `_osc._udp` service type.
This makes mot compatible with the [EMI-kit](https://github.com/IPEM/EMI-kit) — the Embodied Music Interface Kit developed at IPEM, Ghent University. OSC-enabled devices can automatically discover mot receivers on your network, eliminating manual configuration if the OSC sources add this functionality.
### Get started
Installation via Rust's cargo:
```ruby
git clone https://github.com/JorenSix/mot.git
cd mot
cargo install --path .
mot midi_processor -h
```
Check out the [mot repository](https://github.com/JorenSix/mot) for full documentation and example Lua scripts!
---
## [Powering low current electronics projects with power banks](https://0110.be/posts/Powering_low_current_electronics_projects_with_power_banks.md)
- Published: 2025-01-26T00:00:00Z
- Updated: 2025-02-01T10:13:55Z
- Author: Joren
- ID: 558
- Canonical: https://0110.be/posts/Powering_low_current_electronics_projects_with_power_banks
- Tags: [Code](https://0110.be/tags/Code.md), [Projecten](https://0110.be/tags/Projecten.md), [UGent](https://0110.be/tags/UGent.md)
Last Friday, I had the pleasure of facilitating a hands-on workshop in Luxembourg as part of [MuTechLab workshop series](https://www.uni.lu/fhse-en/research-projects/mutechlab/), organized by [Luc Nijs](https://www.uni.lu/fhse-en/people/luc-nijs/) at the University of Luxembourg. Together with Bart Moens from [XRHIL](https://xrhil.ugent.be) and [IPEM](https://www.ugent.be/lw/kunstwetenschappen/ipem/en), we presented a system to control musical parameters with body movement.
MuTechLab is a series of workshops for music teachers who wish to dive into the world of music technology. Funded by the Luxembourgish National Research Fund (FNR, PSP-Classic), the initiative brings together educators eager to explore how technology can enhance music education and creative practice.
### What we built and presented
During the workshop, participants got hands-on experience with the [EMI-Kit](https://github.com/IPEM/EMI-kit) (Embodied Music Interface Kit) – an open-source, low-cost system that allows musicians to control Digital Audio Workstation (DAW) parameters through body movement.
The EMI-Kit consists of:
- **A wearable sensor device** (M5StickC Plus2) that captures body orientation and gestures
- **A receiver unit** (M5Stack STAMP S3A) that converts sensor data to MIDI messages
Unlike expensive commercial alternatives, EMI-Kit is fully open source, customizable, and designed specifically for creative music practice and embodied music interaction practice and research.
### The Experience
Teachers experimented with mapping natural body movements – pitch, yaw, roll, and tap gestures – to various musical parameters in their DAWs. The low-latency wireless system made it possible to move and control sound, opening up new possibilities for expressive musical performance and pedagogy.
### Learn More
Interested in exploring embodied music interaction yourself? Check out:
- [MuTechLab Project Page](https://www.uni.lu/fhse-en/research-projects/mutechlab/)
- [EMI-Kit on GitHub](https://github.com/IPEM/EMI-kit)
The EMI-Kit project as-is is a demonstrator to inspire educators to embrace these tools and imagine new ways of teaching and creating music. The EMI-Kit as a platform can - with some additional programming - be a good basis to control musical parameters using various sensors. Have fun with checking out the EMI-Kit.



---
## [MIDI and OSC tools improvements - MIDI processing and mDNS support](https://0110.be/posts/MIDI_and_OSC_tools_improvements__-_MIDI_processing_and_mDNS_support.md)
- Published: 2025-10-02T00:00:00Z
- Updated: 2025-10-06T13:54:28Z
- Author: Joren
- ID: 566
- Canonical: https://0110.be/posts/MIDI_and_OSC_tools_improvements__-_MIDI_processing_and_mDNS_support
- Tags: [Code](https://0110.be/tags/Code.md), [Music Information Retrieval](https://0110.be/tags/Music%20Information%20Retrieval.md), [UGent](https://0110.be/tags/UGent.md)
I've just pushed some updates to [mot](https://github.com/JorenSix/mot) — a command-line application for working with OSC and MIDI messages. My LLM tells me that these are exciting updates but I am not entirely sure that this is the case. Let me know if this ticks your box and seek professional help.
### 1. Scriptable MIDI Processor via Lua
I have implemented a **MIDI processor** that lets you transform, filter, and generate MIDI messages using [Lua](https://www.lua.org/about.html) scripts.
**Why is this useful?** MIDI processors act as middlemen between your input devices and output destinations.You can do the following on incoming MIDI messages:
- **Transform** - Transpose notes, generate chords, map velocity curves
- **Filter** - Block unwanted messages - channels - or select specific ranges
- **Route** - Send different notes to different channel
- **Generate** - Create complex patterns from simple input
The processor reads incoming MIDI from a physical device, processes it through your Lua script, and outputs the modified messages to a virtual MIDI port that your DAW or synth can receive. Some examples:
```ruby
# Generate chords from single notes
mot midi_processor --script scripts/chord_generator.lua 0 6666
# Transpose notes up by one octave
mot midi_processor --script scripts/example_processor.lua 0 6666
```
### 2. Network Discovery via mDNS
OSC receivers now **advertise themselves on the network** using mDNS/Bonjour with the `_osc._udp` service type.
This makes mot compatible with the [EMI-kit](https://github.com/IPEM/EMI-kit) — the Embodied Music Interface Kit developed at IPEM, Ghent University. OSC-enabled devices can automatically discover mot receivers on your network, eliminating manual configuration if the OSC sources add this functionality.
### Get started
Installation via Rust's cargo:
```ruby
git clone https://github.com/JorenSix/mot.git
cd mot
cargo install --path .
mot midi_processor -h
```
Check out the [mot repository](https://github.com/JorenSix/mot) for full documentation and example Lua scripts!
---
## [Powering low current electronics projects with power banks](https://0110.be/posts/Powering_low_current_electronics_projects_with_power_banks.md)
- Published: 2025-01-26T00:00:00Z
- Updated: 2025-02-01T10:13:55Z
- Author: Joren
- ID: 558
- Canonical: https://0110.be/posts/Powering_low_current_electronics_projects_with_power_banks
- Tags: [Code](https://0110.be/tags/Code.md), [Projecten](https://0110.be/tags/Projecten.md), [UGent](https://0110.be/tags/UGent.md)
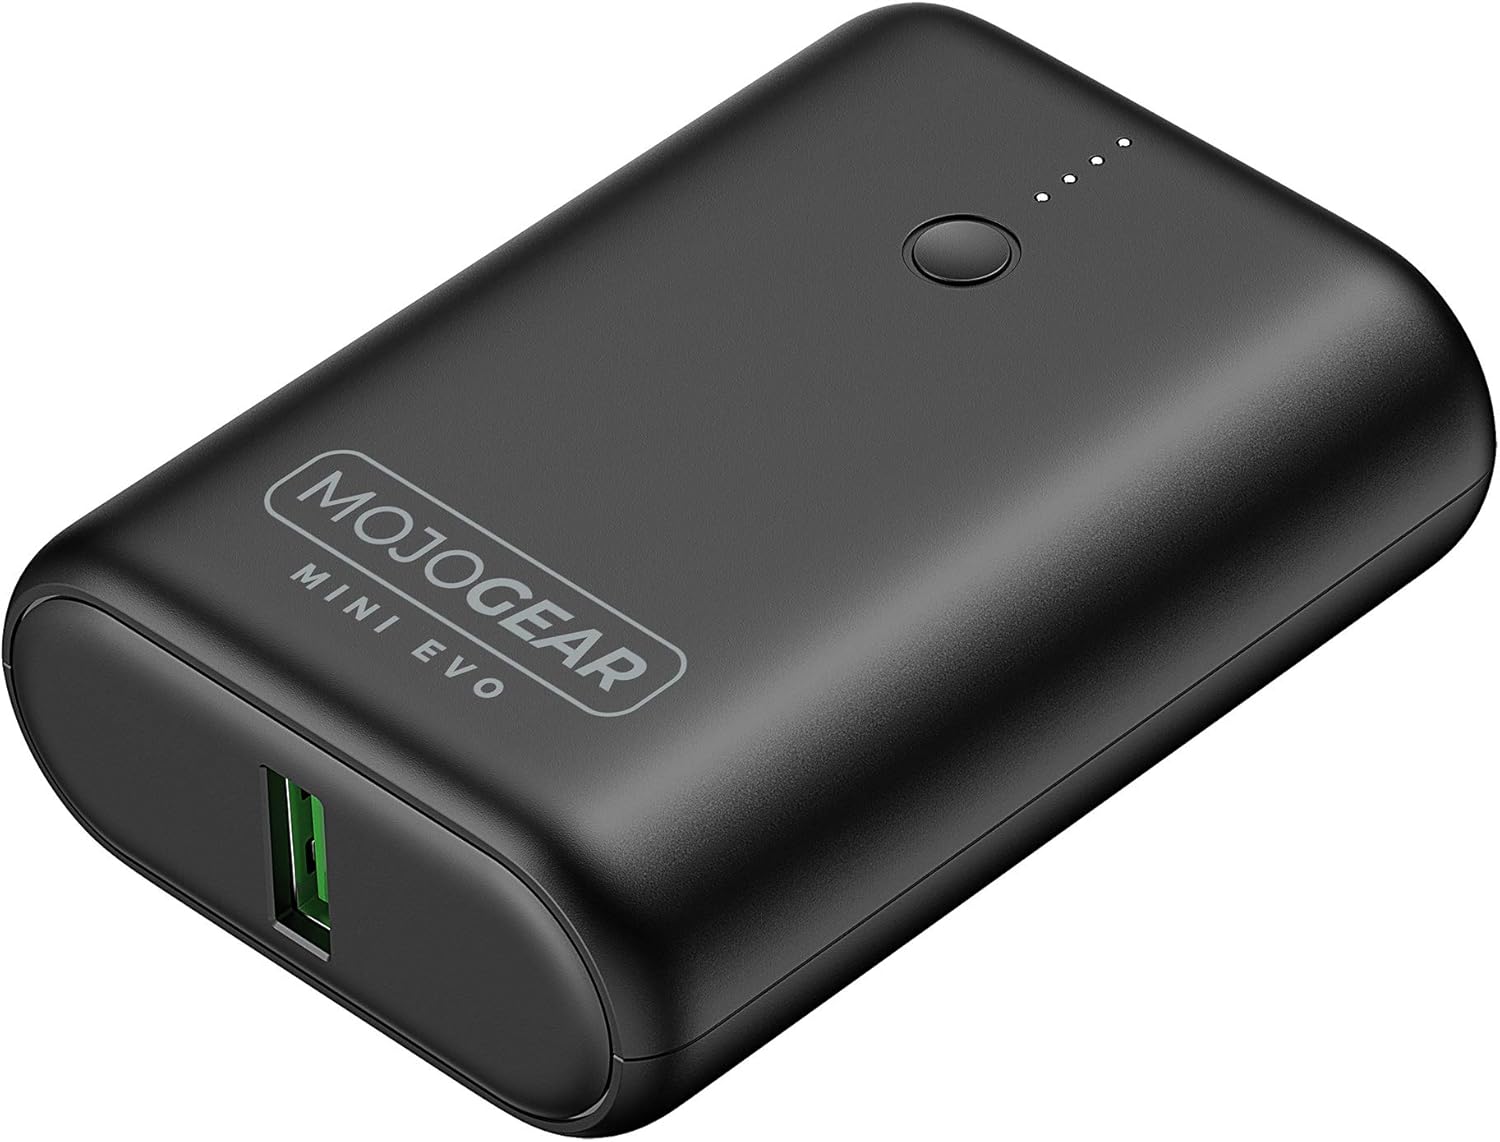 Power banks have become a staple for charging smartphones, tablets, and other devices on the go. They seem ideal to power small microcontroller projects but, they often pose a problem for low-current applications. Most modern power banks include an auto-shutdown feature to conserve energy when they detect a current draw below a specific threshold, often around 50–200mA. The idea being that the power bank can shut off after charging a smartphone. However, if you rely on power banks to power DIY electronics projects or remote applications with low current draw, this auto-off feature can be a significant inconvenience.
To address this issue, consider using power banks designed with an “always-on” or “low-current” mode. These power banks are engineered to sustain power delivery even when the current draw is minimal. Look for models that explicitly mention support for low-power devices in their specifications. If replacing a power bank isn’t an option, you can add a small load resistor or a USB dummy load to artificially increase the current draw. It works, but feels wrong and dirty.
For a [previous electronics project](https://0110.be/posts/When_both_tech_and_nature_call%3A_a_DIY_motion_sensor_to_activate_birdsong) I bought a power bank randomly. After a bit of testing, I determined that the minimal power draw was around 150mA, so I added a resistor to increase current draw. Only afterwards did I check the [manual of the power bank](https://mojogear.eu/cdn/shop/files/Manual-MG-10.pdf?v=683883965702775870) and noticed, luckily, that there was a low-current mode. I removed the resistor and improved the battery life of the project considerably. If you want to power your DIY Arduino or electronics project, first check the manual of the power bank you want to use!
Edit: after further testing it seemed that the low current mode of this specific power bank still shuts down after a couple of hours. Your mileage may vary, and the main point of this post still holds: check the manual of your power bank. Eventually I went with a [solution designed for electronics projects](https://www.az-delivery.de/nl/products/battery-expansion-shield-18650-v3-inkl-usb-kabel).
---
## [Tasmota for custom ESP32 smart home devices](https://0110.be/posts/Tasmota_for_custom__ESP32_smart_home_devices.md)
- Published: 2025-01-03T00:00:00Z
- Updated: 2025-01-08T20:12:39Z
- Author: Joren
- ID: 555
- Canonical: https://0110.be/posts/Tasmota_for_custom__ESP32_smart_home_devices
- Tags: [Code](https://0110.be/tags/Code.md), [Projecten](https://0110.be/tags/Projecten.md), [UGent](https://0110.be/tags/UGent.md)
Power banks have become a staple for charging smartphones, tablets, and other devices on the go. They seem ideal to power small microcontroller projects but, they often pose a problem for low-current applications. Most modern power banks include an auto-shutdown feature to conserve energy when they detect a current draw below a specific threshold, often around 50–200mA. The idea being that the power bank can shut off after charging a smartphone. However, if you rely on power banks to power DIY electronics projects or remote applications with low current draw, this auto-off feature can be a significant inconvenience.
To address this issue, consider using power banks designed with an “always-on” or “low-current” mode. These power banks are engineered to sustain power delivery even when the current draw is minimal. Look for models that explicitly mention support for low-power devices in their specifications. If replacing a power bank isn’t an option, you can add a small load resistor or a USB dummy load to artificially increase the current draw. It works, but feels wrong and dirty.
For a [previous electronics project](https://0110.be/posts/When_both_tech_and_nature_call%3A_a_DIY_motion_sensor_to_activate_birdsong) I bought a power bank randomly. After a bit of testing, I determined that the minimal power draw was around 150mA, so I added a resistor to increase current draw. Only afterwards did I check the [manual of the power bank](https://mojogear.eu/cdn/shop/files/Manual-MG-10.pdf?v=683883965702775870) and noticed, luckily, that there was a low-current mode. I removed the resistor and improved the battery life of the project considerably. If you want to power your DIY Arduino or electronics project, first check the manual of the power bank you want to use!
Edit: after further testing it seemed that the low current mode of this specific power bank still shuts down after a couple of hours. Your mileage may vary, and the main point of this post still holds: check the manual of your power bank. Eventually I went with a [solution designed for electronics projects](https://www.az-delivery.de/nl/products/battery-expansion-shield-18650-v3-inkl-usb-kabel).
---
## [Tasmota for custom ESP32 smart home devices](https://0110.be/posts/Tasmota_for_custom__ESP32_smart_home_devices.md)
- Published: 2025-01-03T00:00:00Z
- Updated: 2025-01-08T20:12:39Z
- Author: Joren
- ID: 555
- Canonical: https://0110.be/posts/Tasmota_for_custom__ESP32_smart_home_devices
- Tags: [Code](https://0110.be/tags/Code.md), [Projecten](https://0110.be/tags/Projecten.md), [UGent](https://0110.be/tags/UGent.md)
 In my house, I have a few smart home features: to control ventilation, to open and close solar screens, and to switch a few smart sockets. Up until a couple of days ago, the ventilation and screen controllers operated using custom software running on an ESP32. However, configuring, maintaining, upgrading, and integrating with this custom software gradually became a headache.
Recently, I switched from custom software to Tasmota, an open-source smart home platform targeting ESP32 devices. Tasmota includes a web UI, flexible configuration options, OTA upgrades, and scripting features. The scripting functionality allows devices to be extended with additional commands, which is especially practical for controlling my solar screens. These screens use pulses to toggle between up-stop-down-stop states. By default, Tasmota only supports enabling or disabling a relay, not enabling it for a very brief period (e.g., 150 milliseconds). With a short ‘Berry’ script, such functionality is quickly added.
I appreciate the effort of the Tasmota team to lower the entry barrier for users. They provide ample documentation and a web installer, making setup straightforward. Simply connect your ESP32 via USB, flash it with Tasmota, and configure it—all from your browser. It’s a surprisingly simple process compared to installing a dedicated toolchain. While this might not be what Tim Berners-Lee envisioned 35 years ago, it certainly simplifies the user experience. Lowering the entry barrier even further, some manufacturers even offer smart home devices with Tasmota preinstalled, such as the Nous A1 smart sockets. Eternal september is here.
If you’re managing custom ESP32 smart home devices, consider switching to Tasmota. Its robust features, ease of setup, and active community support make it an excellent choice for both beginners and advanced users.
---
## [Making a flute controlled mouse](https://0110.be/posts/Making_a_flute_controlled_mouse.md)
- Published: 2024-04-22T00:00:00Z
- Updated: 2024-05-15T10:22:18Z
- Author: Joren
- ID: 539
- Canonical: https://0110.be/posts/Making_a_flute_controlled_mouse
- Tags: [Code](https://0110.be/tags/Code.md), [UGent](https://0110.be/tags/UGent.md)
There is something about surprising interfaces: clapping to switch on lights is more fun than a flipping a switch. [Pressing a panic-button to order a pizza](https://0110.be/posts/Order_Pizza_with_USB_Pizza_Button) is more fun than ordering via an app. Recently I came across [this surprising interface](https://www.reddit.com/r/JustGuysBeingDudes/comments/195gqnm/imagine_losing_to_this_dude/): a flute controlled mouse cursor for a first person shooter. I recognize a good idea when I see one, and immediately wanted replicate the idea and make it freely available. So I got to work:
In my house, I have a few smart home features: to control ventilation, to open and close solar screens, and to switch a few smart sockets. Up until a couple of days ago, the ventilation and screen controllers operated using custom software running on an ESP32. However, configuring, maintaining, upgrading, and integrating with this custom software gradually became a headache.
Recently, I switched from custom software to Tasmota, an open-source smart home platform targeting ESP32 devices. Tasmota includes a web UI, flexible configuration options, OTA upgrades, and scripting features. The scripting functionality allows devices to be extended with additional commands, which is especially practical for controlling my solar screens. These screens use pulses to toggle between up-stop-down-stop states. By default, Tasmota only supports enabling or disabling a relay, not enabling it for a very brief period (e.g., 150 milliseconds). With a short ‘Berry’ script, such functionality is quickly added.
I appreciate the effort of the Tasmota team to lower the entry barrier for users. They provide ample documentation and a web installer, making setup straightforward. Simply connect your ESP32 via USB, flash it with Tasmota, and configure it—all from your browser. It’s a surprisingly simple process compared to installing a dedicated toolchain. While this might not be what Tim Berners-Lee envisioned 35 years ago, it certainly simplifies the user experience. Lowering the entry barrier even further, some manufacturers even offer smart home devices with Tasmota preinstalled, such as the Nous A1 smart sockets. Eternal september is here.
If you’re managing custom ESP32 smart home devices, consider switching to Tasmota. Its robust features, ease of setup, and active community support make it an excellent choice for both beginners and advanced users.
---
## [Making a flute controlled mouse](https://0110.be/posts/Making_a_flute_controlled_mouse.md)
- Published: 2024-04-22T00:00:00Z
- Updated: 2024-05-15T10:22:18Z
- Author: Joren
- ID: 539
- Canonical: https://0110.be/posts/Making_a_flute_controlled_mouse
- Tags: [Code](https://0110.be/tags/Code.md), [UGent](https://0110.be/tags/UGent.md)
There is something about surprising interfaces: clapping to switch on lights is more fun than a flipping a switch. [Pressing a panic-button to order a pizza](https://0110.be/posts/Order_Pizza_with_USB_Pizza_Button) is more fun than ordering via an app. Recently I came across [this surprising interface](https://www.reddit.com/r/JustGuysBeingDudes/comments/195gqnm/imagine_losing_to_this_dude/): a flute controlled mouse cursor for a first person shooter. I recognize a good idea when I see one, and immediately wanted replicate the idea and make it freely available. So I got to work:

 Fig: a black box generating 3D models.




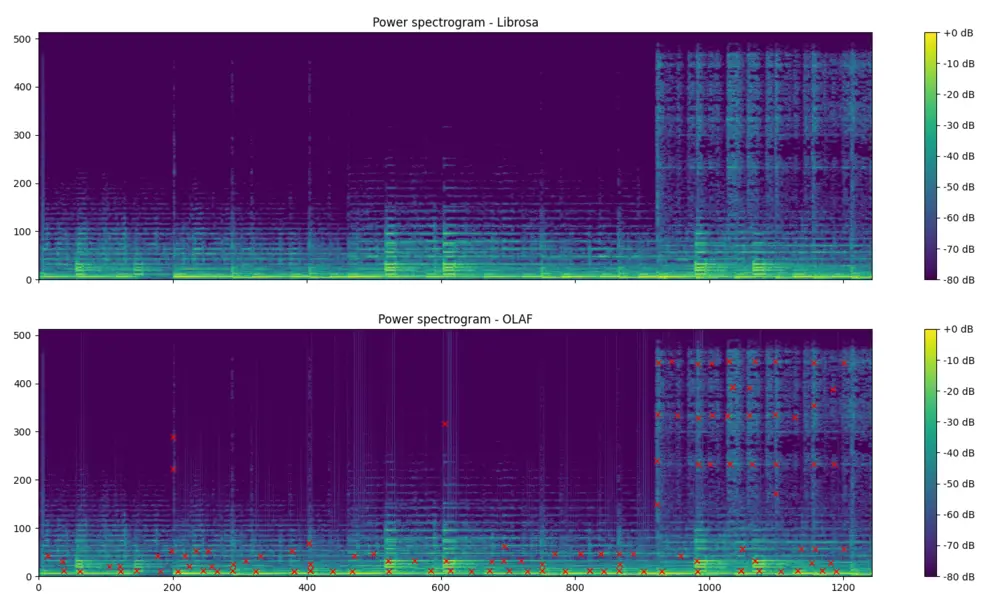 \
\


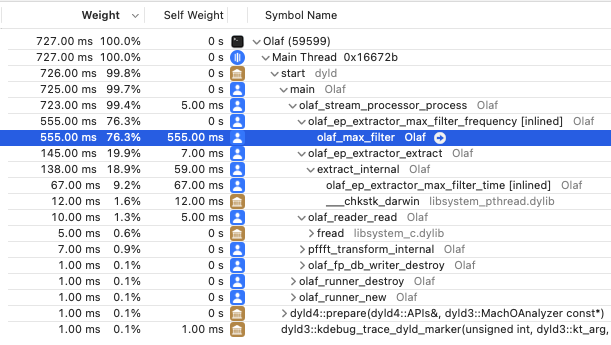 \
Fig: The results of profiling Olaf in XCode's time profiler. Almost all time is spend in a single function which is the prime target for optimization.
\
Fig: The results of profiling Olaf in XCode's time profiler. Almost all time is spend in a single function which is the prime target for optimization.
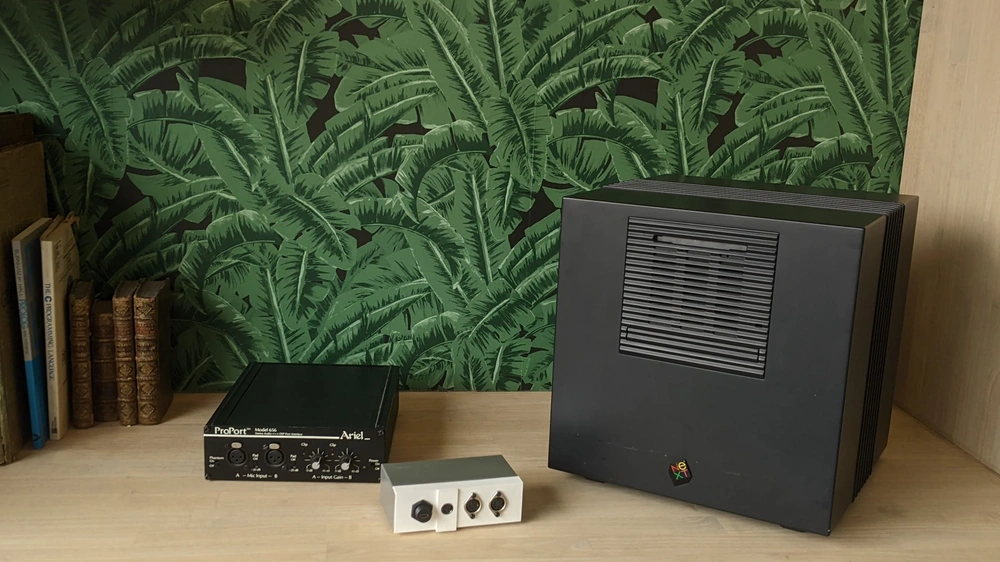




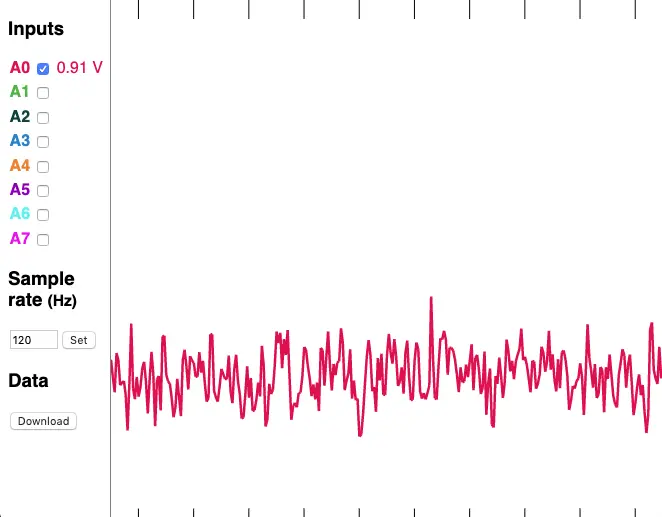 Fig: Sensor data as MIDI.
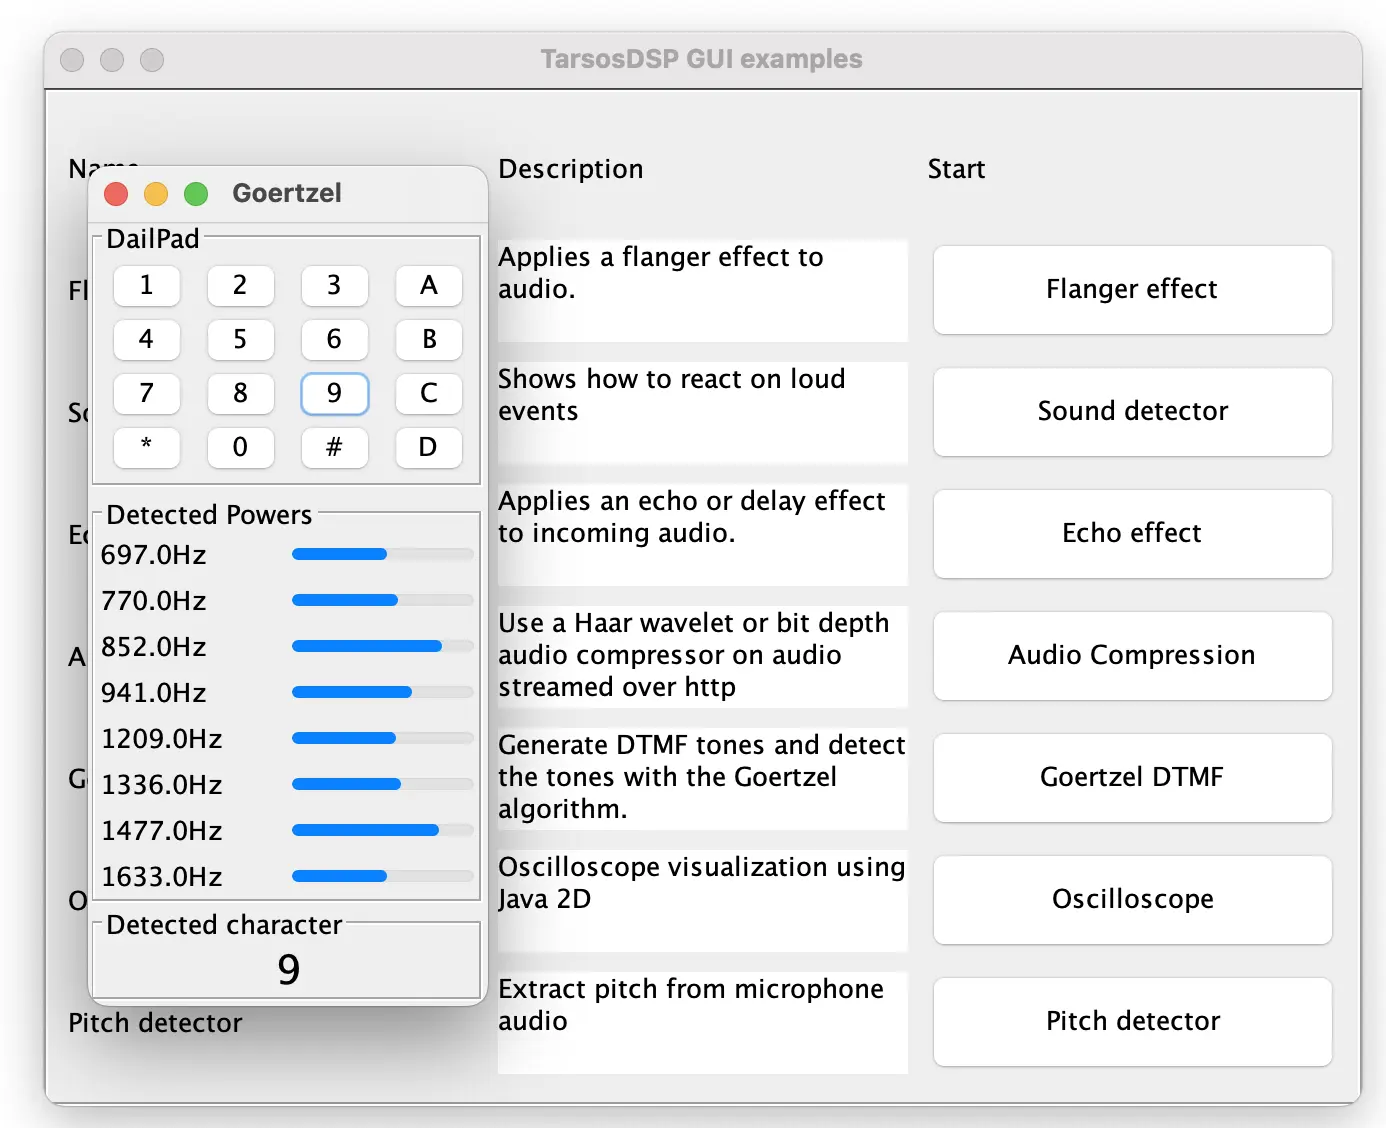
 [LMDB](http://www.lmdb.tech/doc/) is a fast key value store, ideal to store and query sorted data with small keys and values. LMDB is a pure C library but often used from other programming languages via some type of bindings. These bindings are 'bridges' between languages and are automatically present on supported platform. On new or unsupported platforms, however, you need to build a this bridge yourself.
This blog post is about getting [java-lmdb](https://github.com/lmdbjava/lmdbjava) working on such unsupported platform: arm64. The arm64 platform is much more popular since the introduction of the Apple silicon - M1 platform. On Apple M1 the default architecture of Docker images is also aarch64.
The java-lmdb project uses [JNR-FFI](https://github.com/jnr/jnr-ffi) in the background. This is only [one of the many ways to bridge Java and other programming languages](https://developer.okta.com/blog/2022/04/08/state-of-ffi-java). The new version of JNR-FFI supports the arm64. Currently, only the ['SNAPSHOT' version of java-lmdb](https://oss.sonatype.org/content/repositories/snapshots/org/lmdbjava/) uses this version. So the dependencies need to be changed to e.g. (when using Gradle):
repositories {
mavenCentral()
maven { url 'https://oss.sonatype.org/content/repositories/snapshots' }
}
dependencies {
implementation group: 'org.lmdbjava', name: 'lmdbjava', version: '0.8.3-SNAPSHOT'
}
Next you need to build the `lmdb` library for your platform and copy it to a location where Java looks for it. This only works when compilers are already available on your system. In macOS you might need to install the XCode command line tools:
#xcode-select --install
git clone --depth 1 https://git.openldap.org/openldap/openldap.git
cd openldap/libraries/liblmdb
make -e SOEXT=.dylib
cp liblmdb.dylib ~/Library/Java/Extensions
On Debian `aarch64` the procedure is similar but a different extension is used (`.so`):
#apt install build-essential
git clone --depth 1 https://git.openldap.org/openldap/openldap.git
cd openldap/libraries/liblmdb
make
mv liblmdb.so /lib
Finally, to use the library in a JAR-file is might be needed to allow
[LMDB](http://www.lmdb.tech/doc/) is a fast key value store, ideal to store and query sorted data with small keys and values. LMDB is a pure C library but often used from other programming languages via some type of bindings. These bindings are 'bridges' between languages and are automatically present on supported platform. On new or unsupported platforms, however, you need to build a this bridge yourself.
This blog post is about getting [java-lmdb](https://github.com/lmdbjava/lmdbjava) working on such unsupported platform: arm64. The arm64 platform is much more popular since the introduction of the Apple silicon - M1 platform. On Apple M1 the default architecture of Docker images is also aarch64.
The java-lmdb project uses [JNR-FFI](https://github.com/jnr/jnr-ffi) in the background. This is only [one of the many ways to bridge Java and other programming languages](https://developer.okta.com/blog/2022/04/08/state-of-ffi-java). The new version of JNR-FFI supports the arm64. Currently, only the ['SNAPSHOT' version of java-lmdb](https://oss.sonatype.org/content/repositories/snapshots/org/lmdbjava/) uses this version. So the dependencies need to be changed to e.g. (when using Gradle):
repositories {
mavenCentral()
maven { url 'https://oss.sonatype.org/content/repositories/snapshots' }
}
dependencies {
implementation group: 'org.lmdbjava', name: 'lmdbjava', version: '0.8.3-SNAPSHOT'
}
Next you need to build the `lmdb` library for your platform and copy it to a location where Java looks for it. This only works when compilers are already available on your system. In macOS you might need to install the XCode command line tools:
#xcode-select --install
git clone --depth 1 https://git.openldap.org/openldap/openldap.git
cd openldap/libraries/liblmdb
make -e SOEXT=.dylib
cp liblmdb.dylib ~/Library/Java/Extensions
On Debian `aarch64` the procedure is similar but a different extension is used (`.so`):
#apt install build-essential
git clone --depth 1 https://git.openldap.org/openldap/openldap.git
cd openldap/libraries/liblmdb
make
mv liblmdb.so /lib
Finally, to use the library in a JAR-file is might be needed to allow