» By Joren on Sunday 26 January 2025
 Power banks have become a staple for charging smartphones, tablets, and other devices on the go. They seem ideal to power small microcontroller projects but, they often pose a problem for low-current applications. Most modern power banks include an auto-shutdown feature to conserve energy when they detect a current draw below a specific threshold, often around 50–200mA. The idea being that the power bank can shut off after charging a smartphone. However, if you rely on power banks to power DIY electronics projects or remote applications with low current draw, this auto-off feature can be a significant inconvenience.
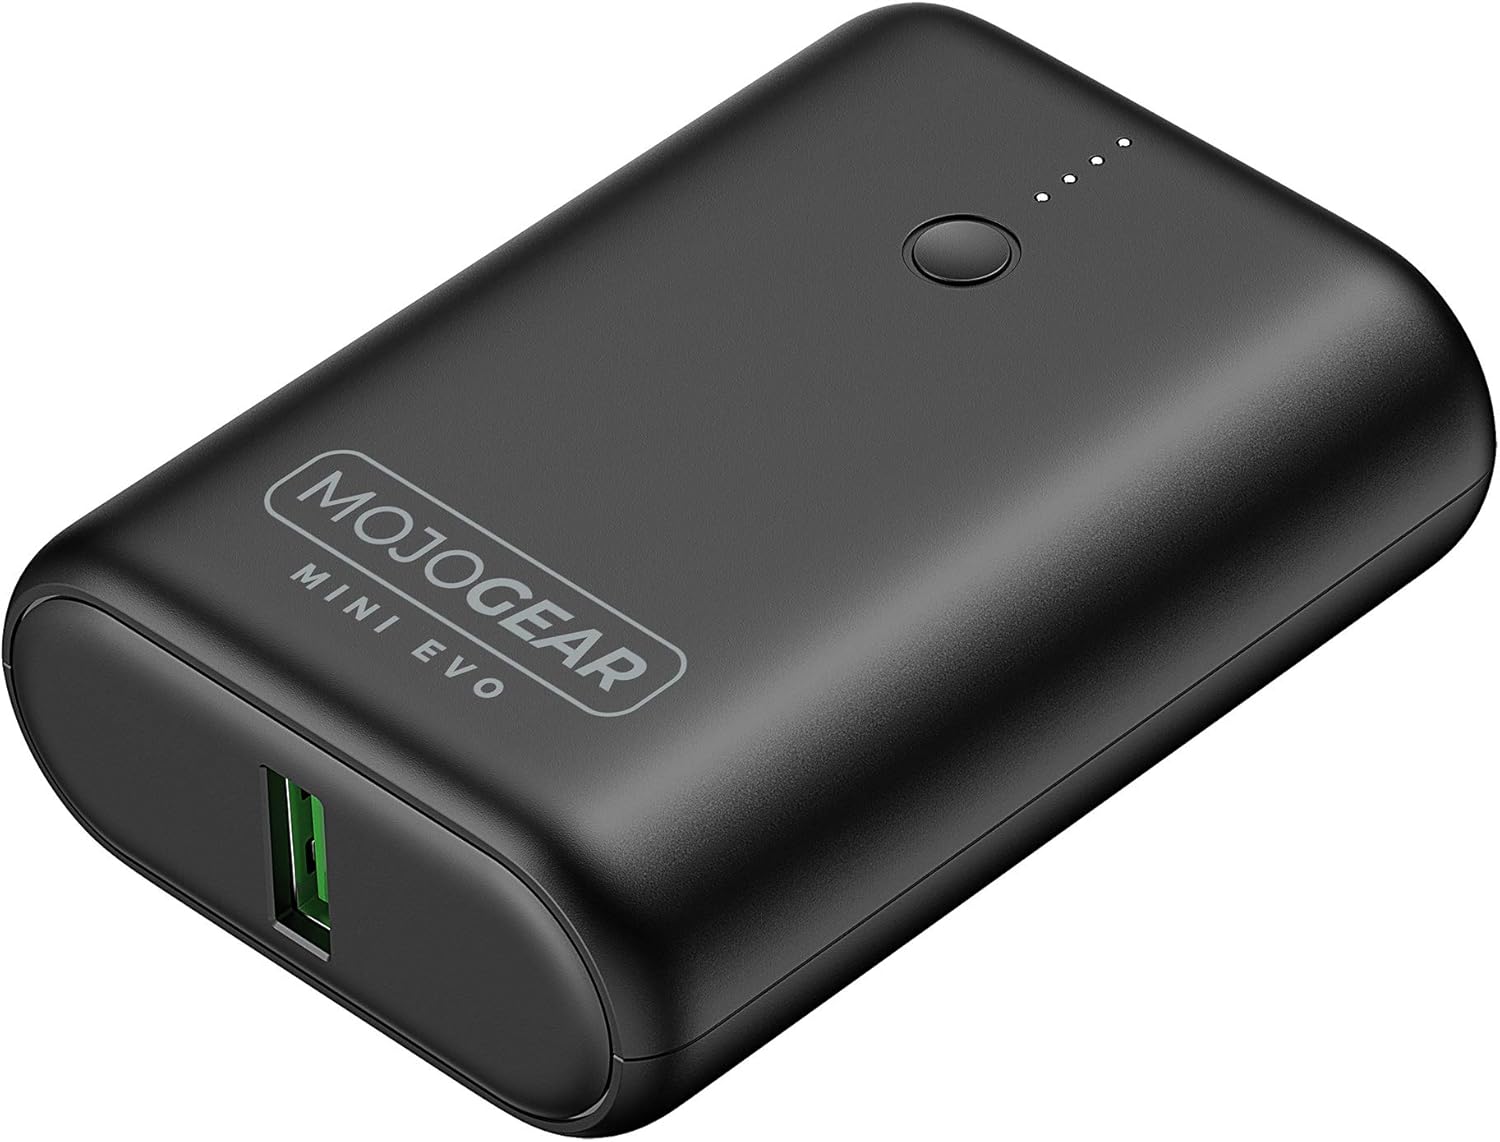
To address this issue, consider using power banks designed with an “always-on” or “low-current” mode. These power banks are engineered to sustain power delivery even when the current draw is minimal. Look for models that explicitly mention support for low-power devices in their specifications. If replacing a power bank isn’t an option, you can add a small load resistor or a USB dummy load to artificially increase the current draw. It works, but feels wrong and dirty.
For a previous electronics project I bought a power bank randomly. After a bit of testing, I determined that the minimal power draw was around 150mA, so I added a resistor to increase current draw. Only afterwards did I check the manual of the power bank and noticed, luckily, that there was a low-current mode. I removed the resistor and improved the battery life of the project considerably. If you want to power your DIY Arduino or electronics project, first check the manual of the power bank you want to use!
Edit: after further testing it seemed that the low current mode of this specific power bank still shuts down after a couple of hours. Your mileage may vary, and the main point of this post still holds: check the manual of your power bank. Eventually I went with a solution designed for electronics projects.
 UGent, Code, and Projecten
» By Joren on Saturday 25 January 2025
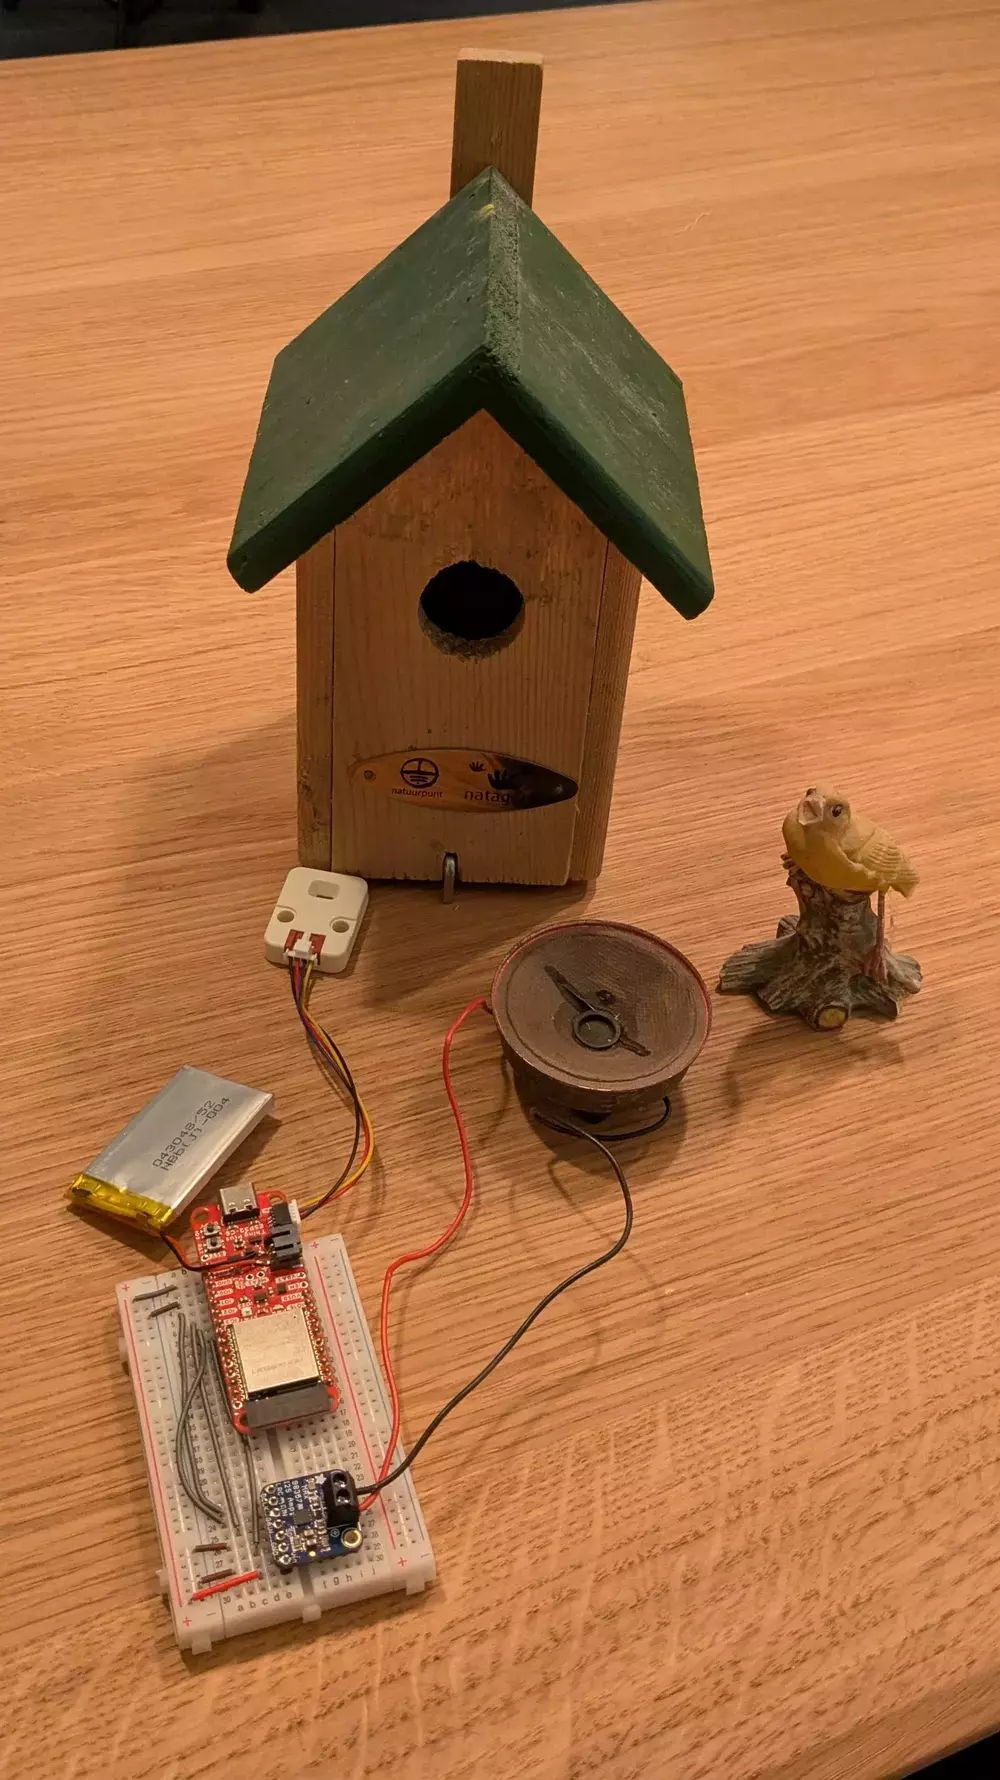
There is this thing that starts playing birdsong when it detects movement. It is ideal to connect to nature while nature calls. It is a good idea, executed well but it got me thinking: this can be made less reliable, more time consuming, more expensive, and with a shorter battery life. So I started working on a DIY version.
Vid: Playing birdsong when presence is detected with an ESP32 microcontroller .
The general idea is to start playing birdsong if someone is present in a necessary room. In addition to a few of electronics components the project needs birdsong recordings. Freesound is a great resource for all kinds of environmental sounds and has a collection of birdsong which was used for this project.
For the electronics components the project needs a microcontroller and a way to detect presence. I had a laser ranging sensor lying around which measures distance but can be repurposed to detect presence in a small room: most of the time, the distance to an opposite wall is reported. If a smaller distance is measured it is probably due to a person being present. The other components:
- An ESP32-C6 based Sparkfun Thing Plus. It has a battery recharging circuit, SD card reader, and a Quic connector.
- A time-of-flight laser sensor to measure distance. I used a VL53L0X with a grove connector.
- An I2S Amplifier to drive a speaker. I used the MAX 98357A, it seems to do what it needs to do.
- A small speaker, salvaged from some other device
- A MicroSD card, to store some audio files
- A rechargeable LiPo battery, or a power bank with a low-current mode
As is often the case with builds like this, neither the software nor the hardware is challenging conceptually but, making hard and software cooperate is. Some pitfalls I encountered: the ESP32 C6 needs USB CDC set in the Arduino IDE, the non standard I2C GPIO pins. Getting the many I2S parameters right. Dealing with a nasty pop sound once audio started. A broken LiPo battery. Most of the fixes can be found in the Arduino code
I use a polling strategy to detect presence. A distance measurement is taken and then the ESP32 goes into a deep sleep until the next measurement. A sensor with the ability to wake up the microcontroller would be a better approach.
Once everything was installed it worked well enough — motion triggered a random birdsong, creating a soothing, natural vibe. It may be less practical than the off-the-shelf version but I did learn quite a lot more than I would have by simply filling in a form and providing payment details…
UGent
 birdsong_arduino.ino, birhouse-example.mp4, birhouse-static.webp, and birdhouse-static.jpg
» By Joren on Thursday 16 January 2025
A discussion at work led to the question how much time it takes for a HTTP request to pass through a HTTP proxy. This blog post deals with this question by measuring a request passing through a stupid amount of HTTP proxies.
1
|
curl -s -o /dev/null -w "%{time_starttransfer}\n" http://localhost:2000 |
Fig: Measuring the time it takes to pass 500 proxies with Curl.
In modern development setups it is not uncommon that your HTTP request passes a few HTTP proxies before reaching a final server that actually handles the request. In our case there is a proxy which ensures an SSL certificate, which is forwarded to a proxy which automatically forwards requests to a docker container. A final HTTP proxy runs in the docker network that forwards the request to a webserver. A response follows the same way in reverse.
1
2
3
4
5
6
7
8
9
10
11
12
13
14
|
:2000 {
reverse_proxy localhost:2001
}
:2001 {
reverse_proxy localhost:2002
}
...
:2500 {
respond "Hello, proxy!"
} |
Fig: Configuration to pass a HTTP request through many proxies. The final response is a simple text.
To measure the time it take to pass through a HTTP proxy, I wrote a small script to start 500 separate instances of the Caddy webserver configured as a HTTP/2 proxy. Then, I measure the time it takes to pass through all 500 of the HTTP proxies or only 490, 480,… which results in the graph below.
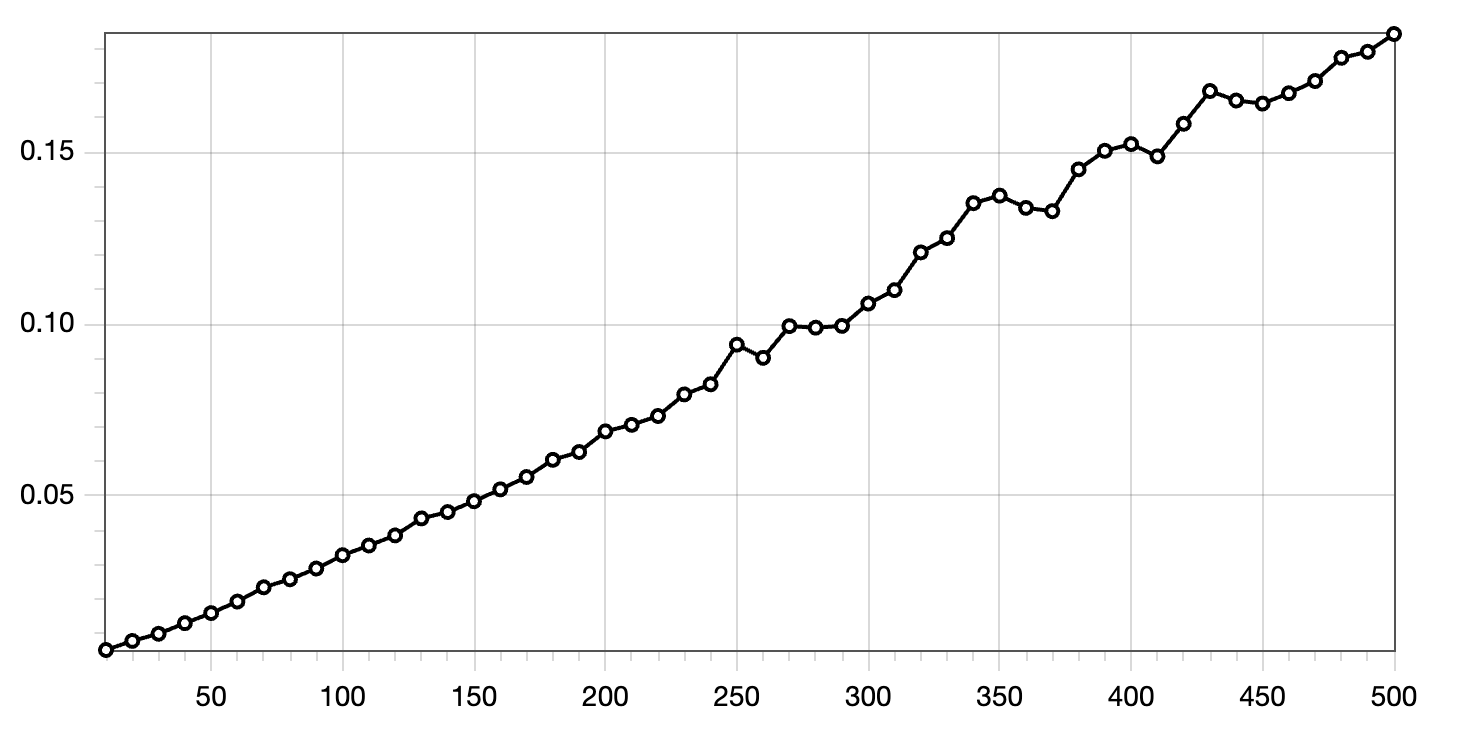
Fig: Time it takes to pass x amount of HTTP proxies. The y-axis represents the time taken (in seconds), and the x-axis indicates the number of HTTP proxies passed.
So each proxy pass takes about 0.4 milliseconds in one of the best cases, where requests are forwarded from and to localhost. Network overhead adds to that but assuming that interconnects are fast, adding a few HTTP proxies does not affect latency in a meaningful way. Of course it is best to evaluate your situation and measure.
UGent
script.rb, measure.rb, and proxy_time_graph.png
» By Joren on Friday 03 January 2025
 In my house, I have a few smart home features: to control ventilation, to open and close solar screens, and to switch a few smart sockets. Up until a couple of days ago, the ventilation and screen controllers operated using custom software running on an ESP32. However, configuring, maintaining, upgrading, and integrating with this custom software gradually became a headache.
Recently, I switched from custom software to Tasmota, an open-source smart home platform targeting ESP32 devices. Tasmota includes a web UI, flexible configuration options, OTA upgrades, and scripting features. The scripting functionality allows devices to be extended with additional commands, which is especially practical for controlling my solar screens. These screens use pulses to toggle between up-stop-down-stop states. By default, Tasmota only supports enabling or disabling a relay, not enabling it for a very brief period (e.g., 150 milliseconds). With a short ‘Berry’ script, such functionality is quickly added.
I appreciate the effort of the Tasmota team to lower the entry barrier for users. They provide ample documentation and a web installer, making setup straightforward. Simply connect your ESP32 via USB, flash it with Tasmota, and configure it—all from your browser. It’s a surprisingly simple process compared to installing a dedicated toolchain. While this might not be what Tim Berners-Lee envisioned 35 years ago, it certainly simplifies the user experience. Lowering the entry barrier even further, some manufacturers even offer smart home devices with Tasmota preinstalled, such as the Nous A1 smart sockets. Eternal september is here.
If you’re managing custom ESP32 smart home devices, consider switching to Tasmota. Its robust features, ease of setup, and active community support make it an excellent choice for both beginners and advanced users.
UGent, Projecten, and Code