The last few halloweens I have been building one-off interactive installations for visiting trick-or-treaters. I did not document the build of last year, but the year before I built an interactive door bell with a jump scare door projection. This year I was trying to take it easy but my son came up with the idea of doing something with a talking pumpkin. I mumbled something about feasibility so he promptly invited all his friends to come over on Halloween to talk to a pumpkin. So I got to work and tried to build something. This blog post documents this build.
A talking pumkin needs a few functions. It needs to understand kids talking in Dutch, it needs to be able to respond with a somewhat logical respons and ideally have a memory about previous interactions. It also needs a way to do turn-taking: indicating who is speaking and listening. It also needs a face and a name. For the name we quickly settled on Pompernikkel.
For the face I tried a few interactive visualisations: a 3D implementation with three.js and a shader based approach but eventually setteled on an approach of using an SVG and CSS animations to make the face come alive. This approach makes it doable to control animations with javascript since animating a part of the pumkin means adding or removing a css class. See below for the result
The other functions I used the following components.
A decent quality bluetooth speaker for audio output and clear voice projection
A microphone setup to capture and record children’s voices speaking to the pumpkin
A glass door serving as a projection surface with a projector mounted behind it
Speech-to-text recognition powered by nvidia/parakeet-tdt-0.6b-v3 (see this paper), implemented via transcribe-rs for transcribing Dutch speech
Text-to-speech synthesis using the built-in macOS ‘say’ command to give Pompernikkel a voice
A controllable interactive projection system displaying the animated SVG website mentioned above
Response generation handled by the Gemma 3 12B large language model (paper), running locally through Ollama with a custom system prompt
A real pumpkin augmented with an ESP32 microcontroller and capacitive touch sensor embedded inside to detect physical touch - the microphone would only activate while someone was touching the pumpkin
A custom Ruby websocket driver orchestrating turn-taking behavior and managing the interactive loop of questions and responses
As an extra feature, I implemented a jump scare where a sudden movement would trigger lightning and thunder:
EMI-Kit for responsive movement detection. The mDNS support really makes it easy to use together with mot.
A 5V SK6812 LED strip controlled by an ESP32 programmed to react to EMI-Kit events, creating lightning effects synchronized with audio and visual elements on the HTML page
Lessons learned
Asking a code assisting LLM to add animations to a part of an SVG only works after manually adding identifiers to paths of the svg: eyes, mouth, nose, … Once added, CSS animation are generated with ease. Understanding which svg path corresponds to which semantic object seems out of reach for now for state of the art systems.
Gemma 3 is not a multilingual LLM. It generates responses in Dutch but these seem very translated: it seems that responses are generated in Eglish and translated to Dutch in the final step. This becomes very clear when the LLM attempts jokes. Of course these nonsensical jokes do work on a certain level.
Gemma 3 has a personality that is difficult to get around if a system promt contains trigger words like dark or scary. In my case it responses became philosophical, nihilistic and very dark. Which was unexpectedly great.
Parakeet speech to text in Dutch is faster than the several OpenAI Whisper based systems I managed to get running on my macOS. It also gave better results for short excerpts.
The SK6812 RGBWW is not the best supported by the FastLED library. I managed to get it working with a hack found on GitHub, not ideal.
There are a few end-to-end systems for voice chat with local LLMs on GitHub but they are not easy to get going with something else than CUDA/linux and almost never support other languages than English. For VAD and transcription the same holds.
Looking closely to several speech to text or text to speech sysems, the default of CUDA/Linux is difficult to get around.
The focus of open source models and tools on the English language is problematic, while Dutch is still relatively well represented many systems are limited to only English.
While some kids interacted with the pumpkin, the jump scare lighting and thunder effect worked better in the environment.
Websockets seems a decent way to do inter process communication, even without web technologies it could be considered. I never though of Websockets in this way. See the Pompernikkel GitHub repository for example Ruby scripts.
Most trick-or-treaters were at least intrigued by it, my son’s friends were impressed, and I got to learn a couple of things, see above. Next year, however, I will try to take it easy.
Last Friday, I had the pleasure of facilitating a hands-on workshop in Luxembourg as part of MuTechLab workshop series, organized by Luc Nijs at the University of Luxembourg. Together with Bart Moens from XRHIL and IPEM, we presented a system to control musical parameters with body movement.
MuTechLab is a series of workshops for music teachers who wish to dive into the world of music technology. Funded by the Luxembourgish National Research Fund (FNR, PSP-Classic), the initiative brings together educators eager to explore how technology can enhance music education and creative practice.
What we built and presented
During the workshop, participants got hands-on experience with the EMI-Kit (Embodied Music Interface Kit) – an open-source, low-cost system that allows musicians to control Digital Audio Workstation (DAW) parameters through body movement.
The EMI-Kit consists of:
- A wearable sensor device (M5StickC Plus2) that captures body orientation and gestures
- A receiver unit (M5Stack STAMP S3A) that converts sensor data to MIDI messages
Unlike expensive commercial alternatives, EMI-Kit is fully open source, customizable, and designed specifically for creative music practice and embodied music interaction practice and research.
The Experience
Teachers experimented with mapping natural body movements – pitch, yaw, roll, and tap gestures – to various musical parameters in their DAWs. The low-latency wireless system made it possible to move and control sound, opening up new possibilities for expressive musical performance and pedagogy.
Learn More
Interested in exploring embodied music interaction yourself? Check out:
The EMI-Kit project as-is is a demonstrator to inspire educators to embrace these tools and imagine new ways of teaching and creating music. The EMI-Kit as a platform can - with some additional programming - be a good basis to control musical parameters using various sensors. Have fun with checking out the EMI-Kit.
Participant package - with sender and receiver pair
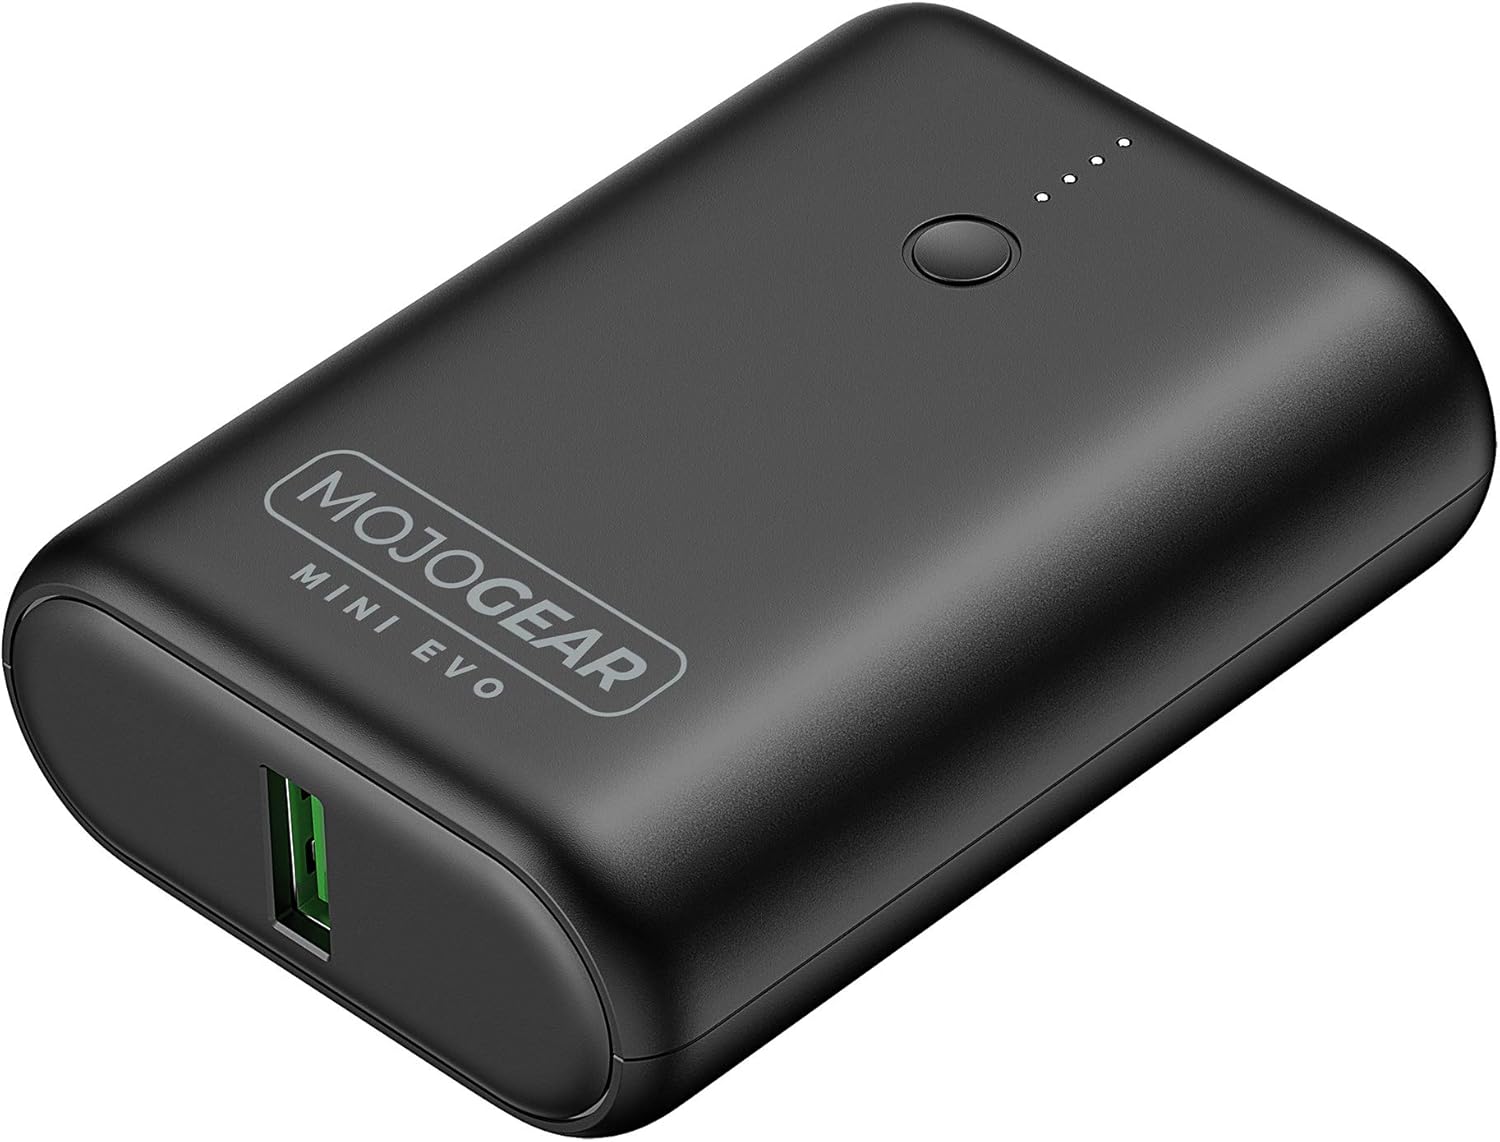
Power banks have become a staple for charging smartphones, tablets, and other devices on the go. They seem ideal to power small microcontroller projects but, they often pose a problem for low-current applications. Most modern power banks include an auto-shutdown feature to conserve energy when they detect a current draw below a specific threshold, often around 50–200mA. The idea being that the power bank can shut off after charging a smartphone. However, if you rely on power banks to power DIY electronics projects or remote applications with low current draw, this auto-off feature can be a significant inconvenience.
To address this issue, consider using power banks designed with an “always-on” or “low-current” mode. These power banks are engineered to sustain power delivery even when the current draw is minimal. Look for models that explicitly mention support for low-power devices in their specifications. If replacing a power bank isn’t an option, you can add a small load resistor or a USB dummy load to artificially increase the current draw. It works, but feels wrong and dirty.
For a previous electronics project I bought a power bank randomly. After a bit of testing, I determined that the minimal power draw was around 150mA, so I added a resistor to increase current draw. Only afterwards did I check the manual of the power bank and noticed, luckily, that there was a low-current mode. I removed the resistor and improved the battery life of the project considerably. If you want to power your DIY Arduino or electronics project, first check the manual of the power bank you want to use!
Edit: after further testing it seemed that the low current mode of this specific power bank still shuts down after a couple of hours. Your mileage may vary, and the main point of this post still holds: check the manual of your power bank. Eventually I went with a solution designed for electronics projects.
In my house, I have a few smart home features: to control ventilation, to open and close solar screens, and to switch a few smart sockets. Up until a couple of days ago, the ventilation and screen controllers operated using custom software running on an ESP32. However, configuring, maintaining, upgrading, and integrating with this custom software gradually became a headache.
Recently, I switched from custom software to Tasmota, an open-source smart home platform targeting ESP32 devices. Tasmota includes a web UI, flexible configuration options, OTA upgrades, and scripting features. The scripting functionality allows devices to be extended with additional commands, which is especially practical for controlling my solar screens. These screens use pulses to toggle between up-stop-down-stop states. By default, Tasmota only supports enabling or disabling a relay, not enabling it for a very brief period (e.g., 150 milliseconds). With a short ‘Berry’ script, such functionality is quickly added.
I appreciate the effort of the Tasmota team to lower the entry barrier for users. They provide ample documentation and a web installer, making setup straightforward. Simply connect your ESP32 via USB, flash it with Tasmota, and configure it—all from your browser. It’s a surprisingly simple process compared to installing a dedicated toolchain. While this might not be what Tim Berners-Lee envisioned 35 years ago, it certainly simplifies the user experience. Lowering the entry barrier even further, some manufacturers even offer smart home devices with Tasmota preinstalled, such as the Nous A1 smart sockets. Eternal september is here.
If you’re managing custom ESP32 smart home devices, consider switching to Tasmota. Its robust features, ease of setup, and active community support make it an excellent choice for both beginners and advanced users.
There is something about surprising interfaces. Having a switch to turn on a light gets quite boring after a while. Turning on a light by clapping twice, on the other hand, has some kind of magic feel to it. In a recent Mr Beast video he and his gang visit a number of expensive houses and in one of those mansions there is a light operated by clapping twice. I am not sure about the blatant materialism, but it got me thinking on how to build a similar clap-operated light yourself.
So, what are the elements needed: first a microphone to pick up sound. Second an algorithm is needed that detects claps. And finally, something that reacts to claps: a light or something else.
Many devices have microphones so sound input is relatively easy, and with some creativity there are many things waiting to be ‘clap triggered’: vacuum robots, sunscreens, lights, in-house ventilation, … The main difficulty is implementing a efficient clap-detection algorithm. Luckily there are already a few described in the literature. I have based my ANSI C implementation on ‘Duxbury, C., et al (2003). Complex domain onset detection for musical signals’.
My version of the clap-detection algorithm has two parameters which might need adapting to fit your environment. The silence threshold determines the minimum loudness for a clap to be triggered. The onset threshold determines more or less how ‘percussive’ the sound needs to be: the idea is to only react to things sounding like a clap and not to e.g. a loud whistle or other sounds. This is what the onset threshold tries to control. You can try it out below:
Demo: click the 'start audio' to capture your microphone and try to clap clearly twice. Lower the parameters if nothing happens.
Clap detection on a micro-controller
With this working we now can try to run this code on a micro-controller. Running it on a micro-controller makes it more practical in daily use to e.g. switch on lights. A low-cost ESP32 with a MEMS microphone is a good platform: these microcontrollers are easy to use and have WiFi connectivity which opens the possibility to trigger commands to smart sockets or other WiFi-enabled devices. The pector GitHub repository contains an Arduino project to run the clap-detection algorithm on an ESP32 or similar device (Teensy, RP2040,… ).
Clap detection in the command line
Next to the main clap detection software, there is a small script to trigger commands when a clap is detected. In this case, the script waits for a double clap and then pushes updates to a git repository. There are two reasons for this: the first is that it is fun, the second is for bragging rights. Not that many people can say they once pushed source code simply by clapping twice. It is, however, a challenge to find people who have the patience to listen to me explaining what I have done and who are impressed by this feat, so maybe there is only one reason: it is fun. Below a screen capture can be found pushing code to the pector repository.
Vid: pushing code by clapping
Have a look at the pector GitHub repository for more info on how you can make your websites/apps/command line tools/devices clap controlled!
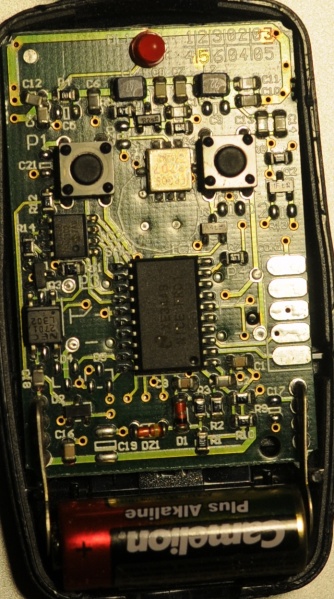
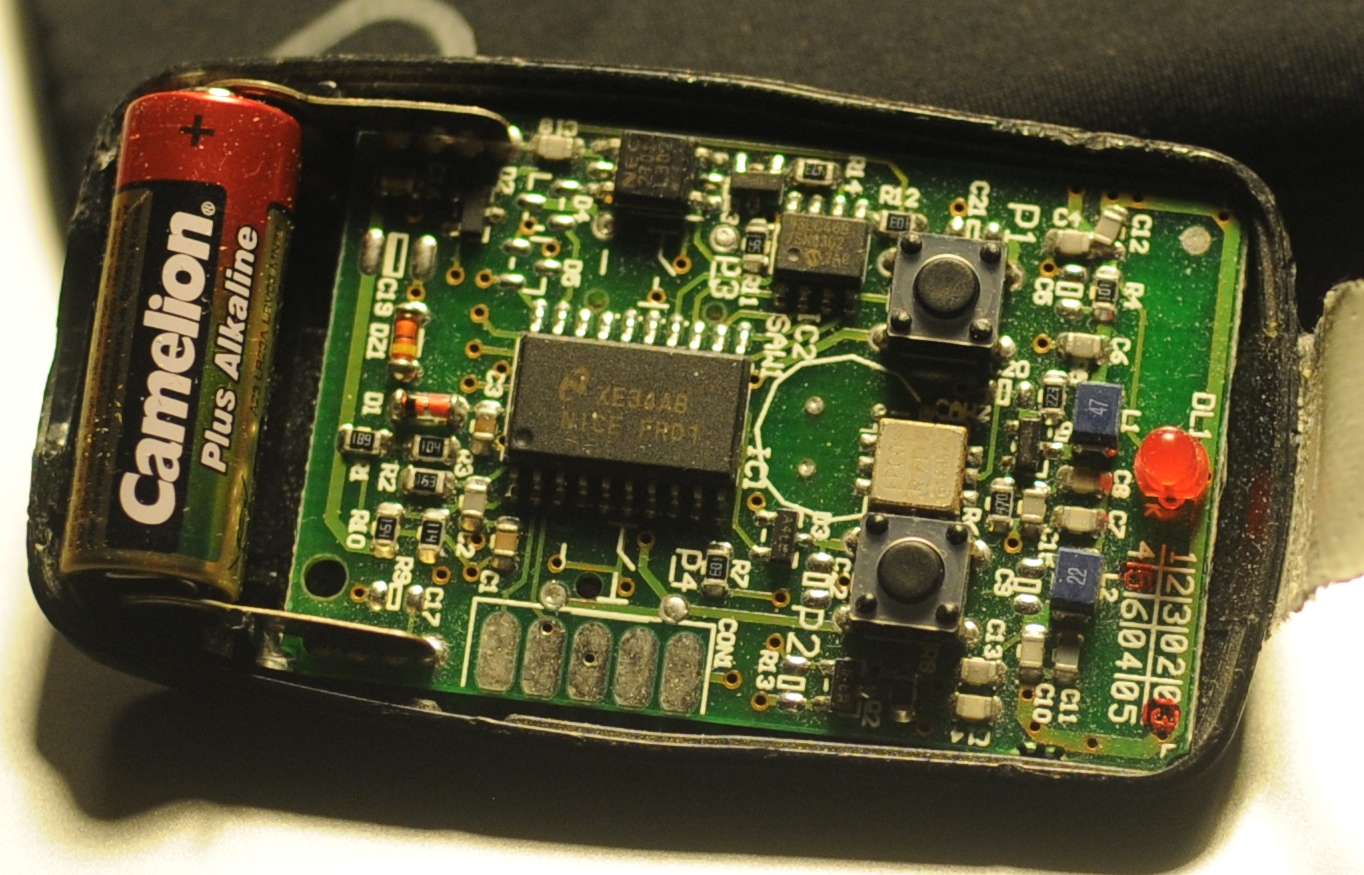
This post contains some info on how do some basic home automation: it shows how cheap remote controlled power sockets can be managed using a computer. The aim is to power on or power off lights, a stereo or other devices remotely from a command shell.
The solution here uses an Arduino connected to a 433.33MHz transmitter. Via a Ruby script installed on the computer a command is send over serial to the Arduino. Subsequently the Arduino sends the command over the air to the power socket(s). If all goes well the power socket reacts by switching the connecting device on or off.
In the video below the process is shown. The command line interface controls the light via the Arduino. It should show the general idea.
The following Ruby script simply sends the binary control codes to the Arduino. For this type of power socket the code consist of a five bit group code and five bit device code. The Arduino is connected to /dev/tty.usbmodem411.
The code below is the complete Arduino sketch. It uses the RCSwich library, which makes the implementation very simple. Essentially it waits for a complete command and transmits it through the connected transmitter. The transmitter connected is a tx433n
```ruby\
#include <RCSwitch.h>
RCSwitch mySwitch = RCSwitch();
char command[12];//2x5 for device and group + command\
int index = 0;\
char currentChar = –1;
//the led pin in use\
int ledPin = 12;
void setup() {\
//start the serial communication\
Serial.begin(9600);\
// 433MHZ Transmitter is connected to Arduino Pin #10\
mySwitch.enableTransmit(10);\
//Led connected to led pin\
pinMode(ledPin, OUTPUT);\
Serial.println(“Started the power command center! Mwoehahaha!”);\
}
void readCommand(){\
//read a command\
while (Serial.available() > 0){\
if(index < 11){\
currentChar = Serial.read(); // Read a character\
command[index] = currentChar; // Store it\
index; // Increment where to write next\
command[index] = ‘\0’; // append termination char\
}\
}\
}
void loop() {\
//read a command\
readCommand();\
//if a command is complete\
if(index == 11){\
Serial.print(“Recieved command: “);\
Serial.println(command);\
char operation = command[0];\
char* group = &command[1];\
//group is 5 bits, as is device\
char* device = &command[6];
//execute the operation\
doSwitch(operation,group,device);\
//reset the index to read a new command\
index=0;\
}\
}
This post documents how to implement a simple music quiz with the meta data provided by Spotify and a big red button.
During my last birthday party, organized at Hackerspace Ghent ,there was an ongoing Spotify music quiz. The concept was rather simple: If music that was playing was created in the same year as I was born, the guests could press a big red button and win a price! If they guessed incorrectly, they were publicly shamed with a sad trombone. Only one guess for each\
song was allowed.
Below you can find a small videograph which shows the whole thing in action. The music quiz is simple: press the button if the song is created in 1984. In the video, at first a wrong answer is given, then a couple of invalid answers follow. Finally a good answer is given, the song “The Killing Moon by Echo & the Bunnymen” is from 1984! Woohoo!
Allright, what did I use to to implement the spotify music quiz:
A big red Arduino button, attatched by USB to a laptop.
A system with Spotify.
A way to access the meta data of the currently playing song in Spotify.
A Ruby script to connect al the parts and checks answers.
The Red Button
A nice big red button, which main features are that it is red and big, serves as the main input device for the quiz. To be able to connect the salvaged safety button to a computer via USB, an Arduino Nano is used. The Arduino is loaded with the code from the debounce tutorial, basically unchanged. Unfortunately, I could not fit the the FTDI-chip, which provides the USB connection, in the original enclosure. An additional enclosure, the white one seen in the pictures below, was added.
When pressed, the button sends a signal over the serial line. See below how the Ruby Quiz script waits for, and handles such event.
Get Meta Data from the Currently Playing Song in Spotify
Another requirement for the quiz to work is the ability to get information about the song currently playing in Spotify. On Linux this can be done with the dbus interface for Spotify. The script included below returns information about the artist, album and title of the song. It also detects if Spotify is running or not. Find it, fork it, use it, on github
With the individual part in order, we now need Ruby glue to paste it all together. The complete music quiz script can be found on github. The main loop, below, waits for a button press. If it is pressed the “sad trombone”:[sad_trombone.wav], “invalid answer”:[cheater.wav] or “winner”:[winner.wav] sound is played. The sounds are attached to this post.
```ruby\
while true do\
# Wait for a button press\
data = sp.readline\
# Fetch meta data about the currently\
# playing song\
result = `#{now_playing_command}`\
# Parse the meta data\
title,artist,album = parse_result(result)\
#Title is hash key, should be unique within playlist\
key = title\
if responded_to.has_key? key\
puts “Already answered: you cheater”\
play cheater\
elsif correct_answers.has_key? key\
puts “Correct answers: woohoo”\
responded_to[key]=true\
play winner\
else\
puts “Incorrect answer: sad trombone”\
responded_to[key]=true\
play sad_trombone\
end\
end\
```
The Amsterdam Music Hack Day is a full weekend of hacking in which participants will conceptualize, create and present their projects. Music + software + mobile + hardware + art + the web. Anything goes as long as it’s music related
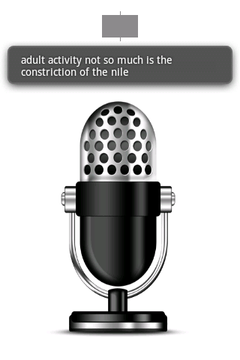
The hackathon was organized at the NiMK(Nederlands instituut voor Media Kunst) the 25th and 24th of May. My hack tries to let a phone start a conversation on its own. It does this by speaking a text and listening to the spoken text with speech recognition. The speech recognition introduces all kinds of interesting permutations of the original text. The recognized text is spoken again and so a dreamlike, unique nonsensical discussion starts. It lets you hear what goes on in the mind of the phone.
The idea is based on Alvin Lucier’s I am Sitting in a Room form 1969 which is embedded below. He used analogue tapes to generate a similar recursive loop. It is a better implementation of something I did a couple of years ago.
The implementation is done with Android and its API’s. Both speech recognition and text to speech are available on android. Those API’s are used and a user interface shows the recognized text. An example of a session can be found below:
To install the application you can download “Tryalogue.apk”:[Tryalogue.apk] of use the QR-code below. You need Android 2.3 with Voice Recognition and TTS installed. Also needed is an internet connection. “The source”:[Tryalogue.zip] is also up for grabs.
I have upgraded the operating system on my LG GT540 Optimus from the stock Android 1.6 to Android Gingerbread 2.3.4. I followed this updgrade procedure.
It is well worth it to spend some time upgrading the phone, especially from 1.6. Everything feels a lot faster and the upgraded applications, e.g. Gallery, are nicely improved.
The main reason I upgraded my phone is to get the open source accessory development kit (ADK) for Android working. I got the DemoKit application working after some time but need to do some more experiments to see if the hardware actually works: I am waiting for a USB Host Shield for Arduino. To be continued…
Vorige zaterdag werd Apps For Ghent georganiseerd: een activiteit om het belang van open data te onderstrepen in navolging van onder meer Apps For Amsterdam en New York City Big App. Tijdens de voormiddag kwamen er verschillende organisaties hun open gestelde data voorstellen de namiddag werd gereserveerd voor een wedstrijd. Het doel van de wedstrijd was om in enkele uren een concept uit te werken en meteen voor te stellen. Het uitgewerkte prototype moest gedeeltelijk functioneren en gebruik maken van (Gentse) open data.
Luk Verhelst en ikzelf hebben er TwinSeats voorgesteld.
TwinSeats is een website / online initiatief om nieuwe mensen te leren kennen. Met hen deel je dezelfde culturele interesse en ga je vervolgens samen naar deze of gene voorstelling. Door events centraal te stellen kan TwinSeats uitzonderlijke cultuurburen zoeken. Leden vinden die cultuurburen dankzij een gezamenlijke voorliefde voor een artiest of attractie of eender welke bezigheid in de vrijetijdssfeer.
Het prototype is ondertussen terug te vinden op TwinSeats.be. Let wel dit is in enkele uren in elkaar geflanst en is verre van ‘af’, het achterliggende concept is belangrijker.
\
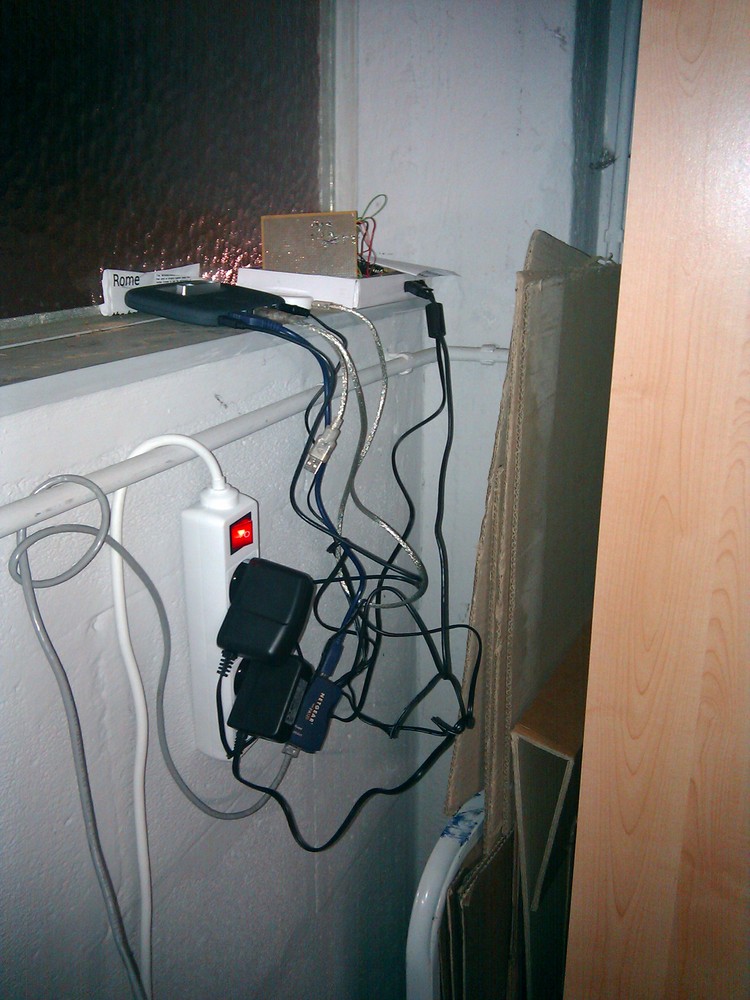
This blog post comments on using the Marvell OpenRD SoC(System on a Chip) as a low power multipurpose home server.
The Hardware
The specifications of the OpenRD SoC are very similar to the better known SheevaPlug devices, so it has 512MB DDR2 RAM, an 1.2GHz ARM processor and 512MB internal flash. To be more precise the OpenRD SoC is essentially a SheevaPlug in a different form factor. The main advantage of this form factor is the number of available connections: 7xUSB, SATA, eSATA, 2xGb Ethernet, VGA, Audio, … which make the device a lot more extendable and practical as a mulitpurpose home server.
The Software
Thanks to the work of Dr. Martin Michlmayr there is a Debian port for the Kirkwood platform readily available. He even wrote a tutorial on how to install Debian on a SheevaPlug. Installing Debian on an OpenRD is exactly the same except for one important detail: the arcNumber variable.
Once Debian is installed you can apt-get or aptitude almost all the software you are used to: webserver, samba, ruby, …
The problem: There is a group of people that want access to Hackerspace Ghent but there is only one remote to open the gate.
The solution: Build a system that reacts to a phone call by opening the gate if the number of the caller is whitelisted.
What you need:
A BeagleBoard or some BeagleBoard alternative with a Linux distribution running on it. Any server running a unix like operating system should be usable.
A Huaweii e220 or an alternative GSM that supports (a subset of) AT commands and has a USB port.
A team of hackers that know how to solder something togeher. E.g. The hardware guys of hackerspace Ghent.
A “python script”:[gatekeeper.py] that reacts to calls.
The Hack: First of all try to get caller id working by following the Caller ID with Linux and Huawei e220 tutorial. If this works you can listen to the serial communication using pySerial and react to a call. The following python code shows the wait for call method:
```ruby\
def wait_for_call(self):\
self.data_channel.open()\
call_id_pattern = re.compile(‘.CLIP.”\+([0-9]+)”,.*’)\
while True:\
bytes = self.data_channel.inWaiting()\
buffer = self.data_channel.readline(bytes)\
call_id_match = call_id_pattern.match(buffer)\
if call_id_match:\
number = call_id_match.group(1)\
self.handle_call(number)\
```
The handle_call method … handles the call.
The second thing that is needed is a way to send a signal from the beagle board to the remote. Sending a signal from the beagle board using Linux is really simple. The following bash commands initialize, activate and deactivate a pin.
This is the scenario: you have a Huawei e220, a linux computer and you want to react to a call from a set of predefined numbers. E.g. ordering a pizza when you receive a call from a certain number.
The Huawei e220 supports a subset of the AT commands, which subset is an enterprise secret of te Huawei company. So there is no documentation available for the device I bought, thanks Huawei. Anyhow when you attach the e220 to a Linux machine you should get two serial ports:
```ruby\
/dev/ttyUSB0\
/dev/ttyUSB1\
```
To connect to the devices you can use a serial client. GNU Screen can be used as a serial client like this: screen /dev/ttyUSB0 115200. The first device, ttyUSB0 is used to control ttyUSB1, so to enable caller ID on te Huawei e220 you need to send this message to ttyUSB0:
```ruby\
AT+CLIP=1\
```
To check for calls you should listen to ttyUSB1. A serial session for ttyUSB1 looks like:
The RING and CLIP messages are the most interesting. The RING signifies an incoming call, the CLIP is the caller ID. The BOOT and RSSI are some kind of ping messages. The following Python script demonstrates a complete session that enables caller ID, waits for a phone call and prints the number of the caller.
```python\
#!/usr/bin/env python\
import serial, re
ser = serial.Serial(\
port=’/dev/ttyUSB1’,\
baudrate=9600,\
parity=serial.PARITY_NONE,\
stopbits=serial.STOPBITS_ONE,\
bytesize=serial.EIGHTBITS\
)
ser.open()
pattern = re.compile(‘.CLIP.”\+([0-9]+)”,.*’)
while 1:\
buffer = ser.read(ser.inWaiting()).strip()\
buffer = buffer.replace(“\n”,””)\
match = pattern.match(buffer)\
if match:\
number = match.group(1)\
print number\
```
To make Tarsos more portable I wrote a pitch tracker in pure JAVA using the YIN algorithm based on the implementation in C of aubio. The implementation also uses some code written by Karl Helgasson and Teun de Lange of the Jazzperiments project.
It can be used to perform real time pitch detection or to analyse files. To use it as a real time pitch detector just start the “JAR-file”:[pitch_detector_yin.jar] by double clicking. To analyse a file execute one of the following. The first results in a list of annotations (text), the second shows the annotations graphically.
Recently I bought a big shiny red USB-button. It is big, red and shiny. Initially I planned to use it to deploy new versions of websites to a server but I found a much better use: ordering pizza. Graphically the use case translates to something akin to:
If you would like to enhance your life quality leveraging the power of a USB pizza-button: you can! This is what you need:
A PC running Linux. This tutorial is specifically geared towards Debian-based distos. YMMV.
A big, shiny red USB button. Just google “USB panic button” if you want one.
A location where you can order pizzas via a website. I live in Ghent, Belgium and use just-eat.be. Other websites can be supported by modifying a Ruby script.
Technically we need a driver to check when the button was pushed, a way to communicate the fact that the button was pushed and lastly we need to be able to react to the request.
The driver: on the internets I found a driver for the button. Another modification was done to make the driver process a daemon.
The communication: The original Python script executed another script on the local pc. A more flexible approach is possible using sockets. With sockets it is possible to notify any computer on a network.
```ruby\
if PanicButton().pressed():\
# create a TCP socket\
s = socket.socket(socket.AF_INET, socket.SOCK_STREAM)\
# connect to server on the port\
s.connect((SERVER, SERVER_TCP_PORT))\
# send the order (margherita at restaurant mario)\
s.send(“mario: [margherita_big]\n”)\
```
The reaction: a ruby TCP server waits for message from the driver. When it does it automates a HTTP session on a website. It executes a series of HTTP-GET’s and POST’s. It uses the mechanize library.
Some libraries are needed. For python you need the usb library, the python deamons lib needs to be installed seperatly. Setuptools are needed to install the deamons package.
Ruby needs rubygems to install the needed mechanize and daemons library. Mechanize needs the libxslt-dev package. You also need the build-essential package to build mechanize.
This blog post is about how to use the Touchatag RFID reader hardware on Ubuntu Linux without using the Touchatag web service.
An RFID reader with tags can used to fire events. With a bit of scripting the events can be handled to do practically any task.
Normally a Touchatag reader is used together with the Touchatag web service but for some RFID applications the web service is just not practical. E.g. for embedded Linux devices without an Internet connection. In this tutorial I wil document how I got the Touchatag hardware working under Ubuntu Linux.
To follow this tutorial you will need:
Touchatag hardware: the USB reader and some tags
A Ubuntu Linux computer (I tested 9.10 Karmic Koala and 8.04 )
SVN to download source code from a repository
The touchatag USB reader works at 13.56MHz (High Frequency RFID) and has a readout distance of about 4 cm (1.5 inch) when used with the touchatag RFID tags. Internally it uses an ACS ACR122U reader with a SAM card. A Linux driver is readily available so when you plug it in lsusb you should get something like this:
```ruby\
lsusb
Bus 007 Device 001: ID 1d6b:0001 Linux Foundation 1.1 root hub\
Bus 005 Device 004: ID 072e:90dd Advanced Card Systems, Ltd\
```
lsusb recognizes the device incorrectly but that’s not a problem. To read RFID-tags and respond to events additional software is needed: tagEventor is a software library that does just that. It can be downloaded using an svn command:
To compile tagEventor a couple of other software packages or header files should be available on your system. Te tagEventor software dependencies are described on the tagEventor wiki. On Ubuntu (and possibly other Debian based distro’s the installation is simple:
```ruby\
sudo aptitude install build-essential libpcsclite-dev build-essential pcscd libccid\
#if you need gnome support\
#sudo aptitude install libgtk2.0-dev\
```
Now the tricky part. Two header files of the pcsclite package need to be modified (update: this bug is fixed see here). tagEventor builds and can be installed:
```ruby\
cd tageventor\
make\
…\
tagEventor BUILT (./bin/Release/tagEventor)
sudo ./install.sh\
…\
```
When tagEventor is correctly installed the only thing left is … to build your application. When an event is fired tagEventor executes the /etc/tageventor/generic script with three parameters (see below). Using some kind of IPC (Inter Process Communication) an application can react to events. A simple and flexible way to propagate events (inter-processes, over a network, platform and programming language independent) uses sockets. The code below is the /etc/tageventor/generic script (make sure it is executable), it communicates with the server: the second script. To run the server execute ruby /name/of/server.rb
```ruby\
#!/usr/bin/ruby
$1 = SAM (unique ID of the SAM chip in the smart card reader if exists, “NoSAM” otherwise
$2 = UID (unique ID of the tag, as later we may use wildcard naming)
$3 = Event Type (IN for new tag placed on reader, OUT for tag removed from reader)
The tagEventor software is made by the Autelic Association a Non-Profit association dedicated to making technology easier to use for all. I would like to thank Andrew Mackenzie, the founder and president of the association for creating the software and the support.
Ik heb in opdracht van scholengroep Sperregem een website gemaakt die het vinden van kandidaten voor korte vervangingen vlotter doet verlopen. Mensen met interesse voor vacatures in het onderwijs in West-Vlaanderen kunnen zich er op inschrijven.
De website heeft enkele voordelen voor verschillende scholen in de scholengroep:
Het zoeken van kandidaten is erg eenvoudig: na het invoeren van een vacature komt er een lijst met kandidaten met een geschikt profiel die tijdens de vacature beschikbaar zijn.
Er kunnen e-mail of SMS-berichten verstuurd worden om kandidaten op de hoogte te brengen van een vacature.
Profielen van kandidaten zijn altijd up-to-date: de kandidaten zijn er zelf verantwoordelijk voor en kandidaten lange tijd niets van zich laten horen worden automatisch op non-actief gezet.
De historiek van kandidaten wordt automatisch bijgehouden en kan opgezocht worden.
Ook voor de aspirant onderwijzers is de website handig:
De vacatures zijn publiek zichtbaar, kandidaten kunnen dus actief solliciteren.
Ze kunnen zelf hun profiel beheren en bijvoorbeeld een vernieuwde versie van hun C.V. uploaden.
Voor elke kandidaat is een gepersonaliseerde lijst met vacatures beschikbaar (ook via RSS), afgestemd op hun profiel.
Daarnaast is het ook voor de personeelsdienst een handige tool: die kan nu een beter overzicht bewaren over de vacatures en de invulling ervan in de verschillende scholen.
 Last Friday, I had the pleasure of facilitating a hands-on workshop in Luxembourg as part of


 Power banks have become a staple for charging smartphones, tablets, and other devices on the go. They seem ideal to power small microcontroller projects but, they often pose a problem for low-current applications. Most modern power banks include an auto-shutdown feature to conserve energy when they detect a current draw below a specific threshold, often around 50–200mA. The idea being that the power bank can shut off after charging a smartphone. However, if you rely on power banks to power DIY electronics projects or remote applications with low current draw, this auto-off feature can be a significant inconvenience.
 In my house, I have a few smart home features: to control ventilation, to open and close solar screens, and to switch a few smart sockets. Up until a couple of days ago, the ventilation and screen controllers operated using custom software running on an ESP32. However, configuring, maintaining, upgrading, and integrating with this custom software gradually became a headache.


 This post is about a hack I did for the 2012


 TwinSeats is een website / online initiatief om nieuwe mensen te leren kennen. Met hen deel je dezelfde culturele interesse en ga je vervolgens samen naar deze of gene voorstelling. Door events centraal te stellen kan TwinSeats uitzonderlijke cultuurburen zoeken. Leden vinden die cultuurburen dankzij een gezamenlijke voorliefde voor een artiest of attractie of eender welke bezigheid in de vrijetijdssfeer.
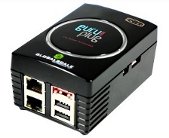 \
This blog post comments on using the Marvell OpenRD SoC(System on a Chip) as a low power multipurpose home server.
\
This blog post comments on using the Marvell OpenRD SoC(System on a Chip) as a low power multipurpose home server.

 This is the scenario: you have a Huawei e220, a linux computer and you want to react to a call from a set of predefined numbers. E.g.