The following text puts into words a change that I have seen happening the last month. At the Ghent Centre for Digital Humanities we manage a fleet of virtual servers on the Ghent University network and have first-hand experience with security incidents appearing regularly now. It has a different tone than other posts here: it was sent in as a letter for a newspaper but was not published. Let’s see in a few years if the tone was too alarmist or if it holds up:
The newest generation of AI coding tools is a great asset for software developers. They help with understanding complex codebases, and assist in writing code. Used properly, AI coding tools increase software quality and developer productivity. Unfortunately, these powerful tools can also be used with bad intentions. AI coding tools are now sufficiently advanced to find and exploit bugs in software. They pose a threat to essentially all computing systems that form the underpinning of modern infrastructure: banking, aviation, industry, and education.
While earlier reports still used conditional terms to describe these threats, now — only a couple of weeks later — the first effects are already here. With the help of AI coding tools, three bugs were found in Linux, an open-source operating system: Copy.fail, Dirty Frag, and Fragnesia. These first AI-discovered exploits in a broadly deployed system form a watershed moment. The bugs led to service outages, but diligent IT teams quickly patched systems, limiting the impact. The effects of Mythos — widely considered the most capable system for finding bugs in software — are now also clear. Mozilla reported finding and fixing around four hundred bugs last month, where in a typical month around twenty similar bugs are discovered and patched. Not every bug is exploitable, but every exploit starts with a bug. The age of AI exploits is here.
The transition to this new age will be painful. Many unmaintained systems are connected to the internet and will not receive security updates: IoT devices, orphaned servers, smartphones and proprietary systems locked in time. It will become easier to gain illegitimate access to these machines. The skills needed to break into such systems are diminishing. What previously required highly specialized experts or state actors is now within reach of a much broader pool of bad actors, due to the very tools that are meant to help developers.
What can be done? Companies need more stringent cybersecurity policies today. The broader public needs awareness of this evolution and basic cybersecurity hygiene to keep devices up to date. And we need a regulatory framework that holds producers of computing systems responsible for updates over a longer lifespan. Unfortunately, we can not afford to collectively ignore this emerging reality.
Recently, my son’s school teacher asked parents to come in and read in front of the class. I kindly declined, since I am not very comfortable doing voices in front of a room full of ten to twelve-year-olds. As an alternative, I proposed to explain some properties of sound and music, based on material I used fifteen years ago for the kids’ university: a series of workshops and lectures aimed at children. Unfortunately, after a couple of months, the teacher took me up on the offer.
Fifteen years ago, I painstakingly hand-coded - yes, this is becoming a thing - demos in the Java programming language to show properties of sound: an oscilloscope, a loudness level meter, a spectrogram, a pitch detector. This took ages but worked reasonably well to show basic properties of waves, sounds and music.
This time, I casually vibe-coded similar demos, not in Java but using self-contained, single-page web applications. Below one of the demos - on sound propagation - is included. With the aid of powerful AI coding tools, programming these interactive demos took only a couple of hours. Fifteen years ago, the hand-coded - arguably worse - versions of the demos took weeks. The main downside is that there is less pride or satisfaction in detailed prompting vs hand-coding.
Giving the presentation went well and as far as I could tell, the kids were at least involved and may have learned a couple of things. Afterwards, I got some feedback via a parent that their kid was intrigued and got curious, so I will take that as a win.
Some takeaways:
AI coding tools are great at creating stand-alone, interactive, shader-based visualizations and demos.
Use web technologies for slides: great for multimedia, accessibility, distribution, and interactive slides.
To create interactive slides where shaders or visual information is used the AI coding tool should be able to peer deep into the browser internals. This can be done with the Chrome DevTools MCP or a similar system. This feedback loop allows an LLM to improve on a single-shot attempt automatically.
It is the result of an European research project in which I was involved in only at the start. I did, however, also contribute to the study in a small but crucial way. During the experiment, the exoskeletons suddenly stopped working. I was asked to have a look and see if there was something to be done. I was a bit hesitant to go near these unique, expensive prototypes with a soldering iron but, after a couple of tense minutes and fixing some - easy to access - connections the arms came back alive. The experiment could continue and everybody started clapping and cheering. This is at least how I remember it. Perhaps that last part is not entirely accurate. Anyhow, I made it into the acknowledgments; thanks Ola.
AbstractJoint actions among humans rely on the integration of multiple sensory modalities, most notably auditory and visual cues, which support explicit communication between partners. However, haptic feedback provides a direct, implicit channel for sensorimotor communication, and its contribution to fine motor coordination in joint actions remains largely unexplored. Here, we demonstrate that haptic communication, rendered through bidirectionally coupled wearable robots, outperforms traditional auditory-visual feedback in a complex and challenging real-life joint action: ensemble violin performance.
First, we developed a pair of two–degree-of-freedom upper-limb exoskeletons capable of transparently following violinists’ natural movements and rendering viscoelastic torques proportional to the joint angular deviation between the partners. Then, we designed a within-subject experiment with 20 violin duos performing a musical piece under four sensory feedback conditions: auditory (A), auditory-visual (AV), auditory-haptic (AH), and auditory-visual-haptic (AVH), across two tempi (72 and 100 beats per minute). Despite the musicians being unfamiliar with the robot-mediated haptic feedback and unaware of the bidirectional connection between them, haptic feedback (AH and AVH) substantially enhanced spatiotemporal coordination and dynamic musical alignment compared with the extensively trained auditory-visual feedback (A and AV). The multisensory feedback condition AVH yielded the highest scores across all measures. Our findings demonstrate that haptic feedback can support fine motor coordination in violin duo performance more effectively than visual cues, particularly for professional musicians, because of its implicit and embodied nature, and that it can be effectively delivered via wearable robots, expanding the paradigms of human-human sensorimotor interactions.
If you’re considering adding USB MIDI functionality to a music project with an ESP32, it’s crucial to choose the right variant of the chip. The ESP32-S3 is currently the go-to model for USB-related tasks thanks to its native USB capabilities. Unlike other ESP32 models, the S3 can handle USB MIDI directly without the need for additional components, making it an ideal choice for integrating MIDI devices into your setup. For more details on using USB MIDI with the ESP32-S3, check out the ESP32USBMIDI project.
When combined with the ESP32-S3’s built-in WiFi and support for OSC (Open Sound Control) or ESP Now, the platform becomes very versatile for music controllers or applications. A quick tip: after flashing your device in MIDI mode, the serial is not available any more. Flashing the device also becomes impossible. If you need to reflash your device, the process is simple: just hold down the Boot button and press Reset.
Another short tip: for troubleshooting and logging, the mot project provides useful tools for debugging OSC or MIDI messages. The support is currently stil in flux but do not make the mistake I made and do not try to do MIDI with a ESP C3 series.
This morning I gave a guest lecture introducing the field of music information retrieval to musicology students at Ghent University. Next to the more general MIR intro, two specific topics are fleshed out: duplicate detection and pitch patterns in music around the world. Two topic I have been working on before.
The presentation has the form of an interactive website via reveal.js. It features a couple of slides which are full-blown applications or have an interactive sound visualization component. Please do try out the slides and check the Music Information Retrieval - Opportunities for digital musicology presentation or try it below.
The last few halloweens I have been building one-off interactive installations for visiting trick-or-treaters. I did not document the build of last year, but the year before I built an interactive door bell with a jump scare door projection. This year I was trying to take it easy but my son came up with the idea of doing something with a talking pumpkin. I mumbled something about feasibility so he promptly invited all his friends to come over on Halloween to talk to a pumpkin. So I got to work and tried to build something. This blog post documents this build.
A talking pumkin needs a few functions. It needs to understand kids talking in Dutch, it needs to be able to respond with a somewhat logical respons and ideally have a memory about previous interactions. It also needs a way to do turn-taking: indicating who is speaking and listening. It also needs a face and a name. For the name we quickly settled on Pompernikkel.
For the face I tried a few interactive visualisations: a 3D implementation with three.js and a shader based approach but eventually setteled on an approach of using an SVG and CSS animations to make the face come alive. This approach makes it doable to control animations with javascript since animating a part of the pumkin means adding or removing a css class. See below for the result
The other functions I used the following components.
A decent quality bluetooth speaker for audio output and clear voice projection
A microphone setup to capture and record children’s voices speaking to the pumpkin
A glass door serving as a projection surface with a projector mounted behind it
Speech-to-text recognition powered by nvidia/parakeet-tdt-0.6b-v3 (see this paper), implemented via transcribe-rs for transcribing Dutch speech
Text-to-speech synthesis using the built-in macOS ‘say’ command to give Pompernikkel a voice
A controllable interactive projection system displaying the animated SVG website mentioned above
Response generation handled by the Gemma 3 12B large language model (paper), running locally through Ollama with a custom system prompt
A real pumpkin augmented with an ESP32 microcontroller and capacitive touch sensor embedded inside to detect physical touch - the microphone would only activate while someone was touching the pumpkin
A custom Ruby websocket driver orchestrating turn-taking behavior and managing the interactive loop of questions and responses
As an extra feature, I implemented a jump scare where a sudden movement would trigger lightning and thunder:
EMI-Kit for responsive movement detection. The mDNS support really makes it easy to use together with mot.
A 5V SK6812 LED strip controlled by an ESP32 programmed to react to EMI-Kit events, creating lightning effects synchronized with audio and visual elements on the HTML page
Lessons learned
Asking a code assisting LLM to add animations to a part of an SVG only works after manually adding identifiers to paths of the svg: eyes, mouth, nose, … Once added, CSS animation are generated with ease. Understanding which svg path corresponds to which semantic object seems out of reach for now for state of the art systems.
Gemma 3 is not a multilingual LLM. It generates responses in Dutch but these seem very translated: it seems that responses are generated in Eglish and translated to Dutch in the final step. This becomes very clear when the LLM attempts jokes. Of course these nonsensical jokes do work on a certain level.
Gemma 3 has a personality that is difficult to get around if a system promt contains trigger words like dark or scary. In my case it responses became philosophical, nihilistic and very dark. Which was unexpectedly great.
Parakeet speech to text in Dutch is faster than the several OpenAI Whisper based systems I managed to get running on my macOS. It also gave better results for short excerpts.
The SK6812 RGBWW is not the best supported by the FastLED library. I managed to get it working with a hack found on GitHub, not ideal.
There are a few end-to-end systems for voice chat with local LLMs on GitHub but they are not easy to get going with something else than CUDA/linux and almost never support other languages than English. For VAD and transcription the same holds.
Looking closely to several speech to text or text to speech sysems, the default of CUDA/Linux is difficult to get around.
The focus of open source models and tools on the English language is problematic, while Dutch is still relatively well represented many systems are limited to only English.
While some kids interacted with the pumpkin, the jump scare lighting and thunder effect worked better in the environment.
Websockets seems a decent way to do inter process communication, even without web technologies it could be considered. I never though of Websockets in this way. See the Pompernikkel GitHub repository for example Ruby scripts.
Most trick-or-treaters were at least intrigued by it, my son’s friends were impressed, and I got to learn a couple of things, see above. Next year, however, I will try to take it easy.
Since a couple of months FFmpeg supports audio transcription via OpenAI Whisper and Wisper-cpp. This allows to automatically transcribe interviews and podcasts or generate subtitles for videos. Most packaged versions of the command line tool ffmpeg do not ship with this option enabled. Here we show how to do this on macOS with the Homebrew package manager. On other platforms similar configuration will apply.
On macOS there is a prepared Homebrew keg which allows to enable or disable the many ffmpeg options. If you already have ffmpeg without options installed you may need to uninstall the current version and install a version with chosen options. See below on how to do this:
# check if you already have ffmpeg with whisper enabled
ffmpeg --help filter=whisper
# uninstall current ffmpeg, it will be replaced with a version with whisper
brew uninstall ffmpeg
# add a brew tap which provides options to install ffmpeg from source
brew tap homebrew-ffmpeg/ffmpeg
# this commands adds most common functionality and other default functions
brew install homebrew-ffmpeg/ffmpeg/ffmpeg \
--with-fdk-aac \
--with-jpeg-xl \
--with-libgsm \
--with-libplacebo \
--with-librist \
--with-librsvg \
--with-libsoxr \
--with-libssh \
--with-libvidstab \
--with-libxml2 \
--with-openal-soft \
--with-openapv \
--with-openh264 \
--with-openjpeg \
--with-openssl \
--with-rav1e \
--with-rtmpdump \
--with-rubberband \
--with-speex \
--with-srt \
--with-webp \
--with-whisper-cpp
Installation will take a while since many dependencies are required for the many options. Once the build is finished the whisper filter should be available in FFmpeg. See below on how this should look, once correctly installed:
I’ve just pushed some updates to mot — a command-line application for working with OSC and MIDI messages. My LLM tells me that these are exciting updates but I am not entirely sure that this is the case. Let me know if this ticks your box and seek professional help.
1. Scriptable MIDI Processor via Lua
I have implemented a MIDI processor that lets you transform, filter, and generate MIDI messages using Lua scripts.
Why is this useful? MIDI processors act as middlemen between your input devices and output destinations.You can do the following on incoming MIDI messages:
Filter - Block unwanted messages - channels - or select specific ranges
Route - Send different notes to different channel
Generate - Create complex patterns from simple input
The processor reads incoming MIDI from a physical device, processes it through your Lua script, and outputs the modified messages to a virtual MIDI port that your DAW or synth can receive. Some examples:
# Generate chords from single notes
mot midi_processor --script scripts/chord_generator.lua 06666# Transpose notes up by one octave
mot midi_processor --script scripts/example_processor.lua 06666
2. Network Discovery via mDNS
OSC receivers now advertise themselves on the network using mDNS/Bonjour with the _osc._udp service type.
This makes mot compatible with the EMI-kit — the Embodied Music Interface Kit developed at IPEM, Ghent University. OSC-enabled devices can automatically discover mot receivers on your network, eliminating manual configuration if the OSC sources add this functionality.
Last Friday, I had the pleasure of facilitating a hands-on workshop in Luxembourg as part of MuTechLab workshop series, organized by Luc Nijs at the University of Luxembourg. Together with Bart Moens from XRHIL and IPEM, we presented a system to control musical parameters with body movement.
MuTechLab is a series of workshops for music teachers who wish to dive into the world of music technology. Funded by the Luxembourgish National Research Fund (FNR, PSP-Classic), the initiative brings together educators eager to explore how technology can enhance music education and creative practice.
What we built and presented
During the workshop, participants got hands-on experience with the EMI-Kit (Embodied Music Interface Kit) – an open-source, low-cost system that allows musicians to control Digital Audio Workstation (DAW) parameters through body movement.
The EMI-Kit consists of:
- A wearable sensor device (M5StickC Plus2) that captures body orientation and gestures
- A receiver unit (M5Stack STAMP S3A) that converts sensor data to MIDI messages
Unlike expensive commercial alternatives, EMI-Kit is fully open source, customizable, and designed specifically for creative music practice and embodied music interaction practice and research.
The Experience
Teachers experimented with mapping natural body movements – pitch, yaw, roll, and tap gestures – to various musical parameters in their DAWs. The low-latency wireless system made it possible to move and control sound, opening up new possibilities for expressive musical performance and pedagogy.
Learn More
Interested in exploring embodied music interaction yourself? Check out:
The EMI-Kit project as-is is a demonstrator to inspire educators to embrace these tools and imagine new ways of teaching and creating music. The EMI-Kit as a platform can - with some additional programming - be a good basis to control musical parameters using various sensors. Have fun with checking out the EMI-Kit.
Workshop hardware set
ESP32-S3 USB MIDI receivers
Participant package - with sender and receiver pair
This weekend the - more-or-less - yearly conference of Hackerspace Ghent took place: Newline.gent. Hackers, makers, and curious minds gathered to share ideas, tools, experiments and a few beers.
I had a small contribution with a short lecture-performance which covered how to control your computer with a flute. The lecture part covered the technical part of the build, the performance part included playing Flappy Bird with a flute. A third significant part of the talk — arguably the main focus — was devoted to bragging about the global attention the project received.
Other highlights of the Newline conference included talks on Home Assistant, 3D design, BTRFS and workshops that invited everyone to get involved.
Big thanks to the organizers and everyone who joined. I’m already looking forward to the next one!
This short guide will help you set up a local certificate using Caddy as the webserver to provide local TLS certificates to be able to develop websites immedately using HTTPS. Having a local HTTPS server in development can help with e.g. debugging CORS issues, accessing resources which require a HTTPS connection, or trying out analytics platforms.
1. Configure your hosts file
If you want to use a domain name, you need to first add a line to /etc/hosts which, in this case, sets localhost to correspond to example.com.
echo "127.0.0.1 example.com" | sudo tee -a /etc/hosts
2. Configure Caddy
In a directory of your choosing, create a Caddyfile with the following content, it sets Caddy to automatically generate certificates on the fly for example.com or any other domain name. Perhaps you will need to trust the main Caddy certificate on first use:
Still in the same directory as the Caddyfile and the index.html file, run the following command to start the Caddy web server: caddy run
5. Trust the locally generated certificate
In macOS this means adding the local caddy root certificate to your keychain. It can be found here /data/caddy/pki/authorities/local/root.crt In other environments a similar step is needed.
6. access the Test Site
Open your web browser and navigate to https://example.com to access the test site in the command line: open https://example.com. If you inspect the certificate it should be issued by the ‘Caddy local authority’.
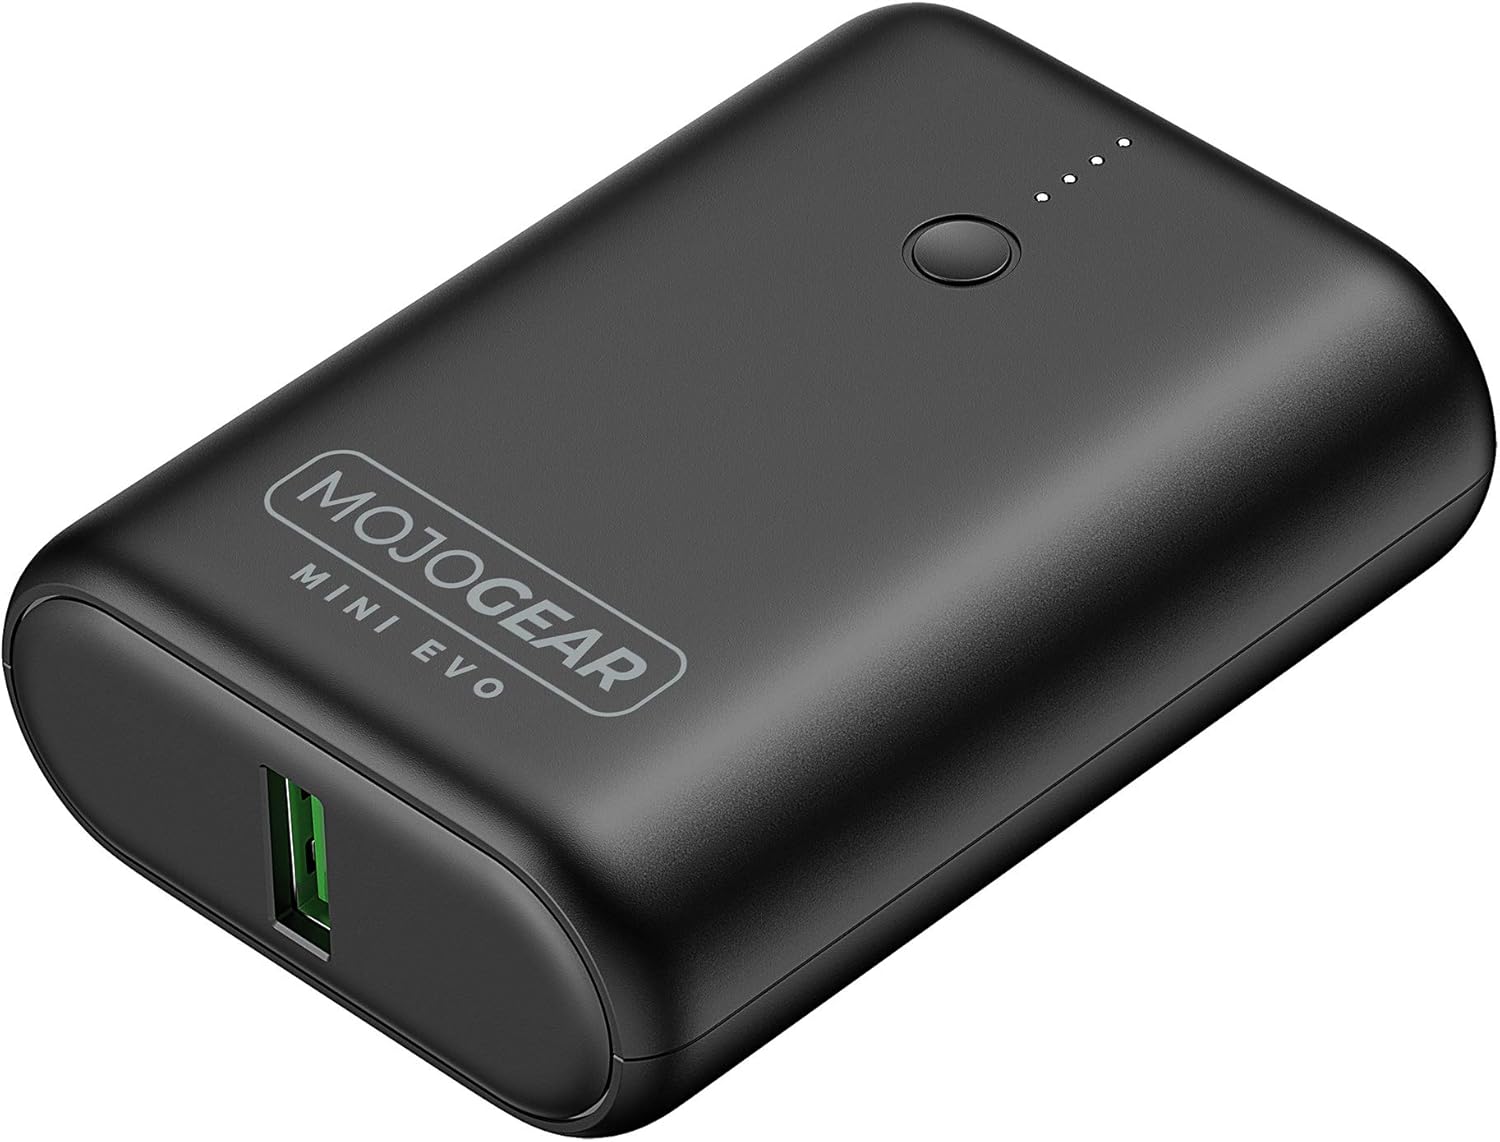
Power banks have become a staple for charging smartphones, tablets, and other devices on the go. They seem ideal to power small microcontroller projects but, they often pose a problem for low-current applications. Most modern power banks include an auto-shutdown feature to conserve energy when they detect a current draw below a specific threshold, often around 50–200mA. The idea being that the power bank can shut off after charging a smartphone. However, if you rely on power banks to power DIY electronics projects or remote applications with low current draw, this auto-off feature can be a significant inconvenience.
To address this issue, consider using power banks designed with an “always-on” or “low-current” mode. These power banks are engineered to sustain power delivery even when the current draw is minimal. Look for models that explicitly mention support for low-power devices in their specifications. If replacing a power bank isn’t an option, you can add a small load resistor or a USB dummy load to artificially increase the current draw. It works, but feels wrong and dirty.
For a previous electronics project I bought a power bank randomly. After a bit of testing, I determined that the minimal power draw was around 150mA, so I added a resistor to increase current draw. Only afterwards did I check the manual of the power bank and noticed, luckily, that there was a low-current mode. I removed the resistor and improved the battery life of the project considerably. If you want to power your DIY Arduino or electronics project, first check the manual of the power bank you want to use!
Edit: after further testing it seemed that the low current mode of this specific power bank still shuts down after a couple of hours. Your mileage may vary, and the main point of this post still holds: check the manual of your power bank. Eventually I went with a solution designed for electronics projects.
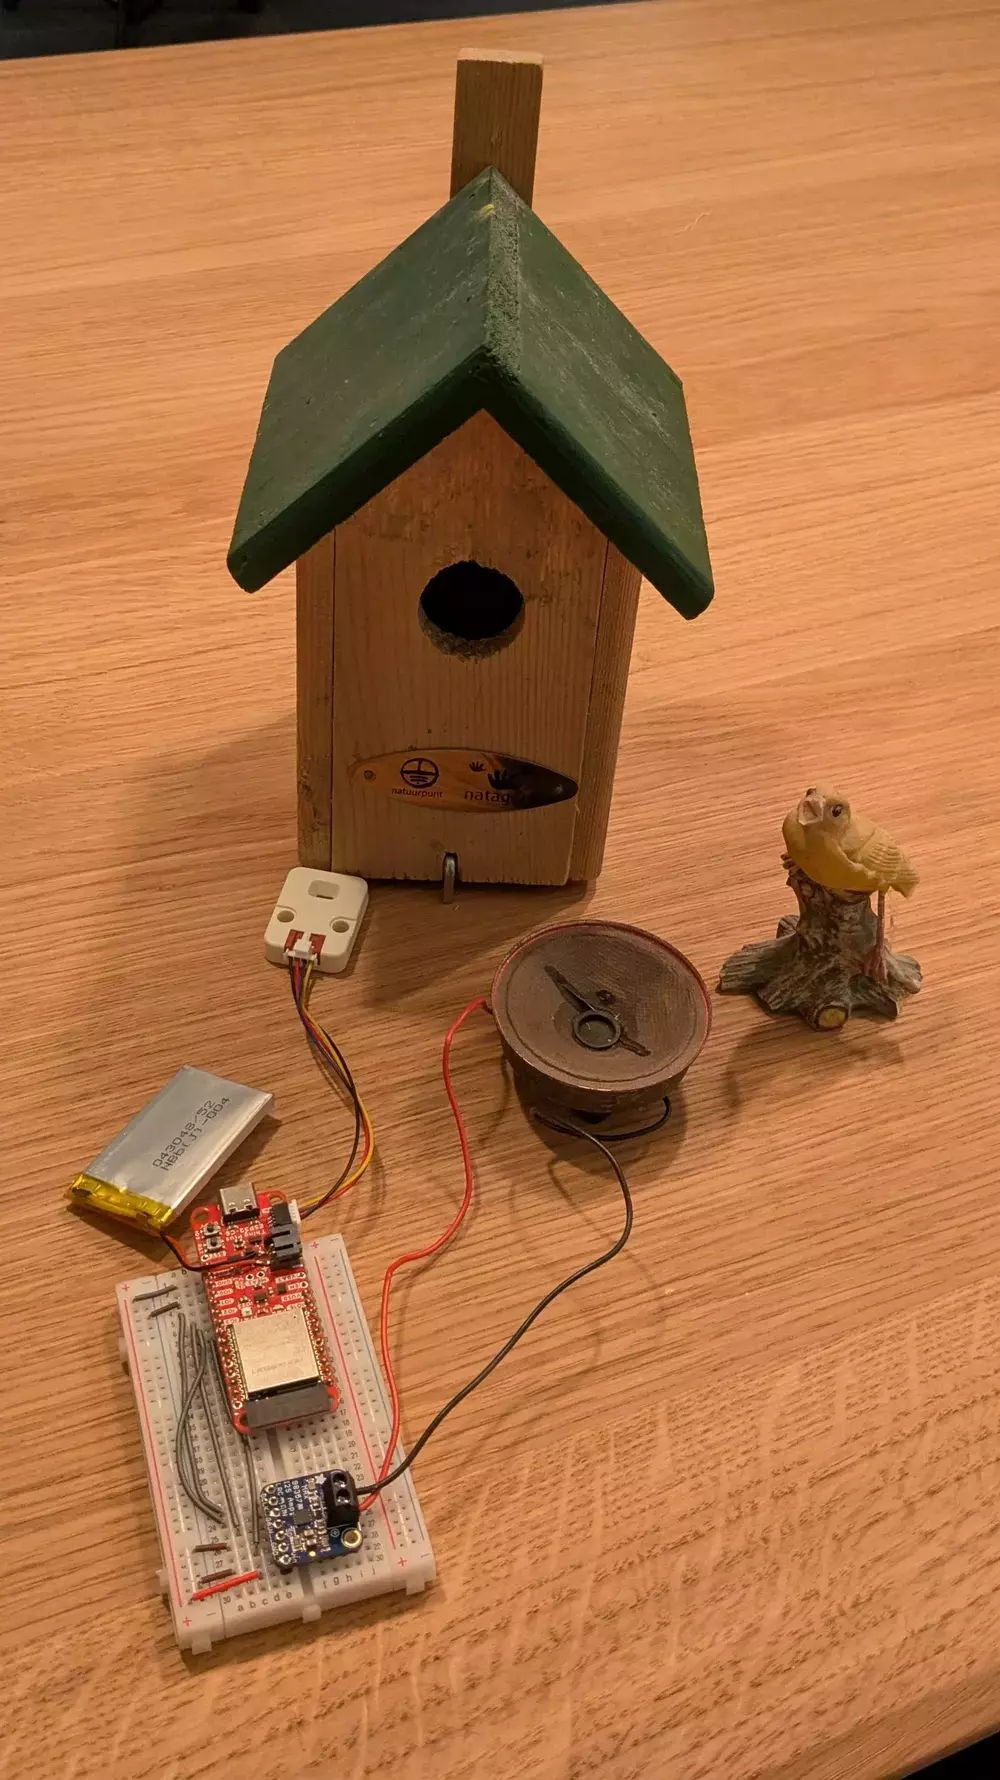
There is this thing that starts playing birdsong when it detects movement. It is ideal to connect to nature while nature calls. It is a good idea, executed well but it got me thinking: this can be made less reliable, more time consuming, more expensive, and with a shorter battery life. So I started working on a DIY version.
Vid: Playing birdsong when presence is detected with an ESP32 microcontroller .
The general idea is to start playing birdsong if someone is present in a necessary room. In addition to a few of electronics components the project needs birdsong recordings. Freesound is a great resource for all kinds of environmental sounds and has a collection of birdsong which was used for this project.
For the electronics components the project needs a microcontroller and a way to detect presence. I had a laser ranging sensor lying around which measures distance but can be repurposed to detect presence in a small room: most of the time, the distance to an opposite wall is reported. If a smaller distance is measured it is probably due to a person being present. The other components:
As is often the case with builds like this, neither the software nor the hardware is challenging conceptually but, making hard and software cooperate is. Some pitfalls I encountered: the ESP32 C6 needs USB CDC set in the Arduino IDE, the non standard I2C GPIO pins. Getting the many I2S parameters right. Dealing with a nasty pop sound once audio started. A broken LiPo battery. Most of the fixes can be found in the Arduino code
I use a polling strategy to detect presence. A distance measurement is taken and then the ESP32 goes into a deep sleep until the next measurement. A sensor with the ability to wake up the microcontroller would be a better approach.
Once everything was installed it worked well enough — motion triggered a random birdsong, creating a soothing, natural vibe. It may be less practical than the off-the-shelf version but I did learn quite a lot more than I would have by simply filling in a form and providing payment details…
A discussion at work led to the question how much time it takes for a HTTP request to pass through a HTTP proxy. This blog post deals with this question by measuring a request passing through a stupid amount of HTTP proxies.
Fig: Measuring the time it takes to pass 500 proxies with Curl.
In modern development setups it is not uncommon that your HTTP request passes a few HTTP proxies before reaching a final server that actually handles the request. In our case there is a proxy which ensures an SSL certificate, which is forwarded to a proxy which automatically forwards requests to a docker container. A final HTTP proxy runs in the docker network that forwards the request to a webserver. A response follows the same way in reverse.
Fig: Configuration to pass a HTTP request through many proxies. The final response is a simple text.
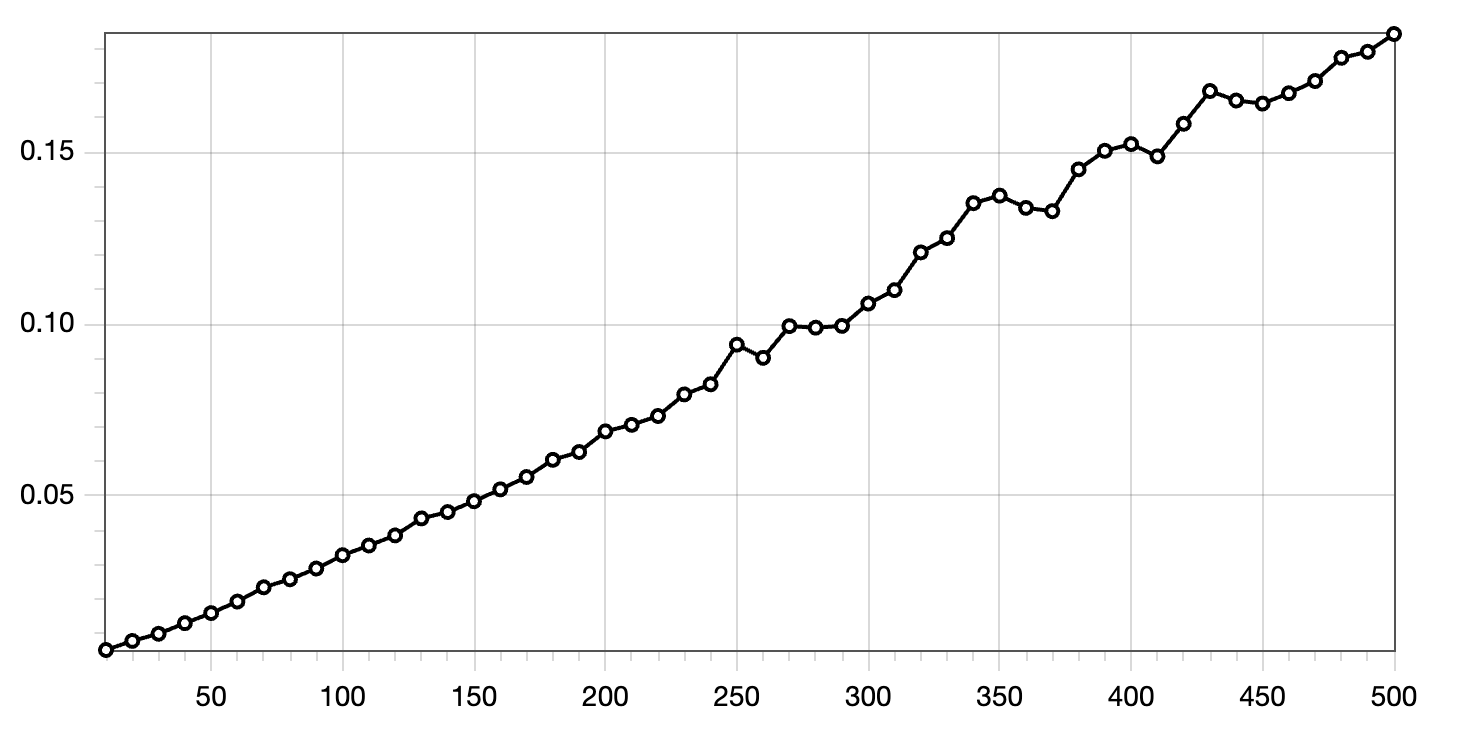
To measure the time it take to pass through a HTTP proxy, I wrote a small script to start 500 separate instances of the Caddy webserver configured as a HTTP/2 proxy. Then, I measure the time it takes to pass through all 500 of the HTTP proxies or only 490, 480,… which results in the graph below.
Fig: Time it takes to pass x amount of HTTP proxies. The y-axis represents the time taken (in seconds), and the x-axis indicates the number of HTTP proxies passed.
So each proxy pass takes about 0.4 milliseconds in one of the best cases, where requests are forwarded from and to localhost. Network overhead adds to that but assuming that interconnects are fast, adding a few HTTP proxies does not affect latency in a meaningful way. Of course it is best to evaluate your situation and measure.
In my house, I have a few smart home features: to control ventilation, to open and close solar screens, and to switch a few smart sockets. Up until a couple of days ago, the ventilation and screen controllers operated using custom software running on an ESP32. However, configuring, maintaining, upgrading, and integrating with this custom software gradually became a headache.
Recently, I switched from custom software to Tasmota, an open-source smart home platform targeting ESP32 devices. Tasmota includes a web UI, flexible configuration options, OTA upgrades, and scripting features. The scripting functionality allows devices to be extended with additional commands, which is especially practical for controlling my solar screens. These screens use pulses to toggle between up-stop-down-stop states. By default, Tasmota only supports enabling or disabling a relay, not enabling it for a very brief period (e.g., 150 milliseconds). With a short ‘Berry’ script, such functionality is quickly added.
I appreciate the effort of the Tasmota team to lower the entry barrier for users. They provide ample documentation and a web installer, making setup straightforward. Simply connect your ESP32 via USB, flash it with Tasmota, and configure it—all from your browser. It’s a surprisingly simple process compared to installing a dedicated toolchain. While this might not be what Tim Berners-Lee envisioned 35 years ago, it certainly simplifies the user experience. Lowering the entry barrier even further, some manufacturers even offer smart home devices with Tasmota preinstalled, such as the Nous A1 smart sockets. Eternal september is here.
If you’re managing custom ESP32 smart home devices, consider switching to Tasmota. Its robust features, ease of setup, and active community support make it an excellent choice for both beginners and advanced users.
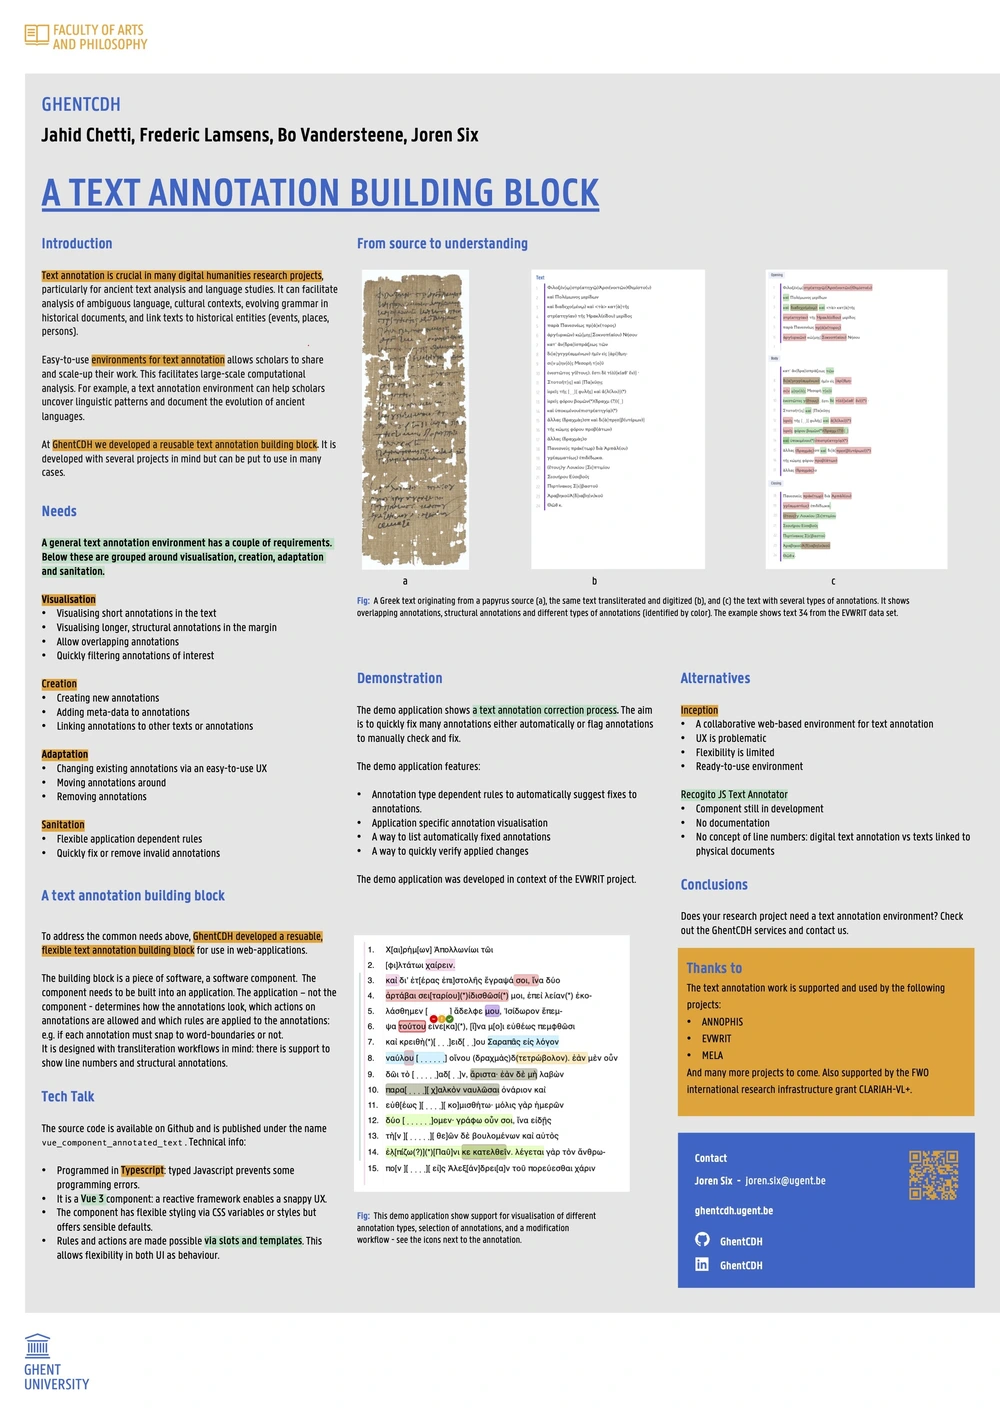
The research day of the faculty of Arts and Philosophy of Ghent University took place last November. The theme of the day was ‘From Source to Understanding’ and the program gave an overview of the breadth of research at our faculty with topics as logic, history, archeology, chemistry, geography, language studies, … There were several contributions by our group: the Ghent Center for Digital Humanities. The contribution by me and my close colleagues was a poster about a reusable text annotation building block.
Fig: Poster on a text annotation component.
At GhentCDH we support several text annotation projects and have extracted a text annotation component for reuse. The abstract reads:
“Text annotation is essential for analyzing ancient texts, identifying entities in texts, or documenting evolving grammar. There is a need for reusable annotation methods which copes with challenges such as overlapping annotations, filtering annotation types, and enabling large-scale collaboration and computational analysis on text annotation work.
We present a reusable text annotation component built with TypeScript and Vue 3. It provides an intuitive interface for creating, visualizing, and editing annotations, it allows component users to enrich annotations with complex metadata, and facilitates flexible annotation filtering. This solution meets many needs of researchers in digital humanities and ancient language studies and will be used in several GhentCDH projects.”
Imagine you want to stream a movie at home but also want to keep things quiet to avoid disturbing others. Evidently, this what headsets were invented for. Connecting one wireless Bluetooth headset is typically straightforward - aside from the occasional Bluetooth pairing issues. But what if you want to watch that movie with someone else, and you both want to use headsets? Connecting two Bluetooth headsets, or even combining wired and wireless headsets to share the same audio, isn’t as simple as it sounds. This blog post shows how to achieve this on modern Linux distributions.
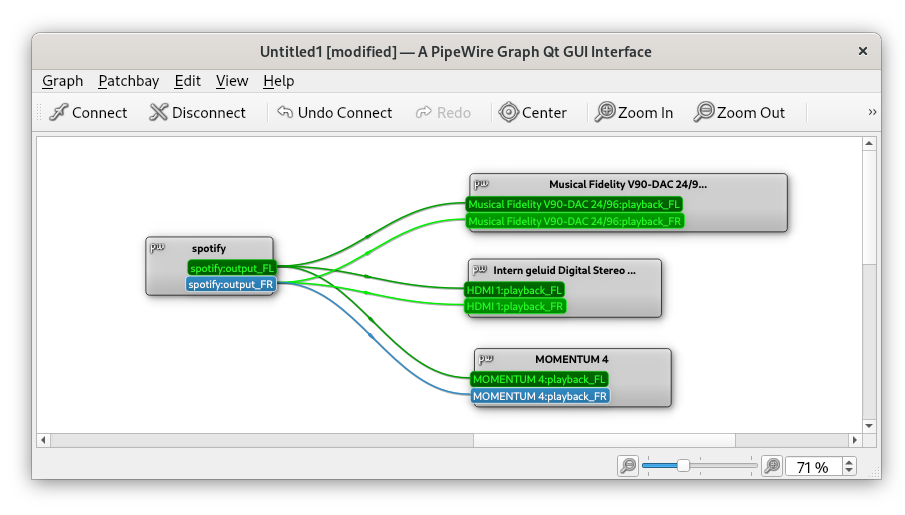
Fig: Connecting an audio source - Spotify - to multiple output devices by using audio routing with PipeWire and `qpwgraph`.
During the last years, several Linux distributions have started to support the PipeWire audio server. It is even the default audio server in Debian 12 and Ubuntu 22.10. With PipeWire, managing audio devices has become much easier. PipeWire enables flexible audio setups and supports audio routing: sending out audio from a single source to several output devices. This is exactly what we need to stream audio to multiple headsets.
If you use PipeWire on your system, qpwgraph provides an intuitive graphical interface that lets you visualize and control audio routing. To connect multiple headsets:
First install qpwgraph e.g via apt install qpwgraph
Startup qpwgraph which should show your current audio routing graph.
Pair your Bluetooth headsets to your machine. They will appear in the audio routing graph once paired successfully.
Connect the audio source to your headsets by connecting ‘wires’ from your media player to the headsets.
I was surprised how robust audio has become on Linux and how easy and user friendly it is to set up even more complex audio / MIDI configurations. Give it a try!
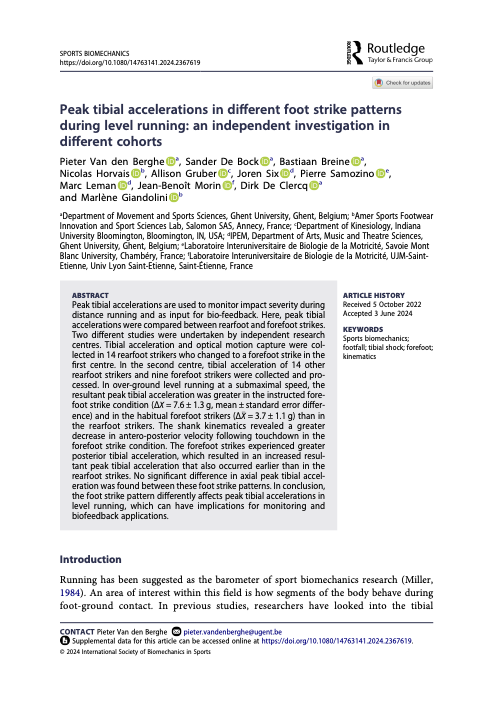
The publication of this paper seemed an almost sisyphean task, but it is now finally in print after about four years since first submission.
All’s well that ends well and it is well indeed: the paper contributes a fundamental insight around the resultant peak tibial acceleration (PTA) in forefoot running: contrary to what is often presumed, the resultant PTA is higher in forefoot running! The paper combines two separate experiments into a single analysis framework which ensures robustness in the finding. The conclusions of the article can be found below:
ConclusionsMany coaches and practitioners presume that forefoot striking decreases impact severity and prevents overuse injuries; however, our data show that instructed and habitual forefoot strikes have greater resultant but not axial PTA than habitual rearfoot strikes in level running at a submaximal speed. The forefoot strikes had a sharp decrease in the antero-posterior velocity of the shank following touchdown and, therefore, a greater antero-posterior acceleration, which resulted in the greater resultant peak tibial acceleration compared to the rearfoot strikes. Conclusively, the foot strike pattern differently affected PTAs and should be taken into account when evaluating 3D impact severity in distance runners.
A couple of days ago, OnTracx launched their first product: a system to measure impact during running with the aim to become ‘The Future of injury-free running’. Next to the launch event itself, OnTracx was featured in the nationalmedia as well.
OnTracx is a Ghent University spin-off and their product is based on a couple of scientific studies. I had the chance to collaborate on some of these studies:
Van den Berghe, P., Lorenzoni, V., Derie, R., Six, J., Gerlo, J., Leman, M., & De Clercq, D. (2021). Music-based biofeedback to reduce tibial shock in over-ground running: A proof-of-concept study. Scientific reports
As is already clear from the title of the second paper: originally the idea was to use music-based biofeedback as a way to reduce impact. Unfortunately, this feature is not - yet? - present in the commercial project which focuses on the measurement and clearly reporting a proxy to mechanical load. This does make the message focused and is probably a good commercial move. I bought one of the sensors and already tested it out during a 5k-run. I was pleasantly surprised with the smooth on-boarding and the slick, well thought-out, user-friendly app.
Become part of the ‘The Future of injury-free running’ and go and get OnTracx!
The OnTracx CEO during the Flanders Technology and Innovation festival
There is something about surprising interfaces: clapping to switch on lights is more fun than a flipping a switch. Pressing a panic-button to order a pizza is more fun than ordering via an app. Recently I came across this surprising interface: a flute controlled mouse cursor for a first person shooter. I recognize a good idea when I see one, and immediately wanted replicate the idea and make it freely available. So I got to work:
Vid: a microcontroller controlling mouse movements based on pitch detection.
What do we need for flute-based mouse? First we need a way to determine if a note is being played and if a note is produced, we need to be able to determine which note is being played by the musician. Next, we need to hijack and control a cursor via the detected note and trigger a click event when a specific note is played. Finally we need to play a flute, preferably a recorder, to move the mouse cursor in an obviously superior and relaxed fashion. It is not strictly required to use a recorder but a recorder is very much advised.
The note determination can be done by a fundamental frequency detector. A detector returns a frequency in Hertz and a confidence score which tells you how reliable the detection is. With some filtering, this is exactly what we need. If the frequency is close enough to a configured value, a note is detected. The confidence score tells us to either accept or ignore the detection. With this info it is possible to connect a note-detection to an action - like moving a cursor left or right, up or down.
Finally we need to move the mouse cursor. There are a few ways to do this.
Fig: Flute-based web-browsing as envisioned by its developer.
A portable way to move a mouse cursor is to let a micro-controller impersonate as a standard mouse, a ‘USB Human Interface Device’. Once the micro-controller is attached via USB it registers as a mouse and allows to move the cursor and register click events. To build a flute-based mouse, the micro-controller then needs a microphone and a pitch estimator to finally send cursor events.
I based my project on an RP2040 - a micro-controller chip designed by Raspberry Pi - since it offers a simple way to present itself to an operating system as a mouse. Just include PluggableUSBHID.h and USBMouse.h and use the Mouse API to control the mouse. For me it only behaved as a standard mouse if Serial is not used at the same time: in other words the dual USB profile does not seem to work reliably.
Sending mouse events from your code looks, for example, like ` Mouse.move(-4, 7)` to move the mouse minus four units in the horizontal and seven units in the vertical direction. Click events have a similarly straightforward API. The RP2040 also has a built-in microphone, which makes it ideal for audio applications, or so it seems.
Unfortunately, the RP2040 chip performs poorly for computationally heavy audio processing workloads. Such applications need to perform many floating point operations per second, but the RP2040 lacks a hardware floating point unit (FPU) which makes it relatively slow. When attempting to run a pitch-detection algorithm, the RP2040 was too slow to run the algorithm in real-time. After profiling the pitch estimation algorithm there was a clear place where most float operations occurred. Replacing those with much quicker fixed point operations makes the algorithm faster than real-time and usable on the RP2040.lt
To give a sens of the difference in speed between fixed point and floating point operations on the RP2040: with the default arduino build process, a million floating point operations take over 883 000 microseconds, a million fixed point operations take 8 microseconds. Fixed point operations are around 5 orders of magnitude faster!
The hardware based solution works reliably but, evidently, it needs a piece of hardware. To make sure everybody can enjoy a solution in software is provided in this section in the form of a chrome browser extension.
Moving a cursor is not possible in a browser: if a pointer location could be modified it would open a whole range of possibilities for abuse. A surprisingly easy workaround, however, is to hide the actual cursor and show a replacement cursor-like icon. This fake cursor can be moved programmatically. With the position of this fake cursor known, a click event can be triggered and result in, for example, following a link.
To take this idea to its logical next step, I implemented a chrome browser plug-in for flute-based web-browsing. I also relased this on GitHub under the Pitch perfect Pointer Positioning or PiPePoPo brand. Check the installation instructions in the PiPePoPo repository. Perhaps most of interest is how audio processing is handled by a Web Audio API Audio Worklet.
Vid: Controlling a cursor via a browser extension.
Join the flute-based web-browsing revolution today and experience web browsing like never before and install PiPePoPo.
I am not sure how but PiPePoPo was also featured on HackADay and the official Arduino Blog.
 Fig: Gemini imagining the age of AI exploits.
 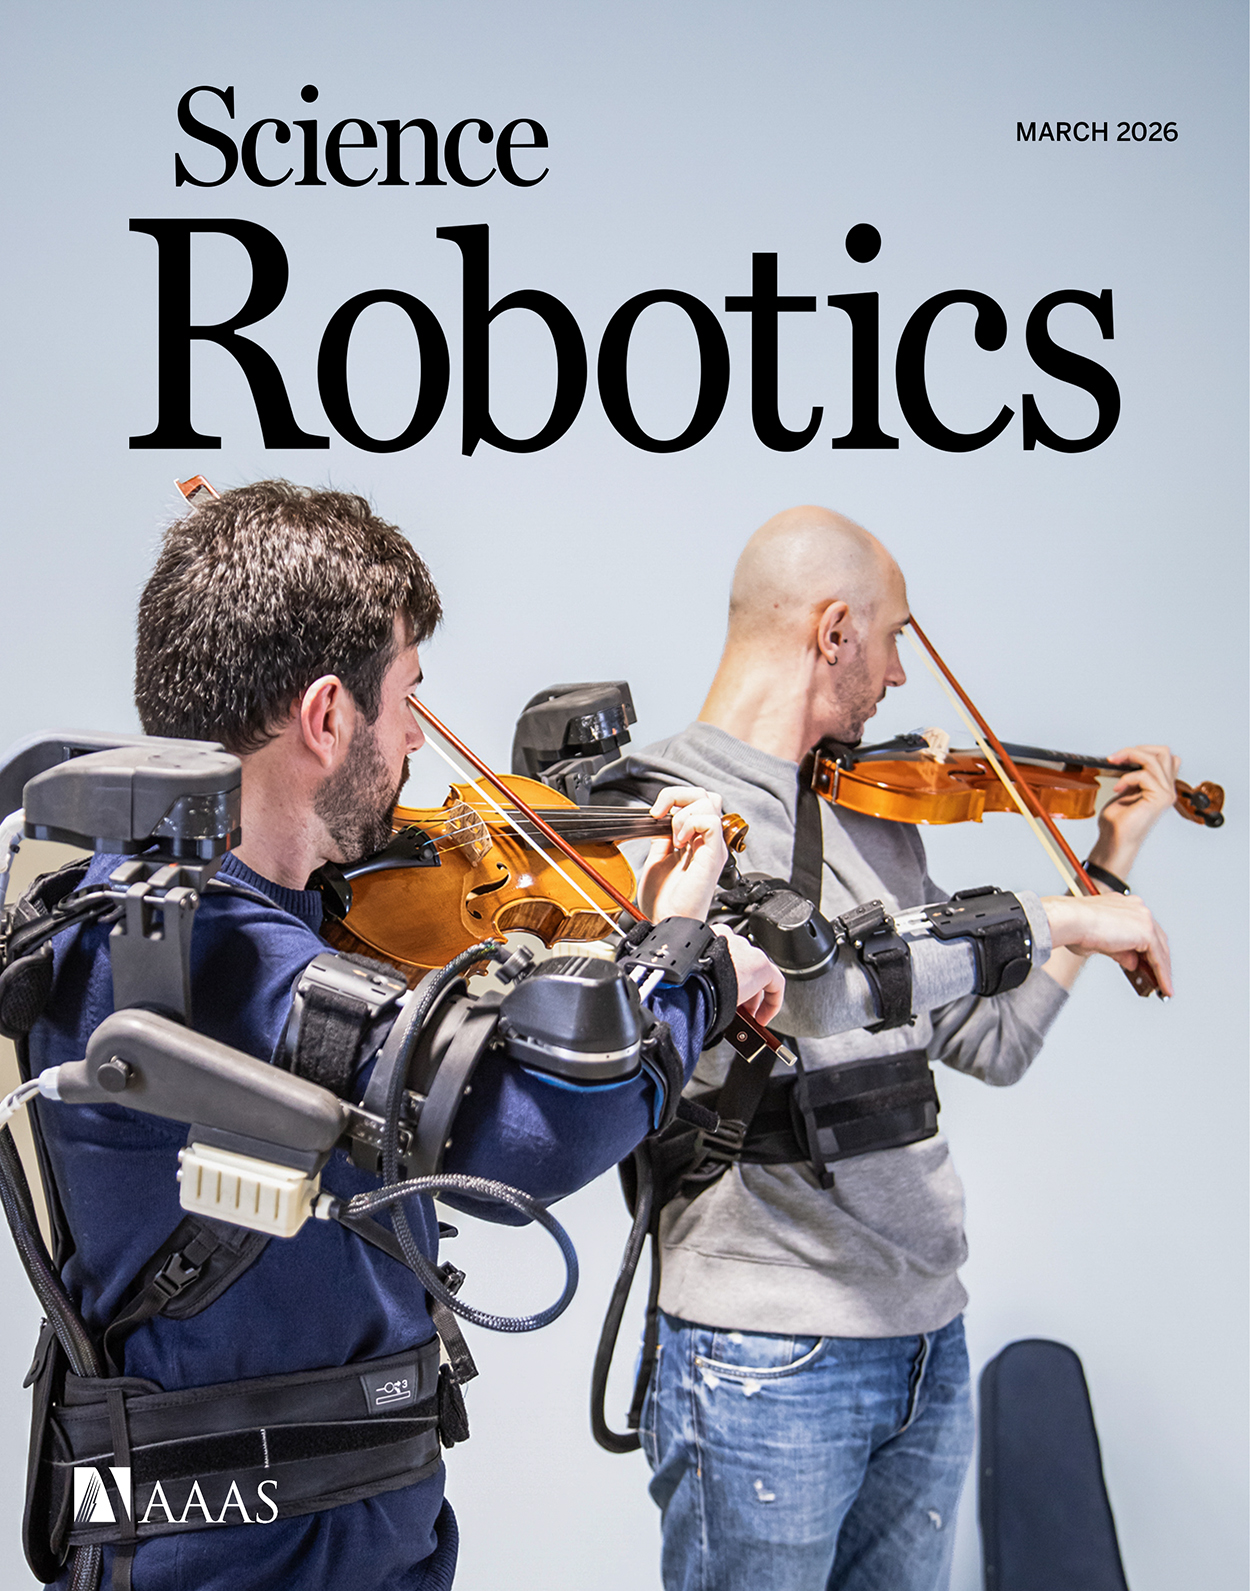 A couple of former colleagues have just published the article
 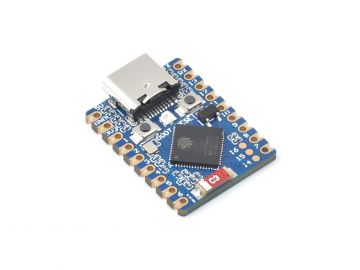 If you’re considering adding USB MIDI functionality to a music project with an ESP32, it’s crucial to choose the right variant of the chip. The ESP32-S3 is currently the go-to model for USB-related tasks thanks to its native USB capabilities. Unlike other ESP32 models, the S3 can handle USB MIDI directly without the need for additional components, making it an ideal choice for integrating MIDI devices into your setup. For more details on using USB MIDI with the ESP32-S3, check out the
 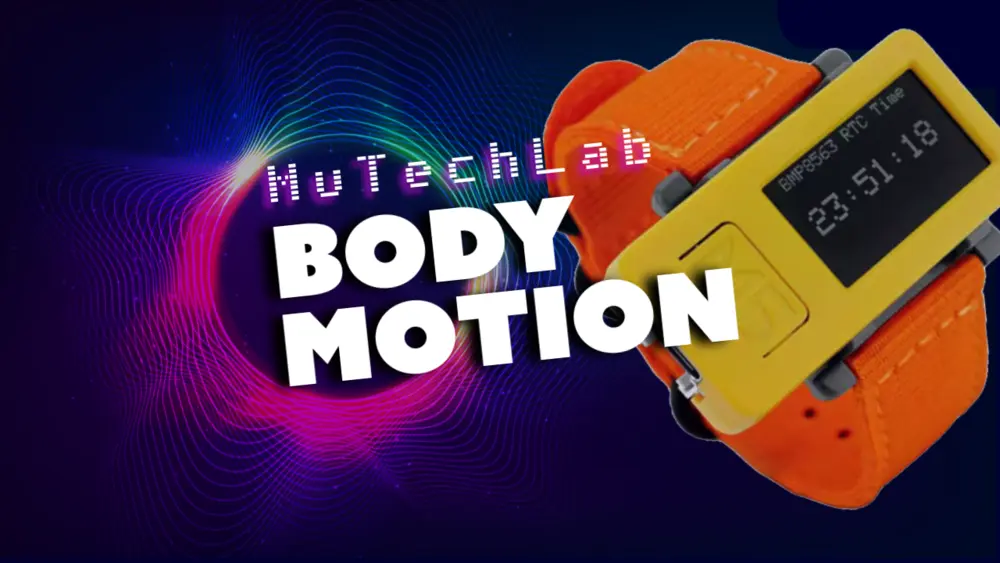 Last Friday, I had the pleasure of facilitating a hands-on workshop in Luxembourg as part of


 Power banks have become a staple for charging smartphones, tablets, and other devices on the go. They seem ideal to power small microcontroller projects but, they often pose a problem for low-current applications. Most modern power banks include an auto-shutdown feature to conserve energy when they detect a current draw below a specific threshold, often around 50–200mA. The idea being that the power bank can shut off after charging a smartphone. However, if you rely on power banks to power DIY electronics projects or remote applications with low current draw, this auto-off feature can be a significant inconvenience.
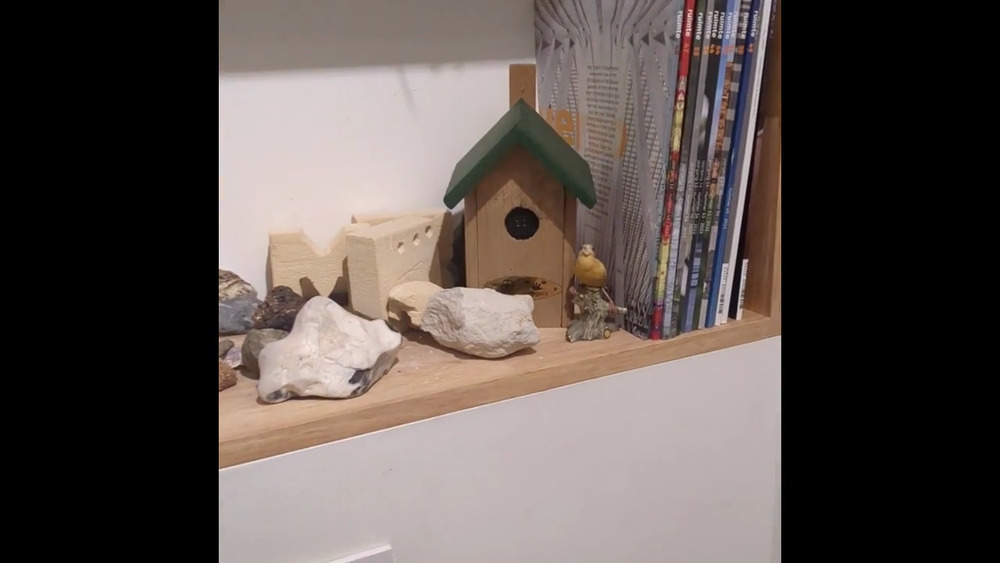
 In my house, I have a few smart home features: to control ventilation, to open and close solar screens, and to switch a few smart sockets. Up until a couple of days ago, the ventilation and screen controllers operated using custom software running on an ESP32. However, configuring, maintaining, upgrading, and integrating with this custom software gradually became a headache.