The following text puts into words a change that I have seen happening the last month. At the Ghent Centre for Digital Humanities we manage a fleet of virtual servers on the Ghent University network and have first-hand experience with security incidents appearing regularly now. It has a different tone than other posts here: it was sent in as a letter for a newspaper but was not published. Let’s see in a few years if the tone was too alarmist or if it holds up:
The newest generation of AI coding tools is a great asset for software developers. They help with understanding complex codebases, and assist in writing code. Used properly, AI coding tools increase software quality and developer productivity. Unfortunately, these powerful tools can also be used with bad intentions. AI coding tools are now sufficiently advanced to find and exploit bugs in software. They pose a threat to essentially all computing systems that form the underpinning of modern infrastructure: banking, aviation, industry, and education.
While earlier reports still used conditional terms to describe these threats, now — only a couple of weeks later — the first effects are already here. With the help of AI coding tools, three bugs were found in Linux, an open-source operating system: Copy.fail, Dirty Frag, and Fragnesia. These first AI-discovered exploits in a broadly deployed system form a watershed moment. The bugs led to service outages, but diligent IT teams quickly patched systems, limiting the impact. The effects of Mythos — widely considered the most capable system for finding bugs in software — are now also clear. Mozilla reported finding and fixing around four hundred bugs last month, where in a typical month around twenty similar bugs are discovered and patched. Not every bug is exploitable, but every exploit starts with a bug. The age of AI exploits is here.
The transition to this new age will be painful. Many unmaintained systems are connected to the internet and will not receive security updates: IoT devices, orphaned servers, smartphones and proprietary systems locked in time. It will become easier to gain illegitimate access to these machines. The skills needed to break into such systems are diminishing. What previously required highly specialized experts or state actors is now within reach of a much broader pool of bad actors, due to the very tools that are meant to help developers.
What can be done? Companies need more stringent cybersecurity policies today. The broader public needs awareness of this evolution and basic cybersecurity hygiene to keep devices up to date. And we need a regulatory framework that holds producers of computing systems responsible for updates over a longer lifespan. Unfortunately, we can not afford to collectively ignore this emerging reality.
Recently, my son’s school teacher asked parents to come in and read in front of the class. I kindly declined, since I am not very comfortable doing voices in front of a room full of ten to twelve-year-olds. As an alternative, I proposed to explain some properties of sound and music, based on material I used fifteen years ago for the kids’ university: a series of workshops and lectures aimed at children. Unfortunately, after a couple of months, the teacher took me up on the offer.
Fifteen years ago, I painstakingly hand-coded - yes, this is becoming a thing - demos in the Java programming language to show properties of sound: an oscilloscope, a loudness level meter, a spectrogram, a pitch detector. This took ages but worked reasonably well to show basic properties of waves, sounds and music.
This time, I casually vibe-coded similar demos, not in Java but using self-contained, single-page web applications. Below one of the demos - on sound propagation - is included. With the aid of powerful AI coding tools, programming these interactive demos took only a couple of hours. Fifteen years ago, the hand-coded - arguably worse - versions of the demos took weeks. The main downside is that there is less pride or satisfaction in detailed prompting vs hand-coding.
Giving the presentation went well and as far as I could tell, the kids were at least involved and may have learned a couple of things. Afterwards, I got some feedback via a parent that their kid was intrigued and got curious, so I will take that as a win.
Some takeaways:
AI coding tools are great at creating stand-alone, interactive, shader-based visualizations and demos.
Use web technologies for slides: great for multimedia, accessibility, distribution, and interactive slides.
To create interactive slides where shaders or visual information is used the AI coding tool should be able to peer deep into the browser internals. This can be done with the Chrome DevTools MCP or a similar system. This feedback loop allows an LLM to improve on a single-shot attempt automatically.
It is the result of an European research project in which I was involved in only at the start. I did, however, also contribute to the study in a small but crucial way. During the experiment, the exoskeletons suddenly stopped working. I was asked to have a look and see if there was something to be done. I was a bit hesitant to go near these unique, expensive prototypes with a soldering iron but, after a couple of tense minutes and fixing some - easy to access - connections the arms came back alive. The experiment could continue and everybody started clapping and cheering. This is at least how I remember it. Perhaps that last part is not entirely accurate. Anyhow, I made it into the acknowledgments; thanks Ola.
AbstractJoint actions among humans rely on the integration of multiple sensory modalities, most notably auditory and visual cues, which support explicit communication between partners. However, haptic feedback provides a direct, implicit channel for sensorimotor communication, and its contribution to fine motor coordination in joint actions remains largely unexplored. Here, we demonstrate that haptic communication, rendered through bidirectionally coupled wearable robots, outperforms traditional auditory-visual feedback in a complex and challenging real-life joint action: ensemble violin performance.
First, we developed a pair of two–degree-of-freedom upper-limb exoskeletons capable of transparently following violinists’ natural movements and rendering viscoelastic torques proportional to the joint angular deviation between the partners. Then, we designed a within-subject experiment with 20 violin duos performing a musical piece under four sensory feedback conditions: auditory (A), auditory-visual (AV), auditory-haptic (AH), and auditory-visual-haptic (AVH), across two tempi (72 and 100 beats per minute). Despite the musicians being unfamiliar with the robot-mediated haptic feedback and unaware of the bidirectional connection between them, haptic feedback (AH and AVH) substantially enhanced spatiotemporal coordination and dynamic musical alignment compared with the extensively trained auditory-visual feedback (A and AV). The multisensory feedback condition AVH yielded the highest scores across all measures. Our findings demonstrate that haptic feedback can support fine motor coordination in violin duo performance more effectively than visual cues, particularly for professional musicians, because of its implicit and embodied nature, and that it can be effectively delivered via wearable robots, expanding the paradigms of human-human sensorimotor interactions.
If you’re considering adding USB MIDI functionality to a music project with an ESP32, it’s crucial to choose the right variant of the chip. The ESP32-S3 is currently the go-to model for USB-related tasks thanks to its native USB capabilities. Unlike other ESP32 models, the S3 can handle USB MIDI directly without the need for additional components, making it an ideal choice for integrating MIDI devices into your setup. For more details on using USB MIDI with the ESP32-S3, check out the ESP32USBMIDI project.
When combined with the ESP32-S3’s built-in WiFi and support for OSC (Open Sound Control) or ESP Now, the platform becomes very versatile for music controllers or applications. A quick tip: after flashing your device in MIDI mode, the serial is not available any more. Flashing the device also becomes impossible. If you need to reflash your device, the process is simple: just hold down the Boot button and press Reset.
Another short tip: for troubleshooting and logging, the mot project provides useful tools for debugging OSC or MIDI messages. The support is currently stil in flux but do not make the mistake I made and do not try to do MIDI with a ESP C3 series.
This morning I gave a guest lecture introducing the field of music information retrieval to musicology students at Ghent University. Next to the more general MIR intro, two specific topics are fleshed out: duplicate detection and pitch patterns in music around the world. Two topic I have been working on before.
The presentation has the form of an interactive website via reveal.js. It features a couple of slides which are full-blown applications or have an interactive sound visualization component. Please do try out the slides and check the Music Information Retrieval - Opportunities for digital musicology presentation or try it below.
The last few halloweens I have been building one-off interactive installations for visiting trick-or-treaters. I did not document the build of last year, but the year before I built an interactive door bell with a jump scare door projection. This year I was trying to take it easy but my son came up with the idea of doing something with a talking pumpkin. I mumbled something about feasibility so he promptly invited all his friends to come over on Halloween to talk to a pumpkin. So I got to work and tried to build something. This blog post documents this build.
A talking pumkin needs a few functions. It needs to understand kids talking in Dutch, it needs to be able to respond with a somewhat logical respons and ideally have a memory about previous interactions. It also needs a way to do turn-taking: indicating who is speaking and listening. It also needs a face and a name. For the name we quickly settled on Pompernikkel.
For the face I tried a few interactive visualisations: a 3D implementation with three.js and a shader based approach but eventually setteled on an approach of using an SVG and CSS animations to make the face come alive. This approach makes it doable to control animations with javascript since animating a part of the pumkin means adding or removing a css class. See below for the result
The other functions I used the following components.
A decent quality bluetooth speaker for audio output and clear voice projection
A microphone setup to capture and record children’s voices speaking to the pumpkin
A glass door serving as a projection surface with a projector mounted behind it
Speech-to-text recognition powered by nvidia/parakeet-tdt-0.6b-v3 (see this paper), implemented via transcribe-rs for transcribing Dutch speech
Text-to-speech synthesis using the built-in macOS ‘say’ command to give Pompernikkel a voice
A controllable interactive projection system displaying the animated SVG website mentioned above
Response generation handled by the Gemma 3 12B large language model (paper), running locally through Ollama with a custom system prompt
A real pumpkin augmented with an ESP32 microcontroller and capacitive touch sensor embedded inside to detect physical touch - the microphone would only activate while someone was touching the pumpkin
A custom Ruby websocket driver orchestrating turn-taking behavior and managing the interactive loop of questions and responses
As an extra feature, I implemented a jump scare where a sudden movement would trigger lightning and thunder:
EMI-Kit for responsive movement detection. The mDNS support really makes it easy to use together with mot.
A 5V SK6812 LED strip controlled by an ESP32 programmed to react to EMI-Kit events, creating lightning effects synchronized with audio and visual elements on the HTML page
Lessons learned
Asking a code assisting LLM to add animations to a part of an SVG only works after manually adding identifiers to paths of the svg: eyes, mouth, nose, … Once added, CSS animation are generated with ease. Understanding which svg path corresponds to which semantic object seems out of reach for now for state of the art systems.
Gemma 3 is not a multilingual LLM. It generates responses in Dutch but these seem very translated: it seems that responses are generated in Eglish and translated to Dutch in the final step. This becomes very clear when the LLM attempts jokes. Of course these nonsensical jokes do work on a certain level.
Gemma 3 has a personality that is difficult to get around if a system promt contains trigger words like dark or scary. In my case it responses became philosophical, nihilistic and very dark. Which was unexpectedly great.
Parakeet speech to text in Dutch is faster than the several OpenAI Whisper based systems I managed to get running on my macOS. It also gave better results for short excerpts.
The SK6812 RGBWW is not the best supported by the FastLED library. I managed to get it working with a hack found on GitHub, not ideal.
There are a few end-to-end systems for voice chat with local LLMs on GitHub but they are not easy to get going with something else than CUDA/linux and almost never support other languages than English. For VAD and transcription the same holds.
Looking closely to several speech to text or text to speech sysems, the default of CUDA/Linux is difficult to get around.
The focus of open source models and tools on the English language is problematic, while Dutch is still relatively well represented many systems are limited to only English.
While some kids interacted with the pumpkin, the jump scare lighting and thunder effect worked better in the environment.
Websockets seems a decent way to do inter process communication, even without web technologies it could be considered. I never though of Websockets in this way. See the Pompernikkel GitHub repository for example Ruby scripts.
Most trick-or-treaters were at least intrigued by it, my son’s friends were impressed, and I got to learn a couple of things, see above. Next year, however, I will try to take it easy.
Since a couple of months FFmpeg supports audio transcription via OpenAI Whisper and Wisper-cpp. This allows to automatically transcribe interviews and podcasts or generate subtitles for videos. Most packaged versions of the command line tool ffmpeg do not ship with this option enabled. Here we show how to do this on macOS with the Homebrew package manager. On other platforms similar configuration will apply.
On macOS there is a prepared Homebrew keg which allows to enable or disable the many ffmpeg options. If you already have ffmpeg without options installed you may need to uninstall the current version and install a version with chosen options. See below on how to do this:
# check if you already have ffmpeg with whisper enabled
ffmpeg --help filter=whisper
# uninstall current ffmpeg, it will be replaced with a version with whisper
brew uninstall ffmpeg
# add a brew tap which provides options to install ffmpeg from source
brew tap homebrew-ffmpeg/ffmpeg
# this commands adds most common functionality and other default functions
brew install homebrew-ffmpeg/ffmpeg/ffmpeg \
--with-fdk-aac \
--with-jpeg-xl \
--with-libgsm \
--with-libplacebo \
--with-librist \
--with-librsvg \
--with-libsoxr \
--with-libssh \
--with-libvidstab \
--with-libxml2 \
--with-openal-soft \
--with-openapv \
--with-openh264 \
--with-openjpeg \
--with-openssl \
--with-rav1e \
--with-rtmpdump \
--with-rubberband \
--with-speex \
--with-srt \
--with-webp \
--with-whisper-cpp
Installation will take a while since many dependencies are required for the many options. Once the build is finished the whisper filter should be available in FFmpeg. See below on how this should look, once correctly installed:
Last Friday, I had the pleasure of facilitating a hands-on workshop in Luxembourg as part of MuTechLab workshop series, organized by Luc Nijs at the University of Luxembourg. Together with Bart Moens from XRHIL and IPEM, we presented a system to control musical parameters with body movement.
MuTechLab is a series of workshops for music teachers who wish to dive into the world of music technology. Funded by the Luxembourgish National Research Fund (FNR, PSP-Classic), the initiative brings together educators eager to explore how technology can enhance music education and creative practice.
What we built and presented
During the workshop, participants got hands-on experience with the EMI-Kit (Embodied Music Interface Kit) – an open-source, low-cost system that allows musicians to control Digital Audio Workstation (DAW) parameters through body movement.
The EMI-Kit consists of:
- A wearable sensor device (M5StickC Plus2) that captures body orientation and gestures
- A receiver unit (M5Stack STAMP S3A) that converts sensor data to MIDI messages
Unlike expensive commercial alternatives, EMI-Kit is fully open source, customizable, and designed specifically for creative music practice and embodied music interaction practice and research.
The Experience
Teachers experimented with mapping natural body movements – pitch, yaw, roll, and tap gestures – to various musical parameters in their DAWs. The low-latency wireless system made it possible to move and control sound, opening up new possibilities for expressive musical performance and pedagogy.
Learn More
Interested in exploring embodied music interaction yourself? Check out:
The EMI-Kit project as-is is a demonstrator to inspire educators to embrace these tools and imagine new ways of teaching and creating music. The EMI-Kit as a platform can - with some additional programming - be a good basis to control musical parameters using various sensors. Have fun with checking out the EMI-Kit.
Participant package - with sender and receiver pair
I’ve just pushed some updates to mot — a command-line application for working with OSC and MIDI messages. My LLM tells me that these are exciting updates but I am not entirely sure that this is the case. Let me know if this ticks your box and seek professional help.
1. Scriptable MIDI Processor via Lua
I have implemented a MIDI processor that lets you transform, filter, and generate MIDI messages using Lua scripts.
Why is this useful? MIDI processors act as middlemen between your input devices and output destinations.You can do the following on incoming MIDI messages:
Filter - Block unwanted messages - channels - or select specific ranges
Route - Send different notes to different channel
Generate - Create complex patterns from simple input
The processor reads incoming MIDI from a physical device, processes it through your Lua script, and outputs the modified messages to a virtual MIDI port that your DAW or synth can receive. Some examples:
# Generate chords from single notes
mot midi_processor --script scripts/chord_generator.lua 06666# Transpose notes up by one octave
mot midi_processor --script scripts/example_processor.lua 06666
2. Network Discovery via mDNS
OSC receivers now advertise themselves on the network using mDNS/Bonjour with the _osc._udp service type.
This makes mot compatible with the EMI-kit — the Embodied Music Interface Kit developed at IPEM, Ghent University. OSC-enabled devices can automatically discover mot receivers on your network, eliminating manual configuration if the OSC sources add this functionality.
This weekend the - more-or-less - yearly conference of Hackerspace Ghent took place: Newline.gent. Hackers, makers, and curious minds gathered to share ideas, tools, experiments and a few beers.
I had a small contribution with a short lecture-performance which covered how to control your computer with a flute. The lecture part covered the technical part of the build, the performance part included playing Flappy Bird with a flute. A third significant part of the talk — arguably the main focus — was devoted to bragging about the global attention the project received.
Other highlights of the Newline conference included talks on Home Assistant, 3D design, BTRFS and workshops that invited everyone to get involved.
Big thanks to the organizers and everyone who joined. I’m already looking forward to the next one!
This short guide will help you set up a local certificate using Caddy as the webserver to provide local TLS certificates to be able to develop websites immedately using HTTPS. Having a local HTTPS server in development can help with e.g. debugging CORS issues, accessing resources which require a HTTPS connection, or trying out analytics platforms.
1. Configure your hosts file
If you want to use a domain name, you need to first add a line to /etc/hosts which, in this case, sets localhost to correspond to example.com.
echo "127.0.0.1 example.com" | sudo tee -a /etc/hosts
2. Configure Caddy
In a directory of your choosing, create a Caddyfile with the following content, it sets Caddy to automatically generate certificates on the fly for example.com or any other domain name. Perhaps you will need to trust the main Caddy certificate on first use:
Still in the same directory as the Caddyfile and the index.html file, run the following command to start the Caddy web server: caddy run
5. Trust the locally generated certificate
In macOS this means adding the local caddy root certificate to your keychain. It can be found here /data/caddy/pki/authorities/local/root.crt In other environments a similar step is needed.
6. access the Test Site
Open your web browser and navigate to https://example.com to access the test site in the command line: open https://example.com. If you inspect the certificate it should be issued by the ‘Caddy local authority’.
Power banks have become a staple for charging smartphones, tablets, and other devices on the go. They seem ideal to power small microcontroller projects but, they often pose a problem for low-current applications. Most modern power banks include an auto-shutdown feature to conserve energy when they detect a current draw below a specific threshold, often around 50–200mA. The idea being that the power bank can shut off after charging a smartphone. However, if you rely on power banks to power DIY electronics projects or remote applications with low current draw, this auto-off feature can be a significant inconvenience.
To address this issue, consider using power banks designed with an “always-on” or “low-current” mode. These power banks are engineered to sustain power delivery even when the current draw is minimal. Look for models that explicitly mention support for low-power devices in their specifications. If replacing a power bank isn’t an option, you can add a small load resistor or a USB dummy load to artificially increase the current draw. It works, but feels wrong and dirty.
For a previous electronics project I bought a power bank randomly. After a bit of testing, I determined that the minimal power draw was around 150mA, so I added a resistor to increase current draw. Only afterwards did I check the manual of the power bank and noticed, luckily, that there was a low-current mode. I removed the resistor and improved the battery life of the project considerably. If you want to power your DIY Arduino or electronics project, first check the manual of the power bank you want to use!
Edit: after further testing it seemed that the low current mode of this specific power bank still shuts down after a couple of hours. Your mileage may vary, and the main point of this post still holds: check the manual of your power bank. Eventually I went with a solution designed for electronics projects.
There is this thing that starts playing birdsong when it detects movement. It is ideal to connect to nature while nature calls. It is a good idea, executed well but it got me thinking: this can be made less reliable, more time consuming, more expensive, and with a shorter battery life. So I started working on a DIY version.
Vid: Playing birdsong when presence is detected with an ESP32 microcontroller .
The general idea is to start playing birdsong if someone is present in a necessary room. In addition to a few of electronics components the project needs birdsong recordings. Freesound is a great resource for all kinds of environmental sounds and has a collection of birdsong which was used for this project.
For the electronics components the project needs a microcontroller and a way to detect presence. I had a laser ranging sensor lying around which measures distance but can be repurposed to detect presence in a small room: most of the time, the distance to an opposite wall is reported. If a smaller distance is measured it is probably due to a person being present. The other components:
As is often the case with builds like this, neither the software nor the hardware is challenging conceptually but, making hard and software cooperate is. Some pitfalls I encountered: the ESP32 C6 needs USB CDC set in the Arduino IDE, the non standard I2C GPIO pins. Getting the many I2S parameters right. Dealing with a nasty pop sound once audio started. A broken LiPo battery. Most of the fixes can be found in the Arduino code
I use a polling strategy to detect presence. A distance measurement is taken and then the ESP32 goes into a deep sleep until the next measurement. A sensor with the ability to wake up the microcontroller would be a better approach.
Once everything was installed it worked well enough — motion triggered a random birdsong, creating a soothing, natural vibe. It may be less practical than the off-the-shelf version but I did learn quite a lot more than I would have by simply filling in a form and providing payment details…
A discussion at work led to the question how much time it takes for a HTTP request to pass through a HTTP proxy. This blog post deals with this question by measuring a request passing through a stupid amount of HTTP proxies.
Fig: Measuring the time it takes to pass 500 proxies with Curl.
In modern development setups it is not uncommon that your HTTP request passes a few HTTP proxies before reaching a final server that actually handles the request. In our case there is a proxy which ensures an SSL certificate, which is forwarded to a proxy which automatically forwards requests to a docker container. A final HTTP proxy runs in the docker network that forwards the request to a webserver. A response follows the same way in reverse.
Fig: Configuration to pass a HTTP request through many proxies. The final response is a simple text.
To measure the time it take to pass through a HTTP proxy, I wrote a small script to start 500 separate instances of the Caddy webserver configured as a HTTP/2 proxy. Then, I measure the time it takes to pass through all 500 of the HTTP proxies or only 490, 480,… which results in the graph below.
Fig: Time it takes to pass x amount of HTTP proxies. The y-axis represents the time taken (in seconds), and the x-axis indicates the number of HTTP proxies passed.
So each proxy pass takes about 0.4 milliseconds in one of the best cases, where requests are forwarded from and to localhost. Network overhead adds to that but assuming that interconnects are fast, adding a few HTTP proxies does not affect latency in a meaningful way. Of course it is best to evaluate your situation and measure.
In my house, I have a few smart home features: to control ventilation, to open and close solar screens, and to switch a few smart sockets. Up until a couple of days ago, the ventilation and screen controllers operated using custom software running on an ESP32. However, configuring, maintaining, upgrading, and integrating with this custom software gradually became a headache.
Recently, I switched from custom software to Tasmota, an open-source smart home platform targeting ESP32 devices. Tasmota includes a web UI, flexible configuration options, OTA upgrades, and scripting features. The scripting functionality allows devices to be extended with additional commands, which is especially practical for controlling my solar screens. These screens use pulses to toggle between up-stop-down-stop states. By default, Tasmota only supports enabling or disabling a relay, not enabling it for a very brief period (e.g., 150 milliseconds). With a short ‘Berry’ script, such functionality is quickly added.
I appreciate the effort of the Tasmota team to lower the entry barrier for users. They provide ample documentation and a web installer, making setup straightforward. Simply connect your ESP32 via USB, flash it with Tasmota, and configure it—all from your browser. It’s a surprisingly simple process compared to installing a dedicated toolchain. While this might not be what Tim Berners-Lee envisioned 35 years ago, it certainly simplifies the user experience. Lowering the entry barrier even further, some manufacturers even offer smart home devices with Tasmota preinstalled, such as the Nous A1 smart sockets. Eternal september is here.
If you’re managing custom ESP32 smart home devices, consider switching to Tasmota. Its robust features, ease of setup, and active community support make it an excellent choice for both beginners and advanced users.
The research day of the faculty of Arts and Philosophy of Ghent University took place last November. The theme of the day was ‘From Source to Understanding’ and the program gave an overview of the breadth of research at our faculty with topics as logic, history, archeology, chemistry, geography, language studies, … There were several contributions by our group: the Ghent Center for Digital Humanities. The contribution by me and my close colleagues was a poster about a reusable text annotation building block.
Fig: Poster on a text annotation component.
At GhentCDH we support several text annotation projects and have extracted a text annotation component for reuse. The abstract reads:
“Text annotation is essential for analyzing ancient texts, identifying entities in texts, or documenting evolving grammar. There is a need for reusable annotation methods which copes with challenges such as overlapping annotations, filtering annotation types, and enabling large-scale collaboration and computational analysis on text annotation work.
We present a reusable text annotation component built with TypeScript and Vue 3. It provides an intuitive interface for creating, visualizing, and editing annotations, it allows component users to enrich annotations with complex metadata, and facilitates flexible annotation filtering. This solution meets many needs of researchers in digital humanities and ancient language studies and will be used in several GhentCDH projects.”
Imagine you want to stream a movie at home but also want to keep things quiet to avoid disturbing others. Evidently, this what headsets were invented for. Connecting one wireless Bluetooth headset is typically straightforward - aside from the occasional Bluetooth pairing issues. But what if you want to watch that movie with someone else, and you both want to use headsets? Connecting two Bluetooth headsets, or even combining wired and wireless headsets to share the same audio, isn’t as simple as it sounds. This blog post shows how to achieve this on modern Linux distributions.
Fig: Connecting an audio source - Spotify - to multiple output devices by using audio routing with PipeWire and `qpwgraph`.
During the last years, several Linux distributions have started to support the PipeWire audio server. It is even the default audio server in Debian 12 and Ubuntu 22.10. With PipeWire, managing audio devices has become much easier. PipeWire enables flexible audio setups and supports audio routing: sending out audio from a single source to several output devices. This is exactly what we need to stream audio to multiple headsets.
If you use PipeWire on your system, qpwgraph provides an intuitive graphical interface that lets you visualize and control audio routing. To connect multiple headsets:
First install qpwgraph e.g via apt install qpwgraph
Startup qpwgraph which should show your current audio routing graph.
Pair your Bluetooth headsets to your machine. They will appear in the audio routing graph once paired successfully.
Connect the audio source to your headsets by connecting ‘wires’ from your media player to the headsets.
I was surprised how robust audio has become on Linux and how easy and user friendly it is to set up even more complex audio / MIDI configurations. Give it a try!
The publication of this paper seemed an almost sisyphean task, but it is now finally in print after about four years since first submission.
All’s well that ends well and it is well indeed: the paper contributes a fundamental insight around the resultant peak tibial acceleration (PTA) in forefoot running: contrary to what is often presumed, the resultant PTA is higher in forefoot running! The paper combines two separate experiments into a single analysis framework which ensures robustness in the finding. The conclusions of the article can be found below:
ConclusionsMany coaches and practitioners presume that forefoot striking decreases impact severity and prevents overuse injuries; however, our data show that instructed and habitual forefoot strikes have greater resultant but not axial PTA than habitual rearfoot strikes in level running at a submaximal speed. The forefoot strikes had a sharp decrease in the antero-posterior velocity of the shank following touchdown and, therefore, a greater antero-posterior acceleration, which resulted in the greater resultant peak tibial acceleration compared to the rearfoot strikes. Conclusively, the foot strike pattern differently affected PTAs and should be taken into account when evaluating 3D impact severity in distance runners.
A couple of days ago, OnTracx launched their first product: a system to measure impact during running with the aim to become ‘The Future of injury-free running’. Next to the launch event itself, OnTracx was featured in the nationalmedia as well.
OnTracx is a Ghent University spin-off and their product is based on a couple of scientific studies. I had the chance to collaborate on some of these studies:
Van den Berghe, P., Lorenzoni, V., Derie, R., Six, J., Gerlo, J., Leman, M., & De Clercq, D. (2021). Music-based biofeedback to reduce tibial shock in over-ground running: A proof-of-concept study. Scientific reports
As is already clear from the title of the second paper: originally the idea was to use music-based biofeedback as a way to reduce impact. Unfortunately, this feature is not - yet? - present in the commercial project which focuses on the measurement and clearly reporting a proxy to mechanical load. This does make the message focused and is probably a good commercial move. I bought one of the sensors and already tested it out during a 5k-run. I was pleasantly surprised with the smooth on-boarding and the slick, well thought-out, user-friendly app.
Become part of the ‘The Future of injury-free running’ and go and get OnTracx!
The product launch
The OnTracx CEO during the Flanders Technology and Innovation festival
There is something about surprising interfaces: clapping to switch on lights is more fun than a flipping a switch. Pressing a panic-button to order a pizza is more fun than ordering via an app. Recently I came across this surprising interface: a flute controlled mouse cursor for a first person shooter. I recognize a good idea when I see one, and immediately wanted replicate the idea and make it freely available. So I got to work:
Vid: a microcontroller controlling mouse movements based on pitch detection.
What do we need for flute-based mouse? First we need a way to determine if a note is being played and if a note is produced, we need to be able to determine which note is being played by the musician. Next, we need to hijack and control a cursor via the detected note and trigger a click event when a specific note is played. Finally we need to play a flute, preferably a recorder, to move the mouse cursor in an obviously superior and relaxed fashion. It is not strictly required to use a recorder but a recorder is very much advised.
The note determination can be done by a fundamental frequency detector. A detector returns a frequency in Hertz and a confidence score which tells you how reliable the detection is. With some filtering, this is exactly what we need. If the frequency is close enough to a configured value, a note is detected. The confidence score tells us to either accept or ignore the detection. With this info it is possible to connect a note-detection to an action - like moving a cursor left or right, up or down.
Finally we need to move the mouse cursor. There are a few ways to do this.
Fig: Flute-based web-browsing as envisioned by its developer.
A portable way to move a mouse cursor is to let a micro-controller impersonate as a standard mouse, a ‘USB Human Interface Device’. Once the micro-controller is attached via USB it registers as a mouse and allows to move the cursor and register click events. To build a flute-based mouse, the micro-controller then needs a microphone and a pitch estimator to finally send cursor events.
I based my project on an RP2040 - a micro-controller chip designed by Raspberry Pi - since it offers a simple way to present itself to an operating system as a mouse. Just include PluggableUSBHID.h and USBMouse.h and use the Mouse API to control the mouse. For me it only behaved as a standard mouse if Serial is not used at the same time: in other words the dual USB profile does not seem to work reliably.
Sending mouse events from your code looks, for example, like ` Mouse.move(-4, 7)` to move the mouse minus four units in the horizontal and seven units in the vertical direction. Click events have a similarly straightforward API. The RP2040 also has a built-in microphone, which makes it ideal for audio applications, or so it seems.
Unfortunately, the RP2040 chip performs poorly for computationally heavy audio processing workloads. Such applications need to perform many floating point operations per second, but the RP2040 lacks a hardware floating point unit (FPU) which makes it relatively slow. When attempting to run a pitch-detection algorithm, the RP2040 was too slow to run the algorithm in real-time. After profiling the pitch estimation algorithm there was a clear place where most float operations occurred. Replacing those with much quicker fixed point operations makes the algorithm faster than real-time and usable on the RP2040.lt
To give a sens of the difference in speed between fixed point and floating point operations on the RP2040: with the default arduino build process, a million floating point operations take over 883 000 microseconds, a million fixed point operations take 8 microseconds. Fixed point operations are around 5 orders of magnitude faster!
The hardware based solution works reliably but, evidently, it needs a piece of hardware. To make sure everybody can enjoy a solution in software is provided in this section in the form of a chrome browser extension.
Moving a cursor is not possible in a browser: if a pointer location could be modified it would open a whole range of possibilities for abuse. A surprisingly easy workaround, however, is to hide the actual cursor and show a replacement cursor-like icon. This fake cursor can be moved programmatically. With the position of this fake cursor known, a click event can be triggered and result in, for example, following a link.
To take this idea to its logical next step, I implemented a chrome browser plug-in for flute-based web-browsing. I also relased this on GitHub under the Pitch perfect Pointer Positioning or PiPePoPo brand. Check the installation instructions in the PiPePoPo repository. Perhaps most of interest is how audio processing is handled by a Web Audio API Audio Worklet.
Vid: Controlling a cursor via a browser extension.
Join the flute-based web-browsing revolution today and experience web browsing like never before and install PiPePoPo.
I am not sure how but PiPePoPo was also featured on HackADay and the official Arduino Blog.
Due to the climate crisis, long droughts are becoming more common in Western Europe during the summers. Conversely, during the winters, it seems that there is more and more extreme rainfall. With record breaking droughts and rainfall, it is essential that enough rainwater buffering capacity is available. As a private citizen this means installing a large rain water tank - perhaps larger than outdated models suggest - and using the captured water effectively, if at all possible.
Fig: Submersible water level meter.
To effectively use rain-water, it helps to have an easy way to view the water level in the tank. This makes clear when to conserve water or when a pump might end up running dry and overheat. So I wanted to install a water level measurement device in my rain water tank.
My first attempt used sonar. This sends out a sound-wave which reflects on the water surface. The sonar measures the time it takes for the echo to return. This setup is finicky in an echoy tank but I managed to get it working. However, after couple of months the sonar stopped working in the damp environment.
Next I tried a optical, infra-red-based setup: the idea was to time the infra-red reflection on the water. After installation it appeared that water is transparent for infra-red. I basically measured the position of the floor of my tank. I took comfort in the fact that this measurement remained stable but had to look for a third option.
I finally became aware of sturdy, submersible pressure sensors which are designed for water level measurements. One of those is the QDY30A sensor, which is available in many versions but there is one which takes five volts as input and returns a 0 - 3.3V output: ideal to use with about any modern micro-controller. The sensor can be connected via a long cable. This helps to keep the Arduino in a dry place indoors. After recording a few measurements and the corresponding sensor depth, the sensor seems to show a very linear response: with two references, converting a sensor value to a depth in millimeters is doable. The readings ended up on a website and are visualized via a SVG sparkline.
Fig: Rain water level visualization for a few days, measured every 15 minutes. Going from 221cm to 197cm.
With the Arduino code attached you should be able to get going. Next to reading and converting a sensor value, it also includes reading the median of several values to add some smoothing. The sensor is read on request: only when a serial message arrives a measurement is done.
At the Ghent Center for Digital Humanities we provide software services for researchers. Think about, for example, annotation platforms for ancient texts or collaborative databases with geographically referenced historical data. Each of those services need some kind of authentication and user management: some parts of the service might be public, some only accessible for researchers at Ghent University and other parts need to be accessible e.g. to external researchers or collaborators. Providing authentication, login-flows and user management for each and every service quickly becomes tedious and, frankly, boring.
We went looking for a solution and stumbled on Keycloak. Keycloak is an open source Identity and Access Management system and is able to either authenticate users itself or pass through authenticate to other authentication providers like LDAP, GitHub, OAuth accounts, or others. It avoids the need to setup application-specific user management system. Flows like ‘forget password’, ‘verify email’, ‘two factor authentication’ are not part of your application itself but are provided by Keycloak. Leaving the developer to focus on application specific tasks.
Video: An API call to a protected back-end first fails. After authentication and receiving a JWT token, the back-end call succeeds. The authenticated session is then shown in Keycloak.
Integration with Keycloak is a bit of work and not straightforward. As part of trying out Keycloak I have created a minimal working example of a front-end / back-end system which uses Keycloak for authentication. To get full access to the back-end API the user first needs a valid JWT-token provided by Keycloak. The flow can be seen in the video above. The dockerized environment can perhaps serve as inspiration for similar setups. Please do try out the dockerized minimal working example and see if Keycloak can fit your use-case.
I have asked ChatGPT to generate 3D models. ChatGPT can not generate 3D models directly but 3D models can generated via intermediary OpenSCAD scripts: OpenSCAD provides a scripting language to describe objects which can be combined to form 3D models. ChatGPT understands the syntax of this scripting language and generates perfectly cromulent scripts. I have asked two versions of ChatGPT to generate a 3D model of a house, a cat, a stick figure, a chair and a tree. The results are interesting…
The models immediately make the difference between ChatGPT 3.5 Turbo and ChatGPT 4.0 clear: 4.0 generates much better models with, at least, recognizable elements: a chair has four legs, a cat has a head and a tail. It is impressive that reasonable 3D models are generated but there is still room for improvement: proportions are not respected and elements are not always connected. Anyway, if the 3D-models can be seen as a way to visualize code quality, then 4.0 is a clear improvement and it makes me curious about future ChatGPT versions. It also made me reflect on a couple of aspects of LLMs in general.
Fig: a black box generating 3D models.
ephemerality The response of a LLM to a prompt is ephemeral: the same prompt causes a different response depending on context, randomness and the position of heavenly bodies - or so it seems. Traditional software systems follow a strict set of clear rules and provide deterministic, predictable and reliable results. The inverse is true for LLMs which takes some getting used to. As a user, an LLM is effectively a vantablack box - there is no way to know why a certain response was given instead of another.
Updates LLMs services - and SaaS in general - have an additional feature which makes them even more unpredictable: updates to systems can happen without notice. After a recent unannounced update, for example, ChatGPT 4 started to produce gibberish. This adds another layer to the already uncontrollable and ephemeral nature of responses to LLM prompts.
To counter the ephemeral quality of prompt responses, I have 3D printed the generated 3D models. Some pictures can be found below. I find that these physical, tangible, immutable objects provide a comforting counterbalance to the digital, ephemeral nature of LLM responses. Additionally, it highlights the absurdity of the generated models.
There are other ways to solidify ephemerality: crochet patterns, juggling patterns, guitar tablature, music notation all have some kind of structured text representation which LLMs can generate and which can have a physical representation. I would encourage people to bring prompt responses to the physical world: it really makes the - current - limitations of LLMs very clear.
At the Ghent Center for Digital Humanities (GhentCDH) we offer IT-services mainly for researchers in the Humanities at Ghent University. The services range from internal collaborative research tools to publicly facing science communication platforms. Technically, it is a mix of off the shelve software with or without modifications and custom solutions using several technical stacks. It is a challenge to keep these services running, secure and up-to-date for years with a limited budget.
In an attempt to make maintenance of these services more manageable we are in the process of containerizing our software. Running software in containers has advantages. One of the advantages is a guaranteed consistency across environments. Also, isolated software containers can be beneficial for security and stability. It also allows one to run different versions of a stack on the same server without running into compatibility problems.
Next to running software in containers, development in containers also has advantages. It allows you to switch projects easily without needing to install dependencies - e.g a specific database system version - directly on a development machine. The main advantage I see is that containerization promotes developer hygiene. Stereotypically, developers do not have the best hygiene and can use any available help. Containerization forces developers to think about separation of code and configuration, code and data and it forces to be explicit about dependencies and environmental assumptions.
The main disadvantage is that some configuration is needed to get the containers running and that there is a small performance penalty. The following might help with that first part.
Dockerized Python database development
To put the theory to the test my colleagues and I put together a GitHub repository with a dockerized Python development setup. It shows interaction between Python and a PostgreSQL database. The database system runs in a container and the development environment is also kept in a container. Both containers are started with docker compose and configured via a .env file.
The stack uses a recent Python version, PDM to resolve Python dependencies and SQLAlchemy to interact with the PostgreSQL database. The VS code editor allows developers to run and debug software in a container. The video below shows the startup procedure and setting a breakpoint in some Python code.
Vid: Starting a database server and development container. Running and debugging Python code in a container.
Note that this is just an example setup, your setup might look quite different. You might need a different stack, use a different container environment (e.g. podman) or IDE but the principle of container based development could stay the same.
I have put off using containers for quite a while and I am quite a late convert, but now that I am doing more technical work in a small team I do see the advantages of an easy-to-set up, controlled, containerized development with explicitly defined dependencies. If you have no experience with containers yet, I would encourage you to at least try container based development out and see where it could help you!
A couple of months ago, OnTracx, a Ghent University sports-tech spin-off launched with the ‘dream of a world where every runner can stay injury-free’. That dream is based on a firmly grounded interdisciplinary research project, which I was fortunate to contributed to. The research project - headed by the UGent sports science department - developed a music-based bio-feedback system to reduce footfall shock while running with the aim to lower common running-related injury risk. I fondly remember soldering and programing the first cluncky prototypes, now already eight years ago!
In my role, I contributed to several key papers that form the foundation of OnTracx. Notably, the ‘validity and reliability’ paper, which has become the most cited work in my academic portfolio, which at least indicates academic interest. The main author of the paper is now doing a post-doc in Harvard, so he must have been doing something right! Additionally, I am also recognized as co-inventor on a patent related to the system.
Van den Berghe, P., Lorenzoni, V., Derie, R., Six, J., Gerlo, J., Leman, M., & De Clercq, D. (2021). Music-based biofeedback to reduce tibial shock in over-ground running: A proof-of-concept study. Scientific reports
Fig: schema of the low impact runner research system. Foot-fall impact is measured with wearable sensors and music-based feedback is given to the runner with the aim to avoid high impact.
The journey from research to commercial realization is always thrilling. As OnTracx steps into the market, I am filled with hope and anticipation for its success, mirroring and potentially exceeding the fruitful research track.
My ex-girlfriend and current wife likes maps. While looking for a gift for the new-years I got the idea to give her a 3D map of the nearby historic city center of Ghent with its three iconic towers. I have a 3D printer at home but still need to find a printable 3D model of Ghent.
Luckily, a couple of days ago a piece of software appeared to capture Google Earth tiles -cubes- into a single 3D file. There you can select an area of interest via google maps and download a GLTF file which captures the landscape in 3D. The software needs an API key which can be requested via the Google Developer tools.
After downloading a GLTF file, the 3D model needs to be made 3D-printable. There are online GLTF to STL converters but a bit of care needs to be taken to end up with an actually printable STL. My selected area of interest only has slight height differences in the landscape which are handled by placing the STL file on a base which compensates for these differences. Your 3D slicer can also generate structure to support inclinations in the landscape.
The 3D model generated by Google Earth is quite noisy and can contain floating parts and holes. It may be needed to edit the STL mesh directly. Selecting a slightly shifted area of interest may also solve problems with the edges of the print: take care to chop less buildings in two.
Have fun printing your own piece of the world!
Fig: a 3D model for the Ghent city center visualized with an Three.js STL viewer.
Elektor, a hobby electronics magazine, recently featured an article on acoustic fingerprinting using the ESP32. It is included in a special edition on Espressive products like the ESP32. This article includes content previously published on this blog and other writings about Olaf.
Since the article is based on my writings, there was an agreement to allow one of their writers to compose the magazine article under my name. This was my first experience with having a ghostwriter – quite convenient, I must say. Although it’s somewhat apparent that the article is compiled from various sources, I am overall pleased with the outcome. It even made the front page!
Elektor has a rich history, dating back to the early 1960s when it was first published in Dutch as ‘Elektuur’. I have fond memories of browsing Elektuur at my nerdy uncle’s place. If anything, this article has certainly earned me some nerd credibility points in my uncle’s eyes.
Fig: Hammer vs. screw. Not the right tool for the job.
For the last couple of years this blog has not been using any Javascript. During the last decade this has become quite rare. Only 1.2% of websites do not use Javascript I see this as a problem. In this text I want to argue that Javascript is perhaps not always the right tool for the job. Especially for web-pages which visitors simply want to read and where no explicit interactive actions are wanted from a user perspective, I see Javascript as detrimental.
I was triggered to write this by a few observations. One is by a Rails frontend framework which claims that “the only technology we should be using to create web UI is JavaScript”. This implies that the whole DOM should be rendered by Javascript. On the other hand there are frameworks which now advertise server side rendering as new feature like Blazor and Nuxt. The old thing is new again.
Let’s look at a few examples. Take visiting news website. On a news site, a user expects to be able to read current news, reviews, opinions, .. and there is no expectation of interactivity. Basically, a news site could work equally well on physical paper, as was the case for the last century or more. Ideally, a news site is a static HTML page with an easy to follow layout and some images, perhaps some static ads, with information flowing in a single direction.
If we look at, for example, the Guardian, we do not get this ideal experience, instead 82 Javascript files are loaded and the full website takes six full seconds to load on a fast fiber connection. The site even tries to load files from other domains. This bloat results in 8 website programming errors and CORS-issues. The Guardian website is far from the worst example of this sprawl of Javascript, the front-end for the Guaridan is even developed in the open.
Another news site is Hacker News. With its focus on Sillicon valley and technical news, this site has probably one of the most tech-savvy readers and … it does not rely on Javascript for functioning. There is a single small, readable 150 line script to improve usability but that is it. The makes the the website fast, easily indexable, straightforward to maintain, accessible, future-proof, failsafe, and compatible with even the most basic browsers and screen-readers.
Similarly, this blog is a dynamic Rails site but thanks to extensive use of server-side rendering and caching it behaves more like a static site generator: once everything is cached, the application mostly serves static HTML fragments. The client-side requirements are minimal as well: since no Javascript is used to modify the DOM - or even at all - lay-outing is straightforward.
Note that some blog posts feature advanced web application prototypes which do use a boatload of Javascript e.g. to convert audio, visualize audio, interact with micro-controllers or MIDI instruments,… . These prototypes use many of the available browser APIs like the Web Audio API, WebAssembly, Web MIDI API, Web Bluetooth API, WebGL, …. I really do like targeting modern browsers with offer many possibilities to build easy-to-use applications. But that is exactly a distinction that needs to be made: applications versus pages. Javascript versus No Javascript.
There is something about surprising interfaces. Having a switch to turn on a light gets quite boring after a while. Turning on a light by clapping twice, on the other hand, has some kind of magic feel to it. In a recent Mr Beast video he and his gang visit a number of expensive houses and in one of those mansions there is a light operated by clapping twice. I am not sure about the blatant materialism, but it got me thinking on how to build a similar clap-operated light yourself.
So, what are the elements needed: first a microphone to pick up sound. Second an algorithm is needed that detects claps. And finally, something that reacts to claps: a light or something else.
Many devices have microphones so sound input is relatively easy, and with some creativity there are many things waiting to be ‘clap triggered’: vacuum robots, sunscreens, lights, in-house ventilation, … The main difficulty is implementing a efficient clap-detection algorithm. Luckily there are already a few described in the literature. I have based my ANSI C implementation on ‘Duxbury, C., et al (2003). Complex domain onset detection for musical signals’.
My version of the clap-detection algorithm has two parameters which might need adapting to fit your environment. The silence threshold determines the minimum loudness for a clap to be triggered. The onset threshold determines more or less how ‘percussive’ the sound needs to be: the idea is to only react to things sounding like a clap and not to e.g. a loud whistle or other sounds. This is what the onset threshold tries to control. You can try it out below:
Demo: click the 'start audio' to capture your microphone and try to clap clearly twice. Lower the parameters if nothing happens.
Clap detection on a micro-controller
With this working we now can try to run this code on a micro-controller. Running it on a micro-controller makes it more practical in daily use to e.g. switch on lights. A low-cost ESP32 with a MEMS microphone is a good platform: these microcontrollers are easy to use and have WiFi connectivity which opens the possibility to trigger commands to smart sockets or other WiFi-enabled devices. The pector GitHub repository contains an Arduino project to run the clap-detection algorithm on an ESP32 or similar device (Teensy, RP2040,… ).
Clap detection in the command line
Next to the main clap detection software, there is a small script to trigger commands when a clap is detected. In this case, the script waits for a double clap and then pushes updates to a git repository. There are two reasons for this: the first is that it is fun, the second is for bragging rights. Not that many people can say they once pushed source code simply by clapping twice. It is, however, a challenge to find people who have the patience to listen to me explaining what I have done and who are impressed by this feat, so maybe there is only one reason: it is fun. Below a screen capture can be found pushing code to the pector repository.
Vid: pushing code by clapping
Have a look at the pector GitHub repository for more info on how you can make your websites/apps/command line tools/devices clap controlled!
I will be demoing an early digital music workstation at the Flanders 2023 Science Day. During the Science Day there will be demonstrations of several of the electronic music heritage instruments of the collection of IPEM, which used to be an early electronic music production studio. In the collection is a vintage analog synthesizer (an EMS Synthi 100), a Yamaha DX7, an analog plate reverb audio effect processor and, finally, a NeXTcube with a unique sound-card and early digital music workstation software.
The NeXTcube is an influential machine in computing history. The NeXTcube, with an additional soundcard, was also one of the first off-the-shelf devices for high-quality, real-time music applications. I have restored a NeXTcube to run an early version of MAX, an environment for interactive music applications. This combination of software and hardware was developed at IRCAM and was known as the IRCAM Musical Workstation or IRCAM Signal Processing Workstation (ISPW). See my previous blog posts on Electronic Music and the NeXTcube and USB MIDI interface for the NeXTCube
Fig: the NeXTcube's design stood out compared to the contemporary beige box PCs.`
The IPEM collection of electronic music instruments is unique with the aim to reintroduce the instruments into daily music practice an turn them into living heritage`. For example in 2020, the Dewaele Brothers released the album made exclusively on the IPEM ‘EMS Synthi 100’ synthesizer. The NeXTcube demo will be hands-on as well. See you there!
I have been asked to give a guest lecture introducing Music Information Retrieval for the course ‘Foundations of Musical Acoustics and Sonology’ at Ghent University. The lecture slides include interactive demos with live sound visualization and can be found below.
As we delve into the intricacies of how machines can analyze and understand musical content, students will gain insights into the cutting-edge research field that underpins modern music technology. From the algorithms powering music recommendation systems to the challenges of extracting meaningful information from audio signals, the lecture aims to ignite curiosity and inspire the next generation of musicologists in both music and technology. Get ready for an engaging session that promises to unlock the doors to a world where the science of sound meets the art of music.
Thanks to ChatGTP for the slightly over-the-top intro text above. Anyway, here you can find my introduction to Music Information Retrieval slides . Especially the interactive slides are perhaps of interest. The lecture was given in the Art-Science Interaction Lab (ASIL) which has a seven meter wide screen, which affects the slide design a bit.
Fig: Click the screenshot to go to the 'Introduction to Music Information Retrieval' slides.
</img>
Fig: *Door projection as imagined by DALL.E*.
I did a thing, and, similar to most stuff made here, it is quite a bit of effort and rather pointless. In that sense, it is a bit like life itself. Anyhow, it seems that the Halloween tradition of trick-or-treating has found a strong foothold in mainland Europe. Due to social embeddedness, I prepared Halloween themed projection that responds to my door-bell. I have a glass door, which is ideal for scary projections. The idea is to have a continuous door projection but with a twist: when kids press the doorbell a projected ghost reacts and rushes towards them along with a loud ghostly scream.
This blog post details the technical setup with the intention to inspire similar projects and serve as documentation for next year. First we need a way react to the doorbell.
Doorbell trigger setup
I sourced a couple of FSR (Force Sensitive Resistor)’s from a “sound book” that I had taken apart. Most of these sound books with e.g. animal sounds are meant for toddlers and have a some type of button and a small electronics circuit to make sound. Some of these books work with FSR ‘buttons’ which are similar in size to a doorbell. I took a single FSR from such a book.
I attached the FSR to a “Teensy LC” micro-controller with an additional resistor and put it in a small 3D-printed case. The Teensy was programmed to emit a MIDI Note On event when the FSR/doorbell is pressed. A Note Off follows when the button is released. Once it is connected via USB to a computer it is essentially regarded as a digital piano with only a single key. Making a micro-controller pretend to be a standard MIDI device is very practical since the message passing protocol is standardized and well supported by many types of systems. MIDI is also optimized for low-latency communication. Via the Web MIDI API there is even support for MIDI in web browsers.
Video projection
While software like Resolume allows for complex interactive video projections, my requirements are more modest: I need a continuous background video and I want the ‘scare’ video and audio to appear when the doorbell is triggered. I opted for a browser-based solution: multi-media capabilities, scripting and MIDI support are all present in modern browsers. Running things in a browser has advantages: there is no need for specialized software, it is easy to program, easy to run, relatively stable and future-proof. The proof-of-concept can be seen below. For the actual projection on a window or door you need to first cover the glass with a thin layer of white paper which lets most light through. A white paper tablecloth works well.
Demo: click the 'start video' to start the background video and click doorbell if you dare...
The code is not much special and a bit hacky but can be found attached. The download includes the “html, javascript, css, video, audio and the micro-controller software for a doorbell-triggered projection”.
From the first of October I started at the Ghent Centre for Digital Humanities (GhentCDH) as research software engineer. GhentCDH ” engages in the field of ‘Digital Humanities’ at Ghent University, ranging from archaeology and geography to linguistics and cultural studies. GhentCDH develops DH collaboration and supports research projects, teaching activities and infrastructure projects across the faculties”.
I will be helping with the many projects they are involved in: ranging form public research valorization to internal research tools. I am sure I will learn a lot by discussing projects with a diverse range of researchers and hope to consolidate my expertise in the area of mulitimedia analysis and annotation in some ways. The current areas of expertise can be found on their website:
Collaborative databases: offering advice and support for collaborative databases at Ghent University. It helps researchers to develop a database instance, powered by e.g. Nodegoat. It provides advice regarding data standards and linked data.
Digital text analysis: aiming to improve digital text analysis at Ghent University by offering support and information to researchers. You can contact us for advice on TEI and digital editions, working with digital text analysis tools, and using computer-assisted qualitative data analysis.
Geospatial analysis: offering advice, support and training regarding geospatial data management, analysis and visualisation to the humanities and social sciences researchers at the Ghent University.
Digital heritage: offering support in regards to digital heritage, participation and virtual expositions. GhentCDH helps researchers, teachers and students to create, manage and enrich their own digital collections and set up virtual exhibitions around them.
A recent GhentCDH project is Gent Gemapt or Ghent mapped‘an interatcive platform which connects places, historical maps and heritage collections which each other and the wider audience’.
The recent version of the OLAF (Overly Lightweight Acoustic Fingerprinting) audio fingerprinting system also includes an updated WASM build which deserves a bit more attention.
The browser version of Olaf enables audio fingerprinting in the browser. This can be used to e.g. react to music playing in the environment, so called second screen applications or to synchronize several devices to an audio stream.
The goal of the demo below is to play music aloud - not using headphones - using the controls on the left. You can either play the reference track or an unrelated distractor. Next, the Olaf fingerpinter system needs to be started using the button on the right which captures the microphone of your device. Then Olaf tries match the incoming sound of the microphone and the reference track. Once a match is found the exact time in the match is displayed until the sound matches no more. Note that there is no direct information flowing between the left and right part. You can also play the reference on another device to be sure.
Reference:
\
Distractor:
To get this demo working with the Web Audio API and use AudioWorklet objects, to process audio in the background an not on the main browser thread. There is surprisingly little info to find on how to combine WASM libraries - I used both Olaf and libsamplerate-js - and the AudioWorklet environment. Thanks to one of the very few resources on combining WASM, emscripten and AudioWorklets led me in the right direction.
The Web Audio API offers some great functionality for web based audio applications. The API also has a couple of quirks and is not always easy to use. One of those quirks is the limited support for resampling audio. When requesting a microphone stream of a certain sample rate the API only allows configurations your hardware supports. Ideally there should be an option to resample the incoming stream to a requested sample rate (and format) independent of hardware.
On macOS and Chrome the issue becomes even more confusing: when using multiple AudioContexts they can only have the same sample rate. E.g. starting a microphone on 16kHz by itself is possible but not when there is also audio playback on the same page, then everything switches over to 48kHz. There even seems to be an effect of different browser tabs. Other browsers and platforms have similar issues. This is problematic when you need audio in a fixed sample rate.
The solution is to resample audio incoming samples in your code or use the OfflineAudioContext as a resampler. The OfflineAudioContext way needs a lot of code and, crucially, only works on the main browser thread and not in an AudioWorklet. The AudioWorklet should be the place for computationally intensive audio processing like resampling. To solve the resampling problem I have glued together an AudioWorklet and libsamplerate-js to provide an easy to use audio resampling solution which is demo’d below:
The demo does not seem to do much but it reads incoming microphone data and uses a high quality audio resampling library to resample an audio stream into a requested audio sampling rate. The browser development console shows some info on this process. To get this working in an audio worklet, the libsamplerate-js needed to be recompiled and directly included in the AudioWorklet. To inspect the source, check the “Web Audio API AudioWorklet resampler”:[web-audio-api-resample.zip].
Olaf is an acoustic fingerprinting system designed with embedded devices in mind. It has a low memory use and computational requirements which are compatible with e.g. the ESP32 line of microcontrollers devices like the SparkFun ESP32 Thing or devices based on the RP2040 chip. Recently I have prepared a demo with the newest version of Olaf running on an ESP32 which deserves some attention.
To match audio, Olaf needs access to streaming audio. This can be audio read from an SD-card but, more likely, audio comes from a microphone. Digital microphones have some great features: a low-noise floor, great at picking up omnidirectional sound and they are inexpensive. I have prepared a demo of Olaf which shows how to use Olaf on an ESP32 with an INMP441 MEMS microphone. To test the MEMS microphone I also made a MEMS microphone to WiFi program which sends incoming sound on the ESP32 over WiFi to a computer where the sound quality can be verified.
The example provides a scaffold for embedded music-reactive applications. Once the microcontroller knows which song is playing and where in the song the match is found it can trigger LED’s (or explosions, fireworks, lyrics, other effects…) which should happen in sync with the music. See the example below to get the idea, this demo runs an older version of Olaf but the idea stays the same:
The main difference between the current and previous versions of Olaf is that now the ESP32 version, the browser version and the PC version are all running the exact same code. No hacks are needed any more to support a platform. This means that testing and debugging can be done on a computer and, if everything goes well, the code should work as expected on the embedded device (or browser).
Getting MEMS microphones to work on microcontroller platforms as the ESP32 is challenging. In theory, the I2S protocol provides a standardised, easy way to receive audio from a microphone and send stereo audio to a DAC. In practice, the many parameters make I2S not straightforwards to use. As with most protocols and standards, the mismatch between limitations and quirks of specific hardware and software implementations can cause issues. To debug I2S microphones on ESP32 or the RP2040 I have prepared a small Arduino program.
The IS2 WiFi microphone program sends audio from the microphone over WiFi to a computer which listen to the microphone: this make sure that the microphone works as expected and audio samples are correctly interpreted. It validates the I2S settings like buffer sizes, sample rates, audio formats, stereo or mono settings, … After configuring an SSID, password and IP-address it becomes possible to listen — in real-time — to the microphone which also allows the listener to sense the microphone quality.
size_t bytesIn = 0;
esp_err_t result = i2s_read(I2S_PORT, &sBuffer, bufferLen, &bytesIn, portMAX_DELAY);
int16_t *sample_buffer = (int16_t *)sBuffer;
int16_t samples_read = bytesIn / 2;
float audio_block_float[samples_read];
for (size_t i = 0; i < samples_read; i++) {
sample_buffer[i] = gain_factor * sample_buffer[i];
// Max for signed int16_t is 2^15
audio_block_float[i] = sample_buffer[i] / 32768.f;
}
// Send raw audio 32bit float samples over UDP
Udp.beginPacket(outIp, outPort);
Udp.write((const uint8_t *)audio_block_float, bytesIn * 2);
Udp.endPacket();
Fig: The main part of reading i2s audio from a microphone and sending an UDP packet.
To listen to the incoming audio an UDP port needs to be captured and subsequently send to a program that can interpret and play or store audio. With netcat UDP data can be captured. With ffmpeg and ffplay audio can be payed or stored. In practice the receiving computer might run the following commands to decode UDP packages and hear the microphone:
# for playback, receive UDP packages and interpret raw audio
nc -l -u 3000 | ffplay -f f32le -ar 16000 -ac 1  -

# for playback, receive UDP packages and store in a wav file
nc -l -u 3000 | ffmpeg -f f32le -ar 16000 -ac 1 -i pipe: microphone.wav
I have just released a Python wrapper for the Olaf acoustic fingerprinting library. Olaf is a scalable audio search system based on indexing . Olaf is programmed in C but a wrapper now makes its functionality available in Python.
The python wrapper should make it more accessible for developers to get started with it and makes it compatible with other Python libraries. A few notable libraries are the librosa python package for music and audio analysis,nnAudio, A fast GPU audio processing toolbox and other more general plotting, data processing and machine learning libraries. Despite Python’s many flaws, its rich library ecosystem is unmatched.
The associated GitHub repository contains documentation on how to use the Olaf python wrapper and also contains examples. The first shows how to index a song into the database and subsequently query the database. The second visualises the event points extracted by Olaf. The figure below shows shows the resulting event points, extracted with Olaf, plotted on a magnitude spectrogram, calculated with Olaf. The spectrogram on top is calculated using librosa and is meant to be very similar to Olaf.
\
Fig: *A power spectrum from librosa and one from Olaf, with event points marked*.
The wrapper was made with Python CFFI which works reasonably well. The automatically generated wrapper library support a large part of the C language but it needs a compilation step for each platform. Currently, the instructions assume a POSIX-like system, but technically, the wrapper can also function on Windows, albeit with the potential need for Windows-equivalent instructions in place of certain POSIX ones. The wrapper is wrapped in an easy to use python class called Olaf.py:
```python\
from olaf import Olaf, OlafCommand\
import librosa
Store the first ten seconds of an audio file\
audio_file = librosa.ex(‘choice’)\
Olaf(OlafCommand.STORE,audio_file).do(duration=10.0)
Query for a part of the same file (with an offset of 7 seconds), but change volume\
y, sr = librosa.load(audio_file,mono=True, sr=16000,duration=10,offset=7.0)\
y = y * 0.8 #change the volume\
results = Olaf(OlafCommand.QUERY,audio_file).do(y=y)
We expect a match between the stored and partially overlapping query\
print(results)\
```
I have been using a couple of UniFi devices in my home network for a couple of years. These devices proved to be reliable and full-featured, especially considering the relatively low price point. To manage UniFi devices a self-hosted instance of the UniFi network server is practical, especially when you already have a home server.
Unfortunately, the official installation instructions for UniFi miss a crucial step for installation on Debian 11. The network manager is not compatible with newer versions of mongodb. To install a version of mongodb compatible with UniFi on Debian 11, use the following commands:
The Wall Street Journal made a video on the internals Shazam fingerprinter. The visuals and technical explanation serves as a very good introduction in spectral-peak-based audio fingerprinting. For those who want a more in depth view or want to try out such systems: I have implemented extensions on the Shazam technique in two open-source systems.
Olaf is a spectral-peak based fingerprinter aimed at embedded systems, traditional computers and browsers. Panako is implemented in Java and has robustness against pitch-shifting and time-stretching which is briefly mentioned in the video below as well:
I often play board games with my kids. One of them is an absolute board game fan while the other is a sore loser and only wants to play collaborative games. These games are played ‘against the board’ and you win, or lose, together. I myself also still have problems losing games so I do understand this predicament. Genetics…
Rock & Troll is one of those games. It is a chance based game where you collaboratively try to build a path to a treasure before the dragon reaches it. Every player has to flip a tile which is either a part of the path (good) or a dragon (very bad). To increase engagement during play I often add sound effects. I was thinking: this can be improved and automated. For example, by doing this when a dragon tile is flipped:
The idea is to unobtrusively detect game state and add sound effects at critical moments. The sound effect should be playing without too much lag, ideally within about 200ms, so it feels immediate and connected to the game event. To implement this a camera based system with robust, fast object detection seemed like the way to go.
Dragon detection
To detect dragons in a video stream I want to retrain an existing object-detection system. So two things need to happen: first a realistic, labeled dataset needs to be created. Then a system needs to be trained to detect the dragons. We do not want to label a massive dataset so we will use transfer learning to retrain an existing network. This existing network should already have learned basic features like edges, colors, geometries and other basic patterns. With the hope that this would result in robust detection, even with a limited dataset.
To create the dataset I wrote a small script which took a webcam picture every few seconds while I was manipulating the board and tiles. This resulted in about 130 pictures, some with no dragons and some with six, 300 labels in total. For annotating the dataset I used the free roboflow web-app which also hosts the final dragon dataset. After augmentation, the size of the dataset can be tripled. The command to extract images from a webcam looks like this on my system:
After some consideration for alternatives I landed on the YOLOv8 object-detection system: a robust and fast object-detection system. Additionally, it is well-documented, pytorch-based, easy-to-use and it has support for video streams. The annotated roboflow dataset can be downloaded in a YOLOv8 compatible format as well. Transfer learning, was based on the yolov8s.pt weights, which are downloaded automatically. With the system installed correctly and the dataset dowloaded, a local GPU based training command might look like this:
Once the system was trained - download the “model wheights here”:[dragons.pt] - a bit of “glue code”:[rock_n_troll_v8.py] is needed. The python script needs to stream images from a camera, here via open cv, and detect dragons in each image. Every time a new dragon is found, the sound effect is played. Note that the Roboflow website automatically trains a model as well which can be tried out with a webcam.
There are a few ways improve the robustness of the system. During a game there are only more and more dragons: if the script detects less dragons than before it is probably a false negative or there is occlusion. Additionally, the dragon tiles remain in the same location once they are placed on the board. This means that new dragons are expected only in certain regions of the image. Both heuristics can be used to together to improve robustness.
Notes
One of the reasons I bought a M1 mac with unified memory is for exactly these types of AI applications. After installing pytorch 2.0, the GPU acceleration resulted in a 10x training speed improvement. Training on a GeForce 1080 GTX from 2016 was still quite a bit faster, probably thanks to years of performance tuning targeting CUDA. It is clear that the mac GPU acceleration software ecosystem can use more effort, even system tools in macOS are limited: e.g. in the macOS activity monitor, GPU activity is very much an afterthought.
I am and hesitant to use cloud based GPU computing due to lack of control and privacy. I am not willing to send pictures from my kids to e.g. Google Cloud GPUs. The dependency on hardware of others might also limit the longevity of systems.
The ease-of-use, performance and accessibility of these deep-learning systems is great. Only a couple of years ago it would take months of hard work to maybe only approach similar detection performance. Adapting this idea for other board games and more types of tiles or board game events should be very possible.
I recently installed a couple of smart electrical sockets. The sockets only switch on when there is a solar energy surplus: when my rooftop solar panels produce more than the current energy consumption. I use these ‘solar sockets’ to charge the battery of an electric bike, for air conditioning and for charging other smaller devices. This post describes the components needed for such a system with the aim to inspire similar build.
Solar panels and a solar inverter with some form of readout.
A device to measure electrical energy use in a home.
Smart sockets with an easy to use API.
Some software to glue everything together.
1. ☀️ Solar panels and inverter
Most solar inverters have some form of API to readout the current solar panel output. In my case I use a SMA inverter which has two ways to extract this data: via Bluetooth and via wired ethernet. I found the wired ethernet solution to be the most reliable. The SMA inverter does use a somewhat annoying data formatting protocol but luckily there is an open source solution to decode the data: SBFspot
For SMA inverters, and possibly for others as well, there another option: the data is also automatically uploaded to a cloud based platform. This platform has an API which can be used to extract data on solar energy production. I do not like to be dependent on external cloud based software platforms, which might change at any time. Additionally, for real-time data cloud based platforms can be slow.
2. Measuring total electrical energy use
To measure total power use, I use an “Eastron SDM220M” measurement device which communicates with a server over a serial connection. There are adapters to translate serial Modbus to USB. The device is installed in my wiring closet by a professional: it is directly connected to the 60A mains and I would not advise to DIY it.
Alternatively, some places are equipped digital energy meters which might have a way for direct readout or readout via a cloud based API, after a few minutes. This might suffice for a solar socket install.
Energy use measurement might not be strictly needed for the ‘solar sockets’: if energy use is predictable it might be ok to simply switch the sockets on your average peak solar power. Perhaps combined with a local weather API. Finally we need to switch on some sockets.
3. Smart WiFi Socket
There are many smart WiFi sockets on the market. Most come with a smartphone app which allows you to control the socket from anywhere. Behind the scenes the sockets communicates with the vendor’s cloud based system over the internet. Additionally there are some integrations with systems like Apple Home, Amazon Alexa en Google Assistant. For fundamental\
infrastructure like sockets in my home I want to avoid dependencies on a external cloud based systems. Next to the concerns about privacy and ownership there is a very practical concern: the cloud based system might just stop working in a few years. Especially any dependency on a Google service is suspect. Also I am not convinced of Amazon Alexa’s future.
Luckily, there is Tasmota which provides open source firmware targeting many types of ‘smart’ devices including smart sockets. The tagline for Tasmota is ‘Total local control with quick setup and updates’. I bought a couple of Nous A1T Tasmota Smart WiFi sockets which come with Tasmota firmware. Switching the socket on is done by sending an HTTP GET request to an url, which can be scripted easily. There is some
4. Control software
A script glues everything together: it logs energy usage and solar output. It switches on the solar sockets when a surplus is detected and switches again when the surplus is gone. There is some additional logic which ensures that the socket remains on for at least an hour even if there is no solar surplus. This to ensure that batteries are charged to a minimal usable state.
In summary, here we presented a couple of building blocks to build ‘solar sockets’ which are on only when there is a energy surplus. By using simple API’s offered by Tasmota and locally running software, there is no dependency on (in the long term) unreliable cloud based systems which ensures the longevity of the build.
As an additional bonus, the solar sockets also serve as an indicator. A small LED shows when they are on, or, in other words, when there is solar energy surplus and when it is a good idea to switch on other electrical appliances.
This post is an efficient way to determine whether a predefined frequency is present in a signal. If such an algorithm can be found, it can serve as a basis for a modem. With a modem data is modulated and demodulated at the receiving side. The modulation allows data to be send over a transmission channel.
With the ability to detect the presence of audible frequencies a modem can transform symbols into a combination of frequencies and send data over sound. This is exactly what happens with DTMF in the sound below. DTMF is also used in the dailup sound.
Audio: dail tone sequence: which numbers are pressed?
Typically, determining the presence of frequencies in a signal is done with an FFT: an FFT divides a signal into e.g. 512 linearly spaced frequency bands and determines the magnitude of each of these frequencies. The annoying thing is that a probe frequency can be right in between two bands: sample rate, FFT size and the frequency to look for need to be carefully chosen to reliably detect a frequency. Also, it is computationally inefficient to calculate the magnitudes for all frequency bands if only one band is actually needed.
Luckily there is an alternative approach which looks like the calculating the FFT but for only one predetermined frequencies. This algorithm is known as the Goertzel algorithm and is used in DTMF dail tone encoding and decoding. With the standard Goertzel algorithm it is still needed to consider sample rate and the frequency of interest.
Recenlty I needed a piece of ANSI c code to detect the magnitude of an arbitrary frequency for a project. The following is a C implementation of this algorithm. It uses the C support for complex numbers in the complex.h header:
Below you can try out the algorithm. You can choose a frequency to detect and a playback frequency. The magnitude of the frequency is reported via the slider. The demo uses a javascript translation of the code above.
Dual-tone Multi-Frequency - DTMF
DTMF in the browser.
On the right you can find a demo of dual tone frequency modulation and demodulation. A combination of frequencies is played and immediately detected.
The green bars show which frequencies have been detected. If for example 1209 Hz is detected together with 770 Hz then this means that we are looking for the symbol in the first column on the second row. Both the first column and the second row are highlighted in green. At that spot we see 4 so we can decode a 4. By using 2 combinations of four frequencies a total number of 16 symbols can be encoded.
Note that this code does not simply highlight the button press directly but encodes the symbol in audio, feeds it into an Web Audio API format and decodes audio, the result of the decoding step highlights the row and column detected.
Both Ghent University’s research output tracking system and Flanders FWO academic profile do not allow to enter software as research output. The focus is still solely on papers, even when custom developed research software has become a fundamental aspect in many research areas. My role is somewhere between that of a ‘pure’ researcher and that of a research software engineer which makes this focus on papers quite relevant to me.
The paper aims to make the recent development on Olaf‘count’. Thanks to the JOSS review process the Olaf software was improved considerably: CI, unit tests, documentation, containerization,… The paper was a good reason to improve on all these areas which are all too easy to neglect. The paper itself is a short, rather general overview of Olaf:
“Olaf stands for Overly Lightweight Acoustic Fingerprinting and solves the problem of finding short audio fragments in large digital audio archives. The content-based audio search algorithm implemented in Olaf can identify a short audio query in a large database of thousands of hours of audio using an acoustic fingerprinting technique.”
The C programming language is deceptively simple. The syntax is straightforward, C has a limited amount of keywords and a small standard library. The first edition of the classic book ‘The C Programming Language’ is only about 200 pages. And yet, when programming in C, it is hard to avoid the many exiting footguns: integer type conversions, unchecked indexes and memory leaks can all cause subtle problems. This is part of the appeal of C: shooting yourself in the foot does make you feel alive. Here I want to focus on ways to check for memory leaks for C programs.
Memory leaks come about when memory is claimed but is never released again. If this is done in a loop or during a long running program, the claimed memory adds up and eventually the system may run out of memory. A memory leak is less a problem if a program forgets to free a small amount of memory it only claims once: after program shut down, the operating system reclaims all memory anyhow. However, it does feels very dirty to not clean up after oneself. And I for one, am not a dirty boy.
Another reason to look for memory use and leaks is when you are programming for embedded devices. For these systems memory is very limited: in that world 500kB RAM is considered a massive amount of memory. I have been busy programming a scalable audio search system called Olaf which targets both traditional computers, embedded systems and browsers (via WebAssembly). It is clear that memory use — and memory leaks — need to be kept in check to pull this of.
Now, these memory leaks might not be easy to spot by inspecting the code. There are tools which help to spot memory management problems. One of these is valgrind which is currently not easy to use on Apple system with ARM processors. Luckily there is an alternative which is probably already installed on macOS via the XCode Command Line Tools a command line tool aptly called leaks. To quote the apple documentation on leaks, leaks reports:
the address of the leaked memory
the size of the leak (in bytes)
the contents of the leaked buffer
The most straightforward use of leaks is to run a program and generate a report after program shutdown. See below to run a memory leak inspection, in this case for the bin/olaf_c program which indexes an audio file in a key-value store. For CI purposes it is practical to know that leaks has an exit status of zero only when no leaks have been found. The exit status can be used in an automated test script to break a build if a leak is detected. The --quiet option can be practical in such setting.
leaks --atExit -- bin/olaf_c store audio.raw audio
In the case of Olaf I made a classic mistake: I had called free() on hash table but I needed to call the hash table destructor: hash_table_destroy() which freed not only the hash table itself but also all memory associated with the hash table entries. After a quick fix the leaks command showed no more leaks!
Output of the `leaks` command which shows where a memory leak can be found.
General takaways
leaks is an easy to use memory leak inspector provided by Apple. It is an alternative for valgrind.
Memory leaks can be checked automatically using the leaks exit status in a CI-script. This makes spotting leaks timely and more straightforward to fix.
Programmers should at least once try to target embedded devices. It makes you conscious of the wealth of resources available when targeting modern computing devices.
This post details how I went about optimizing a C application. This is about an audio search system called Olaf which was made about 10 times faster but contains some generally applicable steps for optimizing C code or even other systems. Note that it is not the aim to provide a detailed how-to: I want to provide the reader with a more high-level understanding and enough keywords to find a good how-to for the specific tool you might want to use. I see a few general optimization steps:
The zeroth step of optimization is to properly **question the need** and balance the potential performance gains against added code complexity and maintainability.
Once ensured of the need, the first step is to **measure the systems performance**. Every optimization needs to be measured and compared with the original state, having automazation helps.
Thirdly, the second step is to **find performance bottle necks**, which should give you an idea where optimizations make sense.
The third step is to **implement and apply** an optimization and measuring its effect.
Lastly, **repeat** steps zero to three until optimization targets are reached.
More specifically, for the Olaf audio search system there is a need for optimization. Olaf indexes and searches through years of audio so a small speedup in indexing really adds up. So going for the next item on the list above: measure the performance. Olaf by default reports how quickly audio is indexed. It is expressed in the audio duration it can process in a single second: so if it reports 156 times realtime, it means that 156 seconds of audio can be indexed in a second.
The next step is to find performance bottlenecks. A profiler is a piece of software to find such bottle necks. There are many options gprof is a command line solution which is generally available. I am developing on macOS and have XCode available which includes the “Instruments - Time Profiler”. Whichever tool used, the result of a profiling session should yield the time it takes to run each functions. For Olaf it is very clear which function needs optimization:
\
Fig: The results of profiling Olaf in XCode's time profiler. Almost all time is spend in a single function which is the prime target for optimization.
The function is a max filter which is ran many, many times. The implementation is using a naive approach to max filtering. There are more efficient algorithms available. In this case looking into the literature and implementing a more efficient algorithm makes sense. A very practical paper by Lemire lists several contenders and the ‘van Herk’ algorithm hits the sweet spot between being easy to implement and needing only a tiny extra amount of memory. The Lemire paper even comes with example c max-filters. With only a slight change, the code fits in Olaf.
After implementing the change two checks need to be done: is the implementation correct and is it faster. Olaf comes with a number of functional and unit checks which provide some assurance of correctness and a built in performance indicator. Olaf improved from processing audio 156 times realtime to 583 times: a couple of times faster.
After running the profiler again, another method came up as the slowest:
//Naive implementationfloat olaf_ep_extractor_max_filter_time(float *array, size_t array_size) {
float max = -10000000;
for (size_t i = 0; i < array_size; i++) {
if (array[i] > max) max = array[i];
}
return max;
}
src: naive implementation of finding the max value of an array.
This is another part of the 2D max filter used in Olaf. Unfortunately here it is not easy to improve the algorithmic complexity: to find the maximum in a list, each value needs to be checked. It is however a good contender for SIMD optimization. With SIMD multiple data elements are processed in a single CPU instruction. With 32bit floats it can be possible to process 4 floats in a single step, potentially leading to a 4x speed increase - without including overhead by data loading.
Olaf targets microcontrollers which run an ARM instruction set. The SIMD version that makes most sense is the ARM Neon set of instructions. Apple Sillicon also provides support for ARM Neon which is a nice bonus. I asked ChatGPT to provide a ARM Neon improved version and it came up with the code below. Note that these type of simple functions are ideal for ChatGPT to generate since it is easily testable and there must be many similar functions in the ChatGPT training set. Also there are less ethical issues with ‘trivial’ functions: more involved code has a higher risk of plagiarization and improper attribution. The new average audio indexing speed is 832 times realtime.
src: a ARM Neon SIMD implementation of a function finding the max value of an array, generated by ChatGPT, licence unknown, informed consent unclear, correct attribution impossible.
Next, I asked ChatGPT for an SSE SIMD version targeting the x86 processors but this resulted in noticable slowdown. This might be related to the time it takes to load small vectors in SIMD registers. I did not pursue the SIMD SSE optimization since it is less relevant to Olaf and the first performance optimization was the most significant.
Finally, I went over the code again to see whether it would be possible exit a loop and simply skip calling olaf_ep_extractor_max_filter_time in most cases. I found a condition which prevents most of the calls without affecting the total results. This proved to be the most significant speedup: almost doubling the speed from about 800 times realtime to around 1500 times realtime. This is actually what I should have done before resorting to SIMD.
In the end Olaf was made about ten times faster with only two local, testable, targeted optimizations.
General takeways
Only think about optimization if there is a need and set a target: otherwise it is infinite.
Try to find a balance between complexity, maintainability and performance.
Changing a naive algorithm to a more intelligent one can have a significant performance increase. Check the literature for inspiration.
Check for conditions to skip hot code paths before trying fancy optimization techniques.
Profilers are crucial to identify where to optimize your code. Applying optimizations blindly is a waste of time.
Try to keep optimizations local and testable. Sprinkling your code with small, hard to test performance oriented improvements might not be worthwile.
SIMD generated by ChatGPT can be a very quick way to optimize critical, hot code paths. I would advise to only let ChatGPT generate small, common, easily testable code: e.g. finding the maximum in an array.
The aptly named emulator Previous allows you to emulate NeXT hardware on modern platforms. It allows you to run NeXTStep and run software made for this environment. I have prepared a downloadable disk image for this emulator to experiment with an early version of MAX, a visual programming environment for music applications.
I am interested in the early days of MAX an influential visual programming environment geared towards music applications. This software originated at IRCAM and an early version was build for the NeXTcube and required a specialized soundcard (ISPW). I have been lucky to have been able to restore a NeXTCube with an ISPW soundcard but this hardware is extremely rare.
A functioning NeXTcube is already a rare collectors item and the ISPW soundcard is even more uncommon. The card was developed at IRCAM and later commercialised by Ariel Inc. which brought it to market right when NeXT announced to phase out hardware production. Overnight, the market for NeXT peripheral hardware collapsed and nobody wanted to buy an expensive soundcard for an obsolete hardware platform. The soundcard was never mass-produced: there are only the prototype boards made at IRCAM and a few batches of the commercial version. The total number ISPW soundcards must have been around a few dozen worldwide, in 1992. Now, over 30 years later, it is virtually impossible to find an ISPW card. Running an early version of MAX on original hardware is nearly impossible.
\
Fig: MAX 0.25 running in the Previous emulator on a modern MacOS system.
To make experiencing an early version of MAX more accessible I have prepared a disk image for the Previous emulator. The emulator emulates several NeXT machines and lets you run NeXT software on modern machines. The disc image uses NeXTStep 3.3 for OS and has MAX 0.25 pre-installed. Several NeXT machines can be emulated by Previous but, crucially for MAX, the ISPW soundcard is not emulated. This puts a severe limitation on MAX: there is no audio or MIDI input or output. However, you can start MAX in simulation mode and experience the patcher and see the original documentation and have a feel for the original supplied patches and follow the logic of patches.
To run MAX, download the disc image with NeXTStep and MAX [about 100MB]. By downloading this material you agree to use it only for academic, educational, historic or documentary use and not for commercial or other purposes. The zip-file also contains some information on how to get started and boot the system. Note that it has only been tested on an M1 mac.
Fig: the NeXTCube with the Ariel ProPort and MIDI input/output interface.
Recently, I was able to restore a NeXTCube and install an early version of MAX - a graphical music programming environment. However, a crucial part of the system was missing: there was no way to do MIDI input/output. MIDI is used to connect controllers, keyboards, synthesizers or other musical instruments to the audio workstation. The NeXTCube itself has a serial port which allows users to connect MIDI devices. Next to the serial port on the mainboard, the NeXTCube I am working with also has a RS-422 serial port on the ISPW ‘soundcard’. The serial port uses RS-422 and mini DIN 8 connectors which provide MIDI input and output. While the MIDI data bytes are transmitted according to spec, the connector and the electrical signals are not compatible with standard MIDI.
Fig: the IRCAM/Ariel ISPW soundcard with mini DIN-8 RS-433 serial port on the right.
For MIDI I/O we need a device which allows to connect the RS-422 MIDI to both legacy MIDI devices and to computers via USB MIDI. If a MIDI event arrives from the NeXTCube’s RS-422 it needs to be passed through to the USB and legacy MIDI ports and the other way around. The Teensy platform is ideal: it supports hardware serial and USB MIDI. In this retro-computing project, it seems wasteful to use the 600MHz Teensy 4.0 only for message passing: the Teensy has much more computing power than NeXTcube but it is cheap, easy to program, available and practical.
The RS-422 serial port uses –6V to 6V logic which needs to be transformed to the 0V to 3.3V logic for the Teensy microcontroller. A PCB provides this capability and is connected to a hardware serial port of the Teensy. The pinout of the RS-422 port was measured via a scope and matched the documentation. The Teensy has an usbMIDI mode and can present itself as a standard MIDI device to a PC. Two opto-isolated legacy MIDI DIN-5 ports were connected to another hardware serial port. The software on the Teensy conducts the “three-way MIDI message passing”:[midi_passthrough.ino].
Vid: Max/FTS FM synth reacting to USB MIDI input.
The electronics were fixed into a reused metal enclosure. The front panel of the enclosure was replaced by a custom 3D printed panel. The front contains the RS-422 port, two MIDI DIN 5 ports and a micro usb port either for power alone or MIDI messages and power. Feel free to check out the “OpenSCAD design with a level MINI DIN8 hole”:[midi_box.scad].
With a working MIDI interface for the NeXTcube allows interfacing with MIDI keyboards and controllers. It can also be used to measure roundtrip latency. MIDI to sound latency determines how long it takes between pressing a MIDI key and hearing sound. MIDI to MIDI roundtrip latency determines how long it takes to process, parse and return a MIDI message. For a responsive, reliable system both types of latencies should be constant and preferably in the range of 10ms or below.
Fig: Measured MIDI roundtrip latency on the ISPW board for the NeXTCube.
Measuring the MIDI roundtrip latency shows that the system is able to respond in 3.6+–0.4 ms (N=300). A combination of a MAX patch and “Teensy firmware”:[next_midi_roundtrip_latency.ino] was used to measure this automatically. The MIDI-to-audio latency was measured a few times manually and always was around 13ms. These figures show that the system is ideal for low-latency real-time music making in its default configuration. In MAX the audio buffer sizes could be reduced to achieve an even lower latency but with the risk of running into buffer underruns and audio glitches.
The NeXTcube is an influential machine in computing history. The NeXTcube, with an additional soundcard, was also one of the first off-the-shelf devices for high-quality, real-time music applications. I have restored a NeXTcube to run an early version of MAX, an environment for interactive music applications.
The NeXTcube context and the IRCAM Musical Workstation
In 1990 NeXT started selling the NeXTcube, a high-end workstation. It introduced or brought together many concepts (objective-c, the Mach kernel, postscript, an app store) which are still in use today. The NeXTcube’s influence is especially felt in the Apple ecosystem with Mac OS X, iPhones and iPads being direct decedents of NeXT’s line of computers.
Due to its high price, the NeXTcube was not a commercial success. It mainly ended up at companies or in the hands of researchers. Two of those researchers, Tim Berners-Lee and Robert Cailliau created the first http server and web browser at CERN on a NeXTcube. Coincidently, the http software was publicly released exactly 30 years ago today. Famously, the cube was also used to develop games like the original Doom and Quake. So yes, the NeXTcube runs Doom.
Fig: the NeXTcube's design stood out compared to the contemporary beige box PCs.
Less well known is the fact that the NeXTcube is also one of the first computing devices capable enough for real-time, high-quality interactive music applications. In the mid 1980s this was still a dream at IRCAM, a French research institute with the aim to ‘contribute to the renewal of musical expression through science and technology’. The bespoke hardware and software systems for music applications from the mid 80s were further developed and commercialised in the early 90s. Together these developments resulted in a commercially available version of the “IRCAM Musical Workstation (IMW)”, an early, if not the first, off-the-shelf computer for interactive music applications.
The IRCAM Musical Workstation (IMW), sometimes called the IRCAM Signal Processing Workstation (ISPW), consisted of several hard and software modules working together to enable interactive music applications. An important component was a ‘soundcard’ which had two beefy 40MHz i860 intel CPUs for DSP. When installed in the NeXTcube, the soundcard had more computing power than the rest of the computer. This is similar to modern computers where some graphics cards have more raw computing power than the main CPU. The soundcard was developed at IRCAM and commercialized by Ariel inc. under the name “Ariel ProPort”.
The IRCAM Ariel DSP coprocessor, soundcard.
A few software environments were developed at IRCAM which made use of the new hardware. One was Animal, another, was the much more influential MAX. MAX provides a graphical programming environment specific for music applications. Descendants of MAX are still used today, see Ableton Max for Live and Pure Data. I consider the introduction of MAX as a pivotal point in electronic music history. Up until the introduction of MAX, creating a new electronic music instrument meant bespoke hardware development. With MAX, this is done purely in software. This made electronic sound or instrument design not only faster but also accessible to a much wider audience of composers, artists and thinkerers.
The NeXTcube at IPEM
IPEM was an early electronic music production studio embedded at Ghent University, Belgium. Now it is active as a internationally acclaimed research center for interdisciplinary music research. In the early 90s IPEM acquired a NeXTcube Turbo with an internal diskette drive, SCSI hard disk, NextDimension color graphics card and an Ariel ProPort DSP/ISPW module. The cube was preserved well and came with many of the original software, books and manuals. I have been trying to get this machine working and configure it as an “IRCAM Musical Workstation”.
IPEM's NeXTcube with IRCAM Ariel ProPort.
There were a few practical issues: the mouse was broken, the hard drive unreliable and the main system fan loud and full of dust. The mouse had a broken cable which was fixed, the hard drive was replaced by a SCSI2SD setup and the fan was replaced with a new one. On the software side of things, the Internet Archive hosts NeXTStep 3.3 which, after many attempts, was installed on the cube. Unfortunately there seemed to be a compatibility issue. The Ariel ProPort kernel module did not work. I started over installed NeXTStep 3.1, with the same result. Finally, I installed NeXTStep 3.0 which was compatible with the kernel module and MAX/FTS!
Vid: Max/FTS with a commercial Ariel soundcard running on a NeXTcube Turbo.
The restoration of the IRCAM Signal Processing Workstation instruments fits in a university project on living heritage The idea is to get key historic electronic music instruments into the hands of researchers and artists to pull the fading knowledge on these devices back into a living culture of interaction. This idea already resulted in an album: DEEWEE Sessions vol. 01. Currently the collection includes a 1960s reverb plate, an EMS Synti 100 analog synthesizer from the 70s, a Yamaha DX7 (80s) and finally the NeXTCube/ISPW represents the early 90s and the departure of physical instruments to immaterial software based systems.
Acknowledgements & Further reading
This project was made possible with the support of the Belgian Music Instrument Museum and IPEM, Ghent University. I was fortunate to get assistance by Ivan Schepers and Marc Leman at IPEM but also by the main developers of MAX: Miller Puckette. I would also like to thank Anthony Agnello formerly at Ariel Corp for additional image material and info. I also found the WinWorld and NeXTComputers communities and resources extremely helpful. Below a picture from the CERN public archives and Ghent University Archive is included. Thanks a lot!
Vid: the trigger box set in recording mode via a button or a MIDI key press.
A while back I have build a trigger box. Such device can be used for various synchronisation tasks. It can be used to synchronise camera’s, capture devices and sensors. All compatible devices have a 5V TTL input, often a BNC connector. For a camera, TTL input could control the shutter time. For a sensor a TTL clock could determine the sample time or simply be registered along side an other data stream. The trigger box allows to either pass-through (or block) an incoming TTL clock. It also outputs a recording level.
There are two ways to use the trigger box. The first is by operating a manual switch to start (and later stop) a recording. When recording, the recording level output is set to 5V and the clock at the CLOCK IN is passed through to the CLOCK OUT port. The second way to set the recording state is by MIDI over USB. While a MIDI key is pressed, the recording state is high, when the key is released the state is low. The MIDI key input makes it compatible and controllable from any DAW. Both ways are shown in the video.
For practical reasons there are two microcontrollers in the device, a Teensy 3.2 and an Arduino. The Arduino is there for its 5V capabilities and is essentially a rather beefy level-shifter. The Teensy is there for the USBMIDI compatibility and controls everything.
For aesthetic reasons the trigger box has been build into a 1950s ‘Sieger portable explosive gas detector’. I did not feel too bad about gutting the original electronics since a battery leak had destroyed most of it. Also, the late WII era knobs are still unmatched for durability and tactile satisfaction.
Today I have released Gabber a bit of code to transform audio from the time domain to a constant-Q frequency domain in the browser. To be more precise it does a constant-Q non-stationary Gabor transform. The heavy-lifting is done by ‘the gaborator’, a C library by Andreas Gustafsson.
I have compiled the Gaborator library to WebAssembly, added some glue code to bridge the Javascript and WASM worlds, implemented a Web Audio AudioWorkletProcessor to transform audio in the background and and finally visualized the results via WebGL2.
There is a Gabber live demo below. If you press start and grant microphone access, incoming audio is transformed and plotted onto a canvas. Thanks to WebAssembly and WebGL2 this should run relatively smoothly even on less powerful devices. Please do play around with the perspective slider.
While Gabber is currently a proof of concept, with some attention the library could be used as a front end for browser based music information retrieval applications. My main goal with Gabber is to use it in educational settings to explain the properties of sound, and more concretely pitch, via spectrograms and interactive demos. Also I plan to use it in a browser based tool to extract pitch patterns from music.
I have presented DiscStitch at the MIR (Music Information Retrieval) get together at the Deezer headquarters in Paris.
DiscStitch is a solution to identify, align and mix digitized audio originating from (overlapping) laquer discs. The main contribution lays in the novel audio to audio alignment algorithm which is robust against some speed differences and variabilities.
I have updated Olaf - the Overly Lightweight Acoustic Fingerprinting system. Olaf is a piece of technology that uses digital signal processing to identify audio files by analyzing unique, robust, and compact audio characteristics - or “fingerprints”. The fingerprints are stored in a database for efficient comparison and matching. The database index allows for fast and accurate audio recognition, even in the presence of distortions, noise, and other variations.
Olaf is unique because it works on traditional computing devices, embedded microprocessors and in the browser. To this end tried to use ANSI C. C is a relatively small programming language but has very little safeguards and is full of exiting footguns. I enjoy the limitations of C: limitations foster creativity. I also made ample use of the many footguns C has to offer: buffer overflows, memory leaks, … However, with the current update I think most serious bugs have been found. Some of the changes to Olaf include:
Fixed a rather nasty array out of bounds bug. The bug remained elusive due to the fact that a segfault was rare on macOS. Linux seems to be more diligent in that regard.
Added a quick way to skip already indexed files. Which improves usability significantly when working with larger datasets.
Improved command line output and fixed incorrectly reported times. The reported start and stop time of a query was wrong and is now fixed.
Olaf now supports caching fingerprints in simple text files. This makes fingerprint extraction much faster since all cores of the system can be used to extract fingerprints and dump them to text files. Writing prints to the database from multiple threads is slow since they need to wait for access to the locked database. There is also a command to store all cashed fingerprints in a single go.
Added support for basic profiling with gprof. The profiler shows where optimizations can have the most impact.
Olaf now includes an algorithm for efficient max-filtering. The min-max filter algorithm by Daniel Lemire is implemented. The profiler showed that most time was spend during max-filtering: replacing the naive max-filter with the Lemire max-filter improved performance drastically.
CI with Github Actions which checks if checked in sources compile and tests some of the basic functionality automatically.
Updated the Zig build script for cross-compilation and updated the pre-build Windows version.
Tested the system with larger databases. The FMA-full datasets, which comprises almost a full year of audio was indexed and queried without problems on a single pc. The limits of Olaf with respect to indexed size is probably a few times larger.
Tested, fixed and improved the ‘memory database’ version. Also added documentation to the readme.
Made a basic web example to call the WASM version of Olaf.
Added an ESP32 example, showing how Olaf can run on this microprocessor. It runs without an external microphone but uses a test audio file. Previously some small changes were needed to Olaf to run on the ESP32, now the exact same code is used.
Anyhow, what originally started as a rather quick and dirty hack has been improved quite a bit. The takeaway message: in the world of software it does seem possible to polish a turd.
As a way to get to know the Rust programming language I have developed a couple of practical tools for OSC and MIDI debugging. OSC and MIDI are protocols which are almost always used for applications dealing with music. In these applications latency should be kept in check. Languages with garbage collection (Java, Go) and scripting languages (Ruby, Python, …) are hard to tune for low-latency applications and do not really have real-time guarantees. Rust, as a modern alternative for C/C, is a better fit for cross platform CLI low-latency applications.
This opens a couple of possibilities which are discussed below.
Sending UDP messages from the browser
One of the ways to send OSC messages from a browser to a local network is by using the MIDI out capability of browsers and - using mot - translating MIDI to OSC an example can be seen below.
Fig: sending an UDP message to a network from a Browser using a the mot MIDI to OSC bridge, click the image for a better readable version.
Measuring UDP message latency
Both MIDI and OSC can be seen as rather general data encapsulation protocols with wide support in terms of libraries and cross platform support. Their value goes beyond mere musical applications. The same holds for mot. In this example we are using mot to measure UDP message latency between two hosts.
On the first host we send MIDI messages from MIDI device 0 over OSC to another host with e.g. mot midi_to_osc 192.168.1.12:3000 /m 0. At the other host we receive the OSC messages and send them to a virtual device: mot osc_to_midi 192.168.1.12:3000 /m 6666.
At the second host we return messages from the virtual device to the first host: mot midi_to_osc 192.168.1.4:5000 /m 1. Perhaps you first need to do mot midi_to_osc -l to find the index of the virtual device. As a final step the messages can be received at the first host and returned to the original midi device. On the first host: mot osc_to_midi 192.168.1.4:5000 /m 0.
If the original MIDI device is a Teensy running the “roundtrip patch” then finally the roundtrip time is accurately measured and shown in the serial console. I am sure the previous text is cromulent, totally not contrived and not confusing. Anyway, to make it more confusing: this is what happens when you use a single host to do midi to osc to midi to osc to midi and use the loopback networking device:
Fig: MIDI to OSC to MIDI to OSC to MIDI roundtrip latency.
Visualizing sensor data in the browser
Fig: Sensor data as MIDI.
When capturing sensor data on microcontrollers, data can be encoded into MIDI. This makes almost any sensor practically useful in Ableton Live or similar environments. It also makes it compatible with all other MIDI supporting devices. With mot it becomes trivial to send MIDI encoded sensor data over OSC e.g. to a central place to log that data.
Another use case is to visualize the incoming data in real-time. A single web page which reads and visualizes incoming MIDI-sensor data becomes much more useful if streams from other devices can be visualized as well with the mot midi_to_osc and mot osc_to_midi commands.
Cross-platform support
With the Rust compiler it is relatively easy to cross-compile for different targets. There is however an important limitation in mot. Windows has no support for virtual MIDI ports which limits the usefulness of mot on that platform.
Fig: Advances in Speech and Music Technology book cover.
I have recently published an chapter in an academic book published by Springer. The topic of the book is of interest to me but can be perceived as rather dry: Advances in Speech and Music Technology.
The chapter I co-authored presented two case studies on detecting duplicates in music archives. The fist case study deals with segmentation reuse in an archive of early electronic music. The second with meta-data reuse in an archive of a public broadcaster containing digitized commercial shellac disc recordings with many duplicates.
Duplicate detection being the main topic, I decided to title the article Duplicate Detection for for Digital Audio Archive Management. It is easy to miss, and not much is lost if you do, but there is a duplicate‘for’ in the title. If you did detect the duplicate you have detected the duplicate in the duplicate detection article. Since I have fathered two kids I see it as an hard earned right to make dad-jokes like that. Even in academic writing.
It was surprisingly difficult to get the title published as-is. At every step of the academic publishing process (review, editorial, typesetting, lay-outing) I was asked about it and had to send an email like the one below. Every email and every explanation made my second-guess my sense of humor but I do stand by it.
From: Joren \
To: Editors ASMT \
\
Dear Editors, \
\
I have updated my submission on easychair in...\
\
I would like to keep the title however as is an attempt at word-play. These things tend to have less impact when explained but the article is about duplicate detection and is titled 'Duplicate detection for for digital audio archive management'. The reviewer, attentively, detected the duplicate 'for' but unfortunately failed to see my attempt at humor. To me, it is a rather harmless witticism.
Regards
Joren
</pre>
Anyway, I do think that humor can serve as a gateway to direct attention to rather dry, academic material. Also the message and the form of the message should not be confused. John Oliver, for example, made his whole career on delivering serious sometimes dry messages with heaps of humor: which does not make the topics less serious. I think there are a couple of things to be learned there. Anyway, now that I have your attention, please do read the author version of Duplicate Detection for for Digital Audio Archive Management: Two Case Studies.
TarsosDSP is a Java library for audio processing I have started working on more than 10 years ago. The aim of TarsosDSP is to provide an easy-to-use interface to practical music processing algorithms. Obviously, I have been using it myself over the years as my go-to library for audio-processing in Java. However, a number of gradual changes in the java ecosystem made TarsosDSP more and more difficult to use.
Since I have apparently not been the only one using it, there was a need to give it some attention. During the last couple of weeks I have found the time to give it this much needed attention. This resulted in a number of updates, some of the changes include:
Change of the build system from Apache Ant to Gradle
Make use of Java Modules to make TarsosDSP compatible with the ModulePath introduced in Java 9.
Packaged the software into a maven compatible format, which makes it easy to use as a dependency.
CI with GitHub actions to automatically build and test the software.
Updated some examples shipped with the TarsosDSP. I have still still some examples to verify.
Improved handling of errors on reading audio via ffmpeg
\
Fig: The updated TarsosDSP release contains many CLI and GUI example applications.
Notably the code of TarsosDSP has not changed much apart from some cosmetic changes. This backwards compatibility is one of the strong points of Java. With this update I am quite confident that TarsosDSP will also be usable during the next decade as well.
This blog has been running on Caddy for the last couple of months. Caddy is a http server with support for reverse proxies and automatic https. The automatic https feature takes care of requesting, installing and updating SSL certificates which means that you need much less configuration settings or maintenance compared with e.g. lighttpd or Nginx. The underlying certmagic ACME client is responsible for requesting these certificates.
Before, it was using lighttpd but the during the last decade the development of lighttpd has stalled. lighttpd version 2 has been in development for 7 years and the bump from 1.4 to 1.5 has been taking even longer. lighttpd started showing its age with limited or no support for modern features like websockets, http/3 and finicky configuration for e.g. https with virtual domains.
Caddy with Ruby on Rails
I really like Caddy’s sensible defaults and the limited lines of configuration needed to get things working. Below you can find e.g. a reusable https enabled configuration for a Ruby on Rails application. This configuration does file caching, compression, http to https redirection and load balancing for two local application servers. It also serves static files directly and only passes non-file requests to the application servers.
If you are self-hosting I think Caddy is a great match in all but the most exotic or demanding setups. I definitely am kicking myself for not checking out caddy sooner: it could have saved me countless hours installing and maintaining https certs or configuring lighttpd in general.
JNI is a way to use C or C code from Java and allows developers to reuse and integrate C/C in Java software. In contrast to the Java code, C/C code is platform dependent and needs to be compiled for each platform/architecture. Also it is generally not a good idea to make users compile a C/C library: it is best provide precompiled libraries. As a developer it is, however, a pain to provide binaries for each platform.
With the dominance of x86 processors receding the problem of having to compile software for many platforms is becoming more pressing. It is not unthinkable to want to support, for example, intel and M1 macOS, ARM and x86_64 Linux and Windows. To support these platforms you would either need access to such a machine with a compiler or configure a cross-compiler for each system: both are unpractical. Typically setting up a cross-compiler can be time consuming and finicky and virtual machines can be tough to setup. There is however an alternative.
Zig is a programming language but, thanks to its support for C/C, it also ships with an easy-to-use cross-compiler which is of interest here even if you have no intention to write a single line of Zig code. The built-in cross-compiler allows to target many platforms easily.
Cross compilation of C code is possible by simply replacing the gcc command with zig cc and adding a target argument, e.g. for targeting a Windows. There is more general information on zig as a cross-compiler here.
Cross-compiling a JNI library is not different to compiling other libraries. To make things concrete we will cross-compile a library from a typical JNI project: JGaborator packs the C/C library gaborator. In this case the C/C code does a computationally intensive spectral transformation of time domain data. The commands below create an x86_64 Windows DLL from a macOS with zig installed:
{style="overflow-x:scroll"}
<code>
bash
#wget https://aka.ms/download-jdk/microsoft-jdk-17.0.5-windows-x64.zip#unzip microsoft-jdk-17.0.5-windows-x64.zip#export JAVA_HOME=`pwd`/jdk-17.0.5+8/
git clone --depth 1https://github.com/JorenSix/JGaborator
cd JGaborator/gaborator
echo $JAVA_HOMEJNI_INCLUDES=-I"$JAVA_HOME/include"\ -I"$JAVA_HOME/include/win32"
zig cc -target x86_64-windows-gnu -c -O3 -ffast-math -fPIC pffft/pffft.c -o pffft/pffft.o
zig cc -target x86_64-windows-gnu -c -O3 -ffast-math -fPIC -DFFTPACK_DOUBLE_PRECISION pffft/fftpack.c -o pffft/fftpack.o
zig c++ -target x86_64-windows-gnu -I"pffft" -I"gaborator-1.7"$JNI_INCLUDES -O3\
-ffast-math -DGABORATOR_USE_PFFFT -o jgaborator.dll jgaborator.cc pffft/pffft.o pffft/fftpack.o
file jgaborator.dll
# jgaborator.dll: PE32+ executable (console) x86-64, for MS Windows
</code>
Note that, when cross-compiling from macOS, to target Windows a Windows JDK is needed. The windows JDK has other header files like jni.h. Some commands to download and use the JDK are commented out in the example above. Also note that targeting Linux from macOS seems to work with the standard macOS JDK. This is probably due to shared conventions regarding compilation of libraries.
To target other platforms, e.g. ARM Linux, there are only two things that need to be changed: the -target switch should be changed to aarch64-linux-gnu and the name of the output library should be (by Linux convention) changed to libjgaborator.so. During the build step of JGaborator a list of target platforms it iterated and a total of 9 builds are packaged into a single Jar file. There is also a bit of supporting code to load the correct version of the library.
Using a GitHub action or similar CI tools this cross compilation with zig can be automated to run on a software release. For Github the Setup Zig action is practical.
Loading the correct library
In a first attempt I tried to detect the operating system and architecture of the environment to then load the library but eventually decided against this approach. Mainly because you then need to keep an exhaustive list of supporting platforms and this is difficult, error prone and decidedly not future-proof.
In my second attempt I simply try to load each precompiled library limited to the sensible ones - only dll’s on windows - until a matching one is loaded. The rationale here is that the system itself knows best which library works and failing to load a library is computationally cheap. There is some code to iterate all precompiled libraries in a JAR-file so supporting an additional platform amounts to adding a precompiled library in the JAR folder: there is no need to be explicit in the Java code about architectures or OSes.
Trying multiple libraries has an additional advantage: this allows to ship multiple versions targeting the same architecture: e.g. one with additional acceleration libraries enabled and one without. By sorting the libraries alphabetically the first, then, should be the one with acceleration and the fallback without. In the case of JGaborator for mac aarch64 there is one compiled with -framework Accelerate and one compiled by the Zig cross-compiler without.
Takehome messages
If you find yourself cross-compiling C or C for many platforms, consider the Zig cross-compiler. Even when you have no intention to write a single line of Zig code.
For JNI and Java the JGaborator source code might offer some inspiration to pre-compile and load libraries for many platforms with little effort.
CI tools can help to verify builds and automate Zig cross-compilation.
If you build for Windows make sure to include windows header-files even when there are no compilation errors using UNIX-header files.
\
\
Fig: Screenshot of *Emotopa*: a browser based tool to extract pitch organization from audio.
A couple of days ago I participated in the Music Hack Day - India. The event was organized the 10th and 11th of December in Bangaluru, India. During the event a representative of Smule suggested a task to evaluate the performance of karaoke-singers in terms of intonation. The idea was to employ pitch histogram like features to estimate pitch use of singers.
I offered to build a browser based application to extract pitch histograms from audio. At the end of the hack day I presented the first release of Emotopa with some limited functionality:
Next, a pitch detector runs on the audio and returns a list of pitch estimates.
Finally a histogram (technically a kernel density estimate) is constructed using the pitch estimates.
The user can export the pitch histogram, the pitch class histogram and the pitch annotations. These features successfully show the intonation quality of singers but the applications are much broader. Some potential applications have been described in (amongst others) the Tarsos article.
The Emotopa name alludes to the Apotome browser based app where, starting from a scale you can make music. With Emotopa you do the reverse. Also very much of interest are Leimma and the rationale behind both Apotome and Leimma
This year the ISMIR 2022 conference is organized from 4 to 9 December 2022 in Bengaluru, India. ISMIR is the main music technology and music information retrieval (MIR) conference. It is a relief to experience a conference in physical form and not through a screen.
I have contributed to the following work which is in the main paper track of ISMIR 2022:
BAF: An Audio Fingerprinting Dataset For Broadcast Monitoring (version of record)\
Guillem Cortès, Alex Ciurana, Emilio Molina, Marius Miron, Owen Meyers, Joren Six, Xavier Serra\
Abstract: Audio Fingerprinting (AFP) is a well-studied problem in music information retrieval for various use-cases e.g. content-based copy detection, DJ-set monitoring, and music excerpt identification. However, AFP for continuous broadcast monitoring (e.g. for TV & Radio), where music is often in the background, has not received much attention despite its importance to the music industry. In this paper (1) we present BAF, the first public dataset for music monitoring in broadcast. It contains 74 hours of production music from Epidemic Sound and 57 hours of TV audio recordings. Furthermore, BAF provides cross-annotations with exact matching timestamps between Epidemic tracks and TV recordings. Approximately, 80% of the total annotated time is background music. (2) We benchmark BAF with public state-of-the-art AFP systems, together with our proposed baseline PeakFP: a simple, non-scalable AFP algorithm based on spectral peak matching. In this benchmark, none of the algorithms obtain a F1-score above 47%, pointing out that further research is needed to reach the AFP performance levels in other studied use cases. The dataset, baseline, and benchmark framework are open and available for research.
I have also presented a first version of DiscStitch, an audio-to-audio alignment algorithm. This contribution is in the ISMIR 2022 late breaking demo session:
DiscStitch: towards audio-to-audio alignment with robustness to playback speed variabilities (version of record)\
Joren Six\
Abstract: Before magnetic tape recording was common, acetate discs were the main audio storage medium for radio broadcasters. Acetate discs only had a capacity to record about ten minutes. Longer material was recorded on overlapping discs using (at least) two recorders. Unfortunately, the recorders used were not reliable in terms of recording speed, resulting in audio of variable speed. To make digitized audio originating from acetate discs fit for reuse, (1) overlapping parts need to be identified, (2) a precise alignment needs to be found and (3) a mixing point suggested. All three steps are challenging due to the audio speed variabilities. This paper introduces the ideas behind DiscStitch: which aims to reassemble audio from overlapping parts, even if variable speed is present. The main contribution is a fast and precise audio alignment strategy based on spectral peaks. The method is evaluated on a synthetic data set.
Next to my own contributions, the ISMIR conference program is the best overview of the state-of-the art of MIR.
This contribution was made possible thanks to travel funds by the FWO travel grant K1D2222N and the Ghent University BOF funded project PaPiOM.
The research output tracking system of Ghent University (biblio) and Flanders FWO’s academic profile are not built to track software as research output. The focus is still solely on papers, even when custom developed research software has become a fundamental aspect in many research areas. My role is somewhere between that of a ‘pure’ researcher and that of a research software engineer which makes this focus on papers quite relevant to me.
The paper aims to make the recent development on Panako‘count’. Thanks to the JOSS review process the Panako software was improved considerably: CI, unit tests, documentation, containerization,… The paper was a good reason to improve on all these areas which are all too easy to neglect. The paper itself is a short, rather general overview of Panako:
“Panako solves the problem of finding short audio fragments in large digital audio archives. The content based audio search algorithm implemented in Panako is able to identify a short audio query in a large database of thousands of hours of audio using an acoustic fingerprinting technique.”
I have been lucky to have been involved in an interdisciplinary research project around the low impact runner: a music based bio-feedback system to reduce tibial shock in over-ground running. In the beginning of October 2022 the PhD defence of Rud Derie takes place so it is a good moment to look back to this collaboration between several branches of Ghent University: IPEM , movement and sports science and IDLab.
The idea behind the project was to first select runners with a high foot-fall impact. Then an intervention would slightly nudge these runner to a running style with lower impact. A lower repetitive impact is expected to reduce the chance on injuries common for runners. A system was invented in which musical bio-feedback was given on the measured impact. The schema to the right shows the concept.
I was involved in development of the first hardware prototypes which measured acceleration on the legs of the runner and the development of software to receive and handle these measurement on a tablet strapped to a backpack the runner was wearing. This software also logged measurements, had real-time visualisation capabilities and allowed remote control and monitoring over the network. Finally measurements were send to a Max/MSP sonification engine. These prototypes of software and hardware were replaced during a valorization project but some parts of the software ended up in the final Android application.
Video: the left screen shows the indoor positioning system via UWB (ultra-wide-band) and the right screen shows the music feedback system and the real time monitoring of impact of the runner. Video by Pieter Van den Berghe
Over time the first wired sensors were replaced with wireless Bluetooth versions. This made the sensors easy to use and also to visualize sensor values in the browser thanks to the Web Bluetooth API. I have experimented with this and made two demos: a low impact runner visualizer and one with the conceptual schema.
Vid: Visualizing the Bluetooth Low Impact Runner sensor in the browser.
The following three studies shows a part of the trajectory of the project. The first paper is a validation of the measurement system. Secondly a proof-of-concept study is done which finally greenlights a larger scale intervention study.
Van den Berghe, P., Six, J., Gerlo, J., Leman, M., & De Clercq, D. (2019). Validity and reliability of peak tibial accelerations as real-time measure of impact loading during over-ground rearfoot running at different speeds. Journal of Biomechanics, 86, 238-242.
Van den Berghe, P., Lorenzoni, V., Derie, R., Six, J., Gerlo, J., Leman, M., & De Clercq, D. (2021). Music-based biofeedback to reduce tibial shock in over-ground running: A proof-of-concept study. Scientific reports, 11(1), 1-12.
Van den Berghe, P., Derie, R., Bauwens, P., Gerlo, J., Segers, V., Leman, M., & De Clercq, D. (2022). Reducing the peak tibial acceleration of running by music‐based biofeedback: A quasi‐randomized controlled trial. Scandinavian Journal of Medicine & Science in Sports
There are quite a number of other papers but I was less involved in those. The project also resulted in two PhD’s:
Motor retraining by real-time sonic feedback: understanding strategies of low impact running (2021) by Pieter Van den Berghe
Running on good vibes: music induced running-style adaptations for lower impact running (2022) by Rud Derie
I am also recognized as co-inventor on the low impact runner system patent and there are concrete plans for a commercial spin-off. To be continued…
I have created a web application to LTC.wasm decodes SMPTE timecodes from an LTC encoded audio signal.
To synchronize multiple music and video recordings a shared SMPTE timecode signal is often used. For practical purposes the timecode signal is encoded in an audio stream. The timecode can then be recorded in sync with microphone inputs or added to a video recording. The timecode is encoded in audio with LTC, linear timecode. A special decoder is needed to extract SMPTE timecode from the audio. This is exactly what the LTC.wasm application does.
Using the [web based SMTE decoder](https://0110.be/attachment/cors/ltc.wasm/ltc_decoder.html
Try out the SMPTE decoder with your own SMPTE files.
The advantage of the web-based version versus the command line ltc-tools is that it does not need to be installed separately and that ffmpeg decodes audio. This means that almost any multimedia format is supported automatically. The command line version only supports a limited number of audio formats.
I have built a tool for audio-to-audio alignment. It has applications for synchronization of media files. It works in the browser and you can synchronize your media files here with SyncSink.wasm. SyncSink.wasm does the following:
From an incoming media-file audio is extracted, downmixed to mono and and resampled. This is done with ffmpeg.audio.wasm a wasm version of ffmpeg.
For each audio track, fingerprints are extracted. These fingerprints reduce the the search space for alignment drastically.
Each list of fingerprints is aligned with the list of fingerprints from the reference. Resulting in a rough alignment
Cross correlation is done to refine the alignment resulting in sample accurate results.
Fig: media synchronization with audio-to-audio alignment.
It supports small time-scale adjustments of around 5%: audio alignment can still be found if audio speed differs a bit.
Some potential use cases where it might be of use:
To stitch partially overlapping audio recordings together resulting in a single long audio recording.
To synchronize multiple independent video recordings of the same event each with an audio recording of the environment.
To align a high quality microphone recording with video/low-quality audio recording of the same event. The low quality audio recorded with a camera can then be replaced with the high quality microphone audio.
Fig: stable diffusion imagining a networked music performance
This post describes how to send audio over a network using the ffmpeg suite. Ffmpeg is the Swiss army knife for working with audio and video formats. It is a command line tool that supports almost all audio formats known to man and woman. ffmpeg also supports streaming media over networks.
Here, we want to send audio recorded by a microphone, over a network to a single receiver on the other end. We are not aiming for low latency. Also the audio is going only in a single direction. This can be of interest for, for example, a networked music performance. Note that ffmpeg needs to be installed on your system.
The receiver - Alice
For the receiver we use ffplay, which is part of the ffmpeg tools. The command instructs the receiver to listen to TCP connections on a randomly chosen port 12345. The \?listen is important since this keeps the program waiting for new connections. For streaming media over a network the stateless UDP protocol is often used. When UDP packets go missing they are simply dropped. If only a few packets are dropped this does not cause much harm for the audio quality. For TCP missing packets are resent which can cause delays and stuttering of audio. However, TCP is much more easy to tunnel and the stuttering can be compensated with a buffer. Using TCP it is also immediately clear if a connection can be made. With UDP packets are happily sent straight to the void and you need to resort to wiresniffing to know whether packets actually arrive.
In this example we use MPEGTS over a plain TCP socket connection. Alteratively RTMP could be used (which also works over TCP). RTP , however is usually delivered over UDP.
The shorthand address 0.0.0.0 is used to bind the port to all available interfaces. Make sure that you are listening to the correct interface if you change the IP address.
The sender - Björn
Björn, aka Bob, sends the audio. First we need to know from which microphone to use. To that end there is a way to list audio devices. In this example the macOS avfoundation system is used. For other operating systems there are similar provisions.
ffmpeg -f avfoundation -list_devices true -i ""
Once the index of the device is determined the command below sends incoming audio to the receiver (which should already be listening on the other end). The audio format used here is MP3 which can be safely encapsulated into mpegts.
Note that the IP address 192.168.x.x needs to be changed to the address of the receiver. Now if both devices are on the same network the incoming audio from Bob should arrive at the side of Alice.
The tunnel
If sender and receiver are not on the same network it might be needed to do Network Addres Translation (NAT) and port forwarding. Alternatively an ssh tunnel can be used to forward local tcp connections to a remote location. So on the sender the following command would send the incoming audio to a local port:
The connection to the receiver can be made using a local port forwarding tunnel. With ssh the TCP traffic on port 12345 is forwarded to the remote receiver via an intermediary (remote) host using the following command:
LMDB is a fast key value store, ideal to store and query sorted data with small keys and values. LMDB is a pure C library but often used from other programming languages via some type of bindings. These bindings are ‘bridges’ between languages and are automatically present on supported platform. On new or unsupported platforms, however, you need to build a this bridge yourself.
This blog post is about getting java-lmdb working on such unsupported platform: arm64. The arm64 platform is much more popular since the introduction of the Apple silicon - M1 platform. On Apple M1 the default architecture of Docker images is also aarch64.
Next you need to build the lmdb library for your platform and copy it to a location where Java looks for it. This only works when compilers are already available on your system. In macOS you might need to install the XCode command line tools:
#xcode-select --install
git clone --depth 1 https://git.openldap.org/openldap/openldap.git
cd openldap/libraries/liblmdb
make -e SOEXT=.dylib
cp  liblmdb.dylib ~/Library/Java/Extensions
On Debian aarch64 the procedure is similar but a different extension is used (.so):
#apt install build-essential
git clone --depth 1 https://git.openldap.org/openldap/openldap.git
cd openldap/libraries/liblmdb
make
mv liblmdb.so /lib
Finally, to use the library in a JAR-file is might be needed to allow lmdbjava to access some parts of the JRE:
I have been lucky to be part of a fruitful interdisciplinary scientific collaboration around AMPEL: ‘The Augmented Movement Platform For Embodied Learning’. The recent publication of an article is an ideal occasion to give a glimpse behind the scenes.
Fig: Schematic representation of AMPEL, a floor with interactive tiles.
Around 2016 the idea arose to search for new potential rehabilitation approaches for persons with multiple sclerosis. Multiple sclerosis causes problems, in varying degrees, with both motor and cognitive function. Common rehabilitation approaches either work on motor or cognitive function. The idea (by Lousin Moumdjian, Marc Leman, Peter Feys) was to combine both motor and cognitive rehabilitation in a single combined ‘embodied learning’ paradigm.
After some discussion we wanted to perform a combined short-term memory and walking task. First the participants would be presented with a target trajectory which would then be performed by walking. During walking we would modulate feedback types (melodic, sounds or visual). To this end, an ‘intelligent floor’ device was needed that was able to present a target trajectory, register a performed trajectory and provide several types of feedback. After a search for off-the-shelf solutions it became clear that a custom hard-and-software platform was required.
After a great deal of cardboard prototyping we settled on a design consisting of interactive tiles. Thomas Vervust of UGhent NamiFab designed a PCB with force sensitive resistors (FSR) on the bottom and RGB LED’s on top. Ivan Schepers provided practical insights during prototyping and developed the hardware around the interactive tiles. I was responsible for programming the system. Custom software was developed for the tiles, a controller to drive the tiles and to run and record experiments. Finally the system was moved to a hospital where the experiments took place. To know more about the exact experiments, please read the following three publications on AMPEL:
[Motor sequence learning in a goal-directed stepping task in persons with multiple sclerosis: a pilot study\
2022](https://nyaspubs.onlinelibrary.wiley.com/doi/10.1111/nyas.14702) Veldkamp, R., Moumdjian, L., van Dun, K., Six, J., Vanbeylen, A., Kos, D. and Feys, P. For this study AMPEL was slightly modified for a reaction time task, showing its flexibility. The participants were asked to step on a tile as quickly as possible after it lit up. They were either knowledgable of the tile trajectory or not. This work was also published in the Annals of the New York Academy of Sciences.
Basic media info: gives information about the streams and encodings used in a media file.
Fig: [audio transcodinging in the browser](/attachment/cors/ffmpeg.audio.wasm/transcode.html). A `wav` file is converted to an `mp3`.
A bit more about the rationale behind this effort: Browsers have become practical platforms for audio processing applications thanks to the combination of Web Audio API , performant Javascript environment and WebAssembly. Have a look, for example, at essentia.JS.
However, browsers only support a small subset of audio formats and container formats. Dealing with many (legacy) audio formats is often a rather painful experience since there are so many media container formats which can contain a surprising variation of audio (and video) encodings. In short, decoding audio for in-browser analysis or playback is often problematic.
Luckily there is FFmpeg which claims to be ‘a complete, cross-platform solution to record, convert and stream audio and video’. It is, indeed, capable to decode almost any audio encoding known to man from about any container. Additionally, it also contains tools to filter, manipulate, resample, stretch, … audio. FFmpeg is a must-have when working with audio. It would be ideal to have FFmpeg running in a browser…
Thanks to WebAssembly ffmpeg can be compiled for use in the browser. There have been effortstoget ffmpeg working in the browser. These efforts have been focusing on the complete ffmpeg suite. Now I have prepared an audio focused ffmpeg build for the web based on these efforts. I have selected only audio parts which makes the resulting .wasm binary four to five times smaller (from \~20MB to \~5MB). I also provided a simplified Javascript wrapper. The project brings audio decoding to the browser but also audio filtering, transcoding, pitch-shifting, sample rate conversions, audio channel manipulation, and so forth. It is also capable to extract audio streams from video container formats.
Next to the pure functionality of ffmpeg there are general advantages to run audio analysis software in the browser at client-side:
Ease-of-use: no software needs to be installed. The runtime comes with a compatible browser.
Privacy: Since media files are not transferred it is impossible for the system running the service to make unauthorised copies of these files. There is no need to trust the service since all processing happens locally, in the browser.
Speed: Downloading and especially uploading large media files takes a while. When files are kept locally, processing can start immediately and no time is wasted sending bytes over the internet. This results in a snappy user experience.
Computational load: the computational load of transcoding is distributed over the clients and not centralised on a (single) server. The server does not do any computing and only serves static files, so it can handle as many concurrent clients as its bandwidth allows.
PFFFT is a small, pretty fast FFT library programmed in C with a BSD-like license. I have taken it upon myself to compile a WebAssembly version of PFFFT to make it available for browsers and node.js environments. It is called pffft.wasm and available on GitHub.
The pffft.wasm library comes in two flavours. One is compiled with SIMD instructions while the other comes without these instructions. SIMD stands for ‘single instruction, multiple data’ and does what it advertises: in a single step it processes multiple datapoints. The aim of SIMD is to make calculations several times faster. Especially for workloads where the same calculations are repeated over and over again on similar data, SIMD optimisation is relevant. FFT calculation is such a workload.
Evidently the SIMD version is much faster but there is no need to take my word for it. Below you can benchmark the SIMD version of pffft.wasm and compare it with the non-SIMD version on your machine. A pure Javascript FFT library called FFT.js serves as a baseline.
When running the same benchmark on Firefox and on Chrome it becomes clear that FFT.js on Chrome is about twice as fast thanks to its superior Javascript engine for this workload. The performance of the WebAssembly versions in Chrome and Firefox is nearly identical. Safari unfortunately does not (yet) support SIMD WebAssembly binaries and fails to complete the benchmark.
This work presents updates to Panako, an acoustic fingerprinting system that was introduced at ISMIR 2014. The notable feature of Panako is that it matches queries even after a speedup, time-stretch or pitch-shift. It is freely available and has no problems indexing and querying 100k sea shanties. The updates presented here improve query performance significantly and allow a wider range of time-stretch, pitch-shift and speed-up factors: e.g. the top 1 true positive rate for 20s query that were sped up by 10 percent increased from 18% to 83% from the 2014 version of Panako to the new version. The aim of this short write-up is to reintroduce Panako, evaluate the improvements and highlight two techniques with wider applicability. The first of the two techniques is the use of a constant-Q non-stationary Gabor transform: a fast, reversible, fine-grained spectral transform which can be used as a front-end for many MIR tasks. The second is how near-exact hashing is used in combination with a persistent B-Tree to allow some margin of error while maintaining reasonable query speeds.
Together with the paper there is also a poster and a short video presentation which explains the work:
Have you ever found yourself wondering how to build an accurate, low-latency LTC decoder with a common micro-controller? Well! Wonder no more and read on! Or, stop reading and do go read something that is more appealing to your predispositions.
SMPTE timecodes were originally used to synchronize audio and video material. SMPTE timecode data is often encoded into audio using LTC or linear time code. This special audio stream can be recorded together with other audio and video material. By decoding the LTC audio afterwards and working back to SMPTE timecodes, synchronization of multiple camera angles and audio material becomes straightforward. This concept tagging data streams with SMPTE timecodes is also used for other types of data.
\
Fig: LTC is a 'self-clocking' protocol for which a period can be found automatically. Once the period is found, transitions within the period are counted. A period with a transition translates to a 1, a period without any transitions to a 0.
SMPTE timecodes supports up to 30 frames per second and this resolution might not be sufficient for some data streams. It helps if the frames could be split up and 60 or 120 frames per second could be generated. With a low latency LTC decoder it would be possible to support this case and, for example, provide four pulses for every SMPTE frame. To be more precise: a SMPTE frame consists of 80 bits and in this case we would send a pulse exactly when decoding bit 0, bit 20, bit 40 and bit 60. We would then be able to sample at 120Hz while staying in sync with the SMPTE.
My first attempt was to treat the signal like audio and use a ready built library for LTC audio decoding The problem there is that sampling is done which might not exactly match the SMPTE bit transition period and relatively large buffers are used to decode LTC. The bit exact decoding is not possible using this method: the latency is too large, the method also uses excessive computational power and memory.
Fig: Biasing circuit to offset voltages
In my second attempt, the current iteration, interrupts are used to detect rising and falling edges in the LTC stream. By counting the number of microseconds between these edges a bit string is constructed. Effectively decoding LTC without any wasted computational power or memory and at a very low latency. If the LTC stream is well-formed, following each incoming bit and reacting to it becomes straightforward. Finally, after gently massaging the LTC bit string, SMPTE timecodes ooze out of the system at a low latency.
I have implemented a low latency LTC and SMPTE timecode data decoder for a Teensy microcontroller. One of the current limitations is that only 30fps SMPTE without skipped frames is supported. Another limitation is that the precision of the derived 120Hz clock is dependent on the sampling rate of the encoded audio signal: if e.g. only 8000Hz is used, transitions can only be precise up until 125µs. The derived clock will jitter slightly but will not drift.
There is still a slight problem with audio and Teensy input: audio is generally transmitted from ~~1.8V to +1.8V and not~~ as a Teensy would expect - from 0 to 3.3V. To make this change a small biasing circuit is placed before the Teensy input. In my case two 100k resistors and a 0.1uF capacitor worked best. The interrupt is relatively robust against signals that are a clipping (outside the 0 - 3.3V) or slightly too silent. If the signal becomes too small LTC decoding obviously fails.
Panako is an acoustic fingerprinting system I developed a couple of years ago. With acoustic fingerprinting systems it is possible to find duplicates in digital music archives and compare meta-data or identify unlabelled audio fragments. In the margins of my post-doc project working with large music archives, I have found the time to update Panako significantly. The updates simplify, improve and speed up Panako.
\
Fig. General content based audio search scheme.
The main algorithms are simplified. There is also a reduction of dependencies and a refocus to core functionality. This also simplifies building the software. The retrieval characteristics are improved, mainly thanks to the use of a fine-grained Gabor transform. Also new is the near-exact hashing construct which helps with off-by-one issues when matching time bins. The key-value store used is now LMDB, which speeds up the query performance of Panako significantly. The updates should make Panako stand the test of time somewhat better.
\
Fig. The top one true positive rate for 20s query fragments. The audio playback is speed modified from 84 to 116% with respect to the indexed reference audio. The original query length is 20s, if it is slowed down by 10% it takes, evidently, 22s. Note the improvement of the 2021 version of Panako (blue) vs the 2014 version (light-gray). As a baseline the standard algorithm (wang 2003) is included as well. For the 2021 Panako algorithm, audio recognition performance suffers (below 80) when playback speed is changed more than 10.
- The number of dependencies has been drastically cut by removing support for multiple key-value stores.
- The key-value store has been changed to a faster and simpler system (from [MapDB](https://mapdb.org) to [LMDB](http://www.lmdb.tech/doc)).
- The SyncSink functionality has been moved to another project (with Panako as dependency).
- The main algorithms have been replaced with simpler and better working versions:
- Olaf is a new implementation of the classic Shazam algorithm.
- The algoritm described in the Panako paper was also replaced. The core ideas are still the same. The main change is the use of a [Gabor transform](https://en.wikipedia.org/wiki/Gabor_transform) to go from time domain to the spectral domain (previously a constant-q transform was used). The gabor transform is implemented by [JGaborator](https://github.com/JorenSix/JGaborator) which in turn relies on [The Gaborator](https://gaborator.com/) C library via JNI.
- Folder structure has been simplified.
- The UI which was mainly used for debugging has been removed.
- A new set of helper scripts are added in the `scripts` directory. They help with evaluation, parsing results, checking results, building panako, creating documentation,...
- Changed the default panako location to \~/.panako, so users can install and use panako more easily (without need for sudo rights)
I have just released a new version of SyncSink. SyncSink is a tool to synchronize media files with shared audio. It is ideal to synchronize video captured by multiple cameras or audio captured by many microphones. It finds a rough alignment between audio captured from the same event and subsequently refines that offset with a crosscorrelation step. Below you can see SyncSink in action or you can try out SyncSink (you will need ffmpeg and Java installed on your system).
SyncSink used to be part of the Panako acoustic fingerprinting system but I decided that it was better to keep the Panako package focused and made a separate repository for SyncSink. More information can be found at the SyncSink GiHub repo
SyncSink is a tool to synchronize media files with shared audio. SyncSink matches and aligns shared audio and determines offsets in seconds. With these precise offsets it becomes trivial to sync files. SyncSink is, for example, used to synchronize video files: when you have many video captures of the same event, the audio attached to these video captures is used to align and sync multiple (independently operated) cameras.
Evidently, SyncSink can also synchronize audio captured from many (independent) microphones if some environmental sound is shared (leaked in) the each recording.
This post deals with the problem of using stateful C code from multiple Java threads. With JNI (Java Native Interface) it is possible to glue C code to a Java environment. There are many helpful tutorials on how to call C code and receive results. JNI helps to reuse existing, often highly complex and computationally expensive, C code.
The introductory tutorials often stop once it is made clear how to repackage (simple) datatypes and do not mention threads. It is, however, reasonable to expect JNI code to take into account thread-safety and proper multi-threading. In all but the simplest cases it is not that straightforward to share state at the C side and allow JNI code to be called from multiple Java threads. Incorrectly sharing state can lead to memory leaks and segmentation faults (segfaults) and crashes the application. In what follows, a way to share thread-local state is presented.
It is quite common to have an init, work and dispose method to create a state, use that state and do some work and finally dispose of used resources. Each Java thread independently calls these methods and expects results. These results should not change if multiple Java threads are calling the same methods. In other words: the state should remain Java thread-local. A typical Java class could look like the code below.
With the Java code in mind, the C code should know which Java thread is used and which state needs to be used for the work. Luckily there is a way to find out: The JNI specification states that each JNIEnv is local to a Java thread. So we can use the JNIEnv pointer to identify a thread. This is the idea that is used below.
The code maps a JNIEnv pointer to a structure with (any) state information. An unordered map is used for this mapping. There is, however, still a problem: multiple threads can call the init method at once. So multiple threads potentially write to the unordered_map at the same time which leads to problems. To prevent this from happening a mutex is used. The mutex, together with a unique lock, makes sure that only a single thread writes to the unordered map. The same holds for the dispose method.
The work method does not need a unique lock since it does not write to the unordered map and reading from multiple threads is no problem.
#include<unordered_map>#include<mutex>constint DATA_ARRAY_SIZE = 300000 * 2;
struct BridgeState {
jfloat *data;
};
//A hash map with a JNIEnv * as key and a BridgeState * as value
std::unordered_map<uintptr_t, uintptr_t> stateMap;
//A mutex to ensure that writes to the stateMap are synchronized.
std::mutex stateMutex;
JNIEXPORT jint JNICALL Java_init(JNIEnv *env, jobject object) {
//Makes sure only one thread writes to the stateMap
std::unique_lock<std::mutex> lck(stateMutex);
BridgeState *state = new BridgeState();
uintptr_t env_addresss = reinterpret_cast<uintptr_t>(env);
state->data = new jfloat[DATA_ARRAY_SIZE];
uintptr_t state_addresss = reinterpret_cast<uintptr_t>(state);
stateMap[env_addresss] = state_addresss;
return1;
}
JNIEXPORT jint JNICALL Java_work(JNIEnv *env, jobject object) {
//get a ref to the state pointer
uintptr_t env_addresss = reinterpret_cast<uintptr_t>(env);
BridgeState *state = reinterpret_cast<BridgeState *>(stateMap[env_addresss]);
//do something with state->data, e.g. calculate the sumint sum = 0;
for (int i = 0; i < DATA_ARRAY_SIZE; i++) {
state->data[i] = state->data[i] + 1;
sum += (int)state->data[i];
}
return sum;
}
JNIEXPORT jint JNICALL Java_dispose(JNIEnv *env, jobject object) {
//Makes sure only one thread writes to the stateMap
std::unique_lock<std::mutex> lck(stateMutex);
uintptr_t env_addresss = reinterpret_cast<uintptr_t>(env);
BridgeState *state = reinterpret_cast<BridgeState *>(stateMap[env_addresss]);
stateMap.erase(env_addresss);
//cleanup memory
delete[] state->data;
delete state;
return0;
}
This conceptual code has been lifted from a JNI library doing actual work: The JGaborator JNI bridge . If you need more information on how to compile and use this construct in actual code, please have a look at the JGaborator GitHub repository
I have updated the JGaborator library. The library calculates fine grained constant-Q spectral representations of audio signals quickly from Java. Such spectral transform can be used for visualisation or as a front-end for audio processing or music information retrieval applications.
The calculation of a Gabor transform is done by a C library named Gaborator. JGaborator provides a Java native interface (JNI) bridge to that library. Thanks to the recent updates, the library is now automatically unpacked which makes it easy to use on supported platforms (intel macOS and x64 Linux).
The new version of JGaborator now also allows multiple Java threads to call the transform. This has the potential to speed up some audio processing chains dramatically.
The visualisation parts of JGaborator also received light touch-ups. Below a number of screenshots can be seen with of spectral representations of several audio files. If you want to try it yourself download the “JGaborator JAR-file”:[JGaborator-0.6.jar]. Note that it should work only on intel macOS and x64 Linux with ffmpeg installed on your path. For other environments, please read and follow the JGaborator instructions to get it working.
For the last couple of years there has been a fruitful collaboration ongoing between the systematic musicology (IPEM) and sports-science departments at Ghent University. IPEM has a rich history of fundamental research on the link between movement and music. In a newly published proof-of-concept study the music-movement link improves running style. The runner is equipped with a musical biofeedback system to lower foot-impact. For more details, see:
Abstract Methods to reduce impact in distance runners have been proposed based on real-time auditory feedback of tibial acceleration. These methods were developed using treadmill running. In this study, we extend these methods to a more natural environment with a proof-of-concept. We selected ten runners with high tibial shock. They used a music-based biofeedback system with headphones in a running session on an athletic track. The feedback consisted of music superimposed with noise coupled to tibial shock. The music was automatically synchronized to the running cadence. The level of noise could be reduced by reducing the momentary level of tibial shock, thereby providing a more pleasant listening experience. The running speed was controlled between the condition without biofeedback and the condition of biofeedback. The results show that tibial shock decreased by 27% or 2.96 g without guided instructions on gait modification in the biofeedback condition. The reduction in tibial shock did not result in a clear increase in the running cadence. The results indicate that a wearable biofeedback system aids in shock reduction during over-ground running. This paves the way to evaluate and retrain runners in over-ground running programs that target running with less impact through instantaneous auditory feedback on tibial shock.
From 11-16 October 2020 the latest instalment of the ISMIR conference series was held. Due to the pandemic, the 21st ISMIR conference was the first virtual one. As usual, participants and presenters from around the world joined the conference. For the first time, however, not all participants synchronised their circadian rhythm. By repeating most events with 12h in between, the organisers managed to put together a schedule befitting nearly all participants.
The virtual format had some clear advantages: travel was not needed, so (environmental) cost was low. Attendance fees were lower than usual since no spaces or catering was needed. This democratised the conference experience and attendance reached a record high.
Form the 1st of October 2020 I will start on a new research project. The BOF fund of Ghent University is kind enough to sponsor the project for three years. The abstract is as follows:
Music is present in every culture in the world. We as a species seem to have an urge to make music. While the diversity of music cultures around the world is phenomenal, they do seem to have patterns in common. Especially for pitch, one of the fundamental building blocks of music, there are strong reasons to believe that there are commonalities amongst cultures on how pitch is organised A better insight in these common patterns may help to answer questions on the definition, origins and evolution of music.
Common patterns in pitch organisation can be studied from two perspectives. Firstly, the perspective of how humans perceive and make music can be gained from systematic, experimental work. Over the years this has yielded insights in which pitch organisations might be most fit for our perceptual, neurophysiological system. Secondly, these patterns can be observed directly in large-scale, corpus-based, cross-cultural studies which has a potential that is not exploited as of yet.
During this fellowship a large-scale global corpus with field recordings will be compiled in collaboration. Music Information Retrieval techniques will be employed to describe how pitch is organised in the corpus. More specifically, it will support claims on the use of discrete pitches, octave equivalence, the number of pitch classes in use and the pitch interval structures. The uncovered fundamental properties of pitch will be confronted with findings from experimental work.
Recently I presented the outline of the project with the following slides:
A good year ago I was asked to develop audio recognition technology for an e-costume. The idea was that lights in the costume would follow a sequence synchronised to a certain song. Only a single song should trigger the lights, all other music should be ignored. Recognition of music and synchronisation is typically done using audio fingerprinting techniques. The challenge was that the recognition needed to run on a cheap, battery-powered microcontroller with limited CPU and memory. I delivered a prototype but eventually a cheap, battle-tested, off-the-shelf, IP-cleared, alternative was found.
The prototype gathered dust for a while but the idea stuck in my head. With my daughters fourth birthday approaching during the lockdown, I decided to turn the prototype into an over-engineered birthday gift and let an ‘Elsa-dress’ react to ‘Let It Go’ from the Frozen soundtrack. With the prototype as a starting point, I ordered an RGB-LED-strip, a beefy Li-Ion Battery, an I2S digital microphone and, of course, an Elsa-dress.
I had an ESP32 microcontroller laying around and used it as the core of the system: it supports I²S, has a floating point unit (FPU), is easy to use together with LED strips and has enough memory. The FPU makes it straightforward to use the same code on traditional computers as on embedded devices: fixed-point math can be avoided.
After soldering the components together and with the help from my better half to sew in the LED strip, it all came together. In the video below, the result of our work can be seen. The video first shows a song that should not and is not recognised. Then, “Let It Go” is played and correctly recognised. After the song is stopped, the lights go on for a while and finally stop: this is by design to allow gaps in recognition. Lastly, the song is continued and again correctly recognised.
With my limited C experience the prototype code was not well organised. During my second attempt this improved enough so that I feel comfortable enough to share the code on GitHub: Olaf - Overly Lightweight Acoustic Fingerprinting.
The code went through several iterations and was expanded beyond the original scope and became a capable general purpose acoustic fingerprinting system with its many applications. Olaf performs quite well thanks to its resource friendly design and the use of PFFT and LMDB. Especially LMDB, a fast, B+-tree backed key value store with low storage overhead enables performant storage and lookups.
The GitHub does not contain an example for the ESP32. That code depends on the microcontroller, digital microphone and pins used and Olaf needs to be hacked to exhibit the requested behaviour. All in all that code is much less reusable (and sharable, testable, maintainable). I have, however, included a platformIO project for “Olaf on ESP32”:[ESP32-Olaf.zip] for reference.
WASM: Olaf in the browser
Olaf, being written in ANSI C, can run in the browser thanks to the Emscripten compiler. According to its website, Emscripten ‘…lets you run C and C on the web at near-native speed without plugins’ Combining the Web Audio API and the WASM version of Olaf makes web-based acoustic fingerprinting applications possible.
Below you can try out Olaf. The exact same code is running on your browser as on the ESP32 demonstrated above. This means that Olaf is listening to recognise ‘Let It Go’ from the Frozen soundtrack. For your convenience the song can be started below on the left. On the right, you can start Olaf by allowing incoming audio to be analysed. The FFT is calculated by Olaf and visualised using Pixi.js. After a few seconds the red fingerprints should become green, indicating a match. Once you stop the song, the fingerprints will eventually turn red again. As with the video above: going from a match to no match takes a couple of seconds to allow gaps in recognition.
1. Start the song and play it aloud. Singing along is encouraged.
2. Start the microphone and check whether recognition succeeds.
Olaf was featured on hackaday. There is also a small discussion about Olaf on Hacker News. A write-up of this project also ended up as a contribution to the Late Breaking Demo track of the first virtual ISMIR conference: Olaf ISMIR 2020 LBD abstract.
The audio shield takes care of the line level audio input. This audio input is then decoded. The decoding is done by libltc. The library runs as is on a Teensy without modification. The three elements are combined in a relatively simple teensy patch
To use the decoder connect the line level input left channel to an SMPTE source via e.g. an RCA plug.
For code, comments, pull requests please consult the Github repository for the Teensy SMPTE LTC decoder
During an experiment which monitors a music performance it might be a requirement to record music, video and sensor data synchronously. Recording analog sensors (balance boards, accelerometers, light sensors, distance sensors) together with audio and video is often problematic. Ideally standard DAW software can be used to record both audio and sensor data. A system is presented here that makes it relatively straightforward to record sensor data together with audio/video.
The basic idea is simple: a microcontroller is programmed to appear as a class compliant MIDI device. Analog measurements on the micro-controller are translated to a specific MIDI protocol. The MIDI data, on the capturing side, can then be converted again into the original sensor data. This setup has several advantages:
It makes it easy to record sensor data together with audio data in a standard DAW software package. Recording a recording a midi track and audio track simultaneously in, e.g., Ableton Live, is easy.
Communication with the micro-controller is bi-directional. The micro-controller can be programmed to react to certain MIDI messages. A note-on can, for example, be used to start analog sensor recording. These MIDI commands can be send from any possible source that can ‘speak’ MIDI.
Thanks to the Web MIDI API this construct presents an easy way to let analog sensors and websites interact.
Real time sonification of the sensor-data is also supported. There are many ready to go options to sonify MIDI. Axoloti, Max/MSP, Zupiter are some of the environments that can be pugged into.
Fig: Visualization in html of analog sensor data, captured as MIDI
While the concept is relatively simple, there are many details to get right. Please consult the MIDImorphosis github page which details the system that consists of an analog sensor, a MIDI protocol and a clocking infrastructure.
Together with Jeska, I presented an ongoing study on musical interaction. In the study one of the measurements was the body movement of two participants. This is done with boards that are equipped with weight sensors. The data that comes out of this can be inspected for synchronisation, quality and quantity of movement, movement periodicities.
The hardware is the work of Ivan Schepers, the software used to capture and transmit messages is called “the MIDImorphosis” and developed by me. The research is in collaboration with Jeska Buhman, Marc Leman and Alessandro Dell’Anna. An article with detailed findings is forthcoming.
I am currently in Birmingham, UK at the 2019 at the joint Analytical Approaches to World Music (AAWM) and Folk Music Conference (FMA). The opening concert by the RBC folk ensemble already provided the most lively and enthusiastic conference opening probably ever. Especially considering the early morning hour (9.30). At the conference, two studies will be presented on which I collaborated:
Automatic comparison of human music, speech, and bird song suggests uniqueness of human scales
“Automatic comparison of human music, speech, and bird song suggests uniqueness of human scales”:[FMA2019_paper_12.pdf] by Jiei Kuroyanagi, Shoichiro Sato, Meng-Jou Ho, Gakuto Chiba, Joren Six, Peter Pfordresher, Adam Tierney, Shinya Fujii and Patrick Savage
The uniqueness of human music relative to speech and animal song has been extensively debated, but rarely directly measured. We applied an automated scale analysis algorithm to a sample of 86 recordings of human music, human speech, and bird songs from around the world. We found that human music throughout the world uniquely emphasized scales with small-integer frequency ratios, particularly a perfect 5th (3:2 ratio), while human speech and bird song showed no clear evidence of consistent scale-like tunings. We speculate that the uniquely human tendency toward scales with small-integer ratios may relate to the evolution of synchronized group performance among humans.
Automatic comparison of global children’s and adult songs
“Automatic comparison of global children’s and adult songs”:[FMA2019_paper_13.pdf] by Shoichiro Sato, Joren Six, Peter Pfordresher, Shinya Fujii and Patrick Savage
Music throughout the world varies greatly, yet some musical features like scale structure display striking crosscultural similarities. Are there musical laws or biological constraints that underlie this diversity? The “vocal mistuning” hypothesis proposes that cross-cultural regularities in musical scales arise from imprecision in vocal tuning, while the integer-ratio hypothesis proposes that they arise from perceptual principles based on psychoacoustic consonance. In order to test these hypotheses, we conducted automatic comparative analysis of 100 children’s and adult songs from throughout the world. We found that children’s songs tend to have narrower melodic range, fewer scale degrees, and less precise intonation than adult songs, consistent with motor limitations due to their earlier developmental stage. On the other hand, adult and children’s songs share some common tuning intervals at small-integer ratios, particularly the perfect 5th (\~3:2 ratio). These results suggest that some widespread aspects of musical scales may be caused by motor constraints, but also suggest that perceptual preferences for simple integer ratios might contribute to cross-cultural regularities in scale structure. We propose a “sensorimotor hypothesis” to unify these competing theories.
At work we have a really nice piano and I wanted to be able to broadcast a live performance over the internet with low latency to potential live listeners. In all honesty, only my significant other gets moderately lukewarm about the idea of hearing me play live. Anyhow:
I did not find any practical tool to easily pump audio over the internet. I did find something that was very close called trx by Mark Hills: trx is a simple toolset for broadcasting live audio from Linux. It unfortunately only works with the ALSA audio system and is limited to Linux. I decided to extend it to support macOS and Pulse Audio. I also extended its name to form trix.
Audio Transmitter/Receiver over Ip eXchange (trix) is a simple toolset for broadcasting live audio from Linux or macOS. It sends and receives encoded audio over IP networks, via an audio interface. If audio interfaces are properly configured, a low-latency point-to-point or multicast broadband audio connection can be achieved. This could be used for networked music performances. The inclusion of the intermediate rtAudio library provides support for various audio input and outputs.
More information on trix can be found on the trix github page.
Latency
The system can be configured for low latency use. The whole chain is dependent several different components which each add to the total latency: audio input latency, encoder (algorithmic) delay, network latency and finally audio output latency.
Thanks to the use of RtAudio it should be possible to use low latency API’s to access audio devices (ASIO on windows or Jack on Unix). This means that audio input and output latencies can be as low as the hardware allows. The opus encoder/decoder that is used has a low algorithmic delay. By default it has a 25ms delay but it can be configured to only 2.5ms (see here). The network latency (and jitter) is very much dependent on the distance to cover. On a local network this can be kept low, when using wide area networks (the internet) control is lost and latencies can add up depending on the number of hops to take. Jitter can be problematic if the smallest possible buffers are used: then dropouts might occur and this might affect the audio in a noticeable way.
I have uploaded a small piece of software which allows users to find a specific audio marker in audio streams. It is mainly practical to synchronise a camera (audio/video) recording with other audio with the same marker. The marker is a set of three beeps. These three beeps are found with millisecond accurate precision within the audio streams under analysis. By comparing the timing of marker synchronization becomes possible. It can be regarded as an alternative for the movie clapper boards.
‘Team Scheire’ is a Flemish TV program with a similar concept as BBC Two’s ‘The Big Life Fix’. In the program, makers create ingenious new solutions to everyday problems and build life-changing solutions for people in desperate need.
One of the cases is Ben. Ben loves to run but has a recurring running related injury. To monitor Ben’s running and determine a maximum training length a sensor was developed that measures the impact and the amount of steps taken. The program makers were interested in the results of the Nano4Sports project at UGent. One of the aims of that project is to build those type of sensors and knowhow related to correct interpretation of data and use of such devices. Below a video with some background information can be found:
With the goal in mind to reduce common runner injuries we first need to measure some running style characteristics. Therefore, we have developed a sensor to measure how hard a runners foot repeatedly hits the ground. This sensor has been compared with laboratory equipment which proofs that its measurements are valid and can be repeated. The main advantages of our sensor is that it can be used ‘in the wild’, outside the lab on the runners regular tours. We want to use this sensor to provide real-time biofeedback in order to change running style and ultimately reduce injury risk.
Studies seeking to determine the effects of gait retraining through biofeedback on peak tibial acceleration (PTA) assume that this biometric trait is a valid measure of impact loading that is reliable both within and between sessions. However, reliability and validity data were lacking for axial and resultant PTAs along the speed range of over-ground endurance running. A wearable system was developed to continuously measure 3D tibial accelerations and to detect PTAs in real-time. Thirteen rearfoot runners ran at 2.55, 3.20 and 5.10 m*s-1 over an instrumented runway in two sessions with re-attachment of the system. Intraclass correlation coefficients (ICCs) were used to determine within-session reliability. Repeatability was evaluated by paired T-tests and ICCs. Concerning validity, axial and resultant PTAs were correlated to the peak vertical impact loading rate (LR) of the ground reaction force. Additionally, speed should affect impact loading magnitude. Hence, magnitudes were compared across speeds by RM-ANOVA. Within a session, ICCs were over 0.90 and reasonable for clinical measurements. Between sessions, the magnitudes remained statistically similar with ICCs ranging from 0.50 to 0.59 for axial PTA and from 0.53 to 0.81 for resultant PTA. Peak accelerations of the lower leg segment correlated to LR with larger coefficients for axial PTA (r range: 0.64–0.84) than for the resultant PTA per speed condition. The magnitude of each impact measure increased with speed. These data suggest that PTAs registered per stand-alone system can be useful during level, over-ground rearfoot running to evaluate impact loading in the time domain when force platforms are unavailable in studies with repeated measurements.
Thanks to the support of a travel grant by the faculty of Arts and Philosophy of Ghent University I was able to attend the ISMIR 2018 conference. A conference on Music Information Retrieval. I am co author on a contribution for the the Late-Breaking / Demos session
The structure of musical scales has been proposed to reflect universal acoustic principles based on simple integer ratios. However, some studying tuning in small samples of non-Western cultures have argued that such ratios are not universal but specific to Western music. To address this debate, we applied an algorithm that could automatically analyze and cross-culturally compare scale tunings to a global sample of 50 music recordings, including both instrumental and vocal pieces. Although we found great cross-cultural diversity in most scale degrees, these preliminary results also suggest a strong tendency to include the simplest possible integer ratio within the octave (perfect fifth, 3:2 ratio, \~700 cents) in both Western and non-Western cultures. This suggests that cultural diversity in musical scales is not without limit, but is constrained by universal psycho-acoustic principles that may shed light on the evolution of human music.
Recently I have published a small library on github called JGaborator. The library calculates fine grained constant-Q spectral representations of audio signals quickly from Java. The calculation of a Gabor transform is done by a C library named Gaborator. A Java native interface (JNI) bridge to the C Gaborator is provided. A combination of Gaborator and a fast FFT library (such as pfft) allows fine grained constant-Q transforms at a rate of about 200 times real-time on moderate hardware. It can serve as a front-end for several audio processing or MIR applications.
While the gaborator allows reversible transforms, only a forward transform (from time domain to the spectral domain) is currently supported from Java.A spectral visualization tool for sprectral information is part of this package. See below for a screenshot:
Claims made in many Music Information Retrieval (MIR) publications are hard to verify due to the fact that (i) often only a textual description is made available and code remains unpublished – leaving many implementation issues uncovered; (ii) copyrights on music limit the sharing of datasets; and (iii) incentives to put effort into reproducible research – publishing and documenting code and specifics on data – is lacking. In this article the problems around reproducibility are illustrated by replicating an MIR work. The system and evaluation described in ‘A Highly Robust Audio Fingerprinting System’ is replicated as closely as possible. The replication is done with several goals in mind: to describe difficulties in replicating the work and subsequently reflect on guidelines around reproducible research. Added contributions are the verification of the reported work, a publicly available implementation and an evaluation method that is reproducible.
A philologist’s approach to heritage is traditionally based on the curation of documents, such as text, audio and video. However, with the advent of interactive multimedia, heritage becomes floating and volatile, and not easily captured in documents. We propose an approach to heritage that goes beyond documents. We consider the crucial role of institutes for interactive multimedia (as motor of a living culture of interaction) and propose that the digital philologist’s task will be to promote the collective/shared responsibility of (interactive) documenting, engage engineering in developing interactive approaches to heritage, and keep interaction-heritage alive through the education of citizens.
I was kindly invited by SoundCloud to give a presentation on “Acoustic fingerprinting in research”. The presentation took place during one of the “MIR Meetups” in Berlin on Monday, April 23, 2018. Before my presentation there was a presentation by Derek and Josh (both SoundCloud engineers) detailing the state of the internal fingerprinting system of SoundCloud.
During my presentation I gave an overview of various applications of acoustic fingerprinting in a music research environment and detailed how these applications can be handled and are implemented in Panako: an open source fingerprinting system
Below the slides used during the presentation can be found:
The 11th of January I successfully completed my PhD training under mentorship of Marc Leman with a public defense at de Krook in Ghent.
I also handed in my dissertation titled Engineering systematic musicology: methods and services for computational and empirical music research (version of record). The dissertation bundles several of my publications and places them in a framework in the introduction and reflects upon these in the conclusion. The publications all contribute either directly to the field of systematic musicology (e.g. tone scale research) or contributes indirectly by facilitating specific research tasks (e.g. synchronization of multi-modal research data).
The presentation during my defense was meant for a broader audience. During the presentation I gave examples of the research topics I have been working and focused on how these are connected. The presentation titled Engineering systematic musicology can be seen by following the previous link and is included below. The slide with the live spectrogram and the slide with the map need to be started by double clicking otherwise they remain empty.
The presentation is essentially an interactive HTML5 website build with the reveal.js framework. This has the advantage that multimedia is well supported and all kinds of interactions can be scripted. The presentation above, for example, uses the web audio API for live audio visualization and the google maps API for interactive maps. Video integration is also seamless. It would be a struggle to achieve similar multi-media heavy presentations with other presentation software packages such as Impress, Keynote or Powerpoint.
To present my research in an accessible way I needed a reliable way to visualize audio, audio feature extraction and processing of audio features into a higher level representation. Canvas, HTML5, javascript and the Reveal.js presentation framework offered a solution.
I often need audio and video material embedded into presentations. I have had bad experiences with powerpoint/keynote and especially the LaTeX beamer package and multimedia: audio/video material does not start playing or at the wrong moment, finicky on codecs, limited compatibility, a clunky UX (whoever came up with the idea to show multimedia controls while hovering over e.g. an audio thumbnail should be reoriented towards back-end programming) all contribute to errors while handling audio/video. Moreover the interactive capabilities are limiting.
The component above is an interactive spectrogram which combines HTML5’s web audio API capabilities with the canvas element and some Javascript to glue things together. Note that this has been tested on Chrome and Firefox only.
“Since 2005, the Italian Research Conference on Digital Libraries has served as an important national forum focused on digital libraries and associated technical, practical, and social issues. IRCDL encompasses the many meanings of the term “digital libraries”, including new forms of information institutions; operational information systems with all manner of digital content; new means of selecting, collecting, organizing, and distributing digital content…”
The 26th of January Federica presented our joint contribution titled “Applications of Duplicate Detection in Music Archives: from Metadata Comparison to Storage Optimisation”. The work focuses on applications of duplicate detection for managing digital music archives. It aims to make this mature music information retrieval (MIR) technology better known to archivists and provide clear suggestions on how this technology can be used in practice. More specifically applications are discussed to complement meta-data, to link or merge digital music archives, to improve listening experiences and to re-use segmentation data.
This weekend the University Hamburg - Institute for Systematic Musicology and more specifically Christian D. Koehn organized the International Symposium on Computational Ethnomusicological Archiving. The symposium featured a broad selection of research topics (physical modelling of instruments, MIR research, 3D scanning techniques, technology for (re)spacialisation of music, library sciences) which all had a relation with archiving musics of the world:
How could existing digital technologies in the field of music information retrieval, artificial intelligence, and data networking be efficiently implemented with regard to digital music archives? How might current and future developments in these fields benefit researchers in ethnomusicology? How can analytical data about musical sound and descriptive data about musical culture be more comprehensively integrated?
I was able to attend the symposium and contributed with a talk titled “Challenges and opportunities for computational analysis of wax cylinders”:[2017.12.Hamburg-Wax-presentation.pdf] and by chairing a panel discussion. The symposium was kindly sponsored by the VolkswagenStiftung. The talk had the following abstract:
In this presentation we describe our experience of working with computational analysis on digitized wax cylinder recordings. The audio quality of these recordings is limited which poses challenges for standard MIR tools. Unclear recording and playback speeds further hinder some types of audio analysis. Moreover, due to a lack of systematical meta-data notation it is often uncertain where a single recording originates or when exactly it was recorded. However, being the oldest available sound recordings, they are invaluable witnesses of various musical practices and they are opportunities to improve the understanding of these practices. Next to sketching these general concerns, we present results of the analysis of pitch content of 400 wax cylinder recordings from Indiana University (USA) and from the Royal Museum from Central Africa (Belgium). The scales of the 400 recordings are mapped and analyzed as a set. It is found that the fifth is almost always present and that scales with four and five pitch classes are organized similarly and differ from those with six and seven pitch classes, latter center around intervals of 170 cents, and former around 240 cents.
I have contributed to the 4th International Digital Libraries for Musicology workshop (DLfM 2017) which was organized in Shanghai, China. It was a satellite event of the ISMIR 2017 conference. Unfortunately I did not mange to find funding to attend the workshop, I did however contribute as co-author to two proceeding papers. Both were presented by Reinier de Valk (thanks again).
By Reinier de Valk (DANS), Anja Volk (Utrecht University), Andre Holzapfel (KTH Royal Institute of Technology) , Aggelos Pikrakis (University of Piraeus), Nadine Kroher (University of Seville - IMUS) and Joren Six (Ghent University - IPEM). Next to the version of record there is also an author version available of the contribution titled “MIRchiving: Challenges and opportunities of connecting MIR research and digital music archives”:[2017.DLfM.MIRchiving-author.pdf].
This study is a call for action for the music information retrieval (MIR) community to pay more attention to collaboration with digital music archives. The study, which resulted from an interdisciplinary workshop and subsequent discussion, matches the demand for MIR technologies from various archives with what is already supplied by the MIR community. We conclude that the expressed demands can only be served sustainably through closer collaborations. Whereas MIR systems are described in scientific publications, usable implementations are often absent. If there is a runnable system, user documentation is often sparse—-posing a huge hurdle for archivists to employ it. This study sheds light on the current limitations and opportunities of MIR research in the context of music archives by means of examples, and highlights available tools. As a basic guideline for collaboration, we propose to interpret MIR research as part of a value chain. We identify the following benefits of collaboration between MIR researchers and music archives: new perspectives for content access in archives, more diverse evaluation data and methods, and a more application-oriented MIR research workflow.
By Federica Bressan, Joren Six and Marc Leman (Ghent University - IPEM). Next to the version of record there is also an author version available of the contribution titled “Applications of duplicate detection: linking meta-data and merging music archives: The experience of the IPEM historical archive of electronic music”:[2017.dlfm_duplicates-author.pdf].
This work focuses on applications of duplicate detection for managing digital music archives. It aims to make this mature music information retrieval (MIR) technology better known to archivists and provide clear suggestions on how this technology can be used in practice. More specifically applications are discussed to complement meta-data, to link or merge digital music archives, to improve listening experiences and to re-use segmentation data. The IPEM archive, a digitized music archive containing early electronic music, provides a case study.
The first was a collaboration with Frank Desmet, Micheline Lesaffre, Nathalie Ehrlé and Séverine Samson. The contribution is titled “Multimodal Analysis of Synchronization Data from Patients with Dementia”:[Desmet-et-al.pdf]. It details a famework to analyze data in an experiment for patients with dementia.
For the second contribution I was the main researcher. It is the result of a project with students of the systematic musicology course at Ghent University (Laura Arens, Hade Demoor, Thomas Kint) . The contribution is called “Regularity and asynchrony when tapping to tactile, auditory and combined pulses”:[2017.escom_multimodal_async.pdf]
The presentation “details a multi sensory tapping task”:[six-escom2017-presentation.pdf] with the aim to develop an assistive technology for dancers.
The 2017 AES international conference on semantic audio was organized at ISS Fraunhofer, Erlangen, Germany. As the birthplace of the MP3 codec, it is holy ground, a stop that can not be skipped on the itinerary of an audio engineers pilgrimage of life. At the conference I presented “ A framework to provide fine-grained time-dependent context for active listening experiences”:[2017.author.aes.pdf] with a poster (“pdf”:[aes_2017_poster.pdf], “inkscape svg”:[aes_2017_poster_2.svg]).
The “active listening demo movie”:[active_listening_demo_movie.mp4] above should explain the aim system succinctly. It shows two different ways to provide ‘context’ to audio playing in the room. In the first instance beats information is used to synchronize smartphones and flash the screen, the second demo shows a tactile feedback device responding to beats. The device is a soundbrenner pulse tactile metronome and was kindly sponsored by the company that sells these.
It was attended by a mix of (Ethno)musicologists, archivists, computer scientists and people identifying themselves as more than one of these categories by varying degrees. This mix ensured a healthy discussion and talks by Frans Wiering, Willard McCarthy, Emilia Gomez, and “may more”:[program.pdf] provided ample source material to discuss. These discussions ranged from the abstracts around schemata down to concrete of software tools for archive management.
On a more personal side the workshop did provide useful insights to contextualize my research and help form ideas that can be condensed in my PhD dissertation.
The xOSC board by x-io technologies looks like a very nice solution in many interactive wireless setups. Judging from the specifications and documentation it offers a lot of value. It is basically a small WiFi transmitter with some sensors and a battery attached to it. The board also has some drawbacks. 1) It is expensive at about € 180. This is especially problematic if you need about five or so for your application.2) It seems that it is also hard to add extra sensors via SPI or I²C. 3)The battery needs to be removed to charge, which makes it harder to build into a fixed enclosure. This post describes an alternative based on the ESP32 platform that addresses these shortcomings.
The ESP32 is a micro-controller with a WiFi transmitter which can be programmed using the Arduino environment. Sparkfun has a thing called the ESP32 Thing which contains the ESP32 chip. It can be used to build an xOSC alternative.
It costs about 20$, when you add a battery 5$ and a sensor 20$ (IMU) you end up with a 45$ price tag. The price of course depends on which exact sensor/battery you need for your application. A 500mAh lasts about two hours when sending 66 messages per second over WiFi (using UDP).
The ESP32 Thing supports the Arduino environment which potentially allows you to use all available Arduino libraries and supported sensors. However, some libraries do contain hardware specific instructions which are often not ported yet. Since the hardware is rather new - large scale production started only 3 months ago - not many libraries have been ported. Fortunately a lot of libraries simply work without any changes. At hackaday they have been testing a few: ESP32 and Arduino libraries. I had success with the BNO55 library, it did not need any changes. The OSC library did need some small changes to operate as expected.
The Thing contains a battery charging circuit. Once embedded into an enclosure the battery can stay in place. The software running on the device even keeps running when changing power sources.
Attached to this post you can find modifications to the Andriod OSC library that enable it to run on the ESP32: ESP32-Arduino-OSC-library together with a patch that sends random data over OSC. This should enable you to build an xOSC alternative.
Some drawbacks of the ESP32 is that the supporting software is quite immature. There is a Bluetooth chip on the ESP32 which is currently not supported in the Arduino environment. The setup can be somewhat challenging. The documentation can be improved. Some of the ESP32 Things seem to be unable to connect to old WiFi routers which can be problematic.
Last Saturday, October eight 2016, IPEM was present at the opening event of the digital week. A small video report was made for VRT news, unfortunately our contribution did not make the cut.
Van 8 tot en met 16 oktober 2016 loopt de elfde editie van de De Digitale Week. Plaatselijke organisaties in heel Vlaanderen en Brussel organiseren tijdens deze week diverse laagdrempelige activiteiten waarbij het gebruik van multimedia centraal staat, steeds gratis of zeer goedkoop, en open voor zowel beginners als mensen met wat meer ervaring. Daarnaast loopt er tijdens de Digitale Week een grote publiciteitscampagne die aandacht vraagt voor de thema’s e-inclusie en mediawijsheid.
This weekend IPEM, the research institute in musicology of University Ghent, was present at Parklife 2016. Parklife is a music festival with a special focus on interactive music installations aimed at children. Two of those were provided by IPEM.
The first installation was a trampoline that triggered sounds. Two trampoline were provided with a pressure sensor. An Axoloti provides the sonic feedback. A simple but fun experience especially for younger children.
The second installation was more involved. It consisted of a bike - controlled by a first participant - that provided the speed of falling blocks that a second participant had to step on. When the second participant triggered the blocks on time a melody appeared. The video above makes it more clear.
During the last semester Ward wrote a Masters thesis titled “Real-time signal synchronization with acoustic fingerprinting”:[Van_Assche_2016_Realtime_signaal_synchronisatie_met_acoustic_fingerprinting.pdf]. For his thesis Marleen Denert and I served both as promoter.
The aim of the thesis was to design and develop a system to automatically synchronize streams of incoming sensor data in real-time. Ward followed up on an idea that was described in an article called Synchronizing Multimodal Recordings Using Audio-To-Audio Alignment. The extended abstract can be consulted. The remainder of the thesis is in Dutch.
For the thesis Ward developed a Max/MSP object to read data from sensors together with audio. Also provided by Ward is an object to synchronize audio and data in real-time. The objects are depicted above.
I have given a presentation at the the Newline conference, a yearly event organized by the Hackerspace Ghent. It was about:
“In this talk I will give a practical overview on how to connect hard- and software components for musical applications. Next to an overview there will be demos! Do you want to make a musical instrument using a light sensor? Use your smartphone as an input device for a synth? Or are you simply interested in simple low-latency communication between devices? Come to this talk! More concretely the talk will feature the Axoloti audio board, Teensy micro-controller with audio board, MIDI and OSC protocols, Android MIDI features and some sensors.”
During the presentation the hard and software components were demonstrated. More concretely an introduction was given to the following:
This morning, the 30th of October 2015, I gave a lecture on Music Information Retrieval in general and two MIR-tasks in particular. The two more detailed tasks were tone scale analysis and acoustic fingerprinting.
During the lecture some live demonstrations were done with Panako and Tarsos. Also some examples from TarsosDSP were used. Excerpts of the music used is available here, this is especially interesting if you want to repeat the demos. Sonic visualizer, Music21 and MuseScore were also mentioned during the lecture.
For the opening of the Sport Science Laboratory - Jacques Rogge of University Ghent I have created a demo of a system to visualize running impact. The demo can be seen starting at 45s in the video below.
Kelsec Systems developed a nice sensor for measuring running impact, the TgForce Running Impact Sensor. The sensor comes with an IOS application but has no available counterpart on Android. To interface with the sensor on Android I needed to create some glue code. The people of Kelsec Systems were kind enough to mail some documentation about the protocol and with that information I got to work.
The TgForce Sensor Android code is available on GitHub, together with some documentation which is available below as well:
TgForce Impact Running Sensor Andoid API
The TgForceSensor repository contains Android code to interface with the TgForce Impact Running Sensor. The TgForce sensor is a Bluetooth LE device that measures tibial shock. It follows the\
Bluetooth LE standards and is relatively easy to interface with.
This repository contains Android code to interface with the device. The protocol is encoded in the source code and is documented in the readme.
Aangezien heel wat joggers met muziek trainen, wilden onderzoekers van het IPEM (het onderzoekscentrum van de afdeling Musicologie, Vakgroep Kunst, Muziek, en Theaterwetenschappen aan de UGent) nagaan of het tempo van muziek de pasfrequentie tijdens het lopen kan beïnvloeden. Eerdere studies hadden al aangetoond dat muziek een motiverend effect kan hebben op sportprestaties en dat een hogere pasfrequentie blessurepreventief kan werken.
Een neerslag van het onderzoek is te lezen in het artikel Spontaneous Entrainment of Running Cadence to Music Tempo. Het persbericht werd goed opgepikt door de media en ook de lokale televisiezender AVS vertoonde interesse. Een cameraploeg kwam langs en dit resulteerde in volgend verslag. In het verslag spelen mijn vriendin en ikzelf een figurantenrol. De hoofdrol is weggelegd voor Dieter.
The Mi Band is a bracelet with some sensors, three RGB leds and a vibration motor. It is marketed as an activity tracker and notifier. It is a neat little device that communicates via Bluetooth LE and has a battery life of around 30 days. It would be nice if it could be used for whatever purpose you want but alas, its API is not very open. This blog post gives pointers to useful resources and tips to make it work with your own code.
I would advise against installing the official Mi Band app, if you want to use it with custom code. The app upgrades the firmware to the latest version and it seems that Xiaomi is obfuscating the protocol more and more with each version. I was able to send vibrate and led commands to a Mi Band with firmware version 10.0.9.3. With the previously mentioned sources and the flow described to the right the device reacts to commands. I used an Android device. The flow:
Pair with the Mi Band in the Android Bluetooth setting.
In your code, connect to the paired device. Save the device address, you will need it later.
Send a pair command to the device. This is part of the Mi Band protocol and has nothing to do with the previous Bluetooth pairing. If all goes well it reacts with a 2. See here
Send user info. This step is crucial and not trivial. The user info needs to be encoded in a certain way and is CRC’d with the device address. The following is an example implementation of the Mi Band user info encoding
Now you can send vibrate or other commands.
Some notes: the self-test command works without the set user step. For Android the Mi Band protocol implementation in Java works well. To check the firmware version of the device, call the get device info characteristic. The last bytes, interpreted as an integer, define the version info. For my device it is 10.9.3.2:
Write to characteristic 0000ff05-0000-1000-8000-00805f9b34fb
onCharacteristicWrite status: 0 characteristic 0000ff05-0000-1000-8000-00805f9b34fb
Read firmware version
11value: 212value: 313value: 914value: 015value: 1
Another note: the set user info needs to be called with a 1 as type the first time the band is used. This is done with new UserInfo(20111111, 1, 32, 180, 55, "NM", 1) with the Android sdk by GitHub user pangliang. This sets and overwrites the user info. The next times you do not want to overwrite the info and the type needs to be zero.
The article titled “Synchronizing Multimodal Recordings Using Audio-To-Audio Alignment” by Joren Six and Marc Leman has been accepted for publication in the Journal on Multimodal User Interfaces. The article will be published later this year. It describes and tests a method to synchronize data-streams. Below you can find the abstract, pointers to the software under discussion and an author version of the article itself.
Synchronizing Multimodal Recordings Using Audio-To-Audio Alignment An Application of Acoustic Fingerprinting to Facilitate Music Interaction Research
Abstract:Research on the interaction between movement and music often involves analysis of multi-track audio, video streams and sensor data. To facilitate such research a framework is presented here that allows synchronization of multimodal data. A low cost approach is proposed to synchronize streams by embedding ambient audio into each data-stream. This effectively reduces the synchronization problem to audio-to-audio alignment. As a part of the framework a robust, computationally efficient audio-to-audio alignment algorithm is presented for reliable synchronization of embedded audio streams of varying quality. The algorithm uses audio fingerprinting techniques to measure offsets. It also identifies drift and dropped samples, which makes it possible to find a synchronization solution under such circumstances as well. The framework is evaluated with synthetic signals and a case study, showing millisecond accurate synchronization.
The algorithm under discussion is included in Panako an audio fingerprinting system but is also available for download here. The SyncSink application has been packaged separately for ease of use.
To use the application start it with double click the downloaded SyncSink JAR-file. Subsequently add various audio or video files using drag and drop. If the same audio is found in the various media files a time-box plot appears, as in the screenshot below. To add corresponding data-files click one of the boxes on the timeline and choose a data file that is synchronized with the audio. The data-file should be a CSV-file. The separator should be ‘,’ and the first column should contain a time-stamp in fractional seconds. After pressing Sync a new CSV-file is created with the first column containing correctly shifted time stamps. If this is done for multiple files, a synchronized sensor-stream is created. Also, ffmpeg commands to synchronize the media files themselves are printed to the command line.
This work was supported by funding by a Methusalem grant from the Flemish Government, Belgium. Special thanks goes to Ivan Schepers for building the balance boards used in the case study. If you want to cite the article, use the following BiBTeX:
@article{six2015multimodal,
      author      = {Joren Six and Marc Leman},
      title       = {{Synchronizing Multimodal Recordings Using Audio-To-Audio Alignment}},
      issn        = {1783-7677},
      volume      = {9},
      number      = {3},
      pages       = {223-229},
      doi         = {10.1007/s12193-015-0196-1},
      journal     = {{Journal of Multimodal User Interfaces}},
      publisher   = {Springer Berlin Heidelberg},
      year        = 2015
 }
A microcontroller fitted with an electret microphone and a microSD card slot. It can record audio in real-time together with sensor data.
Conceptual drawing used as a basis for the SyncSync application. A reference stream (blue) can be synchronized with streams one and two. It allows a workflow where streams are started and stopped (red) or start before the reference stream (green).
SyncSink Synchronize media files. A user-friendly interface to synchronize media and data files. First a reference media-file is added using drag-and-drop. The audio steam of the reference is extracted and plotted on a timeline as the topmost box. Subsequently other media-files are added. The offsets with respect to the reference are calculated and plotted. CSV-files with timestamps and data recorded in sync with a stream can be attached to a respective audio stream. Finally, after pressing Sync!, the data and media files are modified to be exactly in sync with the reference.
Multimodal recording system diagram. Each webcam has a microphone and is connected to the pc via USB. The dashed arrows represent analog signals. The balance board has four analog sensors but these are simplified to one connection in the schematic. The analog output of the microphones is also recorded through the DAQ. An analog accelerometer is connected with a microcontroller which also records audio.
Two streams of audio with fingerprints marked. Some fingerprints are present in both streams (green, O) while others are not (red, x). Matching fingerprints have the same offset, indicated by the dotted lines.
Synchronized streams in Sonic Visualizer. Here you can see two channel audio synchronized with accelerometer data (top, green) and balanceboard data (bottom, purple).
The synchronized data from the two webcams, accelerometer and balanceboard in ELAN. From top to bottom the synchronized streams are two video-streams, balance-board data (red), accelerometer-data (green) and audio (black).
This post explains how to do real-time pitch-shifting and audio time-stretching in Java. It uses two components. The first component is a high quality software C library for audio time-stretching and pitch-shifting C called Rubber Band. The second component is a Java audio library called TarsosDSP. To bridge the gap between the two JNI (Java Native Interface) is used. Rubber Band provides a JNI interface and starting from the currently unreleased version 1.8.2, makefiles are provided that make compiling and subsequently using the JNI version of Rubber Band relatively straightforward.
However, it still requires some effort to control real-time pitch-shifting and audio time-stretching from java. To make it more easy some example code and documentation is available in a GitHub repository called RubberBandJNI. It documents some of the configuration steps needed to get things working. It also offers precompiled libraries and documents how to compile those for the following systems:
This post describes how to decode MP3’s using an already compiled ffmpeg binary on android. Using ffmpeg to decode audio on Android has advantages:
It supports about every audio format known to man. Three channel flac, vorbis with 32 bit samples, … do not pose a problem.
Extracting audio from video container formats is supported. Accessing the first audio stream from mkv, avi, mov,… just works.
Decoding audio frames is more efficient using native code than often buggy Java decoders.
Resampling and downmixing is supported. If you want to resample incoming audio to e.g. 44.1kHz and only want single channel audio this is easily achievable.
The main disadvantage is that you need an ffmpeg build for your Android device. Luckily some poor soul already managed to compile ffmeg for Android for several architectures. The precompiled ffmpeg binaries for Android are available for download and are mirrored here as well.
To bridge the ffmpeg binary and the java world TarsosDSP contains some glue code. The AndroidFFMPEGLocator is responsible to find and extract the correct binary for your Android device. It expects these ffmpeg binaries in the assets folder of your Android application. When the correct ffmpeg binary has been extracted and made executable the PipeDecoder is able to call it. The PipeDecoder calls ffmpeg so that decoded, downmixed and resampled PCM samples are streamed into the Java application via a pipe, which explains its name.
With the TarsosDSP Android library the following code plays an MP3 from external storage:
This code just works if the application has the READ_EXTERNAL_STORAGE permission, includes a recent TarsosDSP-Android.jar, is ran on one of the supported ffmpeg architectures and has these binaries available in the assets folder.
This post describes a tool to quickly visualize and record analog signals with a Teensy micro-controller and some custom software. It is mainly useful to quickly get an idea of how an analog sensor reacts to different stimuli. Since it is also able to capture and store analog input siginals it is also useful to generate test data recordings which then can be used for example to test a peak detection algorithm on. The tool is called TeensyDAQ hinting at the Data AcQuisition features and the micro-controller used.
Some of the features of the TeensyDAQ:
Visualize up to five analog signals simultaneously in real-time.
Capture analog input signals with sampling rates up to 8000Hz.
Record analog input to a CSV-file and, using drag-and-drop, previously recorded CSV-files can be visualized.
Works on Linux, Mac OS X and Windows.
While a capture session is in progress you can going back in time and zoom, pan and drag to get a detailed view on your data.
Allows you to listen to your input signal, this is especially practical with analog microphone input.
The system consists of two parts. A hardware and a software part. The hardware is a Teensy micro-controller running an Arduino sketch that ready analog input A0 to A4 at the requested sampling rate. A Teensy is used instead of a regular Arduino for two reasons. First the Teensy is capable of much higher data throughput, it is able to send five reading at 8000Hz, which is impossible on Arduino. The second reason is the 13bit analog read resolution. Classic Arduino only provides 10 bits.
The software part reads data from the serial port the Teensy is attached to. It interprets the data and stores it in an efficient data-structure. As quickly as possible the data is visualized. The software is written in Java. A recent Java runtime environment is needed to execute it.
TarsosDSP, the is a real-time audio processing library written in Java, is featured in EFY (Electronics For Your) Plus Magazine of July 2015. It is a leading electronics magazine with a history going back more than 40 years and about 300 000 subscribers mainly in India. The index mentions this:
TarsosDSP: A Real-Time Audio Analysis and Processing Framework\
In last month’s EFY Plus, we discussed Essentia, a C library for audio analysis. In this issue we will discuss a Java based real-time audio analysis and processing framework known as TarsosDSP
To read the full article, buy a (digital) copy of the magazine.
This post describes how to get notifications from a Bluetooth LE (Low Energy) or Bluetooth v4.0 device on a Linux machine. Since it took me a while to get it going it is perhaps of interest to others.
The hardware I used is an RFduino board and a Belikin mini Bluethooth v4.0 adapter. The RFduino was programmed to wait for an event with RFduino_pinWake(pni, HIGH). When the pin is HIGH a count is incremented and this number is send to any device that is listening. In my case a Linux machine. The code is essentially the same as the button example included in the RDduino software distribution.
To install the Bluetooth stack on Debian the following command is executed sudo apt-get install bluetooth bluez bluez-utils bluez-firmware. A blog post describes more about the Bluetooth tools. Some other interesting reads are Get started with Bluetooth Low Energy and this stackoverflow question. Once the stack is installed correctly the lescan utility should give an output like this:
Bluetooth LE works with the Generic Attribute Profile (GATT). A Bluetooth LE device can provide services by combining characteristics. These characteristics are the way to communicate with the device. Some characteristics are writable and are able to send notifications. To receive notifications one such characteristic (referred to with a hex handle) needs to be written. Write 0100 to get notifications, 0200 for indications (indications are notifications that are acknowledged), 0300 for both, or 0000 for nothing (default). With this in mind, the following command enables listening for notifications:
With those commands working, the process can be automated with “a Ruby script to get Bluetooth LE notifications”:[bluetooth_notifications.rb]. The script essentially calls gatttool with the correct parameters and parses and reacts to its output. To make it work lescan needs to be called before starting the script:
This post describes how to connect music in your library with precomputed features. Say, for example, you are developing a DJ application and you want to facilitate mixing tracks. To provide a seamless mix you perhaps want information about beats and about the key the music in your library is in. Since vast databases of features are already available you probably want to access those, instead of using your own feature extractors and database. The problems that need to be addressed are:
Automatically identify the music in your library without relying on incomplete meta-data (tag information).
Connect the music with a data-base of meta-data. Preferably a large and well curated database.
Fetch pre-computed features for the music. The features should be extracted using algorithms that are currently state of the art or at least perform well. The features and the audio itself should be synchronized, otherwise beat information, for example, is not of much use.
To help with these task there are several open source tools and services available.
To identify music a condensed representation of musical audio is created. This process is known as acoustic fingerprinting. On the website AcoustID a tool is available to create such fingerprint. The library is called Chromaprint and the command line client is called fpcalc. Currently the latest version is Chromaprint version 1.2 and static binaries for fpcalc are available on the AcoustID website. A packages for Debian (and probably Ubuntu) can be installed by calling apt-get install libchromaprint-tools. Once this tool is correctly installed a fingerprint for a piece of music can be created:
A fingerprint by itself is not of much use. The AcoustID webservice translates a fingerprint into one or more MusicBrainz identifiers. One fingerprint can result in multiple identifiers because the same audio can be released on several albums. There is documentation for AcoustID webservice available. To use the webservice an API key is needed. Confusingly, the AcoustID service has two types of API keys. One for end-users and one for developers. The last type is needed to translate ID’s. To request a developer API key, log in on the AcoustID website and “add an application”, there you can find the correct API key. Substitute dev_api_key in the following URL. Also change the fingerprint and duration to match the information provided by the fpcalc application. The webservice should reply with a set of MusicBrainz identifiers:
AcousticBrainz provides features for a subset of music that has a MusicBrainz identifier. Currently about a million tracks are analyzed but more are added every day. The API for the webservice is straightforward:
The low-level features include beat positions and chroma information. For the hypothetical DJ-application this is the information that would be used.
If you find the services useful please consider contributing to MusicBrainz, AcoustID and AcousticBrainz.
A small Ruby script to “automatically fetch features”:[mbid_lookup.rb] for audio can be downloaded here. It needs Ruby and a RubyGems to parse JSON. On Debian this can be installed with apt-get install ruby and rubygems install json. Once these dependencies are installed the script can be ran as follows:
ruby mbid_lookup.rb example.mp3
Found6 musicbrainz identifiers!
Not found inAcousticBrainz: 0afcd4a1-3709-499b-b76f-0d5491f839a5
Beat positions for3d49fab8-fd08-42be-b0d2-9f1dc884d902: 0.522448956966,1.05650794506,1.57895684242,2.10140585899,2.61224484444,3.13469386101Not found inAcousticBrainz: 448258f0-aa5a-4968-8efd-8c9348d5142e
Not found inAcousticBrainz: adcd7079-57d9-49bd-a36b-a20fa27b02b1
Beat positions for d1cd1321-0b66-4848-935e-f3afba6c7356: 0.441179126501,0.905578196049,1.369977355,1.83437633514,2.29877543449,2.76317453384Not found inAcousticBrainz: e1f433be-af6b-4b5d-a969-4b53f014c395
TarsosDSP is a real-time audio processing library written in Java. Since version 2.0 it is compatible with Android. Judging by the number of forks of the TarsosDSP GitHub repository Android compatibility increased the popularity of the library. Now the first Android application which uses TarsosDSP has found its way to the Google Play store. Download and play with SINGmaster to see an application of the pitch tracking capabilities within TarsosDSP. The SINGmaster description:
“SING master is a smart phone app that helps you to learn how to sing. SING master presents a collection of practical exercises (on the most important building blocks of melodies). Colours and sounds guide you in the exercise. After recording, SING master gives visual feedback : you can see and hear your voice. This is important so that you can identify where your mistakes are.”
Another application in the Play Store that uses TarsosDSP is CuePitcher.
This post explains how to receive OSC in a MatLab environment. It uses a platform independent Java library which should work on 64 and 32 bit versions of Windows, Unix and Mac OS X. Using Java makes installation relatively easy compared with other solutions.
The most used method to get OSC-messages in Matlab can be found here. This method uses a library called liblo which needs to be configured (compiled) correctly on your system. Especially on Windows this can be problematic. A brave soul documented his quest to get OSC working with Matlab on Windows here. Obviously not for the faint of heart.
An alternative way leverages the Matlab facilities to run Java. Since there is a Java OSC library available (JavaOSC on github) it is relatively easy to bridge the two. To make the connection, I have written some glue code and provide an easy to use Jar-library here. Using the bridge is done as follows:
How to make Matlab receive OSC-messages
Download the “JavaOSCtoMatlab Java library”:[javaosctomatlab.jar] and store it in an easy to remember directory.
Download the “example Matlab OSC client Script”:[osc_java_test.m] and store it in the same directory. The client is included below as well.
Start Matlab, modify the client script to fit your needs. You probably need to change the OSC method to listen to and the OSC port. Also make sure that the cd command points to the directory with the downloaded jar-file.
Run the client script and receive your OSC messages.
Note that there are three ways to receive the payload of a message. They are returned by the Java code as either Object[], double[] or String[]. The last two are automatically understood by Matlab, so they are more easy to work with. Respectively to get the message data you need to call either osc_listener.getMessageArguments(), osc_listener.getMessageArgumentsAsDouble(), osc_listener.getMessageArgumentsAsString().
This post explains how to measure audio output latency on Android devices. To measure audio latency USB-OTG(On The Go) and an Arduino is used. In the process it documents audio output latency on an LG Nexus 5 device running the most recent version of Android, which currently is Lollipop (5.0).
Audio latency is an important aspect of a system, especially if it is used for real-time sonification or for musical applications. Audio latency is the, preferably short, delay between audio entering a system and emerging from a system. Audio output latency is the time it takes between a signal (e.g. a button pressed) and when audio emerges. For sonification purposes audio output latency is more interesting than round-trip audio latency.
Android systems are often portable, generally available and relatively cheap. Android offers an attractive platform to develop sonifications or musical applications for. Unfortunately, audio latency on Android has not been a priority in the first versions. With Android 4.1 things started to change but due to hard- and software fragmentation it is still hard to find how much audio latency is expected. Even if the exact model (e.g. Nexus 5) and software version (stock Android 5.0) is known, exact numbers are, so it seems, nowhere to be found. For more information on the internal changes that make low latency audio on Android possible, watch the talk on High Performance Audio from the 2013 Google I/O conference. Also note the lack of exact latency numbers in that talk. It is a very enjoyable talk by two Google engineers going after the culprits of high latency in true Sherlock/dr. Watson style.
Since audio output latency is generally not documented and since it is an important factor to decide if Android is a viable platform for real-time sonification or musical applications it needs to be measured. One way of measuring audio output latency on Android is documented by the people of Google. Unfortunately, the approach is not easily reproducible since it needs a custom circuit board, an oscilloscope and there is no source code available. Below a reproducible way to measure audio output latency for Android is documented.
An Arduino, an Android device, an USB-OTG cable and a butchered mini-jack audio cable are needed together with the software provided here. Optionally, a data acquisition module can be used to visualize the signals. The measurement system works as follows:
An Arduino sends a signal over USB. The time at which the signal is send is stored for later use.
An Android device, connected to the Arduino via an USB-OTG-cable, receives the signal.
The Android device responds as quickly as possible, with the lowest latency as possible, by emitting a sound.
The sound is captured on an analog input port of the Arduino, via the mini-jack cable. The time the sound appears on the Arduino is stored.
By comparing the time when the signal was send with the time when the sound arrived, the audio output latency is measured and reported.
The previous steps are repeated every second to gain insights into the variability of the measurements. To generate microsecond accurate timing interrupts are used on the Arduino. For visualisation, a digital pin is toggled every time the Arduino sends a signal. The Arduino sketch is attached to this post, as is the source code for the Android application. An already compiled APK is also available. With some luck - a recent Android version is needed, your device should support USB-OTG - it might work on your device.
Results
Using the OpenSL ES native interface on a Nexus 5 with Lollipop installed the USB input to audio output latency is on average about 48 milliseconds. There is some variability but it is usually within 15 milliseconds. For music applications this latency is not great but, depending on the application, acceptable. For expert drummers latency should be in the range of 20ms but for many sonification tasks, 50ms suffices. It is clear that Android will never be able to compete with purpose built hardware running a real time operating system like Axoloti (Audio roundtrip latency 2ms, usb-audio 1.6ms) but for a general purpose device the measured latency is significantly better than what I expected (around 100ms).
The non-native audio interface is a lot slower. I have measured an average latency of about 85ms and a much larger variability (25ms).
With this post I hope others will report the latency for their devices as well, so that buyers that are interested in a low-latency Android devices can make an informed decision.
Onsets and audio visualized using a DAC and a Java program.
Currently, there is a crowd-funding campaign ongoing about Axoloti . Axoloti is a very cool project by Johannes Taelman. It is a stand alone audio processing unit that can be used as a synthesizer, groovebox, guitar effect pedal, as a part of a sound installation, or for about any other audio application you can think of.
Axeloti is controlled by a patcher environment and once it is programmed it operates as a stand alone unit. For more information, visit the Axoloti Website, watch the video below and and fund Axoloti.
Update: Good news everyone! Axoloti has been funded!
TarsosLSH is a Java library implementing Locality-sensitive Hashing (LSH), a practical nearest neighbor search algorithm for high dimensional vectors that operates in sublinear time. The open source software package is authored by me and is available on GitHub: TarsosLSH on GitHub.
With TarsosLSH, Joseph Hwang and Nicholas Kwon from Rice University created an Image Mosaic web application. The application chops an uploaded photo into small blocks. For each block, a color histogram is created and compared with an index of color histograms of reference images. Subsequently each block is replaced with one of the top three nearest neighbors, creating a mosaic. Since high dimensional nearest neighbor search is needed, this is an ideal application for TarsosLSH. The application somewhat proves that TarsosLSH can be used in practical applications, which is comforting.
The Starry Night, by Van Ghogh in Mosaic as created by the mosaic webapplication.
Below some notes on installing and using the drivers for the Avandtech USB-4716 on Linux can be found. Since I was unable to find these instructions elsewhere and it took me some time to figure things out, it is perhaps of use to someone else. A similar approach should work for the following devices as well: pci1715, pci1724, pci1734, pci1752, pci1758, pcigpdc, usb4711a, usb4750, pci1711, pci1716, pci1727, pci1747, pci1753_mic3753_pcm3753i, pci1761_pcm3761i, pcm3810i, usb4716, usb4761, pci1714_pcie1744, pci1721, pci1730_pcm3730i, pci1750, pci1756, pci1762, usb4702_usb4704, usb4718
Download the linux driver for the Avandtech USB-4716 DAQ. If you are on a system that can install either deb or rpm use the driver_package. Unzip the package. The driver is split into two parts. A base driver biokernbase and a driver specific for the USB-4716 device, bio4716. The drivers are Linux kernel modules that need to installed. First the base driver needs to be installed, the order is important. After the base driver install the device specific deb kernel module. After a reboot or perhaps immediately this should be the result of executing lsmod | grep bio:
A library to interface with the hardware is provided as a deb package as well. Install this library on your system.
Next download the the examples for the Avandtech USB-4716 DAQ. With the kernel modules installed the system is ready to test the examples in the provided examples directory. If you are using the Java code, make sure to set the java.library.path correctly.
The 27th of November, 2014 a lecture on audio fingerprinting and its applications for digital musicology will be given at IPEM. The lecture introduces audio fingerprinting, explains an audio fingerprinting technique and then goes on to explain how such algorithm offers opportunities for large scale digital musicological applications. Here you can download the slides about audio fingerprinting and its opportunities for digital musicology.
With the explained audio fingerprinting technique a specific form of very reliable musical structure analysis can be done. Below, in the figure section, an example of repetitive structure in the song Ribs Out is shown. Another example is comparing edits or versions of songs. Below, also in the figure section, the radio edit of Daft Punk’s Get Lucky is compared with the original version. Audio synchronization using fingerprinting is another application that is actively used in the field of digital musicology to align audio with extracted features.
Since acoustic fingerprinting makes structure analysis very efficiently it can be applied on a large scale (20k songs). The figure below shows that identical repetition is something that has been used more and more since the mid 1970’s. The trend probably aligns with the amount of technical knowledge needed to ‘copy and paste’ a snippet of music.
\
Fig: How much identical repetition is used in music, over the years.
At ISMIR 2014 i will present a paper on a fingerprinting system. ISMIR is the annual conference of the International Society for Music Information Retrieval is the world’s leading interdisciplinary forum on accessing, analyzing, and organizing digital music of all sorts. This years instalment takes place in Taipei, Taiwan. My contribution is a paper titled Panako - A Scalable Acoustic Fingerprinting System Handling Time-Scale and Pitch Modification, it will be presented during a poster session the 27th of October.
This paper presents a scalable granular acoustic fingerprinting system. An acoustic fingerprinting system uses condensed representation of audio signals, acoustic fingerprints, to identify short audio fragments in large audio databases. A robust fingerprinting system generates similar fingerprints for perceptually similar audio signals. The system presented here is designed to handle time-scale and pitch modifications. The open source implementation of the system is called Panako and is evaluated on commodity hardware using a freely available reference database with fingerprints of over 30,000 songs. The results show that the system responds quickly and reliably on queries, while handling time-scale and pitch modifications of up to ten percent.
The system is also shown to handle GSM-compression, several audio effects and band-pass filtering. After a query, the system returns the start time in the reference audio and how much the query has been pitch-shifted or time-stretched with respect to the reference audio. The design of the system that offers this combination of features is the main contribution of this paper.
It makes sense to connect TarsosDSP, a real-time audio processing library written in Java, with patcher environments such as Pure Data and Max/MSP. Both Pure Data and Max/MSP offer the capability to code object, or externals using Java. In Pure Data this is done using the pdj~ object, which should be compatible with the Max/MSP implementation. This post demonstrates a patch that connects an oscillator with a pitch tracking algorithm implemented in TarsosDSP.
To the left you can see the finished patch. When it is working an audio stream is generated using an oscillator. The frequency of the oscillator can be controlled. Subsequently the stream is send to the Java environment with the pdj bridge. The Java environment receives an array of floats, representing the audio. A pitch estimation algorithm tries to find the pitch of the audio represented by the buffer. The detected pitch is returned to the pd environment by means of outlet. In pd, the detected pitch is shown and used for auditory feedback.
PitchDetectionResult result = yin.getPitch(audioBuffer);
pitch = result.getPitch();
outlet(0, Atom.newAtom(pitch));
Please note that the pitch detection algorithm can handle any audio stream, not only pure sines. The example here demonstrates the most straightforward case. Using this method all algorithms implemented in TarsosDSP can be used in Pure Data. These range from onset detection to filtering, from audio effects to wavelet compression. For a list of features, please see the TarsosDSP github page. Here, the source for this patch implementing pitch tracking in pd can be downloaded. To run it, extract it to a directory and simply run the pitch.pd patch. Pure Data should load pdj~ automatically together with the classes present in the classes directory.
This post explains how to get TarsosDSP running on Android. TarsosDSP is a Java library for audio processing. Its aim is to provide an easy-to-use interface to practical music processing algorithms implemented, as simply as possible, in pure Java and without any other external dependencies.
Since version 2.0 there are no more references to javax.sound.* in the TarsosDSP core codebase. This makes it easy to run TarsosDSP on Android. Audio Input/Output operations that depend on either the JVM or Dalvik runtime have been abstracted and removed from the core. For each runtime target a Jar file is provided in the TarsosDSP release directory.
The following example connects an AudioDispatcher to the microphone of an Android device. Subsequently, a real-time pitch detection algorithm is added to the processing chain. The detected pitch in Hertz is printed on a TextView element, if no pitch is present in the incoming sound, –1 is printed. To test the application download and install the /files/attachments/420/TarsosDSPAndroid.apk(/files/attachments/420/TarsosDSPAndroid.apk) application on your Android device. The source code is available as well.
The TarsosDSP Java library for audio processing now contains an implementation of the Haar Wavelet Transform. A discrete wavelet transform based on the Haar wavelet (depicted at the right). This reversible transform has some interesting properties and is practical in signal compression and for analyzing sudden transitions in a file. It can e.g. be used to detect edges in an image.
As an example use case of the Haar transform, a simple lossy audio compression algorithm is implemented in TarsosDSP. It compresses audio by dividing audio into bloks of 32 samples, transforming them using the Haar wavelet Transform and subsequently removing samples with the least difference between them. The last step is to reverse the transform and play the audio. The amount of compressed samples can be chosen between 0 (no compression) and 31 (no signal left). This crude lossy audio compression technique can save at least a tenth of samples without any noticeable effect. A way to store the audio and read it from disk is included as well.
The algorithm works in real time and an example application has been implemented which operates on an mp3 stream. To make this work immediately, the avconv tool needs to be on your system’s path. Also implemented is a bit depth compressor, which shows the effect of (extreme) bit depth compression.
The TarsosDSP Java library for audio processing now contains a module for spectral peak extraction. It calculates a short time Fourier transform and subsequently finds the frequency bins with most energy present using a median filter. The frequency estimation for each identified bin is significantly improved by taking phase information into account. A method described in “Sethares et al. 2009 - Spectral Tools for Dynamic Tonality and Audio Morphing”.
The noise floor, determined by the median filter, the spectral information itself and the estimated peak locations are returned for each FFT-frame. Below a visualization of a flute can be found. As expected, the peaks are harmonically spread over the complete spectrum up until the Nyquist frequency.
Spectral peaks of a flute. The first 10 harmonic are detected up until the Nyquist frequency.
Give students an intensive course in the most advanced and current topics in the research fields of systematic musicology and sound and music computing. Give students the opportunity to discuss their research proposals/project with an international staff of teachers representing a variety of expertise in different domains of systematic musicology and sound and music computing. Teach students the most recent knowledge and basic skills needed to start a PhD. Give students the opportunity to join the research communities on systematic musicology, on sound and music computing.
Next to the lectures, the informal meetings with the professors was very interesting. I got to add some things to my ‘to read’ list:
Rolf Bader, Calculation of Helmholtz frequency of a Renaissance vihuela string instrument with five tone hole
Schneider, A. & Frieler, K. (2009) __Perception of harmonic and inharmonic sounds: Results from\
ear models. In S. Ystad, R. Kronland-Martinet & K. Jensen (Eds.), Computer music modeling and retrieval. Genesis of meaning in sound and music (pp. 18–44). Berlin: Springer.
TarsosDSP will be presented at the AES 53rd International conference on Semantic Audio in London . During the conference both a presentation and demonstration of the paper “TarsosDSP, a Real-Time Audio Processing Framework in Java”:[aes53_tarsos_dsp.pdf], by Joren Six, Olmo Cornelis and Marc Leman, in Proceedings of the 53rd AES Conference (AES 53rd), 2014. From their website:
Semantic Audio is concerned with content-based management of digital audio recordings. The rapid evolution of digital audio technologies, e.g. audio data compression and streaming, the availability of large audio libraries online and offline, and recent developments in content-based audio retrieval have significantly changed the way digital audio is created, processed, and consumed. New audio content can be produced at lower cost, while also large audio archives at libraries or record labels are opening to the public. Thus the sheer amount of available audio data grows more and more each day. Semantic analysis of audio resulting in high-level metadata descriptors such as musical chords and tempo, or the identification of speakers facilitate content-based management of audio recordings. Aside from audio retrieval and recommendation technologies, the semantics of audio signals are also becoming increasingly important, for instance, in object-based audio coding, as well as intelligent audio editing, and processing. Recent product releases already demonstrate this to a great extent, however, more innovative functionalities relying on semantic audio analysis and management are imminent. These functionalities may utilise, for instance, (informed) audio source separation, speaker segmentation and identification, structural music segmentation, or social and Semantic Web technologies, including ontologies and linked open data.
This conference will give a broad overview of the state of the art and address many of the new scientific disciplines involved in this still-emerging field. Our purpose is to continue fostering this line of interdisciplinary research. This is reflected by the wide variety of invited speakers presenting at the conference.
The paper presents TarsosDSP, a framework for real-time audio analysis and processing. Most libraries and frameworks offer either audio analysis and feature extraction or audio synthesis and processing. TarsosDSP is one of a only a few frameworks that offers both analysis, processing and feature extraction in real-time, a unique feature in the Java ecosystem. The framework contains practical audio processing algorithms, it can be extended easily, and has no external dependencies. Each algorithm is implemented as simple as possible thanks to a straightforward processing pipeline. TarsosDSP’s features include a resampling algorithm, onset detectors, a number of pitch estimation algorithms, a time stretch algorithm, a pitch shifting algorithm, and an algorithm to calculate the Constant-Q. The framework also allows simple audio synthesis, some audio effects, and several filters. The Open Source framework is a valuable contribution to the MIR-Community and ideal fit for interactive MIR-applications on Android. The full paper can be downloaded “TarsosDSP, a Real-Time Audio Processing Framework in Java”:[aes53_tarsos_dsp.pdf]
A BibTeX entry for the paper can be found below.
```ruby\
\@inproceedings{six2014tarsosdsp,\
author = {Joren Six and Olmo Cornelis and Marc Leman},\
title = {{TarsosDSP, a Real-Time Audio Processing Framework in Java}},\
booktitle = {{Proceedings of the 53rd AES Conference (AES 53rd)}},\
year = 2014\
}\
```
Woensdag 18 december 2013 organiseerde Olmo Cornelis een concert in het kader van zijn doctoraat. De dag erna volgde zijn verdediging. Nogmaals proficiat Olmo met het mooie eeh mbirapunt. Hieronder staat kort wat uitleg over het project en het concert.
bq.. In zijn onderzoeksproject ‘Exploring the symbiosis of Western and non-Western Music’ stelde Olmo Cornelis de beschrijving van Centraal-Afrikaanse muziek centraal. Deze werd verkend via computationele technieken die de klank als signaal\
benaderden. De verkregen informatie zorgde voor beïnvloeding van het artistieke oeuvre waarin steeds een mengeling van impliciete en expliciete etnische invloeden spelen.
In het kader van de afronding van dit doctoraal onderzoek spelen het HERMESensemble, het Nadar Ensemble, Maja Jantar en Françoise Vanhecke op 18 december werk van Olmo Cornelis dat tijdens dit project geschreven werd. Het onderzoeksproject Exploring the symbiosis of Western and non-Western Music werd in 2008 geïnitieerd aan het Conservatorium / School of Arts van de HoGent en werd gefinancierd door het onderzoeksfonds Hogeschool Gent.
Beeld: Noel Cornelis, Reality of Possibilities, 2012
Yesterday, December 4th 2013, the RTBF (Radio Télévision Belge Francophone) was at IPEM (Institute for Psychoacoustics and Electronic Music) to do a small feature on research currently going on at the institue. The RTBF is the public broadcasting organization of the French Community of Belgium, the southern, French-speaking part of Belgium. The clip shows the D-Jogger in action, with me using it. The fragment is available on the RTBF website and is embedded below.
The aim of this research project is to gain novel musicological insights into a large dataset of music from Central Africa. While practising ethnomusicological research on this dataset, we to develop and publish useful software and methodologies for the (ethno)musicological research community.
From November 2009 until November 2013 this research project was organised at the School of Arts, University College Ghent, under supervision by Olmo Cornelis. Later, from November 2013 onwards, the project turned into a 2 year doctoral research project hosted at IPEM, University Ghent under the supervision of Marc Leman.
Partners
University Ghent, IPEM: The Institute for Psychoacoustics and Electronic Music is part of the Music department at the Faculty of Arts and Philosophy, at Ghent University.
 Fig: Gemini imagining the age of AI exploits.
 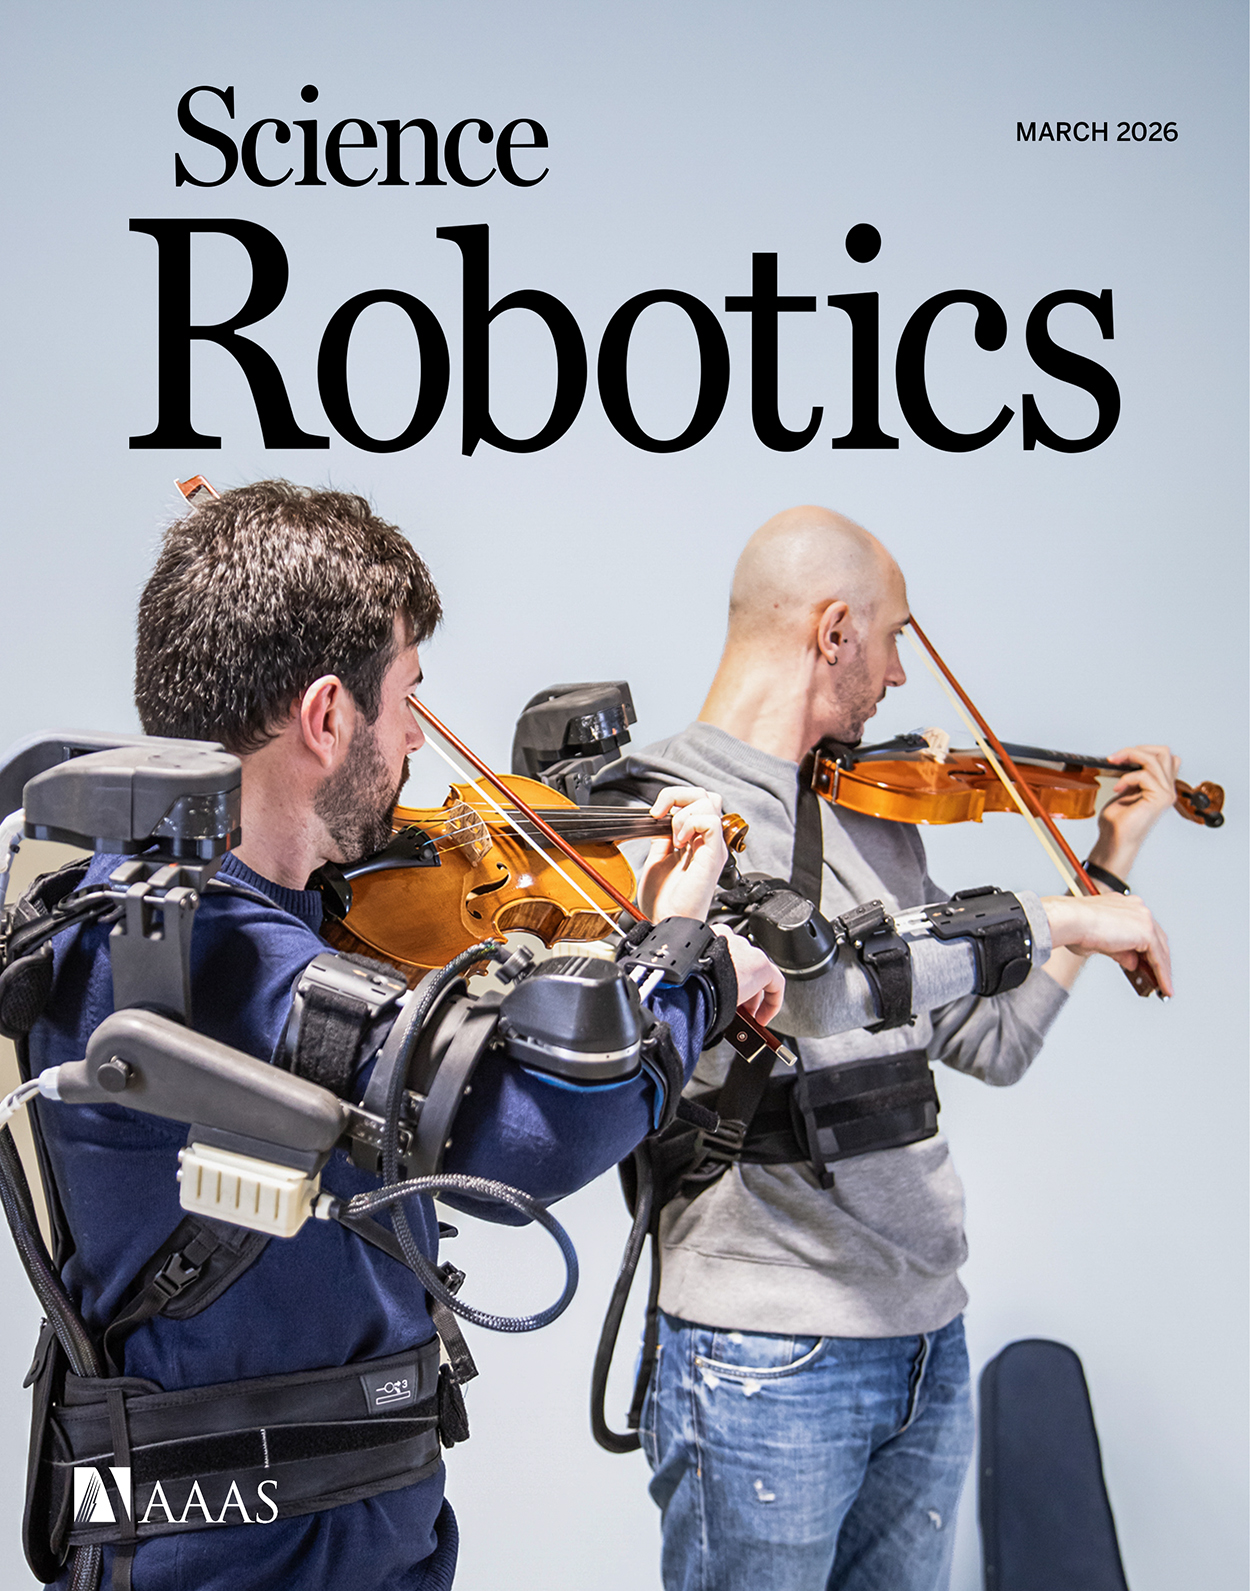 A couple of former colleagues have just published the article
 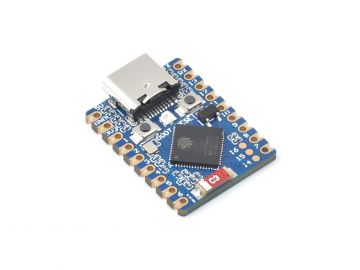 If you’re considering adding USB MIDI functionality to a music project with an ESP32, it’s crucial to choose the right variant of the chip. The ESP32-S3 is currently the go-to model for USB-related tasks thanks to its native USB capabilities. Unlike other ESP32 models, the S3 can handle USB MIDI directly without the need for additional components, making it an ideal choice for integrating MIDI devices into your setup. For more details on using USB MIDI with the ESP32-S3, check out the
 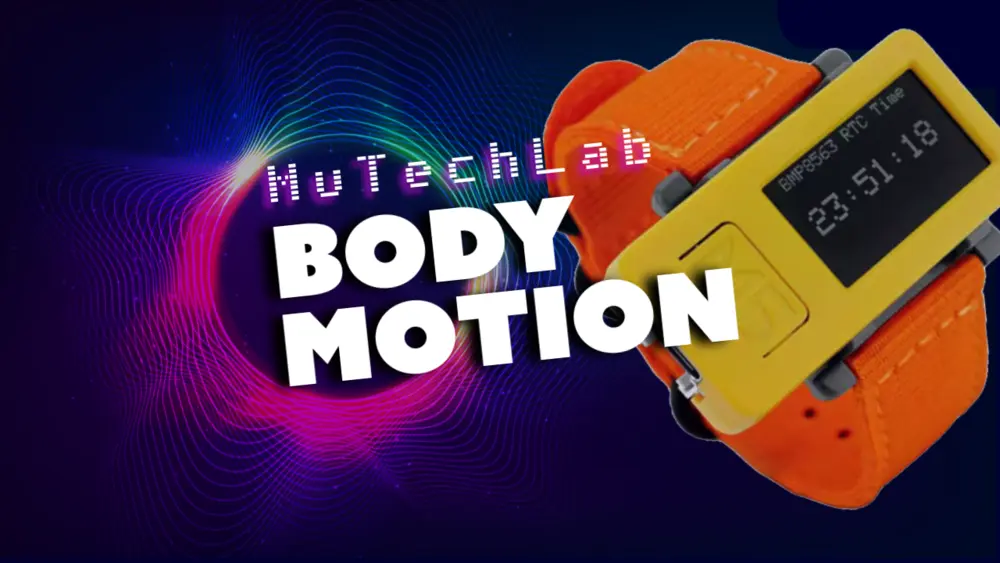 Last Friday, I had the pleasure of facilitating a hands-on workshop in Luxembourg as part of


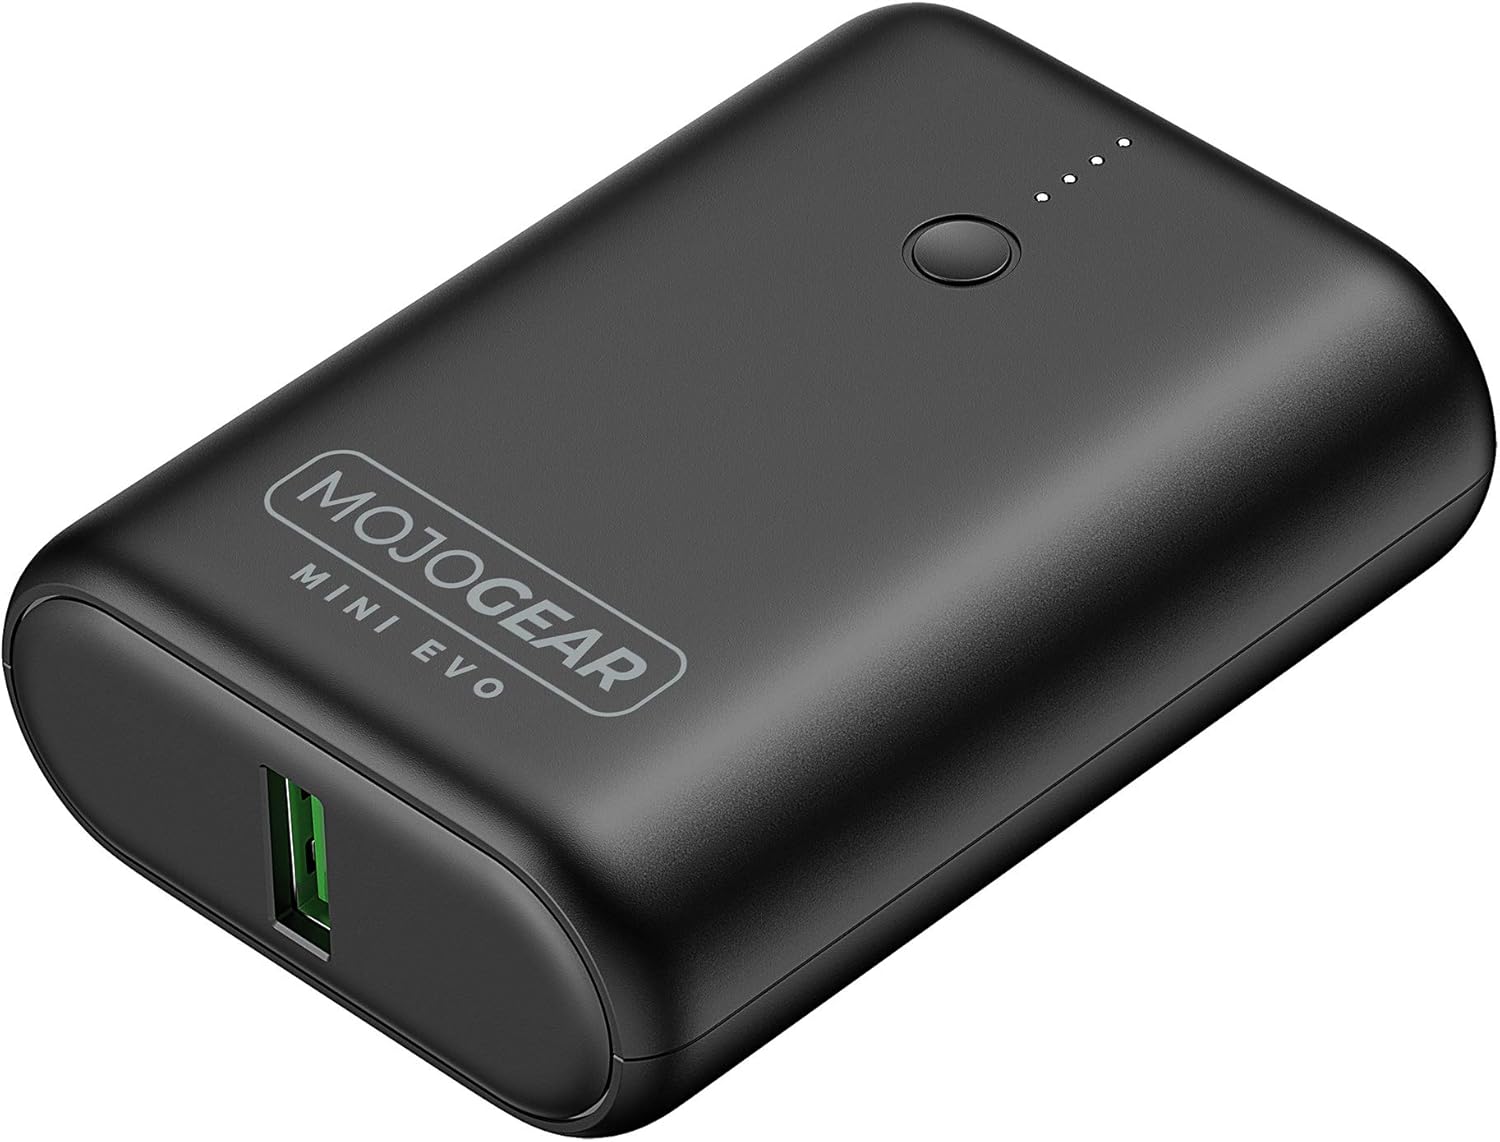 Power banks have become a staple for charging smartphones, tablets, and other devices on the go. They seem ideal to power small microcontroller projects but, they often pose a problem for low-current applications. Most modern power banks include an auto-shutdown feature to conserve energy when they detect a current draw below a specific threshold, often around 50–200mA. The idea being that the power bank can shut off after charging a smartphone. However, if you rely on power banks to power DIY electronics projects or remote applications with low current draw, this auto-off feature can be a significant inconvenience.
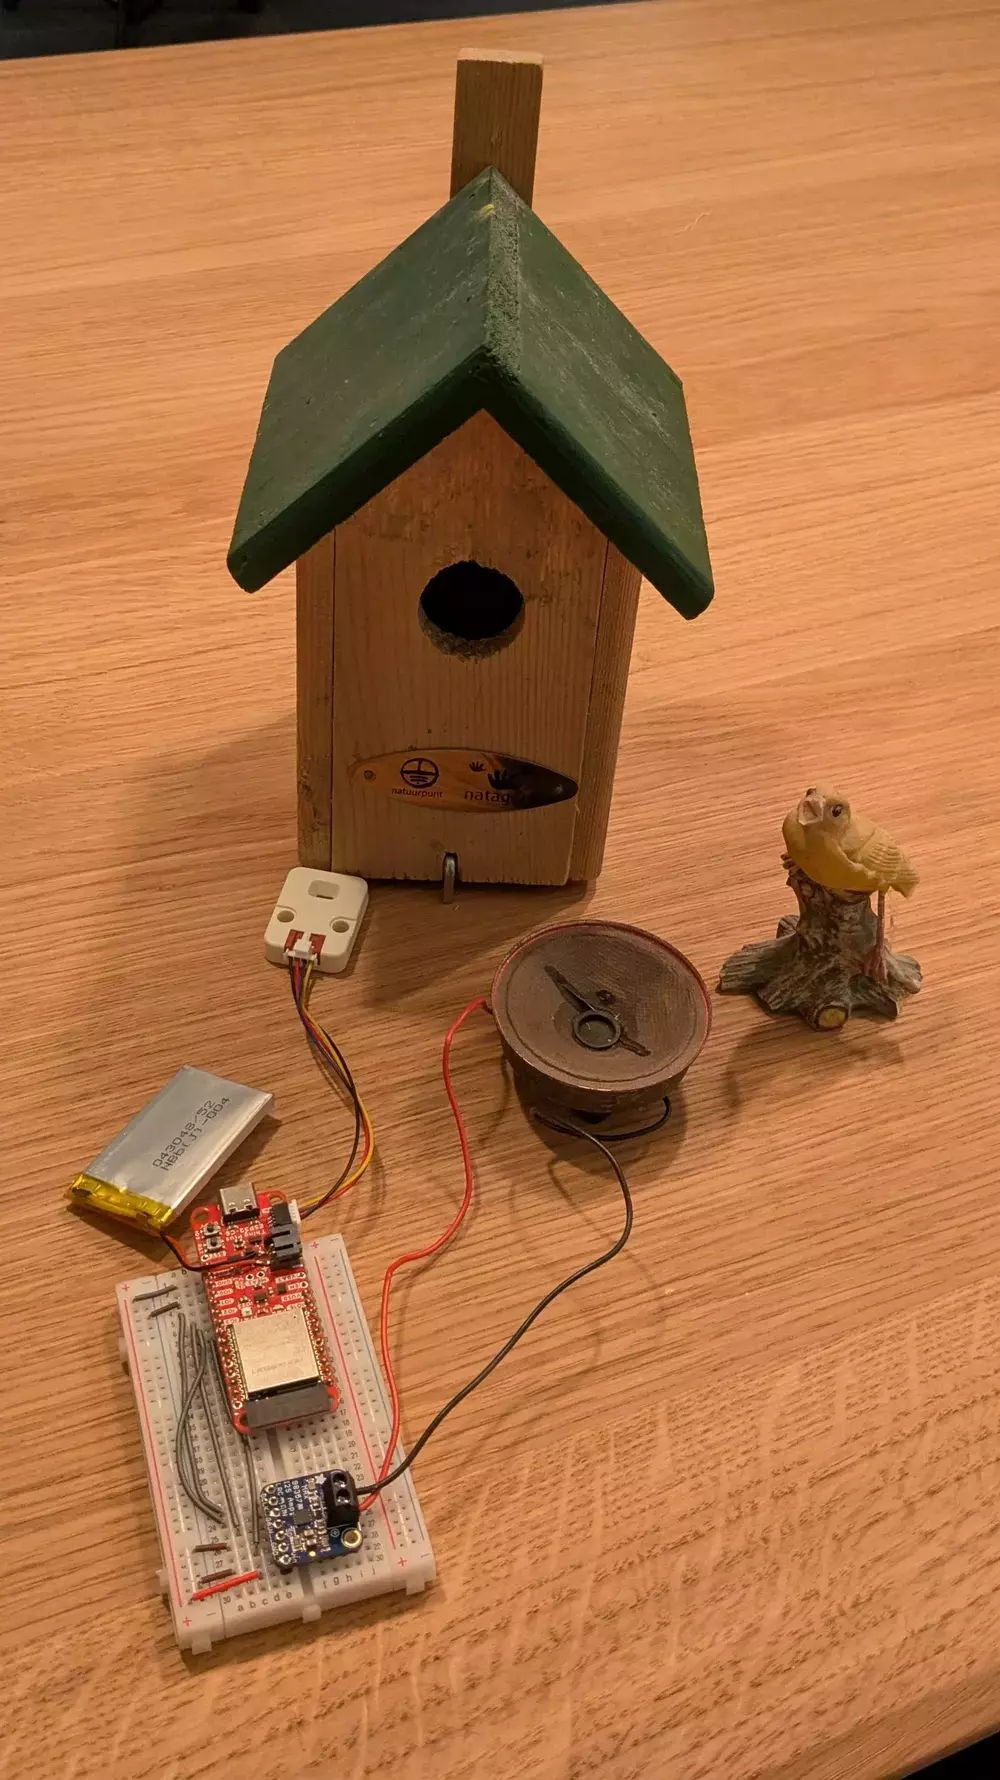
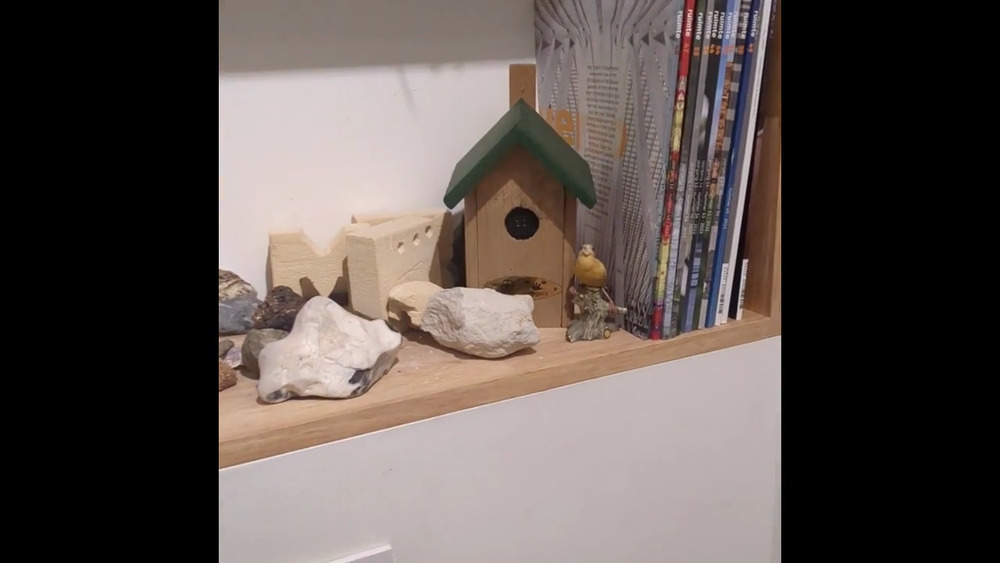
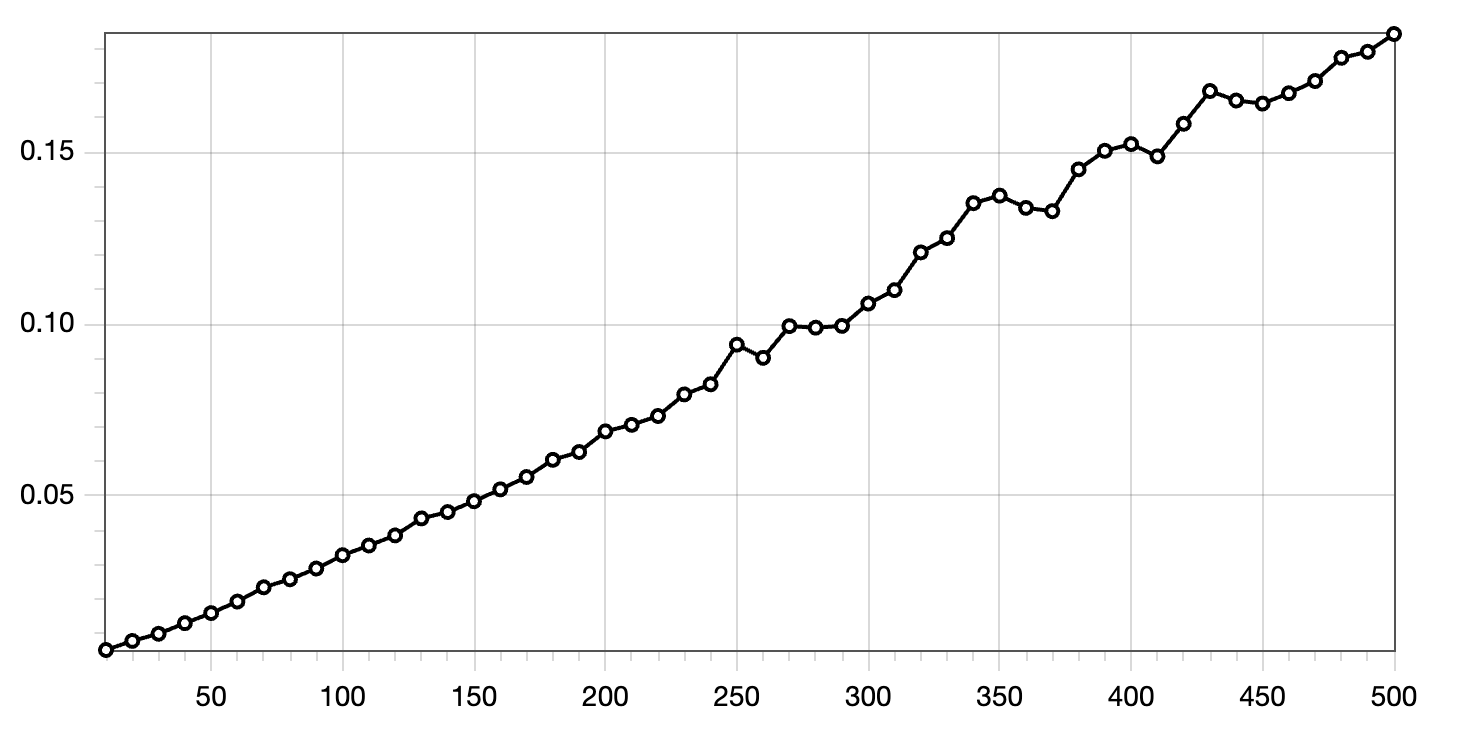
 In my house, I have a few smart home features: to control ventilation, to open and close solar screens, and to switch a few smart sockets. Up until a couple of days ago, the ventilation and screen controllers operated using custom software running on an ESP32. However, configuring, maintaining, upgrading, and integrating with this custom software gradually became a headache.
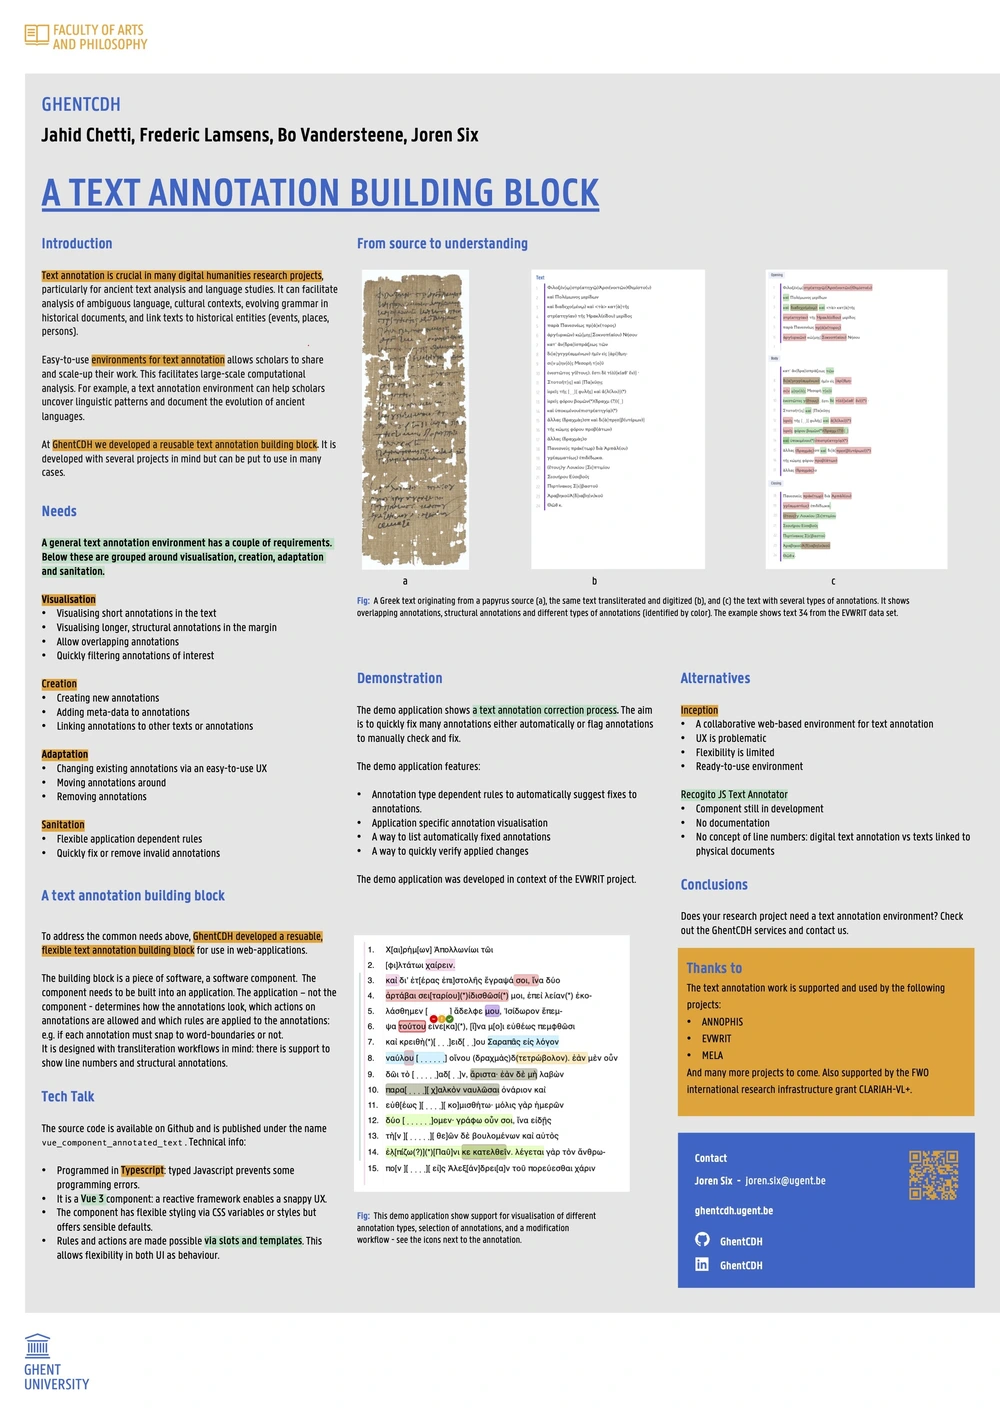
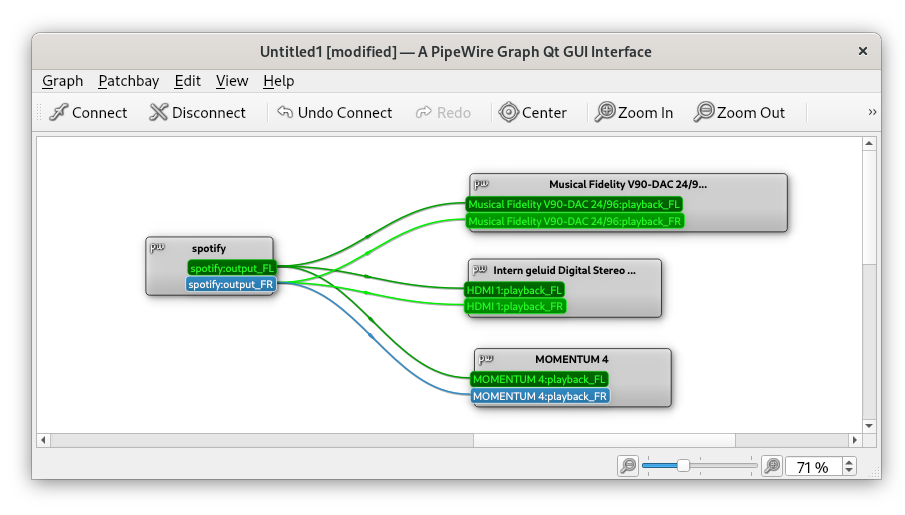

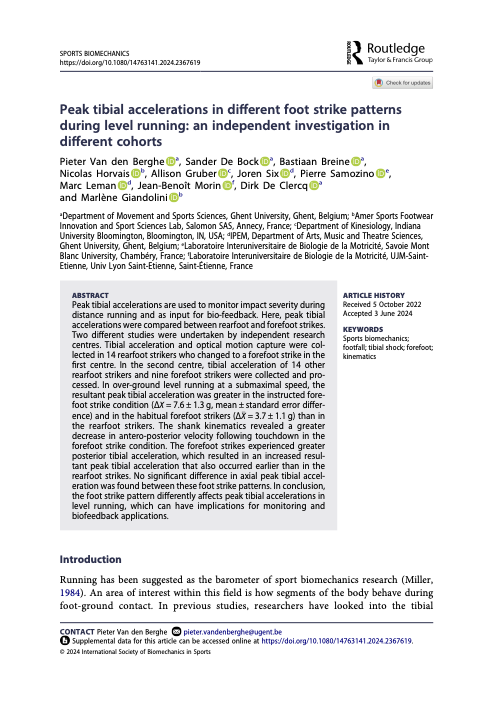


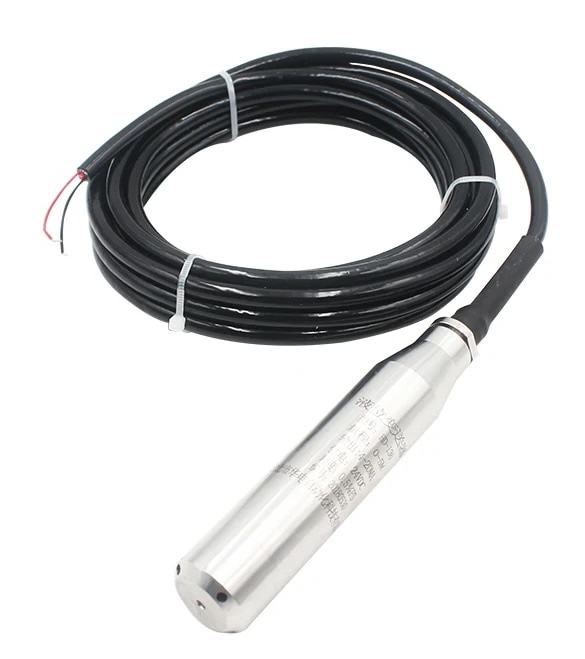
 Fig: a black box generating 3D models.


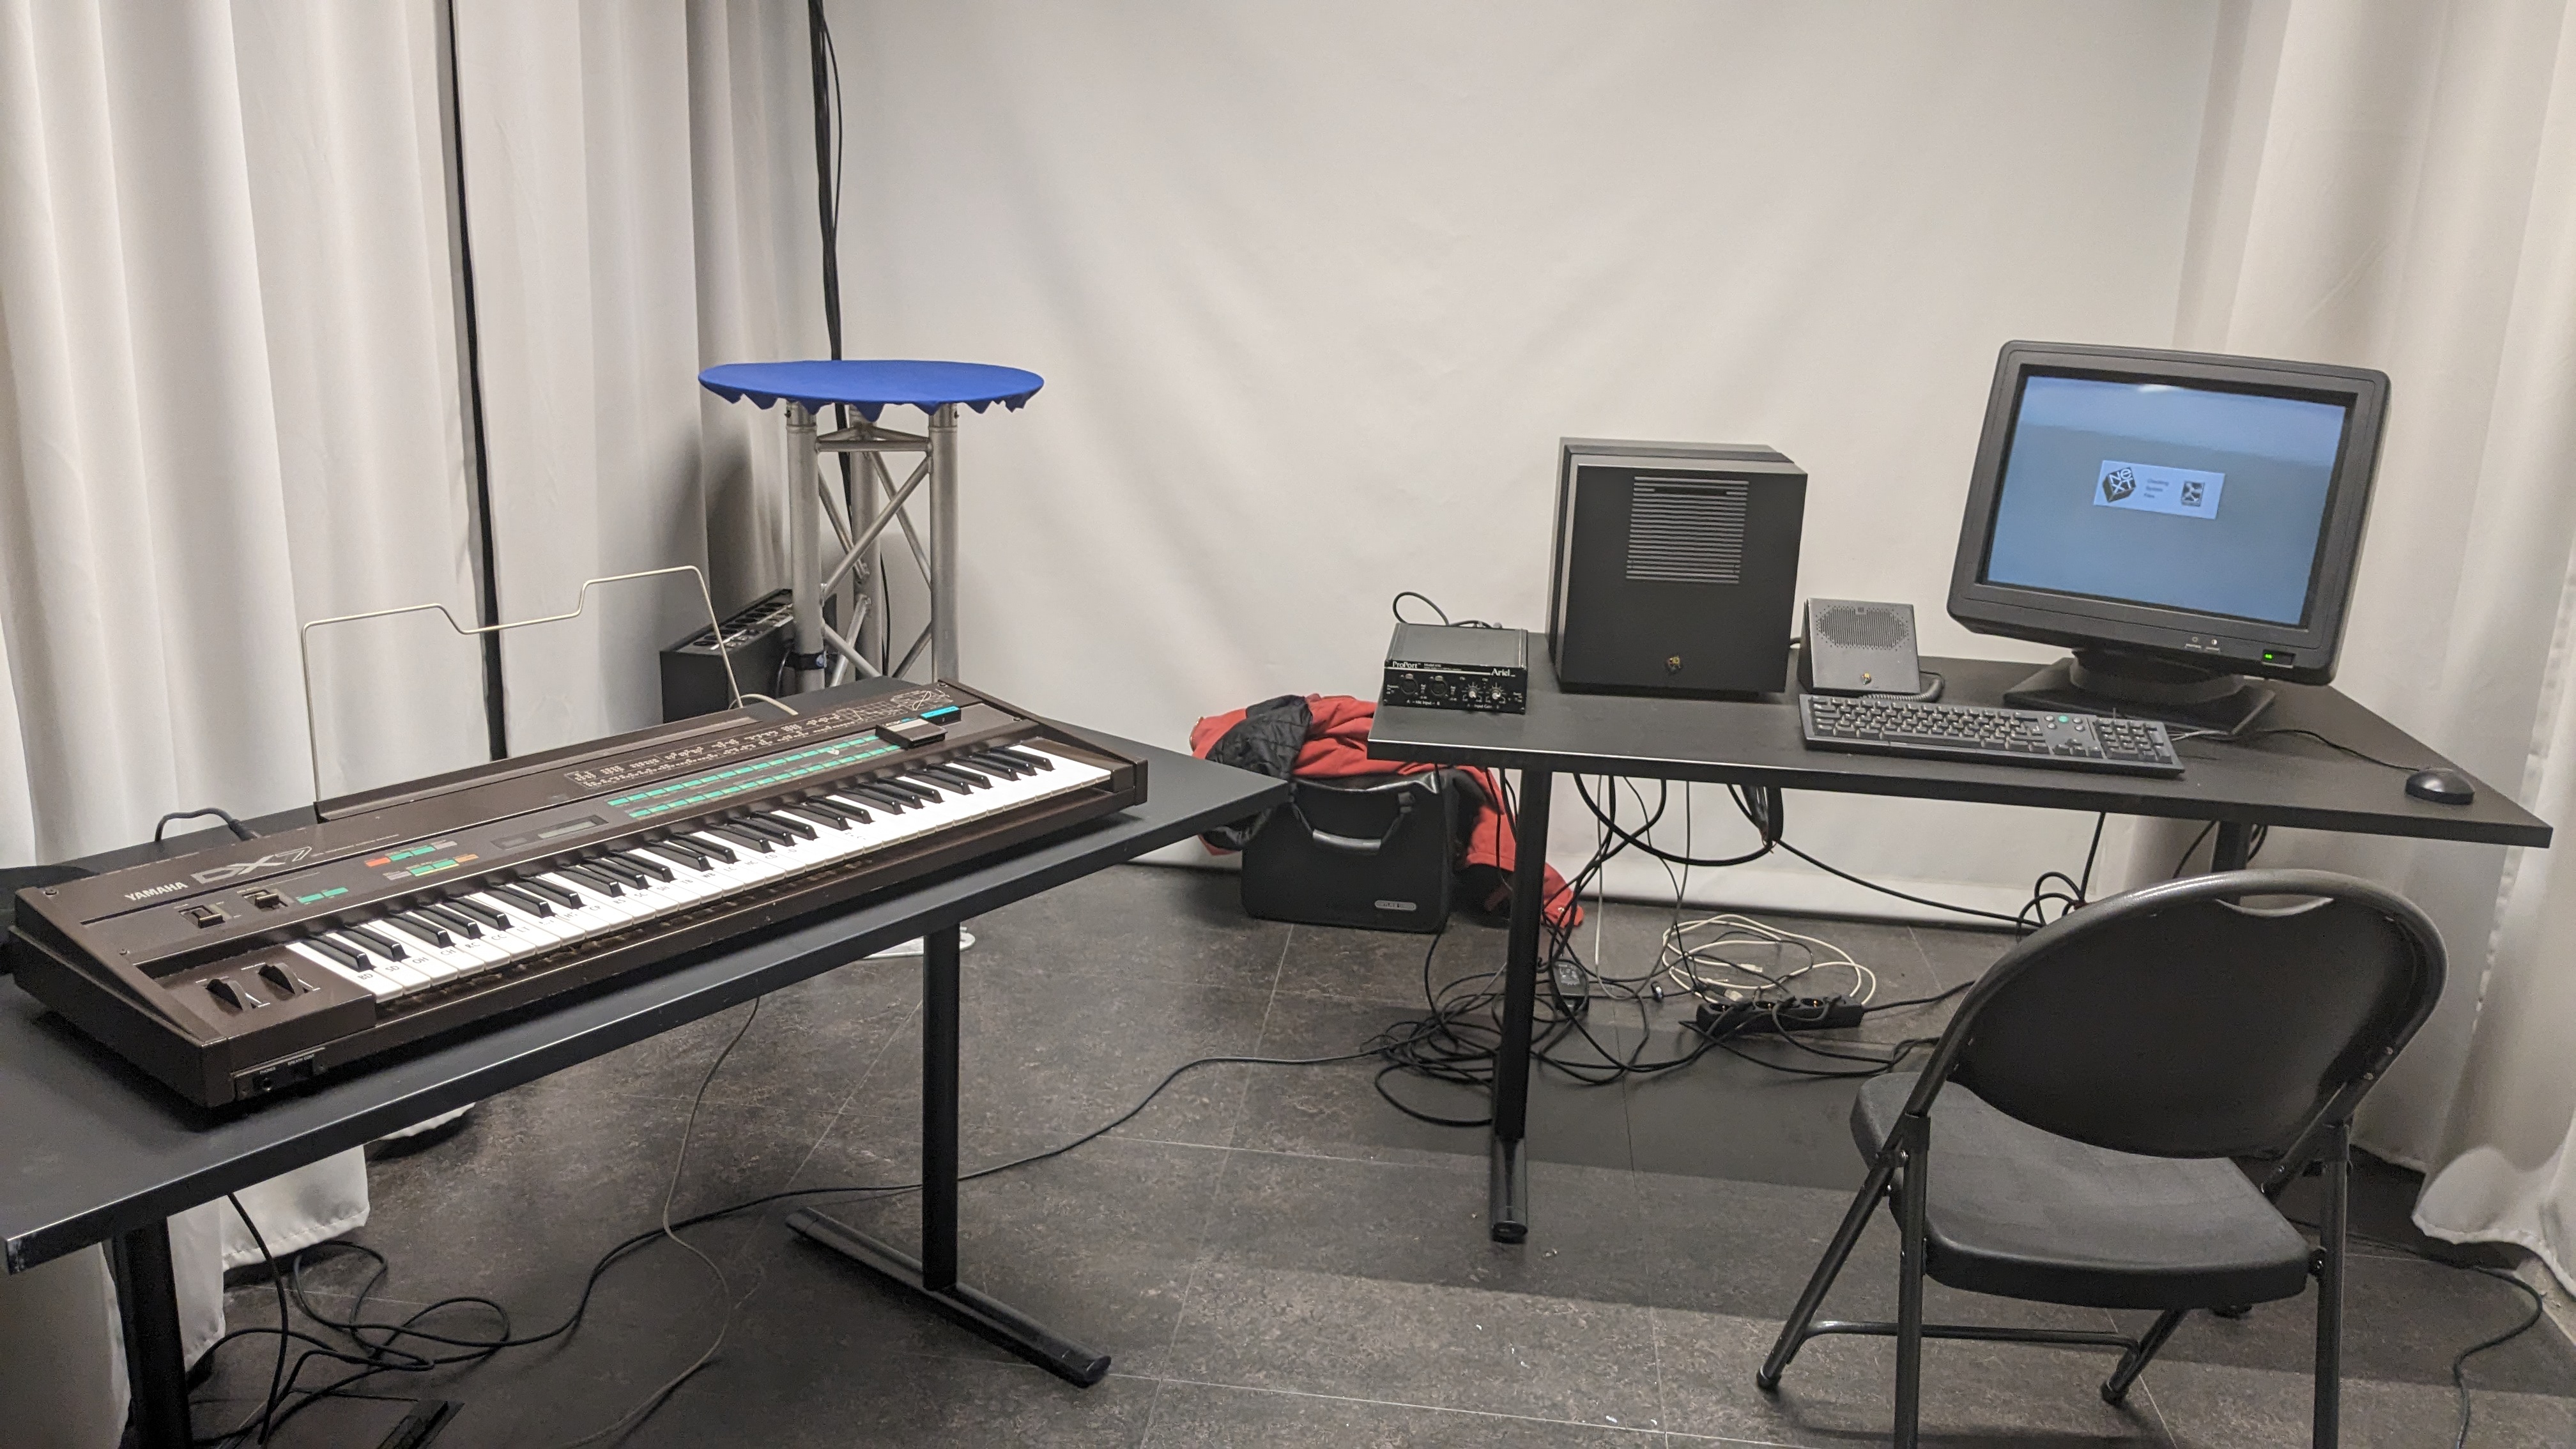
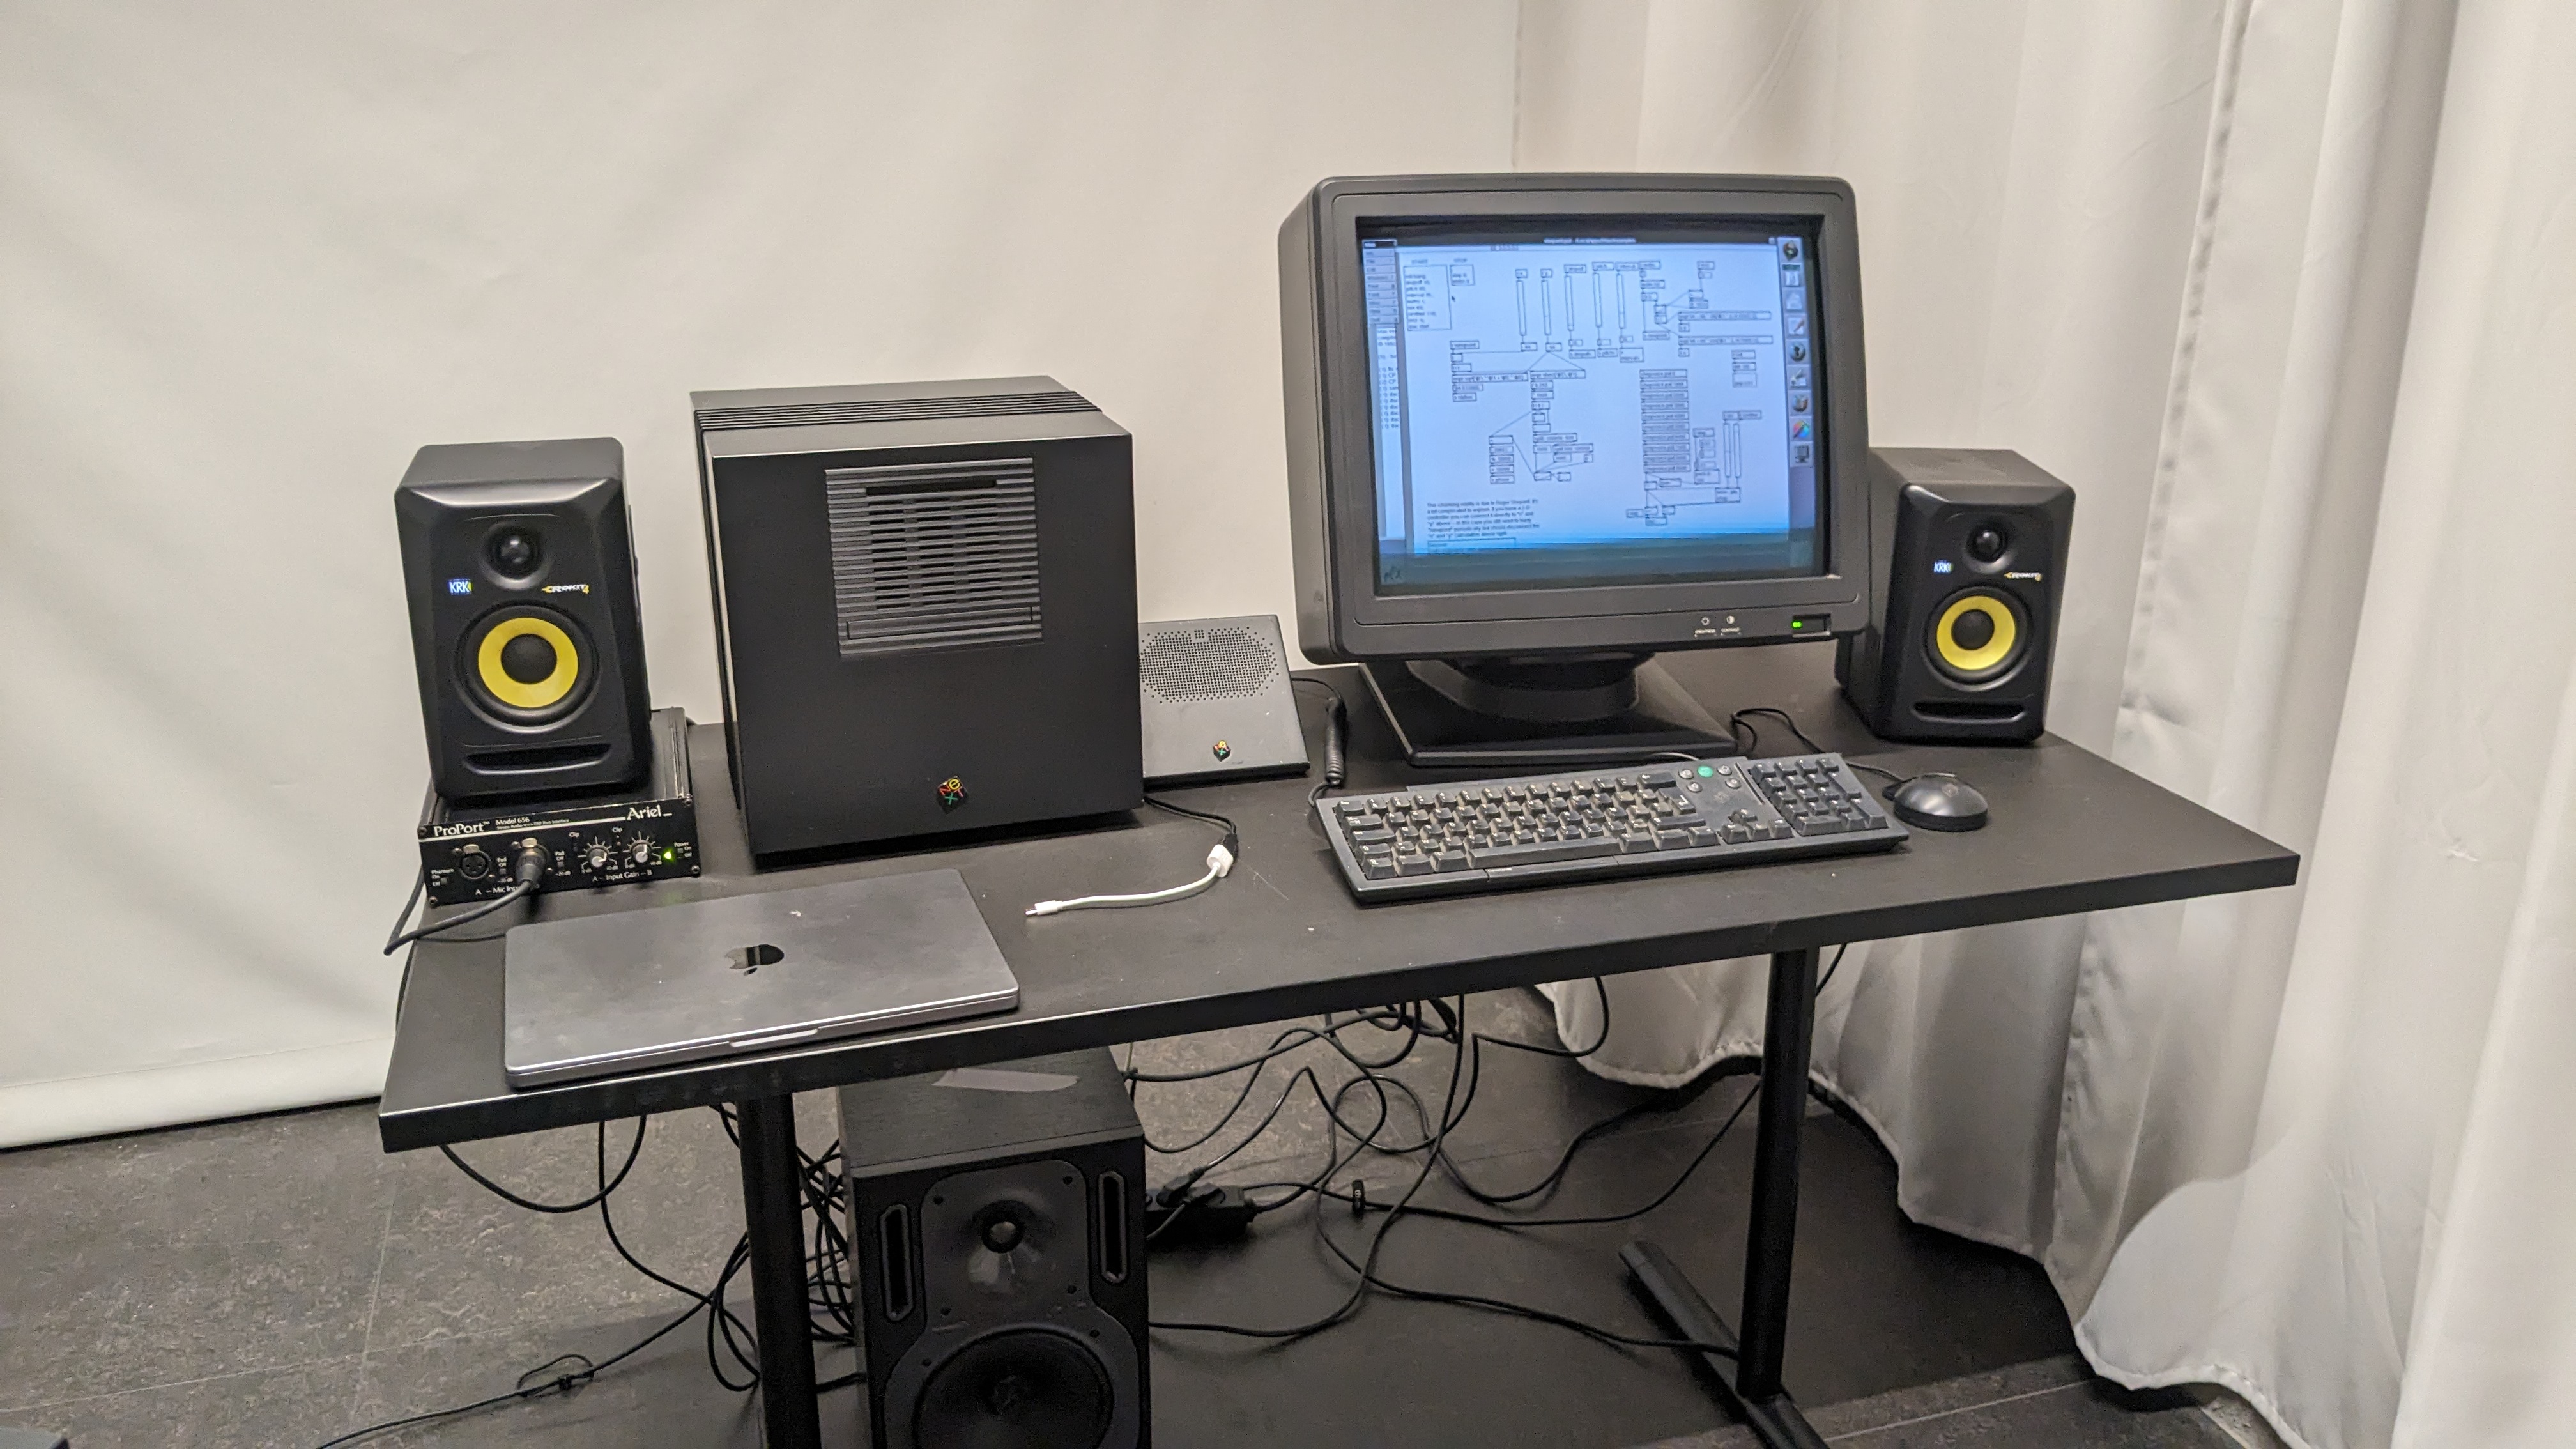
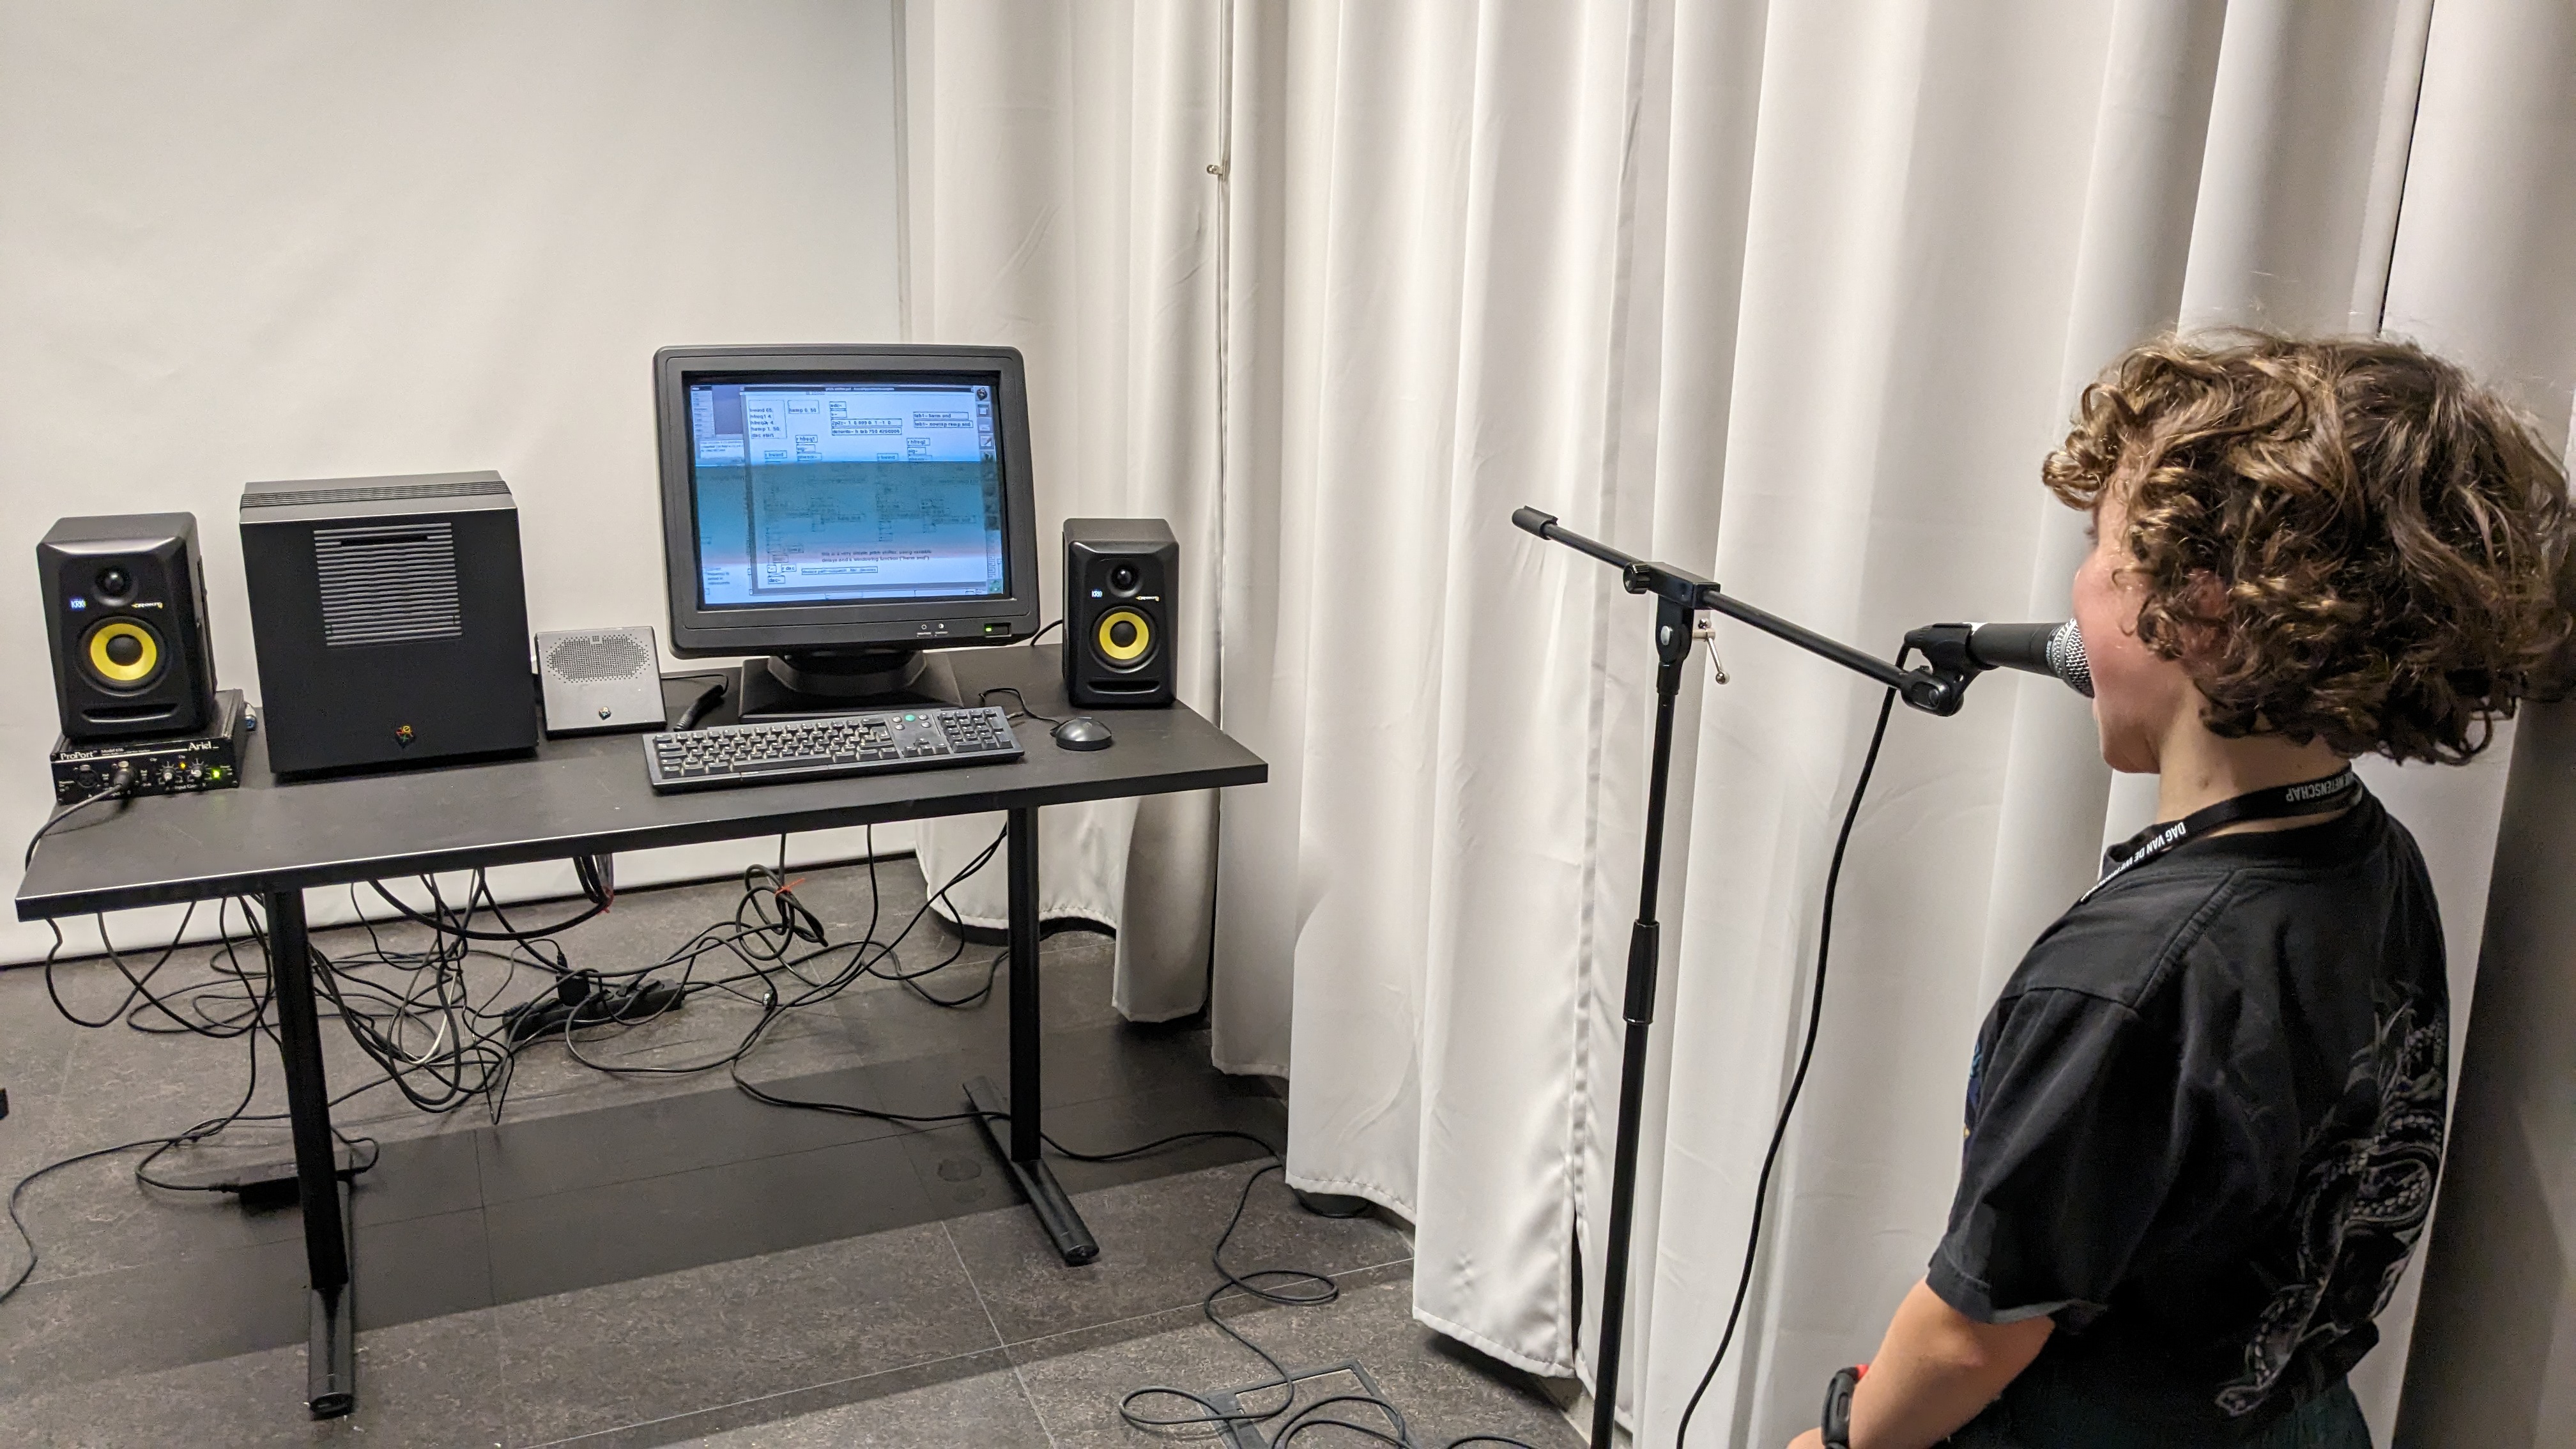
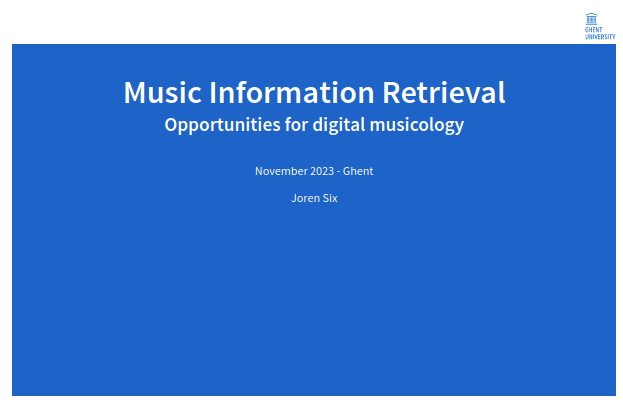
 </img>
Fig: *Door projection as imagined by DALL.E*.
</img>
Fig: *Door projection as imagined by DALL.E*.


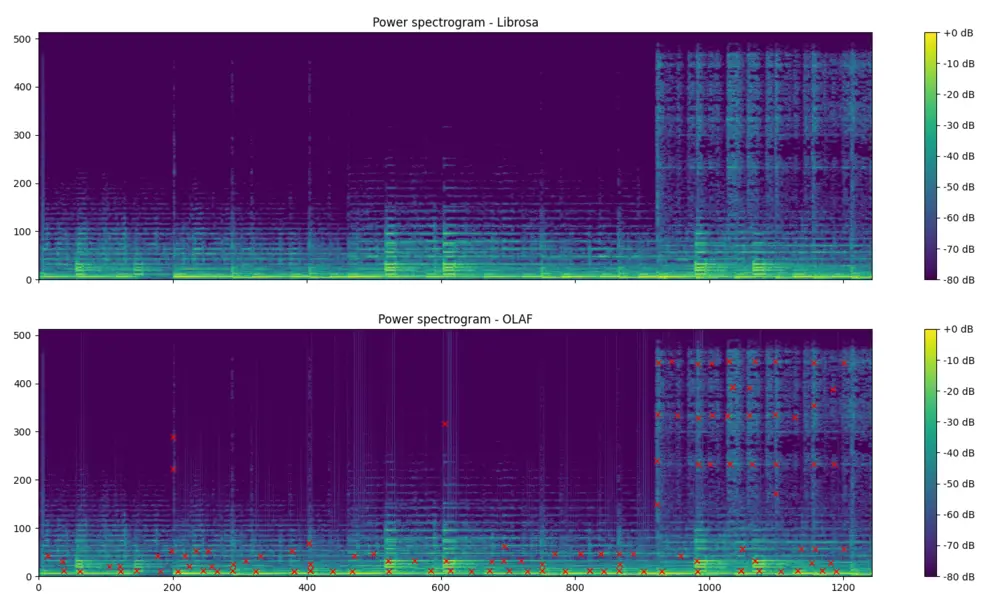 \
\
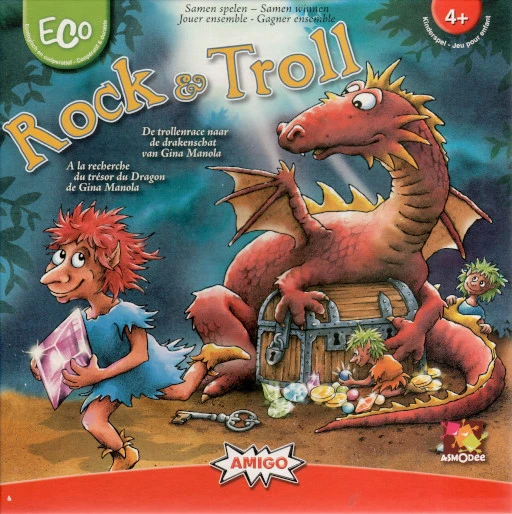


 Fig: Some AI imagining audio search.


 \
Fig: The results of profiling Olaf in XCode's time profiler. Almost all time is spend in a single function which is the prime target for optimization.
\
Fig: The results of profiling Olaf in XCode's time profiler. Almost all time is spend in a single function which is the prime target for optimization.


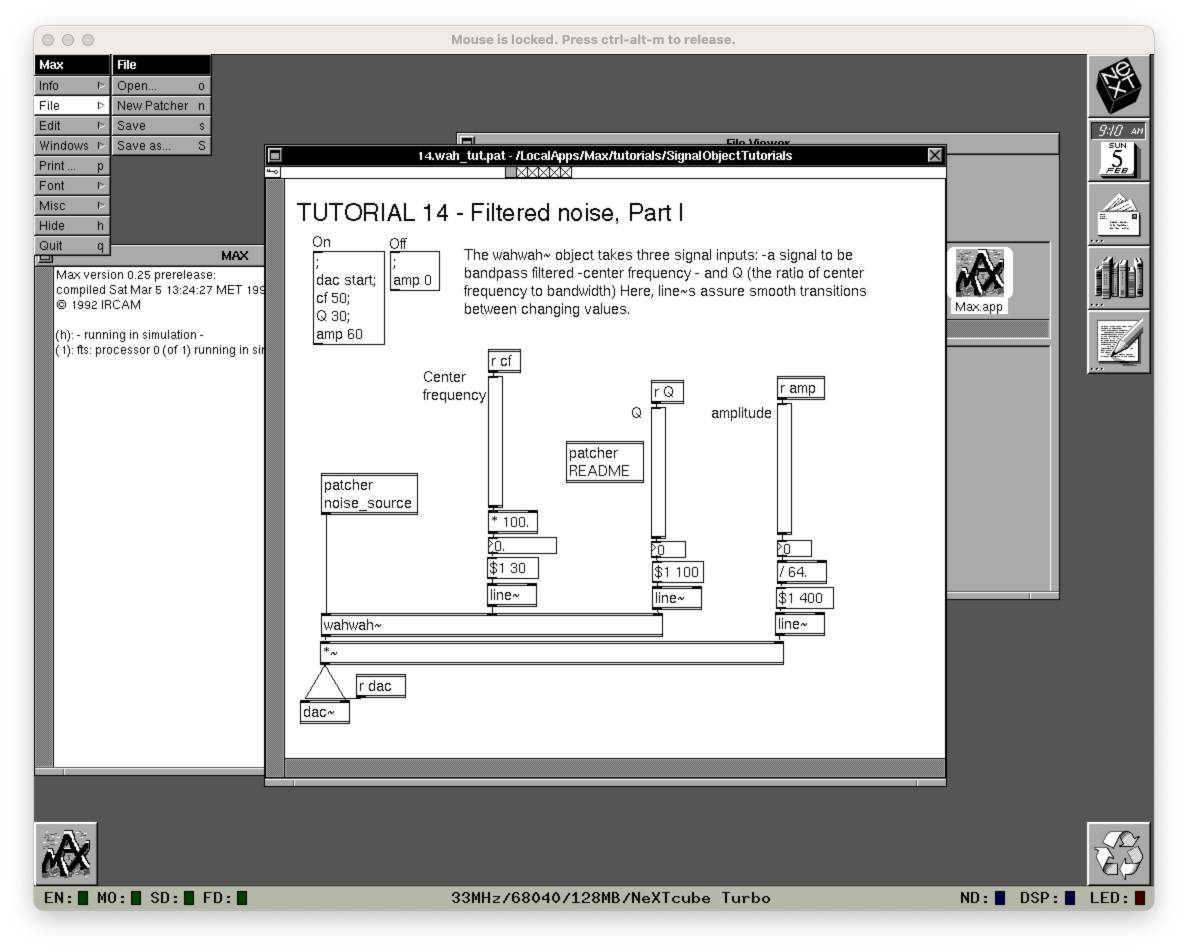 \
Fig: MAX 0.25 running in the Previous emulator on a modern MacOS system.
\
Fig: MAX 0.25 running in the Previous emulator on a modern MacOS system.


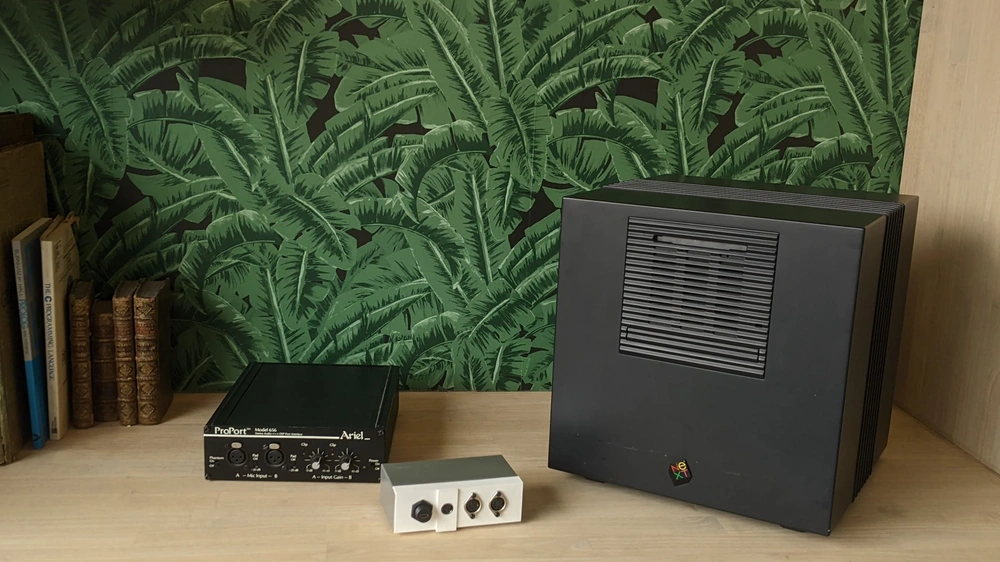


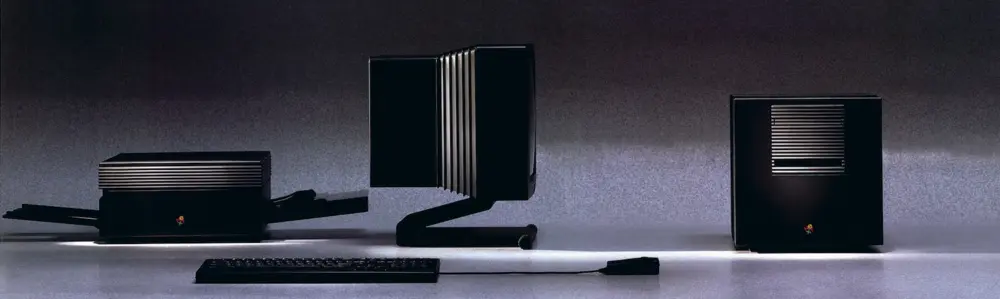

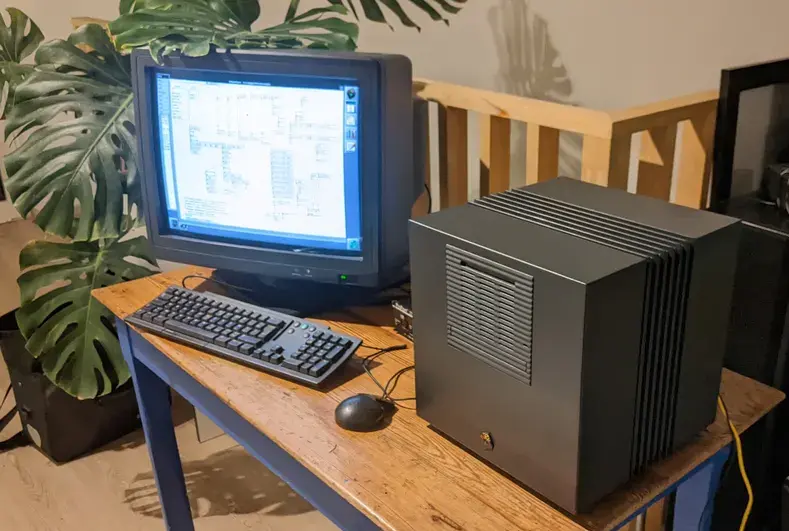


 \
\


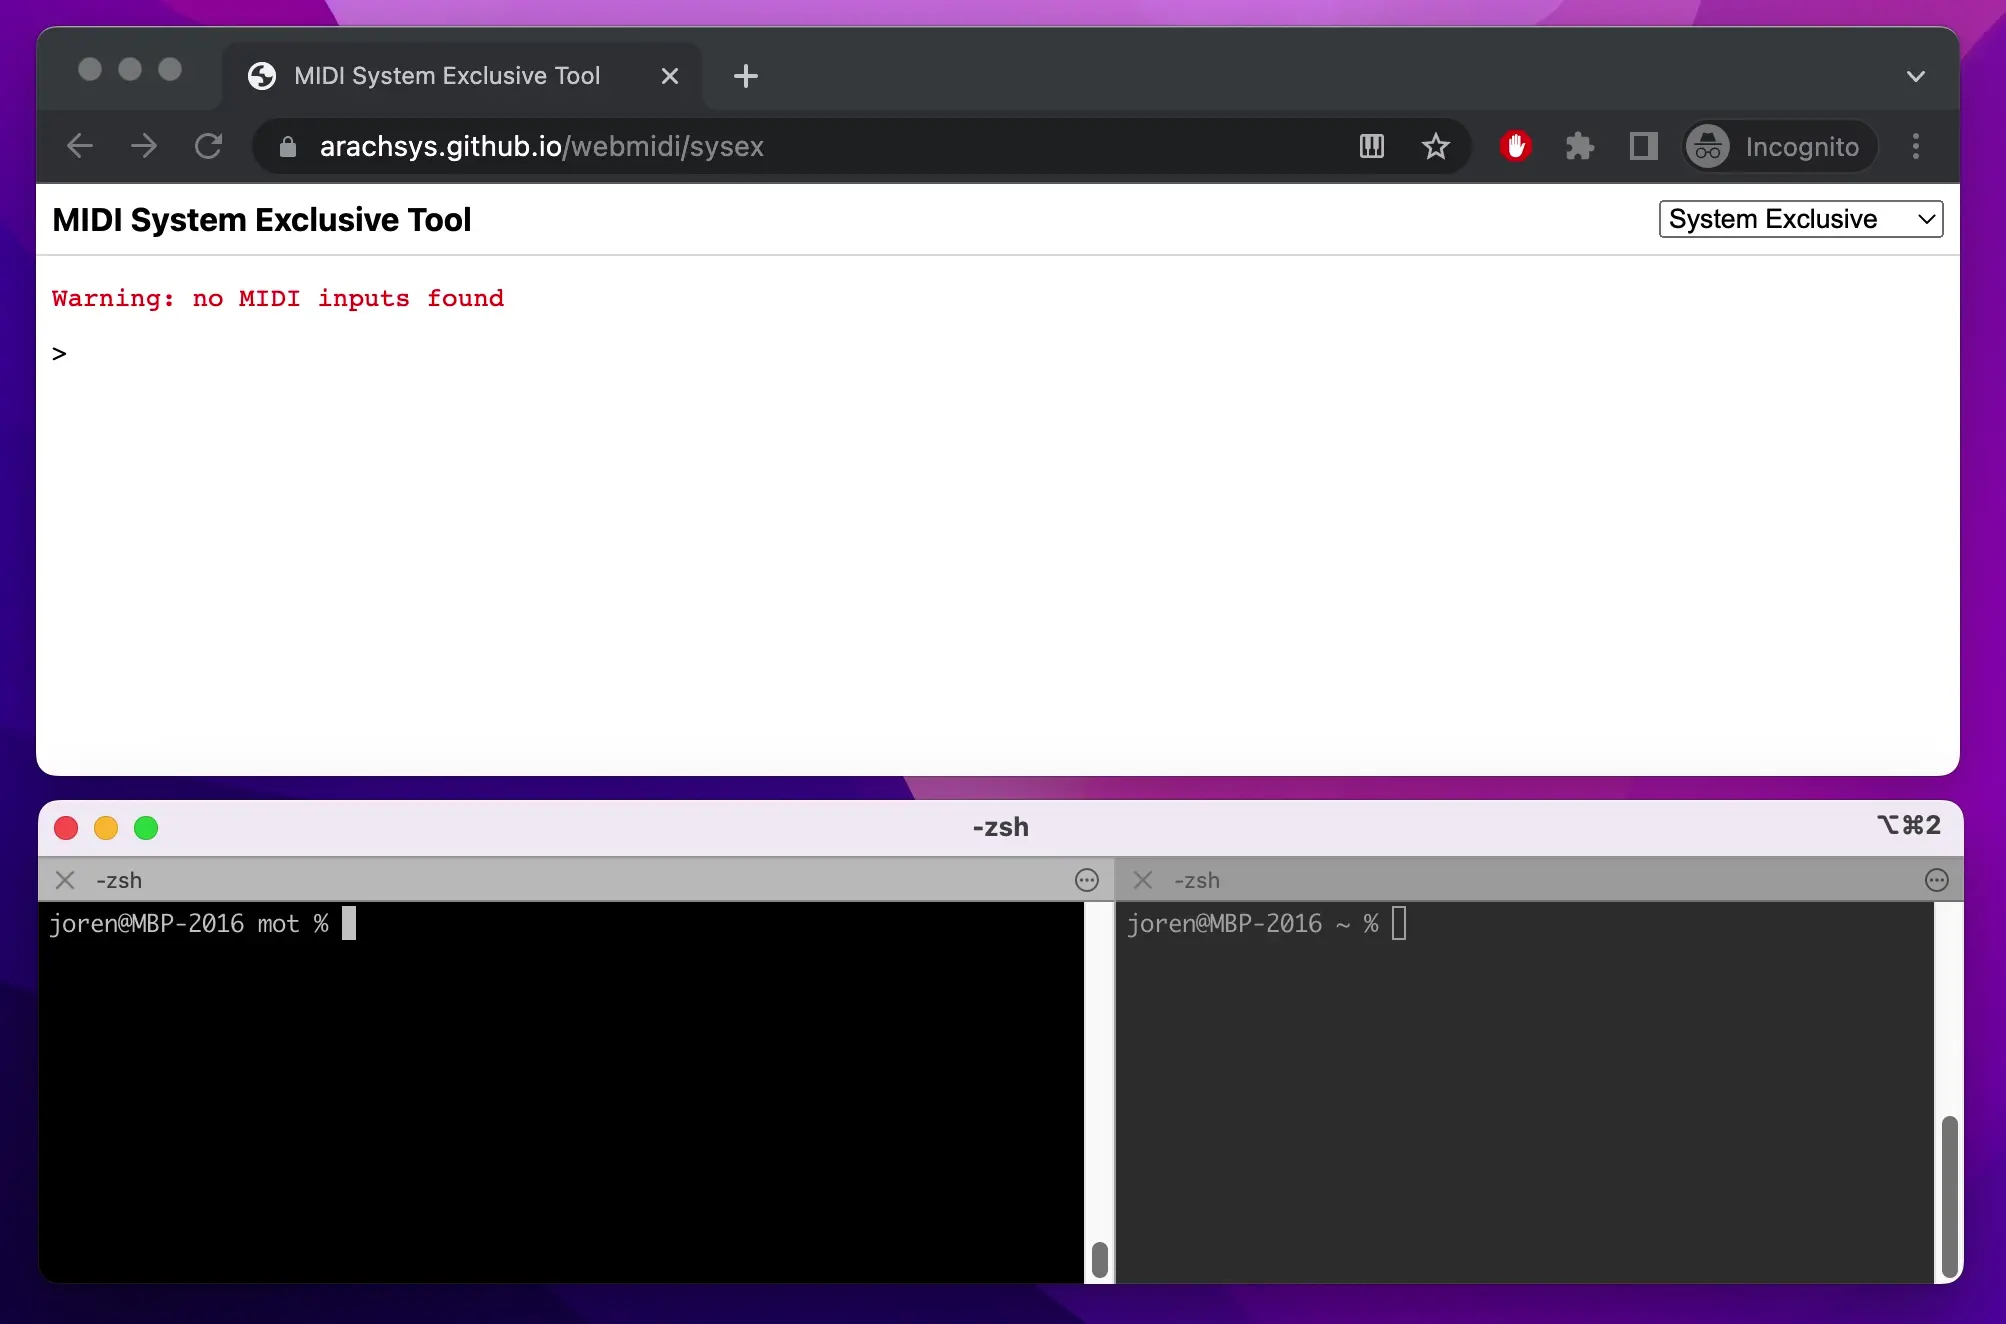
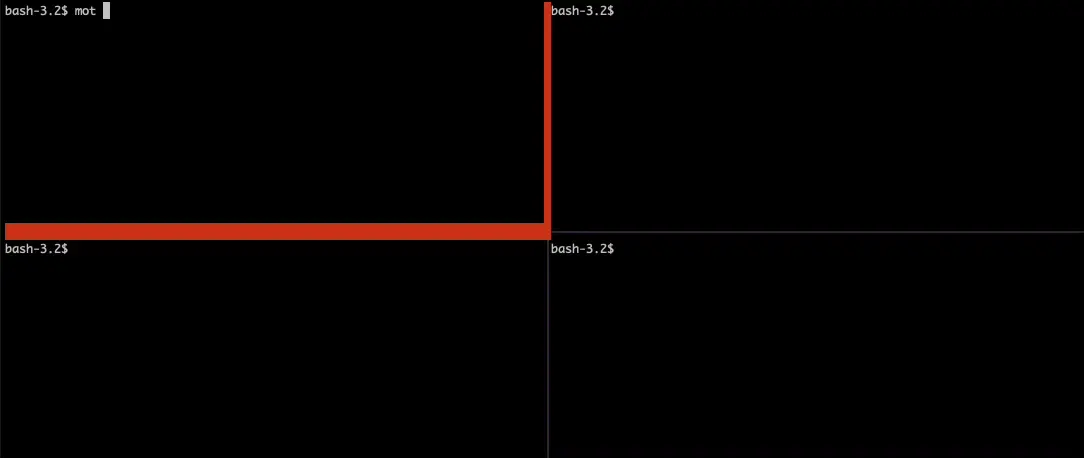


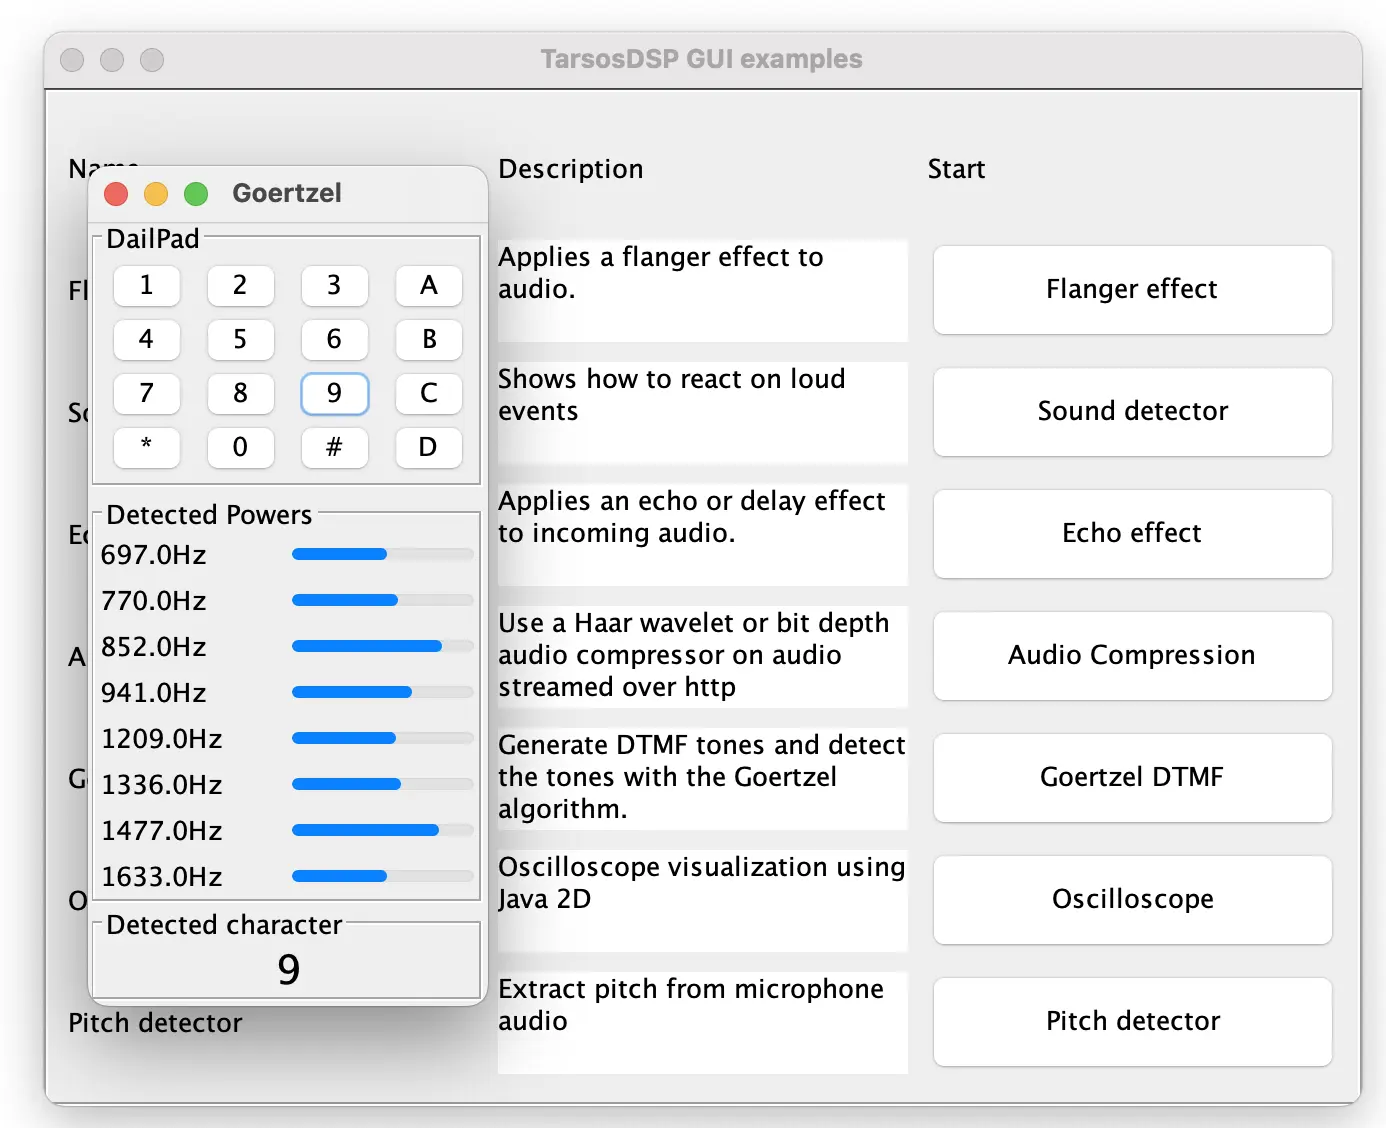


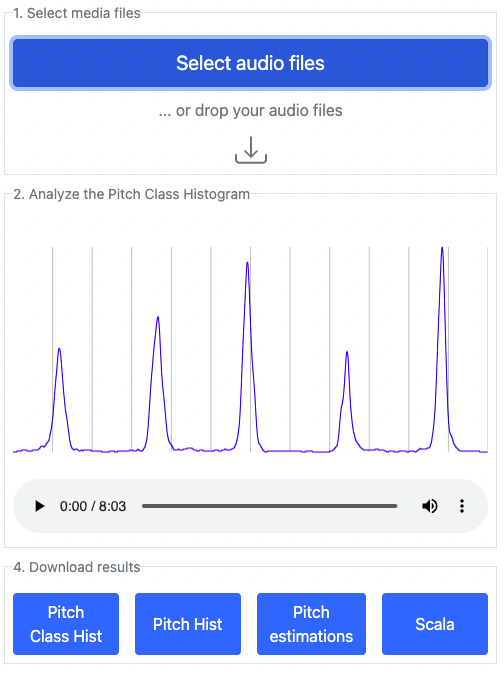
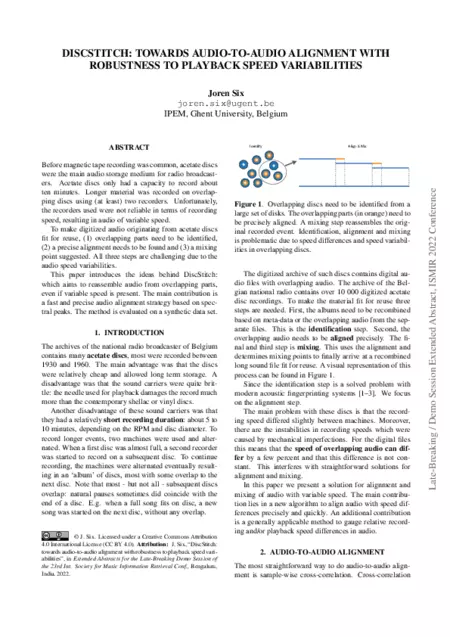
 Fig: DALL.E 2 imagining a fight between papers and software.


 Fig: stable diffusion imagining a networked music performance

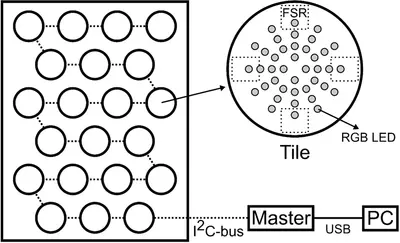


 \
Fig. General content based audio search scheme.
\
Fig. General content based audio search scheme.
 \
Fig. The top one true positive rate for 20s query fragments. The audio playback is speed modified from 84 to 116% with respect to the indexed reference audio. The original query length is 20s, if it is slowed down by 10% it takes, evidently, 22s. Note the improvement of the 2021 version of Panako (blue) vs the 2014 version (light-gray). As a baseline the standard algorithm (wang 2003) is included as well. For the 2021 Panako algorithm, audio recognition performance suffers (below 80) when playback speed is changed more than 10.
\
Fig. The top one true positive rate for 20s query fragments. The audio playback is speed modified from 84 to 116% with respect to the indexed reference audio. The original query length is 20s, if it is slowed down by 10% it takes, evidently, 22s. Note the improvement of the 2021 version of Panako (blue) vs the 2014 version (light-gray). As a baseline the standard algorithm (wang 2003) is included as well. For the 2021 Panako algorithm, audio recognition performance suffers (below 80) when playback speed is changed more than 10.


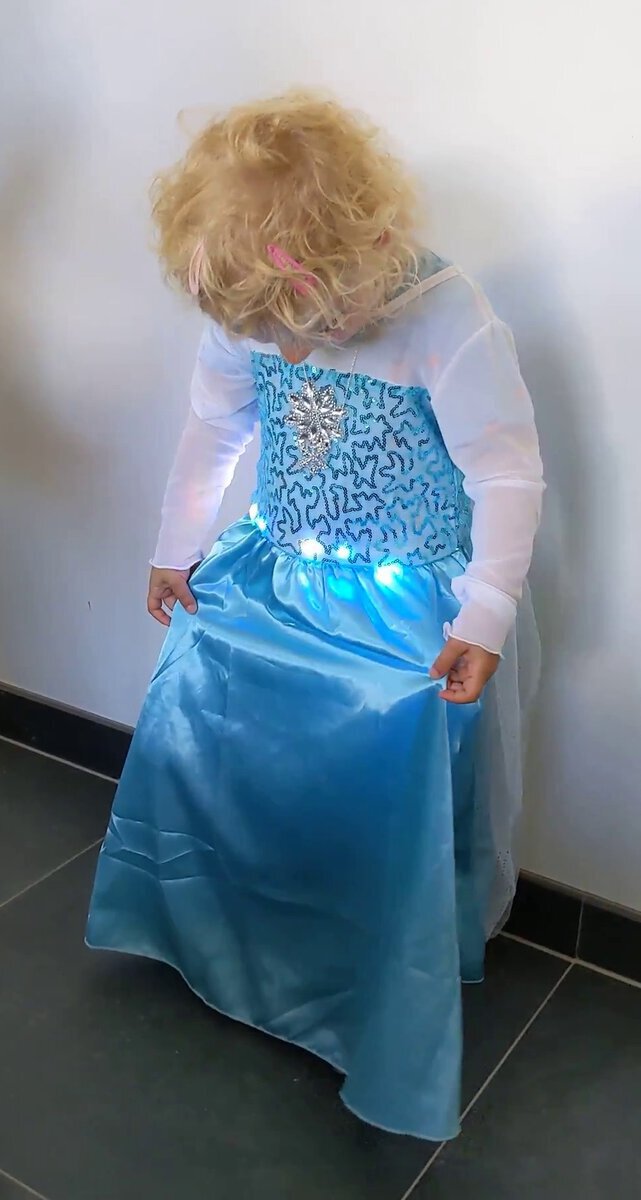 A good year ago I was asked to develop audio recognition technology for an e-costume. The idea was that lights in the costume would follow a sequence synchronised to a certain song. Only a single song should trigger the lights, all other music should be ignored. Recognition of music and synchronisation is typically done using audio fingerprinting techniques. The challenge was that the recognition needed to run on a cheap, battery-powered microcontroller with limited CPU and memory. I delivered a prototype but eventually a cheap, battle-tested, off-the-shelf, IP-cleared, alternative was found.
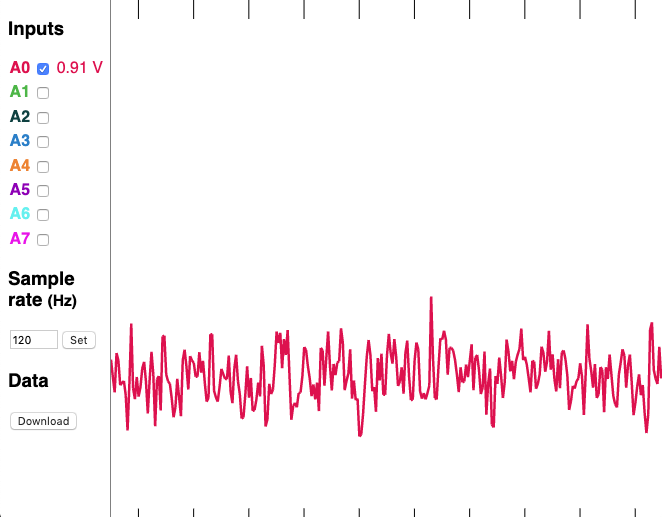
 On the 9th of September 2019 the second
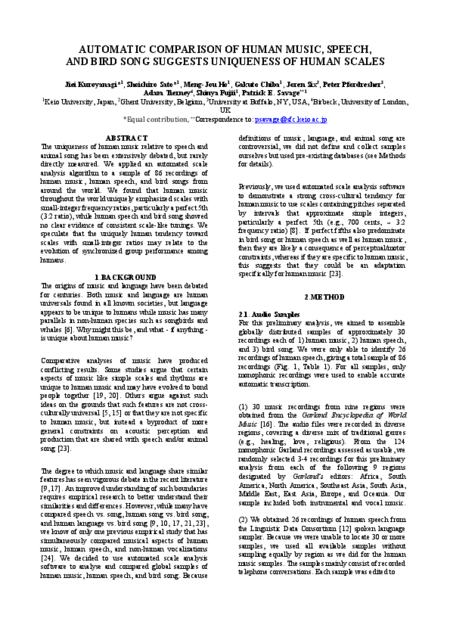


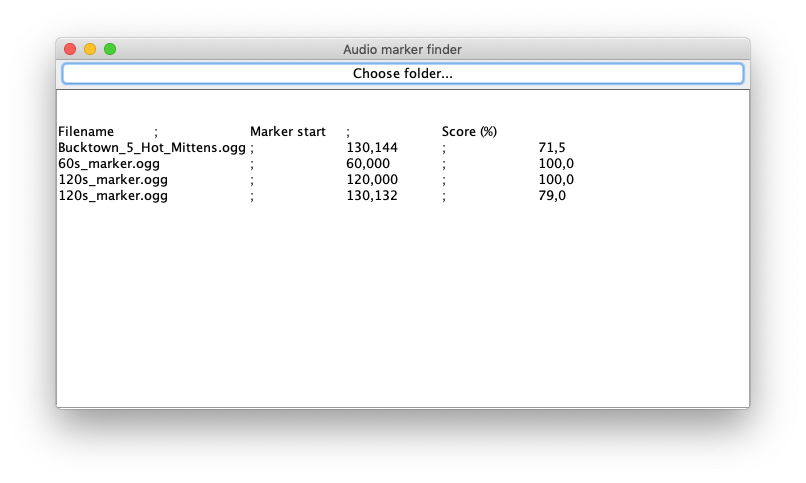
 With the goal in mind to reduce common runner injuries we first need to measure some running style characteristics. Therefore, we have developed a sensor to measure how hard a runners foot repeatedly hits the ground. This sensor has been compared with laboratory equipment which proofs that its measurements are valid and can be repeated. The main advantages of our sensor is that it can be used ‘in the wild’, outside the lab on the runners regular tours. We want to use this sensor to provide real-time biofeedback in order to change running style and ultimately reduce injury risk.
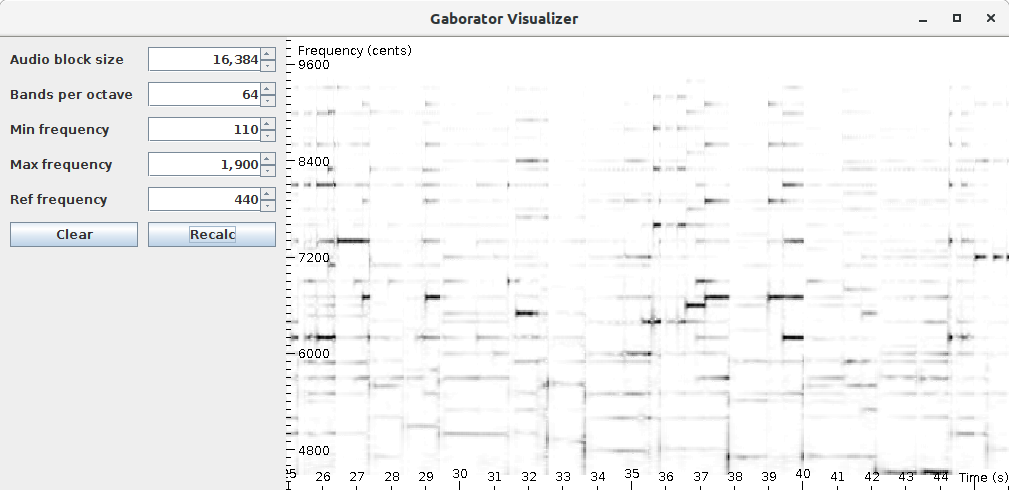
 As an extension of the ISMIR conferences the International Society for Music Information Retrievel started a new journal: TISMIR. The first issue contains an article of mine:\

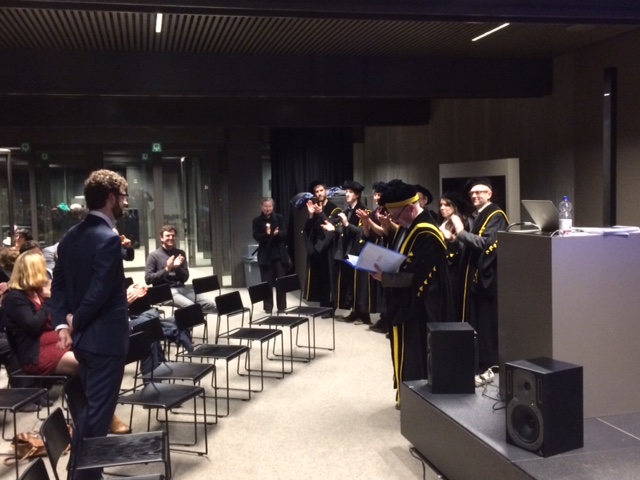

 I have contributed to the 4th International Digital Libraries for Musicology workshop (DLfM 2017) which was organized in Shanghai, China. It was a satellite event of the ISMIR 2017 conference. Unfortunately I did not mange to find funding to attend the workshop, I did however contribute as co-author to two proceeding papers. Both were presented by Reinier de Valk (thanks again).


 From 27 to 31 March 2017 I have attended a workshop on
 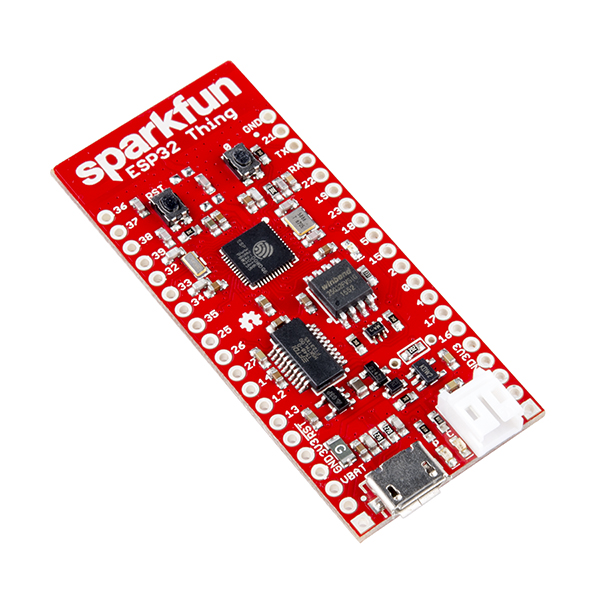 The xOSC board by


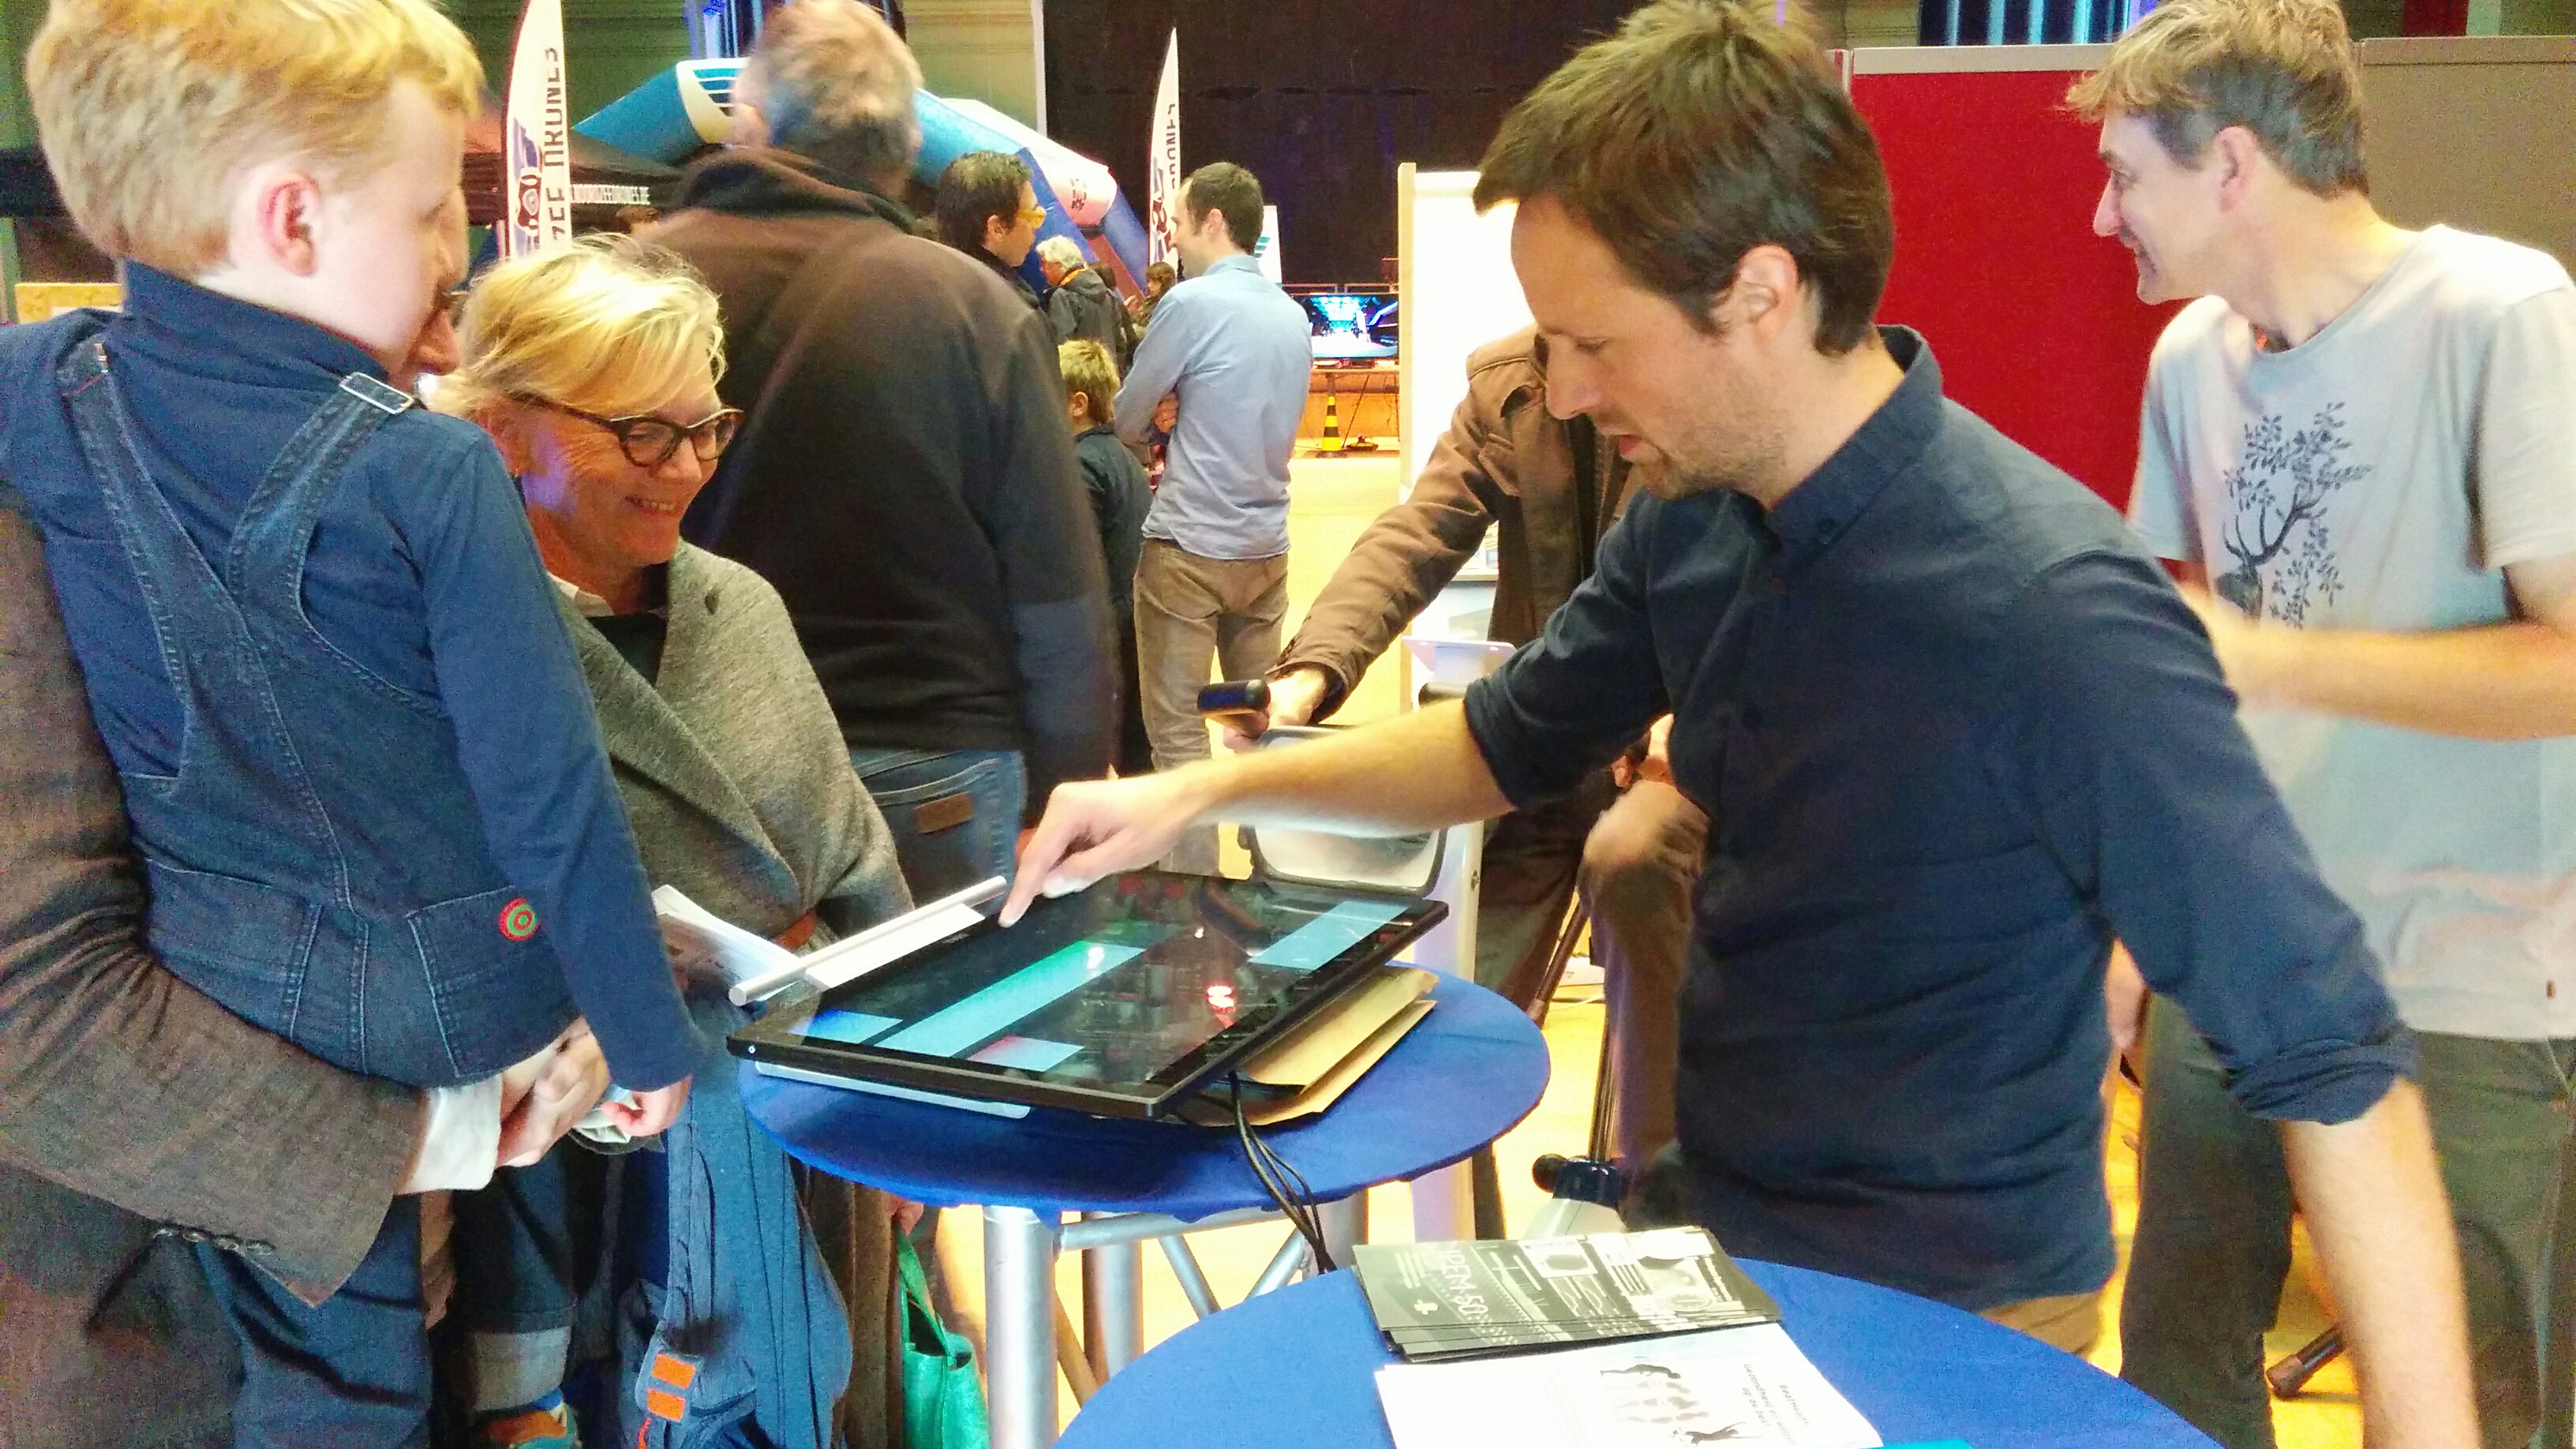
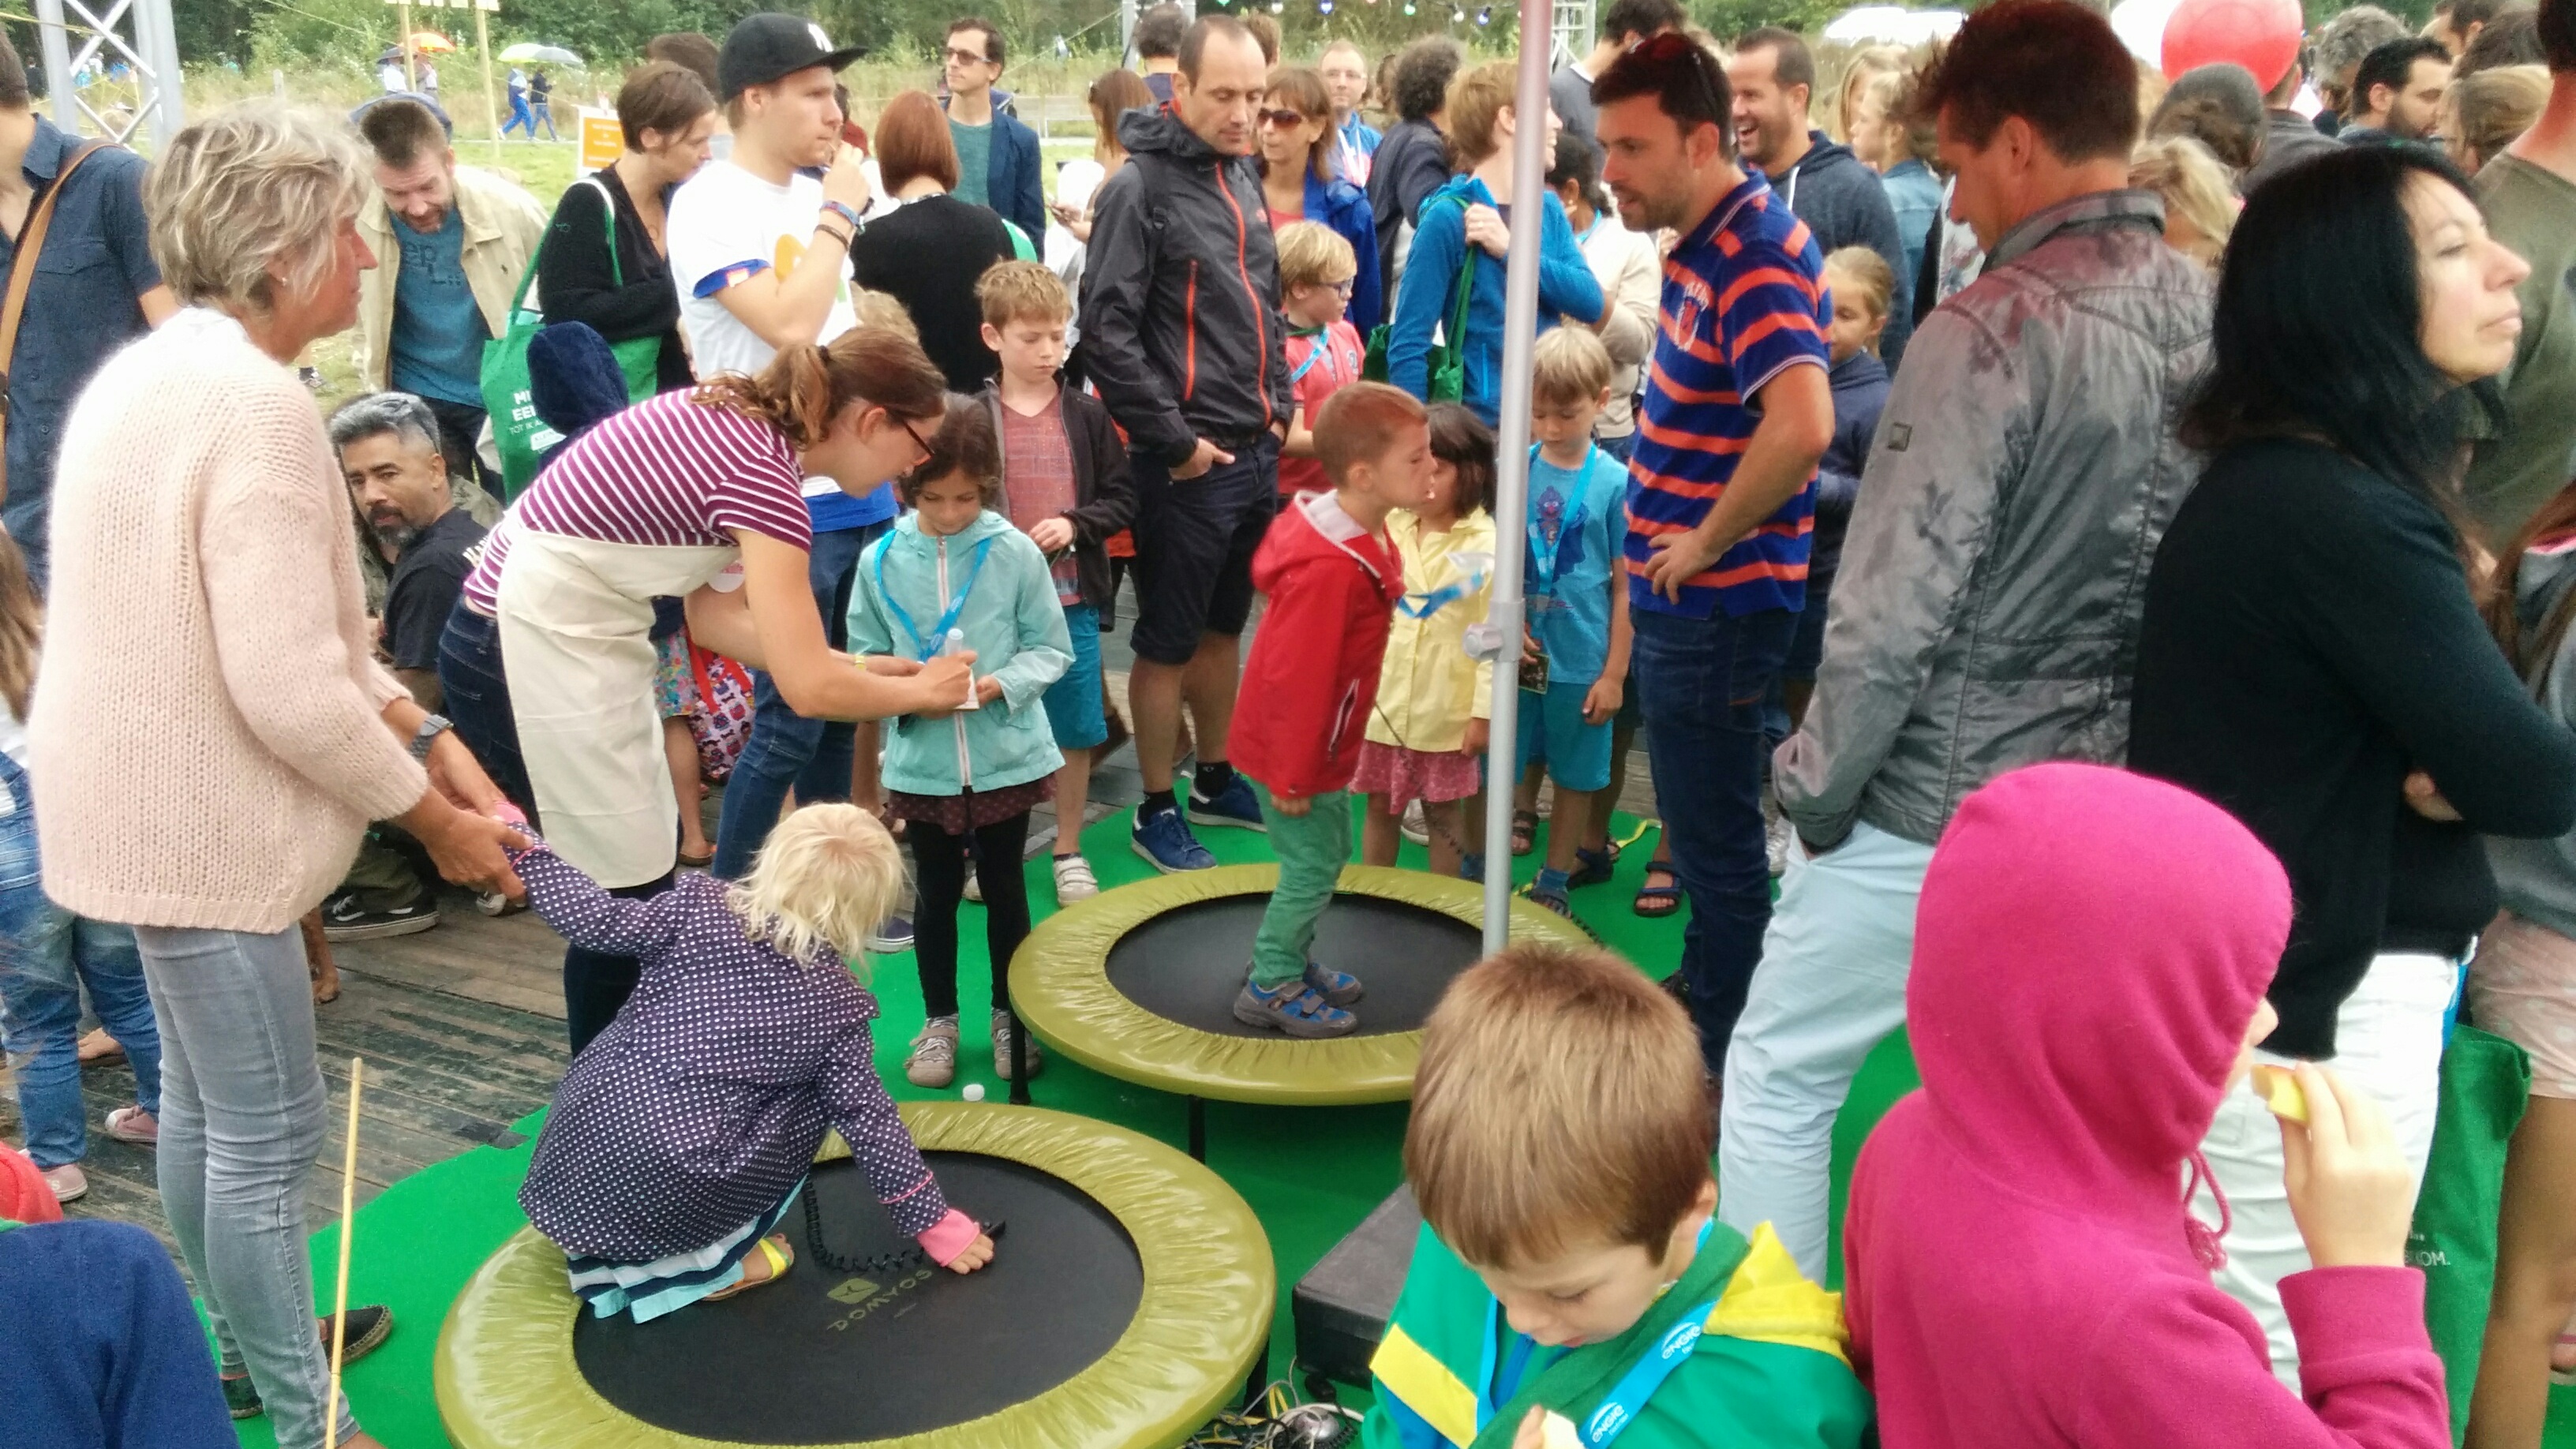

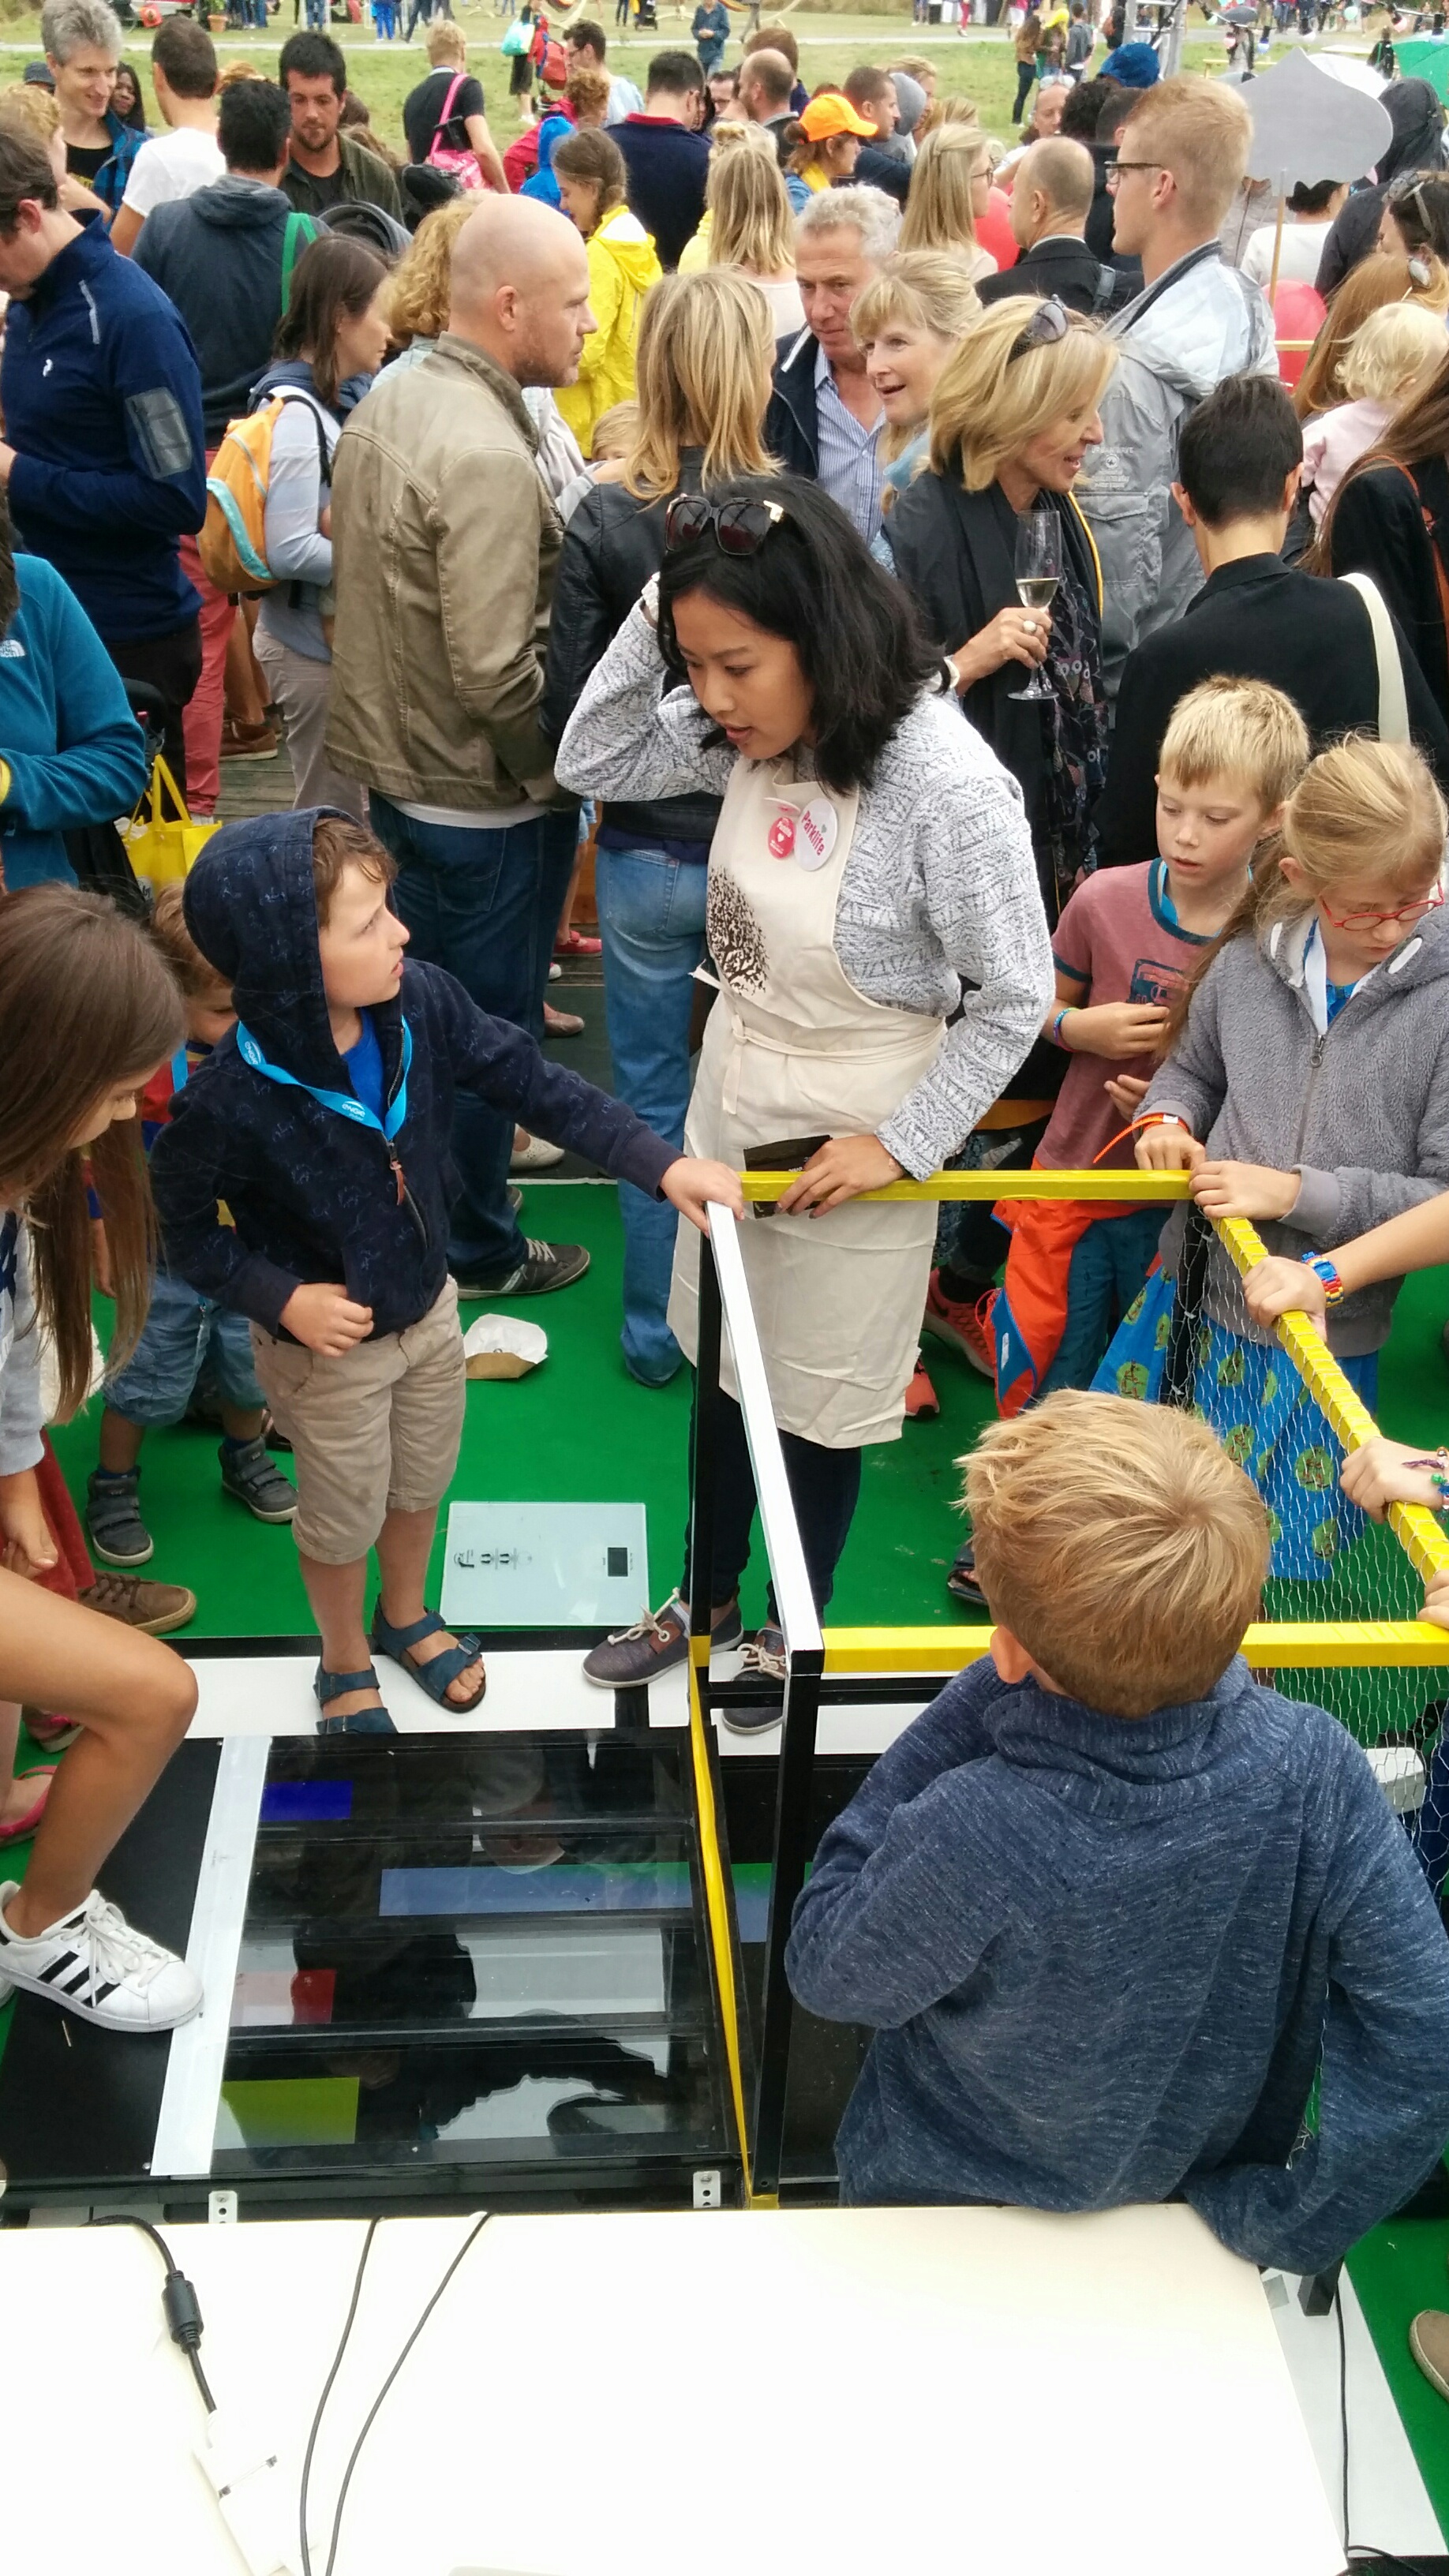
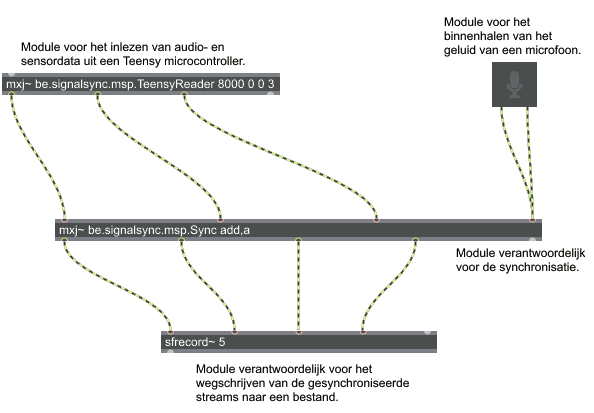
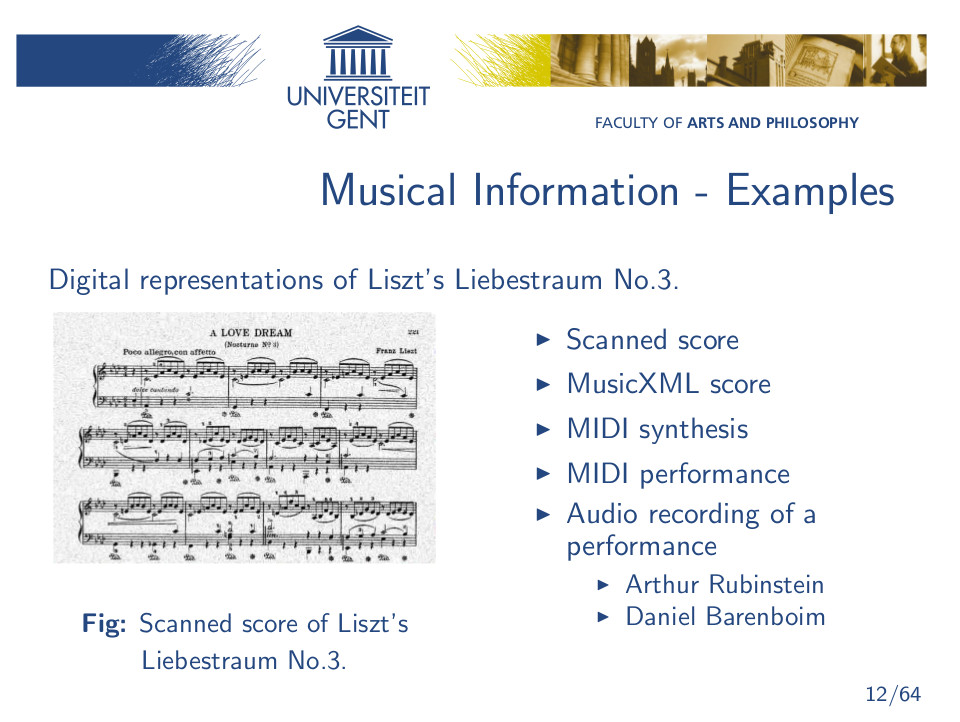


 The
The 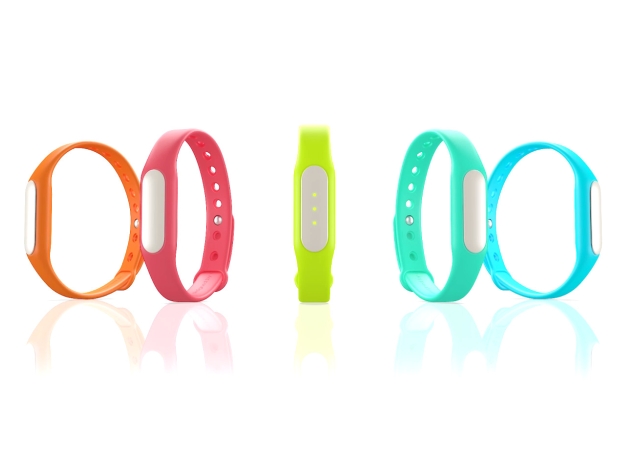
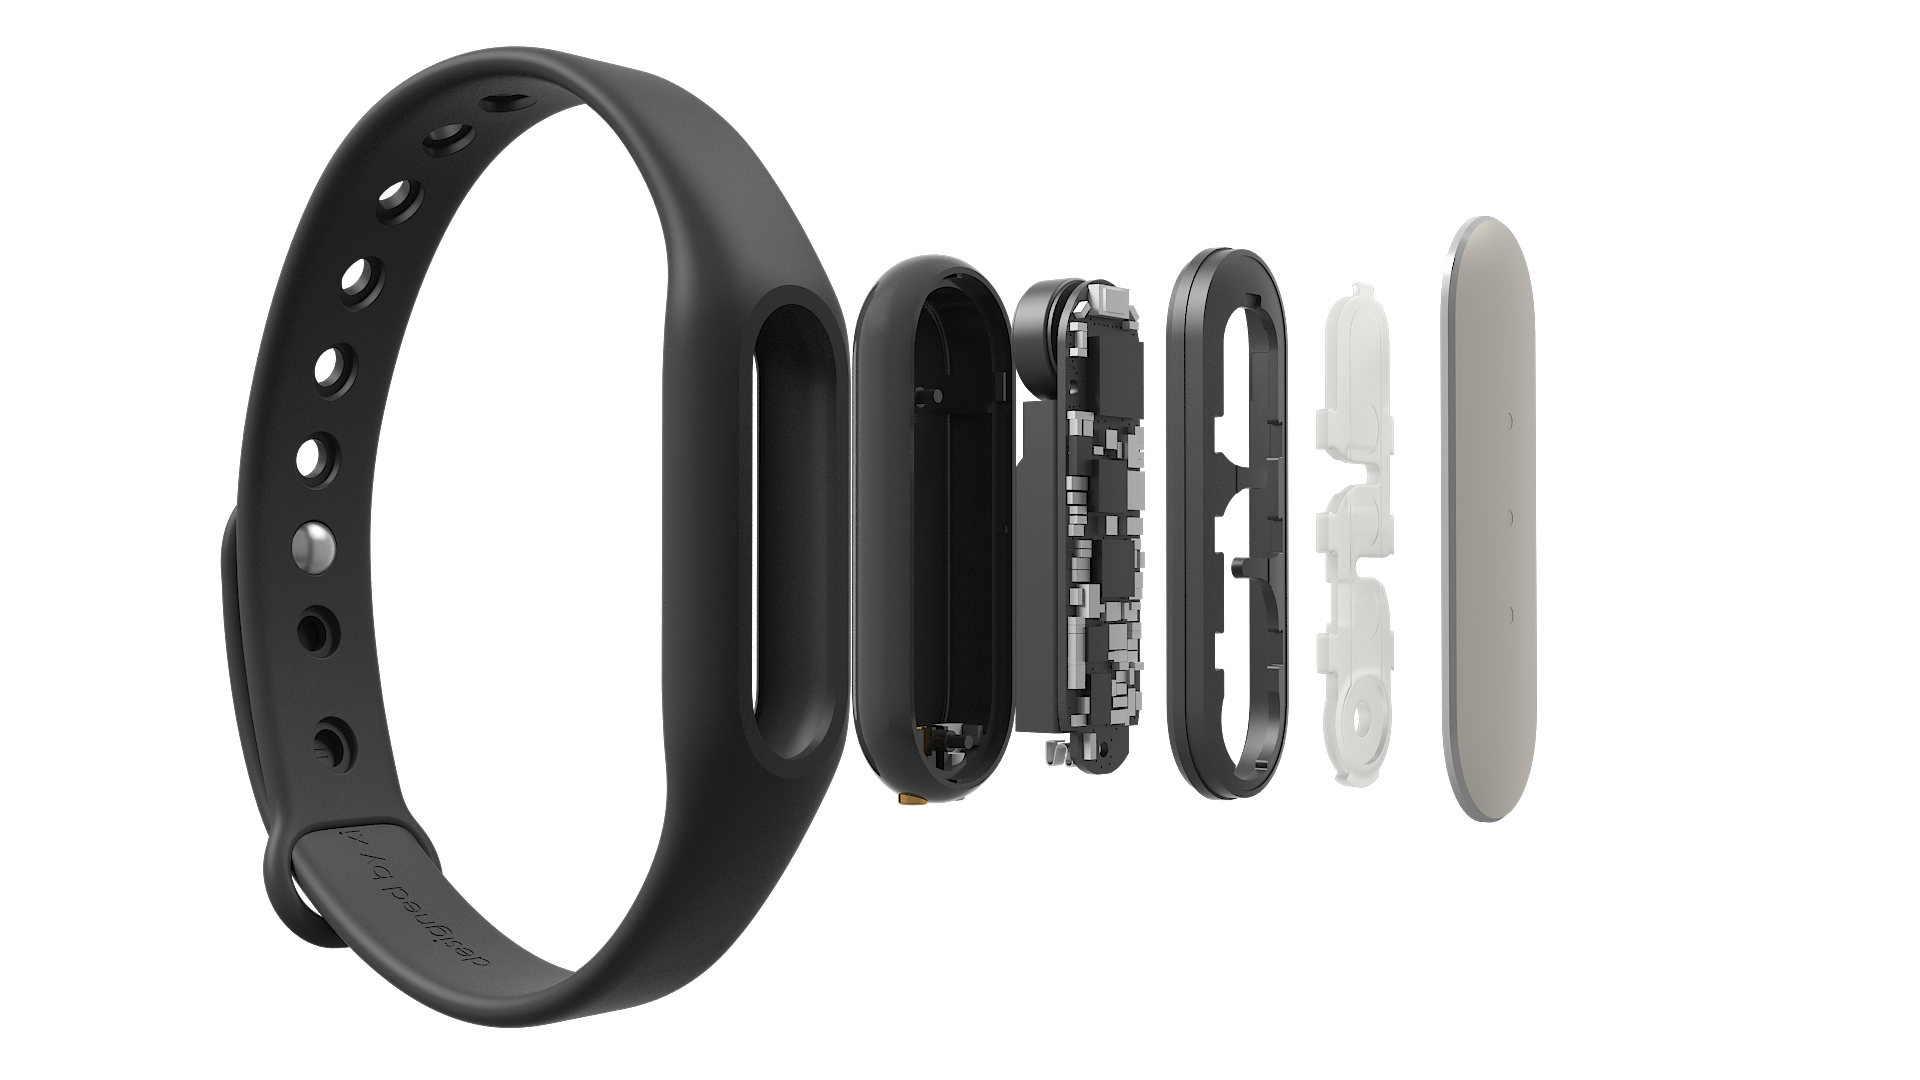

 can be synchronized with streams one and two. It allows a workflow where streams are started and stopped (red) or start before the reference stream (green).")


 while others are not (red, x). Matching fingerprints have the same offset, indicated by the dotted lines.")
 and balanceboard data (bottom, purple).")
, accelerometer-data (green) and audio (black).")


 TarsosDSP, the is a real-time audio processing library written in Java, is featured in
 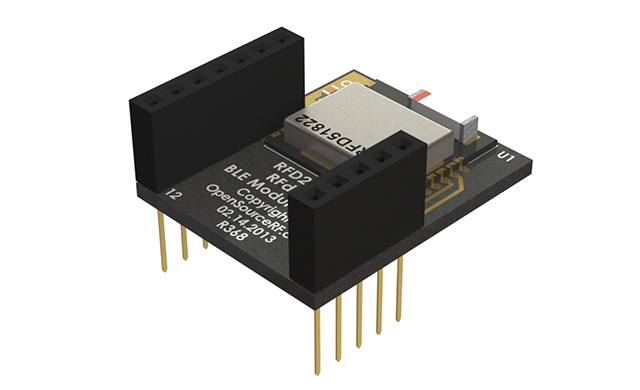 This post describes how to get notifications from a Bluetooth LE (Low Energy) or Bluetooth v4.0 device on a Linux machine. Since it took me a while to get it going it is perhaps of interest to others.

 This post explains how to receive
  This post explains how to measure audio output latency on Android devices. To measure audio latency USB-OTG(On The Go) and an Arduino is used. In the process it documents audio output latency on an LG Nexus 5 device running the most recent version of Android, which currently is Lollipop (5.0).


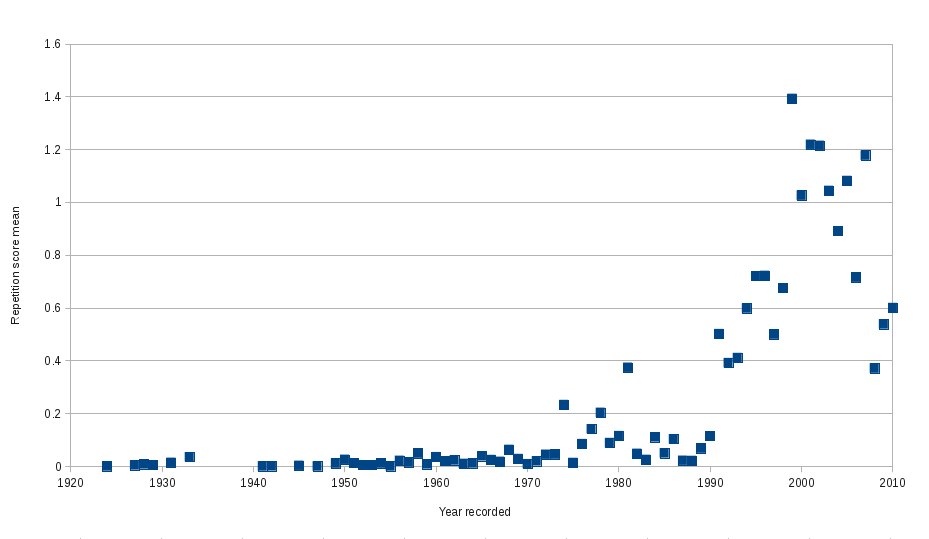 \
\


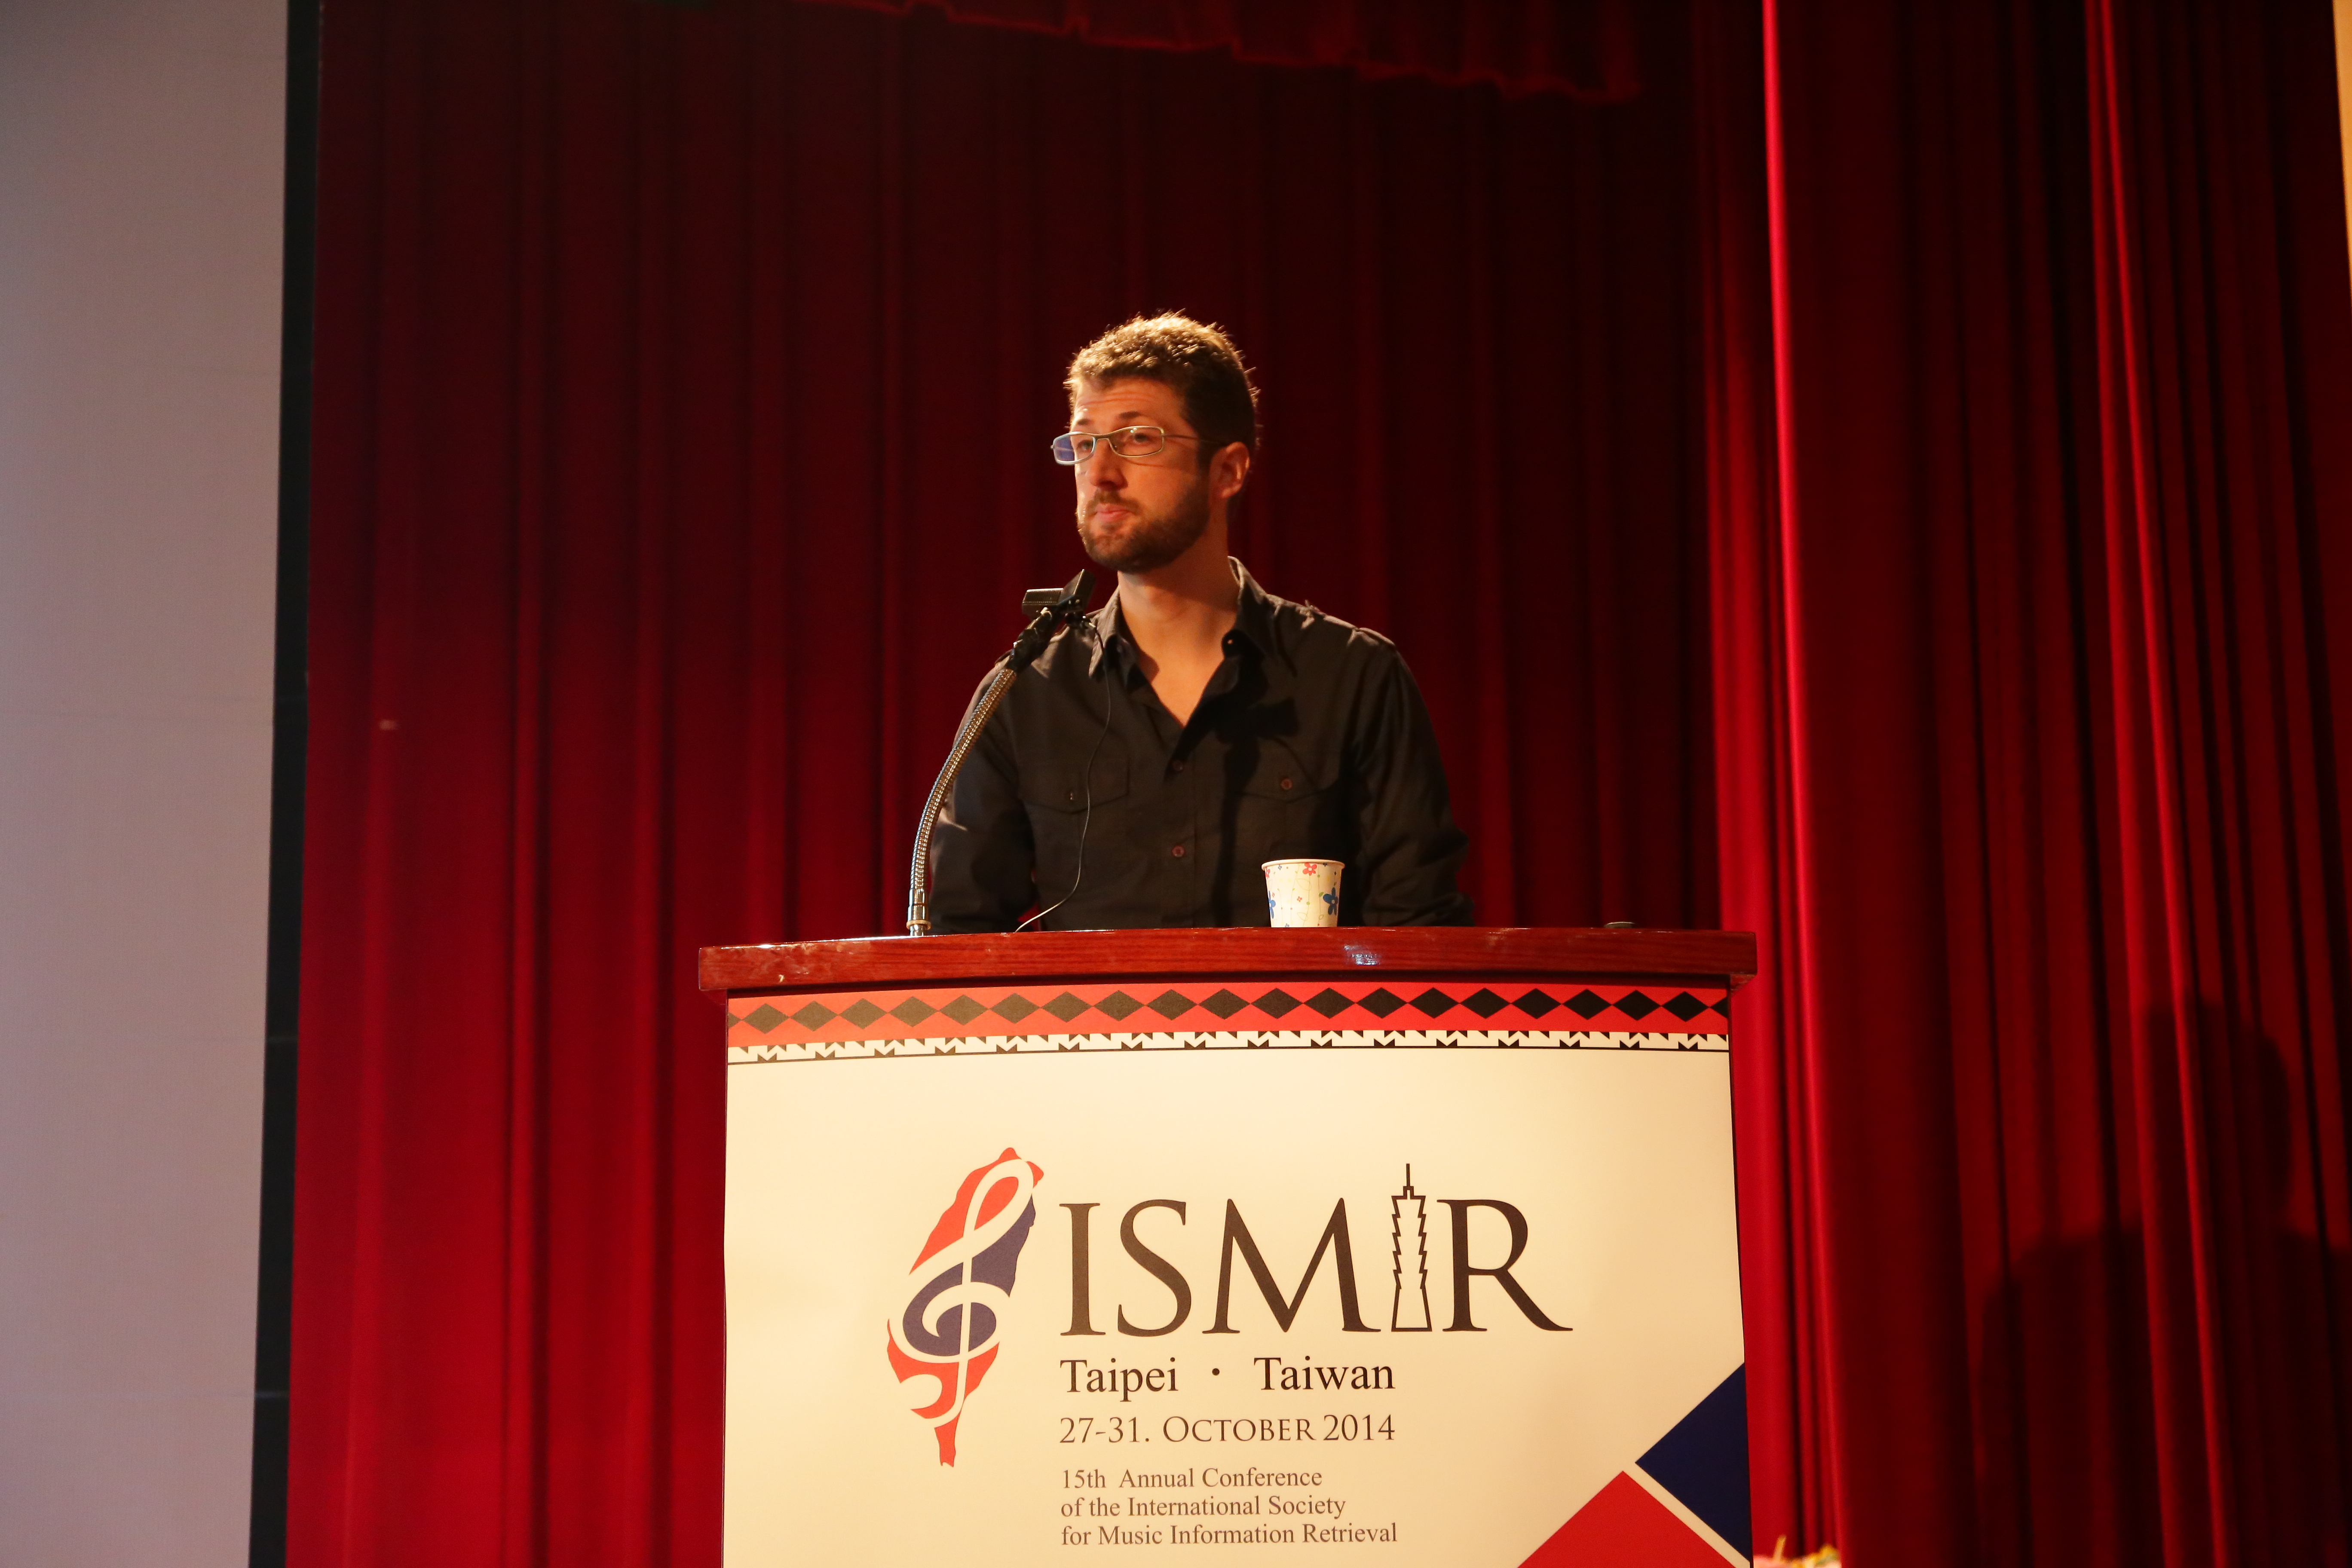


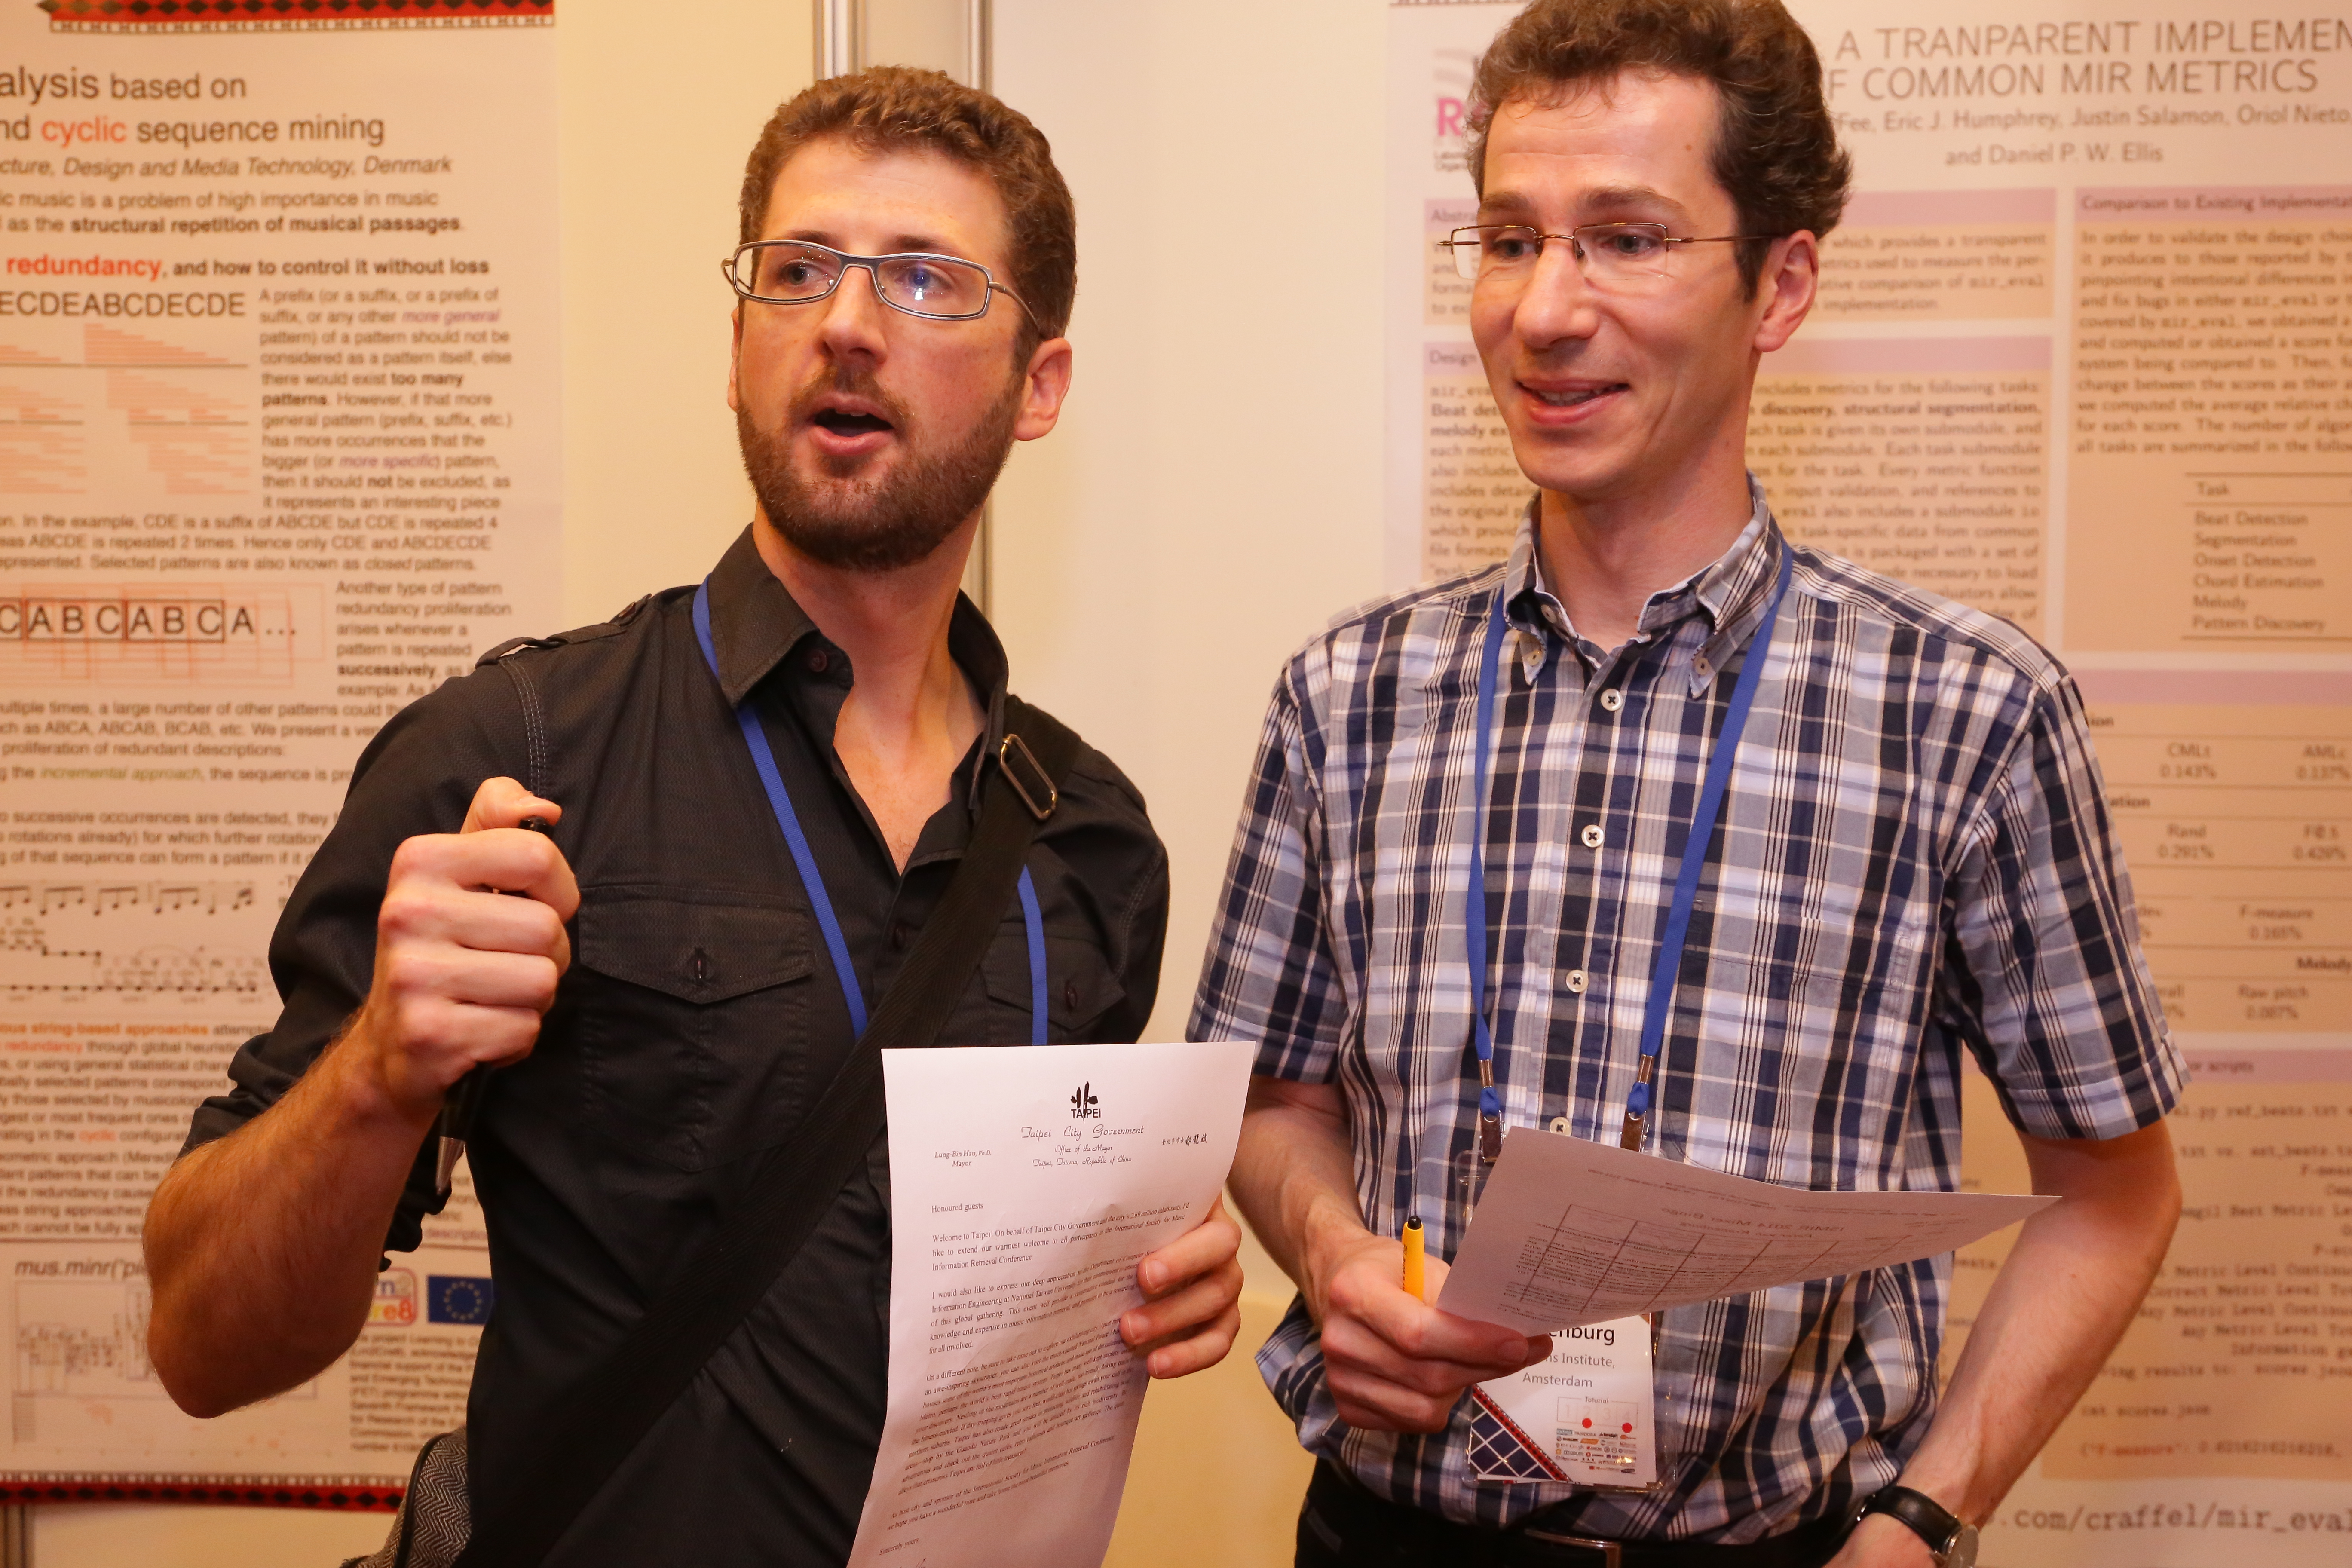
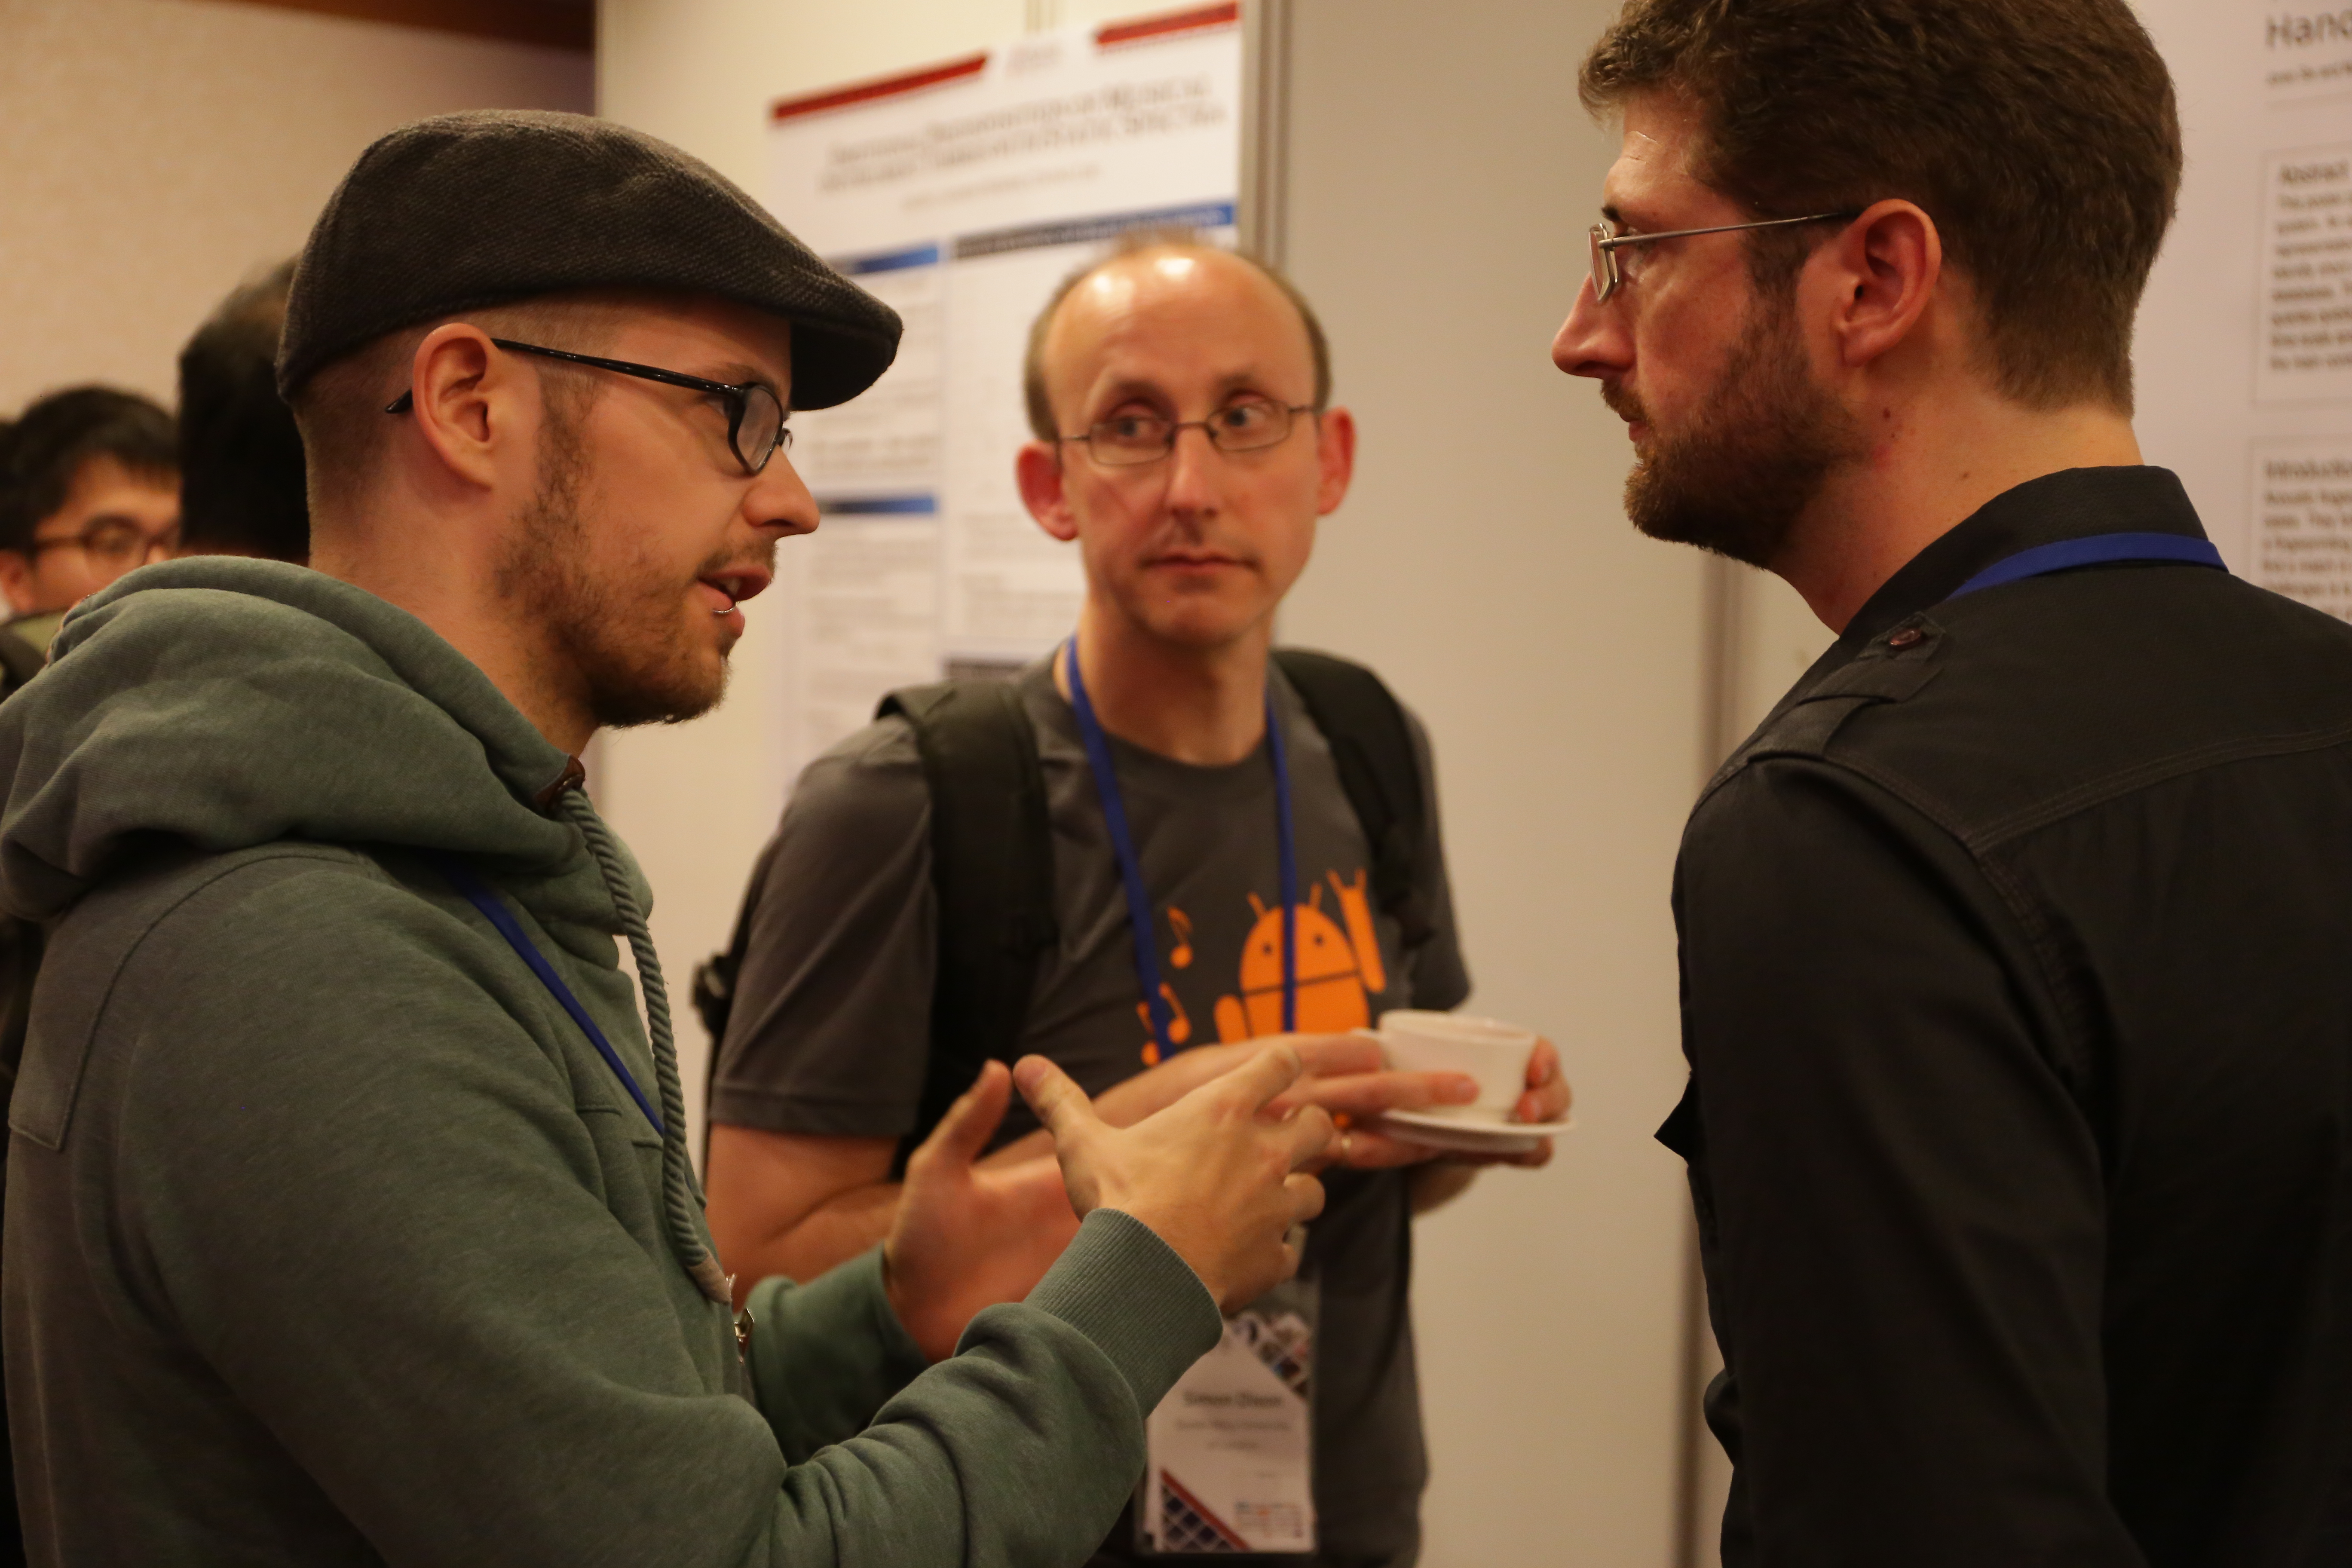
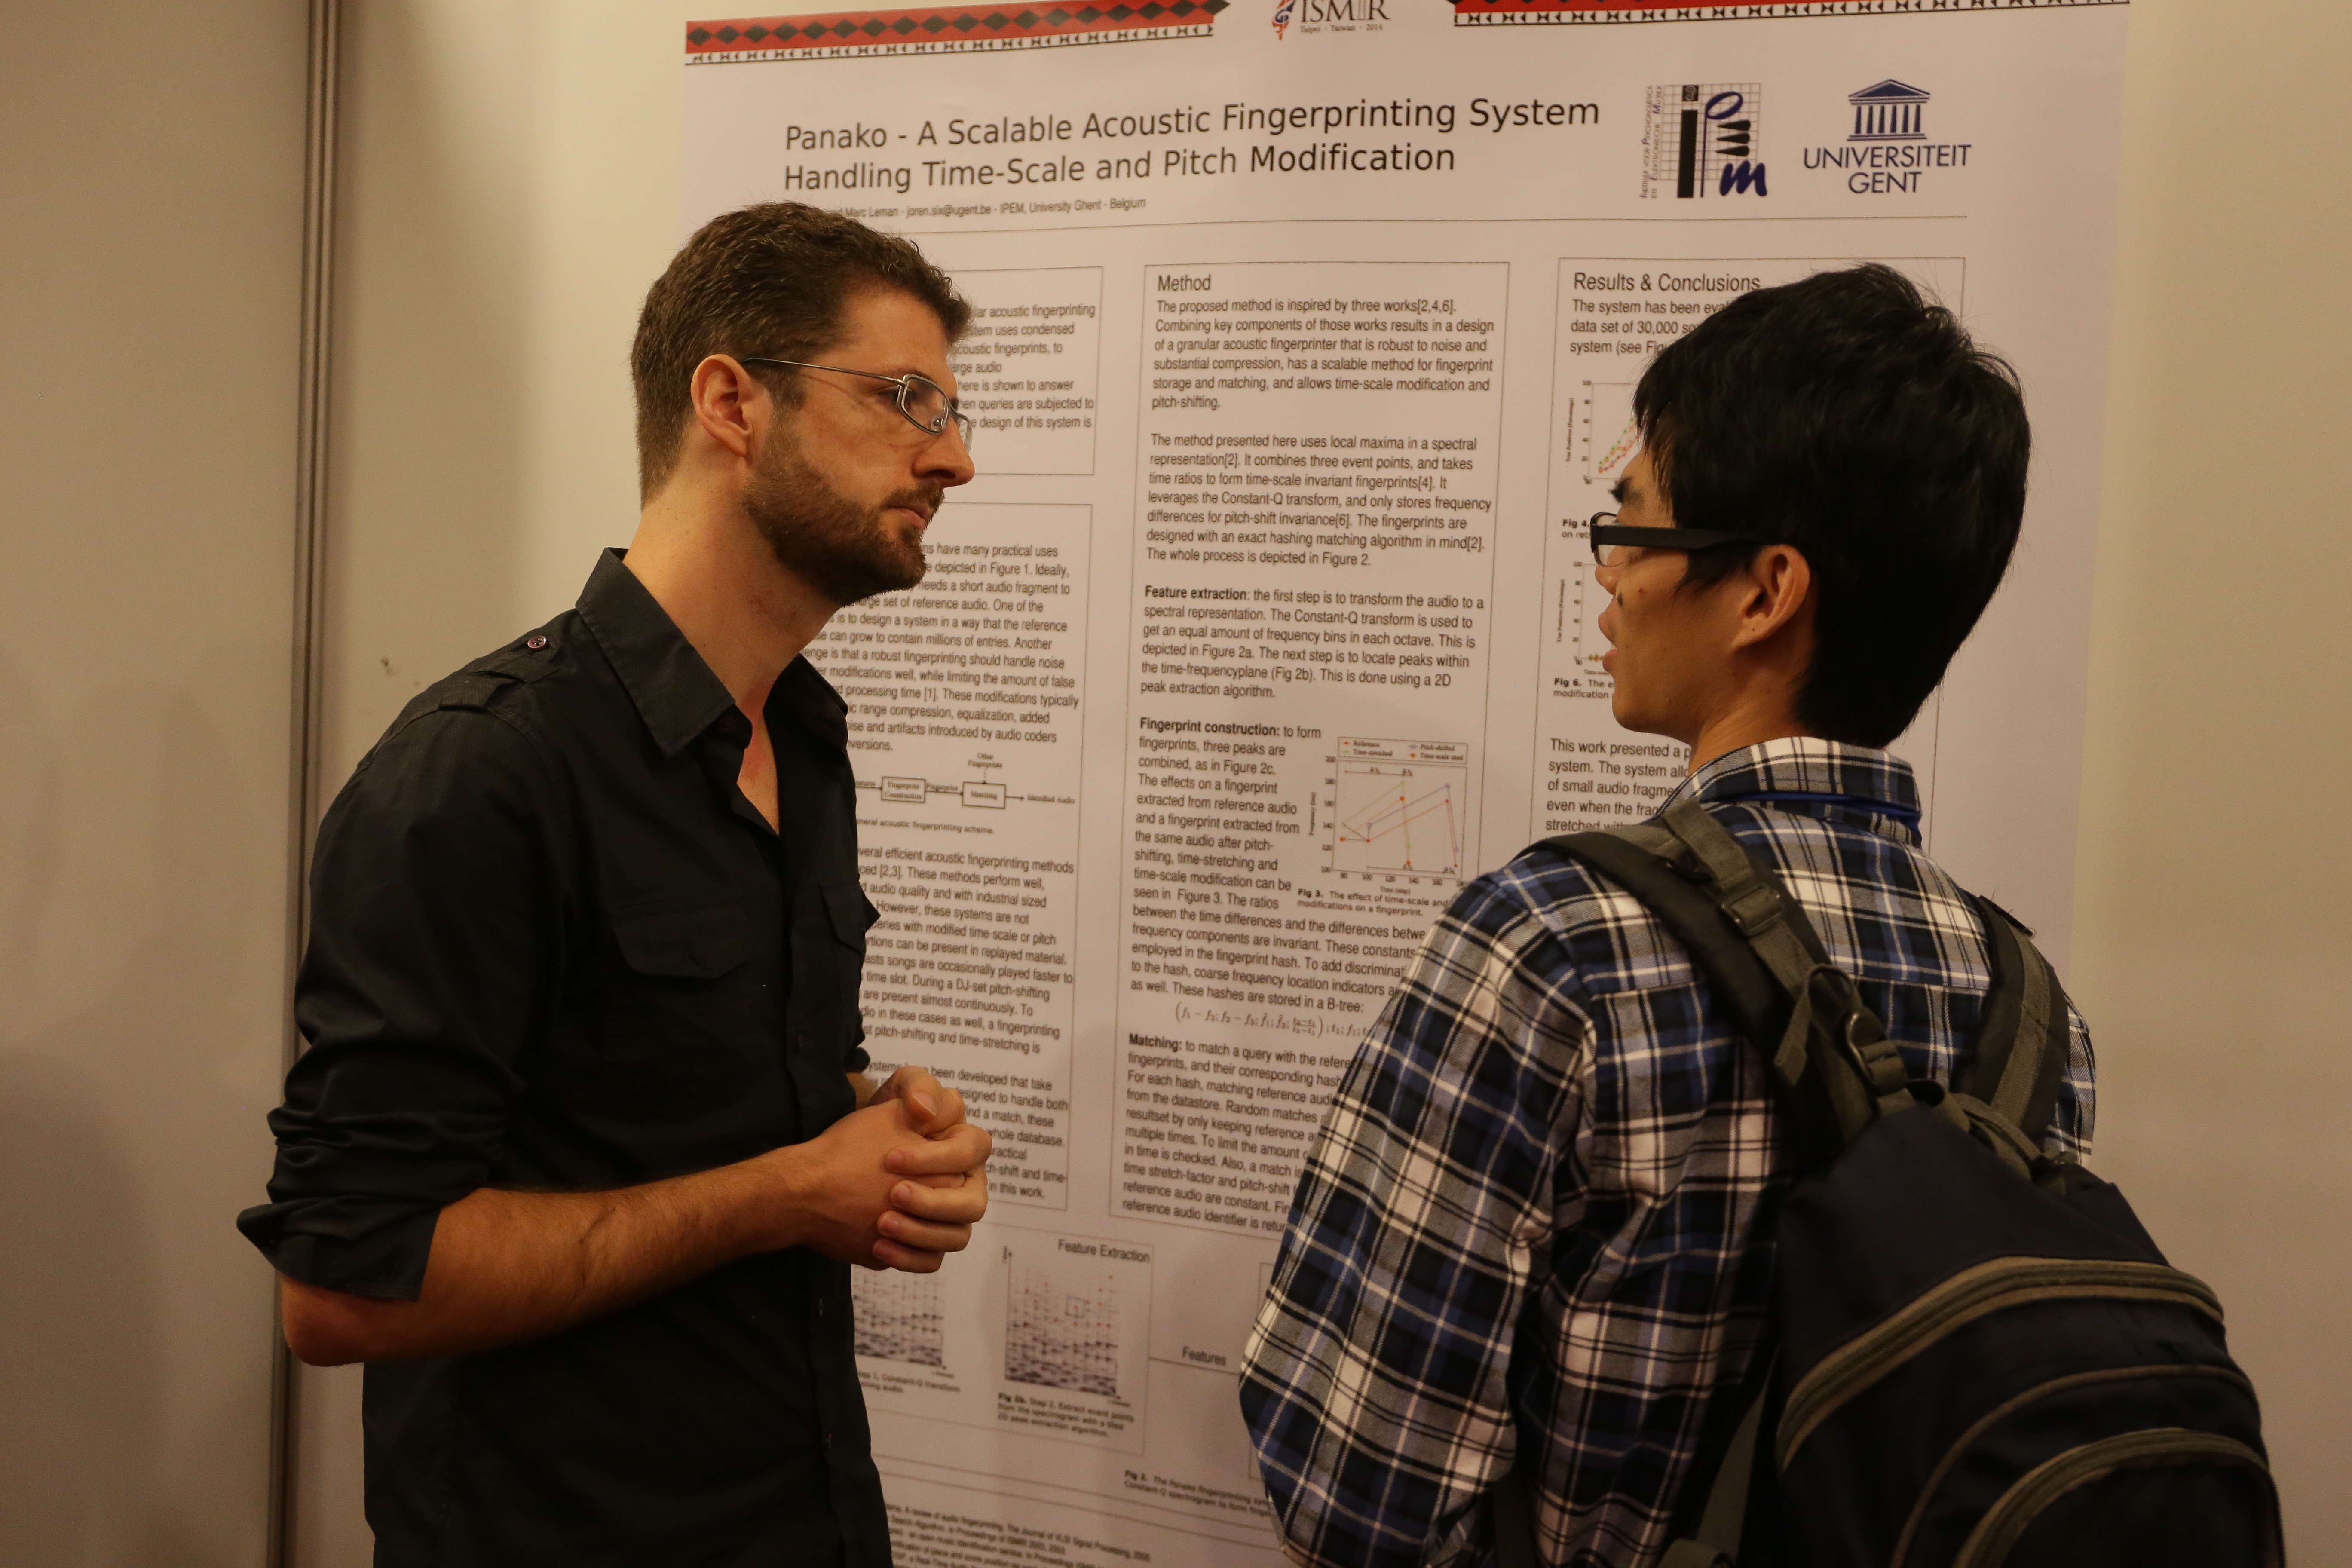
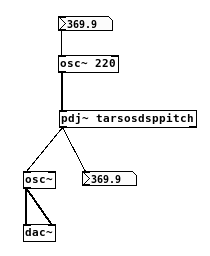 It makes sense to connect TarsosDSP, a real-time audio processing library written in Java, with patcher environments such as Pure Data and Max/MSP. Both Pure Data and Max/MSP offer the capability to code object, or externals using Java. In Pure Data this is done using the
  This post explains how to get TarsosDSP running on Android. TarsosDSP is a Java library for audio processing. Its aim is to provide an easy-to-use interface to practical music processing algorithms implemented, as simply as possible, in pure Java and without any other external dependencies.
 The TarsosDSP Java library for audio processing now contains an implementation of the