Hi, I'm Joren. Welcome to my website. I'm a research software engineer in the field of Music Informatics and Digital Humanities. Here you can find a record of my research and projects I have been working on. Learn more »
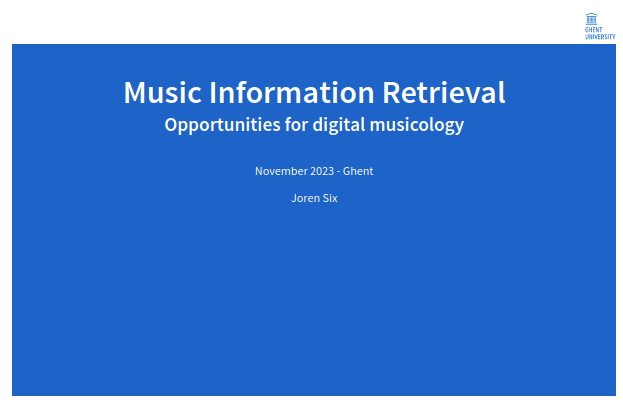
I have been asked to give a guest lecture introducing Music Information Retrieval for the course ‘Foundations of Musical Acoustics and Sonology’ at Ghent University. The lecture slides include interactive demos with live sound visualization and can be found below.
As we delve into the intricacies of how machines can analyze and understand musical content, students will gain insights into the cutting-edge research field that underpins modern music technology. From the algorithms powering music recommendation systems to the challenges of extracting meaningful information from audio signals, the lecture aims to ignite curiosity and inspire the next generation of musicologists in both music and technology. Get ready for an engaging session that promises to unlock the doors to a world where the science of sound meets the art of music.
Thanks to ChatGTP for the slightly over-the-top intro text above. Anyway, here you can find my introduction to Music Information Retrieval slides . Especially the interactive slides are perhaps of interest. The lecture was given in the Art-Science Interaction Lab (ASIL) which has a seven meter wide screen, which affects the slide design a bit.
Fig: Click the screenshot to go to the 'Introduction to Music Information Retrieval' slides.
</img>
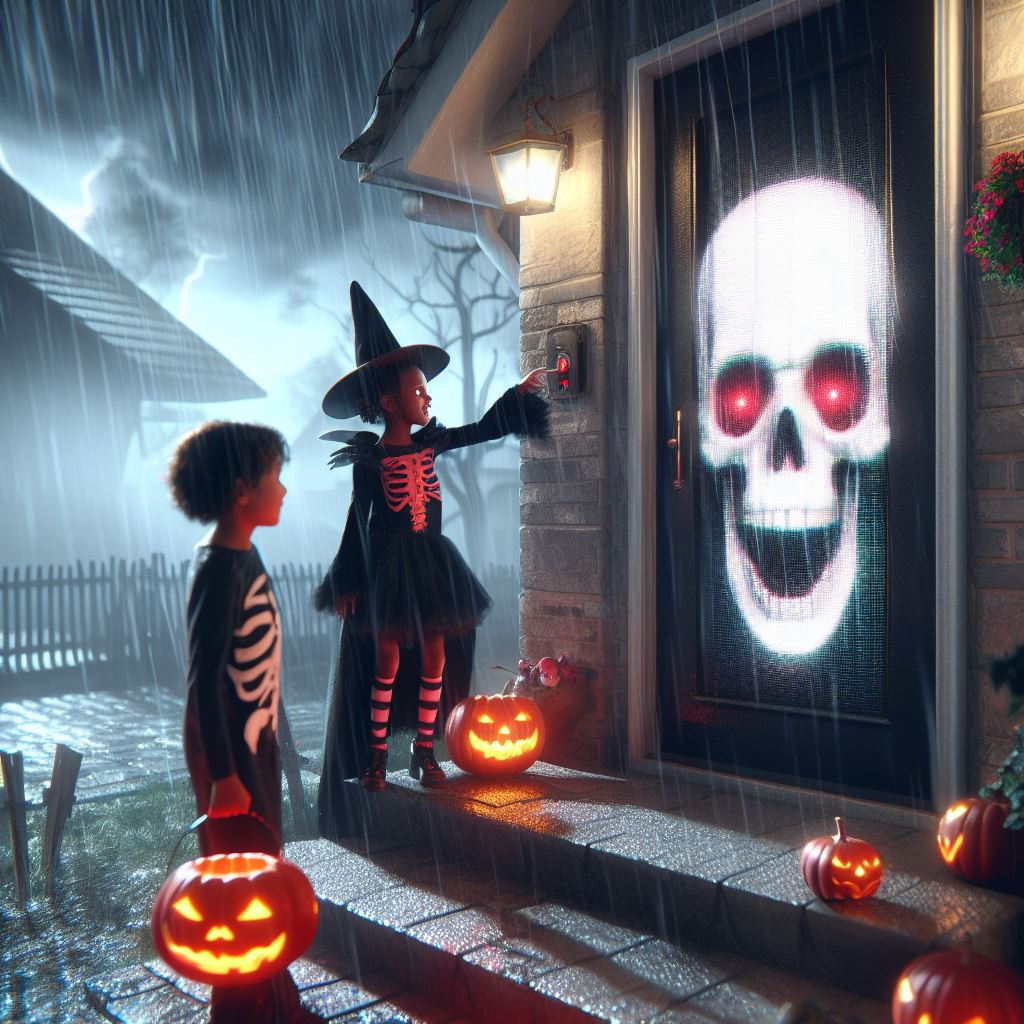
Fig: *Door projection as imagined by DALL.E*.
I did a thing, and, similar to most stuff made here, it is quite a bit of effort and rather pointless. In that sense, it is a bit like life itself. Anyhow, it seems that the Halloween tradition of trick-or-treating has found a strong foothold in mainland Europe. Due to social embeddedness, I prepared Halloween themed projection that responds to my door-bell. I have a glass door, which is ideal for scary projections. The idea is to have a continuous door projection but with a twist: when kids press the doorbell a projected ghost reacts and rushes towards them along with a loud ghostly scream.
This blog post details the technical setup with the intention to inspire similar projects and serve as documentation for next year. First we need a way react to the doorbell.
Doorbell trigger setup
I sourced a couple of FSR (Force Sensitive Resistor)’s from a “sound book” that I had taken apart. Most of these sound books with e.g. animal sounds are meant for toddlers and have a some type of button and a small electronics circuit to make sound. Some of these books work with FSR ‘buttons’ which are similar in size to a doorbell. I took a single FSR from such a book.
I attached the FSR to a “Teensy LC” micro-controller with an additional resistor and put it in a small 3D-printed case. The Teensy was programmed to emit a MIDI Note On event when the FSR/doorbell is pressed. A Note Off follows when the button is released. Once it is connected via USB to a computer it is essentially regarded as a digital piano with only a single key. Making a micro-controller pretend to be a standard MIDI device is very practical since the message passing protocol is standardized and well supported by many types of systems. MIDI is also optimized for low-latency communication. Via the Web MIDI API there is even support for MIDI in web browsers.
Video projection
While software like Resolume allows for complex interactive video projections, my requirements are more modest: I need a continuous background video and I want the ‘scare’ video and audio to appear when the doorbell is triggered. I opted for a browser-based solution: multi-media capabilities, scripting and MIDI support are all present in modern browsers. Running things in a browser has advantages: there is no need for specialized software, it is easy to program, easy to run, relatively stable and future-proof. The proof-of-concept can be seen below. For the actual projection on a window or door you need to first cover the glass with a thin layer of white paper which lets most light through. A white paper tablecloth works well.
Demo: click the 'start video' to start the background video and click doorbell if you dare...
The code is not much special and a bit hacky but can be found attached. The download includes the “html, javascript, css, video, audio and the micro-controller software for a doorbell-triggered projection”.
From the first of October I started at the Ghent Centre for Digital Humanities (GhentCDH) as research software engineer. GhentCDH ” engages in the field of ‘Digital Humanities’ at Ghent University, ranging from archaeology and geography to linguistics and cultural studies. GhentCDH develops DH collaboration and supports research projects, teaching activities and infrastructure projects across the faculties”.
I will be helping with the many projects they are involved in: ranging form public research valorization to internal research tools. I am sure I will learn a lot by discussing projects with a diverse range of researchers and hope to consolidate my expertise in the area of mulitimedia analysis and annotation in some ways. The current areas of expertise can be found on their website:
Collaborative databases: offering advice and support for collaborative databases at Ghent University. It helps researchers to develop a database instance, powered by e.g. Nodegoat. It provides advice regarding data standards and linked data.
Digital text analysis: aiming to improve digital text analysis at Ghent University by offering support and information to researchers. You can contact us for advice on TEI and digital editions, working with digital text analysis tools, and using computer-assisted qualitative data analysis.
Geospatial analysis: offering advice, support and training regarding geospatial data management, analysis and visualisation to the humanities and social sciences researchers at the Ghent University.
Digital heritage: offering support in regards to digital heritage, participation and virtual expositions. GhentCDH helps researchers, teachers and students to create, manage and enrich their own digital collections and set up virtual exhibitions around them.
A recent GhentCDH project is Gent Gemapt or Ghent mapped‘an interatcive platform which connects places, historical maps and heritage collections which each other and the wider audience’.
The recent version of the OLAF (Overly Lightweight Acoustic Fingerprinting) audio fingerprinting system also includes an updated WASM build which deserves a bit more attention.
The browser version of Olaf enables audio fingerprinting in the browser. This can be used to e.g. react to music playing in the environment, so called second screen applications or to synchronize several devices to an audio stream.
The goal of the demo below is to play music aloud - not using headphones - using the controls on the left. You can either play the reference track or an unrelated distractor. Next, the Olaf fingerpinter system needs to be started using the button on the right which captures the microphone of your device. Then Olaf tries match the incoming sound of the microphone and the reference track. Once a match is found the exact time in the match is displayed until the sound matches no more. Note that there is no direct information flowing between the left and right part. You can also play the reference on another device to be sure.
Reference:
\
Distractor:
To get this demo working with the Web Audio API and use AudioWorklet objects, to process audio in the background an not on the main browser thread. There is surprisingly little info to find on how to combine WASM libraries - I used both Olaf and libsamplerate-js - and the AudioWorklet environment. Thanks to one of the very few resources on combining WASM, emscripten and AudioWorklets led me in the right direction.
The Web Audio API offers some great functionality for web based audio applications. The API also has a couple of quirks and is not always easy to use. One of those quirks is the limited support for resampling audio. When requesting a microphone stream of a certain sample rate the API only allows configurations your hardware supports. Ideally there should be an option to resample the incoming stream to a requested sample rate (and format) independent of hardware.
On macOS and Chrome the issue becomes even more confusing: when using multiple AudioContexts they can only have the same sample rate. E.g. starting a microphone on 16kHz by itself is possible but not when there is also audio playback on the same page, then everything switches over to 48kHz. There even seems to be an effect of different browser tabs. Other browsers and platforms have similar issues. This is problematic when you need audio in a fixed sample rate.
The solution is to resample audio incoming samples in your code or use the OfflineAudioContext as a resampler. The OfflineAudioContext way needs a lot of code and, crucially, only works on the main browser thread and not in an AudioWorklet. The AudioWorklet should be the place for computationally intensive audio processing like resampling. To solve the resampling problem I have glued together an AudioWorklet and libsamplerate-js to provide an easy to use audio resampling solution which is demo’d below:
The demo does not seem to do much but it reads incoming microphone data and uses a high quality audio resampling library to resample an audio stream into a requested audio sampling rate. The browser development console shows some info on this process. To get this working in an audio worklet, the libsamplerate-js needed to be recompiled and directly included in the AudioWorklet. To inspect the source, check the “Web Audio API AudioWorklet resampler”:[web-audio-api-resample.zip].
Getting MEMS microphones to work on microcontroller platforms as the ESP32 is challenging. In theory, the I2S protocol provides a standardised, easy way to receive audio from a microphone and send stereo audio to a DAC. In practice, the many parameters make I2S not straightforwards to use. As with most protocols and standards, the mismatch between limitations and quirks of specific hardware and software implementations can cause issues. To debug I2S microphones on ESP32 or the RP2040 I have prepared a small Arduino program.
The IS2 WiFi microphone program sends audio from the microphone over WiFi to a computer which listen to the microphone: this make sure that the microphone works as expected and audio samples are correctly interpreted. It validates the I2S settings like buffer sizes, sample rates, audio formats, stereo or mono settings, … After configuring an SSID, password and IP-address it becomes possible to listen — in real-time — to the microphone which also allows the listener to sense the microphone quality.
size_t bytesIn = 0;
esp_err_t result = i2s_read(I2S_PORT, &sBuffer, bufferLen, &bytesIn, portMAX_DELAY);
int16_t *sample_buffer = (int16_t *)sBuffer;
int16_t samples_read = bytesIn / 2;
float audio_block_float[samples_read];
for (size_t i = 0; i < samples_read; i++) {
sample_buffer[i] = gain_factor * sample_buffer[i];
// Max for signed int16_t is 2^15
audio_block_float[i] = sample_buffer[i] / 32768.f;
}
// Send raw audio 32bit float samples over UDP
Udp.beginPacket(outIp, outPort);
Udp.write((const uint8_t *)audio_block_float, bytesIn * 2);
Udp.endPacket();
Fig: The main part of reading i2s audio from a microphone and sending an UDP packet.
To listen to the incoming audio an UDP port needs to be captured and subsequently send to a program that can interpret and play or store audio. With netcat UDP data can be captured. With ffmpeg and ffplay audio can be payed or stored. In practice the receiving computer might run the following commands to decode UDP packages and hear the microphone:
# for playback, receive UDP packages and interpret raw audio
nc -l -u 3000 | ffplay -f f32le -ar 16000 -ac 1  -

# for playback, receive UDP packages and store in a wav file
nc -l -u 3000 | ffmpeg -f f32le -ar 16000 -ac 1 -i pipe: microphone.wav
Olaf is an acoustic fingerprinting system designed with embedded devices in mind. It has a low memory use and computational requirements which are compatible with e.g. the ESP32 line of microcontrollers devices like the SparkFun ESP32 Thing or devices based on the RP2040 chip. Recently I have prepared a demo with the newest version of Olaf running on an ESP32 which deserves some attention.
To match audio, Olaf needs access to streaming audio. This can be audio read from an SD-card but, more likely, audio comes from a microphone. Digital microphones have some great features: a low-noise floor, great at picking up omnidirectional sound and they are inexpensive. I have prepared a demo of Olaf which shows how to use Olaf on an ESP32 with an INMP441 MEMS microphone. To test the MEMS microphone I also made a MEMS microphone to WiFi program which sends incoming sound on the ESP32 over WiFi to a computer where the sound quality can be verified.
The example provides a scaffold for embedded music-reactive applications. Once the microcontroller knows which song is playing and where in the song the match is found it can trigger LED’s (or explosions, fireworks, lyrics, other effects…) which should happen in sync with the music. See the example below to get the idea, this demo runs an older version of Olaf but the idea stays the same:
The main difference between the current and previous versions of Olaf is that now the ESP32 version, the browser version and the PC version are all running the exact same code. No hacks are needed any more to support a platform. This means that testing and debugging can be done on a computer and, if everything goes well, the code should work as expected on the embedded device (or browser).
I have just released a Python wrapper for the Olaf acoustic fingerprinting library. Olaf is a scalable audio search system based on indexing . Olaf is programmed in C but a wrapper now makes its functionality available in Python.
The python wrapper should make it more accessible for developers to get started with it and makes it compatible with other Python libraries. A few notable libraries are the librosa python package for music and audio analysis,nnAudio, A fast GPU audio processing toolbox and other more general plotting, data processing and machine learning libraries. Despite Python’s many flaws, its rich library ecosystem is unmatched.
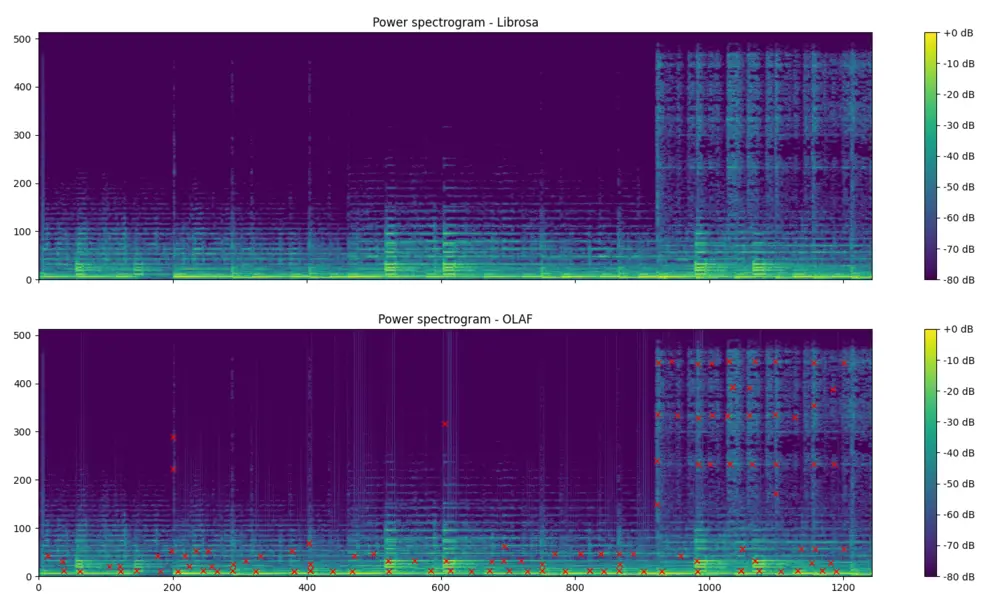
The associated GitHub repository contains documentation on how to use the Olaf python wrapper and also contains examples. The first shows how to index a song into the database and subsequently query the database. The second visualises the event points extracted by Olaf. The figure below shows shows the resulting event points, extracted with Olaf, plotted on a magnitude spectrogram, calculated with Olaf. The spectrogram on top is calculated using librosa and is meant to be very similar to Olaf.
\
Fig: *A power spectrum from librosa and one from Olaf, with event points marked*.
The wrapper was made with Python CFFI which works reasonably well. The automatically generated wrapper library support a large part of the C language but it needs a compilation step for each platform. Currently, the instructions assume a POSIX-like system, but technically, the wrapper can also function on Windows, albeit with the potential need for Windows-equivalent instructions in place of certain POSIX ones. The wrapper is wrapped in an easy to use python class called Olaf.py:
```python\
from olaf import Olaf, OlafCommand\
import librosa
Store the first ten seconds of an audio file\
audio_file = librosa.ex(‘choice’)\
Olaf(OlafCommand.STORE,audio_file).do(duration=10.0)
Query for a part of the same file (with an offset of 7 seconds), but change volume\
y, sr = librosa.load(audio_file,mono=True, sr=16000,duration=10,offset=7.0)\
y = y * 0.8 #change the volume\
results = Olaf(OlafCommand.QUERY,audio_file).do(y=y)
We expect a match between the stored and partially overlapping query\
print(results)\
```
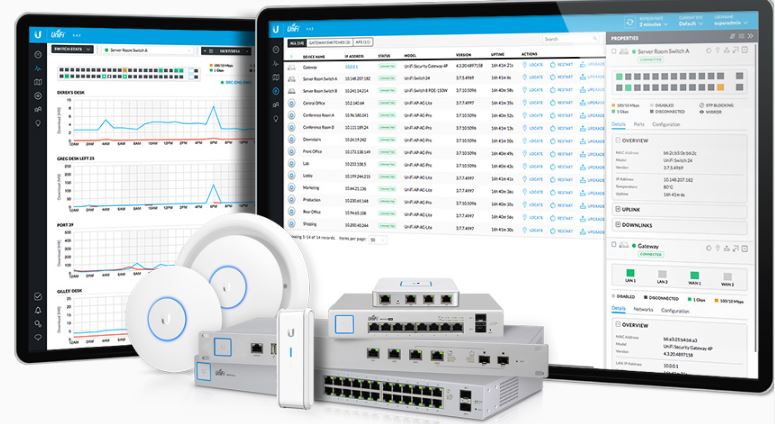
I have been using a couple of UniFi devices in my home network for a couple of years. These devices proved to be reliable and full-featured, especially considering the relatively low price point. To manage UniFi devices a self-hosted instance of the UniFi network server is practical, especially when you already have a home server.
Unfortunately, the official installation instructions for UniFi miss a crucial step for installation on Debian 11. The network manager is not compatible with newer versions of mongodb. To install a version of mongodb compatible with UniFi on Debian 11, use the following commands:
The Wall Street Journal made a video on the internals Shazam fingerprinter. The visuals and technical explanation serves as a very good introduction in spectral-peak-based audio fingerprinting. For those who want a more in depth view or want to try out such systems: I have implemented extensions on the Shazam technique in two open-source systems.
Olaf is a spectral-peak based fingerprinter aimed at embedded systems, traditional computers and browsers. Panako is implemented in Java and has robustness against pitch-shifting and time-stretching which is briefly mentioned in the video below as well:
 </img>
Fig: *Door projection as imagined by DALL.E*.
</img>
Fig: *Door projection as imagined by DALL.E*.


 \
\