Hi, I'm Joren. Welcome to my website. I'm a research software engineer in the field of Music Informatics and Digital Humanities. Here you can find a record of my research and projects I have been working on. Learn more »
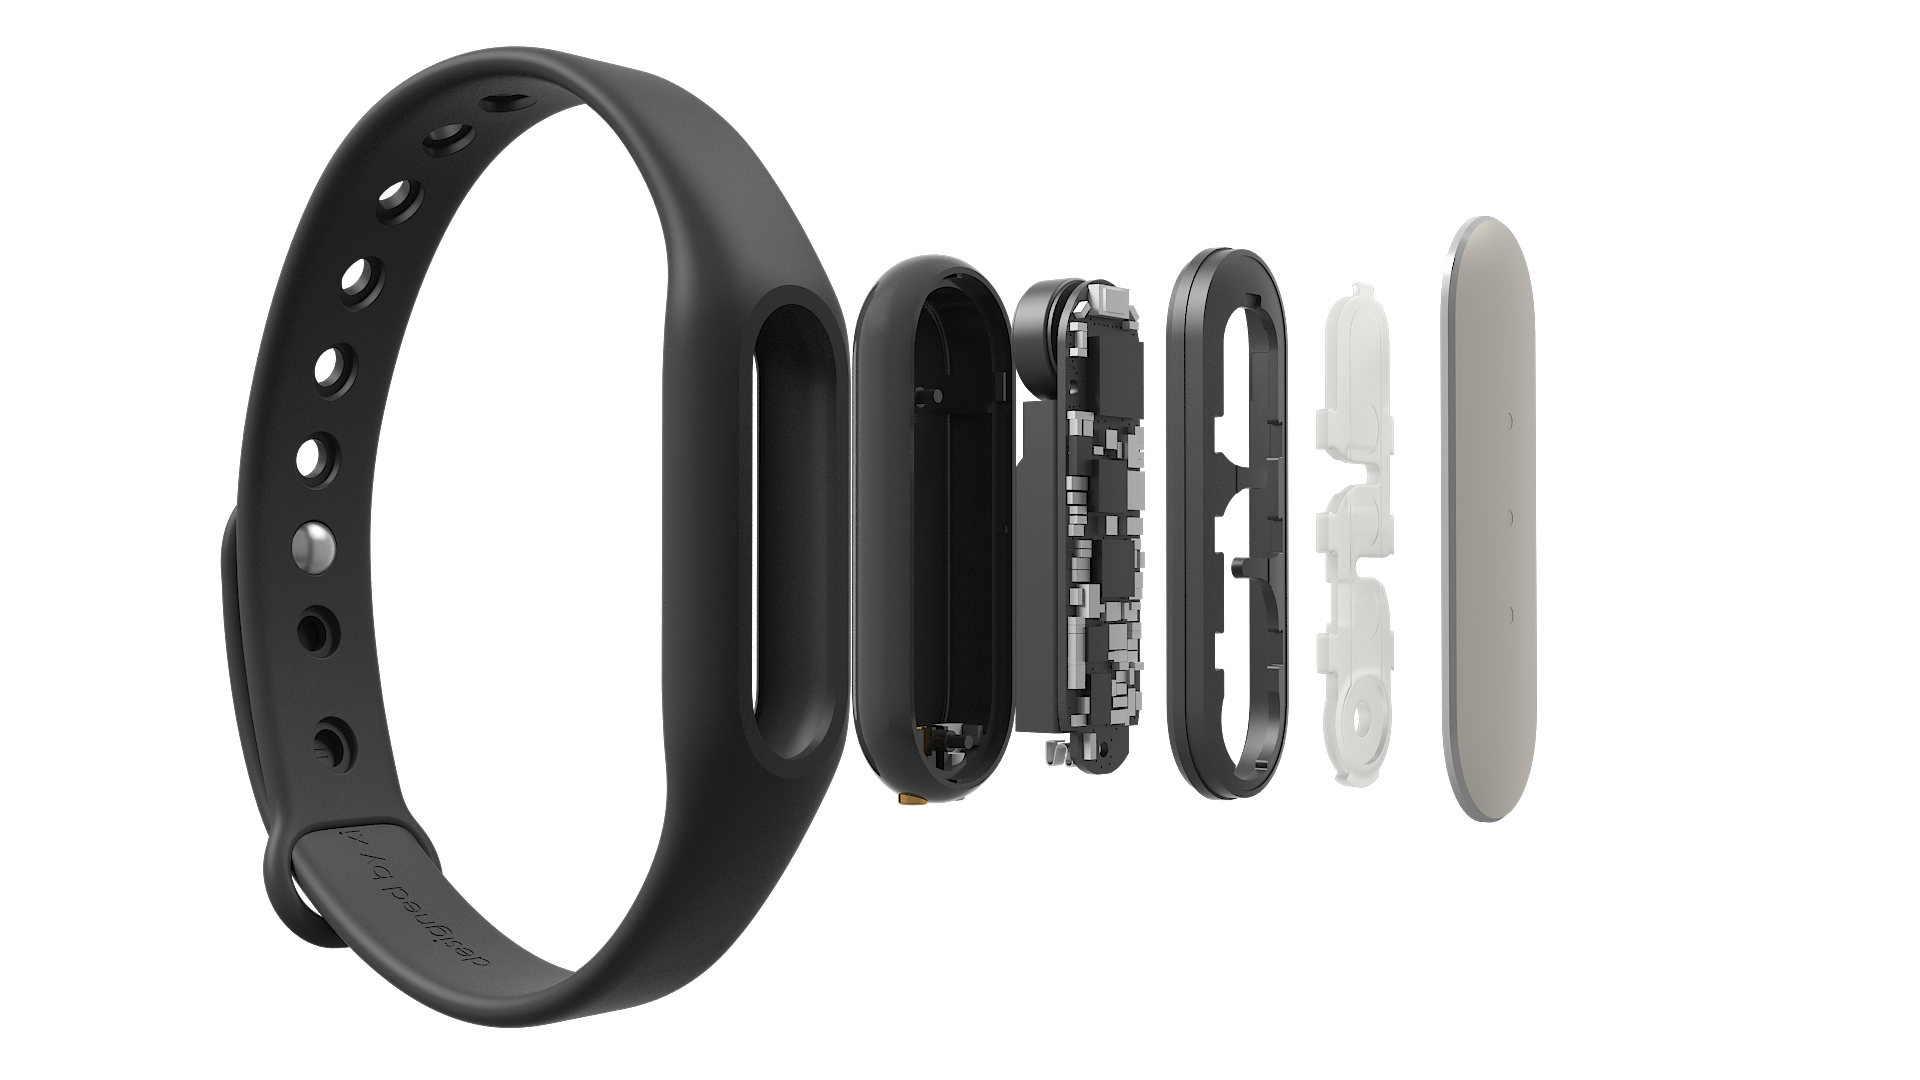
The Mi Band is a bracelet with some sensors, three RGB leds and a vibration motor. It is marketed as an activity tracker and notifier. It is a neat little device that communicates via Bluetooth LE and has a battery life of around 30 days. It would be nice if it could be used for whatever purpose you want but alas, its API is not very open. This blog post gives pointers to useful resources and tips to make it work with your own code.
I would advise against installing the official Mi Band app, if you want to use it with custom code. The app upgrades the firmware to the latest version and it seems that Xiaomi is obfuscating the protocol more and more with each version. I was able to send vibrate and led commands to a Mi Band with firmware version 10.0.9.3. With the previously mentioned sources and the flow described to the right the device reacts to commands. I used an Android device. The flow:
Pair with the Mi Band in the Android Bluetooth setting.
In your code, connect to the paired device. Save the device address, you will need it later.
Send a pair command to the device. This is part of the Mi Band protocol and has nothing to do with the previous Bluetooth pairing. If all goes well it reacts with a 2. See here
Send user info. This step is crucial and not trivial. The user info needs to be encoded in a certain way and is CRC’d with the device address. The following is an example implementation of the Mi Band user info encoding
Now you can send vibrate or other commands.
Some notes: the self-test command works without the set user step. For Android the Mi Band protocol implementation in Java works well. To check the firmware version of the device, call the get device info characteristic. The last bytes, interpreted as an integer, define the version info. For my device it is 10.9.3.2:
Write to characteristic 0000ff05-0000-1000-8000-00805f9b34fb
onCharacteristicWrite status: 0 characteristic 0000ff05-0000-1000-8000-00805f9b34fb
Read firmware version
11value: 212value: 313value: 914value: 015value: 1
Another note: the set user info needs to be called with a 1 as type the first time the band is used. This is done with new UserInfo(20111111, 1, 32, 180, 55, "NM", 1) with the Android sdk by GitHub user pangliang. This sets and overwrites the user info. The next times you do not want to overwrite the info and the type needs to be zero.
The article titled “Synchronizing Multimodal Recordings Using Audio-To-Audio Alignment” by Joren Six and Marc Leman has been accepted for publication in the Journal on Multimodal User Interfaces. The article will be published later this year. It describes and tests a method to synchronize data-streams. Below you can find the abstract, pointers to the software under discussion and an author version of the article itself.
Synchronizing Multimodal Recordings Using Audio-To-Audio Alignment An Application of Acoustic Fingerprinting to Facilitate Music Interaction Research
Abstract:Research on the interaction between movement and music often involves analysis of multi-track audio, video streams and sensor data. To facilitate such research a framework is presented here that allows synchronization of multimodal data. A low cost approach is proposed to synchronize streams by embedding ambient audio into each data-stream. This effectively reduces the synchronization problem to audio-to-audio alignment. As a part of the framework a robust, computationally efficient audio-to-audio alignment algorithm is presented for reliable synchronization of embedded audio streams of varying quality. The algorithm uses audio fingerprinting techniques to measure offsets. It also identifies drift and dropped samples, which makes it possible to find a synchronization solution under such circumstances as well. The framework is evaluated with synthetic signals and a case study, showing millisecond accurate synchronization.
The algorithm under discussion is included in Panako an audio fingerprinting system but is also available for download here. The SyncSink application has been packaged separately for ease of use.
To use the application start it with double click the downloaded SyncSink JAR-file. Subsequently add various audio or video files using drag and drop. If the same audio is found in the various media files a time-box plot appears, as in the screenshot below. To add corresponding data-files click one of the boxes on the timeline and choose a data file that is synchronized with the audio. The data-file should be a CSV-file. The separator should be ‘,’ and the first column should contain a time-stamp in fractional seconds. After pressing Sync a new CSV-file is created with the first column containing correctly shifted time stamps. If this is done for multiple files, a synchronized sensor-stream is created. Also, ffmpeg commands to synchronize the media files themselves are printed to the command line.
This work was supported by funding by a Methusalem grant from the Flemish Government, Belgium. Special thanks goes to Ivan Schepers for building the balance boards used in the case study. If you want to cite the article, use the following BiBTeX:
@article{six2015multimodal,
      author      = {Joren Six and Marc Leman},
      title       = {{Synchronizing Multimodal Recordings Using Audio-To-Audio Alignment}},
      issn        = {1783-7677},
      volume      = {9},
      number      = {3},
      pages       = {223-229},
      doi         = {10.1007/s12193-015-0196-1},
      journal     = {{Journal of Multimodal User Interfaces}},
      publisher   = {Springer Berlin Heidelberg},
      year        = 2015
 }
Synchronized streams in Sonic Visualizer. Here you can see two channel audio synchronized with accelerometer data (top, green) and balanceboard data (bottom, purple).
Two streams of audio with fingerprints marked. Some fingerprints are present in both streams (green, O) while others are not (red, x). Matching fingerprints have the same offset, indicated by the dotted lines.
Multimodal recording system diagram. Each webcam has a microphone and is connected to the pc via USB. The dashed arrows represent analog signals. The balance board has four analog sensors but these are simplified to one connection in the schematic. The analog output of the microphones is also recorded through the DAQ. An analog accelerometer is connected with a microcontroller which also records audio.
SyncSink Synchronize media files. A user-friendly interface to synchronize media and data files. First a reference media-file is added using drag-and-drop. The audio steam of the reference is extracted and plotted on a timeline as the topmost box. Subsequently other media-files are added. The offsets with respect to the reference are calculated and plotted. CSV-files with timestamps and data recorded in sync with a stream can be attached to a respective audio stream. Finally, after pressing Sync!, the data and media files are modified to be exactly in sync with the reference.
The synchronized data from the two webcams, accelerometer and balanceboard in ELAN. From top to bottom the synchronized streams are two video-streams, balance-board data (red), accelerometer-data (green) and audio (black).
Conceptual drawing used as a basis for the SyncSync application. A reference stream (blue) can be synchronized with streams one and two. It allows a workflow where streams are started and stopped (red) or start before the reference stream (green).
A microcontroller fitted with an electret microphone and a microSD card slot. It can record audio in real-time together with sensor data.
This post explains how to do real-time pitch-shifting and audio time-stretching in Java. It uses two components. The first component is a high quality software C library for audio time-stretching and pitch-shifting C called Rubber Band. The second component is a Java audio library called TarsosDSP. To bridge the gap between the two JNI (Java Native Interface) is used. Rubber Band provides a JNI interface and starting from the currently unreleased version 1.8.2, makefiles are provided that make compiling and subsequently using the JNI version of Rubber Band relatively straightforward.
However, it still requires some effort to control real-time pitch-shifting and audio time-stretching from java. To make it more easy some example code and documentation is available in a GitHub repository called RubberBandJNI. It documents some of the configuration steps needed to get things working. It also offers precompiled libraries and documents how to compile those for the following systems:
This post describes how to decode MP3’s using an already compiled ffmpeg binary on android. Using ffmpeg to decode audio on Android has advantages:
It supports about every audio format known to man. Three channel flac, vorbis with 32 bit samples, … do not pose a problem.
Extracting audio from video container formats is supported. Accessing the first audio stream from mkv, avi, mov,… just works.
Decoding audio frames is more efficient using native code than often buggy Java decoders.
Resampling and downmixing is supported. If you want to resample incoming audio to e.g. 44.1kHz and only want single channel audio this is easily achievable.
The main disadvantage is that you need an ffmpeg build for your Android device. Luckily some poor soul already managed to compile ffmeg for Android for several architectures. The precompiled ffmpeg binaries for Android are available for download and are mirrored here as well.
To bridge the ffmpeg binary and the java world TarsosDSP contains some glue code. The AndroidFFMPEGLocator is responsible to find and extract the correct binary for your Android device. It expects these ffmpeg binaries in the assets folder of your Android application. When the correct ffmpeg binary has been extracted and made executable the PipeDecoder is able to call it. The PipeDecoder calls ffmpeg so that decoded, downmixed and resampled PCM samples are streamed into the Java application via a pipe, which explains its name.
With the TarsosDSP Android library the following code plays an MP3 from external storage:
This code just works if the application has the READ_EXTERNAL_STORAGE permission, includes a recent TarsosDSP-Android.jar, is ran on one of the supported ffmpeg architectures and has these binaries available in the assets folder.
This post describes a tool to quickly visualize and record analog signals with a Teensy micro-controller and some custom software. It is mainly useful to quickly get an idea of how an analog sensor reacts to different stimuli. Since it is also able to capture and store analog input siginals it is also useful to generate test data recordings which then can be used for example to test a peak detection algorithm on. The tool is called TeensyDAQ hinting at the Data AcQuisition features and the micro-controller used.
Some of the features of the TeensyDAQ:
Visualize up to five analog signals simultaneously in real-time.
Capture analog input signals with sampling rates up to 8000Hz.
Record analog input to a CSV-file and, using drag-and-drop, previously recorded CSV-files can be visualized.
Works on Linux, Mac OS X and Windows.
While a capture session is in progress you can going back in time and zoom, pan and drag to get a detailed view on your data.
Allows you to listen to your input signal, this is especially practical with analog microphone input.
The system consists of two parts. A hardware and a software part. The hardware is a Teensy micro-controller running an Arduino sketch that ready analog input A0 to A4 at the requested sampling rate. A Teensy is used instead of a regular Arduino for two reasons. First the Teensy is capable of much higher data throughput, it is able to send five reading at 8000Hz, which is impossible on Arduino. The second reason is the 13bit analog read resolution. Classic Arduino only provides 10 bits.
The software part reads data from the serial port the Teensy is attached to. It interprets the data and stores it in an efficient data-structure. As quickly as possible the data is visualized. The software is written in Java. A recent Java runtime environment is needed to execute it.
TarsosDSP, the is a real-time audio processing library written in Java, is featured in EFY (Electronics For Your) Plus Magazine of July 2015. It is a leading electronics magazine with a history going back more than 40 years and about 300 000 subscribers mainly in India. The index mentions this:
TarsosDSP: A Real-Time Audio Analysis and Processing Framework\
In last month’s EFY Plus, we discussed Essentia, a C library for audio analysis. In this issue we will discuss a Java based real-time audio analysis and processing framework known as TarsosDSP
To read the full article, buy a (digital) copy of the magazine.
This post describes how to get notifications from a Bluetooth LE (Low Energy) or Bluetooth v4.0 device on a Linux machine. Since it took me a while to get it going it is perhaps of interest to others.
The hardware I used is an RFduino board and a Belikin mini Bluethooth v4.0 adapter. The RFduino was programmed to wait for an event with RFduino_pinWake(pni, HIGH). When the pin is HIGH a count is incremented and this number is send to any device that is listening. In my case a Linux machine. The code is essentially the same as the button example included in the RDduino software distribution.
To install the Bluetooth stack on Debian the following command is executed sudo apt-get install bluetooth bluez bluez-utils bluez-firmware. A blog post describes more about the Bluetooth tools. Some other interesting reads are Get started with Bluetooth Low Energy and this stackoverflow question. Once the stack is installed correctly the lescan utility should give an output like this:
Bluetooth LE works with the Generic Attribute Profile (GATT). A Bluetooth LE device can provide services by combining characteristics. These characteristics are the way to communicate with the device. Some characteristics are writable and are able to send notifications. To receive notifications one such characteristic (referred to with a hex handle) needs to be written. Write 0100 to get notifications, 0200 for indications (indications are notifications that are acknowledged), 0300 for both, or 0000 for nothing (default). With this in mind, the following command enables listening for notifications:
With those commands working, the process can be automated with “a Ruby script to get Bluetooth LE notifications”:[bluetooth_notifications.rb]. The script essentially calls gatttool with the correct parameters and parses and reacts to its output. To make it work lescan needs to be called before starting the script:
This post describes how to connect music in your library with precomputed features. Say, for example, you are developing a DJ application and you want to facilitate mixing tracks. To provide a seamless mix you perhaps want information about beats and about the key the music in your library is in. Since vast databases of features are already available you probably want to access those, instead of using your own feature extractors and database. The problems that need to be addressed are:
Automatically identify the music in your library without relying on incomplete meta-data (tag information).
Connect the music with a data-base of meta-data. Preferably a large and well curated database.
Fetch pre-computed features for the music. The features should be extracted using algorithms that are currently state of the art or at least perform well. The features and the audio itself should be synchronized, otherwise beat information, for example, is not of much use.
To help with these task there are several open source tools and services available.
To identify music a condensed representation of musical audio is created. This process is known as acoustic fingerprinting. On the website AcoustID a tool is available to create such fingerprint. The library is called Chromaprint and the command line client is called fpcalc. Currently the latest version is Chromaprint version 1.2 and static binaries for fpcalc are available on the AcoustID website. A packages for Debian (and probably Ubuntu) can be installed by calling apt-get install libchromaprint-tools. Once this tool is correctly installed a fingerprint for a piece of music can be created:
A fingerprint by itself is not of much use. The AcoustID webservice translates a fingerprint into one or more MusicBrainz identifiers. One fingerprint can result in multiple identifiers because the same audio can be released on several albums. There is documentation for AcoustID webservice available. To use the webservice an API key is needed. Confusingly, the AcoustID service has two types of API keys. One for end-users and one for developers. The last type is needed to translate ID’s. To request a developer API key, log in on the AcoustID website and “add an application”, there you can find the correct API key. Substitute dev_api_key in the following URL. Also change the fingerprint and duration to match the information provided by the fpcalc application. The webservice should reply with a set of MusicBrainz identifiers:
AcousticBrainz provides features for a subset of music that has a MusicBrainz identifier. Currently about a million tracks are analyzed but more are added every day. The API for the webservice is straightforward:
The low-level features include beat positions and chroma information. For the hypothetical DJ-application this is the information that would be used.
If you find the services useful please consider contributing to MusicBrainz, AcoustID and AcousticBrainz.
A small Ruby script to “automatically fetch features”:[mbid_lookup.rb] for audio can be downloaded here. It needs Ruby and a RubyGems to parse JSON. On Debian this can be installed with apt-get install ruby and rubygems install json. Once these dependencies are installed the script can be ran as follows:
ruby mbid_lookup.rb example.mp3
Found6 musicbrainz identifiers!
Not found inAcousticBrainz: 0afcd4a1-3709-499b-b76f-0d5491f839a5
Beat positions for3d49fab8-fd08-42be-b0d2-9f1dc884d902: 0.522448956966,1.05650794506,1.57895684242,2.10140585899,2.61224484444,3.13469386101Not found inAcousticBrainz: 448258f0-aa5a-4968-8efd-8c9348d5142e
Not found inAcousticBrainz: adcd7079-57d9-49bd-a36b-a20fa27b02b1
Beat positions for d1cd1321-0b66-4848-935e-f3afba6c7356: 0.441179126501,0.905578196049,1.369977355,1.83437633514,2.29877543449,2.76317453384Not found inAcousticBrainz: e1f433be-af6b-4b5d-a969-4b53f014c395
TarsosDSP is a real-time audio processing library written in Java. Since version 2.0 it is compatible with Android. Judging by the number of forks of the TarsosDSP GitHub repository Android compatibility increased the popularity of the library. Now the first Android application which uses TarsosDSP has found its way to the Google Play store. Download and play with SINGmaster to see an application of the pitch tracking capabilities within TarsosDSP. The SINGmaster description:
“SING master is a smart phone app that helps you to learn how to sing. SING master presents a collection of practical exercises (on the most important building blocks of melodies). Colours and sounds guide you in the exercise. After recording, SING master gives visual feedback : you can see and hear your voice. This is important so that you can identify where your mistakes are.”
Another application in the Play Store that uses TarsosDSP is CuePitcher.
This post explains how to receive OSC in a MatLab environment. It uses a platform independent Java library which should work on 64 and 32 bit versions of Windows, Unix and Mac OS X. Using Java makes installation relatively easy compared with other solutions.
The most used method to get OSC-messages in Matlab can be found here. This method uses a library called liblo which needs to be configured (compiled) correctly on your system. Especially on Windows this can be problematic. A brave soul documented his quest to get OSC working with Matlab on Windows here. Obviously not for the faint of heart.
An alternative way leverages the Matlab facilities to run Java. Since there is a Java OSC library available (JavaOSC on github) it is relatively easy to bridge the two. To make the connection, I have written some glue code and provide an easy to use Jar-library here. Using the bridge is done as follows:
How to make Matlab receive OSC-messages
Download the “JavaOSCtoMatlab Java library”:[javaosctomatlab.jar] and store it in an easy to remember directory.
Download the “example Matlab OSC client Script”:[osc_java_test.m] and store it in the same directory. The client is included below as well.
Start Matlab, modify the client script to fit your needs. You probably need to change the OSC method to listen to and the OSC port. Also make sure that the cd command points to the directory with the downloaded jar-file.
Run the client script and receive your OSC messages.
Note that there are three ways to receive the payload of a message. They are returned by the Java code as either Object[], double[] or String[]. The last two are automatically understood by Matlab, so they are more easy to work with. Respectively to get the message data you need to call either osc_listener.getMessageArguments(), osc_listener.getMessageArgumentsAsDouble(), osc_listener.getMessageArgumentsAsString().
 The Mi Band is a bracelet with some sensors, three RGB leds and a vibration motor. It is marketed as an activity tracker and notifier. It is a neat little device that communicates via Bluetooth LE and has a battery life of around 30 days. It would be nice if it could be used for whatever purpose you want but alas, its API is not very open. This blog post gives pointers to useful resources and tips to make it work with your own code.
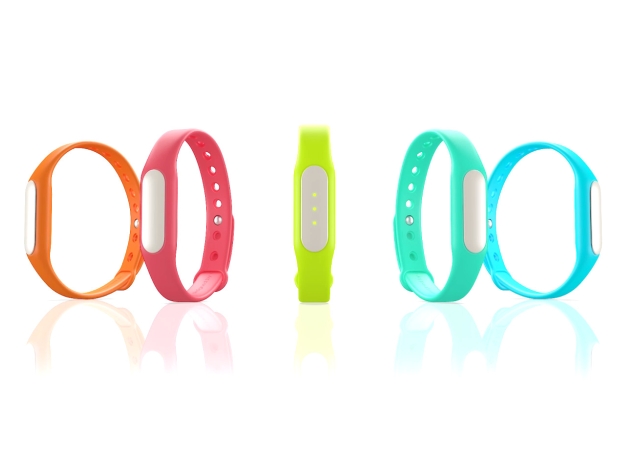
 and balanceboard data (bottom, purple).")
 while others are not (red, x). Matching fingerprints have the same offset, indicated by the dotted lines.")


, accelerometer-data (green) and audio (black).")
 can be synchronized with streams one and two. It allows a workflow where streams are started and stopped (red) or start before the reference stream (green).")


 TarsosDSP, the is a real-time audio processing library written in Java, is featured in
 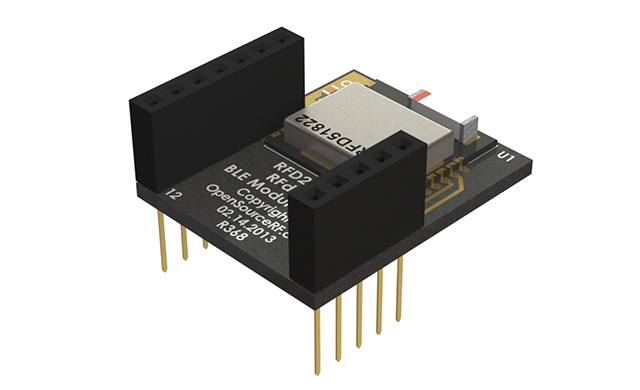 This post describes how to get notifications from a Bluetooth LE (Low Energy) or Bluetooth v4.0 device on a Linux machine. Since it took me a while to get it going it is perhaps of interest to others.

 This post explains how to receive