TarsosDSP: a Java Library for Audio Processing
TarsosDSP is a Java library for audio processing. Its aim is to provide an easy-to-use interface to practical music processing algorithms implemented, as simply as possible, in pure...
Below you can find links to the open source software I developed during my research. It is always nice to hear how this software is used, don’t hesitate to drop me a line. Bug reports are welcomed as well.
TarsosDSP is a Java library for audio processing. Its aim is to provide an easy-to-use interface to practical music processing algorithms implemented, as simply as possible, in pure...
MI-Kit is a low-cost, open-source system for controlling music production software through body movement. Designed for creative music practice and embodied music interaction research. EMI-Kit can be used...
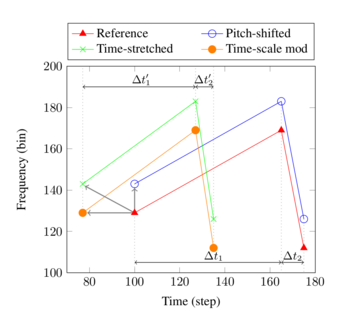
Panako is an extendable acoustic fingerprinting framework. The aim of acoustic fingerprinting is to find small audio fragments in large audio databases. Panako contains several acoustic fingerprinting algorithms...
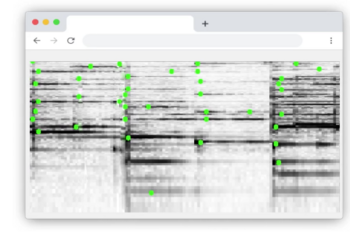
Olaf is a portable, landmark-based, acoustic fingerprinting system released as open source software. Olaf runs on embedded platforms, traditional computers and in the browser. Olaf is able to...
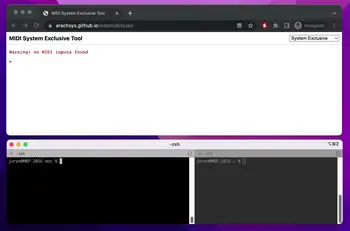
mot consists of several MIDI and OSC command line tools. These are mainly of interest to debug and check OSC messages and MIDI devices. The tools are written...
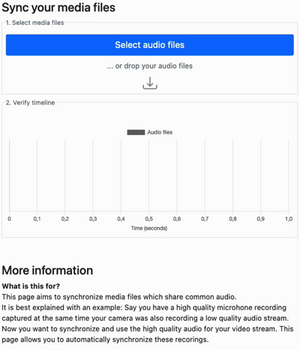
Thanks to WebAssembly it is possible to repurpose software for use on the web, even if it was originally designed with other use in mind. I have developed...
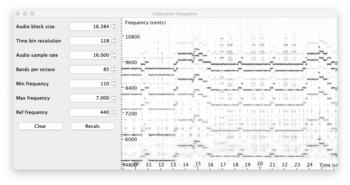
This library calculates fine-grained constant-Q spectral representations of audio signals quickly from Java. The spectral transform can be visualized or further processed in a (Music Information Retrieval) processing...
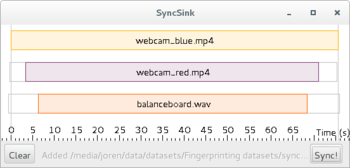
SyncSink is able to synchronize video and audio recordings of the same event. As long as some audio is shared between the multimedia files a reliable synchronization solution...
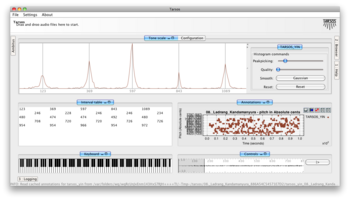
Tarsos is a software tool to analyze and experiment with pitch organization in all kinds of musics. Most of the analysis is done using pitch histograms and octave...

TarsosLSH is a Java library implementing Locality-sensitive Hashing (LSH), a practical nearest neighbor search algorithm for multidimensional vectors that operates in sublinear time. It supports several LSH families:...
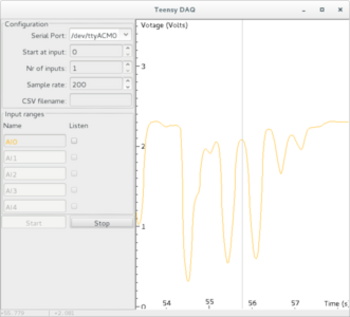
TeensyDAQ is a Java application to quickly visualize and record analog signals with a Teensy micro-controller and some custom software. It is mainly useful to quickly get an...
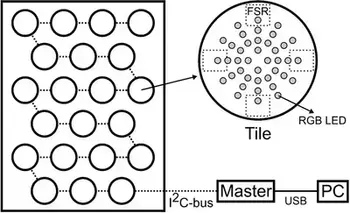
The idea behind AMPEL (by Lousin Moumdjian, Marc Leman, Peter Feys) is to combine both motor and cognitive rehabilitation in a single combined ‘embodied learning’ paradigm. To this...
The Pidato experiment demonstrates a rather straightforward method to handle vibrato on a digital piano. It ‘solves’ the age-old problem on what to do with the enigmatic “vibrato”...
This post details how I went about optimizing a C application. This is about an audio search system called Olaf which was made about 10 times faster but contains some generally applicable steps for optimizing C code or even other systems. Note that it is not the aim to provide a detailed how-to: I want to provide the reader with a more high-level understanding and enough keywords to find a good how-to for the specific tool you might want to use. I see a few general optimization steps:
More specifically, for the Olaf audio search system there is a need for optimization. Olaf indexes and searches through years of audio so a small speedup in indexing really adds up. So going for the next item on the list above: measure the performance. Olaf by default reports how quickly audio is indexed. It is expressed in the audio duration it can process in a single second: so if it reports 156 times realtime, it means that 156 seconds of audio can be indexed in a second.
The next step is to find performance bottlenecks. A profiler is a piece of software to find such bottle necks. There are many options gprof is a command line solution which is generally available. I am developing on macOS and have XCode available which includes the “Instruments - Time Profiler”. Whichever tool used, the result of a profiling session should yield the time it takes to run each functions. For Olaf it is very clear which function needs optimization:
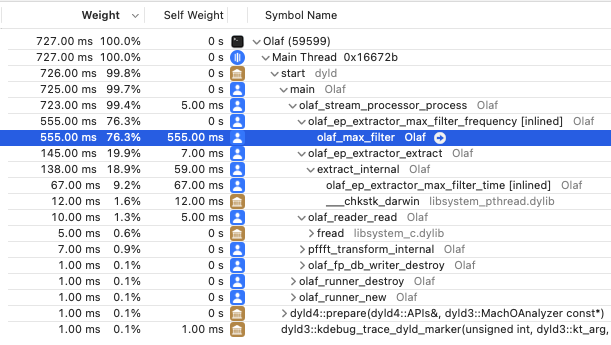 \
Fig: The results of profiling Olaf in XCode's time profiler. Almost all time is spend in a single function which is the prime target for optimization.
\
Fig: The results of profiling Olaf in XCode's time profiler. Almost all time is spend in a single function which is the prime target for optimization.
The function is a max filter which is ran many, many times. The implementation is using a naive approach to max filtering. There are more efficient algorithms available. In this case looking into the literature and implementing a more efficient algorithm makes sense. A very practical paper by Lemire lists several contenders and the ‘van Herk’ algorithm hits the sweet spot between being easy to implement and needing only a tiny extra amount of memory. The Lemire paper even comes with example c max-filters. With only a slight change, the code fits in Olaf.
After implementing the change two checks need to be done: is the implementation correct and is it faster. Olaf comes with a number of functional and unit checks which provide some assurance of correctness and a built in performance indicator. Olaf improved from processing audio 156 times realtime to 583 times: a couple of times faster.
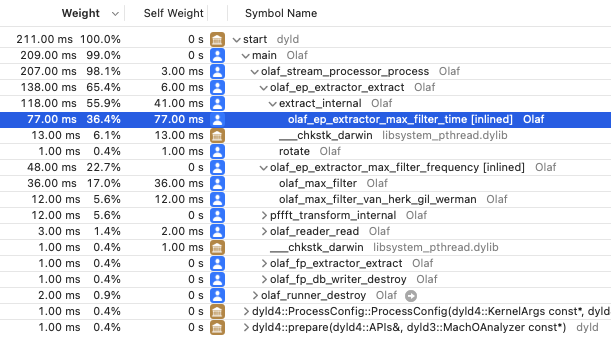
After running the profiler again, another method came up as the slowest:
  1
2
3
4
5
6
7
8

  //Naive implementation
float olaf_ep_extractor_max_filter_time(float *array, size_t array_size) {
    float max = -10000000;
    for (size_t i = 0; i < array_size; i++) {
        if (array[i] > max) max = array[i];
    }
    return max;
}
src: naive implementation of finding the max value of an array.
This is another part of the 2D max filter used in Olaf. Unfortunately here it is not easy to improve the algorithmic complexity: to find the maximum in a list, each value needs to be checked. It is however a good contender for SIMD optimization. With SIMD multiple data elements are processed in a single CPU instruction. With 32bit floats it can be possible to process 4 floats in a single step, potentially leading to a 4x speed increase - without including overhead by data loading.
Olaf targets microcontrollers which run an ARM instruction set. The SIMD version that makes most sense is the ARM Neon set of instructions. Apple Sillicon also provides support for ARM Neon which is a nice bonus. I asked ChatGPT to provide a ARM Neon improved version and it came up with the code below. Note that these type of simple functions are ideal for ChatGPT to generate since it is easily testable and there must be many similar functions in the ChatGPT training set. Also there are less ethical issues with ‘trivial’ functions: more involved code has a higher risk of plagiarization and improper attribution. The new average audio indexing speed is 832 times realtime.
  1
2
3
4
5
6
7
8
9
10
11
12
13
14
15
16
17

  #if defined(__ARM_NEON)
#include <arm_neon.h>
// ARM NEON implementation
float olaf_ep_extractor_max_filter_time(float *array, size_t array_size) {
    assert(array_size % 4 == 0);
    float32x4_t vec_max = vld1q_f32(array);
    for (size_t j = 4; j < array_size; j += 4) {
        float32x4_t vec = vld1q_f32(array + j);
        vec_max = vmaxq_f32(vec_max, vec);
    }
    float32x2_t max_val = vpmax_f32(vget_low_f32(vec_max), vget_high_f32(vec_max));
    max_val = vpmax_f32(max_val, max_val);
    return vget_lane_f32(max_val, 0);
}
#else
//Naive implementation
#endif
src: a ARM Neon SIMD implementation of a function finding the max value of an array, generated by ChatGPT, licence unknown, informed consent unclear, correct attribution impossible.
Next, I asked ChatGPT for an SSE SIMD version targeting the x86 processors but this resulted in noticable slowdown. This might be related to the time it takes to load small vectors in SIMD registers. I did not pursue the SIMD SSE optimization since it is less relevant to Olaf and the first performance optimization was the most significant.
Finally, I went over the code again to see whether it would be possible exit a loop and simply skip calling olaf_ep_extractor_max_filter_time in most cases. I found a condition which prevents most of the calls without affecting the total results. This proved to be the most significant speedup: almost doubling the speed from about 800 times realtime to around 1500 times realtime. This is actually what I should have done before resorting to SIMD.
In the end Olaf was made about ten times faster with only two local, testable, targeted optimizations.
Only think about optimization if there is a need and set a target: otherwise it is infinite.
Try to find a balance between complexity, maintainability and performance.
Changing a naive algorithm to a more intelligent one can have a significant performance increase. Check the literature for inspiration.
Check for conditions to skip hot code paths before trying fancy optimization techniques.
Profilers are crucial to identify where to optimize your code. Applying optimizations blindly is a waste of time.
Try to keep optimizations local and testable. Sprinkling your code with small, hard to test performance oriented improvements might not be worthwile.
SIMD generated by ChatGPT can be a very quick way to optimize critical, hot code paths. I would advise to only let ChatGPT generate small, common, easily testable code: e.g. finding the maximum in an array.
Having only localized ‘trivial’ ChatGPT parts means you can take them out once it is clear that you have copied code without proper attribution or licensing.
The use of SIMD can slow down your code if you are not careful, measure the effects of your ‘optimizations’!
 Code, UGent, Command Line Application, and Music Information Retrieval
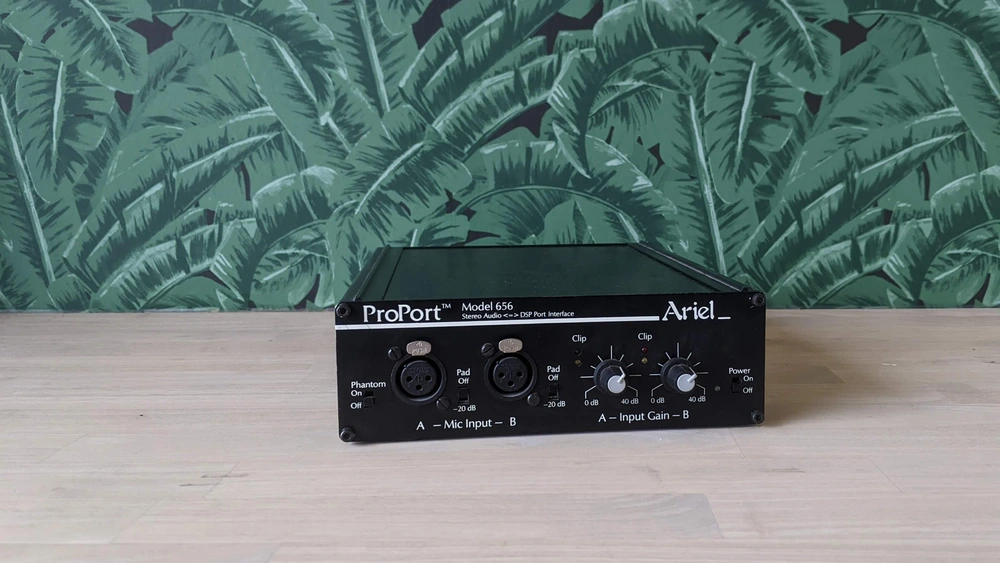
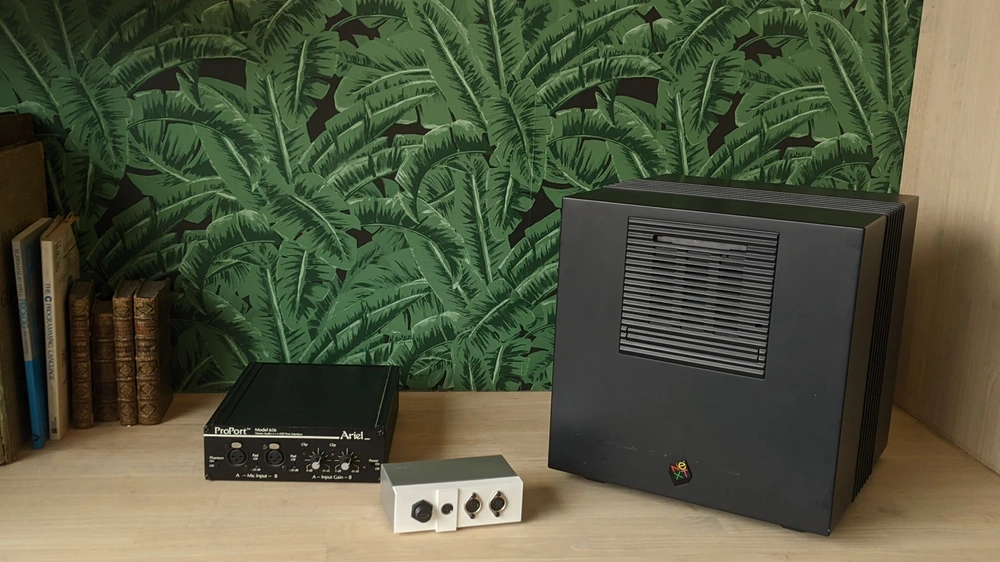
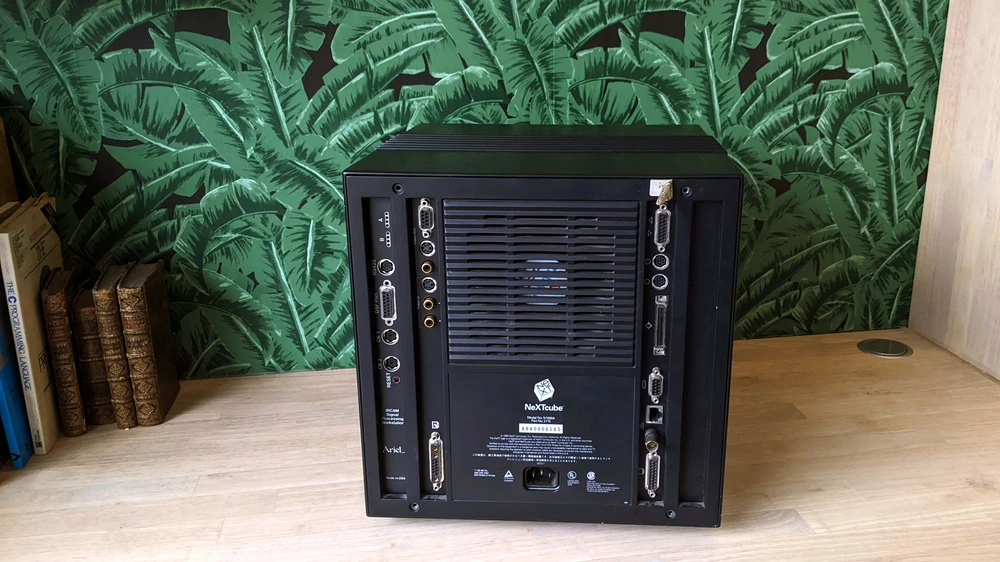
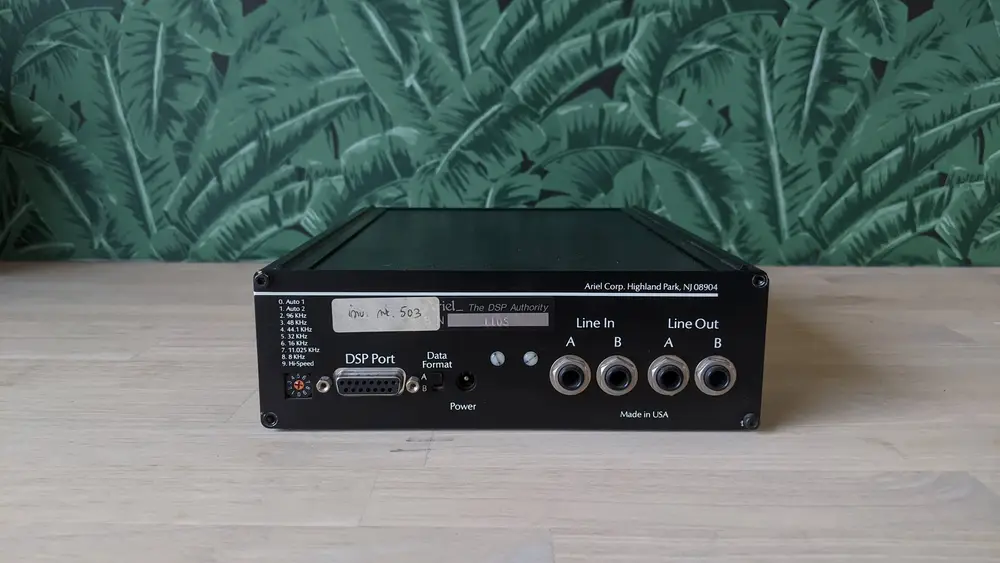
I have recently restored a NeXTCube with an ISPW Ariel soundcard with the aim to put it in the hands of artists and researchers in the context of a living electronic music instrument heritage project. To make the cube talk to keyboards, synths or other audio workstations I have built a MIDI interface for the NeXTcube.
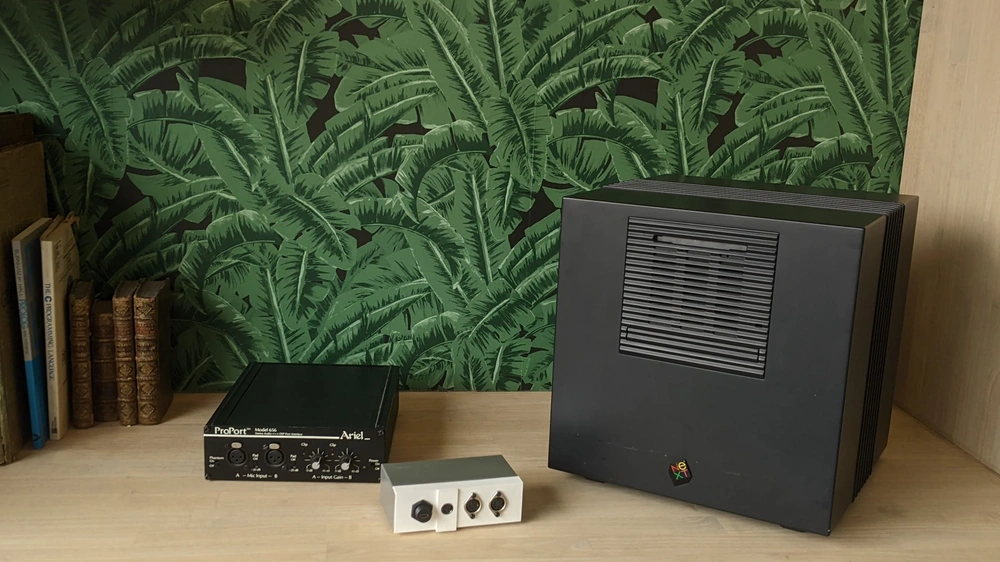
Recently, I was able to restore a NeXTCube and install an early version of MAX - a graphical music programming environment. However, a crucial part of the system was missing: there was no way to do MIDI input/output. MIDI is used to connect controllers, keyboards, synthesizers or other musical instruments to the audio workstation. The NeXTCube itself has a serial port which allows users to connect MIDI devices. Next to the serial port on the mainboard, the NeXTCube I am working with also has a RS-422 serial port on the ISPW ‘soundcard’. The serial port uses RS-422 and mini DIN 8 connectors which provide MIDI input and output. While the MIDI data bytes are transmitted according to spec, the connector and the electrical signals are not compatible with standard MIDI.

For MIDI I/O we need a device which allows to connect the RS-422 MIDI to both legacy MIDI devices and to computers via USB MIDI. If a MIDI event arrives from the NeXTCube’s RS-422 it needs to be passed through to the USB and legacy MIDI ports and the other way around. The Teensy platform is ideal: it supports hardware serial and USB MIDI. In this retro-computing project, it seems wasteful to use the 600MHz Teensy 4.0 only for message passing: the Teensy has much more computing power than NeXTcube but it is cheap, easy to program, available and practical.
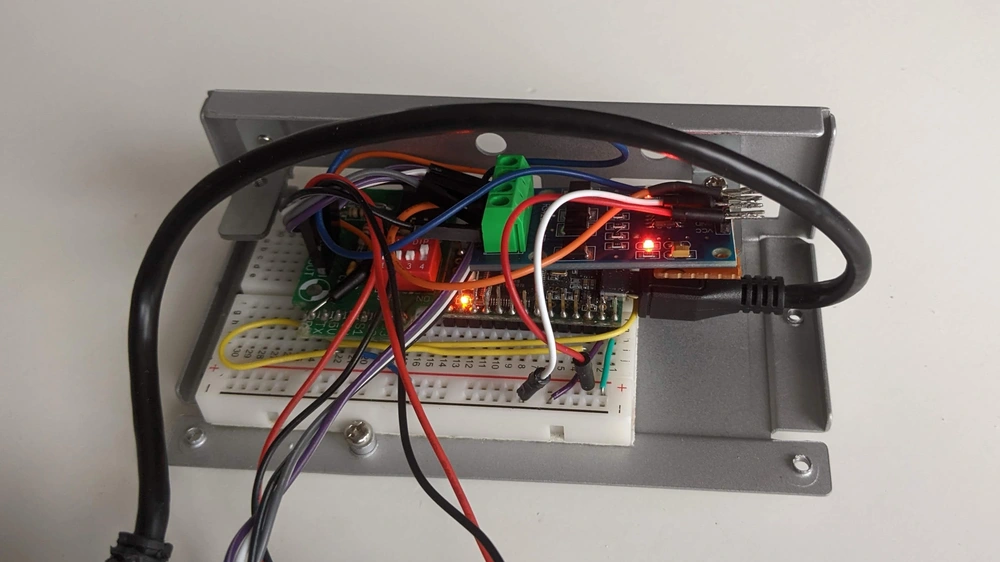
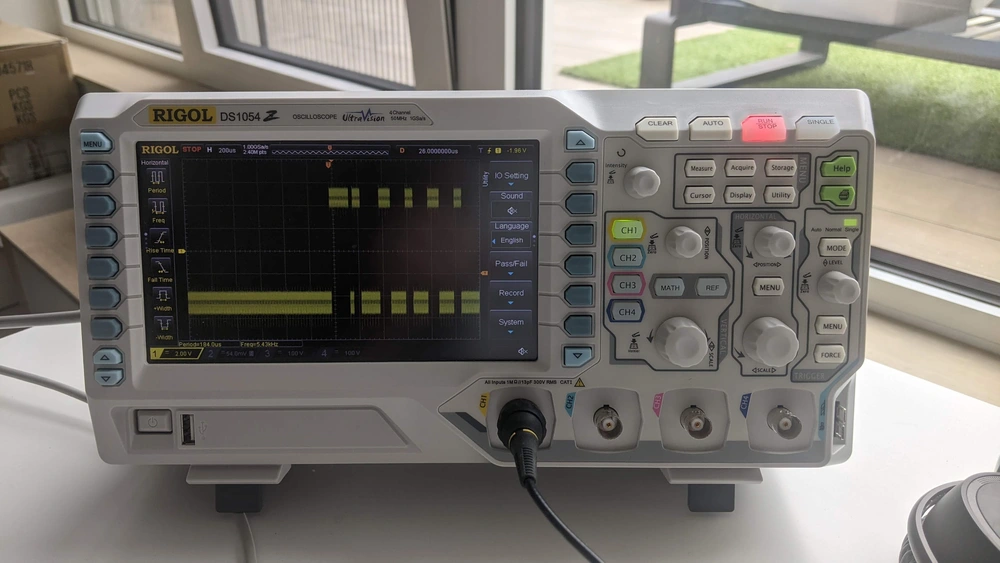
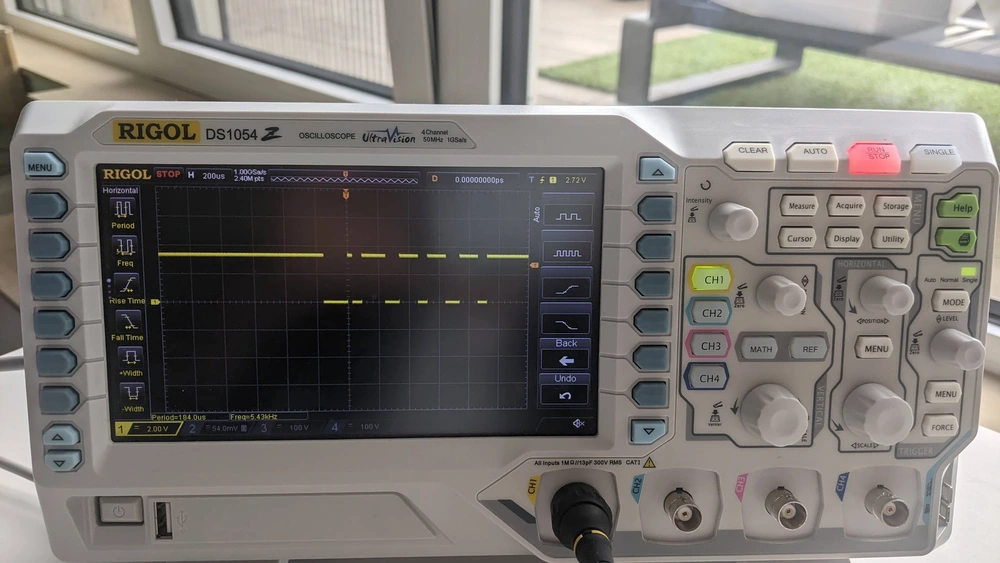
The RS-422 serial port uses –6V to 6V logic which needs to be transformed to the 0V to 3.3V logic for the Teensy microcontroller. A PCB provides this capability and is connected to a hardware serial port of the Teensy. The pinout of the RS-422 port was measured via a scope and matched the documentation. The Teensy has an usbMIDI mode and can present itself as a standard MIDI device to a PC. Two opto-isolated legacy MIDI DIN-5 ports were connected to another hardware serial port. The software on the Teensy conducts the “three-way MIDI message passing”:[midi_passthrough.ino].
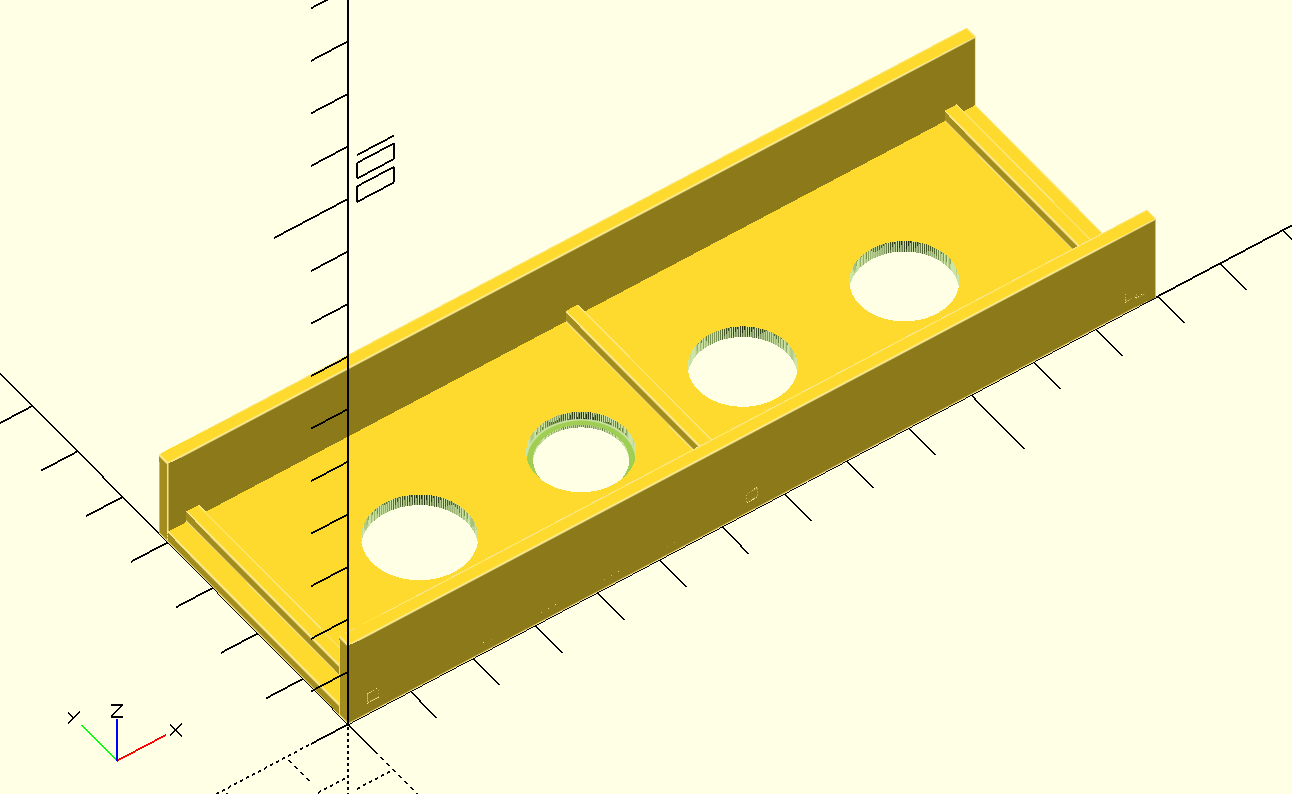
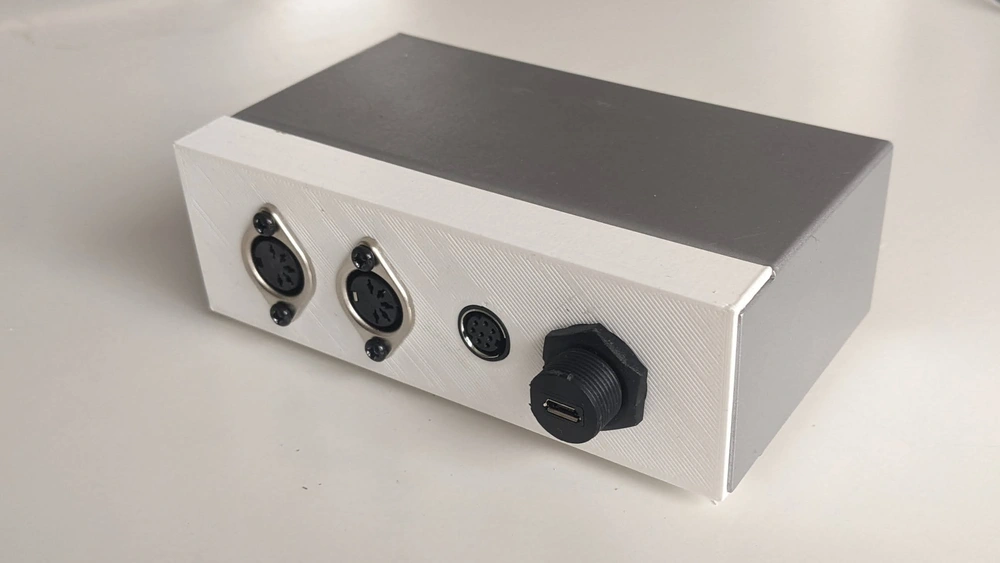
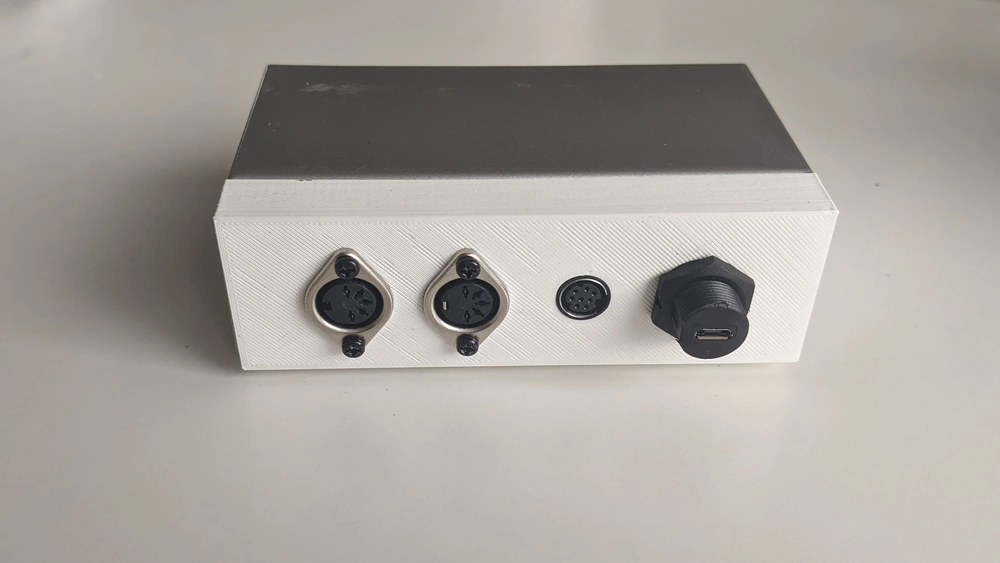
The electronics were fixed into a reused metal enclosure. The front panel of the enclosure was replaced by a custom 3D printed panel. The front contains the RS-422 port, two MIDI DIN 5 ports and a micro usb port either for power alone or MIDI messages and power. Feel free to check out the “OpenSCAD design with a level MINI DIN8 hole”:[midi_box.scad].
With a working MIDI interface for the NeXTcube allows interfacing with MIDI keyboards and controllers. It can also be used to measure roundtrip latency. MIDI to sound latency determines how long it takes between pressing a MIDI key and hearing sound. MIDI to MIDI roundtrip latency determines how long it takes to process, parse and return a MIDI message. For a responsive, reliable system both types of latencies should be constant and preferably in the range of 10ms or below.

Measuring the MIDI roundtrip latency shows that the system is able to respond in 3.6+–0.4 ms (N=300). A combination of a MAX patch and “Teensy firmware”:[next_midi_roundtrip_latency.ino] was used to measure this automatically. The MIDI-to-audio latency was measured a few times manually and always was around 13ms. These figures show that the system is ideal for low-latency real-time music making in its default configuration. In MAX the audio buffer sizes could be reduced to achieve an even lower latency but with the risk of running into buffer underruns and audio glitches.
Small discussion the USB MIDI interface for the NeXTCube on Hackaday
 Code, Harde waren, Muziek, and UGent
 ariel_soundcard_IRCAM_ISPW.jpg, midi_box.scad, midi_roundtrip_latency.svg, midi_passthrough.ino, next_midi_roundtrip_latency.ino, midi_roundtrip_test.pat, nextcube_midi_proport.webp, midi_box_example_web.webp, and midi_box_example_web.mp4
As a way to get to know the Rust programming language I have developed a couple of practical tools for OSC and MIDI debugging. OSC and MIDI are protocols which are almost always used for applications dealing with music. In these applications latency should be kept in check. Languages with garbage collection (Java, Go) and scripting languages (Ruby, Python, …) are hard to tune for low-latency applications and do not really have real-time guarantees. Rust, as a modern alternative for C/C, is a better fit for cross platform CLI low-latency applications.
The MIDI and OSC Tools (mot) are bundled in a single CLI application. The application includes:
midi_echo prints MIDI messages coming from a connected MIDI device.osc_echo prints OSC messages arriving at a certain UDP port.midi_to_osc a MIDI to OSC bridge which sends MIDI messages coming from a connected MIDI device to an OSC target.osc_to_mid an OSC to MIDI bridge which receives OSC messages and sends them to a connected MIDI device.midi_roundtrip_latency measure MIDI round-trip latency.This opens a couple of possibilities which are discussed below.
One of the ways to send OSC messages from a browser to a local network is by using the MIDI out capability of browsers and - using mot - translating MIDI to OSC an example can be seen below.

Both MIDI and OSC can be seen as rather general data encapsulation protocols with wide support in terms of libraries and cross platform support. Their value goes beyond mere musical applications. The same holds for mot. In this example we are using mot to measure UDP message latency between two hosts.
On the first host we send MIDI messages from MIDI device 0 over OSC to another host with e.g. mot midi_to_osc 192.168.1.12:3000 /m 0. At the other host we receive the OSC messages and send them to a virtual device: mot osc_to_midi 192.168.1.12:3000 /m 6666.
At the second host we return messages from the virtual device to the first host: mot midi_to_osc 192.168.1.4:5000 /m 1. Perhaps you first need to do mot midi_to_osc -l to find the index of the virtual device. As a final step the messages can be received at the first host and returned to the original midi device. On the first host: mot osc_to_midi 192.168.1.4:5000 /m 0.
If the original MIDI device is a Teensy running the “roundtrip patch” then finally the roundtrip time is accurately measured and shown in the serial console. I am sure the previous text is cromulent, totally not contrived and not confusing. Anyway, to make it more confusing: this is what happens when you use a single host to do midi to osc to midi to osc to midi and use the loopback networking device:

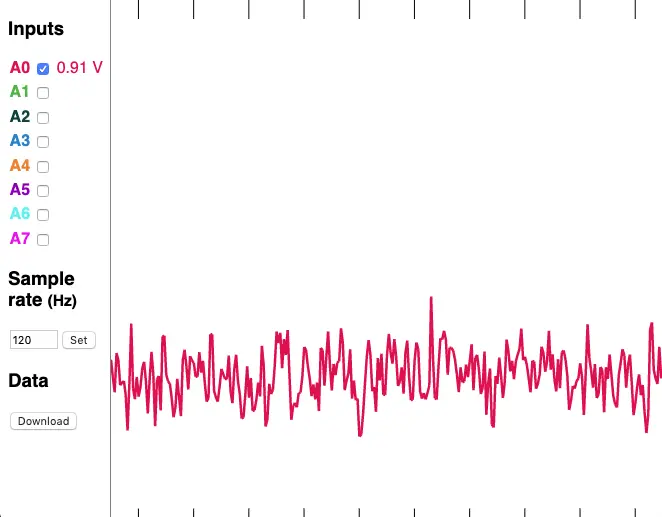 Fig: Sensor data as MIDI.
When capturing sensor data on microcontrollers, data can be encoded into MIDI. This makes almost any sensor practically useful in Ableton Live or similar environments. It also makes it compatible with all other MIDI supporting devices. With mot it becomes trivial to send MIDI encoded sensor data over OSC e.g. to a central place to log that data.
Another use case is to visualize the incoming data in real-time. A single web page which reads and visualizes incoming MIDI-sensor data becomes much more useful if streams from other devices can be visualized as well with the mot midi_to_osc and mot osc_to_midi commands.
With the Rust compiler it is relatively easy to cross-compile for different targets. There is however an important limitation in mot. Windows has no support for virtual MIDI ports which limits the usefulness of mot on that platform.
Check the mot - MIDI and OSC Tools GitHub repository for the software. Perhaps also of interest for MIDI debugging are VMPK, MIDI Monitor and the web MIDI tools.
Code and UGent
TarsosDSP is a Java library for audio processing I have started working on more than 10 years ago. The aim of TarsosDSP is to provide an easy-to-use interface to practical music processing algorithms. Obviously, I have been using it myself over the years as my go-to library for audio-processing in Java. However, a number of gradual changes in the java ecosystem made TarsosDSP more and more difficult to use.
Since I have apparently not been the only one using it, there was a need to give it some attention. During the last couple of weeks I have found the time to give it this much needed attention. This resulted in a number of updates, some of the changes include:
Change of the build system from Apache Ant to Gradle
Make use of Java Modules to make TarsosDSP compatible with the ModulePath introduced in Java 9.
Packaged the software into a maven compatible format, which makes it easy to use as a dependency.
CI with GitHub actions to automatically build and test the software.
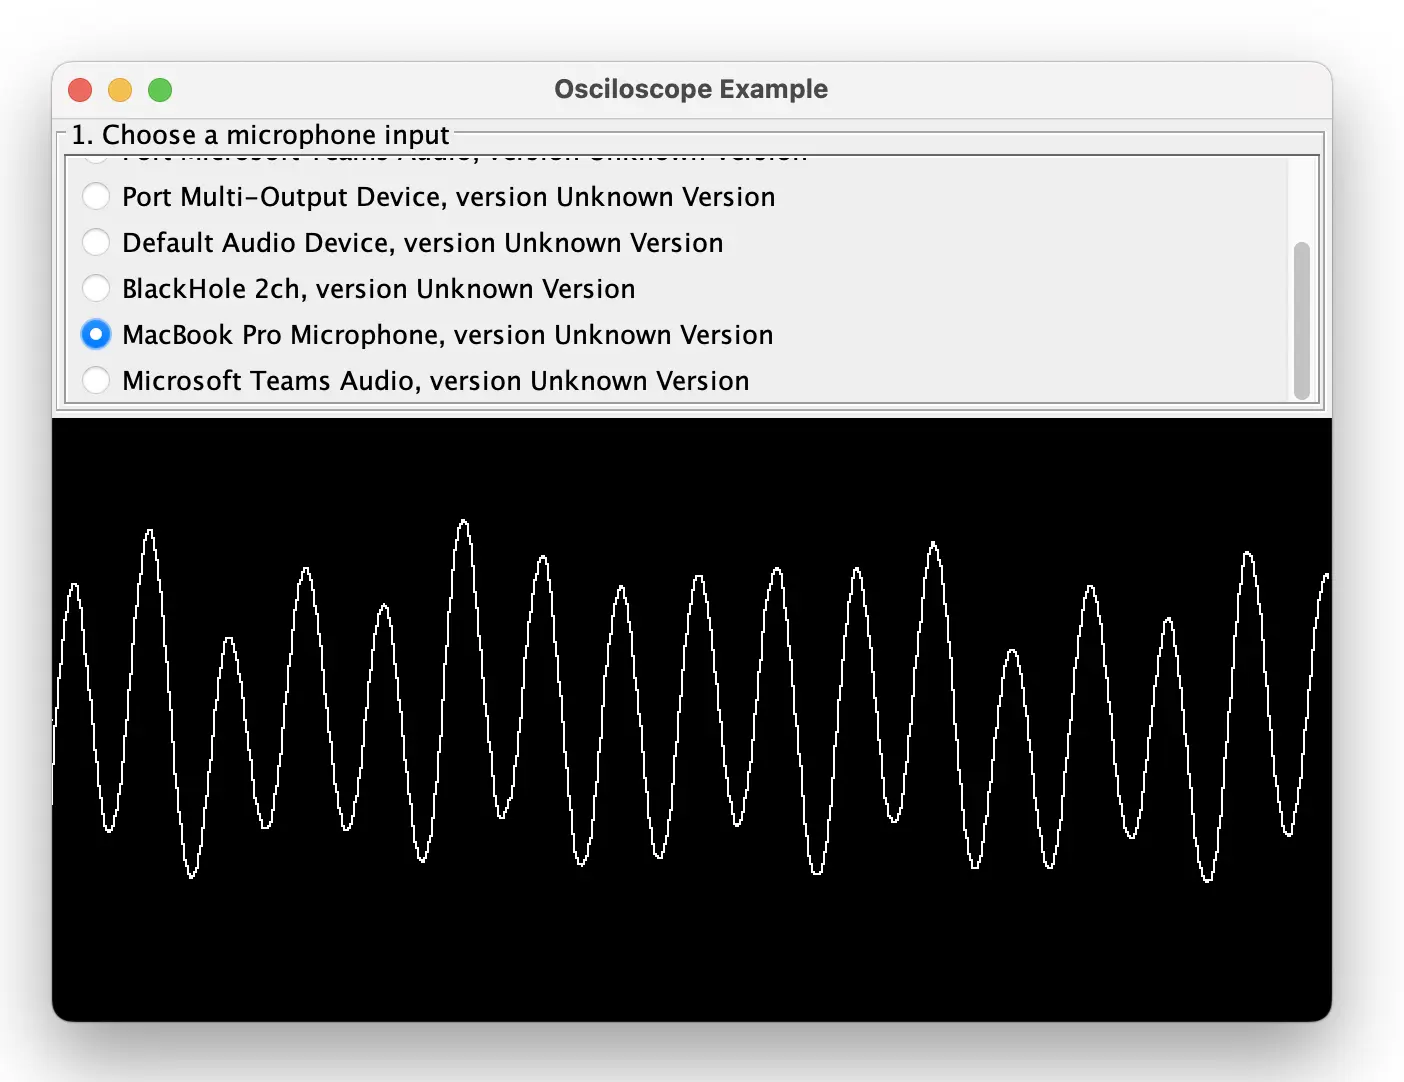
Updated some examples shipped with the TarsosDSP. I have still still some examples to verify.
Improved handling of errors on reading audio via ffmpeg
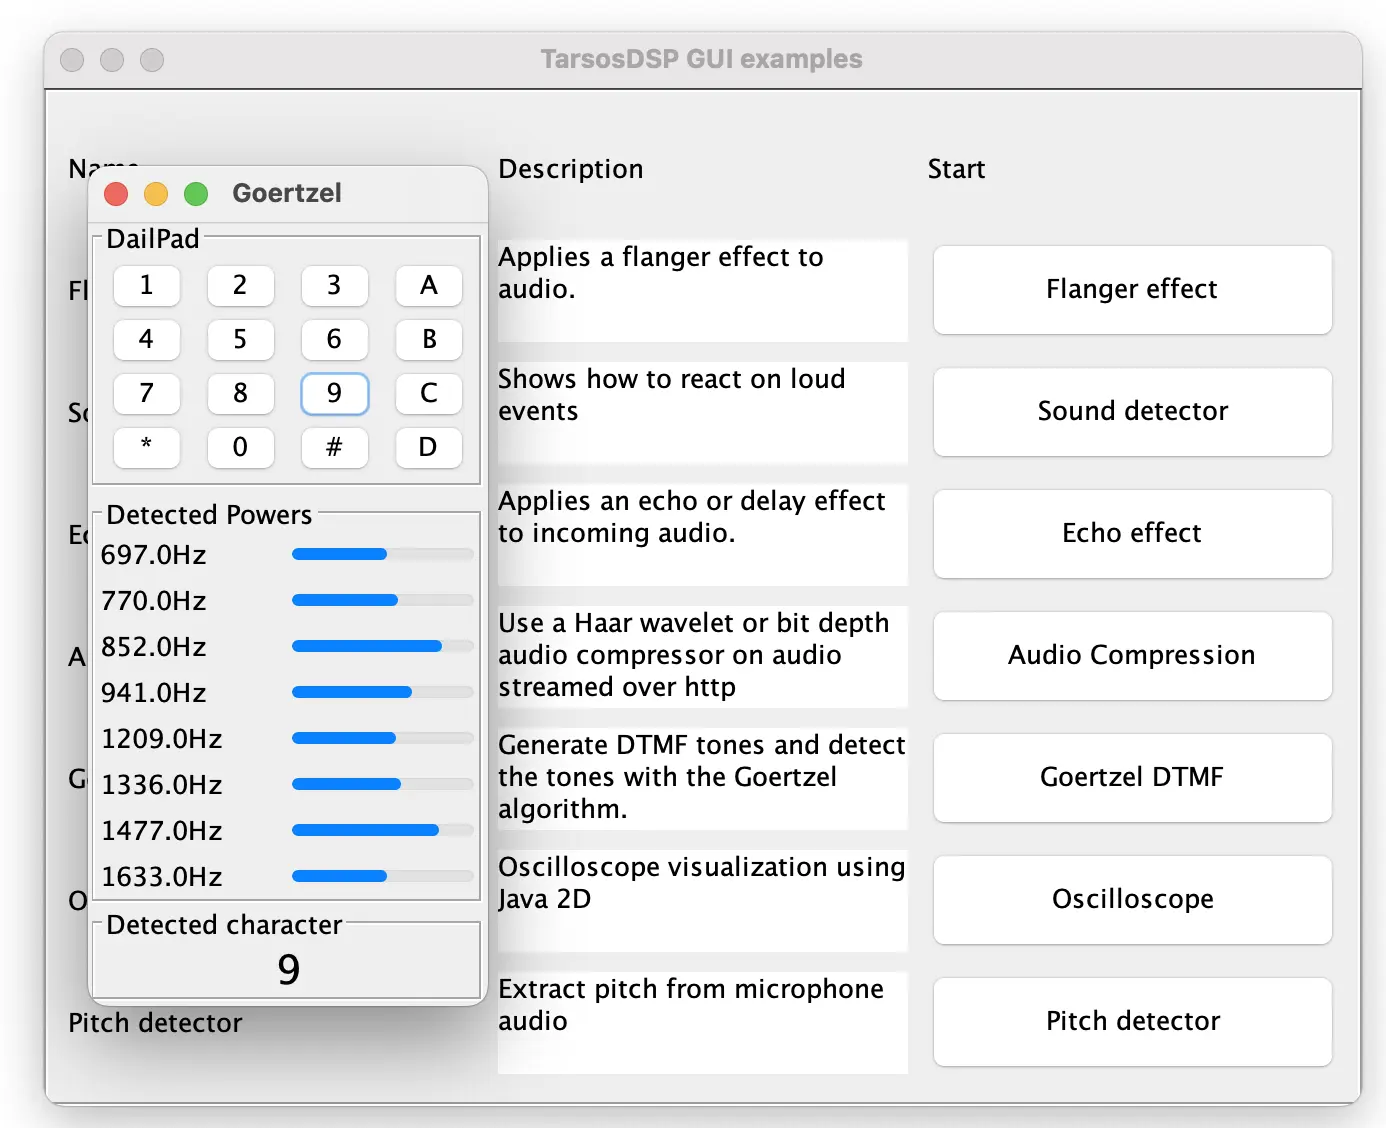
Notably the code of TarsosDSP has not changed much apart from some cosmetic changes. This backwards compatibility is one of the strong points of Java. With this update I am quite confident that TarsosDSP will also be usable during the next decade as well.
Please check out the updated TarsosDSP repository on GitHub.

 Code, Music Information Retrieval, TarsosDSP, and UGent
JNI is a way to use C or C code from Java and allows developers to reuse and integrate C/C in Java software. In contrast to the Java code, C/C code is platform dependent and needs to be compiled for each platform/architecture. Also it is generally not a good idea to make users compile a C/C library: it is best provide precompiled libraries. As a developer it is, however, a pain to provide binaries for each platform.
With the dominance of x86 processors receding the problem of having to compile software for many platforms is becoming more pressing. It is not unthinkable to want to support, for example, intel and M1 macOS, ARM and x86_64 Linux and Windows. To support these platforms you would either need access to such a machine with a compiler or configure a cross-compiler for each system: both are unpractical. Typically setting up a cross-compiler can be time consuming and finicky and virtual machines can be tough to setup. There is however an alternative.
Zig is a programming language but, thanks to its support for C/C, it also ships with an easy-to-use cross-compiler which is of interest here even if you have no intention to write a single line of Zig code. The built-in cross-compiler allows to target many platforms easily.
#### The Zig cross-compiler in practice
Cross compilation of C code is possible by simply replacing the gcc command with zig cc and adding a target argument, e.g. for targeting a Windows. There is more general information on zig as a cross-compiler here.
Cross-compiling a JNI library is not different to compiling other libraries. To make things concrete we will cross-compile a library from a typical JNI project: JGaborator packs the C/C library gaborator. In this case the C/C code does a computationally intensive spectral transformation of time domain data. The commands below create an x86_64 Windows DLL from a macOS with zig installed:
  1
2
3
4
5
6
7
8
9
10
11
12
13
14
15
16
17

  {style="overflow-x:scroll"}
<code>
bash
#wget https://aka.ms/download-jdk/microsoft-jdk-17.0.5-windows-x64.zip
#unzip microsoft-jdk-17.0.5-windows-x64.zip
#export JAVA_HOME=`pwd`/jdk-17.0.5+8/
git clone --depth 1 https://github.com/JorenSix/JGaborator
cd JGaborator/gaborator
echo $JAVA_HOME
JNI_INCLUDES=-I"$JAVA_HOME/include"\ -I"$JAVA_HOME/include/win32"
zig cc  -target x86_64-windows-gnu -c -O3 -ffast-math -fPIC pffft/pffft.c -o pffft/pffft.o
zig cc  -target x86_64-windows-gnu -c -O3 -ffast-math -fPIC -DFFTPACK_DOUBLE_PRECISION pffft/fftpack.c -o pffft/fftpack.o
zig c++ -target x86_64-windows-gnu -I"pffft" -I"gaborator-1.7"  $JNI_INCLUDES -O3\
        -ffast-math -DGABORATOR_USE_PFFFT  -o jgaborator.dll jgaborator.cc pffft/pffft.o pffft/fftpack.o
file jgaborator.dll
# jgaborator.dll: PE32+ executable (console) x86-64, for MS Windows
</code>
Note that, when cross-compiling from macOS, to target Windows a Windows JDK is needed. The windows JDK has other header files like jni.h. Some commands to download and use the JDK are commented out in the example above. Also note that targeting Linux from macOS seems to work with the standard macOS JDK. This is probably due to shared conventions regarding compilation of libraries.
To target other platforms, e.g. ARM Linux, there are only two things that need to be changed: the -target switch should be changed to aarch64-linux-gnu and the name of the output library should be (by Linux convention) changed to libjgaborator.so. During the build step of JGaborator a list of target platforms it iterated and a total of 9 builds are packaged into a single Jar file. There is also a bit of supporting code to load the correct version of the library.
Using a GitHub action or similar CI tools this cross compilation with zig can be automated to run on a software release. For Github the Setup Zig action is practical.
In a first attempt I tried to detect the operating system and architecture of the environment to then load the library but eventually decided against this approach. Mainly because you then need to keep an exhaustive list of supporting platforms and this is difficult, error prone and decidedly not future-proof.
In my second attempt I simply try to load each precompiled library limited to the sensible ones - only dll’s on windows - until a matching one is loaded. The rationale here is that the system itself knows best which library works and failing to load a library is computationally cheap. There is some code to iterate all precompiled libraries in a JAR-file so supporting an additional platform amounts to adding a precompiled library in the JAR folder: there is no need to be explicit in the Java code about architectures or OSes.
Trying multiple libraries has an additional advantage: this allows to ship multiple versions targeting the same architecture: e.g. one with additional acceleration libraries enabled and one without. By sorting the libraries alphabetically the first, then, should be the one with acceleration and the fallback without. In the case of JGaborator for mac aarch64 there is one compiled with -framework Accelerate and one compiled by the Zig cross-compiler without.
If you find yourself cross-compiling C or C for many platforms, consider the Zig cross-compiler. Even when you have no intention to write a single line of Zig code.
For JNI and Java the JGaborator source code might offer some inspiration to pre-compile and load libraries for many platforms with little effort.
CI tools can help to verify builds and automate Zig cross-compilation.
If you build for Windows make sure to include windows header-files even when there are no compilation errors using UNIX-header files.
If you find this valuable consider sponsoring the work on Zig
Code, Music Information Retrieval, and UGent
I have built a tool for audio-to-audio alignment. It has applications for synchronization of media files. It works in the browser and you can synchronize your media files here with SyncSink.wasm. SyncSink.wasm does the following:
It supports small time-scale adjustments of around 5%: audio alignment can still be found if audio speed differs a bit.
Some potential use cases where it might be of use:
The code can be found in the SyncSink.wasm GitHub repository
Code, ISMIR, and UGent
media_sync_recording.apng
 LMDB is a fast key value store, ideal to store and query sorted data with small keys and values. LMDB is a pure C library but often used from other programming languages via some type of bindings. These bindings are ‘bridges’ between languages and are automatically present on supported platform. On new or unsupported platforms, however, you need to build a this bridge yourself.
This blog post is about getting java-lmdb working on such unsupported platform: arm64. The arm64 platform is much more popular since the introduction of the Apple silicon - M1 platform. On Apple M1 the default architecture of Docker images is also aarch64.
The java-lmdb project uses JNR-FFI in the background. This is only one of the many ways to bridge Java and other programming languages. The new version of JNR-FFI supports the arm64. Currently, only the ‘SNAPSHOT’ version of java-lmdb uses this version. So the dependencies need to be changed to e.g. (when using Gradle):
repositories {
    mavenCentral()
    maven { url 'https://oss.sonatype.org/content/repositories/snapshots' }
}

dependencies {
    implementation group: 'org.lmdbjava', name: 'lmdbjava', version: '0.8.3-SNAPSHOT'
}
Next you need to build the lmdb library for your platform and copy it to a location where Java looks for it. This only works when compilers are already available on your system. In macOS you might need to install the XCode command line tools:
#xcode-select --install
git clone --depth 1 https://git.openldap.org/openldap/openldap.git
cd openldap/libraries/liblmdb
make -e SOEXT=.dylib
cp  liblmdb.dylib ~/Library/Java/Extensions
On Debian aarch64 the procedure is similar but a different extension is used (.so):
#apt install build-essential
git clone --depth 1 https://git.openldap.org/openldap/openldap.git
cd openldap/libraries/liblmdb
make
mv liblmdb.so /lib
Finally, to use the library in a JAR-file is might be needed to allow lmdbjava to access some parts of the JRE:
java -jar your_jar.jar --add-opens=java.base/java.nio=ALL-UNNAMED --add-opens=java.base/sun.nio.ch=ALL-UNNAMED
A very similar setup was needed for the docker version of Panako.
Code and UGent
I have prepared an audio focused ffmpeg build for the web which facilitates browser based audio applications. I have prepared three demos:
A bit more about the rationale behind this effort: Browsers have become practical platforms for audio processing applications thanks to the combination of Web Audio API , performant Javascript environment and WebAssembly. Have a look, for example, at essentia.JS.
However, browsers only support a small subset of audio formats and container formats. Dealing with many (legacy) audio formats is often a rather painful experience since there are so many media container formats which can contain a surprising variation of audio (and video) encodings. In short, decoding audio for in-browser analysis or playback is often problematic.
Luckily there is FFmpeg which claims to be ‘a complete, cross-platform solution to record, convert and stream audio and video’. It is, indeed, capable to decode almost any audio encoding known to man from about any container. Additionally, it also contains tools to filter, manipulate, resample, stretch, … audio. FFmpeg is a must-have when working with audio. It would be ideal to have FFmpeg running in a browser…
Thanks to WebAssembly ffmpeg can be compiled for use in the browser. There have been efforts to get ffmpeg working in the browser. These efforts have been focusing on the complete ffmpeg suite. Now I have prepared an audio focused ffmpeg build for the web based on these efforts. I have selected only audio parts which makes the resulting .wasm binary four to five times smaller (from \~20MB to \~5MB). I also provided a simplified Javascript wrapper. The project brings audio decoding to the browser but also audio filtering, transcoding, pitch-shifting, sample rate conversions, audio channel manipulation, and so forth. It is also capable to extract audio streams from video container formats.
Next to the pure functionality of ffmpeg there are general advantages to run audio analysis software in the browser at client-side:
Check out the audio focused ffmpeg build for the web on GitHub.
UGent, Code, and Command Line Application
PFFFT is a small, pretty fast FFT library programmed in C with a BSD-like license. I have taken it upon myself to compile a WebAssembly version of PFFFT to make it available for browsers and node.js environments. It is called pffft.wasm and available on GitHub.
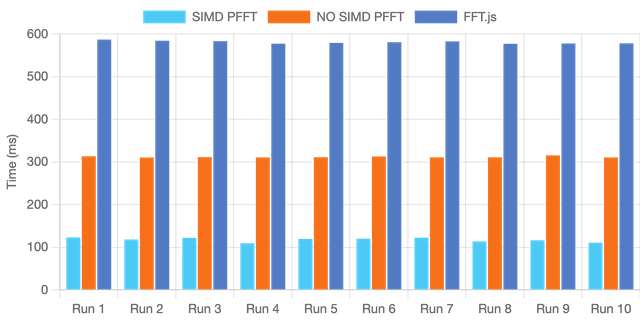
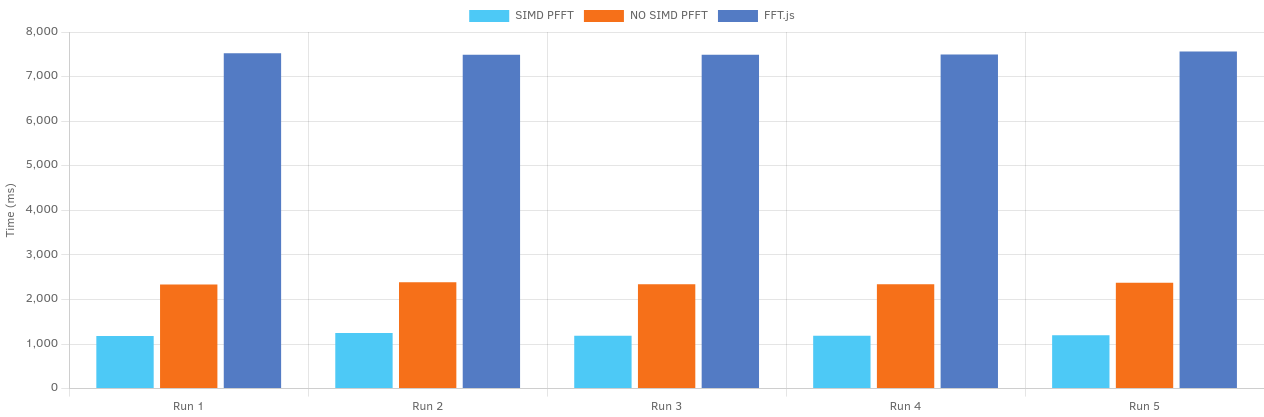
The pffft.wasm library comes in two flavours. One is compiled with SIMD instructions while the other comes without these instructions. SIMD stands for ‘single instruction, multiple data’ and does what it advertises: in a single step it processes multiple datapoints. The aim of SIMD is to make calculations several times faster. Especially for workloads where the same calculations are repeated over and over again on similar data, SIMD optimisation is relevant. FFT calculation is such a workload.
Evidently the SIMD version is much faster but there is no need to take my word for it. Below you can benchmark the SIMD version of pffft.wasm and compare it with the non-SIMD version on your machine. A pure Javascript FFT library called FFT.js serves as a baseline.
When running the same benchmark on Firefox and on Chrome it becomes clear that FFT.js on Chrome is about twice as fast thanks to its superior Javascript engine for this workload. The performance of the WebAssembly versions in Chrome and Firefox is nearly identical. Safari unfortunately does not (yet) support SIMD WebAssembly binaries and fails to complete the benchmark.
The source code, the limitations and other info can be found at the pffft.wasm GitHub repository
Edit: PulseFFT might be of interest as well: a (as far as I can tell non-SIMD) WASM version of KissFFT.

 Code and UGent
Have you ever found yourself wondering how to build an accurate, low-latency LTC decoder with a common micro-controller? Well! Wonder no more and read on! Or, stop reading and do go read something that is more appealing to your predispositions.
SMPTE timecodes were originally used to synchronize audio and video material. SMPTE timecode data is often encoded into audio using LTC or linear time code. This special audio stream can be recorded together with other audio and video material. By decoding the LTC audio afterwards and working back to SMPTE timecodes, synchronization of multiple camera angles and audio material becomes straightforward. This concept tagging data streams with SMPTE timecodes is also used for other types of data.

SMPTE timecodes supports up to 30 frames per second and this resolution might not be sufficient for some data streams. It helps if the frames could be split up and 60 or 120 frames per second could be generated. With a low latency LTC decoder it would be possible to support this case and, for example, provide four pulses for every SMPTE frame. To be more precise: a SMPTE frame consists of 80 bits and in this case we would send a pulse exactly when decoding bit 0, bit 20, bit 40 and bit 60. We would then be able to sample at 120Hz while staying in sync with the SMPTE.
My first attempt was to treat the signal like audio and use a ready built library for LTC audio decoding The problem there is that sampling is done which might not exactly match the SMPTE bit transition period and relatively large buffers are used to decode LTC. The bit exact decoding is not possible using this method: the latency is too large, the method also uses excessive computational power and memory.

In my second attempt, the current iteration, interrupts are used to detect rising and falling edges in the LTC stream. By counting the number of microseconds between these edges a bit string is constructed. Effectively decoding LTC without any wasted computational power or memory and at a very low latency. If the LTC stream is well-formed, following each incoming bit and reacting to it becomes straightforward. Finally, after gently massaging the LTC bit string, SMPTE timecodes ooze out of the system at a low latency.
I have implemented a low latency LTC and SMPTE timecode data decoder for a Teensy microcontroller. One of the current limitations is that only 30fps SMPTE without skipped frames is supported. Another limitation is that the precision of the derived 120Hz clock is dependent on the sampling rate of the encoded audio signal: if e.g. only 8000Hz is used, transitions can only be precise up until 125µs. The derived clock will jitter slightly but will not drift.
There is still a slight problem with audio and Teensy input: audio is generally transmitted from ~~1.8V to +1.8V and not~~ as a Teensy would expect - from 0 to 3.3V. To make this change a small biasing circuit is placed before the Teensy input. In my case two 100k resistors and a 0.1uF capacitor worked best. The interrupt is relatively robust against signals that are a clipping (outside the 0 - 3.3V) or slightly too silent. If the signal becomes too small LTC decoding obviously fails.
For more information and updates see the GitHub Repository for the low latency LTC and SMPTE timecode data decoder.
UGent and Code