TarsosDSP: a Java Library for Audio Processing
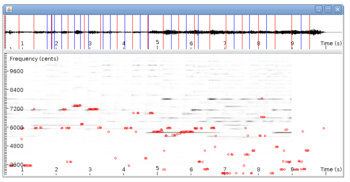
TarsosDSP is a Java library for audio processing. Its aim is to provide an easy-to-use interface to practical music processing algorithms implemented, as simply as possible, in pure...
Below you can find links to the open source software I developed during my research. It is always nice to hear how this software is used, don’t hesitate to drop me a line. Bug reports are welcomed as well.
TarsosDSP is a Java library for audio processing. Its aim is to provide an easy-to-use interface to practical music processing algorithms implemented, as simply as possible, in pure...
MI-Kit is a low-cost, open-source system for controlling music production software through body movement. Designed for creative music practice and embodied music interaction research. EMI-Kit can be used...
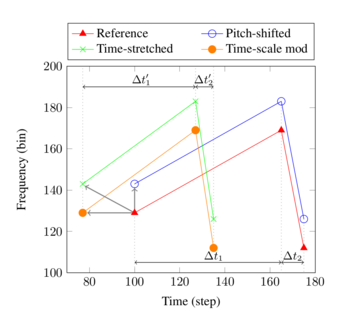
Panako is an extendable acoustic fingerprinting framework. The aim of acoustic fingerprinting is to find small audio fragments in large audio databases. Panako contains several acoustic fingerprinting algorithms...
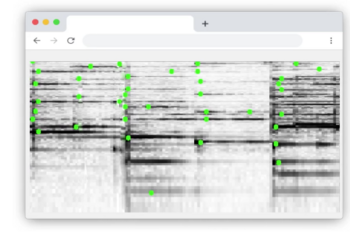
Olaf is a portable, landmark-based, acoustic fingerprinting system released as open source software. Olaf runs on embedded platforms, traditional computers and in the browser. Olaf is able to...
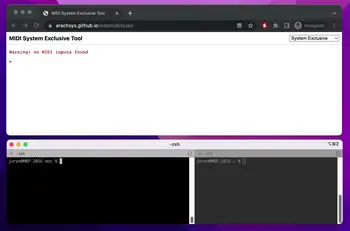
mot consists of several MIDI and OSC command line tools. These are mainly of interest to debug and check OSC messages and MIDI devices. The tools are written...
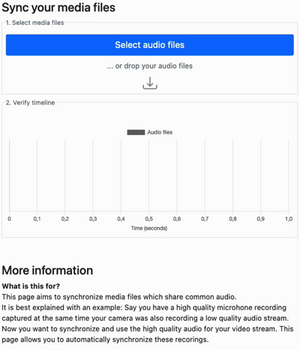
Thanks to WebAssembly it is possible to repurpose software for use on the web, even if it was originally designed with other use in mind. I have developed...
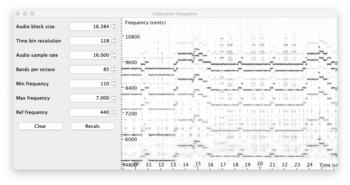
This library calculates fine-grained constant-Q spectral representations of audio signals quickly from Java. The spectral transform can be visualized or further processed in a (Music Information Retrieval) processing...
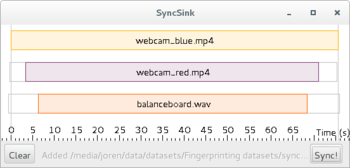
SyncSink is able to synchronize video and audio recordings of the same event. As long as some audio is shared between the multimedia files a reliable synchronization solution...
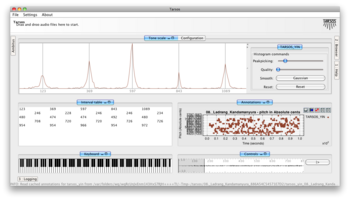
Tarsos is a software tool to analyze and experiment with pitch organization in all kinds of musics. Most of the analysis is done using pitch histograms and octave...

TarsosLSH is a Java library implementing Locality-sensitive Hashing (LSH), a practical nearest neighbor search algorithm for multidimensional vectors that operates in sublinear time. It supports several LSH families:...
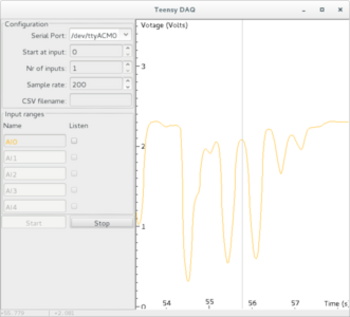
TeensyDAQ is a Java application to quickly visualize and record analog signals with a Teensy micro-controller and some custom software. It is mainly useful to quickly get an...
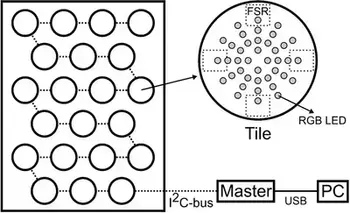
The idea behind AMPEL (by Lousin Moumdjian, Marc Leman, Peter Feys) is to combine both motor and cognitive rehabilitation in a single combined ‘embodied learning’ paradigm. To this...
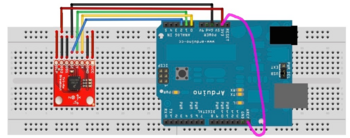
The Pidato experiment demonstrates a rather straightforward method to handle vibrato on a digital piano. It ‘solves’ the age-old problem on what to do with the enigmatic “vibrato”...
There is something about surprising interfaces. Having a switch to turn on a light gets quite boring after a while. Turning on a light by clapping twice, on the other hand, has some kind of magic feel to it. In a recent Mr Beast video he and his gang visit a number of expensive houses and in one of those mansions there is a light operated by clapping twice. I am not sure about the blatant materialism, but it got me thinking on how to build a similar clap-operated light yourself.
So, what are the elements needed: first a microphone to pick up sound. Second an algorithm is needed that detects claps. And finally, something that reacts to claps: a light or something else.
Many devices have microphones so sound input is relatively easy, and with some creativity there are many things waiting to be ‘clap triggered’: vacuum robots, sunscreens, lights, in-house ventilation, … The main difficulty is implementing a efficient clap-detection algorithm. Luckily there are already a few described in the literature. I have based my ANSI C implementation on ‘Duxbury, C., et al (2003). Complex domain onset detection for musical signals’.
My version of the clap-detection algorithm has two parameters which might need adapting to fit your environment. The silence threshold determines the minimum loudness for a clap to be triggered. The onset threshold determines more or less how ‘percussive’ the sound needs to be: the idea is to only react to things sounding like a clap and not to e.g. a loud whistle or other sounds. This is what the onset threshold tries to control. You can try it out below:
With this working we now can try to run this code on a micro-controller. Running it on a micro-controller makes it more practical in daily use to e.g. switch on lights. A low-cost ESP32 with a MEMS microphone is a good platform: these microcontrollers are easy to use and have WiFi connectivity which opens the possibility to trigger commands to smart sockets or other WiFi-enabled devices. The pector GitHub repository contains an Arduino project to run the clap-detection algorithm on an ESP32 or similar device (Teensy, RP2040,… ).
Next to the main clap detection software, there is a small script to trigger commands when a clap is detected. In this case, the script waits for a double clap and then pushes updates to a git repository. There are two reasons for this: the first is that it is fun, the second is for bragging rights. Not that many people can say they once pushed source code simply by clapping twice. It is, however, a challenge to find people who have the patience to listen to me explaining what I have done and who are impressed by this feat, so maybe there is only one reason: it is fun. Below a screen capture can be found pushing code to the pector repository.
Have a look at the pector GitHub repository for more info on how you can make your websites/apps/command line tools/devices clap controlled!
 UGent, 0110.be, Code, and Projecten
I have been asked to give a guest lecture introducing Music Information Retrieval for the course ‘Foundations of Musical Acoustics and Sonology’ at Ghent University. The lecture slides include interactive demos with live sound visualization and can be found below.
As we delve into the intricacies of how machines can analyze and understand musical content, students will gain insights into the cutting-edge research field that underpins modern music technology. From the algorithms powering music recommendation systems to the challenges of extracting meaningful information from audio signals, the lecture aims to ignite curiosity and inspire the next generation of musicologists in both music and technology. Get ready for an engaging session that promises to unlock the doors to a world where the science of sound meets the art of music.
Thanks to ChatGTP for the slightly over-the-top intro text above. Anyway, here you can find my introduction to Music Information Retrieval slides . Especially the interactive slides are perhaps of interest. The lecture was given in the Art-Science Interaction Lab (ASIL) which has a seven meter wide screen, which affects the slide design a bit.
 Code, Music Information Retrieval, and UGent
 MIR-intro-screenshot.png and MIR_intro.pdf
The recent version of the OLAF (Overly Lightweight Acoustic Fingerprinting) audio fingerprinting system also includes an updated WASM build which deserves a bit more attention.
The browser version of Olaf enables audio fingerprinting in the browser. This can be used to e.g. react to music playing in the environment, so called second screen applications or to synchronize several devices to an audio stream.
The goal of the demo below is to play music aloud - not using headphones - using the controls on the left. You can either play the reference track or an unrelated distractor. Next, the Olaf fingerpinter system needs to be started using the button on the right which captures the microphone of your device. Then Olaf tries match the incoming sound of the microphone and the reference track. Once a match is found the exact time in the match is displayed until the sound matches no more. Note that there is no direct information flowing between the left and right part. You can also play the reference on another device to be sure.
To get this demo working with the Web Audio API and use AudioWorklet objects, to process audio in the background an not on the main browser thread. There is surprisingly little info to find on how to combine WASM libraries - I used both Olaf and libsamplerate-js - and the AudioWorklet environment. Thanks to one of the very few resources on combining WASM, emscripten and AudioWorklets led me in the right direction.
For more information, check the Olaf acoustic fingerpinter system source code repository.
Code and UGent
The Web Audio API offers some great functionality for web based audio applications. The API also has a couple of quirks and is not always easy to use. One of those quirks is the limited support for resampling audio. When requesting a microphone stream of a certain sample rate the API only allows configurations your hardware supports. Ideally there should be an option to resample the incoming stream to a requested sample rate (and format) independent of hardware.
On macOS and Chrome the issue becomes even more confusing: when using multiple AudioContexts they can only have the same sample rate. E.g. starting a microphone on 16kHz by itself is possible but not when there is also audio playback on the same page, then everything switches over to 48kHz. There even seems to be an effect of different browser tabs. Other browsers and platforms have similar issues. This is problematic when you need audio in a fixed sample rate.
The solution is to resample audio incoming samples in your code or use the OfflineAudioContext as a resampler. The OfflineAudioContext way needs a lot of code and, crucially, only works on the main browser thread and not in an AudioWorklet. The AudioWorklet should be the place for computationally intensive audio processing like resampling. To solve the resampling problem I have glued together an AudioWorklet and libsamplerate-js to provide an easy to use audio resampling solution which is demo’d below:
The demo does not seem to do much but it reads incoming microphone data and uses a high quality audio resampling library to resample an audio stream into a requested audio sampling rate. The browser development console shows some info on this process. To get this working in an audio worklet, the libsamplerate-js needed to be recompiled and directly included in the AudioWorklet. To inspect the source, check the “Web Audio API AudioWorklet resampler”:[web-audio-api-resample.zip].
The resampling issue came up in development the browser based component of Olaf, an audio fingerprinting solution.
Code and UGent
web-audio-api-resample.zip

Olaf is an acoustic fingerprinting system designed with embedded devices in mind. It has a low memory use and computational requirements which are compatible with e.g. the ESP32 line of microcontrollers devices like the SparkFun ESP32 Thing or devices based on the RP2040 chip. Recently I have prepared a demo with the newest version of Olaf running on an ESP32 which deserves some attention.
To match audio, Olaf needs access to streaming audio. This can be audio read from an SD-card but, more likely, audio comes from a microphone. Digital microphones have some great features: a low-noise floor, great at picking up omnidirectional sound and they are inexpensive. I have prepared a demo of Olaf which shows how to use Olaf on an ESP32 with an INMP441 MEMS microphone. To test the MEMS microphone I also made a MEMS microphone to WiFi program which sends incoming sound on the ESP32 over WiFi to a computer where the sound quality can be verified.
The example provides a scaffold for embedded music-reactive applications. Once the microcontroller knows which song is playing and where in the song the match is found it can trigger LED’s (or explosions, fireworks, lyrics, other effects…) which should happen in sync with the music. See the example below to get the idea, this demo runs an older version of Olaf but the idea stays the same:
The main difference between the current and previous versions of Olaf is that now the ESP32 version, the browser version and the PC version are all running the exact same code. No hacks are needed any more to support a platform. This means that testing and debugging can be done on a computer and, if everything goes well, the code should work as expected on the embedded device (or browser).
If you want to know more about Olaf, read the paper on the Olaf audio search, check out the Olaf source code repository or consult the Olaf on ESP32 readme.
Code and UGent

Getting MEMS microphones to work on microcontroller platforms as the ESP32 is challenging. In theory, the I2S protocol provides a standardised, easy way to receive audio from a microphone and send stereo audio to a DAC. In practice, the many parameters make I2S not straightforwards to use. As with most protocols and standards, the mismatch between limitations and quirks of specific hardware and software implementations can cause issues. To debug I2S microphones on ESP32 or the RP2040 I have prepared a small Arduino program.
The IS2 WiFi microphone program sends audio from the microphone over WiFi to a computer which listen to the microphone: this make sure that the microphone works as expected and audio samples are correctly interpreted. It validates the I2S settings like buffer sizes, sample rates, audio formats, stereo or mono settings, … After configuring an SSID, password and IP-address it becomes possible to listen — in real-time — to the microphone which also allows the listener to sense the microphone quality.
  1
2
3
4
5
6
7
8
9
10
11
12
13
14
15
16
17

  size_t bytesIn = 0;
esp_err_t result = i2s_read(I2S_PORT, &sBuffer, bufferLen, &bytesIn, portMAX_DELAY);

int16_t *sample_buffer = (int16_t *)sBuffer;
int16_t samples_read = bytesIn / 2;
float audio_block_float[samples_read];

for (size_t i = 0; i < samples_read; i++) {
    sample_buffer[i] = gain_factor * sample_buffer[i];
    // Max for signed int16_t is 2^15
    audio_block_float[i] = sample_buffer[i] / 32768.f;
}

// Send raw audio 32bit float samples over UDP
Udp.beginPacket(outIp, outPort);
Udp.write((const uint8_t *)audio_block_float, bytesIn * 2);
Udp.endPacket();
To listen to the incoming audio an UDP port needs to be captured and subsequently send to a program that can interpret and play or store audio. With netcat UDP data can be captured. With ffmpeg and ffplay audio can be payed or stored. In practice the receiving computer might run the following commands to decode UDP packages and hear the microphone:
# for playback, receive UDP packages and interpret raw audio
nc -l -u 3000 | ffplay -f f32le -ar 16000 -ac 1  -

# for playback, receive UDP packages and store in a wav file
nc -l -u 3000 | ffmpeg -f f32le -ar 16000 -ac 1 -i pipe: microphone.wav
The ESP32 WiFi microphone has been developed during the development of Olaf, an audio search system which also works for embedded devices. There is a page with more info on Olaf on ESP32.
Code and UGent
audio_over_wifi.webp and esp32_inmp441_wifi_mic.ino

I have just released a Python wrapper for the Olaf acoustic fingerprinting library. Olaf is a scalable audio search system based on indexing . Olaf is programmed in C but a wrapper now makes its functionality available in Python.
The python wrapper should make it more accessible for developers to get started with it and makes it compatible with other Python libraries. A few notable libraries are the librosa python package for music and audio analysis,nnAudio, A fast GPU audio processing toolbox and other more general plotting, data processing and machine learning libraries. Despite Python’s many flaws, its rich library ecosystem is unmatched.
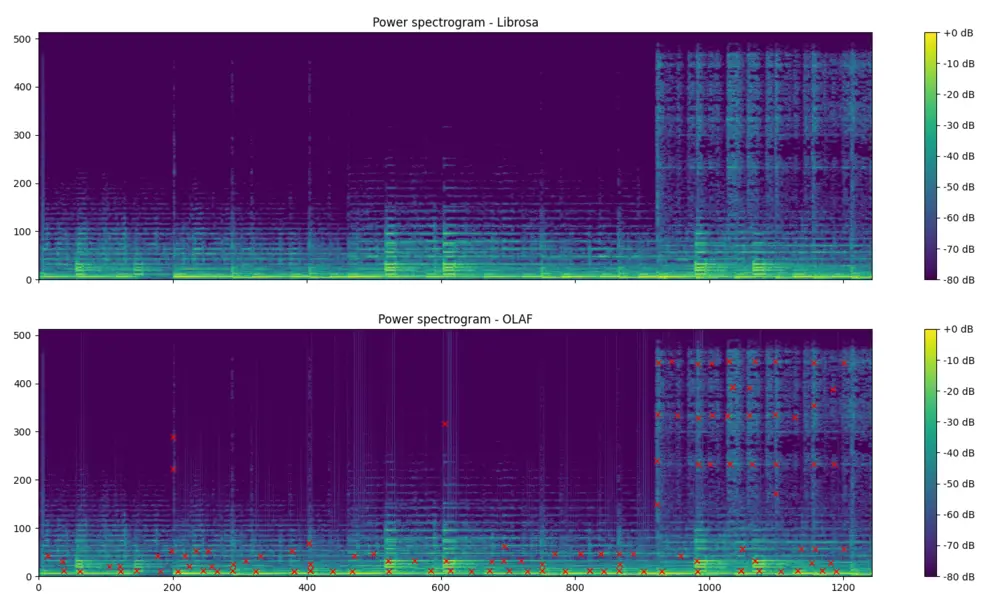
The associated GitHub repository contains documentation on how to use the Olaf python wrapper and also contains examples. The first shows how to index a song into the database and subsequently query the database. The second visualises the event points extracted by Olaf. The figure below shows shows the resulting event points, extracted with Olaf, plotted on a magnitude spectrogram, calculated with Olaf. The spectrogram on top is calculated using librosa and is meant to be very similar to Olaf.
 \
\
The wrapper was made with Python CFFI which works reasonably well. The automatically generated wrapper library support a large part of the C language but it needs a compilation step for each platform. Currently, the instructions assume a POSIX-like system, but technically, the wrapper can also function on Windows, albeit with the potential need for Windows-equivalent instructions in place of certain POSIX ones. The wrapper is wrapped in an easy to use python class called Olaf.py:
```python\ from olaf import Olaf, OlafCommand\ import librosa
Code, Command Line Application, and UGent
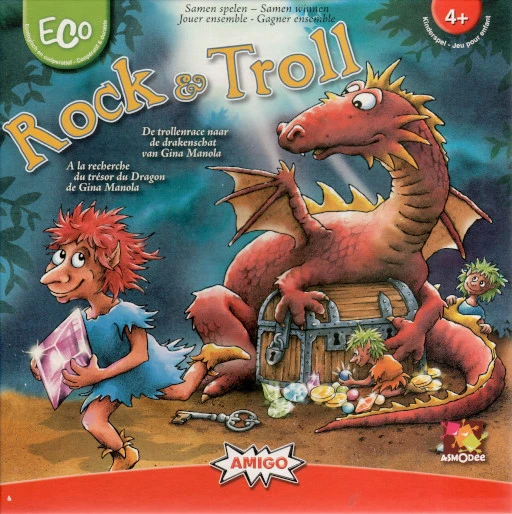
I often play board games with my kids. One of them is an absolute board game fan while the other is a sore loser and only wants to play collaborative games. These games are played ‘against the board’ and you win, or lose, together. I myself also still have problems losing games so I do understand this predicament. Genetics…
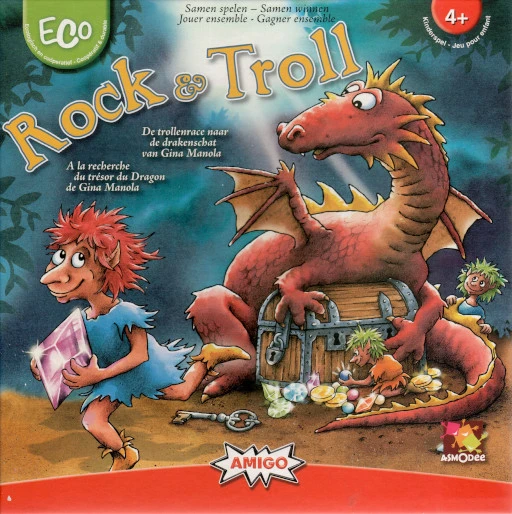
Rock & Troll is one of those games. It is a chance based game where you collaboratively try to build a path to a treasure before the dragon reaches it. Every player has to flip a tile which is either a part of the path (good) or a dragon (very bad). To increase engagement during play I often add sound effects. I was thinking: this can be improved and automated. For example, by doing this when a dragon tile is flipped:
The idea is to unobtrusively detect game state and add sound effects at critical moments. The sound effect should be playing without too much lag, ideally within about 200ms, so it feels immediate and connected to the game event. To implement this a camera based system with robust, fast object detection seemed like the way to go.
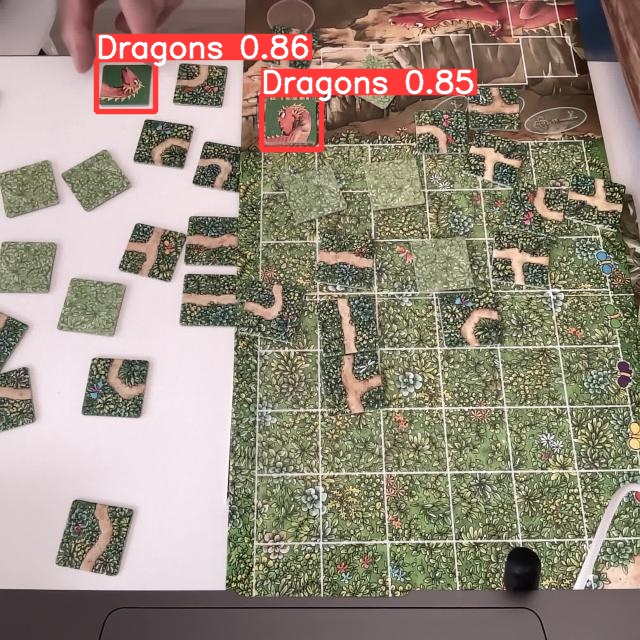
To detect dragons in a video stream I want to retrain an existing object-detection system. So two things need to happen: first a realistic, labeled dataset needs to be created. Then a system needs to be trained to detect the dragons. We do not want to label a massive dataset so we will use transfer learning to retrain an existing network. This existing network should already have learned basic features like edges, colors, geometries and other basic patterns. With the hope that this would result in robust detection, even with a limited dataset.
To create the dataset I wrote a small script which took a webcam picture every few seconds while I was manipulating the board and tiles. This resulted in about 130 pictures, some with no dragons and some with six, 300 labels in total. For annotating the dataset I used the free roboflow web-app which also hosts the final dragon dataset. After augmentation, the size of the dataset can be tripled. The command to extract images from a webcam looks like this on my system:
ffmpeg -y -r 30 -f avfoundation -i '0' -frames:v 1 snapshot.jpg
After some consideration for alternatives I landed on the YOLOv8 object-detection system: a robust and fast object-detection system. Additionally, it is well-documented, pytorch-based, easy-to-use and it has support for video streams. The annotated roboflow dataset can be downloaded in a YOLOv8 compatible format as well. Transfer learning, was based on the yolov8s.pt weights, which are downloaded automatically. With the system installed correctly and the dataset dowloaded, a local GPU based training command might look like this:
yolo train data=RocknTroll.v3i.yolov8/data.yaml epochs=30 model=yolov8s.pt device=mps imgsz=640 batch=32
Once the system was trained - download the “model wheights here”:[dragons.pt] - a bit of “glue code”:[rock_n_troll_v8.py] is needed. The python script needs to stream images from a camera, here via open cv, and detect dragons in each image. Every time a new dragon is found, the sound effect is played. Note that the Roboflow website automatically trains a model as well which can be tried out with a webcam.
There are a few ways improve the robustness of the system. During a game there are only more and more dragons: if the script detects less dragons than before it is probably a false negative or there is occlusion. Additionally, the dragon tiles remain in the same location once they are placed on the board. This means that new dragons are expected only in certain regions of the image. Both heuristics can be used to together to improve robustness.
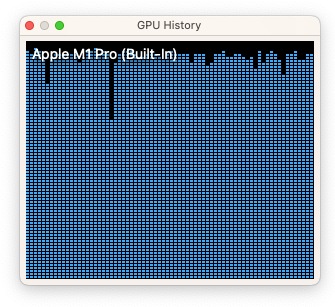
One of the reasons I bought a M1 mac with unified memory is for exactly these types of AI applications. After installing pytorch 2.0, the GPU acceleration resulted in a 10x training speed improvement. Training on a GeForce 1080 GTX from 2016 was still quite a bit faster, probably thanks to years of performance tuning targeting CUDA. It is clear that the mac GPU acceleration software ecosystem can use more effort, even system tools in macOS are limited: e.g. in the macOS activity monitor, GPU activity is very much an afterthought.
I am and hesitant to use cloud based GPU computing due to lack of control and privacy. I am not willing to send pictures from my kids to e.g. Google Cloud GPUs. The dependency on hardware of others might also limit the longevity of systems.
The ease-of-use, performance and accessibility of these deep-learning systems is great. Only a couple of years ago it would take months of hard work to maybe only approach similar detection performance. Adapting this idea for other board games and more types of tiles or board game events should be very possible.
 0110.be, Code, UGent, and Deep-learning
315794__bevibeldesign__dragon-roar-distressed-7.mp3, rockntroll.webp, rock_n_troll_demo.mp4, thumb_rock_n_troll.webp, dragons.pt, and rock_n_troll_v8.py
0110.be, Code, UGent, and Deep-learning
315794__bevibeldesign__dragon-roar-distressed-7.mp3, rockntroll.webp, rock_n_troll_demo.mp4, thumb_rock_n_troll.webp, dragons.pt, and rock_n_troll_v8.py
This post is an efficient way to determine whether a predefined frequency is present in a signal. If such an algorithm can be found, it can serve as a basis for a modem. With a modem data is modulated and demodulated at the receiving side. The modulation allows data to be send over a transmission channel.
With the ability to detect the presence of audible frequencies a modem can transform symbols into a combination of frequencies and send data over sound. This is exactly what happens with DTMF in the sound below. DTMF is also used in the dailup sound.
Typically, determining the presence of frequencies in a signal is done with an FFT: an FFT divides a signal into e.g. 512 linearly spaced frequency bands and determines the magnitude of each of these frequencies. The annoying thing is that a probe frequency can be right in between two bands: sample rate, FFT size and the frequency to look for need to be carefully chosen to reliably detect a frequency. Also, it is computationally inefficient to calculate the magnitudes for all frequency bands if only one band is actually needed.
Luckily there is an alternative approach which looks like the calculating the FFT but for only one predetermined frequencies. This algorithm is known as the Goertzel algorithm and is used in DTMF dail tone encoding and decoding. With the standard Goertzel algorithm it is still needed to consider sample rate and the frequency of interest.
Finally there is the “Generalized Goertzel”: algorithm. In this version of the algorithm employs a couple of tricks to allow an arbitrary frequency and sample rate while still respecting the Kotelnikov frequency limit, better known as the Nyquist frequency.
Recenlty I needed a piece of ANSI c code to detect the magnitude of an arbitrary frequency for a project. The following is a C implementation of this algorithm. It uses the C support for complex numbers in the complex.h header:
  1
2
3
4
5
6
7
8
9
10
11
12
13
14
15
16
17
18
19
20
21
22
23
24
25
26
27
28
29
30
31
32
33
34
35

  #include <math.h>
#include <stddef.h>
#include <complex.h>

float detect_frequency(float frequency_to_detect,
                       float audio_sample_rate,
                       float *audio_block,
                       float *window,
                       size_t audio_block_size) {
    float audio_block_sizef = (float)audio_block_size;
    float indvec = frequency_to_detect / audio_sample_rate * audio_block_sizef;
    float pik_term = 2 * M_PI * indvec / audio_block_sizef;
    float cos_pik_term2 = cosf(pik_term) * 2;

    float s0 = 0;
    float s1 = 0;
    float s2 = 0;

    for (size_t i = 0; i < audio_block_size; i++) {
        // potential improvement: expect windowed samples
        float windowed_audio_sample = window[i] * audio_block[i];
        s0 = windowed_audio_sample + cos_pik_term2 * s1 - s2;
        s2 = s1;
        s1 = s0;
    }

    s0 = cos_pik_term2 * s1 - s2;

    float complex cc = cexpf(0 + -1.0f * pik_term * I);
    float complex neg_s1 = -s1 + 0 * I;
    float complex pos_s0 = s0 + 0 * I;
    float power = cabsf(cc * neg_s1 + pos_s0);

    return power;
}
Below you can try out the algorithm. You can choose a frequency to detect and a playback frequency. The magnitude of the frequency is reported via the slider. The demo uses a javascript translation of the code above.
On the right you can find a demo of dual tone frequency modulation and demodulation. A combination of frequencies is played and immediately detected.
The green bars show which frequencies have been detected. If for example 1209 Hz is detected together with 770 Hz then this means that we are looking for the symbol in the first column on the second row. Both the first column and the second row are highlighted in green. At that spot we see 4 so we can decode a 4. By using 2 combinations of four frequencies a total number of 16 symbols can be encoded.
Note that this code does not simply highlight the button press directly but encodes the symbol in audio, feeds it into an Web Audio API format and decodes audio, the result of the decoding step highlights the row and column detected.
Code, Command Line Application, and UGent

The C programming language is deceptively simple. The syntax is straightforward, C has a limited amount of keywords and a small standard library. The first edition of the classic book ‘The C Programming Language’ is only about 200 pages. And yet, when programming in C, it is hard to avoid the many exiting footguns: integer type conversions, unchecked indexes and memory leaks can all cause subtle problems. This is part of the appeal of C: shooting yourself in the foot does make you feel alive. Here I want to focus on ways to check for memory leaks for C programs.
Memory leaks come about when memory is claimed but is never released again. If this is done in a loop or during a long running program, the claimed memory adds up and eventually the system may run out of memory. A memory leak is less a problem if a program forgets to free a small amount of memory it only claims once: after program shut down, the operating system reclaims all memory anyhow. However, it does feels very dirty to not clean up after oneself. And I for one, am not a dirty boy.
Another reason to look for memory use and leaks is when you are programming for embedded devices. For these systems memory is very limited: in that world 500kB RAM is considered a massive amount of memory. I have been busy programming a scalable audio search system called Olaf which targets both traditional computers, embedded systems and browsers (via WebAssembly). It is clear that memory use — and memory leaks — need to be kept in check to pull this of.
Now, these memory leaks might not be easy to spot by inspecting the code. There are tools which help to spot memory management problems. One of these is valgrind which is currently not easy to use on Apple system with ARM processors. Luckily there is an alternative which is probably already installed on macOS via the XCode Command Line Tools a command line tool aptly called leaks. To quote the apple documentation on leaks, leaks reports:
the address of the leaked memory
the size of the leak (in bytes)
the contents of the leaked buffer
The most straightforward use of leaks is to run a program and generate a report after program shutdown. See below to run a memory leak inspection, in this case for the bin/olaf_c program which indexes an audio file in a key-value store. For CI purposes it is practical to know that leaks has an exit status of zero only when no leaks have been found. The exit status can be used in an automated test script to break a build if a leak is detected. The --quiet option can be practical in such setting.
  1

  leaks --atExit -- bin/olaf_c store audio.raw audio
In the case of Olaf I made a classic mistake: I had called free() on hash table but I needed to call the hash table destructor: hash_table_destroy() which freed not only the hash table itself but also all memory associated with the hash table entries. After a quick fix the leaks command showed no more leaks!
  1
2
3
4
5
6
7
8
9
10
11
12
13
14
15
16

  leaks Report Version: 4.0, multi-line stacks
Process 35293: 2200395 nodes malloced for 135146 KB
Process 35293: 2200171 leaks for 138371200 total leaked bytes.

STACK OF 1 INSTANCE OF 'ROOT LEAK: ':
5 dyld 0x1a16dbf28 ...
4 olaf_c 0x100db145c main ...
3 olaf_c 0x100db53c8 olaf_...
2 olaf_c 0x100db4400 olaf_...
1 olaf_c 0x100da5788 hash_...
0 libsystem_malloc.dylib 0x1a1874d88 _mall...

2200171 (132M) ROOT LEAK:  [64]
2200170 (132M)  [50348032]
2 (80 bytes)  [32]
1 (48 bytes)  [48]
leaks is an easy to use memory leak inspector provided by Apple. It is an alternative for valgrind.
Memory leaks can be checked automatically using the leaks exit status in a CI-script. This makes spotting leaks timely and more straightforward to fix.
Programmers should at least once try to target embedded devices. It makes you conscious of the wealth of resources available when targeting modern computing devices.

 UGent, Code, and Command Line Application