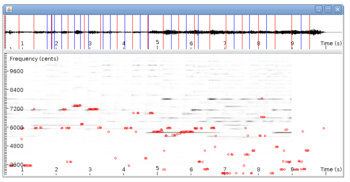
TarsosDSP: a Java Library for Audio Processing
TarsosDSP is a Java library for audio processing. Its aim is to provide an easy-to-use interface to practical music processing algorithms implemented, as simply as possible, in pure...

Below you can find links to the open source software I developed during my research. It is always nice to hear how this software is used, don’t hesitate to drop me a line. Bug reports are welcomed as well.
TarsosDSP is a Java library for audio processing. Its aim is to provide an easy-to-use interface to practical music processing algorithms implemented, as simply as possible, in pure...

MI-Kit is a low-cost, open-source system for controlling music production software through body movement. Designed for creative music practice and embodied music interaction research. EMI-Kit can be used...
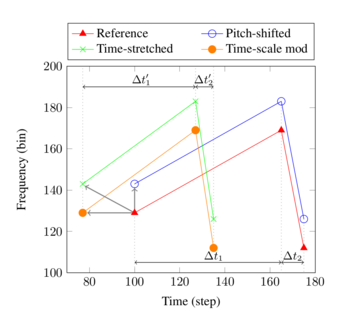
Panako is an extendable acoustic fingerprinting framework. The aim of acoustic fingerprinting is to find small audio fragments in large audio databases. Panako contains several acoustic fingerprinting algorithms...
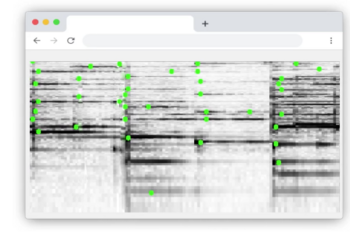
Olaf is a portable, landmark-based, acoustic fingerprinting system released as open source software. Olaf runs on embedded platforms, traditional computers and in the browser. Olaf is able to...
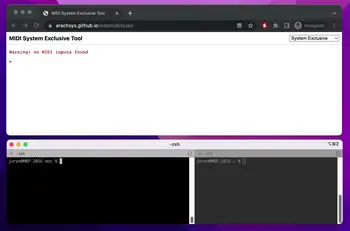
mot consists of several MIDI and OSC command line tools. These are mainly of interest to debug and check OSC messages and MIDI devices. The tools are written...
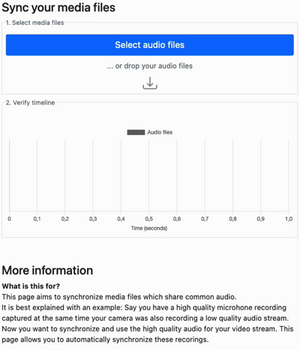
Thanks to WebAssembly it is possible to repurpose software for use on the web, even if it was originally designed with other use in mind. I have developed...
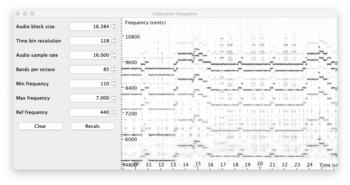
This library calculates fine-grained constant-Q spectral representations of audio signals quickly from Java. The spectral transform can be visualized or further processed in a (Music Information Retrieval) processing...
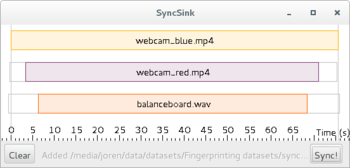
SyncSink is able to synchronize video and audio recordings of the same event. As long as some audio is shared between the multimedia files a reliable synchronization solution...
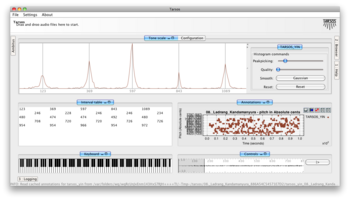
Tarsos is a software tool to analyze and experiment with pitch organization in all kinds of musics. Most of the analysis is done using pitch histograms and octave...

TarsosLSH is a Java library implementing Locality-sensitive Hashing (LSH), a practical nearest neighbor search algorithm for multidimensional vectors that operates in sublinear time. It supports several LSH families:...
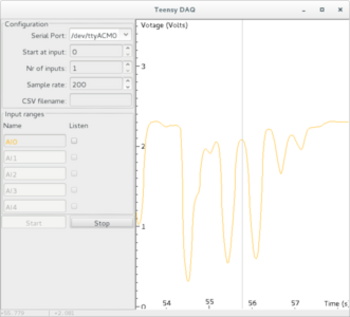
TeensyDAQ is a Java application to quickly visualize and record analog signals with a Teensy micro-controller and some custom software. It is mainly useful to quickly get an...
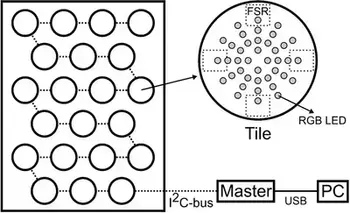
The idea behind AMPEL (by Lousin Moumdjian, Marc Leman, Peter Feys) is to combine both motor and cognitive rehabilitation in a single combined ‘embodied learning’ paradigm. To this...
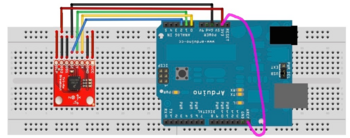
The Pidato experiment demonstrates a rather straightforward method to handle vibrato on a digital piano. It ‘solves’ the age-old problem on what to do with the enigmatic “vibrato”...
This post describes a crucial aspect of how to connect an android phone, the LG GT540 Optimus, to an Ubunu Linux computer. The method is probably similar on different UNIX like platforms with different phones.
To recognize the phone when it is connected via usb you need to create an UDEV rule. Create the file /etc/udev/rules.d/29.lg545.rules with following contents:
```ruby\ SUBSYSTEM"usb",ATTRS{idVendor}”1004”,ATTRS{idProduct}==”61b4”,MODE=”0666”\ ```
On the phone you need to enable debugging using the settings and (this is rather important) make sure that the “mass storage only” setting is disabled.
Rooting the device makes sure you have superuser rights. Installing the android SDK is well documented.
Good luck!
 Code, Hackerspace Ghent, and 0110.be
This post is about the tools I use to keep the source code of Tarsos reasonably clean, consistent and readable. Static code analysis can be of great help if you want to maintain strict coding standards and follow language idioms. Some of the patterns they can detect for you:
Dead code - unused variables, parameters, methods
Suboptimal code - wasteful resource usage
Overcomplicated expressions - unnecessary if statements, for loops that could be while loops
Duplicate code - copied/pasted code is a code smell.
Formatting inconsistencies, e.g. variable modifier order
And even more subtle, but equally important:
Resource management: is a resource handled (closed) correctly on all possible code paths?
Abstraction level: is it needed to expose the concrete type of an object or could an (abstract) supertype or even an interface be used instead?
…
In a previous life I used .NET and the static code analysis tools FxCop & StyleCop. FxCop operates on bytecode (or intermediate language in .NET parlance) level, StyleCop analyses the source code itself. Tarsos uses JAVA so I looked for JAVA alternatives and found a few.
PMD & Checkstyle both operate on source code level.
FindBugs operates on bytecode level.
On freesoftwaremagazine.com there is an article series on JAVA static code analysis software. It covers PMD and FixBugs and integration in Eclipse. It does not cover Checkstyle. Checkstyle is essentialy the same as PMD but it is better integrated in eclipse: it checks code on save and uses the standard ‘Problems’ interface, PMD does not.
To fix problems Eclipse save actions can save you some time. IBM has an article on how to keep your code clean using Eclipse.
Continuous testing is also a really nice thing to have: detecting unexpected behavior while refactoring/programming can prevent unnecessary bug hunts. A video about immediate feedback using continuous testing makes this clear.
Another tip is a more philosophical one: making your code and code revisions publicly available makes you think twice before implementing (and subsequently publishing) a quick and dirty hack. Tarsos is available on github.

 Java, Code, featured, and HoGent
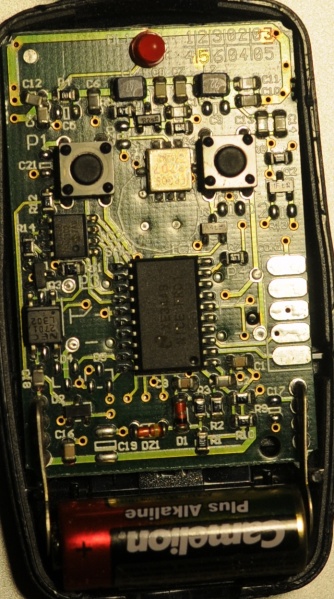
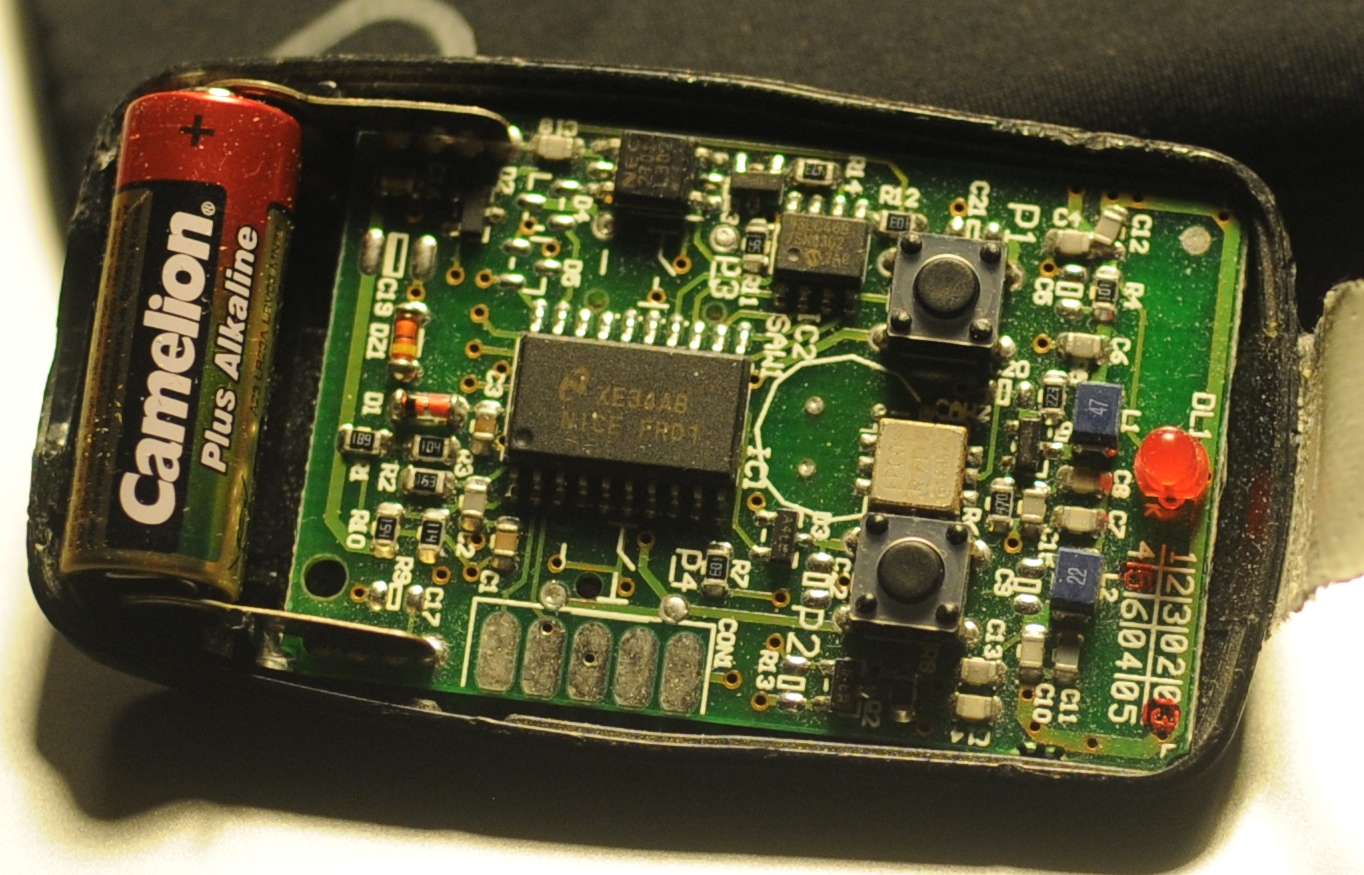
The problem: There is a group of people that want access to Hackerspace Ghent but there is only one remote to open the gate.
The solution: Build a system that reacts to a phone call by opening the gate if the number of the caller is whitelisted.
What you need:
A BeagleBoard or some BeagleBoard alternative with a Linux distribution running on it. Any server running a unix like operating system should be usable.
A Huaweii e220 or an alternative GSM that supports (a subset of) AT commands and has a USB port.
A team of hackers that know how to solder something togeher. E.g. The hardware guys of hackerspace Ghent.
A “python script”:[gatekeeper.py] that reacts to calls.
The Hack: First of all try to get caller id working by following the Caller ID with Linux and Huawei e220 tutorial. If this works you can listen to the serial communication using pySerial and react to a call. The following python code shows the wait for call method:
```ruby\ def wait_for_call(self):\ self.data_channel.open()\ call_id_pattern = re.compile(‘.CLIP.”\+([0-9]+)”,.*’)\ while True:\ bytes = self.data_channel.inWaiting()\ buffer = self.data_channel.readline(bytes)\ call_id_match = call_id_pattern.match(buffer)\ if call_id_match:\ number = call_id_match.group(1)\ self.handle_call(number)\ ```
The handle_call method … handles the call.
The second thing that is needed is a way to send a signal from the beagle board to the remote. Sending a signal from the beagle board using Linux is really simple. The following bash commands initialize, activate and deactivate a pin.
```ruby\ echo 168 > /sys/class/gpio/export\ echo “high” > /sys/class/gpio/gpio168/direction\ echo “low” > /sys/class/gpio/gpio168/direction\ ```
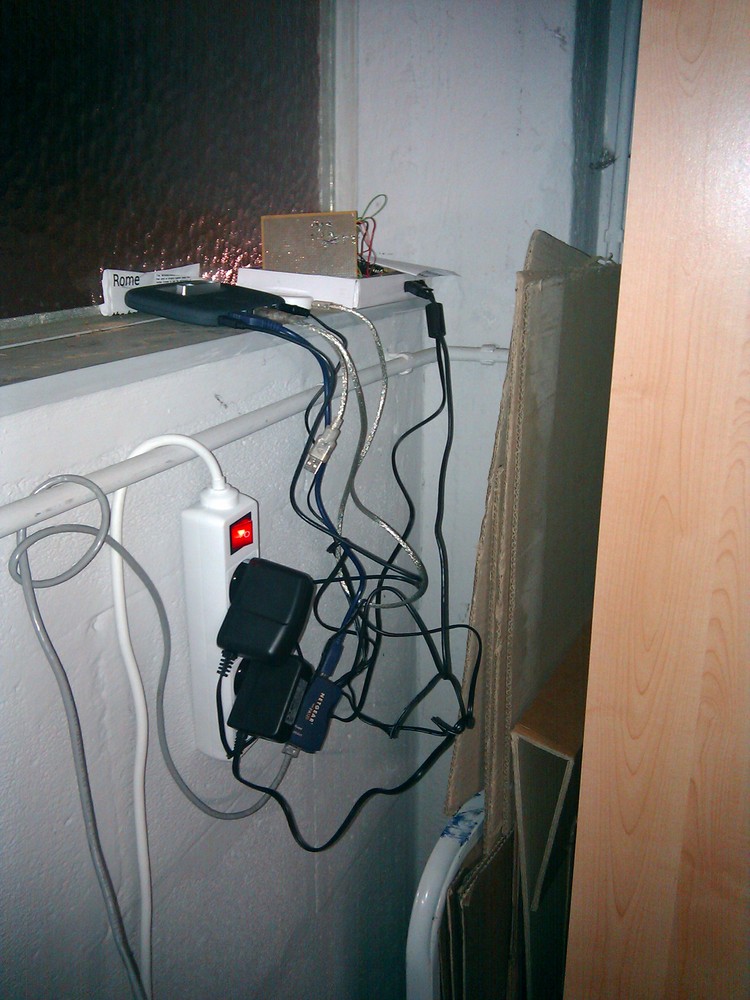
 Code, Projecten, Hackerspace Ghent, and 0110.be
 gatekeeper.py
Today I created a spectrogram application using Tarsos. The application listens to an audio input, computes an FFT and at the same time calculates pitch. The expected pitch is overlaid on the spectrogram. All this happens real-time and is implemented using JAVA.
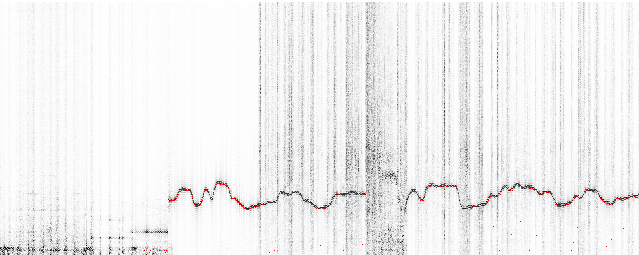
This is the most recent version of the spectrogram implementation in java.
```java\ float pitch = Yin.processBuffer(buffer, (float) sampleRate);\ fft.transform(buffer);\ double maxAmplitude = 0;\ for (int j = 0; j < buffer.length / 2; j) {\ double amplitude = buffer[j] * buffer[j] + buffer[j +\ buffer.length/2] * buffer[j+ buffer.length/2];\ amplitude = Math.pow(amplitude, 0.5);\ colorIndexes[j] = amplitude;\ maxAmplitude = Math.max(amplitude, maxAmplitude);\ }\ ```
If you want to test it yourself download the “spectrogram jar package”:[spectrogram.jar] and execute:
```ruby\ java -jar spectrogram.jar\ ```
Computational ethnomusicology, Code, Java, Music Information Retrieval, Tarsos, and HoGent
spectrum.png and spectrogram.jar
 This is the scenario: you have a Huawei e220, a linux computer and you want to react to a call from a set of predefined numbers. E.g. ordering a pizza when you receive a call from a certain number.
The Huawei e220 supports a subset of the AT commands, which subset is an enterprise secret of te Huawei company. So there is no documentation available for the device I bought, thanks Huawei. Anyhow when you attach the e220 to a Linux machine you should get two serial ports:
```ruby\ /dev/ttyUSB0\ /dev/ttyUSB1\ ```
To connect to the devices you can use a serial client. GNU Screen can be used as a serial client like this: screen /dev/ttyUSB0 115200. The first device, ttyUSB0 is used to control ttyUSB1, so to enable caller ID on te Huawei e220 you need to send this message to ttyUSB0:
```ruby\ AT+CLIP=1\ ```
To check for calls you should listen to ttyUSB1. A serial session for ttyUSB1 looks like:
```ruby\ \^BOOT:44594282,0,0,0,6\ \^RSSI:18\ RING\ +CLIP: “+33499311152”,145,,,,0\ \^BOOT:44594282,0,0,0,6\ ```
The RING and CLIP messages are the most interesting. The RING signifies an incoming call, the CLIP is the caller ID. The BOOT and RSSI are some kind of ping messages. The following Python script demonstrates a complete session that enables caller ID, waits for a phone call and prints the number of the caller.
```python\ #!/usr/bin/env python\ import serial, re
command_channel = serial.Serial(\ port=’/dev/ttyUSB0’,\ baudrate=115200,\ parity=serial.PARITY_NONE,\ stopbits=serial.STOPBITS_ONE,\ bytesize=serial.EIGHTBITS\ )\ command_channel.open()\ #enable caller id\ command_channel.write(“AT+CLIP=1” + “\r\n”)\ command_channel.close()
ser = serial.Serial(\ port=’/dev/ttyUSB1’,\ baudrate=9600,\ parity=serial.PARITY_NONE,\ stopbits=serial.STOPBITS_ONE,\ bytesize=serial.EIGHTBITS\ )
ser.open()
pattern = re.compile(‘.CLIP.”\+([0-9]+)”,.*’)
while 1:\ buffer = ser.read(ser.inWaiting()).strip()\ buffer = buffer.replace(“\n”,””)\ match = pattern.match(buffer)\ if match:\ number = match.group(1)\ print number\ ```
Code, Projecten, Hackerspace Ghent, and 0110.be
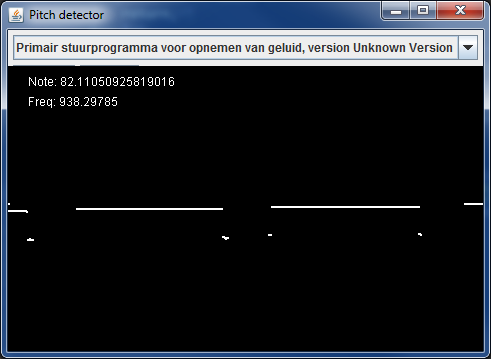
To make Tarsos more portable I wrote a pitch tracker in pure JAVA using the YIN algorithm based on the implementation in C of aubio. The implementation also uses some code written by Karl Helgasson and Teun de Lange of the Jazzperiments project.
It can be used to perform real time pitch detection or to analyse files. To use it as a real time pitch detector just start the “JAR-file”:[pitch_detector_yin.jar] by double clicking. To analyse a file execute one of the following. The first results in a list of annotations (text), the second shows the annotations graphically.
```ruby\ java -jar pitch_detector_yin.jar flute.novib.mf.C5B5.wav\ java -jar pitch_detector_yin.jar —file flute.novib.mf.C5B5.wav\ ```
The provided “flute sample”:[flute.novib.mf.C5B5.wav] is from The Musical Samples library of the University of Iowa and converted to mono wav. The source code of the pitch tracker can be found below.
Update: the Yin implementation in Java has been incorporated into the TarsosDSP project. An open source, Real-Time Audio Processing Framework in Java.
 Muziek, Code, Cultuur, Projecten, and 0110.be
pitch_detector_yin.jar, pitch_detector_yin_src.zip, and flute.novib.mf.C5B5.wav
Muziek, Code, Cultuur, Projecten, and 0110.be
pitch_detector_yin.jar, pitch_detector_yin_src.zip, and flute.novib.mf.C5B5.wav
The JAVA software program we are developing is called Tarsos and can now be found on GitHub. GitHub is a web-based hosting service for projects that use the Git version control system.
Currently Tarsos is a collection of Java classes to create, compare and process pitch-frequency data using histograms. In it’s current state it is not usable for end-users.
Tarsos is developed at University College Ghent, Faculty of Music and uses a number of open source libraries:
Gervill: a software sound synthesizer, supports the MIDI Tuning Standard. API.
Apache Commons Math: a library of lightweight, self-contained mathematics and statistics components API.
JASS: a unit generator based audio synthesis programming environment. API.
Java-getopt: a port of the GNU getopt family of functions. API.
Computational ethnomusicology, featured, Code, Java, Tarsos, and HoGent
			<object classid="java:Boids.class"
        			type="application/x-java-applet"
        			archive="/files/attachments/1/Boids.jar,/files/attachments/1/peasycam.jar,/files/attachments/1/core.jar"
        			width="550" height="600"
        			standby="Loading Processing software..." >

				<param name="archive" value="/files/attachments/1/Boids.jar,/files/attachments/1/peasycam.jar,/files/attachments/1/core.jar" />

				<param name="mayscript" value="true" />
				<param name="scriptable" value="true" />

				<param name="image" value="loading.gif" />
				<param name="boxmessage" value="Loading Processing software..." />
				<param name="boxbgcolor" value="#FFFFFF" />

				<param name="test_string" value="outer" />
		<!--<![endif]-->

			<object classid="clsid:8AD9C840-044E-11D1-B3E9-00805F499D93"
					codebase="http://java.sun.com/update/1.5.0/jinstall-1_5_0_15-windows-i586.cab"
					width="550" height="600"
					standby="Loading Processing software..."  >

				<param name="code" value="Boids" />
				<param name="archive" value="/files/attachments/1/Boids.jar,/files/attachments/1/peasycam.jar,/files/attachments/1/core.jar" />

				<param name="mayscript" value="true" />
				<param name="scriptable" value="true" />

				<param name="image" value="/files/attachments/1/loading.gif" />
				<param name="boxmessage" value="Loading Processing software..." />
				<param name="boxbgcolor" value="#FFFFFF" />

				<param name="test_string" value="inner" />
			</object>

		<!--[if !IE]> -->
			</object>
		<!--<![endif]-->
Recently I bought a big shiny red USB-button. It is big, red and shiny. Initially I planned to use it to deploy new versions of websites to a server but I found a much better use: ordering pizza. Graphically the use case translates to something akin to:

If you would like to enhance your life quality leveraging the power of a USB pizza-button: you can! This is what you need:
A PC running Linux. This tutorial is specifically geared towards Debian-based distos. YMMV.
A big, shiny red USB button. Just google “USB panic button” if you want one.
A location where you can order pizzas via a website. I live in Ghent, Belgium and use just-eat.be. Other websites can be supported by modifying a Ruby script.
Technically we need a driver to check when the button was pushed, a way to communicate the fact that the button was pushed and lastly we need to be able to react to the request.
The driver: on the internets I found a driver for the button. Another modification was done to make the driver process a daemon.

The communication: The original Python script executed another script on the local pc. A more flexible approach is possible using sockets. With sockets it is possible to notify any computer on a network.
```ruby\ if PanicButton().pressed():\ # create a TCP socket\ s = socket.socket(socket.AF_INET, socket.SOCK_STREAM)\ # connect to server on the port\ s.connect((SERVER, SERVER_TCP_PORT))\ # send the order (margherita at restaurant mario)\ s.send(“mario: [margherita_big]\n”)\ ```
The reaction: a ruby TCP server waits for message from the driver. When it does it automates a HTTP session on a website. It executes a series of HTTP-GET’s and POST’s. It uses the mechanize library.
```ruby\ login_url = “http://www.just-eat.be/pages/member/login.aspx”\ a = WWW::Mechanize.new\ a.get(login_url) do |login_page|\ #post login_form\ login_form = login_page.forms.first\ login_form.txtUser = “username”\ login_form.txtPass = “password”\ a.submit(login_form, login_form.buttons[1])\ end\ ```
Some libraries are needed. For python you need the usb library, the python deamons lib needs to be installed seperatly. Setuptools are needed to install the deamons package.
```ruby\ sudo apt-get install python-usb python-setuptools\ ```
Ruby needs rubygems to install the needed mechanize and daemons library. Mechanize needs the libxslt-dev package. You also need the build-essential package to build mechanize.
```ruby\ sudo apt-get install rubygems libxslt-dev\ sudo gem install mechanize daemons\ ```
To automatically start the daemons on boot you can use the crontab \@reboot directive of the root user. E.g.:
```ruby\
reboot /opt/pizza_service/pizza_daemon.rb
reboot /opt/pizza_service/pizza_button_driver.py\
```
Code, Poging tot humor, Projecten, Hackerspace Ghent, and 0110.be
order_pizza_with_panic_button.jpg, pizza_daemon.rb.txt, pizza_server.rb, usb-panic-button.png, and pizza_button_driver.py

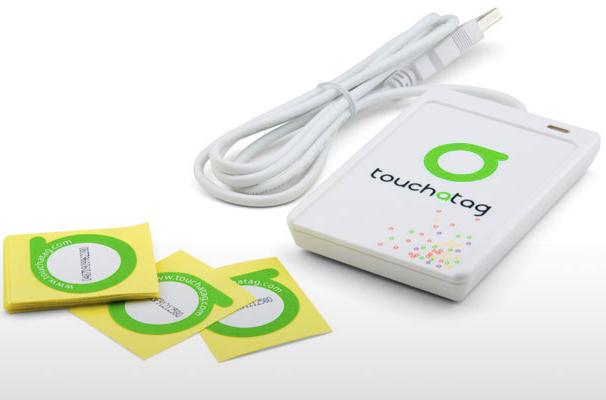
This blog post is about how to use the Touchatag RFID reader hardware on Ubuntu Linux without using the Touchatag web service.
An RFID reader with tags can used to fire events. With a bit of scripting the events can be handled to do practically any task.
Normally a Touchatag reader is used together with the Touchatag web service but for some RFID applications the web service is just not practical. E.g. for embedded Linux devices without an Internet connection. In this tutorial I wil document how I got the Touchatag hardware working under Ubuntu Linux.
To follow this tutorial you will need:
Touchatag hardware: the USB reader and some tags
A Ubuntu Linux computer (I tested 9.10 Karmic Koala and 8.04 )
SVN to download source code from a repository
The touchatag USB reader works at 13.56MHz (High Frequency RFID) and has a readout distance of about 4 cm (1.5 inch) when used with the touchatag RFID tags. Internally it uses an ACS ACR122U reader with a SAM card. A Linux driver is readily available so when you plug it in lsusb you should get something like this:
```ruby\ lsusb
Bus 007 Device 001: ID 1d6b:0001 Linux Foundation 1.1 root hub\ Bus 005 Device 004: ID 072e:90dd Advanced Card Systems, Ltd\ ```
lsusb recognizes the device incorrectly but that’s not a problem. To read RFID-tags and respond to events additional software is needed: tagEventor is a software library that does just that. It can be downloaded using an svn command:
```ruby\ svn export http://tageventor.googlecode.com svn/trunk/ tageventor\ ```
To compile tagEventor a couple of other software packages or header files should be available on your system. Te tagEventor software dependencies are described on the tagEventor wiki. On Ubuntu (and possibly other Debian based distro’s the installation is simple:
```ruby\ sudo aptitude install build-essential libpcsclite-dev build-essential pcscd libccid\ #if you need gnome support\ #sudo aptitude install libgtk2.0-dev\ ```
Now the tricky part. Two header files of the pcsclite package need to be modified (update: this bug is fixed see here). tagEventor builds and can be installed:
```ruby\ cd tageventor\ make\ …\ tagEventor BUILT (./bin/Release/tagEventor)
sudo ./install.sh\ …\ ```
When tagEventor is correctly installed the only thing left is … to build your application. When an event is fired tagEventor executes the /etc/tageventor/generic script with three parameters (see below). Using some kind of IPC (Inter Process Communication) an application can react to events. A simple and flexible way to propagate events (inter-processes, over a network, platform and programming language independent) uses sockets. The code below is the /etc/tageventor/generic script (make sure it is executable), it communicates with the server: the second script. To run the server execute ruby /name/of/server.rb
```ruby\ #!/usr/bin/ruby
$1 = SAM (unique ID of the SAM chip in the smart card reader if exists, “NoSAM” otherwise
$2 = UID (unique ID of the tag, as later we may use wildcard naming)
$3 = Event Type (IN for new tag placed on reader, OUT for tag removed from reader)
require ‘socket’
data = ARGV.join(‘|’)\ puts data
streamSock = TCPSocket.new( “127.0.0.1”, 20000 )\ streamSock.send(data, 0)\ streamSock.close\ ```
```ruby\ require “socket”\ dts = TCPServer.new(‘localhost’, 20000)\ loop do\ Thread.start(dts.accept) do |s|\ puts s.gets\ s.close\ end\ end\ ```
The tagEventor software is made by the Autelic Association a Non-Profit association dedicated to making technology easier to use for all. I would like to thank Andrew Mackenzie, the founder and president of the association for creating the software and the support.
 Code, Harde waren, Projecten, and 0110.be